#ribbon embroidery
Text
19 notes
·
View notes
Text
Reblog for a bigger sample size
#needlework#craft poll#hand embroidery#knitting#crochet#quilting#applique#needle lace#ribbon embroidery#needle felting
924 notes
·
View notes
Text


Rosebud Ribbonwork Mules
245 notes
·
View notes
Text
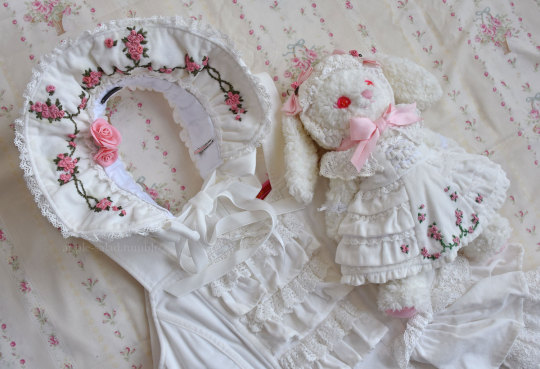
Rose Ribbon Embroidery "Mini" Projects (for BABY NYFW) Part 2: Embroidered Bonnet
I decided semi-last minute to attend BABY's fashion show at NYFW!
BABY had mentioned in their NYFW brand description that their newest collection would be a return to their origins, as well as presenting archival items.
You have to dress to impress for NYFW, right? So of course, I had to pull out all the stops and wear my Rose Ribbon Embroidery.
Also at the last minute, I decided to make a few extra complementing items...
A matching RRE kumya JSK, and a bonnet.

What follows is more of a sew-along/journal rather than a tutorial or guide, mainly for my own memory's sake. But if you enjoy looking at my process (sometimes sloppy), I'm happy!
Also feel free to take a look at the more romantic process video I edited.
Part 1: Kumya JSK
Part 2: Bonnet (you are here)
This post will be my process pictures and notes for the bonnet, as well as a matching mask as a bonus.
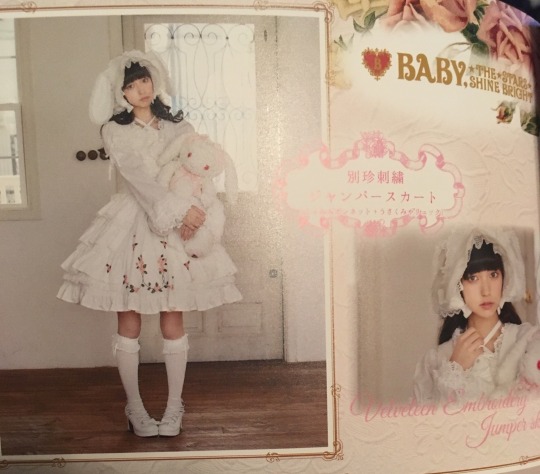
I don't believe BABY released matching headwear for Rose Ribbon Embroidery, although I've seen an unknown velveteen headbow with rose lace sold with RRE before.
BABY usually coords RRE with the bunny ear bonnet since Ichigo wears it this way in Kamikaze Girls.
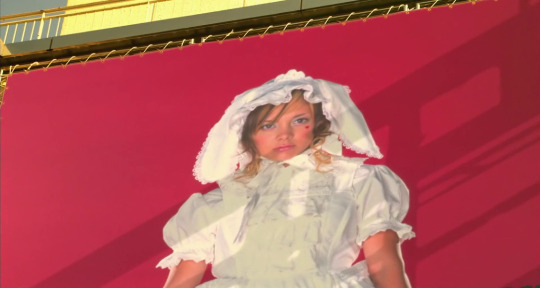
I do own this because I wanted to wear an Ichigo-like outfit at some point, but for this occasion I decided to do something different and make a "matching" embroidered bonnet.
I originally wanted to make a hard bonnet with a very defined brim that could show off the embroidery clearly as I don't really like soft bonnets, but when looking at existing BABY bonnets as a reference, it doesn't look like hard bonnets were a thing back in 2004 (and as it is, BABY rarely releases hard bonnets). So to keep with the oldschool theme, the bonnet is a soft one, although I later make some decisions to make it slightly more structured.
The next decision to make was full bonnet vs half bonnet. The bunny ear bonnet is a full bonnet and I think this is technically more "period accurate", but I am not a fan of how they look like a weird hood from the back so I opted for half (plus, that makes construction and patterning easier for me).
I still used my own bunny ear bonnet as a reference for approximate brim dimensions!
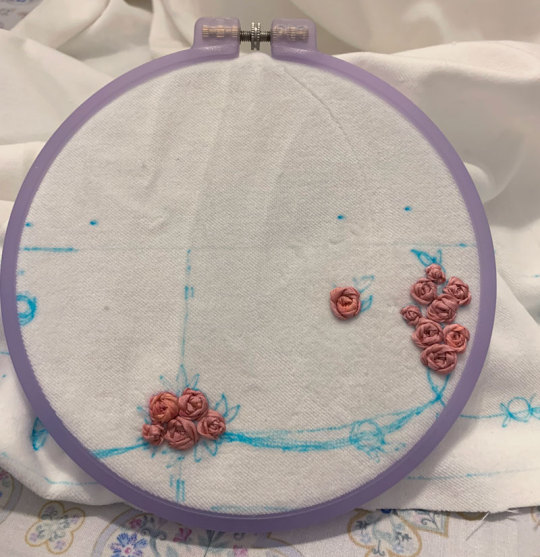
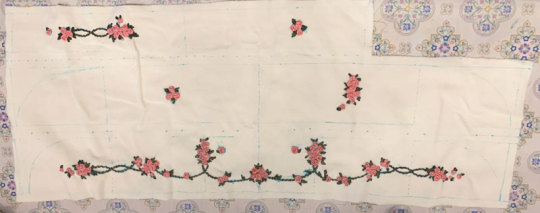
The kumya JSK was a little easier to carelessly sketch out and embroider since I was copying 1:1 from an existing design, but I felt I needed to do at least a bit more careful planning for the embroidery on this. I'm quite bad at creating embroidery designs from scratch, but with the mental image of the rose clusters and swags of vine, as well as referencing the embroidery from the film, I came up with this:

I wanted to emulate the embroidery style of the Momoko's (well, in reality likely the embroidery designer Onoe Megumi--unclear if she did the actual embroidery, but it's likely) embroidery, which I figured wouldn't be too difficult if I was also embroidering by hand.
For material, I am using the same velveteen I used for kumya's JSK. Not my first choice and I actually purchased some thicker looking 100% cotton velvet that I thought would be more similar to the original JSK material, but was worried it wouldn't arrive in time and wanted this project out of the way in case things went wrong/took longer than I expected (it did arrive about a week before the event, but it was totally wrong IRL so I'm glad I just went with this acceptable option). I also bought some more torchon lace, so I used that and another lace from my stash.
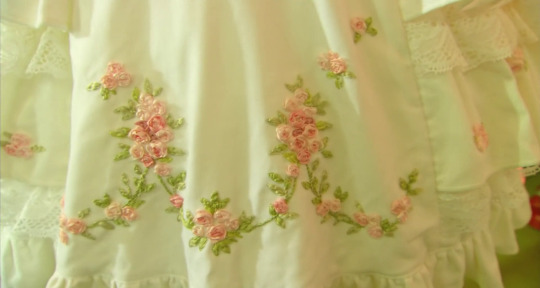
The colours of the embroidery in the film also seem to be quite different than BABY's dress. I'm not sure if the pink of the roses has faded over the years, but it has a slight salmon tone whereas the film's roses seem to be more of a pale cool/neutral pink (hard to tell with the yellow tint of the entire film) with some variegation. I love the colour scheme of the film's embroidery, but to keep things coordinated I try to opt for the same colours as the actual dress I have.
I only have white silk ribbon in the width I wanted, so I opted to attempt to dye it to match. Previously I have used alcohol markers to colour the embroidery afterwards, but I find the colour hard to control and it tends to bleed into the fabric. I've also tried colouring the ribbon with the marker before embroidering, but without heat setting the colour transfers onto the fabric as well (and it seems like trying to do so with the amount of ribbon I need would be a waste of ink).
I don't have a lot of experience with it, but since the ribbon is silk, acid dyeing seemed like the way to go.
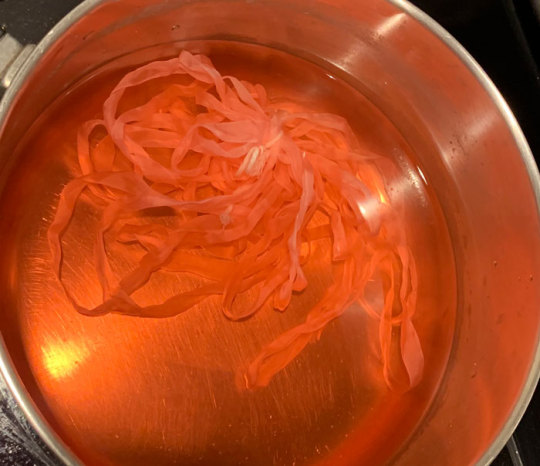
Very interesting photo of ribbon in pot (the pink ribbon gets eaten up by pinwheel roses much faster than I expected so this is the second batch I had to dye--not ideal as they are definitely slightly different in colour but it's not too noticeable). In total, I think I had to dye 3 batches of ribbon and 4 for the pink ribbon as I just barely ran out near the end, and they are all slightly different colours. Thankfully the undertone is the same so it's difficult to tell unless you are really comparing up close.
I thought I would take this opportunity to use the "peach" acid dye that I bought years ago for another project, but this ended up being a mistake as the colour was totally off (maybe the red dye was too expired). I ended up using my regular fiber reactive procion dyes (with heat/acid), because I have many more colours I could mix together, and that was much better. I really should have done this from the start as I wasted perfectly good silk ribbon by making it too dark/off for my purposes (I ended up overdyeing it in pink so it's a usable colour now, but not for this project).
The silk seems to take on dye extremely fast--even just heating up the dyebath will colour it. In some cases I removed the ribbon before adding any acid at all because I felt the ribbon was already getting too dark.
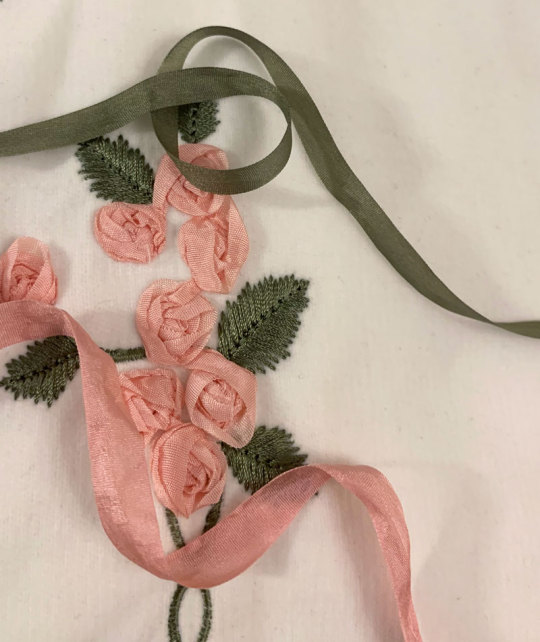
I managed to get a fairly usable mossy green colour for the leaves and vines, however the pink still ended up being a little off/dark compared to whatever BABY used. It's not too bad here as one strand of ribbon, but when many layers are on top of each other in a rose it seems pretty dark. While not ideal, I think it's still okay, especially considering the embroidery colours used in kumya's JSK match nothing else (many pinks will be going on in this coord).
After dyeing and drying, the ribbon is super wrinkled so I ironed it and wound it on some spare card so it's ready to use.
And now I can start the arduous process of embroidery.
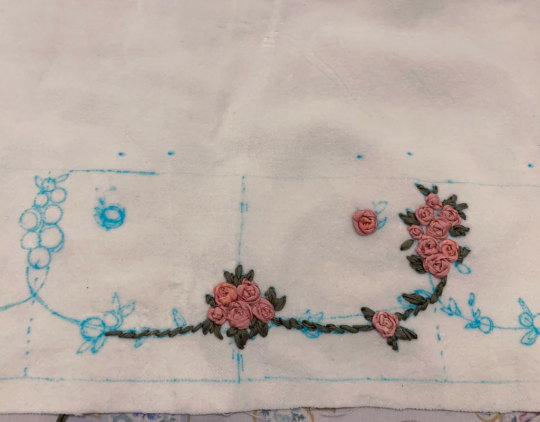
Like before, I mainly use a combination of ordinary ribbon stitches, pinwheel roses, and french knot roses. However, this time I try harder to duplicate, or at least evoke the appearance of the embroidery of the film.
It's interesting how plain and somewhat boring the roses look on their own, especially with this monotone colouring. The varied colours of the film's embroidered roses are lovely, but I decided against it here because the BABY dress has monotone ribbon roses.
The roses definitely seem to just be pinwheel style which is very easy and doable, however I am a bit more confused about the leaves. They look like a number of straight stitches in various lengths and directions that fill in a leaf-like shape. I have no idea if this technique has a name and if there is a proper method for it, because I am a silly beginner who is very uneducated in embroidery.
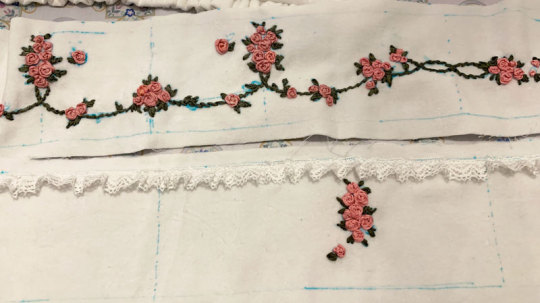
Anyway I do my best and hopefully I got close enough. Ribbon embroidery is really all about the texture, which is really lovely to look at. Except I have trouble looking at my own work for too long because I start nitpicking all the mistakes I made...
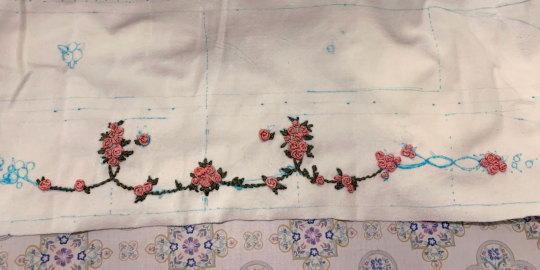
Adding the green and leaves really helps the embroidery come to life.
I took even fewer pictures of the embroidery process than kumya's JSK this time because it's not that interesting. I was definitely getting sick of doing the same pinwheel over and over...
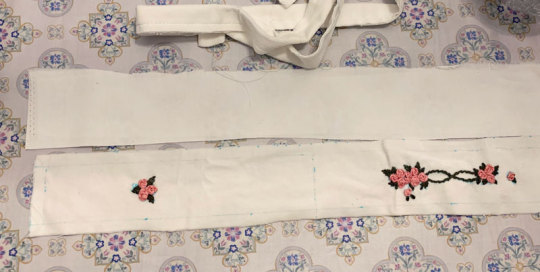
I stupidly decided that aside from embroidering the front of the brim, I also wanted a little bit of embroidery on the back of the brim for interest, as well as on the side.
The designs I drafted out for these two pieces is much simpler, but still, more work....
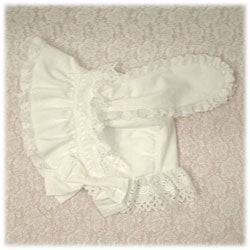
Almost ready for construction! Hopefully a lot faster with the handwork out of the way.
I iron on some interfacing onto the back brim panel and the bonnet band for slight extra stiffness.
The bottom part of the brim is plain cotton sateen because I was worried that the part that touches the head would get dirtier more quickly it if was velveteen.
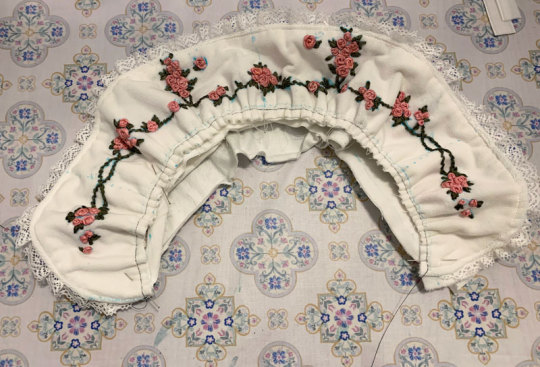
I wanted some lace gathered around the brim and an extra velveteen ruffle on the back of the band, so I prepare that now. The lace is gathered with a single gathering thread and sewn down before sandwiching between the two brim panels.
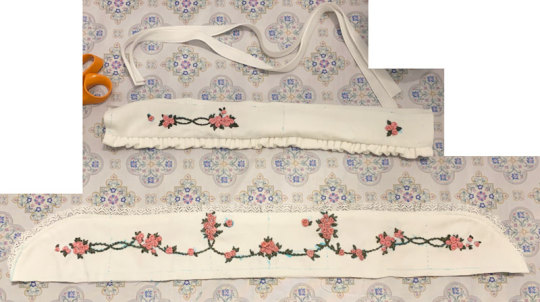
Brim sewn and topstitched (and band is ready for attachment).
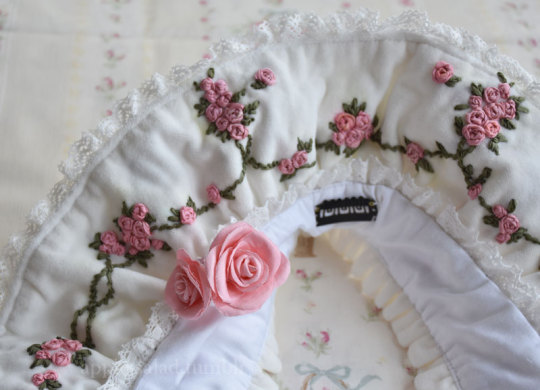
The upper flowers ended up a little closer to the top of the band then I intended, but I think it's okay.
Gathering brim and attaching it to band. Because the velvet fabric is so thick, the usual "sew one line of stitching with a wide stitch length" not only made the fabric incredibly difficult to gather, but the thin polyester thread also continually broke when trying to do so. Therefore, I opted for an alternative method I think I'd remember seeing in my sewing machine manual of all things--a zigzag carefully stitched over a central gathering thread. This worked much better, although I probably should have used a thicker/extra strong thread as the central gathering thread because it did break the second time I had to gather the brim due to a mistake.
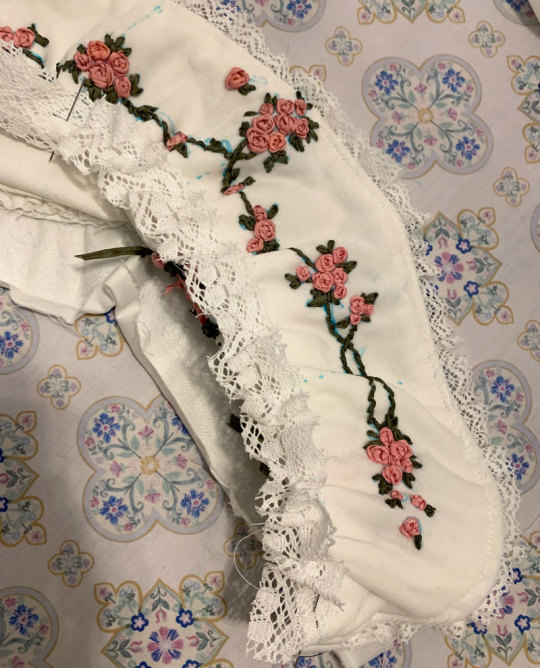
I also add a bit of lace to the inside of the brim. I think this adds some luxury and frilliness between the head and the bonnet's brim, so I wanted to add a small width. I probably could have used even more of the lace's width since it turned out very subtle when worn. But I still think it adds a small amount of interest to the innermost part of the brim and was worth adding.
Unfortunately here after sewing on both brim parts I realize that I gathered both using an incorrectly marked centre line, so I had to rip it out and do it again ;_;
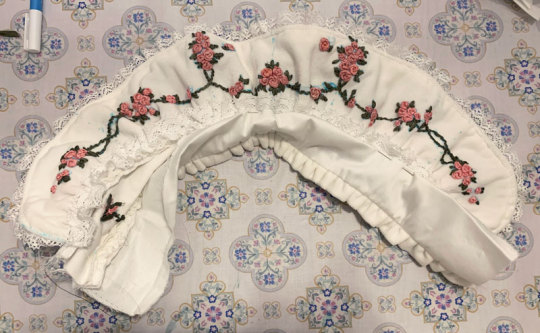
Next, I can carefully align and pin the bottom of the brim to the bonnet and sew it down. I tack this down by hand because I'm not skilled/accurate enough with a sewing machine to topstitch both sides nicely at once (look closely, and my messy stitching is quite visible...)

I also fold in the raw edges and finish the sides of the brim by hand, leaving some openings for ribbon ties.
At this point I spray almost the whole bonnet with water to disperse and fade my markings. Unfortunately, some of the earlier batches of ribbon that I dyed (Can you tell the variance in the 3 dye batches I needed to do?) were probably not washed well after dying and seem to have bled into the fabric from the water...but hopefully it's not too noticeable.
Next I topstitched all around the brim and attached the ribbon ties.
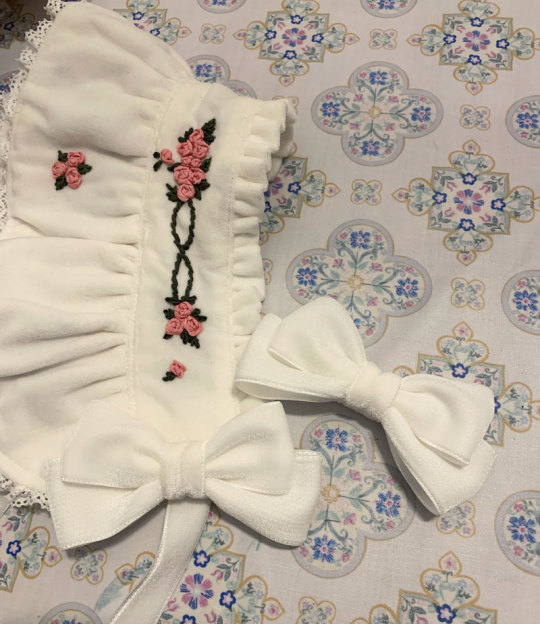
I bought some double sided velvet ribbon in my last minute supplies shipment and made some bows from it. I think the material is a little thick and petersham would have worked alright as well, but the consistent velvet material feels more luxurious, doesn't it? I also think as an added benefit (?) the ribbon being plush and double sided made the bows more puffy looking.
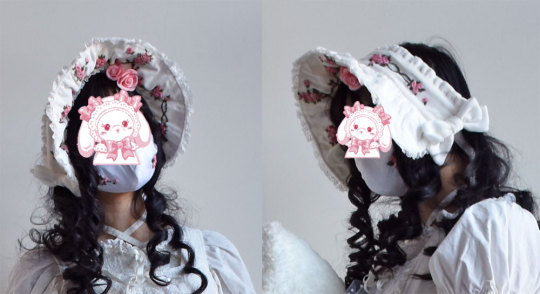
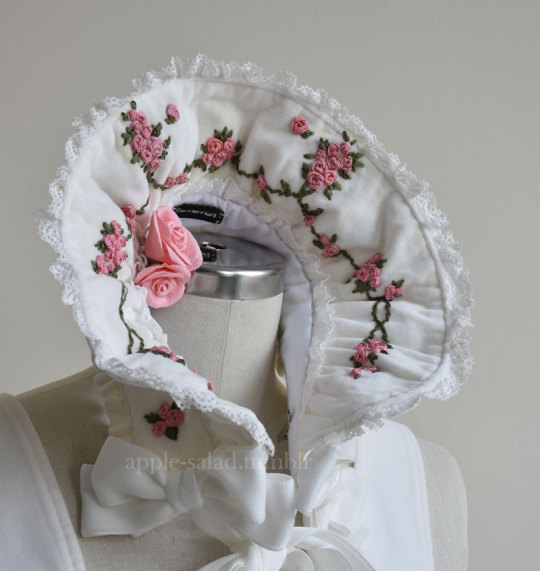
I add some clips to the sides and a toupee clip to the top for security. I opted for a toupee clips because I think it's really the way to go if you don't want the head item to move at all, no matter how thin or slippery your hair.
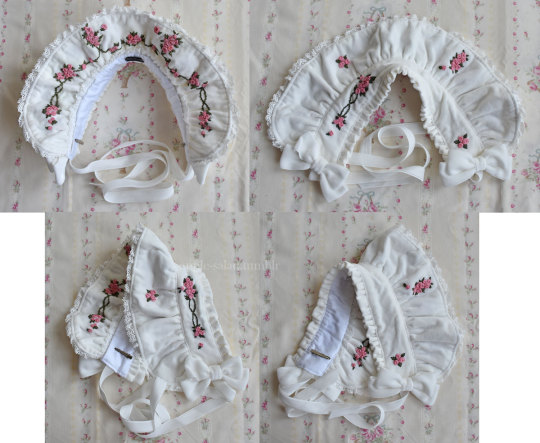
Finished.
Bonus 1: rose accent pin
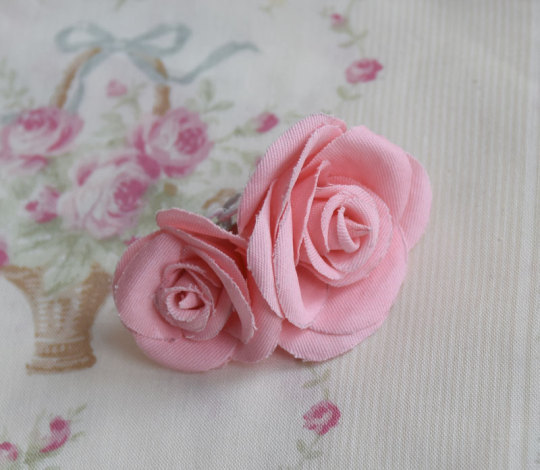
I was in a bit of a rush at this point as it was near the end of the week coming up to the show, so I didn't take any photos of the process here but the technique and templates I used were identical to my handmade faux rose rosettes I made for UM (and the bonus corsages). I have a post with all the details of this sitting in my drafts that I will post eventually, and I will update this post when that happens.
The brooch was just meant to add a bit of 3D faux flower accent to the bonnet, bringing in the rose motif even more. Partially inspired by the faux flowers BABY adds to their bonnets sometimes, like on Milk Tea Doll.
The fabric was "custom dyed" with the same fiber reactive dye I used for the silk. The fabric was further starched, cut out by hand, and shaped with flower iron tools before gluing together.
Bonus 2: matching embroidered mask
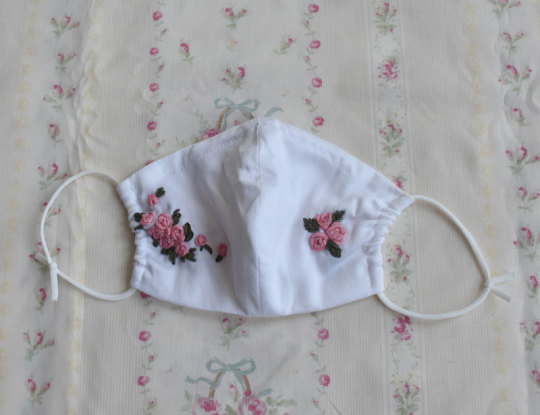
I wasn't sure about whether or not I wanted to wear a matching mask, but decided to do so for situations when I would want my face at least half-covered in public. I didn't really expect to be visible in fashion show pictures as someone in the back, but just in case. (I think this decision was worth it, although my makeup transferred all over the thing and in most pictures my face was even more unflattering. eh well)
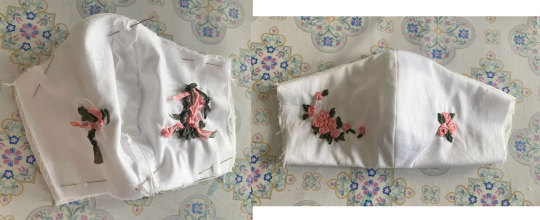
I forgot to take a lot of pictures of my process for this, but it's very uninteresting and not dissimilar from every other mask sewalong from 2020. I draft out a design similar to the bonnet motifs on both of my mask panels (cotton sateen), and embroider.
I should have embroidered closer to the centre of the mask because when worn the embroidery is not very visible/covered by my hair at the sides. What can I do since the panels were already cut though...oh well!
The lining material is some Japanese CLEANSE Ex fabric I had bought previously to make masks during the pandemic. It's supposed to be antibacterial and antiviral, as well as washable, but I have no idea how well supported those claims are.
Sew together normally on both upper and lower sides, turn inside out, add a channel for nose wire and side channels for elastic.
I also have some mask elastic on hand so I use that.
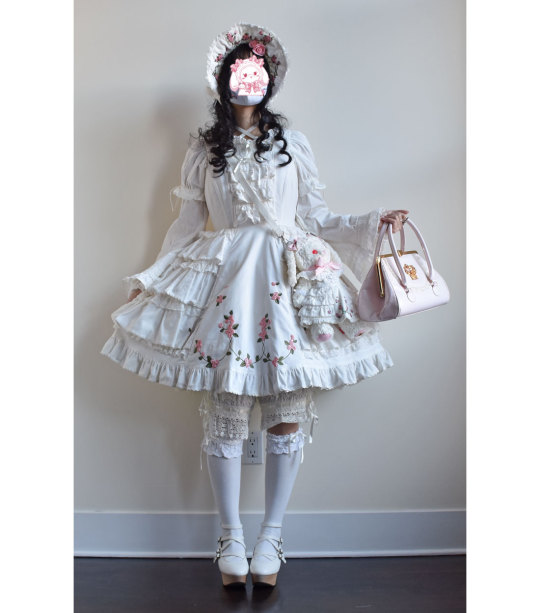
And the finished outfit again with all my items~
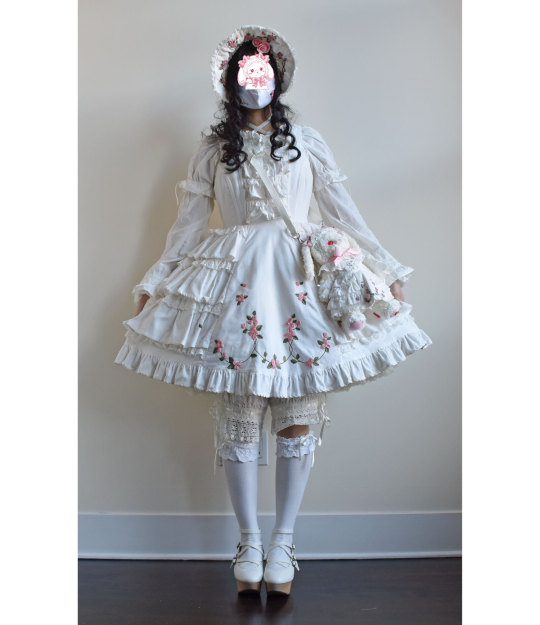
Thank you for reading! If you ever feel inspired to take up a similar project, such as the kumya JSK, I'd love to see it!
222 notes
·
View notes
Text
...and done!
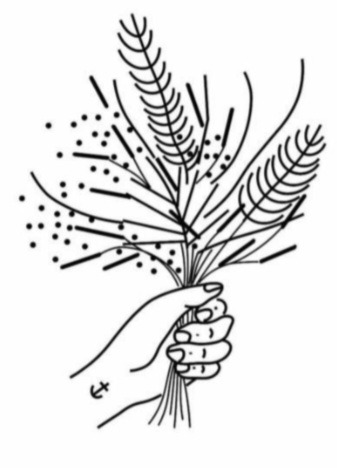
pattern inspired by this picture
203 notes
·
View notes
Text

ribbon-embroidered pendant
23 notes
·
View notes
Text
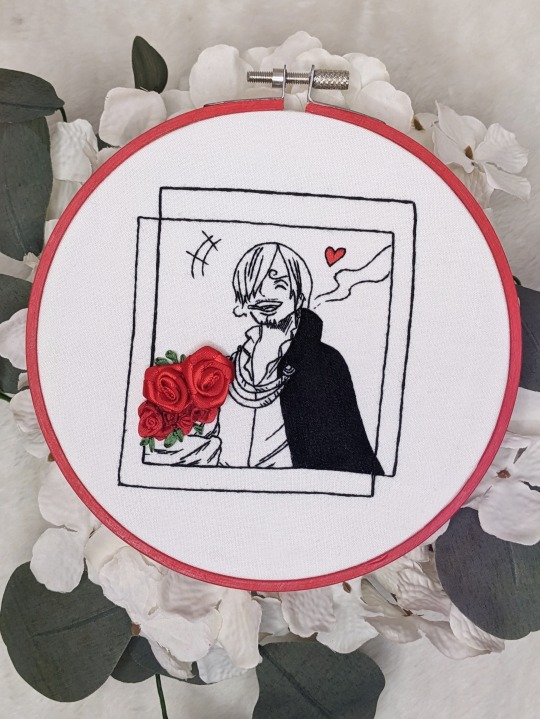
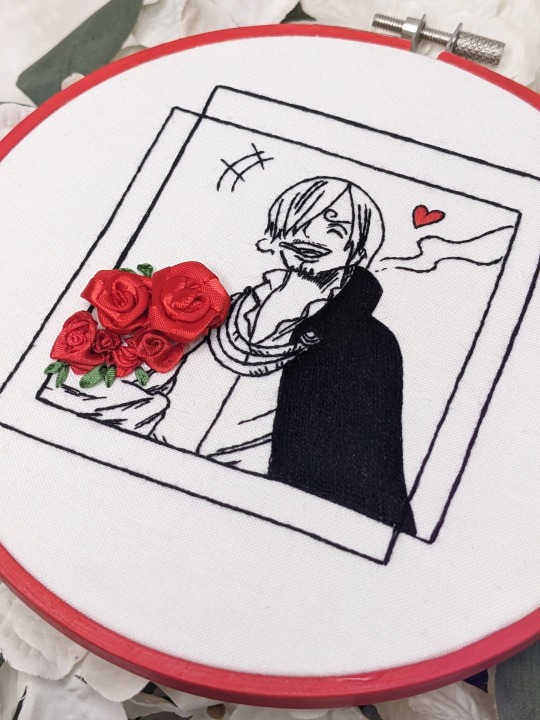
I simply don't know what I would do if this man brought me flowers, I'd probably just die
#lizz stitches#anime embroidery#embroidery#ribbon embroidery#one piece#op embroidery#sanji#vinsmoke sanji#anyway ribbon embroidery is hard#at no point did I feel like I had any control over what was going on#it's all in gods hands tbh
57 notes
·
View notes
Text
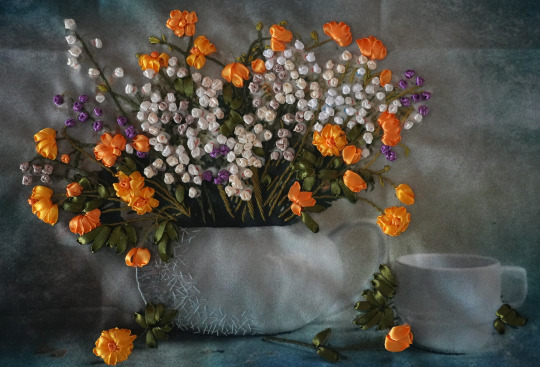
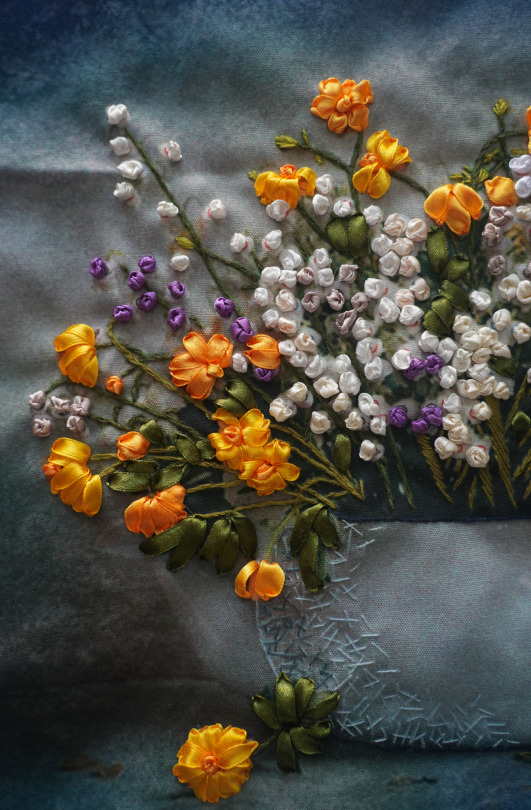

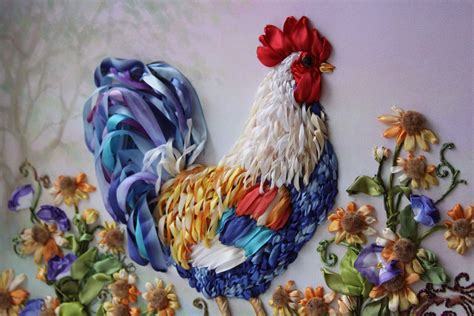
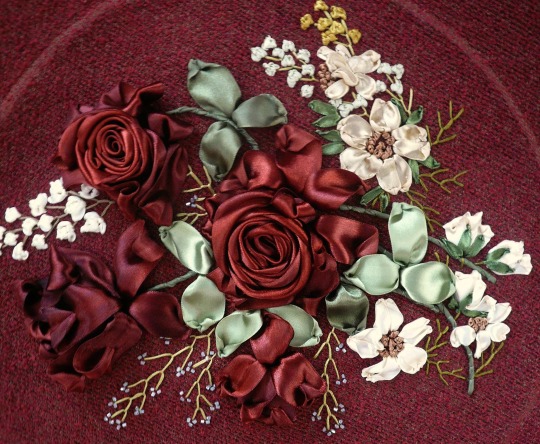
Ribbon embroidery of beautiful flowers. | Art by Dusya
3 notes
·
View notes
Text


embroidery and ribbon embroidery
6 notes
·
View notes
Text

Using craft kits from 1996 that my mom had been hoarding & realizing some of you are younger than them makes me feel ancient.
Also, it's so delightfully HIDEOUS! Like honestly, I think this is fugly but it was fun anyway.
6 notes
·
View notes
Text


5 notes
·
View notes
Text
New Post has been published on Free embroidery designs
New Post has been published on https://embroidery-designs.org/silken-orchid-embroidery-project/
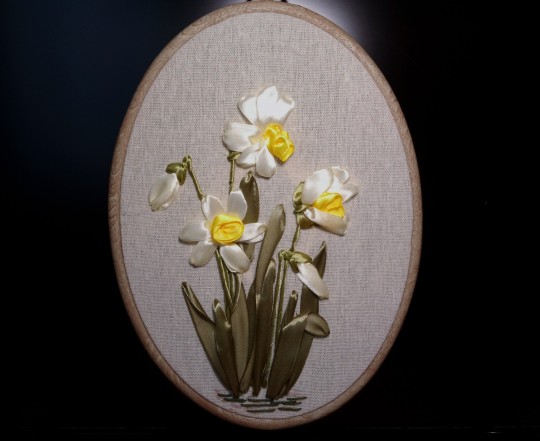
Silken orchid-embroidery project
Silken orchid-embroidery project
Lily Wong captures the delicate beauty of this bloom forever with her skilful use of variegated ribbons and thread.
MATERIALS
• 45cm x 35cm (18in x 14in) rectangle of light green damask
• DMC Stranded Embroidery Cotton: 1 skein of cream (712)
• Edmar Beta thread: 1 skein of variegated green (17)
• 15mm (5/8 in) Hanah Silk Ribbon: 1.2m (1 ¹⁄³ yd) bridal ivory; 40cm (½ yd) mossy
• 10mm (³⁄s in) Hanah Silk Ribbon: 40cm (½ yd) passionate daisy (yellow/red); 20cm (¼ yd) bridal ivory
• No 16, 18 and 20 chenille needles
• No 8 crewel needle
• 30cm (12in) embroidery hoop
• HB pencil
FINISHED SIZE
Design area: 21cm x 8cm
(8¼in x 3in)
STITCHES USED
French knot, pistil stitch, ribbon stitch, running stitch, stem stitch
PREPARATION
Transfer the stem and flower positions from the pattern sheet to the front of the damask fabric using your preferred method.
Put the fabric in the hoop and tension it until it is drum tight.
EMBROIDERY
Note: Use the No 16 chenille needle for the 15mm (5/8 in) ribbon, the No 18 for the 10mm (3/8 in) ribbon and the No 20 for the Beta thread. The crewel is used for the stranded thread.
Flowers: Work all three in the same way. Keep the ribbon stitches loose for a full, three-dimensional effect.
Using the 15mm (5/8 in) bridal ivory ribbon, work the outer layer of petals in ribbon stitch, see diagram 1.
Cut two 5cm (2in) lengths of the same ribbon and with one strand of 712, running-stitch around three sides as shown in diagram 2.
Pull up the thread to form a rounded petal and secure it.
Place these two petals over the other three with the gathered edges together in the middle and sew them in position with the same thread, see diagram 3.
With 10mm (3/8 in) passionate daisy, bring the needle up in the centre and ribbon-stitch a petal over each side of the gathered ribbon and another one downwards between the two outer petals. Make this stitch a little longer than the other side ones, then sew a French knot in the centre with the same ribbon.
Run a pistil stitch from the centre towards the upper petal with 10mm (3/8 in) bridal ivory ribbon.
Open bud: Work two ribbon- stitch petals fanning out slightly from the centre in 15mm (5/8 in) bridal ivory ribbon. Then with 10mm (3/8 in) passionate daisy ribbon, form a short ribbon stitch on top between the first two petals.
Cut a 5cm (2in) length of 15mm (5/8 in) bridal ivory ribbon and make a gathered petal as before. Attach it to the base of the ribbon-stitch petals and then work another ribbon-stitch petal on each side of it, also with the bridal ivory ribbon.
To finish the open bud, thread one strand of 17 in the needle and bring it up at the base of the petals. Take the back of the needle under the ribbon, around the loop and then through it before pulling it in a knot. Then stem-stitch down to join the main stem line under the top flower in the same thread.
Large bud: Using the 15mm (5/8 in) bridal ivory ribbon, ribbon-stitch one petal on the fabric and two
more over the first one. Then again with the back of a needle, lift these petals up a bit so they stand over the back one.
Work the loop around the base and the stem in the same way as before to join the main stem line.
Small buds: Stitch two ribbon-stitch petals over each other with 10mm (3/8 in) bridal ivory ribbon
for each of the three buds at the top of the marked stem lines. Then work the stems in the same way as the previous two buds.
Leaves: Using 15mm (5/8 in) mossy rock ribbon, work these at the base of the stem in ribbon stitches
of varying lengths as shown in the photograph. To make them look three-dimensional, don’t pull them too tight.
Stem: The main stem is sewn at the end as part of it goes over one leaf. Beginning under the top flower, stem-stitch down the line under the left-hand flower to join the stem on the right-hand one, then continue down
to the base, taking the stitches over one of the leaves and under another so the stalk seems to emerge
from it.
FINISHING
Take the work out of the hoop and have it framed as you prefer.
Download the description and charts for Silken orchid-embroidery project:
Download
3 notes
·
View notes
Text
Ribbon embroidery - a fun way to create an embroidery with a 3D effect. Used to be very popular in the 15th century : ) #etsy shop: Ribbon Embroidery Kits, 4 different motifs https://etsy.me/4aDefTK
1 note
·
View note
Text

So I'm doing a thing
0 notes
Text
Momoko, the Moon Shine Bright...
Channeling Kamikaze Girls' Momoko! I hand embroidered a few accessories to match Rose Ribbon Embroidery for the BtSSB NYFW show. This post is more of a process/homage type of video, but there is a lot more video and photos to come!
#sweet lolita#lolita fashion#oldschool lolita#baby the stars shine bright#btssb#shimotsuma monogatari#kamikaze girls#daily coordinate#victorian maiden#usakumya#rose ribbon embroidery#rose ribbon embroidery jsk#handmade#下妻物語
443 notes
·
View notes
Last Seen Blogs

freespirit-trippy-hippy
Honey, Sugar, Baby
noodledog
Noodle beasts
004thebrave
Cinnamon Girl
pulsar-1919
It's always Barry Allen loving hours here

probinemphyl
Untitled