#rit dye
Text
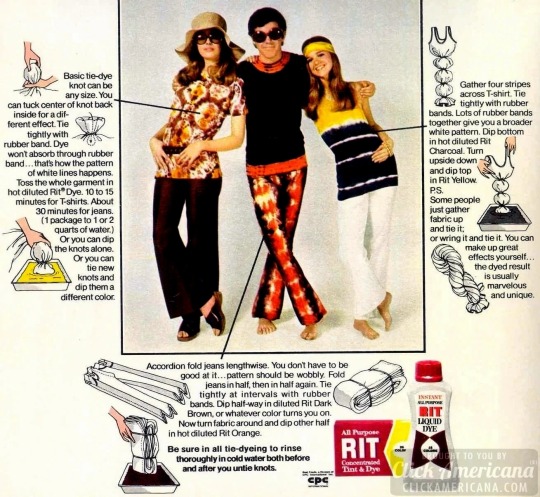
1970 Rit dye ad
28 notes
·
View notes
Text
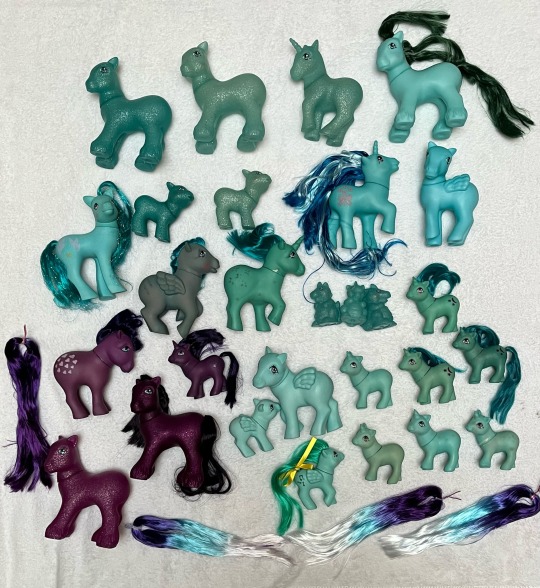
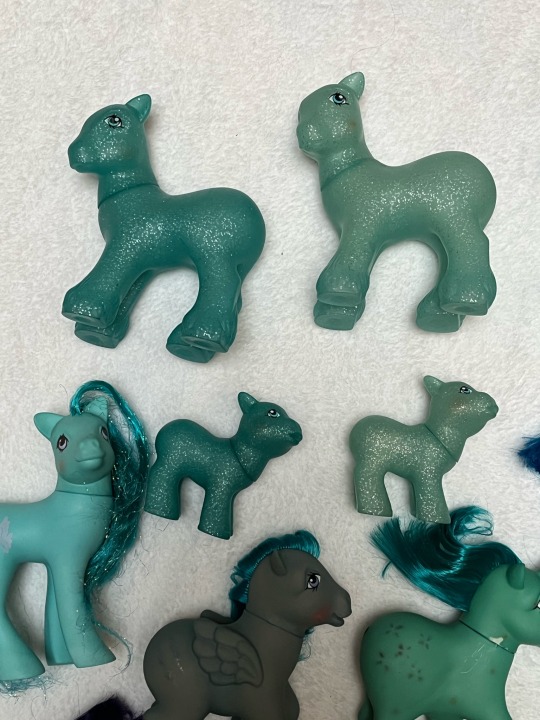
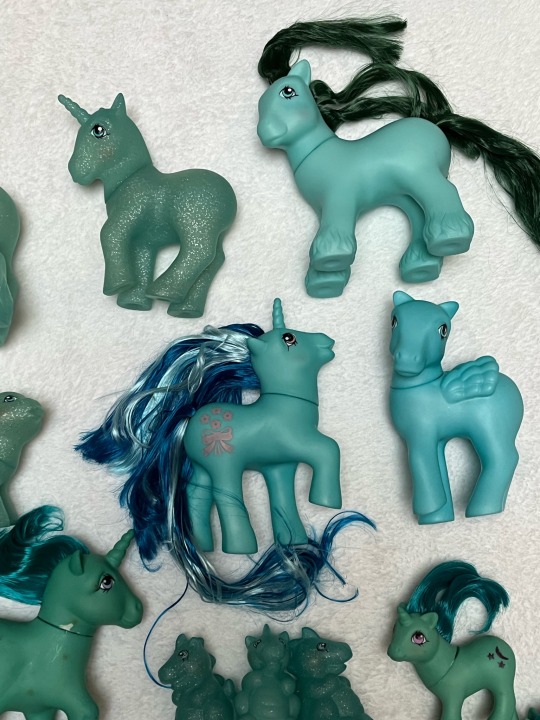

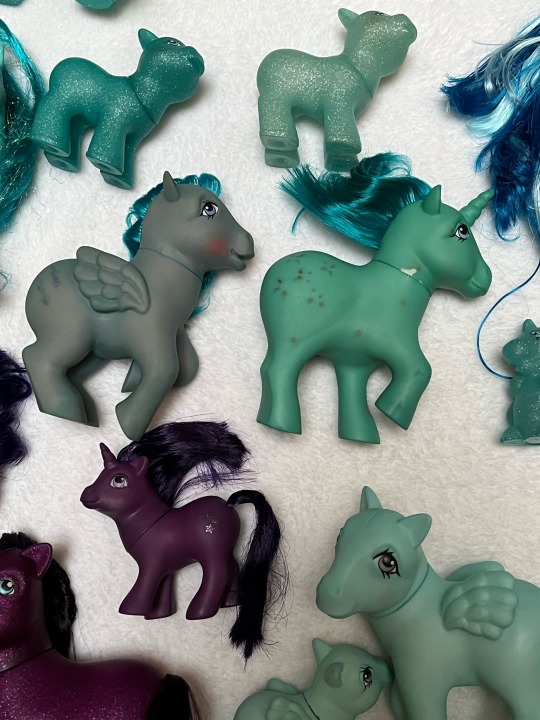
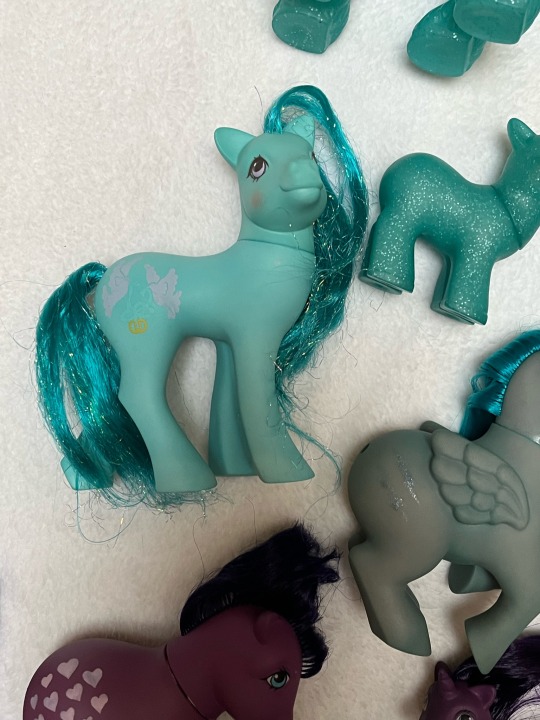
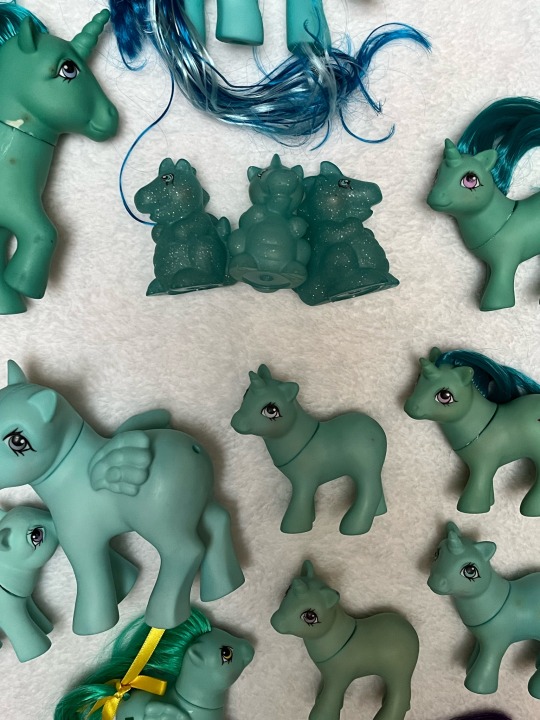
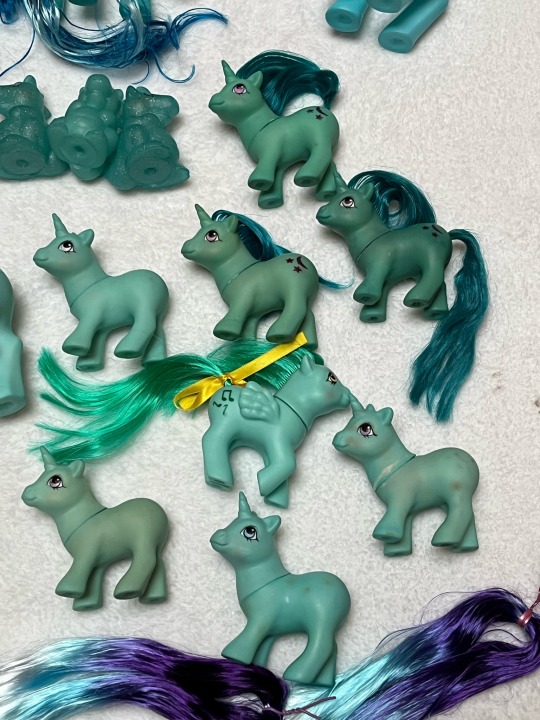

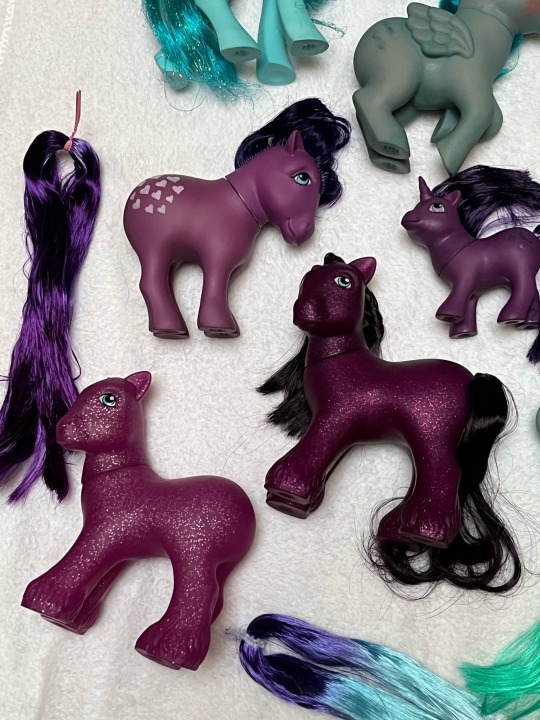
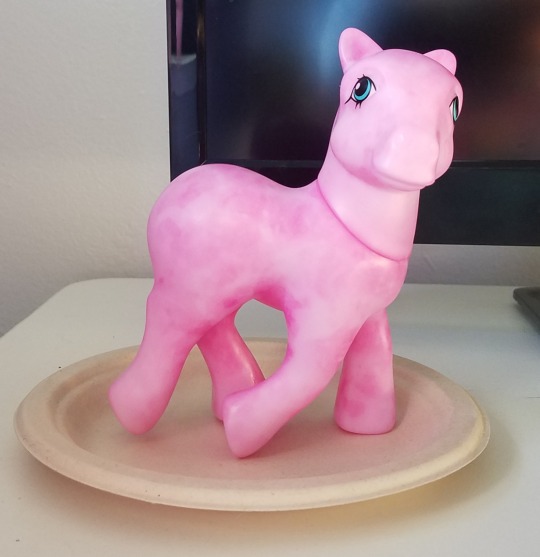
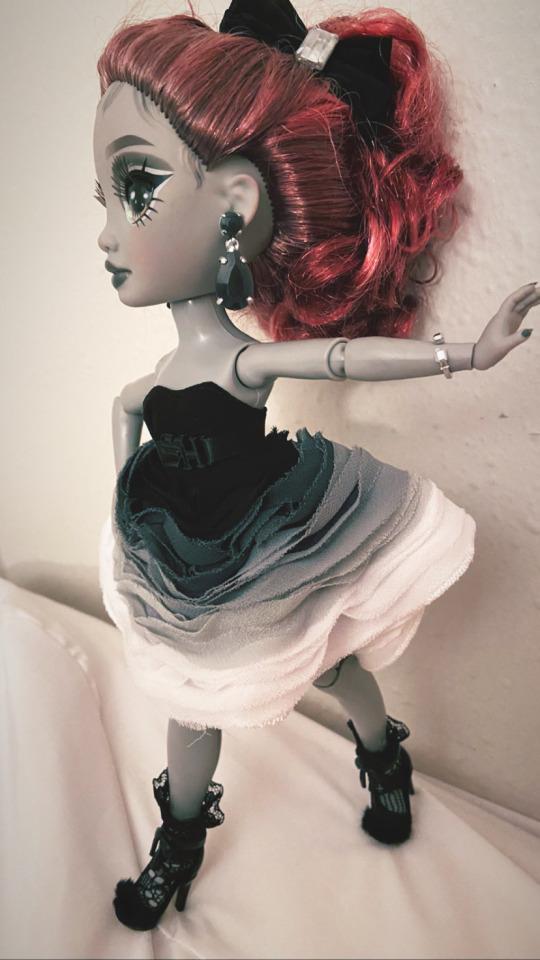
It’s finally here … pony dye a palooza part 2! 🤣 I may have to retake these photos later, both because I’m chasing the weak winter sunlight to get the most “true to color” photos, and because I really want to make sure this color match is right! 🤣 The entire purpose of this dye-a-thon is to find a match for HQG1C Baby Singalong, and it’s so close IRL, I feel like the hair might make the color fit perfectly. But I’m not sure! 🤣 But while I tired, I made her a bunch of new friends! 😀 Hope you like these pics, since I got even more for tomorrow that wouldn’t fit! 🤣
48 notes
·
View notes
Photo
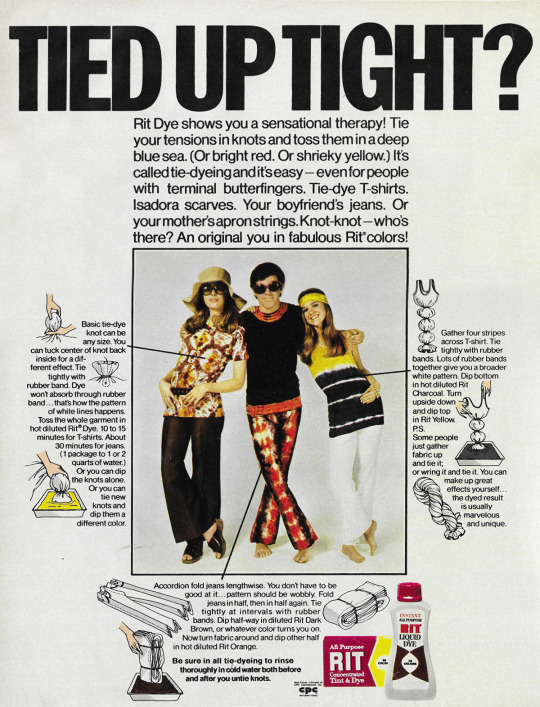
May 1970. 'Tied up tight? RIT Dye shows you a sensational therapy!'
80 notes
·
View notes
Text

29 notes
·
View notes
Text
#screenprinting#screen printing#3D space coyote#space Coyote#HiddenStash#hiddenstashart#Portland#Portland Oregon#apparel#tie dye#tie dyeing#rit dye#shirtspace#Bella+Canvas#speedball#pdxchange#3D#coyote#handmade#artists on tumblr
11 notes
·
View notes
Video
youtube
Rit Dying Doll Hair Tutorial! Rainbow High and LOL Surprise OMG
INSTRUCTIONS - How to dye doll hair with Rit!
Supplies:
Your dolly!
Dye
Big bowl or your sink
Stirring stick (chopstick)
Disposable gloves
gentle soap
1. Start with clean hair. Rinse your dolls hair with water to remove any product. A teeny tiny amount of a gentle soap can be used. I like Dr. Bronners.
2. Prepare the dye bath. No need to boil water, just fill a large bowl with hot water from your sink. pour out a small amount of dye into the water. You can eyeball it or try this ratio: 1 Gallon to 1 teaspoon dye dilution as a rough starting point and then add more water or dye as needed. The color of the water will look darker than the outcome. You can always dye a test strand but I like to live dangerously.
3. Time to DYE! With wet hair dip your dolls head in the dye bath and swirl around. Dip for 10-30 seconds at a time so you don't over dye. Less is more with this project since there isn't an undo button! When you dip make sure you get to the hair line. You can even face her forward in the water briefly to get the hairline area.
4. Time to RINSE! After dipping immediately rinse the dye out of the hair. Once the water runs clean you have your final color. repeat the dip again if you want a stronger color.
5. Done! Just dry and style however you like now.
TIPS:
This is my method but everyone has their own way. There's no "correct" way to customize your doll so do whatever you prefer! Different types of doll hair may dye differently. I'm not responsible if you mess up your doll!
Don't use Rit Dyemore as it can stain the face or body. Stick with basic Rit, the liquid is a lot easier and less messy than the powder! Salt and vinegar are not necessary. The hair takes color just fine in hot water, no need to boil. Read instructions on the bottle but adjust them for doll hair like this tutorial or another's instructions.
Consider the dolls existing hair color when choosing the dye color. Just like human hair you can't dye dark colors to light colors. You will need to go from a lighter color to a darker color. Such as light blue to brown. Most dolls have paint on their scalp that matches their stock hair color. This paint won't change colors and can sometimes be seen contrasting with the new dyed hair.
LESS IS MORE! It's OK if it doesn't come out exactly as you envisioned. Even with some precision there are always surprises.
#youtube#dolls#fashion dolls#rit dye#rit#dying hair#doll hair#doll custom#how2#tutorial#rainbow high#lol surprise#omg lol#omg doll#lol doll#mga#customizing
12 notes
·
View notes
Text
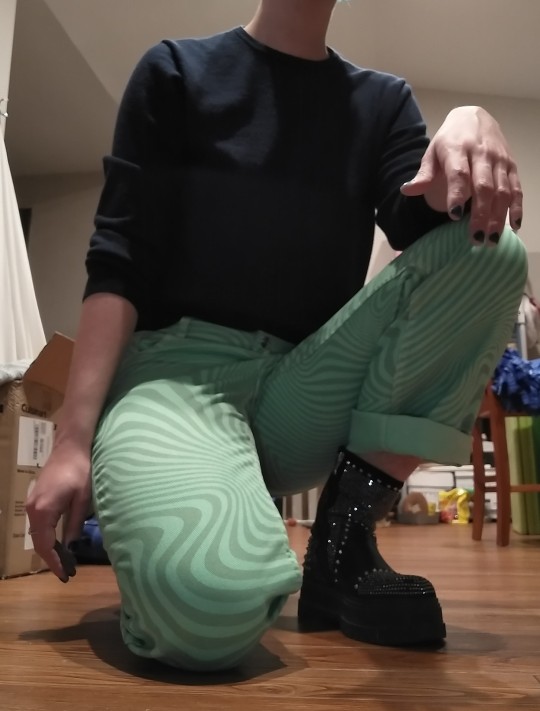
ABSINTHE GREEN DYE JOB WAS A SUCCESS!!
39 notes
·
View notes
Text
Fuschia rit dye + a new wardrobe to ring in the new year! ✨👏🏽
20 notes
·
View notes
Text
OK, Maybe Don't Use Dye on Your Resin BJD...
Or it might end up like mine!
(this is a test print from my BJD prototype)
Time to sand all of this off and maybe just paint the skin in layers of acrylic paint?
2 notes
·
View notes
Photo


How Not to Look Like A Tablecloth, Or Dyeing Gingham
Gingham is a naturally cheerful form of check, often used in home decor and or in youthful garments--see Judy Garland in The Wizard of Oz in a blue and white pinafore style gingham dress. I bought this all cotton spring green gingham on line during a sale intending to make a dress. When it arrived I realized it looked too much like a tablecloth or curtains for a kitchen. What to do? Try dye, I always think. Technically, this is over-dyeing as the threads of the green fabric were already dyed once.
Dress Doctor books from the early 20th century often discussed the pros and cons of dyeing finished dresses in their section on remaking and remodeling. I even found a Vogue Pattern magazine suggesting dyeing a wedding dress after the ceremony. Of course, with a finished dress, you are dealing with details and interfacing and the need to submit all of them to the rigors of dyeing. Which in the case of Rit Dye or IDye means a long agitation in as warm a water as the fabric will stand. Which is why I would much rather try dyeing yardage than a finished garment although I have had success dyeing all cotton jackets, shorts, and tops (the polyester thread they are sewn with stay the same).
I have Rit dyes on hand usually, but this time I tried IDye in royal blue. You can see the results. From a cheerful but kitcheny check, it went to a darker blue and teal check which is a much better look for a dress which is what I am working on now. Stay tuned to see the final results.
For lots of color formulas and dyeing instruction, go here: https://www.ritdye.com/
For IDye, go here: https://www.jacquardproducts.com/idye-main
#dyeing#dyeing fabric#over-dyeing fabric#rit dye#idye#making#makers#fabric#dress fabric#remodeling#remaking#over-dyeing#over-dyeing garments#gingham#wizard of oz#judy garland#gingham fabric
22 notes
·
View notes
Text
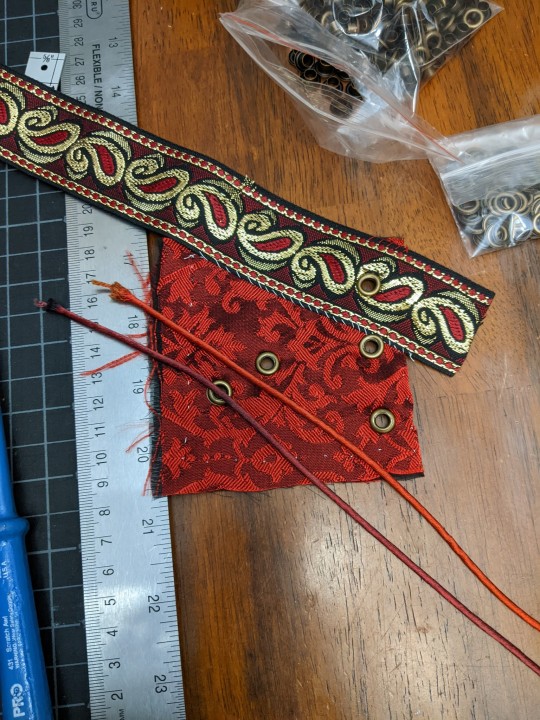
Test swatches! The next big task for my Rhaenyra cosplay is getting the grommets into the center back and along the armscyes, and I know just as soon as that's done I'll want to lace it up, so I figured I'd spend today getting ready for both.
In the second photo you can see, along the bottom, the color that the lacing cord started at -- a bright and slightly blue-ish red. I probably could have left it, but since I'm planning to attach lacing points to the end of each of the cords, I decided to take the time now to over-dye the red to tone it down to something slightly closer to my fabric. Since the cord has a rayon outer with a cotton core, I knew it would take dye like a champ.
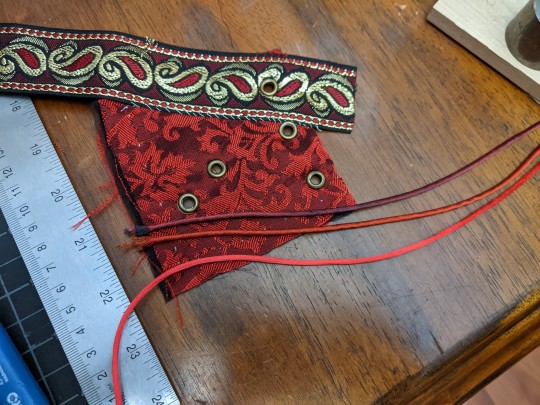
The darker test run was my first attempt, using tan Rit Dye over the existing bright red, turned out much darker and still too blue-leaning for my taste, so I did another test with Tan and Golden Yellow mixed in equal amounts, and less dye total than the first attempt. That color turned out pretty damn perfect.
Since I was so happy with the color, I decided to just add more water and more dye to my dye pot and head straight into dyeing the several yards I'll need for the dress and the bag I'm (hopefully) going to make to carry my con gear around in. I actually ended up doing the whole thing twice because of unforeseen circumstances, but I'll post about that tomorrow when the cording is all dry and I can get a shot of it in daylight.
3 notes
·
View notes
Text

Rit Dye ad, 1972
19 notes
·
View notes
Text

Ritdyed my delica and got a nice wine red. Sry for the shitty lighting, my dumbass forgot to turn off the rgb on my keyboard.
5 notes
·
View notes
Text


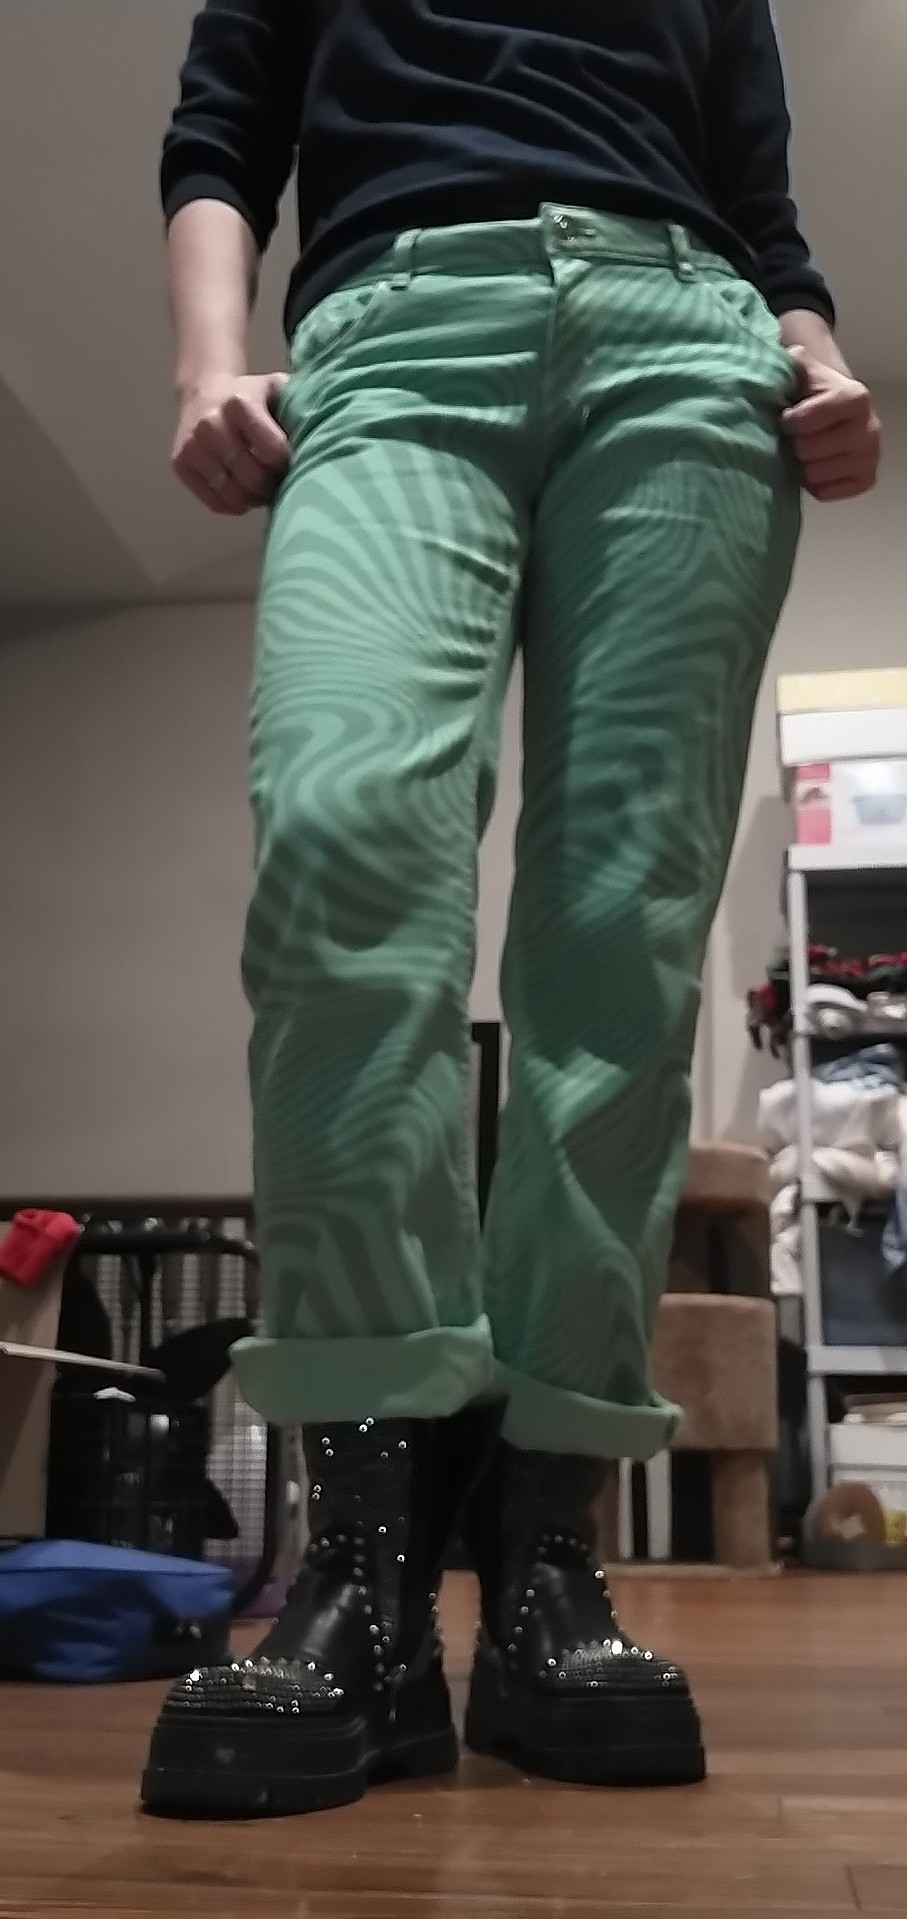
I've been looking for black jeans that fit me for like 2 years. I finally got frustrated and dyed a pair of jeans that fit me black. I'm bad at taking photos but they turned out really well.
3 notes
·
View notes
Photo


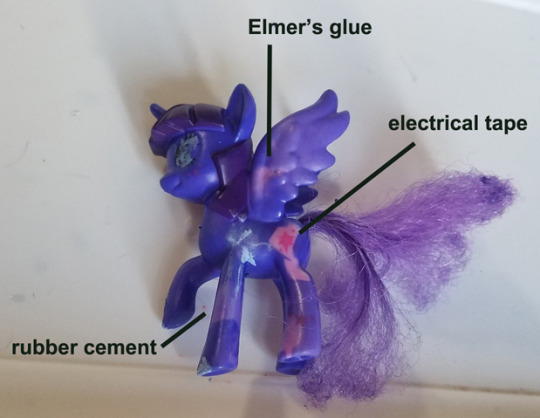
I did an experiment with RIT Dyemore and various masking elements: Elmer’s glue, rubber cement, hot glue, whiteout, and electrical tape.
Whiteout was a total fail, it was hard to get it off and didn’t mask well.
Electrical tape and hot glue worked best.
Rubber cement and Elmer’s glue had middling results. Elmer’s glue works best if the dye mixture is highly saturated and the pony isn’t in it long; otherwise the glue will start melting off. Rubber cement stays on, but some dye gets under it.
Heat is definitely necessary for the dye to work; the purple G3 fakie’s head was in cold dye for twenty minutes and barely changed color; her body was in simmering dye of the same color for fifteen minutes. The dye doesn’t have be boiling, I had it on low heat.
42 notes
·
View notes
Text
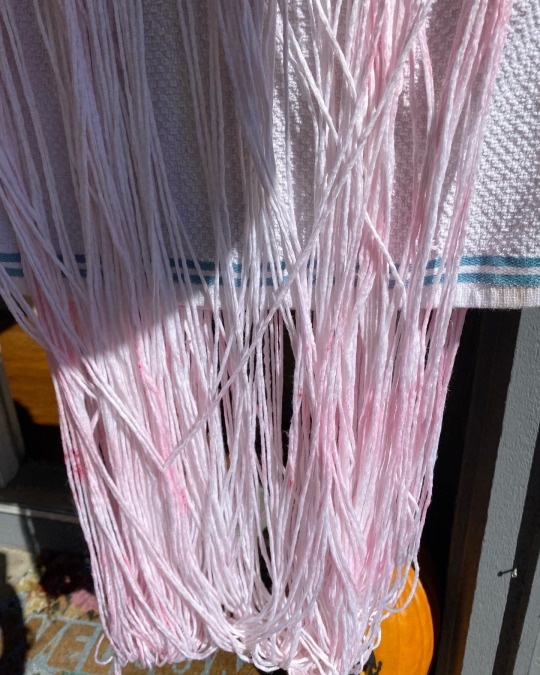

Dried and in the sunlight ! Okay, so . I’m REALLY happy with how this has turned out, honestly? I really really am! Just!!!! Look at it!!!
Look at that blushed pink! Look at that back and forth of rose and magenta! I love it I love I love it so much!
It was my first time trying out dying yarn, and I of course did not use any timers or let things soak nearly as long as I should have but regardless, really, I am so very happy with what I made! I am thinking of trying again, with some more cotton yarns.
5 notes
·
View notes
Last Seen Blogs
orangboi
tobi in the streets, obito in the sheets

selineram3421
A Person
also-history-of-stichery
Also History Of Stitchery

6brit6brat6
BrittyBeatz™️

bestvalues1
Untitled