#there are loads of tutorial tumblrs out there that I go to frequently to try new things
Text

Hey friends! This tutorial is going to take you through the steps to make a very simple gif. I won’t be touching on sharpening, colourings, texts etc. but if you want a tutorial on those, I am more than happy to make them :D
Just a few things before we start:
- I am not the best at explaining things and tend to ramble so please stick with this
- Please like/reblog if you found this useful at all
- If you have any questions about anything in here, or anything else, please send an ask or a DM, I’m always happy to help out and answer any questions that you have
I’m putting the rest under the cut so I don’t clog you dashes, enjoy!
So just a bit of housekeeping before we start:
- I’m using Photoshop 2020 (I can send a link if you need one)
- I use the KM Player (again I can send a link if you need one)
- Try to get your episodes in 1080p or 720p, the higher the better because yay we love quality! (I can help you find links if you need them)
1. Open your Photoshop, KM player and capture folder.

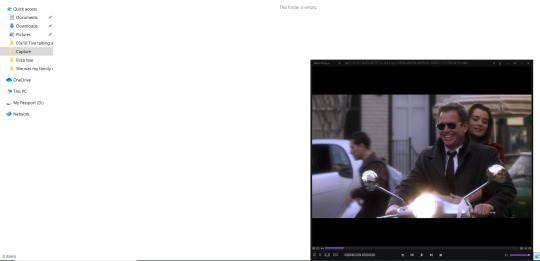
I like to have my KM player open over my capture folder so I can see the screens captures as they happen but that’s just me :’) lol look at all the tiva gifs I’m still spiralling y’all anyway
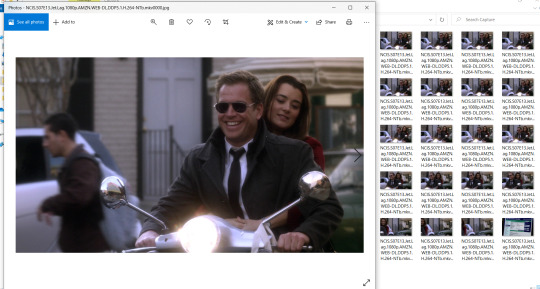
2. Open the file that you want on the KM player.

Click on the open file option and find the one you want, then press open! Find the scene you want and pause it there (hehe look at happy tiva on their moped wow blissfully happy fools)
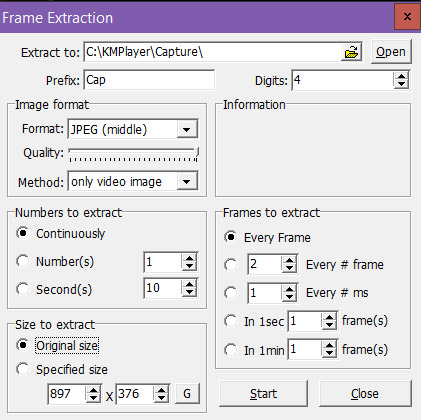
3. Setting up your frame extraction. While on your KM player, press “ctrl + G” to open up this dialogue box. These are the settings you are going to want to use (they will stay the same every time you open it so you don’t need to keep changing them every time).
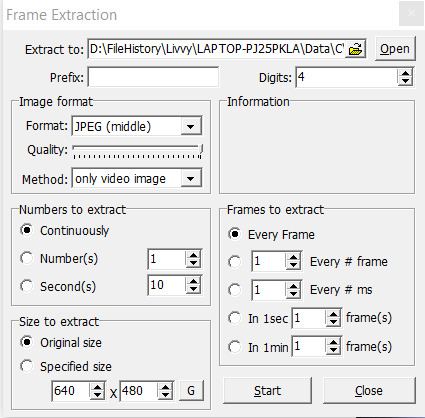
For the extract to box, choose your capture folder that you already have open. Image format, and size to extract, make sure they are on those settings, they are the defaults anyway. Numbers to extract set it to continuously so we can get all those pretty pretty frames. Now your frames to extract, your gifs will look the prettiest if you have it set to capture every frame, you can do every second frame but I wouldn’t recommend it.
4. Let’s get those frames! The frame extraction box will stay open unless you click the x but seeing as we want it open, let’s keep it :D so we are on the scene that we want (I normally put it back a few seconds so I can start my capture at the point I want my gif to start at) that sentence didn’t make sense but stay with me for this.
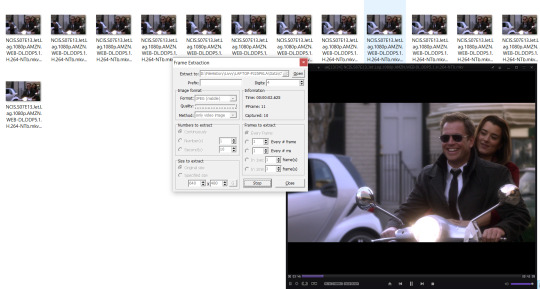
Press play on your scene and when it gets to that part that you want to gif, press start on your frame extraction box and you should see the frames coming up in your capture folder (why I like to have it open lol there is a method to my madness). Then when you have reached the end of the part you would like in your gif, just press the stop button and you frames will stop being captured. (Depending on how many frames you are capturing, you might get a delay on your KM player, now this part is important, the frames that it captures are from what you can see on the screen (which will be lagged from the audio that you can hear) so keep capturing the frames you want from what you can see not what you can hear. But this will only happen when you are capturing a lot of frames so it shouldn’t really be a problem, it could just be my KM player who knows.)
I’ve stopped my KM player capture and have got all my frames that I have just captured (yayayay frammmeeesssss)
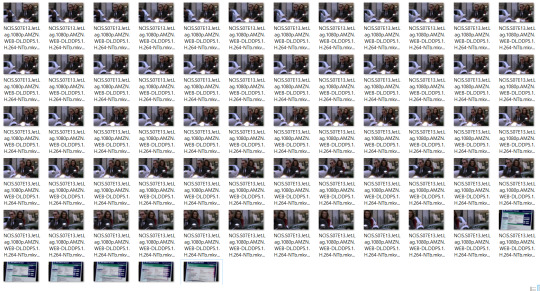
5. Sorting your frames. Okay so I know we have just gone through a lot to get those frames however there are way too many of them (and some at the end which I definitely don’t need in my gif lol what even is that a computer?? no thanks). For my gifs, I generally have between 30-40 frames. Anything more, to me, feels long and doesn’t...flow? Idk how to explain this one but you get a feel for when your gif should end, but I’ll come to that more later. Anything less than 30 is perfectly fine too, I think the lowest I’ve ever gone is 16/17 but it honestly depends on you and your preferences :)
This part is pretty easy, so I click on the first capture so it opens in a new window. I then scroll through with my arrow key to see how the frames look together, then delete from both ends for the parts I don’t want. This step will help a lot before we put it into Photoshop as the more frames that you load into it, the harder PS has to work, the poor baby :(
Now I’ve only got the frames that I want which will make my gif! (you can delete frames later in PS so don’t worry if you’re an indecisive fool like me who sometimes ends up with 50 and sulks because I want them all but tough Liv you can’t have them all, make a decision for once in your life)
6. Let’s get those delicious looking frames into Photoshop :D
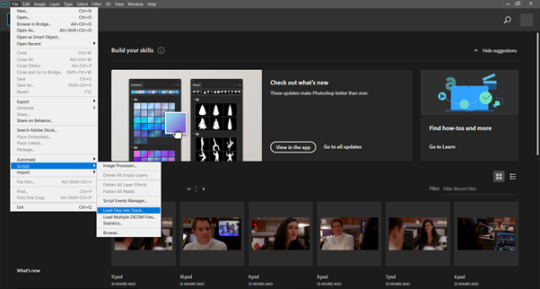
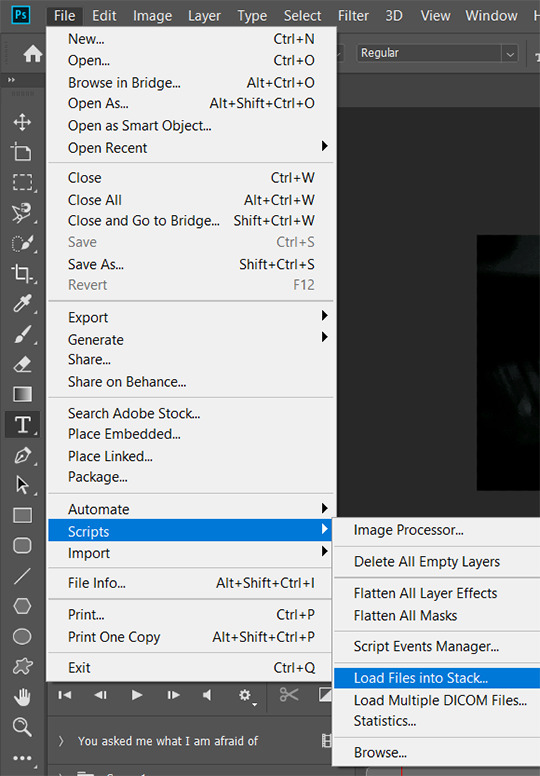
On your PS, go to file > scripts > load files into stack. This should then open this dialogue box.
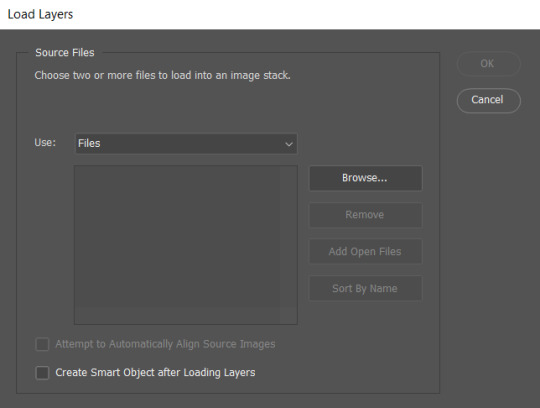
Go ahead and click that browse button and find your capture folder with all your lovely frames in it.

Select all of them and press okay.
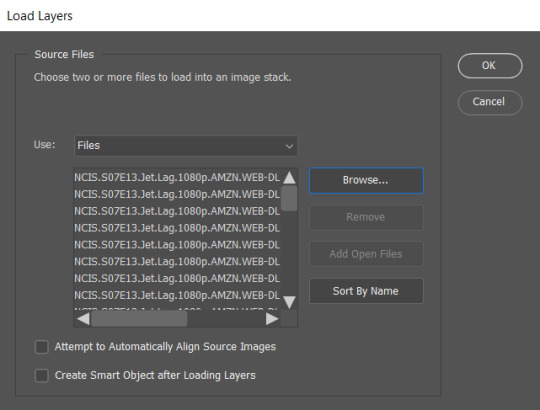
They will pop into your load layers box and just click okay on that one too.
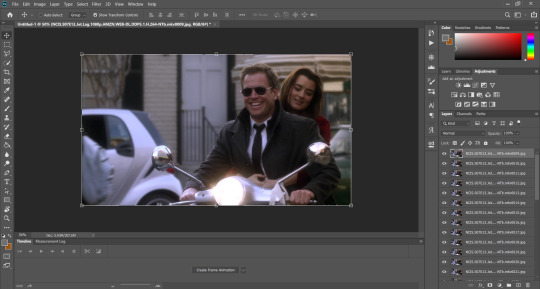
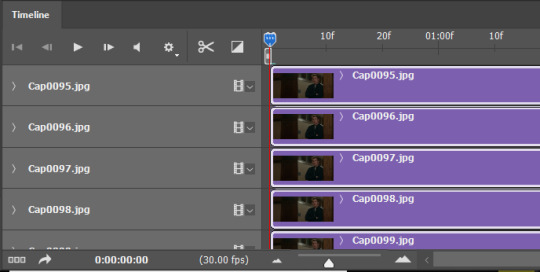
Just give it a few seconds and they will appear in your PS like this (wooooo we’re doing it, we’re really doing it!!!)
7. Frames to layers. When will the technical terms stop, captures to frames to layers WHY PS WHY :’( I’ve actually had to remind myself how to do this step because I have an action that does it for me because I am hella lazy oops

Let’s go ahead and click that lovely looking button that says “create frame animation”. Yours should now look like this with the timeline at the bottom instead.
If you don’t have that, go to window > timeline. Make sure that it has a tick next to it and it should come up.

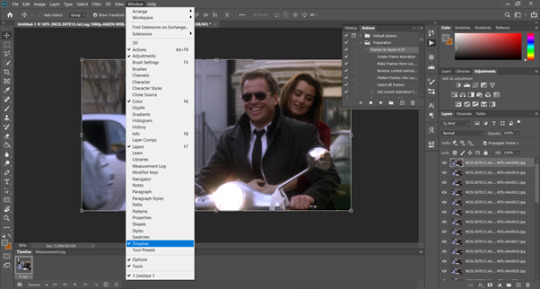
Next click on the super sexy little three lines which opens this wonderful options box, and click on the “make frames from layers” option. (ha omg i’ve just realised you can see my action in there which I’m following oooopppppsssssss, I really can’t remember these steps because I haven’t done them in so long ANYWAY)
We’re starting to look like a gif YAYAYAYAY but we’ve still got more to do.
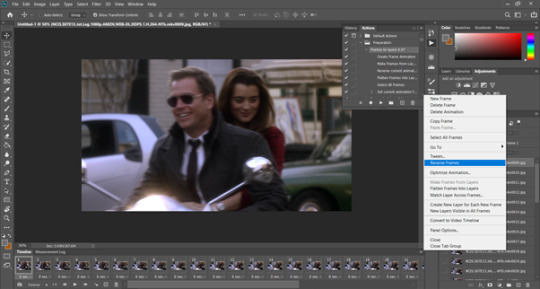
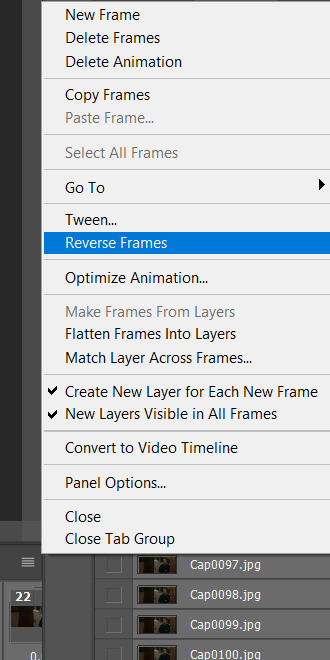
For whatever reason, when we put our frames to layers they are backwards (wtf ps???) but no worries, we can sort it! Get back to those sexy three lines and click on the “reverse frames” option and hopefully we will be in the right order.

If you want to, have a little press of your play button now and your gif should be MOVING AHHHHHHHHHHHH
BUT WE STILL HAVE MORE STEPS TO DO GAAAHHHHHHH (actions people, get yourself some actions!!) I can do a tutorial on those too because wow I forgot how long this all took wow *wipes sweat from brow*
ONWARDS FELLOW GIFFERS.
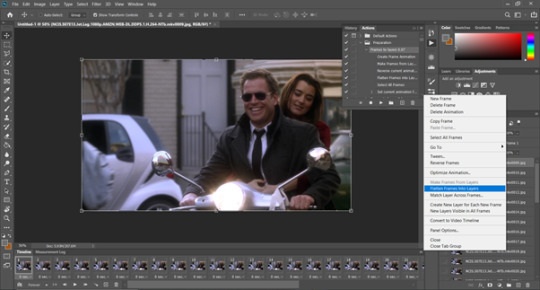
Those three sexy lines are back again but this times let’s go to the “flatten frames to layers” option.

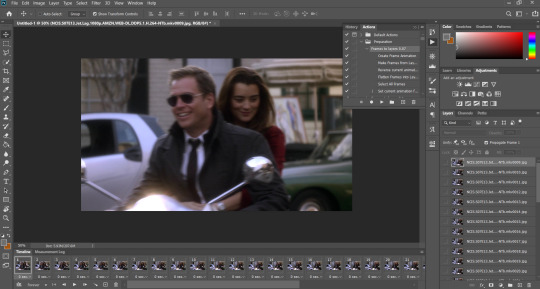
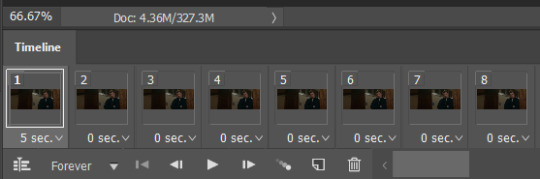
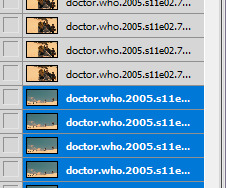
Over on the right, your frames should look something like this, depending on how many frames you had got. If you scroll down in this section, you can delete all the frames which have you episode names on them by using the little dustbin icon, we only need to keep the ones labelled “frame 1, frame 2, frame 3″ etc.
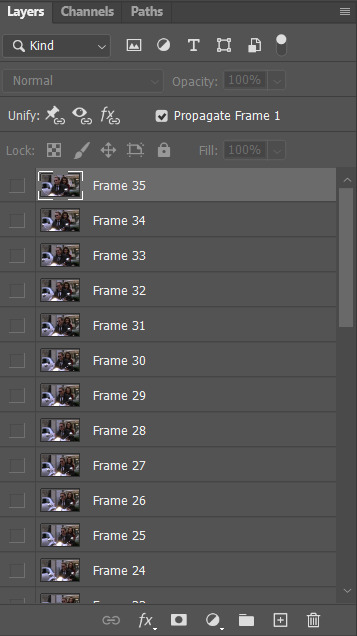
Scroll back up to the top of that section and click on your highest layer (just leave it highlighted because it’s our top layer and we want to keep that one highlighted so that anything we do to our gif will all be affected) again terrible sentence but just click on the top one. Also, make sure you are on the first frame in the frame animation tab too.
8. Frame delay. So our gif is looking pretty good right now but our delay isn’t.

Let’s click those sexy three lines again (seriously what are they so beautiful for) and click on the “select all frames” option.
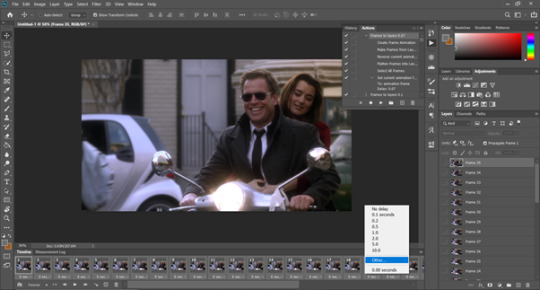
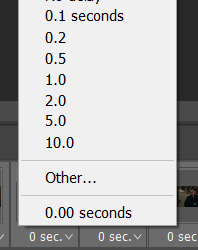
With all your frames now highlighted, click at the bottom of any of the frames where it says “0 sec.”, which opens up the little dialogue box and there are options there for you to choose from but give the “other” a click.
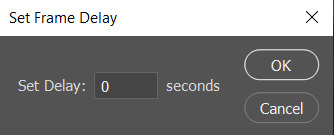
Which should open this lovely looking box! Now, your frame delay is completely up to you and your personal preference. I like to use 0.07 but that is by no means the only option. Anywhere between 0.05 and 0.1 are all fine to use, it really depends on what you like. I would suggest playing around and seeing what feels right for you. Just click okay when you’ve decided.
9. Resize your gif. Tumblr has very specific dimensions that we need to follow otherwise it messes up our gifs.
These are for the width of your gif. The height can be anything you choose. Please make sure you follow them otherwise tumblr will ruin all your hard work. I’m going to use 268px for this tutorial.

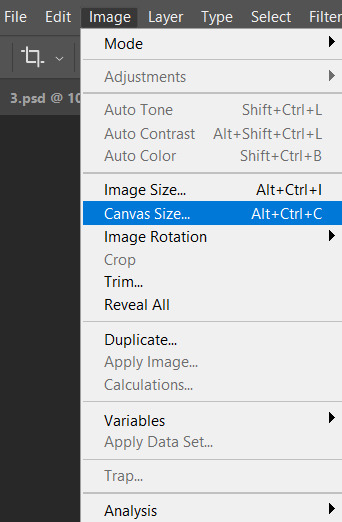
Head on over to your image > image size.
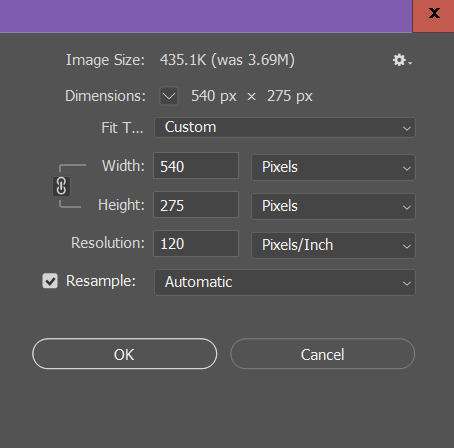
And it should open this hella sexy beast of a dialogue box. In this PLEASE make sure the little chain symbol is highlighted because it’s keeps your gif correlated(?) idk it keeps it looking fab.

Pop your 268 into the width box and it should automatically adjust the height box to keep your gif looking correct(?) (I’ve lost all words today but it keeps it looking how we want it to). Then click the okay button.
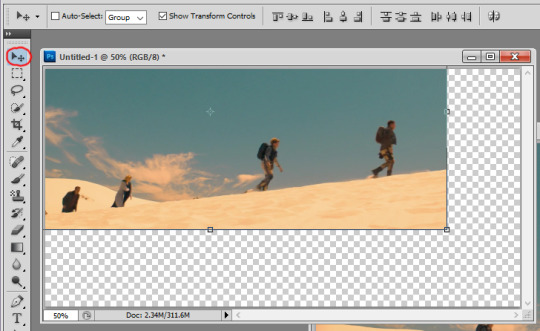
Your gif will looks like it’s “shrunk” and it has because we have changed the size to a smaller one, but just press “ctrl and the + symbol” on your keyboard to zoom it back in. (ctrl and the - symbol zooms back out)
The gif has a nice “feel” to it, it flows well so I’m keeping all the frames I used before. You can delete frames as necessary.
NOW OUR GIF IS THE RIGHT SIZE SO LET’S SAVE THAT BAD BOY WOOOOOOO!!!!
10. Save your psd file.

Go to your file > save as, then choose your folder to save your file in. You can name it whatever you want to, I normally just go with 1, 2, 3, 4 etc because I’m basic and lazy but everything is neatly in their own folders lolol
Your psd file should be sitting nicely in your folder now.
11. Save for web. We’ve got our psd file, so now we need our gif file.

Head on up to your file > export > save for web.

And this sexy beast of a dialogue box should open. These are the settings I use, and I know there are other options out there but these are the ones that work for me at the moment.
A few things to point out here:
- Perceptual and pattern. I like these so that’s what I use but there are other tutorials out there which use others so shop around to see what is best for you.
- Leave your colours as 256.
- Make sure your looping options are set to forever because we don’t want our gif to stop playing at any point.
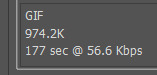
This bit here. Tumblr has a limit on gifs of 5M. This gif is just under 1M so we are completely fine to use it. If your gif is over 5M then it won’t play when it’s uploaded. If you make a gif over 5M, take some frames out and it should bring the size down. Only 540px gifs should be reaching towards the 5M, our 268px gif shouldn’t get close to it.
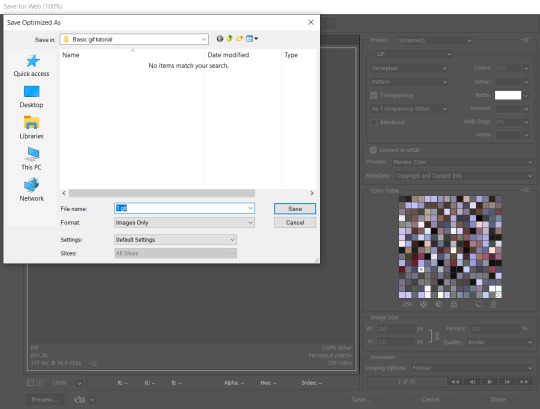
Then click your save button and it should open yet another dialogue box. Find your folder with your psd file in it and save it in there because we like to be organised ;D
And we’re done yayayay!!! Upload your gif to tumblr, tag your heart away and stare at your amazing gif because YOU made that!!!
#photoshop#photoshop tutorials#ps tutorials#gif tutorial#tutorials#photoshop tricks#mine: tutorials#my posts#I am by no means an amazing gif maker#I just do this for fun#there are numerous ways of making gifs#this is just what works for me#there are loads of tutorial tumblrs out there that I go to frequently to try new things#I'm constantly finding easier and quicker ways of doing things#like the actions#a literal blessing#I hope this helps any gif makers out there who are starting up#it's really a wonderful thing to do#and bring me so much happiness#my asks and dms are open any time for questions
18 notes
·
View notes
Note
Hello! I've oredered a bullet jornel but idk how to make it so pretty
hi anon! well firstly i just wanna remind u that ‘pretty’ is 100% subjective when it comes to these things, and i have to say that i especially notice it in regards to bullet journaling - i always feel like everyone’s spreads look miles better than mine, but people seem to like my bujo posts just fine :) so what i’m trying to say is, don’t focus on how pretty your journal is, focus on the process - do what feels good, let your creativity run wild, try new things etc. i assure you you’ll start liking your spreads more and more as you go and get a hang of it :)
here’s just a couple tips you might find helpful:
discover what medium you like best - what type of pens? gel/ballpoint? maybe markers or crayons? do you enjoy adding printed photos or stickers? it’s easy to get overwhelmed by all the options you see on studyblr, but remember that you don’t need fancy stationery to make ‘pretty’ spreads :) i usually just go for a black gel pen, a pastel marker for my accent color, sometimes i add some washi tape, but that’s it - i prefer a pretty minimalistic look to my spreads
draw inspiration from others’ bujos - ofc this doesn’t mean copy them completely (unless they say it’s alright if you do, most will if you ask them beforehand!), but you can find layout ideas and handwriting styles etc. by going through the #bujo or #bullet journal tag here on tumblr, you can also go on youtube (amanda rach lee is my fave bujo youtuber, her videos are lovely if you’re just starting out, as she does explain her process well) or instagram (again, amanda posts lots of doodle tutorials that you might like there). you can also see all bullet journal posts i’ve reblogged by searching ‘bujo’ on my blog.
when you first start out, i think the most important thing is to play around with different spreads and layouts so you can find what works best for you. do you prefer vertical or horizontal weekly layouts? do you enjoy making playlist spreads? maybe quote pages or memory collages? remember that your bujo can be anything you want! a practical life planner with a hint of art, an artistic outlet with zero functionality, do what you want and what you want only. don’t think you have to make a certain spread just bc loads of other people are making them in their own journals. i, for instance, have come to realise i have absolutely zero use for a year at a glance spread. it does look lovely, though :)
most importantly: try not to hold yourself to a too high standard. i know. it’s not easy, but toning down on perfectionism will free you and allow you to focus on journaling for the fun of it, l'art pour l'art and all that :) additionally, you can use a pencil to sketch your spread before going in with a pen, just so you can easily fix any spacing mistakes you might make
Lastly, you might also find this post by @journalsanctuary helpful
and here’s a list of some studyblrs who post their bujo spreads frequently if you want to check their work out (i find their bujos inspirational myself, so): @jeonchemstudy @study-van @museeofmoon @starrystvdy *these clearly aren’t all of my faves, just a couple i can name off the top of my head atm*
+ @merostudies who hasn’t posted in a while, but their spreads are drop dead gorgeous and @saltwaterstudies who doesn’t post as frequently, but i love his spreads all the same :)
@ everyone: if you also post your bujo frequently, feel free to reply to this so others can discover your blog through the notes xx
#if you have any more questions you can always send me another ask!:)#bujo#tips#anon#sabrinas mail#sabrinas masterposts#i guess lol#studyvan#jeonchemstudy#saltwaterstudies#heyzainab#starryvstudy#just gonna tag some more mutuals in case anyone else finds this helpful/useful:#medustudies#stuhde#heystasia#myhoneststudyblr#uglystudies#athenastudying#serendistudy
163 notes
·
View notes
Text
I saw that ask meme with questions for gif makers going around, but I felt like answering them all on my own lmao
1. What are your top 3 favorite sets you’ve made
This one, this one (if the timing works lmao), and this one (I’m so proud of my AU gifsets... where did all that creativity go??)
2. What is your least favorite set you’ve made
I honestly don’t know... I don’t think I hate anything I’ve posted though. If I don’t like how it’s turning out, I just won’t post it lol
3. Which of your sets has the most notes
The most notes ever is this one I think
4. A set that flopped but deserved better
I don’t know... there’s a bunch, but I’m fine if a gifset flops
5. What is your favorite movie/TV show to gif
DOCTOR WHO
6. What is your least favorite movie/TV show to gif
I really don’t gif anything else lmao...
7. Who are your top 3 gif makers
I’ll just pick 3 people off the top of my head :) @shatner, @melodyspond, @stupidape
8. What gif trend do you hate
The pale/black and white gifs that are so hard to see.......
9. What/who inspired you to start making gifs
I wanted to gif my favourite parts of DW that I didn’t see anyone else doing, so I was like alrighty, time to learn how to do this!! I think the people that inspired me are long gone from tumblr, or I’m no longer following them because they’ve moved blogs (Natasha aka lumos-maxima... wherever you are, I MISS YOU... also Courtney aka needlebug I MISS YOU TOO)
10. What was the first gif you ever posted
THIS ONE! I remember being so happy about posting it, haha. Also, I still love that Confidential episode so much. I miss my space hipsters...
11. What is that one set you made that just won’t die
The Zoboomafoo one
12. What is the most embarrassing thing you’ve ever giffed
Everything I’ve ever posted
13. Where or from whom did you learn how to gif
Various tutorials on here and just by experimenting. I don’t even think I used Photoshop to begin with, since back in my Neopets days I used Paint Shop Pro to make graphics so I think that’s what I used first to try making gifs of videos.
14. How long does it usually take you to make a set
45 minutes to an hour or so?? It’s been taking longer and longer because the screencaps are so huge though and my poor laptop can’t handle it.
15. Have you ever had gifs stolen and reposted
Yes, and don’t think that I can’t tell when those are my gifs, even without a watermark!!
16. How long have you been making gifs
Since 2011...... my god
17. 10 sets, 8 sets, 6 sets? How many gifs to you prefer in a set
As many as it takes!!!!! But usually between 6-8
18. For the aesthetic, for the laughs, or for the feels what your preference
For FUN!
19. What is your gifting process like
Open video, find scene, screencap, load screencaps in Photoshop, resize to gif dimensions, add colouring, curse myself for picking a hard-to-colour scene, continue adjusting colouring and become increasingly frustrated because it’s not turning out the way I want it to, give up, add text, save gif, POST!
20. Mac or PC
PC
21. PSDs or original coloring for each gif
Original colouring. PSD who???
22. What fandom/movie/show/person etc do you gif the most
DOCTOR WHO and more specifically, David Tennant... I think his tag has the most :’)
23. What is the thing you gif when you don’t have anything else you want to gif
Any episode with Ten and Donna, or The Eleventh Hour, or the Day of the Doctor, or Blink
24. 480p 720p 1080p? What is the minimum quality you’ll gif from
I used to be all good with giffing 480p back in the day, but I guess now it’s 720p since the gif limits have gone way up.
25. Old dimensions or new dimensions and why
New dimensions because they look nicer on the dashboard.
26. How many un posted sets are in your drafts right now
ZERO.
27. Have you ever made a set, decided you hated it and deleted it? What was it
Probably at least one or twice, but I don’t remember.
28. Have you ever posted a set, regretted it and immediately deleted it
No, I don’t think so. I’m leaving my mistakes there for all to see!
29. Have you ever posted a set, realized you made a mistake later but it was already too late
Yes, I did this just the other day with that Missy, Bill and Nardole set. I got the dialogue slightly wrong lmao..... shh
30. How frequently do you like to post
I try to do at least one gifset a day if I can!
31. Do you schedule/queue posts or do you post right after you’re done
Right away. These gifsets are fresh off the grill.
32. What is your favorite tool/adjustment layer in Photoshop
Selective Color or Color Balance
33. Do you like to/can you make edits and graphics too or only gifs
Yes, I can do both but gifs are way more fun imo
34. A set that took you a long time/was really hard but you’re really proud of how it came out
I’m gonna say this one again because I was so proud of it when I made it, and I can’t believe I used to put that much effort into my gifs.
35. Do you change your giffing style a lot or do you have a set routine
I have a routine, as described above. My gifs are pretty much all made the same way as I describe in my colouring tutorial too.
36. Do you gif with something specific in mind or do you just wing it
Usually a mixture of both. I like to try to gif a different Doctor each day, so I’ll know who I have in mind but I’m not planning on a specific episode. I’ll just open up one of their series and go from there!
37. What sets if any do you have planned to make in the future
Idk, I was thinking of doing yet another gifset with Donna in it since I just finished her Big Finish series... but maybe I’ll do one with Eleven and the Ponds??? We’ll see.
38. What are you really excited to gif that isn’t out yet
The next Doctor Who holiday special?? :D
39. How often, if ever, do you delete old sets that you don’t like anymore
Never!! I love seeing how my gifs have slowly changed and improved over time.
40. Why do you make gifs
Because it’s fun, and it’s a way for me to relax after a long and busy day at work.
41. What is your least favorite part about your gif making process
When it takes forever for my screencaps to load, and when it takes forever for my gifs to save sometimes
42. How is your gif folder organized? Is it organized at all?
Lol nope.
43. Do you keep videos forever or delete them once you’re done giffing
I keep the episodes forever, but honestly I think I keep everything forever because I forget about getting rid of the other stuff like trailers and interviews... I should go through my downloads folder.
44. Ever had a gif become a meme? Would you like that if you haven't
I’ve had people use my gifs as reaction gifs and it is a weird feeling, especially seeing the gifs being used on websites other than tumblr. I remember seeing one of my gifs used in someone’s book review on Goodreads and I was like “WAIT THAT LOOKS FAMILIAR!!”
45. Ever gotten hate over a set
Not really hate, but I do get a lot people that are like “WHERE IS ______?” in their tags. And sometimes I just want to be like “Make your own gifs if you think they should be there!!!”
46. Ever gotten a really sweet compliment over a set
Yes :’)
47. Any advice for novice gif makers/people who want to start making gifs
Don’t give up!! Make gifs of whatever makes you happy, don’t worry about the notes too much, and use your tags! KEEP PRACTICING!
48. How would you describe your giffing style
I don’t know??? If someone else has a way to describe my style, then please let me know haha
49. How much would you say you’ve improved since you first started giffing
It’s been almost 9 years since I’ve started, so I hope I’ve improved quite a bit! :P
Well, that was fun. Congrats on making it to the end of this post!!! Now I will go make a gifset.
7 notes
·
View notes
Text
Beginner Friendly Gif Tutorial (Part 1): The Screencap Method
This was requested by a anon earlier this week and, while I don’t think I do anything terrible unique with my gifs, I will do my best to explain my process. I’m going to be posting this tutorial in two parts, as it got super long 😅 and I think things will be easier to keep track of this way.
This first post is going to be focusing on how I set up my gifs (loading files into stack, cropping, converting to smart object, and sharpening). I use the screencap method 85% of the time, so that is what I’ll be focusing on here. I’ll be talking about my approach to coloring in the second post.
Please like or reblog if this tutorial helps you!!
So, before you can actually make a gif, you need to have the right tools. For me, these tools are:
KMPlayer (for screencaps)
Photoshop CC (for everything else)
If you’ve made gifs before or looked at other tutorials, you are probably aware that there are two ways of getting started. Some people use the “video frames to layers” option in Photoshop, while others use the “load files into stack” option. The former requires video in a format Photoshop can read. The latter requires an external program such as KMPlayer capable of screencapping the moment you want. I use both methods, although I use load files into stack more frequently. Because of this and the fact that load files into stack is a bit more complicated, that is what I’ll be explaining today.
Step 1: Screencapping
For load files into stack, you need to first open your video in KMPlayer and screencap the moment you want to gif. These are the settings I use:
With your screencaps in hand, you can hop over to Photoshop.
Step 2: Creating Your Timeline
In Photoshop, you need to open the menu and select “load files into stack”:
Once you do that, this box will appear:
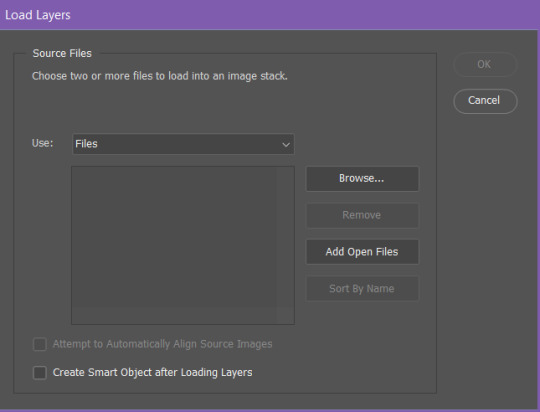
You need to click browse and then select all the screen caps you want to use.
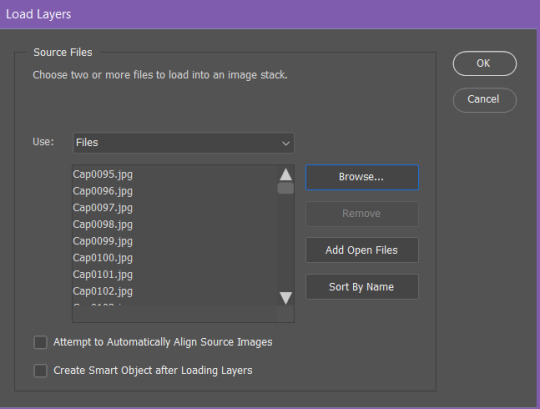
Once you have all the caps you want to use, click “ok.” (I don’t recommend loading more than 100 to 150 at once, as the process is not the fastest. However, I have loaded more than 400 screencaps at once, so, depending on what you’re doing, the wait can be worth it).
Once your screencaps have loaded, you’ll see something like this on the side of your screen:

Now you need to select all layers by scrolling down to the bottom, holding down shift, and selecting the last layer. Then (and you will need the timeline window showing for this), you need to click “create video timeline”.
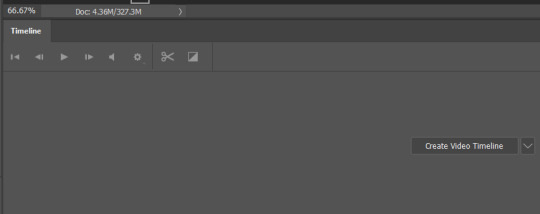
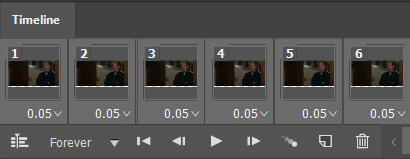
Once you’ve done that, your timeline should look something like this:
Next, you need to select those three little boxes on the bottom left. That’s convert to frame animation. You should end up with this:

Now, you need to go over to the right side of the timeline, click the three little lines, and then select “make frames from layers” from the menu that pops up:

You will end up with this:
It might look we’re ready to go, but, there are a few more things that we need to do before we can really get down to business. First, you need to select all frames and set the frame delay:
Click “other” and set the frame delay to .05:

Now (and this is the last thing we need to do before we get to the business of actually making our gif), we have to reverse the frames. When you use the load files into stack method, your frames are loaded in reverse order. So, before we start cropping and coloring, we need to fix that.
In order to fix that, you need to head back to that little menu on the right side of the timeline bar and click “reverse frames”:
Once that is done, your gif is ready to be cropped and resized!
Step 3: Cropping and Resizing
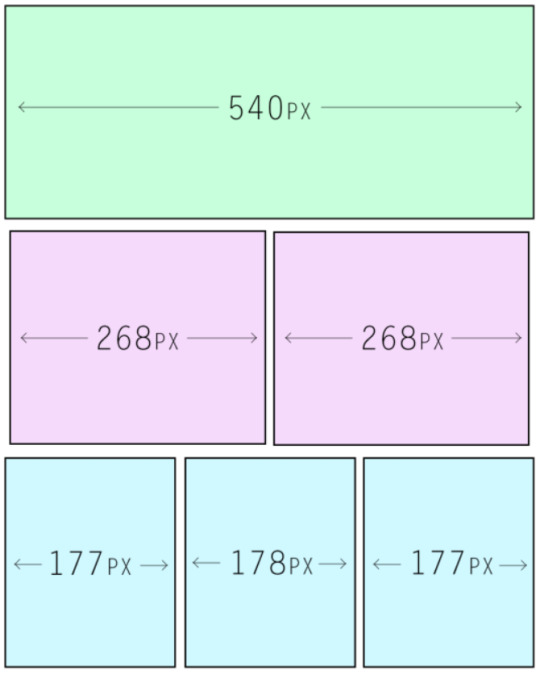
When making gifs for Tumblr, you want to make sure you are using the correct widths:
540px for full width gifs
268px for 2 per row gifs
177/178/177px for 3 per row gifs
Gifs that are not wide enough will look fuzzier and lower quality once stretched on Tumblr and gifs that are too wide will make it harder to stay under the 3mb size limit.
Beyond that, you can really size things how you wish. Very big and tall gifs, very short and skinny gifs, etc. It just depends on what you’re trying to do and what dimensions will best serve that. The larger your dimensions (particularly if you’re giffing a scene with a lot of movement), the less frames you will be able to fit under the 3mb mark.
For this gif, I’m going with 540px x 275 px.

With your dimensions entered, a cropping box will have appeared on your image and you can drag it or shrink it as you wish.

I like where Steve is positioned in the frame, so I’m just going to leave it as is and click the checkbox.
After my frames have been cropped, I like to click on “image” and then select the “canvas size option” in order to smooth out the edges:
I remove 2 px from both the height and the width to help smooth out the edges. Click okay and then click proceed:

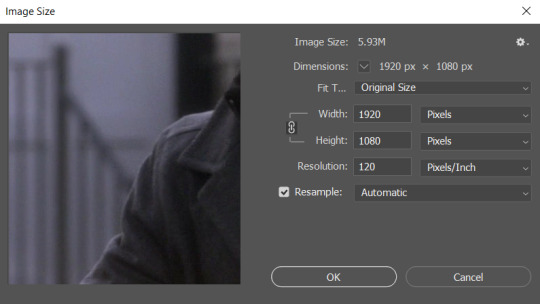
Now, we can FINALLY resize things for Tumblr. Go back to the image menu at the top, click “image size”, enter your width (the height should automatically change with it), and then click OK:
Step 4: Convert to Smart Object
With things now resized and ready to go, click select all layers again, and then click “convert to video timeline” (the little symbol on the bottom left of the timeline):
This will give you something that looks like this:

From here, you need to go to the filter menu and click “convert for smart filters”:

With that done, you’ll have something that looks like this:

Step 5: Sharpening
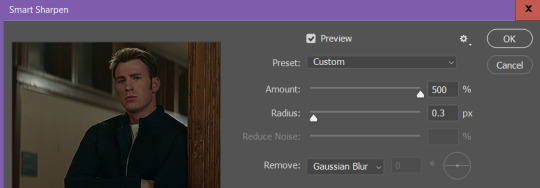
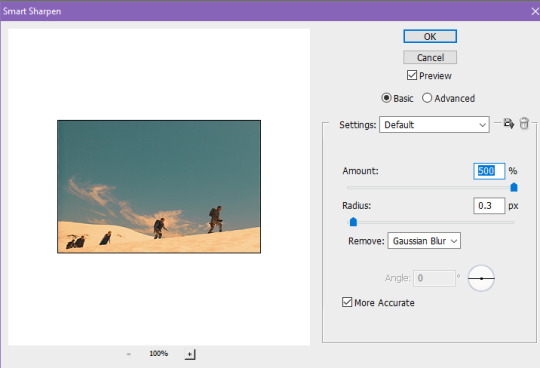
Because we’ve converted our file to a smart object, we can sharpen everything all at once. Go up to the filter’s menu and select smart sharpen:

These are my settings:
After this, I add a bit of Gaussian Blur, so you will need to head back up to the filter menu:
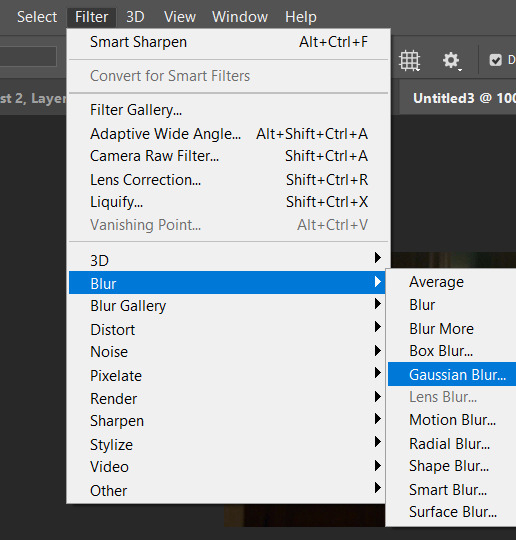
These are my settings:
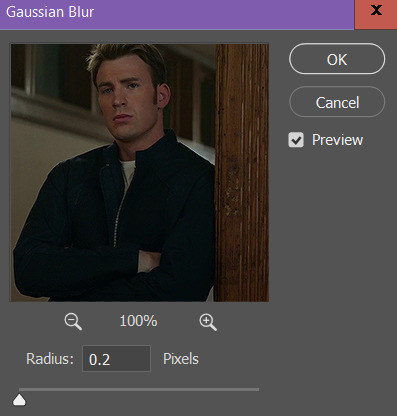
(.3 is a more common setting and I use it sometimes, but I have generally found that I like .2 a bit better for some reason).
So, at this point, you have the basics of how to physically set up your gif and can basically color things however you want. If you already have a method of coloring you like (or aren’t terribly interested in how I color my gifs), feel free to skip the second half of this tutorial 👍🏽!!
P.S. if you are going to regularly gif and plan to use the screencap method, I highly recommend creating your own Photoshop actions to automate and speed up these steps.
#tutorial#gif tutorial#photoshop help#gif making#content creation#elysia makes stuff#(this took a lot of time so i think it counts)
182 notes
·
View notes
Text
a complete gif tutorial
hi! so i was requested by @popalice007 to make a tutorial on how to make gifs and i am very happy to oblige! this will cover pretty much everything, from capturing frames to saving the final product. this is just how i personally do it, and there are loads of other ways to gif, and i recommend looking at other gifmakers’ tutorials to get a more well rounded view on how to gif. please continue reading if you are interested, and please like/reblog if you find it useful!
disclaimer this is going to get really wordy as i try to explain where to find things and how to do them and my thought process behind why i do them, but please send me a message/ask if something needs clarified!
also some of the pictures can be viewed in full size by clicking on them!
part 1: required materials and other tips
just another heads up, i have a pc, and while i believe most of this should be the same whether you have a mac or a pc, i could be very wrong as i’m not a computer expert and have never really used anything besides windows.
so the two programs i use are kmplayer and adobe photoshop cs5 portable. kmplayer can be downloaded for free here. i have the 32 bit version for windows, so that is what i’m going to be providing the instructions for, since the 64 bit version seems to be a little different. photoshop is pretty expensive, but thepiratebay has several torrents for it, and other downloads and torrents for it do exist. i downloaded mine quite awhile ago so i don’t remember exactly where and how i did it so it might require some researching. i would just double check the comments and instructions to make sure the download will work. there are also dedicated photoshop tumblrs that will probably have links to downloads.
if you are giffing a scene from a tv show, movie, video, etc, you also need to have the video saved somewhere on your computer/flashdrive/whatever. hd-source is a good source for tv shows, and there are tons of other sources. i download a lot from thepiratebay using a program called utorrent (i just use the free version) but beware because since you are downloading copyrighted materials it isnt legal, and while i have never had a problem, i have heard of people getting warning letters from their internet providers. you can also download youtube videos and videos from other places and there are lots of other ways to get videos that i won’t cover.
no matter where you get your video, you want it to be pretty high quality, since the higher quality the video is, the clearer and nicer the gif will turn out to be. most of the time you want 720p if you can get it. 1080p is nice and if you can get your hands on it without the video size being enormous you can certainly utilize it, but it isn’t a necessity and usually i don’t bother. anything lower than 480p can get to looking pretty grainy especially if you are doing full size 540 px gifs, but if you are giffing something from a convention panel video taken by a phone, for example, you don’t really have an option.
additionally, if you are giffing dialogue, find a script online somewhere or find subtitles. you can transcribe it yourself if you want, but if a character is mumbling or has an accent or something i like to be sure of what they are saying.
and finally, have some patience! a lot of the popular gifmakers have been doing this for years and have streamlined their process so it doesn’t take hours, but as a beginner it takes time to get everything right,so it is totally normal if you get to feeling frustrated.
part 2: capturing the frames
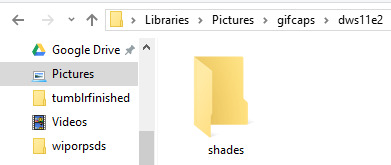
first you will want to have an idea of what scene you would like to gif. before i get started i create a new folder where i want the captured frames to go, and i name it something memorable so i can find it again later. kmplayer does also automatically create a folder called capture that you can use if you want. if you are doing a gifset like this, i would have 8 different folders and gave each of those gifs/scenes their own folders.
however, the example i’m going to be using throughout this tutorial is going to be a dialogue scene, specifically this one here, just because they can get a little more complicated imo (plus i want to show how i use the text tool etc). if i’m giffing a scene where characters are talking, even if the scene is a long one with back and forth dialogue, i usually like to cap it all at once and put it in the same folder, and then i separate it out later in photoshop. you can also plan ahead and put all the different bits in different folders, thats up to you and your personal preference.
next i open up kmplayer. kmplayer likes to update pretty regularly and will let you know when you open it if it wants to update. it doesn’t usually hurt to ignore it if you are in a rush, but i usually let it do its thing and make sure i don’t also download whatever browser service, etc. it also wants to install. sometimes ads show up on the right side, you can close them by hitting the little arrow between the ads and the video screen
to open the video, click on “kmplayer” in the upper left hand corner and then click on “open files”. search for your video file and double click it to open it

kmplayer will then open the video, and if its 720p often i have to make the window smaller because it fill up the entire screen and i need to be able to see other windows besides the video. if i remember correctly when you first download kmplayer it isnt automatically set to keep the aspect ratio the same, so if you need to, hit the f2 key to open the preferences or click the lightning bolt on top next to kmplayer, and then click on preferences. under general and then screen on the sidebar, and then under general again i have my settings like so, and hopefully that resolves that issue if you have it. you might have to reopen the video again for that to kick in but i’m not positive. if it still doesn’t work try to google it. i’ve had the problem a couple times and the answer is out there but i’m no tech pro.

anyway, i then locate the beginning of the scene that i want to gif. you can click around on the bottom along the progress bar, as well as using alt+left or right to jump forward and back a minute, the left or right arrow key to jump 5 seconds, or the f key to go forward a single frame. every frame counts, and it is preferable to have too many frames and have to delete them later than to find out your gif will only be 10 frames long because you started capping in the middle of the scene, or because you stopped capping too early. i typically will watch the clip a few times so that i have a set idea of where i want to start and stop.
once you are paused at the beginning of the scene you want to gif, press ctrl+g to open kmplayer’s frame extraction window. click on the folder icon so that you can locate that empty folder you had made earlier. this is where kmplayer will save the screencaps. i then set my settings to png, continuously, original size, and every frame, like so

now we are ready to start capturing! click start on the frame extraction window, and then click back over to the video (this is why i make the video window smaller, so that i can see the video and the frame extraction window at the same time). once i’m back on the window, i hold down and/or tap the f key. kmplayer will capture the frames as you go along. the audio plays along with it albeit choppily which is why i watch the clip several times beforehand, because it can be hard to follow and is disorienting. you can also click the play and pause button, but, again, the audio tends to play at a different rate and it gets confusing, so for me frame by frame is the way to go. keep tapping f until you get to end of the scene/wherever you want to stop. i keep the folder where the caps go open usually so if i mess up or change my mind on where to start/end, i can delete the whole folder and create a new empty one to start over again. this process takes practice and is often dependent on what you are trying to gif and its not a big deal if you have to try it a couple times to get it right.
once you have reached the end of the scene, click back over to the frame extraction window and click stop. if you are giffing multiple scenes from the same video you can click the folder icon and select a different folder to save frames into and then repeat the process of finding the scene and capping it, or if you want to cap from a different video, you can open a new video and cap from there. then if you are satisfied and have all your caps, you are free to exit out of kmplayer.
part 3: making the gif
now it is time to actually make the gif! go ahead and open photoshop, and if it is your first time you can play around and familiarize yourself with where things are. basic gifs don’t require a lot of the tools that photoshop has, and you can customize some as to what windows and panels are open. below is what my workspace typically looks like so that i can get to certain things quicker, but i will explain as i go along where the controls normally are found in the toolbar. also, if you hover over a control photoshop will tell you what it is and what it does.


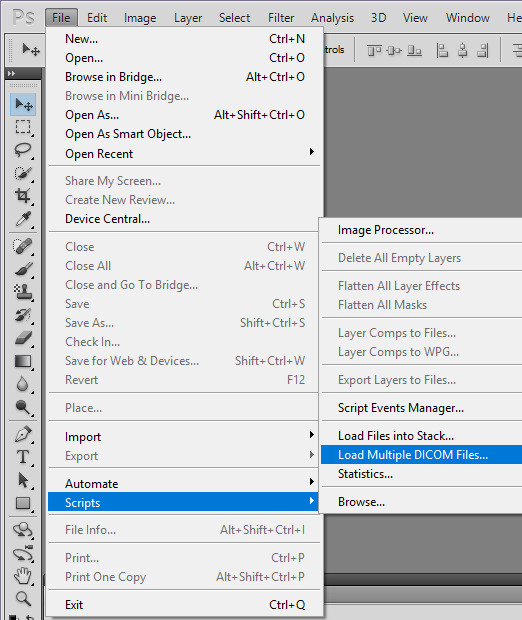
to open the frames, go to file, then scripts, then load multiple dicom files. then find your folder of caps, select it, and then click OK to open
be aware that depending on the number of frames in that file and the size of the images it sometimes can take awhile to fully load. once they are loaded, you should be able to see all those screencaps as layers on the right hand side of the screen. if not, go to the top where it says windows and click on layers. i frequently accidentally cap a couple extra frames where the scene shifts and i go ahead and delete those layers by highlighting them (use the shift or ctrl key to highlight several at a time) and then clicking on the trashcan at the bottom of the layers sidepanel.
next we are going to turn these layers into gif frames! i have combined this step into an action that i use to automatically do this for me to save time since i gif on a semi regular basis, but the steps are as follows.
first, make sure the animation bar is open. if it is not then go up to window and click animation, and then it should open at the bottom of the screen. you also have to be in frame animation mode. on the upper right hand corner of that panel is an icon with four lines and and an arrow. click on that and then click on convert to frame animation. then in the same menu click make frames from layers.

this can also sometimes take some time if there are a lot of caps but when its done loading there will be frames in the animation bar. in the animation menu click select all frames. then, underneath any of the frames, there will be an arrow beside where it says 0 sec. click it and change the frame delay. what you set it to can be up to personal preference. i typically set mine to 0.07 or 0.08 which seems a bit slow, but i find when i convert the gif to a smart object (we’ll get to that) that seems to speed it up a little so i’ve just stuck with it. feel free to change the delay if you find later that that is too slow for your taste. also in lower left corner of the animation bar is where you set how many times the gif loops. change it from once to forever. the controls to play the gif are also below the frames.

since i gif a scene like this all in one big long take, it is now time to separate it into separate gifs if need be. if you are making a gifset like this you can skip this part because you most likely capped frames from different scenes and gave them their own folders, so they shouldnt need separating.
sometimes you have to get creative on how you split apart the scene, and there arent really any hard and fast rules. here are some things i like to keep in mind:
the camera angles - this is the most important for me. if the camera goes from showing one character to another, or from one angle to another, i separate those into separate gifs pretty much no matter what.
the length of the gifs - this is dependent on the size you are going to crop to, how much movement the scene has, how much color, etc., but i typically try not to go over 80-100 frames in a 265px width gif. they can be trimmed down later, but if it takes 200 frames for the camera to switch to the other character, don’t make that one gif
the dialogue - if there is a natural break in the dialogue, that is a good place to end a gif. you don’t need 50 frames of no one speaking if you are doing a gifset with dialogue.
how many gifs you are making/size - at some point you have to decide how wide your gifs will be and how many of them. if your gifs will be 268 px wide (2 columns of gifs) then you have to have an even number of gifs, and you will need to separate to account for that
going along with the first tip, i’m going to separate the frames by camera changes. i do this first so that way when i crop the gifs, i get things centered how i like.
you can see here by looking at the thumbnails of the layers what i mean by the camera changing angles.
first, press ctrl+n to open a new blank image. if the preset doesn’t say dicom files, click on that menu and click dicom files, that way the new image will be the same size as the original. hit ok.
next, highlight the layers in the original that are going to be the new gif. hold shift while clicking the first and last layer that you want to be in the new gif to do that. click on them, hold, and drag them over to the new document. they will probably be off center and/or invisible. if the layers are invisible click an empty box next to one of the layers so that an eye appears and the layer shows up. then click the move tool and move the layers around til the fill the document correctly. be sure not to stretch/transform the layers by dragging on the edges and corners. as long as all the layers are still highlighted they should all move at once.

next, scroll to the bottom of the layers and delete the blank layer. then repeat the steps to make frames and set the time delay and there is your new gif!
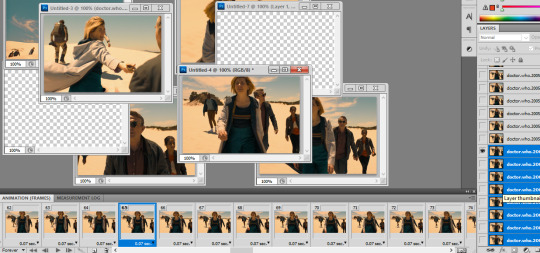
the layers for that new gif are still in the original document, so go ahead and hit the trashcan to delete them, as well as the now blank frames. continue opening new documents and splitting up the scene until you have a new gif for every camera change. the last gif i leave in the original document. i ended up with 5 camera changes so 6 gifs to start with
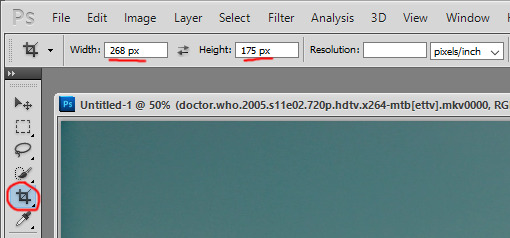
at this point i crop each gif. tumblr has a guide for image sizes, and the width is the most important thing to follow there. the height is really up to you. if i’m only doing two or four gifs i tend to make them taller than if i do 8 or 10 gifs just because it looks better to me. i’m going to probably end up with 8 gifs because a couple bits are a little long, so i’m going to go with 268 px as the width and 175px as the height. again, the 268 part is the important part to get right since i’m doing two gifs across. to crop, find the crop tool on the left and set your dimensions at the top. make sure when you enter your dimensions, it is in pixels/px and not inches or centimeters.
click, hold, and drag to stretch to create a shadow for what you cropping. i usually go as big as the edges of the image will allow, and then bring the corners in a tad, since occasionally i get a video that has a black outline and i don’t like to have that in the gif. either hit enter or the checkmark in the upper right corner of the toolbar to crop.

you might have to zoom at this point and resize your window. in the bottom left corner there is a percentage you can change, and now that the gif is cropped it will be small enough that you can set it to 100% if it isn’t that already. continue to crop the remaining gifs to the same size. after this i usually play through each one to make sure i have everything in the frame and roughly centered. if you need to undo, press ctrl+z or ctrl+alt+z and recrop or redo whatever needs redone. there is also a history you can pull up under windows, and you can use that to backtrack multiple steps.
next i figure out if i need to break up any of the gifs because of their length. with a gif this size i can probably get away with having more frames and i can trim them later, but if a gif has more than 100 frames i look and see if i can either trim it down now because there is a lot of frames without talking or movement, or if there is a natural break in dialogue where i can split it into two gifs. there are also times when the gifs are really short that you can sometimes combine with a gif before or after that one. that’s your perogative ultimately and what you think looks good but will fall under the 3mb limit, and takes practice and experience to get an idea if a gif is going to be too large. sometimes i go back and rewatch the scene to figure out where to split things up. i also keep in mind that i want 8 gifs for this scene and right now i have 6, so i need to create 2 more, whether i separate two gifs in half, or separate one gif into three new ones.
ultimately i decided to split my largest gif of 180 frames into 3 gifs because it has quite a bit of dialogue, and the other gifs are either already under 80 frames or can easily have some frames deleted out of it. between using the script, rewatching the scene a few more times, and trying to lipread what the doctor was saying, i decided to separate between frames 65/66 and 120/121 so that way they were roughly the same number of frames. the process to separate them is the same as it was when we had the big original gif. i selected the last frame i wanted to include in the new gif so that way the eye appears next to the corresponding layer in the layer panel, and this is how i know which layers to drag to the new document. for example, in the picture i’m moving frames 1-65 to the new document, so i select frame 65, then find that layer and select all the layers below and including that layer and drag them. then repeat the steps to make the frames, etc.
go ahead and delete the empty frames, as well as any frames on the other gifs you may want to delete to trim them up.
so now we should have all of our gifs laid out! my next step is to sharpen them, and i do this using smart objects, and the steps are as follows. (i also made this into an action.)
first, select all the frames and all the layers in the gif. if you deleted some frames but didn’t delete the corresponding layers, don’t worry about it, it doesn’t matter and doesn’t affect the final product.
next, click on convert to timeline animation. this is in the animation menu where we earlier found convert to frame animation.
then, at the top go to filter and click on convert for smart filters. this creates a smart object and turns all of the frames and layers into just a single layer/object. this allows us to sharpen the whole gif at once instead of having to sharpen each frame one at a time (trust me that takes forever if you don’t have an action or do it this way).

next under filter again, then under sharpen, click on smart sharpen. this brings up a window with a bunch of settings. these are what mine are:
repeat this for every gif. look how much better they look already!
at this point, if you haven’t saved yet, do it now! this is a good time to save and take a break. go to file and then save. the format should be set as photoshop/.psd. i go ahead and rename the files too, for example, dwshades1 and so on. i number them too so i can get the order right when i upload them. with it saved as a psd, you could close out and reopen it later and the layers will all be there.
next is coloring! this is technically optional, but is usually the most fun part of giffing in my opinion, and i tend to find uncolored gifs rather boring and bland. this is where you can do some brightening, color correcting, make gifs black and white, and more! its time to get creative with those adjustments.
as there are so many ways to color things, and whole tutorials dedicated just to coloring, i’m only going to show the basics of where to find the adjustments and some of the different adjustment layers that i use most. my first step always though is to create a group just for the coloring layers. the button to create a group is at the bottom of the layer panel and looks like a folder. the button to the left of that is the one that contains the different adjustments you can make.

the black and white circle contains a list of different adjustments you can make. the two i like to use most are curves and vibrance. curves is really useful to brighten gifs and vibrance obviously adds vibrance. my advice is to just play around with all the settings, and look at coloring tutorials. a lot of gifmakers also have psds that you can download. you can either use them as is to apply to your gifs and credit the maker, or just study what they did and learn from it.
anyway, i went ahead and colored my gifs. here is a before and after look, as well as a list of adjustment layers i added:


in this case the before gif doesn’t look bad, but that isn’t always the case, sometimes they start out super dark and colorless. and i like the tone and colors of the colored gif better (you can see how much i like purples and blues lol). again, all personal preference.
whether you color or not, if you have dialogue in your gifs, the next step is adding it in! if the gif doesn’t have a dialogue or if you don’t want to add text, you can skip this next bit.
first, select the text tool on the left side toolbar, it looks like a T. next i choose my font, font size, and color at the top. here are my settings, the key thing is to make it easy to read.

there are more settings like bold and italics under window and then character. these are my settings.

after these are set, click in roughly the middle of the gif and start typing the text that goes with that gif. i usually start with white for the first person to speak, and then change to yellow for the second person and so on, so that way its clear who is speaking, but that’s up to you. when the text starts to go off the edge of the gif, i hit enter to start the next line until i’m out of text. otherwise photoshop will allow you to type right off the edge of the gif.
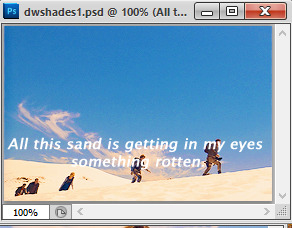
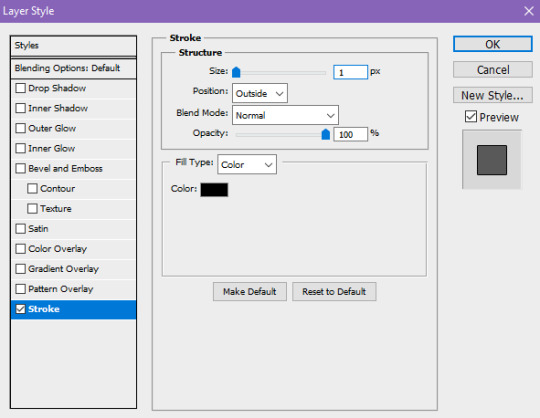
a little hard to read, right? that’s why i add stroke, which outlines the text. to do this, make sure the text layer is highlighted, and then click the fx button at the bottom of the layer panel, and then click stroke.
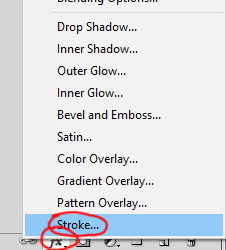
these are the settings i use. usually i only have to change the size from 3 to 1px. hit ok.
so much easier to read! also, double check to make sure that the text layer is above the coloring layers.
next, i want to move the text to where i want. select the move tool on the left, and first move the text layer all the way to the bottom. photoshop has it so that it is kind of magnetized to the edges. i then go back to the character menu and change the baseline shift setting to 5 pt.
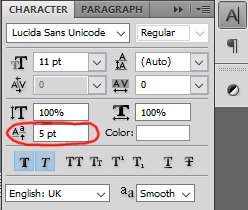
however, when you click to a different gif it doesn’t reset back to 0, so manually reset it back to 0 before moving your text layer, then change it to 5 again.
next, to center it on the gif. first select the gif layer, then hold ctrl while you select the text layer. the order is important, if you select the text then the gif, the gif will be moved to center itself around the text. then, with the move tool still selected, click this button on the top tool bar to align horizontal centers.

great! now save your gif again, and repeat all these steps for the text for every gif that you are adding text to. most of the time i type the text on each gif first, and then move the text that way i’m not switching tools a dozen times, but it really doesn’t matter.
your gifs are officially done! time to save them in a format that you can upload to tumblr. go up to file, and click save for web and devices. these are my settings, but you can play around with some of the ones on the upper right side. however, you want to make sure that it is a gif, and that it is set to loop forever. those are circled. hit save, name your gif however you want, and save it somewhere you can find it later. do this for all of your gifs.

the other thing i circled in the document size. tumblr does not allow you to upload images that are above 3mb. if yours is above this, you have a few options to cut down on the size. changing the settings on this window such as going from diffusion to pattern, or reducing the number of colors can change the size, but if you reduce the number of colors, you lose some quality. you can also change your coloring layers around, because making a bright gif with a lot of colors can increase the size. black and white gifs tend to be smaller.
the option i tend to go for if i want to keep the colors and quality, is to reduce the number of frames you have. its a little trickier to do in timeline mode than it is when the frames are all there, but this is how to do it. if your gifs are all under 3mb, you can skip ahead to uploading.
in the timeline animation bar, there are blue rectangularish sliders you can move at the beginning and end, as well as a triangular one that shows where you are within the gif. decide the new place where you want the gif to start and end, and move the rectangle sliders there, like so. one tick over does not equal a frame, so i use the triangle indicator to figure out how many frames over i’m moving.

then in the animation bar menu, click trim document duration to work area. this will set your gif to begin and end where those sliders were. at this point you can try saving again to see if your gif is below 3mb. if so, then save it! if not, continue to move the sliders and trim until your gif is below the limit.
so now all your gifs are saved and ready to be uploaded! upload them like you would any other photo post. i always save as a draft first so i can make sure they upload right and so i can look them over again to be sure they are looping correctly and have no typos. only then do i close out of photoshop. tag with the appropriate edit tags (for example, dwedit for doctor who) or tag popular blogs for maximum exposure, but be aware that only the first 5 tags count and will appear in the tags. post and you are done! congrats!
#popalice007#yeahps#completeresources#chaoticresources#gif tutorial#hey look something original#my resources
47 notes
·
View notes
Text
8 Ball Pool
8 Ball Pool
Miniclip
Facebook
Twitter
Pinterest
Tumblr
Ball Games Bowling Games Fun Games Kids Games Multiplayer Games Pool Games Sports Games
PLAY NOWDownload and Play 8 Ball Pool for PC by Miniclip | Free Unblocked Billiards Fun online
If you loved playing Billiard, you gotta try 8 Ball Pool as well! Have unlimited fun with billiards in 8 Ball Pool, brought to you by Miniclip! The rules are simple, just grab your cue stick and play 8 Ball Pool! Play this unblocked games 24h, any time you want and challenge players online to become the strongest player!
Got no time to go down to a Pool Hall or Cue Room? Why not play virtual pool on your PC in the comfort of your home? Be the first to pocket 8 balls and win the game. Earn coins and awesome rewards with every victory. Purchase better quality cues and be the next cue master. Download 8 Ball Pool and play online now!
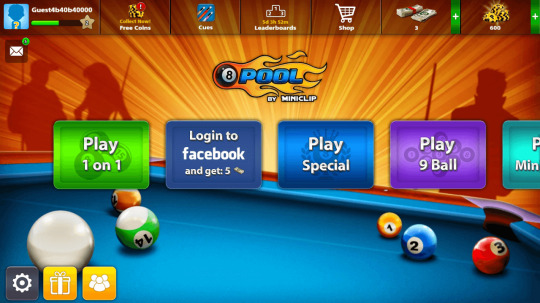
Pic 1: 8 Ball Pool Game Launch Screen
8 Ball Pool Game Features:
Easy to use Controls
Easy to use controls. There’s almost nothing to learn in the game tutorial. Simply adjust the angle of your cue stick, then adjust the strength of strike, and you are good to go! This is one of the few games with the shortest tutorial. Get into the main 1v1 game and start playing away! You will get the hang of the game in minutes!
Customizable items
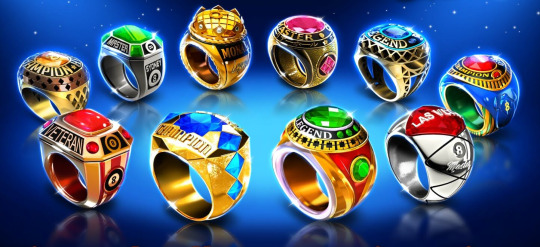
Get a new cue stick by buying it from the in-game shop using coins won in your games or by using real cash to buy the Surprise Boxes. Each cue has its own unique power and different strengths in Force, Aim, Spin and Time. Get special Victory cues when you win in the various match locations. You can also get new Avatars in the Pool Shop to change your profile picture.

Pic 2: 8 Ball Pool Cue Sticks Billiards Shop
Play in 1 vs 1 matches or World Tournaments
Engage in one-to-one battles with online players or participate in 8 player tournaments. Tournaments are unlocked at level 6 so start leveling up to enter those tournaments! Get coins with every game you win and enter higher ranked matches where the stakes are higher, and the winnings are greater. For example, the first room / match location is Downtown London Pub where the entry fee is 50 coins and the prize is 100 coins if you win the match (net gain of 50 coins).
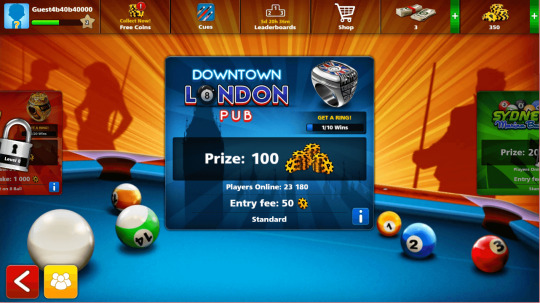
Pic 3: 8 Ball Pool Game Locations Rules
Cool Rewards waiting for you
Win trophies to display on your profile and obtain exclusive cues. Get access to exclusive match locations and unlock exclusive items. Level 3 unlocks the Sydney Marina Bar. Level 5 unlocks the Moscow Winter Club. Level 7 unlocks the Tokyo Warrior Hall. Accumulate your wins at the various locations and get your Ring trophies!
Pic 4: 8 Ball Pool Trophies Play Online
Share your achievements and Play with friends
Share your achievements on social media such as Facebook and Twitter. Play with friends and challenge them to a game of 8 Ball Pool. Brush up your skills in the Practice Offline room where the entry fee is lesser than the basic competitive room.
Hacks, Cheats and Tips for 8 Ball Pool:
While we do not encourage downloading mod apk to get unlimited coins and cash for 8 Ball Pool, we have found some pretty legit methods to getting those coins that you need to proceed in the game! Read on for more.
Connect to Facebook
Simply connect your Facebook account to the game and get access to all these goodies! Get 5 Pool cash for free instantly. Get free coins every hour without doing anything. So just make sure you launch the game every hour to claim those coins! Get your friends to gift you coins as well! Request for them whenever you are out of coins and send some to them. It’s a win-win situation!

Pic 5: Connect your 8 Ball Pool account to Facebook and get more rewards
Cues with Unique Powers
As mentioned above, each cue has its own unique powers and different strengths (ie the intensity of each power). Force refers to how hard you can hit the cueball. Spin is the amount of spin that you can apply in your shot. Aim determines the length of your aim-line when adjusting your shot. Time refers to the amount of time you have to release the shot. The Beginner cue that you receive at the start of the game is rather with no boost in any of the 4 powers. Hence it’s advisable to save up coins quickly and upgrade your cue stick to a better one that suits your gameplay.
8 Ball Pool FAQ
Here are some frequently asked questions on 8 Ball Pool. For more game FAQs, visit our 8 Ball Pool FAQ page.
Is 8 Ball Pool free?
The game is downloadable for free in iOS App Store, Google Play Store, and PC. It can also be played on the web without any charges. However, players are given the option to purchase with cash premium items and upgrades. Another thing needed on the game is Pool Coins. While there are ways to earn free Pool Coins, some players can instead buy more coins.
What is the difference between matches and tournaments?
There are two game options in 8 Ball Pool. You can either choose one-on-one matches or tournaments. With matches, you compete with another player in any of the different city locations. There is an entrance fee to pay and if you win, you get a prize that is double your entrance fee. In tournaments, however, you play with seven other players. Like matches, you pay before you can enter a tournament and the higher the fee is, the bigger the prizes are.
Can I play 8 Ball Pool offline?
Playing offline in the game is possible. However, tournaments and competing against online players will not be available. You can use that offline playing mode instead as your practice period.
What are the rules of the game?
Like any legitimate 8 Ball Pool game, playing Miniclip’s 8 Ball Pool also has rules, fouls, and defaults that can happen. The basic premise of the game is that two players will be assigned either striped or dotted balls. Each has to pot their designated balls to be allowed to pot the 8 Ball. If a player pots the 8 Ball before all his other balls, the other player wins the game. If the cue ball is potted, the other players get the freedom to place the cue ball wherever. That penalty is called “ball in hand”. Other fouls that might penalize you are running out of time to make a shot, and potting the opponent’s balls.
How do I win in the game?
There is no shortcut to winning the game. You need to practice and learn your own unique style of playing because all the upgrades you might plan to do in the future depends on that. Learning how the game works, practicing your own style, upgrading your cue sticks, and pool table all contribute to your winning capacity.
How do I “Auto Win” in 8 Ball Pool?
Auto win happens when you pot the 8 ball during breaking. It is not considered an “auto win” if you do it any time after breaking the game. In fact, you will lose the game if you do it after breaking and before all your assigned balls have been potted.
How do I earn coins without paying for them?
There are different ways to earn Pool Coins for free. The first way is by redeeming your free coins every 30 minutes. Another option is to watch video ads. Every time you win, you also receive coins as prizes. To learn more about the different ways you can have 8 Ball Pool free coins, you can check our FAQs page.
8 Ball Pool is fun, interactive, competitive, and strategic. It forces you to do better than other players like in real billiard games. However, unlike those games, 8 Ball Pool by Miniclip is played by over a hundred million people from anywhere in the world. You might be competing with amateurs or absolute veterans and experts of the game. It is always enjoyable and full of surprises!
8 Ball Pool is certainly a great game to destress and just have fun! It is suitable for players of all ages. So come download and play 8 Ball Pool now! If you like 8 Ball Pool, we recommend that you can try out other sports games such as Billiard and Archery King as well!
Down load here: https://games.lol/8-ball-pool/
0 notes
Text
Tailwind Drives A Tonne Of Targeted Traffic To My Blog - Here's How

Tailwind Drives A Tonne Of Targeted Traffic To My Blog - Here's How
Tailwind is by far my number one Scheduler for Pinterest & Instagram for so many reasons and I'm about to do a dive deep on my top 10 reasons below (including a video review from Becca from Bloguettes), lets take a quick look at what Pinterest is and why I choose to use it to promote my blog posts.
Disclosure: Some of the links in this post are affiliate links. I will only make recommendations on products and services I personally believe to be of value.
If You're Not On Pinterest Yet... Here's Why It's a Good Idea
After numerous referrals, I made the decision to give Pinterest a chance. Pinterest has suddenly become my biggest social referral even without having a pin go viral ... There are loads of pin scheduling options including ViralTag (too expensive), and Buffer (not very detailed analytics and no option to join tribes) and Board Booster which is no longer available.
I had heard so much from people raving about Pinterest. I was definitely already spread too thin promoting my blog around social media. Facebook, Instagram, Twitter, Tumblr and Digital Bloggers and lots of other niche sites.

Noteworthy Pinterest demographic data to consider:
* With over 175 Million (with a capital M) users on Pinterest there is definitely a reason to be on there!
* 81% of Pinterest users are in fact, Women.
* 40% of All new members are Men; 60% All New members are Women.
* Men account for merely 7% of overall pins on Pinterest (c'mon guys... start creating content!).
* Millennials use Pinterest as much as Instagram (this fact shocked me)
* The average age of a Pinterest member is 40 years old, but having said that, more than half of active pinners are under 40.
* 50% of Pinterest users earn $50K or more per year, along with 10 percent of Pinteresting households generating greater than $125K.
* 30% of US social media users are Pinterest users.
* 60% of Pinterest users are from US.
All Pinterest stats provided by Omnicoreagency.com

Compared To Facebook, Twitter, and now Instagram, where posts from preceding days get lost, Pinterest is a micro search engine for searchable images. Like Google, quality pins (as categorized by # repins, likes, and clicks) rank at the top of search results regardless of when it was pinned.
Pinterest pins are searchable by categories, keywords, and hashtags. And because of this Pinterest has the potential to boost your blog and increase your traffic.
With Pinterest, the more engaged your account is, the more followers you get. And together with more followers, you have increased odds of your pins being discovered. With more discovery comes a surge of blog post traffic... WooHoo!!
Keeping in mind that Pinterest rewards enthusiastic active members, you want to continue to be active by pinning fabulous content frequently. When I first started out, I was trying to physically share at least 30 pins per day but it was challenging just remembering to pin regularly and make sure most my boards had new pins every day.

Feel like you don't have time to try and learn a new system? Don't worry, Tailwind has you covered with their short step-by-step video tutorials, teaching you the most important features fast. But even so, In this blog post, I'll definitely be showing you how to start saving time starting TODAY! Let's face it... your time is best spent creating fabulous content and Tailwind gives you back the time to focus on that and other cool ideas to boost your blog presence.
One of the things that got me to test Tailwind out in the first place is that they made it possible for me to try out the service for Free! If you'd like to check it out for yourself you can do that HERE!
Becca from Bloguettes offers a super useful walkthrough of some of Tailwind's most popular features:
WATCH VIDEO DEMO HERE
10 SHAMAZEBALLS REASONS I LOVE TAILWIND
1. Bulk Scheduling Made Easy
The Tailwind Chrome Extension ensures scheduling pins from Pinterest or any website you choose to share content from very easy. Also, do you have photos on your device? You can bulk upload images to your Tailwind profile and share them too! The Chrome extension can be found and activated from inside your Tailwind dashboard.
2. What's Your Prime Time To Post?... Don't Know... Tailwind Does!
When you connect your Pinterest account to Tailwind, Tailwind instantly optimizes your pinning schedule so that you pin whenever your followers are most active. This capability removes the uncertainty of trying to figure out when the best time is to pin.
But maybe you want to set up your own customized schedule? Tailwind allows you to do that too and it's super easy!

3. Get Board Insights & Pinterest Profile Stats
There's a reason this priceless asset of Tailwind is ranked close to the top of my list. Having access to this level of insight offers you more detailed information to make decisions on whether you need to pin more or less to specific boards or even leave an inactive Pinterest board altogether.
4. Create Board Lists & Save Time!
One perk of using Tailwind is definitely being able to create board lists. Let's say you see something you want to pin, but that pin could easily go under a number of similar boards you have on Pinterest. Inside Tailwind, you can create group heading and put all the similar boards under that heading. When it's time to schedule a post that fits in all the boards in that board list, simply click on the dropdown for and select that specific board list and Tailwind populates your pin with ALL the selected boards within that list!
Making use of this function saves me the time and effort of scrolling through my never-ending list of Pinterest boards in search of similar boards that I want to publish the same pin to.
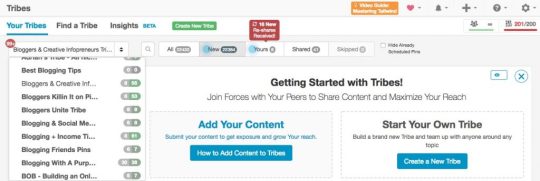
See in the image below; I have 3 board lists set up; now whenever I select one of these board lists when scheduling a pin... Tailwind will automatically select all of the boards in that list for the pin to be published to.

5. Quick & Easy Unlimited Pinning
Who likes limits? Not me! When you sign up for the annual Plus plan you can schedule an unlimited number of pins with Tailwind (or 400 pins/month with month-to-month subscription)
.
If this isn't reason enough to fall in love with Tailwind... I don't know what is... When I realized I can organize an unlimited number of pins with TailWind and just set and forget.... for months in advance I thought I'd won the lottery!!

6. Option To Set Intervals For all Your Pins
If you are a contributor to a number of boards, you will undoubtedly appreciate the ability to set up intervals for a pin that fits into all of these related boards (super handy for scheduling your content to multiple Group Boards). You could be tempted to post that blog post pin to all Group Boards at the same time but that method decreases your chances of being found and can be looked at as spam.
By using interval pinning, you schedule your pin to be posted on each board on a loop cycle according to the timing of your choice (to be repeated on a certain number of minutes/hours/days or weeks). I personally prefer to spread out my pin by a couple of days at a time. By the time the pin gets posted on the following board, it ought to have gotten a few repins on the previous one.
Also, a pin that has been repinned has a higher chance of receiving more repins within the Tribe. Repins = Discovery = Quality traffic to your blog.
See in the image: Here is an example of interval scheduling to multiple boards. You can see I have 6 boards selected and this pin will be posted to those boards every 2 days and 10 hours into the closest open timeslot I have available in my scheduling calendar.
7. Alerts From Tailwind Help You Stay Compliant With Pinterest
There are a number of pins that link to fraudulent websites. Previously, the only way to know if you were sharing a pin that links to one was by examining every pin prior to you publish it on your board... srsly who has time for that?
I use Tailwind's bulk scheduling to send a group of potential pins to my Tailwind drafts over the course of the week. When I am ready to schedule the draft pins to be published on my account, Tailwind quickly checks all pins to make sure that they meet Pinterest's guidelines.
Tailwind then flags all pins that have no description, have no link, or that link to questionable websites. I can easily choose to correct the pins or just delete them all. Easy as pie :)
8. Shuffle & Lock Pins
By this stage, I have 100's of pins which I have just scheduled in bulk to be published to certain boards at optimized times on an interval loop. But because I usually search for pins to send to my drafts by doing a keyword search on Pinterest... this means that all the Pins on similar topics will all be published around the same time (not ideal). But with the push of a button, Tailwind will random shuffles my pins to mix my content to be spread out evenly among my boards.
Also, I like to keep a daily pinning balance of 30/70 = 30% my pins & 70% other peoples pins. By locking my blog pins before I shuffle, I'll be certain that pins from my blog are regularly shared 30% of the time every day!
9. Analytics That Help To Make Better Pinning Decisions
By having a Pinterest business profile, you do get access to some analytics data. Although this is helpful, it offers only limited information. Tailwind provides very detailed analytics on your Pinterest profile. You get to see how viral each of your pins are, so that you are able to repin those pins more often.
In addition, you will definitely be able to see your top performing boards so you can create a pining strategy to pin there more often. Knowledge is power (insert evil witch chuckle here)
10. Drum Roll Please... Tailwind Tribes!
One very special feature unique to Tailwind, that I haven't experienced on any other scheduling platform is the ability to join and create collaborative groups, Tailwind calls these groups Tribes.
Here's a quick walk-through on how to get started making the best use of Tailwind Tribes:
* Just search for a niche Tribe from within the Tribe's section of the Tailwind dashboard.
* Pin a few of your pins that you want to be repinned by the Tribe
* Then start repinning your tribe members pins to your boards. This simple tool is the power boost that is unique to Tailwind that you can use to help each other grow, increase exposure, rank higher in search results but most importantly drive targeted traffic back to your website or blog!
How to Add A Pin To A Tribe From Your Blog Or Pinterest
Go to your blog, Pinterest board, or any website you want to pin from.
Hover over the image you want to pin or add to the Tribe.
If on your blog/website: The Tailwind button will show up on the bottom left section of the pic.
If on Pinterest: The Tailwind button will show up at the top of the pic.
The goal of Tribes is to make it quick and easy to work together and distribute content to expand your reach. You can also create your own Tribe for other specific niche partnerships if you like!
It's worth mentioning that Tailwind is one of the few partners of the Pinterest Marketing Partner Program. This just means that Tailwind gives us access to awesome capabilities while at the same time abiding by Pinterest's Terms of Use and latest updates.
Take Tailwind for A Spin with A Free Month Trial
Tailwind makes it possible for you to try out their service absolutely free without handing over credit card details. The free trial is actually how I started on Tailwind... and now I'm 100% sure I couldn't live without it!
Tailwind provides Shamazing customer service; your questions literally get answered in a matter of hours... not days!
Now you have a great overview of some of the different ways Tailwind can be used to expand your Pinterest profile, get discovered, and drive quality traffic straight to your blog, let's get you set up with your FREE Trial!
Read the full article
#pin#pins#pinswithtailwind#Pinterest#PinterestMarketing#pinterestscheduling#scheduling#socialmedia#SocialMedia&Networking#socialmediausers#Tailwind#tailwindapp#tailwindblog#TailwindChromeExtension#TailwindCoaching#TailwindExamples#TailwindExtension#tailwindreview#tailwindscheduling#tailwindtribes#TailwindTutorial#tailwindvideo#TailwindWordpress
0 notes
Last Seen Blogs

daddiesdrarryy
daddiesdrarry

dreammie
Favorite Tea Flavor?

agallimaufryofoddments
What a Hullabaloo

golsaileach
Disaster Sandwich

dr0wning--d0ll
drowning doll