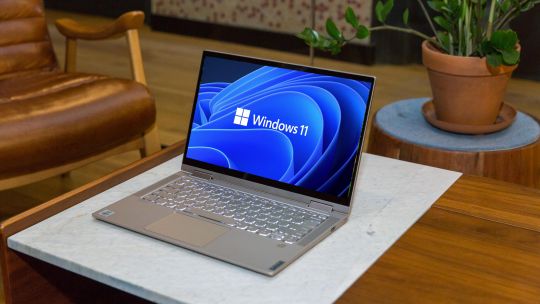
#tpm 1.2 update
Text
How to introduce and actuate BitLocker on my gadget?
In the domain of network safety, safeguarding delicate information has become fundamental. BitLocker, a powerful encryption instrument created by Microsoft, fills in as a defend against unapproved admittance to your gadget and guarantees the classification of your information. In this thorough aide, we will walk you through the bit by bit course of introducing and enacting BitLocker on your gadget, normally alluded to as aka.ms/yourpc.
I. Figuring out BitLocker:
Prior to digging into the establishment cycle, it's critical to comprehend what BitLocker is and why it's a fundamental apparatus for getting your information. BitLocker is a full-plate encryption highlight included with Microsoft Windows working frameworks aka ms yourpc. It scrambles the whole plate to safeguard the information put away on it from unapproved access.
II. Framework Prerequisites:
Prior to continuing with the establishment, guarantee that your gadget meets the essential framework necessities. BitLocker is available on Windows 10 Pro, Enterprise, and Education editions, among others. Moreover, your gadget ought to have a Confided in Stage Module (TPM) rendition 1.2 or later for improved security.
III. Bit by bit Establishment Guide:
Presently, we should go through the bit by bit course of introducing BitLocker on your gadget.
Getting to the BitLocker Setup:
Open the Beginning menu and select "Settings."
Explore to "Update and Security" and snap on "Gadget encryption."
Really take a look at BitLocker Similarity:
Guarantee that your gadget meets the important prerequisites for BitLocker encryption.
Check to see if your device supports TPM versions earlier than 1.2.
Activate TPM (if required):
In the event that your gadget's TPM isn't empowered, access the Profiles/UEFI aka ms mfasetup firmware settings during the framework boot.
Enable the TPM settings wherever you find them. After making changes, exit.
Make use of BitLocker:
Get back to the "Gadget encryption" segment in the "Update and Security" settings.
On the off chance that your gadget is qualified, you'll track down the choice to "Turn on BitLocker." Click on it to start the establishment interaction.
Pick Encryption Technique:
Select by the same token "TPM as it were" or "TPM and PIN" in light of your inclination and security necessities.
Pick a Method for Unlocking Your Drive:
Choose whether to utilize a secret key, a savvy card, or both to open your drive.
Take a Backup of Your Recovery Key:
Save your BitLocker recuperation key in a solid area. In the event that you forget your password or run into other problems, you will need this key to unlock your drive.
Pick Encryption Mode:
Select the encryption mode - by the same token "Scramble utilized plate space as it were" or "Encode whole drive." The last option gives more complete assurance.
Start the encryption procedure:
To begin the BitLocker encryption process, select "Start encrypting" and then "Next."
IV. BitLocker activation with MS YourPC:
Since you have effectively introduced BitLocker, how about we investigate how to initiate it utilizing Otherwise known as MS YourPC.
Getting into AKA MS YourPC:
Navigate to the AKA MS YourPC portal using your browser.
Signing In:
Use the credentials from your Microsoft account to log in.
Gadget Approval:
Find the part for BitLocker gadget approval.
Follow the on-screen prompts to interface your gadget to your Microsoft account.
Two-Element Validation (2FA):
Add an extra layer of protection by enabling two-factor authentication.
Evaluating Gadget Status:
Actually look at the Also known as MS YourPC dashboard to guarantee that your gadget is effectively connected and approved.
Far off Administration:
Exploit Otherwise known as MS YourPC's distant administration highlights for BitLocker, permitting you to screen and deal with your gadget's encryption status from the entryway.
V. Best Practices and Investigating:
To expand the viability of BitLocker and aka ms myrecoverykey, think about the accompanying accepted procedures:
Make regular backups of your BitLocker recovery key in a number of safe places.
Update your operating system and device with the most recent security patches.
Test your recuperation key to guarantee it fills in true to form.
In the event that you experience any issues, allude to the BitLocker investigating documentation given by Microsoft or look for help from Otherwise known as MS YourPC support.
Conclusion:
Getting your gadget and information is a basic part of mindful registering. By introducing and initiating BitLocker on your gadget and utilizing the capacities of Also known as MS YourPC, you can essentially upgrade the security of your delicate data. Follow the bit by bit guide gave in this article to guarantee a smooth and secure establishment process. Make sure to remain informed about the most recent security practices and updates to keep up with the honesty of your scrambled information.
0 notes
Text
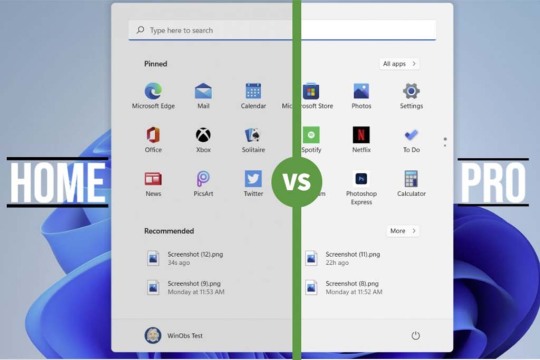
Difference Between Windows 11 Home vs Pro
Introduction
Windows 11 Professional and Home are both excellent operating systems, but they differ in a few key ways. Windows 11 home features differ from those in windows 11 pro.
If you’re considering upgrading your PC to Windows 11 Pro, this guide should help you decide if that’s right for you.
Windows 11 Pro offers more security features.

Windows 11 home vs Pro?
You can use Windows 11 Pro to install the operating system on any device with a 64-bit processor and at least 2 GB of memory. In comparison, the Home edition of Windows can only be installed on devices with 2 GB of memory or less. This means you’ll need to purchase an additional license if you want to upgrade your computer’s hardware to run Windows 11 Pro.
Windows 11 Pro also offers longer life cycles for its features than Windows Home, which makes it more suitable for businesses that need long-term support from Microsoft in case something goes wrong with their computers’ hardware or software components over time (hence why many companies always choose this version).
Finally, there are some networking features present only in Windows 11 Pro:
Encryption capabilities allow for more secure file transfers between devices via Wi-Fi connections.
Virtual Private Network connectivity allows users who connect remotely through public Wi-Fi networks (such as those found at airports) to access internet traffic securely.
Domain Join enables administrators within larger organizations to set up domains consisting of multiple connected machines running different versions of Windows software without having separate server systems configured specifically for each individual task required by each user group within said organization.
Windows 11 Pro has a longer life cycle.
Windows 11 home vs pro life cycle.
This is another major difference between windows 11 home and Pro.
Windows 11 Pro has a longer life cycle.
By the time you’re ready to upgrade, the current version of Windows may be outdated and unsupported, but if you buy Professional, your computer will still be running smoothly for years to come. In fact, it’s supported for 10 years after its release date, more than twice as long as Home is.
If you want the best experience possible with your new computer without having to worry about system stability or security updates every year (or two), go with Pro. It costs more than Home because it comes with additional features that some people might value highly enough to justify paying an extra $120 or so.
Windows 11 Pro has more networking features.

How do windows 11 home vs pro networking features vary?
Windows 11 Pro offers more networking features out of the box, including support for the latest networking technologies. With Windows 11 Pro, you can connect to a network using an Ethernet cable or Wi-Fi. You can also share files on your computer with other people on your home or office network.
You can use Windows 11 Home if you only want to connect one computer to the Internet, for example, if it’s in your home and not connected to a network. But if you want to share files with other computers on your home or office network and want advanced options for connecting networks (like a company intranet), then choose Windows 11 Pro instead of Home.
Windows 11 Pro offers more security and encryption options.
Windows 11 home vs pro security and encryption options differences?
When you’re using a laptop, the last thing you want to think about is what will happen if someone steals your computer. Well, Windows 11 Pro offers more security and encryption options.
The biggest difference between the two versions of Windows 11 is the inclusion of BitLocker in Pro. BitLocker is a hardware-based encryption feature that protects your data if your laptop is lost or stolen. This feature can be used with both Home and Professional versions of Windows 11 but requires Trusted Platform Module (TPM) version 1.2 or later, a piece of hardware on newer computers designed specifically for encryption purposes, and an operating system that supports native AES-128 bit symmetric key support at rest plus Secure Boot.
Windows 11 Pro offers more flexibility in how Windows is installed.

Windows 11 home vs pro flexibility.
This is also another major difference between windows 11 home and Pro.
Windows 11 Pro offers more flexibility in how Windows is installed. You can choose to install Windows 11 Pro as a virtual machine, install it as a dual boot operating system on your computer’s hard drive, or even install it on a USB drive.
In addition, if you’re installing the professional version of this operating system for use at Home only and don’t want some of the features included with enterprise editions of it (such as BitLocker), then upgrading from Home Edition will allow you access to those functions without purchasing another license.
Windows 11 Pro includes Hyper-V virtualization software.

Windows 11 home vs Pro, which can run multiple operating systems?
Hyper-V is a hypervisor-based virtualization platform that enables you to run multiple operating systems on one physical computer. Hyper-V supports both Windows and Linux guests, as well as virtual machines (VM). With Hyper-V, you can create up to 64 VMs on your computer. You can also use Hyper-V to create and manage snapshots of individual VMs or clone existing VMs.
Which to choose between, windows 11 home vs Pro?
There is a significant difference between Windows 11 home and Pro.
Windows 11 pro features are superior compared to windows 11 home features.
If you require more advanced networking and security, or if you’re interested in running virtual machines, upgrading to the Professional version of Windows 11 makes sense. In addition, if you need the flexibility to install windows in different ways (such as onto a USB drive), then upgrading to Professional is also a good idea.
Conclusion
Which version of windows should you choose between windows 11 home vs Pro?
Windows 11 Pro offers more advanced networking and security options, but it’s not necessary for most users.
If you need the extra features or want to run virtual machines with Hyper-V software, upgrading to Professional makes sense. Otherwise, the Home version will work fine on most computers today.
#windows 11 home vs pro#difference between windows 11 home and pro#windows 11 home features#Windows 11 Pro#Windows 11 pro features#windows 11 home vs Pro
1 note
·
View note
Text
Virtualization is one of the oldest technology in the tech field but is still very useful up to date. It can simply be defined as dividing and sharing the resources of a computer locally. This helps in creating virtual/software versions of the resources on a system such as storage, networks, applications e.t.c.
Many people/organizations use Virtualization in different methods to divide a single machine into several VMs that run independently. For virtualization to occur, a Hypervisor is required. There tow major types of Hypervisors, i.e
Type 1/Bare Metal Hypervisors: They are normally installed directly on a physical machine. They include the open-source Kernel-based VMs (KVMs), VMware ESXi, Microsoft Hyper-V e.t.c
Type 2/Hosted Hypervisors: They earn the name “hosted” because they are installed on top of an Operating system. These include the Oracle VirtualBox and VMware Workstation
In this guide we will learn how to install and use VirtualBox 7.0 on Rocky Linux 9 / AlmaLinux 9.
What is VirtualBox?
Virtualbox is an open-source hosted/type 2 hypervisor for both enterprise and home use. It can be used to create and run Virtual Machines on an Operating system such as Windows, Linux, OS/2, Solaris, macOS e.t.c. This tool was first released in 2007. It not only offers high performance but also a rich feature set.
The latest release version is 7.0, which was made in October 2022. The cool features associated with VirtualBox 7.0 are:
Virtual machines can be fully encrypted now, including the VM config logs and saved states (CLI only for now)
Added a new GUI utility which lists performance statistics (CPU usage, RAM usage, disk I/O rate, etc.) of running guests
Improved GUI theme support on all platforms – Linux and macOS use native engine while for Windows host it is separately implemented.
Implemented initial support for automatic updating of Guest Additions for Linux guests
Implemented ability to wait for and/or reboot the guest when updating Guest Additions via VBoxManage
Linux Guest Additions: Reworked guest screen re-size functionality, added basic integration with some of guest Desktop Environments
Implemented new 3D support based on DirectX 11 (and DXVK on non Windows hosts)
Added virtual TPM 1.2 and 2.0 devices
Added EFI support for Secure Boot
The EHCI and XHCI USB controller devices are now part of the open source base package
Added experimental support for guest debugging through GDB and highly experimental support for guest debugging through KD/WinDbg
Cloud virtual machines can be added to Virtual Machine Manager and controlled as local VMs
Cloud networks can now be configured via Network Manager tool same way as it is done for Host-only and NAT networks
Install VirtualBox 7.0 on Rocky Linux 9 / AlmaLinux 9
In order to install VirtualBox on your system, you need to ensure that Virtualization is enabled on your processor. This is normally made in BIOS/UEFI configurations. To check if it is enabled, execute the command:
$ lscpu | grep Virtualization
Virtualization: VT-x
Virtualization type: full
Also, verify that you are running a 64-bit system.
$ lscpu
Architecture: x86_64
CPU op-mode(s): 32-bit, 64-bit
Address sizes: 39 bits physical, 48 bits virtual
Byte Order: Little Endian
CPU(s): 1
On-line CPU(s) list: 0
Vendor ID: GenuineIntel
Model name: Intel(R) Xeon(R) CPU E3-1275 v5 @ 3.60GHz
CPU family: 6
Model: 94
#1. Add Virtualbox Repository
Virtualbox does not reside in the default Rocky /AlmaLinux 9 repositories. To be able to install it, you need to add the official repositories.
First, enable the EPEL repository:
sudo dnf install epel-release -y
Install the required build tools:
sudo dnf install wget curl gcc make perl bzip2 dkms kernel-devel kernel-headers -y
Once installed, compare the kernel-devel versions and the kernel versions:
$ rpm -q kernel-devel
kernel-devel-5.14.0-70.17.1.el9_0.x86_64
$ uname -r
5.14.0-70.13.1.el9_0.x86_64
Since the two do not match, we need to update the Linux Kernel
sudo dnf update -y
Reboot the system for the Kernel updates to apply:
sudo reboot now
Once the system boots, verify if the Kernel and kernel-devel are of the same version. Then add the VirtualBox repositories to the system:
sudo dnf config-manager --add-repo=https://download.virtualbox.org/virtualbox/rpm/el/virtualbox.repo
#2. Install VirtualBox 7.0 on Rocky /AlmaLinux 9
Once the repository has been added, identify the available VirtualBox versions
dnf search virtualbox
Sample Output:
================================================================================= Name & Summary Matched: virtualbox =================================================================================
VirtualBox-6.1.x86_64 : Oracle VM VirtualBox
VirtualBox-7.0.x86_64 : Oracle VM VirtualBox
As seen, we have VirtualBox 7.0 provided, proceed and install it using the command:
sudo dnf install VirtualBox-7.0 -y
Dependency Tree:
Dependencies resolved.
================================================================================
Package Arch Version Repository Size
================================================================================
........
Transaction Summary
================================================================================
Install 63 Packages
Total download size: 134 M
Is this ok [y/N]: y
Accept the GPG key to be imported:
Oracle Linux / RHEL / CentOS-9 / x86_64 - Virtu 3.0 kB/s | 1.7 kB 00:00
Importing GPG key 0x98AB5139:
Userid : "Oracle Corporation (VirtualBox archive signing key) "
Fingerprint: 7B0F AB3A 13B9 0743 5925 D9C9 5442 2A4B 98AB 5139
From : https://www.virtualbox.org/download/oracle_vbox.asc
Is this ok [y/N]: y
#3. Install Virtualbox Extension Pack
Wait until the installation has been completed then proceed and install the Virtualbox Extension Pack. This provides features such as Virtualbox RDP, disk encryption, NVMe and PXE boot for intel cards, USB 2.0, USB 3.0 devices to VirtualBox.
To download the Virtualbox Extension Pack, visit the official Virtualbox downloads page. On the page, download the “all supported platforms” pack
It is also possible to download the pack via wget
wget https://download.virtualbox.org/virtualbox/7.0.0/Oracle_VM_VirtualBox_Extension_Pack-7.0.0.vbox-extpack
Now build the kernel modules using the command:
$ sudo /sbin/vboxconfig
vboxdrv.sh: Stopping VirtualBox services.
vboxdrv.sh: Starting VirtualBox services.
vboxdrv.sh: Building VirtualBox kernel modules.
Once downloaded, navigate to the location of the file and install it with the command:
sudo VBoxManage extpack install Oracle_VM_VirtualBox_Extension_Pack-*.vbox-extpack
Proceed as shown;
VirtualBox Extension Pack Personal Use and Evaluation License (PUEL)
License version 11, 21 May 2020
PLEASE READ THE FOLLOWING ORACLE VM VIRTUALBOX EXTENSION PACK PERSONAL
USE AND EVALUATION LICENSE CAREFULLY BEFORE DOWNLOADING OR USING THE
ORACLE SOFTWARE. THESE TERMS AND CONDITIONS CONSTITUTE A LEGAL AGREEMENT
BETWEEN YOU AND ORACLE.
ORACLE AMERICA, INC. ("ORACLE") IS WILLING TO LICENSE THE PRODUCT DEFINED
IN SECTION 1 BELOW ONLY ON THE CONDITION THAT YOU ACCEPT ALL OF THE TERMS
CONTAINED IN THIS VIRTUALBOX EXTENSION PACK PERSONAL USE AND EVALUATION
LICENSE AGREEMENT ("AGREEMENT").
......
Do you agree to these license terms and conditions (y/n)? y
License accepted. For batch installation add
--accept-license=33d7284dc4a0ece381196fda3cfe2ed0e1e8e7ed7f27b9a9ebc4ee22e24bd23c
to the VBoxManage command line.
0%...10%...20%...30%...40%...50%...60%...70%...80%...90%...100%
Successfully installed "Oracle VM VirtualBox Extension Pack".
#4. How to Use VirtualBox 7.0
Once installed, Virtualbox 7.0 is ready for use. Launch it from the App Menu as shown:
To create a Virtual Machine, click on New and set the name of the VM as shown.
Assign the memory size for your Virtual Machine.
Create a hard disk for the VM. This will act as storage for your VM
Set the disk size.
Now you will have your VM created. There are some configurations you can make before you begin the installation.
Navigate to the VM’s Settings -> Storage and load the ISO file to be used to install the required Operating System.
It is also possible to configure the Network. Here, you can choose between NAT, bridged,l internal Network, host-only e.t.c
#5. Transfer Files Between Virtual Machine To Host
There are three ways how to transfer files between the Host and VM. These are:
Drag and drop & Shared Clipboard
USB drive
Shared Folder
Top configure Drag and Drop, which is typically copy and paste, navigate to the VM’s settings-> General settings-> Advanced settings and enable it as shown.
To allow data to be copied from USB Stick to your VM, enable the USB controller and set the controller. You can now click on + to add the USB device.
To configure a shared folder between the host and VM, click on Shared Folders and set the host folder to be shared, the share name then the required permissions. You also need to specify a mount point on the VM as shown.
Once the desired configurations have been made click Ok and start the VM. The installation will begin as shown:
#6. Configure VirtualBox Networking
VirtualBox supports several network modes that include:
NAT
NAT Network
Bridged Adapter
Internal Network
Host-Only Adapter
Generic Driver
In this guide, we will discuss and learn how to set 3 commonly used modes which are:
NAT Networking
This is the default enabled mode, the VM is able to access hosts in a physical area network using the virtual NAT. The internet is also accessible from the guest OS. Using this mode, allows the VM to be accessed internally and cannot be accessed remotely. The NAT mode has a internal DHCP server with the default IP address as 10.0.2.2
Bridged Networking
With this mode, the VM’s adapter is connected to the host’s physical network adapter. The VM now uses the hots network interface for internet connection. Here, the VMs are fully accessible from the physical LAN. The IP is assigned from your physical network using the IP address of the default gateway in the physical network.
Host-only Networking
This mode is used to establish communication between the host and the guest. The VM is also able to communicate with other VMs that are connected to the host-only network. The host-only network can be created on Virtualbox by navigating to File > Host Network Manager. Create the network and check the properties. You can edit them manually or configure them automatically.
Once the host-only network has been created, you can now use it on VMs as shown.
That is it, now proceed and install the VirtualBox Guest Additions that consist of a set of device drivers and system applications used to optimize the performance of the VM. They provide a number of features such as Mouse pointer integration, shared folders, shared clipboards e.t.c
This can be achieved using the aid in the guide below
Install VirtualBox guest additions on Rocky Linux / AlmaLinux 9
Closing Thoughts
That marks the end of this guide on how to install and use VirtualBox 7.0 on Rocky Linux 9 / AlmaLinux 9. You are now able to create and use VMs on your system as desired. I hope this was significant.
0 notes
Text
VirtualBox 7.0 Released - Full VM Encryption Support, Direct3D Acceleration Using DXVK - Phoronix
VirtualBox 7.0 Released - Full VM Encryption Support, Direct3D Acceleration Using DXVK
Written by Michael Larabel in Virtualization on 10 October 2022 at 06:30 PM EDT. 52 Comments
VIRTUALIZATION --
It's been a long time since last having anything significant to report on for Oracle's VM VirtualBox software: VirtualBox 6.0 debuted in 2018 and VirtualBox 6.1 in 2019, but since has been rather quiet... But out today is now VirtualBox 7.0 with big features like support for full virtual machine encryption and a new Direct3D 11 based graphics stack, which for Linux use is now going through DXVK.
VirtualBox 7.0 released today and now allows virtual machines to run fully encrypted -- including the encrypting of configuration logs and saved states. But for VirtualBox 7.0 this VM encryption support is only exposed via the command-line interface.
VirtualBox 7.0 also introduces a new 3D stack. This VirtualBox 3D support is based on DirectX 11 while Oracle indicates that it's making use of DXVK for non-Windows hosts (in particular: DXVK-Native), which means the Direct3D stack is ultimately running over Vulkan.
VirtualBox 7.0 also supports other big features like virtual IOMMU devices for Intel and AMD, virtual TPM 1.2 and 2.0 device support, EFI Secure Boot is finally wired up, various GUI enhancements, Vorbis is the default audio codec for audio recording with WebM containers while Opus is no longer used, initial support for automatic updating of VirtualBox Guest Additions for Linux guests, and many other changes. The UEFI SecureBoot and TPM support also now allows Windows 11 guests to work with VirtualBox 7.0. VirtualBox 7.0 also updates the Qt toolkit in use, improves accessibility of the UI, and has various fixes.
Downloads and more details on VirtualBox 7.0 via VirtualBox.org.
52 Comments
Related News
VirtGPU DRM Native Contexts Show Potential For Good VM Gaming Performance
Intel, Microsoft & Arm Continue Advancing The Cloud-Hypervisor With v27 Released
QEMU 7.1 Released With LoongArch Support, Zero-Copy-Send Migration
Cloud Hypervisor 26.0 Released With SMBIOS Improvements, Unified Binary For MSHV/KVM
Many VirtIO Changes Land For Linux 6.0
Linux 6.0 KVM Brings Intel IPI Virtualization, AMD x2AVIC
About The Author
Author picture
Michael Larabel is the principal author of Phoronix.com and founded the site in 2004 with a focus on enriching the Linux hardware experience. Michael has written more than 20,000 articles covering the state of Linux hardware support, Linux performance, graphics drivers, and other topics. Michael is also the lead developer of the Phoronix Test Suite, Phoromatic, and OpenBenchmarking.org automated benchmarking software. He can be followed via Twitter, LinkedIn, or contacted via MichaelLarabel.com.
Popular News This Week
Intel Laptop Users Should Avoid Linux 5.19.12 To Avoid Potentially Damaging The Display
KDE Plasma 5.27 Planning To Be The Last Plasma 5 Feature Release
The Initial Rust Infrastructure Has Been Merged Into Linux 6.1
Btrfs Brings Some Great Performance Improvements With Linux 6.1
Steam Deck Now Available For Immediate Ordering, Steam Deck Dock Also In-Stock
AMD Continues Working Toward HDR Display Support For The Linux Desktop
Canonical Now Providing Free Ubuntu Pro Subscriptions For Up To 5 Systems
Wireshark 4.0 Network Protocol Analyzer Released
Latest Linux News
uutils 0.0.16 Released As Rust-Based GNU Coreutils Replacement
RISC-V Adds Support For CD-ROM Images To Its Default Linux 6.1 Kernel Configuration
Kernel Memory Sanitizer Lands For Linux 6.1
LLVM Clang 15 Delivers Some Small x86_64 Performance Improvements But Mostly Flat
Zink Lands Async Pipeline Precompiles For Better Performance, Less Game Stuttering
Linux 6.1 Lands Code To Warn About W+X Mappings By Default
KDE Plasma 5.26 Released With Many Great Desktop Improvements
AMD IOMMU v2 Page Tables Getting Wired Up For Linux 6.1
Blender 3.4 Aims To Ship Wayland Support Enabled
MGLRU Merged For Linux 6.1
VirtGPU DRM Native Contexts Show Potential For Good VM Gaming Performance
Linux 6.1 Finishes Gutting Out The Old a.out Code
Show Your Support, Go Premium
0 notes
Text
Grand ages rome battle gameplay


The optional remote integrity validation capability using the Windows Defender System Guard cloud service requires TPM 1.2 or greater and a management system that supports remote attestation capabilities (e.g.: Intune and System Centre Configuration Manager). Windows Defender System Guard’s boot time integrity protection requires the use of UEFI 2.3.1 or greater with Secure Boot. How to use the Microsoft Authenticator App

Get the free Microsoft Authenticator app for Android or iOS Learn more about Mobile Device Management, Remote Desktop app is available for Windows, iOS, Android and Mac, the machine you want to access needs to be on. Borrow ebooks, audiobooks, and more from your local public library for free Get the app today Or, use it in your web browser at. Brought to you by your local library, and built with by. See screenshots, read the latest customer reviews, and compare ratings for Hulu. Requires TPM 1.2 or greater for TPM based key protection. The Libby App by OverDrive: Free ebooks & audiobooks from the library. Download this app from Microsoft Store for Windows 10, Windows 8.1, Xbox One. Active Directory makes management easier, but is not required. Windows Information Protection requires either Mobile Device Management or System Centre Configuration Manager to manage settings. This version for Windows is exactly the type of flagship app you’d expect - it’s crisp-looking, fast, and easy-to-use and, although music quality depends largely on the quality of the device you’re reproducing it on (and not the app you’re using to play it), only the pickiest ears will have anything to say about the quality of the music. To check for compatibility, support period and other important information, visit your device manufacturer’s website and /windows10specs. Updates are automatically enabled during the support period – additional storage and/or hardware requirements apply for updates over time. This app is one of the most popular Imaging and Digital Photo apps worldwide Install SolidWorks latest full setup on your PC/laptop Safe and Secure. We recommend you back up your files before installing. SolidWorks app for Windows 10 Download SolidWorks for Windows 10/8/7 64-bit/32-bit.
0 notes
Text
Windows 11 download free

#Windows 11 freeload update#
#Windows 11 freeload upgrade#
#Windows 11 freeload full#
#Windows 11 freeload software#
Otherwise, you'll get " This PC can't run Windows 11."TPM 2.0 is a requirement for running Windows 11" error on your PC.
#Windows 11 freeload update#
To obtain a smooth Windows update on your computer, it's highly recommended that you get everything ready for Windows 11, including the TPM 2.0 enabled on your PC. According to the Windows 11 requirements that we posted at the beginning of this page, TPM: Trusted Platform Module version 2.0 is a must for Windows 11 update. If yes, it means that your computer has TPM 2.0. This means that your computer has a TPM chip, and you'll just need to confirm whether the Specification Version is 2.0 or not.
TPM Management on Local Computer Configure the TPM and its support by the Windows platform.
This means that your current computer doesn't support a TPM chip. Verify that this computer has a 1.2 TPM or later and it is turned on in the BIOS.
Compatible TPM cannot be found: Compatible Trusted Platform Module (TPM) cannot be found on this computer.
Wait for the Run dialog to open the Trusted Platform Module Management on Local Computer.Ĭheck the onscreen message, and you'll learn if you have TPM or if the TPM 2.0 is enabled on your computer: Press Windows + R keys to open the Run dialog, type tpm.msc and click "OK". Here is a guide that you can follow to check if your computer has TPM or if TPM2.0 is enabled on your PC. Do I Have TPM and Is TPM 2.0 Enabled on My Computer? If you feel like to learning the differences between TPM 1.2 and TPM 2.0, follow this page to learn everything about TPM.
#Windows 11 freeload software#
Device Integrity Verification: Any application can use a TPM 2.0 for digital rights management, Windows Defender, Windows Domain logon, protection and enforcement of software licenses, and prevention of cheating in online games, etc.
#Windows 11 freeload full#
Encrypt Storage Devices: TPM 2.0 also works like a full disk encryption utility that uses the technology to protect the keys for encrypting computer storage devices and provide integrity authentication for a trusted boot pathway that includes firmware and boot sector.
Ensure Integrity of Platform: TPM 2.0 is designed to ensure the boot process starts from a trusted combination of hardware and software, and continues until the operating system has fully booted and applications are running.
What Is TPM 2.0Īccording to DoD (United States Department of Defense), TPM is to be used for device identification, authentication, encryption, and device integrity verification. - by WikipediaĪs a successor of TPM, the TPM 2.0 does mostly the same work as TPM that are: (source from Wikipedia)
#Windows 11 freeload upgrade#
Can those devices that lack the essential TPM 2.0 requirement still get the Windows 11 update? Is there any way to bypass TPM 2.0 and get Windows 11 free upgrade from Windows 10? Here we come, with a feasible solution for you. Even though some old devices are capable enough to match a UEFI firmware, their TPM version is still at 1.0. Internet connection: Microsoft account and internet connectivity required for setup for Windows 11 HomeĪccording to the minimum system requirements for Windows 11, the harsh ones are mainly the demand for UEFI secure boot firmware settings and a TPM 2.0 chip.Graphics card: DirectX 12 compatible graphics / WDDM 2.x.TPM: Trusted Platform Module (TPM) version 2.0.System firmware: UEFI, Secure Boot capable.Storage: 64 GB or larger storage device.Processor: 1 gigahertz (GHz) or faster with 2 or more cores on a compatible 64-bit processor or System on a Chip (SoC).How to Install/Run Windows 11 without TPM 2.0 How to Configure Your PC to Be Eligible for Other Requirements Except TPM 2.0
0 notes
Text
DOWNLOAD CANON A630 WINDOWS 7 DRIVER
Uploader: Juicy
Downloads: 6963
Download Type: http
File Size: 23 Mb
File Format: exe
Operating Systems: Windows NT/2000/XP/2003/2003/7/8/10 MacOS 10/X
Price: Free
Date Added: 04 November, 2019
File Name: canon a630 windows 7 driver
File Version: 716161767

What's New:
- Fixed issue whereby IPv6 in IPv4 tunnelling doesn’t work.
- Bug Fixes- [WebAccess](canon a630 windows 7 driver [WebAccess]) Fixed a bug where files were not accessible via WebAccess if UPnP is enabled for the WebAccess settings.
- Fixed issue whereby(canon a630 windows 7 driver whereby) string translation incorrect for QoS Page.
- Bug - [Folder Setup] Fixed a bug where an NTFS-formatted USB drive became inaccessible.
- Web Service] Fixed a bug where the upload speed may become slow when cloud storage is configured.
- Fixed TPM 1.2 state will(canon a630 windows 7 driver will) affect TPM2.0 function.
- Fixed USB storage information issue.
- Fixed HK ISP DHCP connection issue.
- Fixes(canon a630 windows 7 driver Fixes) Set Boot Sector Virus Protection to enabled,use Fdisk /MBR command under dos mode,it can't popup warning message.
- Fixes issue with Twonky media server(canon a630 windows 7 driver server) not being visible from all DLNA/UPNP clients on the network.
Users content:
Do not install this driver for the Creative Sound Blaster Audigy LS or Sound Blaster Audigy SE audio device. Audio Boost 4 PRO: Isolated audio with 2x audio processors & Nahimic 2+ for the most immersive gaming experience. BIOS Update: Update USB code. M.2 SHIELD FROZR: strengthened built-in M.2 thermal solution. Instructions: - Download the update file « update. Firefox plug is busy easily when viewing the live streaming with 1920x1080. OLED can indicate rebuild progress. A temporary workaround is to disable the AMD Gaming Evolved "In Game Overlay". - Battlefield 4 may experience crashes when using Mantle. Solved failure of heavy-loaded USB printer. Support 28W CPUIt is highly recommended to always use the most recent driver version available. https://goodsoftwarescollectionn7w.hatenablog.com/entry/2020/03/15/004346
Supported OS:
Microsoft Windows 8 Enterprise (64-bit)
Microsoft Windows 8.1 Enterprise (32-bit)
Microsoft Windows 8 Pro (64-bit)
Windows 7
Notebook 8.1/8/7 64-bit
Windows 10
Windows Vista 32-bit
Microsoft Windows 10 (32-bit)
Microsoft Windows 8.1 Pro (32-bit)
Windows Server 2012 R2
Windows Server 2003 64-bit
Windows 8
Notebook 8.1/8/7 32-bit
Windows 8.1
Windows Vista 64-bit
Windows XP 64-bit
Windows XP 32-bit
Microsoft Windows 8.1 (64-bit)
Windows Server 2016
Microsoft Windows 10 (64-bit)
Microsoft Windows 8.1 Enterprise (64-bit)
Microsoft Windows 8 (32-bit)
Microsoft Windows 8 Pro (32-bit)
Windows 8.1/8/7/Vista 32-bit
Windows Server 2012
Windows 8.1/8/7/Vista 64-bit
Windows Server 2008 R2
Microsoft Windows 8.1 (32-bit)
Windows 7 64-bit
Windows Server 2003 32-bit
Microsoft Windows 8 (64-bit)
Microsoft Windows 8.1 Pro (64-bit)
Windows Server 2008
Microsoft Windows 8 Enterprise (32-bit)
Windows 2000
Windows 7 32-bit
Searches:
canon a630 windows 7 C61v; canon a630 windows 7 driver for Windows Server 2003 32-bit; canon a630 windows 7 C CO613-6; canon a630 windows 7 CO6130; canon a630 windows 7 driver for Notebook 8.1/8/7 32-bit; windows 7 a630 driver canon; canon a630 windows 7 driver for Microsoft Windows 8.1 Pro (64-bit); canon a630 windows 7 driver for Windows 8; canon a630 windows 7 driver for Microsoft Windows 8 (64-bit); canon a630 windows 7 COGVI6130; canon a630 windows 7 Cvh613-vhc
Compatible Devices:
Hard Drive; Wifi router; Video Projector; Videocard; Soundcard; Ipad
To ensure the integrity of your download, please verify the checksum value.
MD5: 756f6773b1c715932ba65fb22083ebbd
SHA1: 842d31b3d1250d876370c5b89b71c4e4f7233f7c
SHA-256: cdd16353a67c724d78daf4cc0eff6a4133e05dba71ec7d6deac4007c1131069c
1 note
·
View note
Text
características que debe de tener una computadora para instalar Windows 7, 10, XP y distribuidor Linux

Para poder instalar windows 7 debemos tener en cuenta los siguientes requisitos:
Procesador de 1 GHz o más rápido de 32 bits o de 64 bits.
1 GB de RAM (32 bits) o 2 GB de RAM (64 bits).
16 GB de espacio disponible en el disco duro (32 bits) o 20 GB (64 bits).
Tarjeta gráfica DirectX 9 con controlador WDDM 1.0 o superior.
otros requisitos que también pueden ser muy útiles para un buen funcionamiento son:
Acceso a Internet.
Según la resolución, la reproducción de vídeo podría requerir memoria adicional y hardware gráfico avanzado.
Es posible que algunos juegos y programas requieran tarjetas gráficas compatibles con DirectX 10 o superior para ofrecer un rendimiento óptimo.
Algunas funciones de Windows Media Center pueden requerir un sintonizador de TV y hardware adicional.
Los equipos Windows Touch y Tablet PC requieren hardware específico.
Grupo Hogar requiere una red y equipos que ejecuten Windows 7.
La creación de DVDs o CDs requiere una unidad óptica compatible.
BitLocker requiere Módulo de plataforma segura (TPM) 1.2.
BitLocker To Go requiere una unidad flash USB.
WINDOWS 10:
para poder instalar windows 10 se debe tener en cuenta las siguientes características:
Procesador a 1 GHz o más rápido o sistema en un chip (SoC).
En memoria RAM debe tener 1 GB para 32 bits o 2 GB para 64 bits.
El espacio en disco duro debe ser 16 GB para un SO de 32 bits o 32 GB para un SO de 64 bits.
Debe tener una tarjeta gráfica DirectX 9 o posterior con un controlador WDDM 1.0
Tener una pantalla de 800×600
Conexión a Internet
Asegurarse de que estás ejecutando la versión más reciente: Windows 7 SP1 o Windows 8.1 Update.
WINDOWS XP:
Para poder instalar windows XP se debe reconocer las siguientes propiedades en una computadora para cada tipo de windows ya que se encuentran tres diferentes.
WINDOWS XP PROFESSIONAL:
procesador pentium a 233 megahercios o superior, se recomienda 300 Mhz
64 megabytes (MB) de memoria ram, se recomienda 128 MB
1,5 GB de espacio en el disco duro
unidad de CD-ROM o DVD-ROM
teclado y Microsoft Mouse o dispositivo señalador compatible
adaptador de vídeo y monitor con resolución Super VGA (800 x 600) o superior
tarjeta de sonido
altavoces o auriculares
WINDOWS XP HOME EDITION:
procesador pentium a 233 megahercios o superior, se recomienda 300 Mhz
64 megabytes (MB) de memoria ram, se recomienda 128 MB
1,5 GB de espacio en el disco duro
unidad de CD-ROM o DVD-ROM
teclado y Microsoft Mouse o dispositivo señalador compatible
adaptador de vídeo y monitor con resolución Super VGA (800 x 600) o superior
tarjeta de sonido
altavoces o auriculares
WINDOWS XP DE 64 BITS:
procesador Intel Itanium de 733 MHz, se recomienda Intel Itanium de 800 MHz
1 GB de memoria ram
adaptador de vídeo y monitor con resolución Super VGA (800 x 600) o superior
DISTRIBUIDOR LINUX

Requisitos para instalar Linux Mint 18.2 Sonya:
512 MB RAM (1GB recomendado).
9 GB de espacio libre en disco (20 GB recomendado).
Tarjeta gráfica 800×600 de resolución mínima (1024×768 recomendada).
DVD drive o puerto USB
2 notes
·
View notes
Text
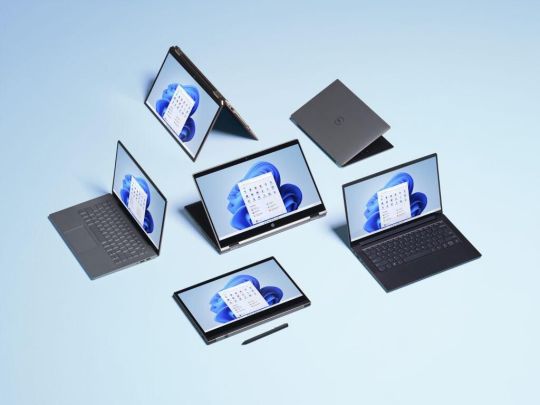
Hoe Windows 11 nu te installeren: alle methoden, uitgelegd
Windows 11 is officieel hier, en u kunt meteen upgraden als u weet waar u moet kijken. Het is zes jaar geleden dat de laatste versie van Windows werd vrijgegeven, wat betekent dat dit geen kleine update is. Als u er echter van wilt profiteren, moet u weten hoe u Windows 11 wilt installeren.
Er zijn een paar verschillende methoden. Windows 11 zou als een gratis update moeten aankomen, dus we raden aan om te wachten om op te komen. Als je het niet erg vindt, kun je op dit moment aan de slag gaan. Er zijn tenslotte veel andere spannende nieuwe functies om mee te spelen.
Windows 11
installeren
Stap 1: Controleer op de update
Microsoft maakt Windows 11 in batches nu vrij, dus het eerste dat u wilt doen is controleren of de update beschikbaar is. Windows Update. Selecteer Controleer op updates. Als uw apparaat in aanmerking komt voor de gratis upgrade, ziet u een banner boven de knop Update waarmee u Windows 11 kunt installeren.
Als je het niet ziet, maak je geen zorgen. Er zijn nog andere manieren om te upgraden nu het besturingssysteem officieel is uitgebracht. Voordat je verder gaat, moet je de PC Health Check-app downloaden en bevestigen dat je computer compatibel is met Windows 11. Je hebt compatibele hardware nodig om de update te installeren.
Stap 2: Installatie-assistent gebruiken
Als de Windows 11-update niet op je wacht, kun je nog steeds upgraden. Microsoft heeft de Installation Assistant beschikbaar op de downloadpagina van Windows 11. Download deze app en voer deze uit om aan de slag te gaan. Het zal een hardwarecontrole uitvoeren om er zeker van te zijn dat uw machine compatibel is met Windows 11.
Volg anders de aanwijzingen op het scherm om te upgraden naar de nieuwste versie. Microsoft raadt dit upgradepad niet aan, tenzij je de upgrade al hebt ontvangen in Windows Update of je bent geïnstrueerd door de ondersteuning. www.epcdream.nl Je hebt de mogelijkheid om te upgraden zonder iets te verwijderen, te upgraden terwijl je apps en Windows-instellingen verwijdert, of een schone installatie uit te voeren.
Stap 3: Gebruik Media Creation Tool (niet aanbevolen)
Als uw pc niet voldoet aan de minimale hardwarevereisten voor Windows 11, kunt u nog steeds upgraden met de Media Creation Tool. Microsoft raadt dit niet aan, en het bedrijf heeft gezegd dat het kritieke beveiligingsupdates kan achterhouden als u het besturingssysteem op niet-ondersteunde hardware installeert. Als u deze route volgt, begrijp dan de risico's die eraan verbonden zijn. Download het hulpmiddel. Maak uw installatiemedia. U hebt minimaal een USB-drive van 8 GB nodig die is geformatteerd om het installatieprogramma te maken. Selecteer het station bij het maken van uw installatiemedia. Wacht tot het downloaden is voltooid.
Sluit daarna uw computer af en plaats het media-USB-station. Spam tijdens het opstarten de Delete-toets (niet Backspace) om het BIOS van uw moederbord te openen. Elk moederbord is anders, maar u wilt de opstartvolgorde wijzigen zodat de USB-drive eerst opstart. Uw machine start rechtstreeks op de USB-drive op en daarna kunt u Windows 11 installeren. Deze route omzeilt de CPU. TPM-controle voor Windows 11. Houd er rekening mee dat je nog steeds TPM 1.2 nodig hebt om Windows 11 op deze manier te installeren, terwijl de officiële release TPM 2.0 vereist. Nogmaals, deze route wordt niet aanbevolen door Microsoft, dus ga op eigen risico te werk.
Windows 11 installeren met het Windows Insider-programma
Stap 1: Registreer u als Windows Insider
Nogmaals, Windows 11 zal pas op 5 oktober algemeen beschikbaar zijn. Maar als je echt het nieuwe besturingssysteem voor die tijd wilt hebben, kun je je aanmelden voor het Windows Insider-programma om het op je pc te krijgen. Als het vliegen van Insider Preview Builds nieuw voor u is, moet u zich eerst via uw webbrowser registreren voor het Windows Insider-programma.
Het enige dat u nodig hebt, is een Microsoft- of Azure-account om aan de slag te gaan, en u bent op weg om u aan te melden. Als je er nog geen hebt, kun je gratis een Microsoft-account maken met je bestaande e-mailadres.
Stap 2: Controleer de hardwarevereisten voor Windows 11
Vervolgens moet u controleren of uw pc Windows 11 kan draaien. Als u niet zeker weet of dit wel of niet het geval is, raadt Microsoft aan om de pagina met minimale hardwarevereisten voor Windows 11 te raadplegen.
Je hebt een TPM (Trusted Platform Module) 2.0-chip nodig: Intel 8e generatie of AMD Ryzen 2000 of nieuwere processor. Dit heeft tot frustratie geleid, waarbij veel mensen zich afvragen waarom hun krachtige gaming-pc's niet aan de minimumvereisten voldoen. Als uw pc dat niet doet, moet u wellicht overwegen uw installatie te upgraden.
TPM 2.0 is al een vereiste voor vooraf gebouwde desktops en laptops, maar veel zelfgebouwde aangepaste pc's ondersteunen dit mogelijk niet. We weten wel dat TPM een versie van minimaal 2.0 moet hebben en dat de systeemfirmware Secure Boot-compatibel moet zijn. Deze verplichte vereiste voor Windows 11 is om veiligheidsredenen, aldus Microsoft.
Andere systeemvereisten zijn niet al te veeleisend. Uw pc moet een processor van 1 GHz of sneller hebben met twee of meer kernen op een 64-bits processor. Het moet minimaal 4 GB RAM en 64 GB opslagruimte of meer bevatten. Het scherm moet minimaal 720 pixels zijn. Groter dan 9 inch diagonaal met minimaal 8 bits per kleurkanaal. De grafische kaart moet compatibel zijn met DirectX12 met de nieuwste WDDM 2.0-driver. Deze vereisten verschillen niet veel van die voor Windows 10.
Stap 3: Meld uw pc aan om Windows 11-builds te krijgen
Nadat u bent geregistreerd en gecontroleerd om te zien dat u Windows 11 kunt gebruiken (of als u een bestaande Insider bent die al Preview-builds uitvoert), kunt u de nieuwe build installeren door naar Instellingen> Update en beveiliging> Windows Insider-programma te gaan.
Als het je eerste ervaring is met het Windows Insider-programma, zul je merken dat er meerdere kanalen zijn: dev, beta en release preview. Momenteel wordt Windows 11 getest in zowel het bètakanaal als het dev-kanaal.
Het bètakanaal is een van de meest stabiele ervaringen om Windows 11 te testen. Als je ervoor kiest om lid te worden van dit kanaal, zul je niet zoveel bugs en problemen ervaren. Houd er echter rekening mee dat bètakanaalreleases slechts om de paar weken plaatsvinden.
Als je de nieuwste en beste versies van Windows 11 van Microsoft wilt, moet je lid worden van het dev-kanaal, dat wekelijkse releases en alle nieuwe functies heeft. Uiteindelijk zullen Windows 11-functies zoals Android-apps in de Microsoft Store als eerste het ontwikkelkanaal bereiken.
Onthoud dat releases van ontwikkelaarskanalen niet de meest stabiele zijn en veel bugs bevatten die van invloed kunnen zijn op de prestaties van uw pc en het vermogen om uw favoriete Windows-apps uit te voeren.
Hoe Windows 11 helemaal opnieuw te installeren en in een VM te installeren
Als u Windows 11 op een schone manier wilt installeren, hebben we enkele belangrijke adviezen voor u. Microsoft heeft onlangs ISO-bestanden voor Windows 11 uitgebracht, maar deze bestanden zijn voor de bètaversie van het besturingssysteem. U moet een Windows Insider zijn om de ISO-bestanden te krijgen. Gebruik ze op een pc om installatiemedia te maken.
Als u de ISO-bestanden wilt gebruiken om Windows 11 schoon te installeren, gaat u naar de Windows Insider-website van Microsoft en kiest u het juiste ISO-bestand. U kunt dan onze handige gids volgen om installatiemedia te maken en uw pc op te starten vanaf een USB-station of cd met een kopie van het nieuwe besturingssysteem. U hebt een Windows 10-licentie nodig om Windows 11 te activeren als u ervoor kiest om deze ISO te gebruiken.
1 note
·
View note
Text
Update FAILED: Blocked by TPM FW Policy
Update FAILED: Blocked by TPM FW Policy
All of the TMP firmware update utilities that DELL has for my system fail to update, with the following message “Update Failed, Blocked by TPM FW Policy”. I have a DELL T3620 Precision Workstation i7-7700K with the WEC TPM chip on the mother board. I’m running Win10 Pro, UEFI boot and GPT partition with the latest DELL BIOS update 2.18.1. The TPM 1.2 firmware is currently at 5.81.0.0.I’ve tried…
View On WordPress
0 notes
Text
How do I Install VirtualBox 7.0 on Ubuntu 22.04|20.04|18.04?. VirtualBox 7.0 has been released with plenty of new features waiting for you to explore. VirtualBox is a powerful, feature-rich, high-performance and open source x86 and AMD64/Intel64 virtualization solution for both home users and enterprise.
The following major features added to VirtualBox 7.0:
Added a new GUI utility which lists performance statistics (CPU usage, RAM usage, disk I/O rate, etc.) of running guests
Virtual machines can be fully encrypted now, including the VM config logs and saved states (CLI only for now)
Improved GUI theme support on all platforms – Linux and macOS use native engine while for Windows host it is separately implemented.
Implemented ability to wait for and/or reboot the guest when updating Guest Additions via VBoxManage
Implemented initial support for automatic updating of Guest Additions for Linux guests
Linux Guest Additions: Reworked guest screen re-size functionality, added basic integration with some of guest Desktop Environments
Added virtual TPM 1.2 and 2.0 devices
Implemented new 3D support based on DirectX 11 (and DXVK on non Windows hosts)
Added EFI support for Secure Boot
Added experimental support for guest debugging through GDB and highly experimental support for guest debugging through KD/WinDbg
The EHCI and XHCI USB controller devices are now part of the open source base package
Cloud networks can now be configured via Network Manager tool same way as it is done for Host-only and NAT networks
Cloud virtual machines can be added to Virtual Machine Manager and controlled as local VMs
Check out the complete list of VirtualBox new features on Changelog for VirtualBox. Without further ado, let’s dive into the installation of VirtualBox 7.0 on Ubuntu 22.04|20.04|18.04
Install VirtualBox 7.0 on Ubuntu 22.04 / 20.04 / 18.04
Follow the steps outlined in this article to install, configure and use VirtualBox 7.0 on Ubuntu 22.04 / 20.04 / 18.04.
Step 1: Update your system
We always recommend you run latest stable versions of your installed packages. if you don’t want to upgrade any package, just update APT package index and skip the upgrade.
sudo apt update
sudo apt -y upgrade
[ -f /var/run/reboot-required ] && sudo reboot -f
Step 2: Import VirtualBox GPG Keys
Add repository key
#Download
curl https://www.virtualbox.org/download/oracle_vbox_2016.asc | gpg --dearmor > oracle_vbox_2016.gpg
curl https://www.virtualbox.org/download/oracle_vbox.asc | gpg --dearmor > oracle_vbox.gpg
#Install on system
sudo install -o root -g root -m 644 oracle_vbox_2016.gpg /etc/apt/trusted.gpg.d/
sudo install -o root -g root -m 644 oracle_vbox.gpg /etc/apt/trusted.gpg.d/
Step 3: Add VirtualBox 7.0 Repository
Once the system is updated and Repository key imported, you can add VirtualBox Repository to it by running the commands below:
echo "deb [arch=amd64] http://download.virtualbox.org/virtualbox/debian $(lsb_release -sc) contrib" | sudo tee /etc/apt/sources.list.d/virtualbox.list
Step 4: Install VirtualBox 7.0 & Extension pack
Finally, install VirtualBox on your Ubuntu 22.04|20.04|18.04 system by running the commands:
sudo apt update
sudo apt install linux-headers-$(uname -r) dkms
sudo apt install virtualbox-7.0
Install VirtualBox Extension Pack
Download VirtualBox Extension Pack. You can download it manually https://www.virtualbox.org/wiki/Downloads
Or with wget command line downloader
cd ~/
wget https://download.virtualbox.org/virtualbox/7.0.0/Oracle_VM_VirtualBox_Extension_Pack-7.0.0.vbox-extpack
Once the file is downloaded, install the extension pack using CLI:
sudo VBoxManage extpack install Oracle_VM_VirtualBox_Extension_Pack-*.vbox-extpack
Or by clicking on the Downloaded file.
Click install and wait for the installation to complete.
Step 5: Launch VirtualBox 7.0 on Ubuntu
Once VirtualBox is installed, you can launch it using the terminal or Desktop applications search.
From terminal, use:
$ virtualbox
The new user interface for VirtualBox interface looks like below:
You should now have the latest version of VirtualBox installed on your Ubuntu22.04|20.04|18.04 Linux system.
0 notes
Text
Trusted Platform Module 2.0 Driver Windows 10
Trusted Platform Module 2.0 Driver Download The release of the Windows 10 Anniversary Update inches closer every day, and we get more and more news about it in the meantime. According to a slide in the “Windows Security” WinHEC event (first spotted by our friends at Neowin) when the Windows 10 Anniversary Update arrives, people who aren’t. Check Whether your PC has TPM for Windows 11#TPM #Windows11Facebook: on Instagram: https://www.instagram.com/mjtube. Windows 11, Windows 10, Windows Server 2016, and Windows Server 2019 support Device Health Attestation with TPM 2.0. Support for TPM 1.2 was added beginning with Windows version 1607 (RS1). TPM 2.0 requires UEFI firmware. A computer with legacy BIOS and TPM 2.0 won't work as expected.
Trusted Platform Module 2.0 Driver Windows 10 Amd
Trusted Platform Module Windows 10 Download
Trusted Platform Module 2.0 Driver Windows 10 Dell
Trusted Platform Module 2.0 Driver Windows 10 32 Bit Download
You must have Trusted Platform Module (TPM) 2.0 to install Windows 11 – Microsoft has made it clear while launching Windows 11. Here is how you can turn on or enable TPM 2.0 in Gigabyte motherboard to install Windows 11.
TPM or Trusted Platform Module is a hardware-level security chipset that prevents various attackers from attacking on your computer. In simple terms, Microsoft opted for TPM as the Windows 11 hardware requirements to protect end-users against various firmware attacks. However, the same thing created a panic and mess among normal computer users because most of the old hardware do not have TPM 2.0. That is why you might get This PC can’t run Windows 11 while using PC Health Check app. However, there is a big chance that you already have TPM 2.0 but you are not aware of not – feeling same? Don’t worry, you are not alone. Microsoft released few documents, allowing people to know whether their processor is compatible with Windows 11 or not.
Windows 11 compatible Intel processors:
Windows 11 compatible AMD processors:
Windows 11 compatible Qualcomm processors:
If your processor is listed on the official list, you can enable TPM 2.0 using BIOS. Here is how you can check and activate TPM 2.0 in Gigabyte motherboard. However, it is possible to enable Trusted Platform Module in Asus, MSI, Intel, Biostar, etc. motherboards as well.
How to enable TPM 2.0 in Gigabyte motherboard
Follow these steps to enable TPM 2.0 in Gigabyte motherboard:
Restart your computer and press Delete button to enter BIOS
Go to the Peripherals tab.
Use the keyword’s up/down keys to select Trusted Computing option.
Expand Security Device Support and choose Enable.
Save settings and exit BIOS to enable TPM 2.0 in Gigabyte motherboard.
To get started, restart your computer and press the Delete button to enter BIOS settings. However, if your motherboard has a different key, press that designated key while restarting to open the BIOS settings.
Once the BIOS settings page is opened, go to the Peripherals tab and use your keyboard’s up/down arrow keys to select Trusted Computing option.
Keymaker bandicam 2020. Then, you can expand the Security Device Support and choose Enable from the list.
Now, save the change and exit BIOS.
To verify whether you have successfully enabled it or not, press Win+I to open Windows Settings and go to System > About.
Scroll down to the bottom and click on the BitLocker settings option.
On your left-side, you can find TPM Administration option and you have to click on it.
After that, you can find the Status as The TPM is ready for use. On the other hand, you can see the Specification Version as 2.0.
Trusted Platform Module 2.0 Driver Windows 10 Amd
Final word: Enable TPM 2.0 in Gigabyte motherboard
Enabling TPM 2.0 in Gigabyte motherboard is not that difficult and you can do it within moments. As Microsoft has made it the hardware requirement, you have to enable this functionality to install Windows 11.
Dell Drivers Download
Dell.GetParts.us is best place to get exotic and hard to find drivers for your Dell hardware. All our uploads are 100% save, tested with top antivirus software.
Trusted Platform Module Windows 10 Download
Driver File Name: dell-trusted-platform-module-20-driver.exe
Driver Upload Date: 19 June 2020
Last Driver Version: 5.3.6
Driver File Size: 19,315 KB
User Driver Rating:
Trusted Platform Module 2.0 Driver Windows 10 Dell
4.7/5
Downloaded: 68,952 times
Last Time: 22 September 2021
Comments
13-Sep-21 15:21
I’m proud of you!
17-Jul-21 09:03
Many thanks for Dell trusted platform module 2.0 :)
01-Jun-21 01:19
I’m impressed.
20-May-21 05:28
What a good try. Dell trusted platform module 2.0
28-Apr-21 06:22
perfect Dell trusted platform module 2.0 Drivers
24-Dec-20 00:20
That was first class work.
19-Dec-20 18:59
It looks like you’ve put a lot of work into this.
31-Oct-20 04:10
hey, thanks for this man. Great Site!
08-Aug-20 02:44
Tremendous!
15-Jul-20 14:45
Amazing, much love for the uploader.
11-Jun-20 20:54
excellent Dell trusted platform module 2.0 guide as always.
20-May-20 16:36
nice work
26-Mar-20 17:40
Works 100%. Thank you.
More drivers for Dell trusted platform module 2.0 driver
Trusted Platform Module 2.0 Driver Windows 10 32 Bit Download
dell-latitude-e4310-broadcom-ush-w-swipe-sensor-driverdell-1135n-scanner-driver-for-macbluetooth-driver-for-windows-81-64-bit-dell-inspirondell-725-windows-7-64-bit-printer-driver-downloadteredo-tunneling-pseudo-interface-driver-download-windows-7-delldell-dimension-2400-vista-video-driverdell-e6230-wifi-driverdell-idt-audio-driver-download-xpdell-driver-for-holding-down-two-fingersdell-away-mode-driver-for-inspiron-win-10
0 notes
Text
This PC can't run Windows 11: How to fix the problem with TPM and Secure Boot
We've found four ways to get around the Windows 11 installation error.
If you saw that your PC is not compatible with Windows 11, it may be because your system doesn't have two security settings turned on, Secure Boot and TPM 2.0. Here's how to do it.Sarah Tew/CNET
New system requirements for the recently announced Windows 11 may create a range of problems for people looking to upgrade to Microsoft's new operating system on their current PC (here's how to download Windows 11). If you've tried installing Windows 11 Insider Preview or using the now-disabled Microsoft PC Health Checker app, and were greeted with an error message reading "This PC can't run Windows 11," it may be because your system doesn't have two security settings turned on, Secure Boot and TPM 2.0. Both these features have been built into many modern computers and processing chips from Intel and AMD, and are now required for all machines running Windows 11.
If your machine is new enough to support both, enabling TPM (short for Trusted Platform Module) and Secure Boot is often quite easy. No special skills are needed, and you'll just be clicking through menus. If you've never heard the words "BIOS menu" you might feel out of your element, but don't be intimidated. With a little patience, any first-timer can do this.
Here's what you need to know. CNET WINDOWS REPORT
What are TPM and Secure Boot?
TPM microchips are small devices known as secure cryptoprocessors. Some TPMs are virtual or firmware varieties but, as a chip, a TPM is attached to your motherboard during the build and designed to enhance hardware security during computer startup. A TPM has been a mandatory piece of tech on Windows machines since 2016, so machines older than this may not have the necessary hardware or firmware. Previously, Microsoft required original equipment manufacturers of all models built to run Windows 10 to ensure that the machines were TPM 1.2-capable. TPM 2.0 is the most recent version required.
TPMs are controversial among security specialists and governments. An updated and enabled TPM is a strong preventative against firmware attacks, which have risen steadily and drawn Microsoft's attention. However, it also allows remote attestation (authorized parties can see when you make certain changes to your computer) and may restrict the kinds of software your machine is allowed to run. TPM-equipped machines generally aren't shipped in countries where western encryption is banned. China uses its state-regulated alternative, TCM. In Russia, TPM use is only allowed with permission from the government.
Secure Boot is a feature in your computer's software that controls which operating systems are allowed to be active on the machine. It's both a good and bad thing for a Windows machine. On the one hand, it can prevent certain classes of invasive malware from taking over your machine and is a core defense against ransomware.
On the other hand, it can prevent you from being able to install a second operating system on your machine, giving you two to choose from when you first start up your computer. So, if you wanted to experiment with Linux operating systems, for instance, Secure Boot could stop you. Secure Boot also plays a part in preventing Windows pirating.
TPM and Secure Boot could be the key to getting your device to run Windows 11.Microsoft
A few words of caution
Now that you know about the secure technologies you'll be using, there are a few things you should keep in mind before you dive into fixing the issue on your own.
- Microsoft confirmed there are four types of problems that might have given you a "This PC can't run Windows 11" error message if you used its PC Health Check tool (as of Monday, the tool has been temporarily disabled so Microsoft can build in more specific feedback as to why your machine is not compatible). If you were able to use the tool before it went offline and saw that you were missing the hardware or firmware necessary for Windows 11, the instructions below won't help -- you'll need to buy a new device to run the OS.
- Keep in mind that these instructions are written as broadly as possible. That's because Windows machines vary so much that it's not feasible to cover all the possible ways to enable TPM and Secure Boot across every device. For the most part, though, the process is similar enough across machines that you should be able to use the instructions as a guide and, where your computer differs, still identify the equivalent menu or label in your own system.
- If your machine is still covered by a warranty, always speak with the manufacturer first before doing anything that could potentially void it. If your machine is owned and maintained by your company or school, it may have a unique security configuration that your IT staff will need to handle. It's also a good idea to get in contact with your local PC repair shop; having a qualified professional on standby is the best way to get back on track if you get turned around or encounter roadblocks.
- Always back up your important files before making any big changes to your computer. Always. Just do it. You'll thank us later.
- If this is your first time working in a BIOS menu, stick close to the instructions and don't veer too far from the beaten path. We're on a very simple mission here, and nothing I recommend below will do any damage to your machine or data, but changing firmware settings in your BIOS menu can have a wide-ranging impact. There are few guardrails here, and you can lose a lot of important data very fast. Some mistakes can be permanent and, in most cases, there won't be any polite pop-ups gently asking whether you're sure you want to make those mistakes.
You should definitely look around, explore your options and familiarize yourself with what's under the hood, but avoid changing any settings or saving any of those changes unless you know specifically what's going to happen when you do.

New Windows 11 features include Microsoft Teams integration.Microsoft/Screenshot by Sarah Tew/CNET
Is my device capable of TPM 2.0 and Secure Boot?
If the PC Health Checker suggested that TPM isn't enabled, you should first find out whether that's an accurate diagnosis. Here's how.
1. From your desktop, press the Windows key next to the spacebar + R. This will bring up a dialog box.
2. In the text field of the box, type tpm.msc and hit Enter. This should bring up a new window labelled "TPM Management on Local Computer."
3. Click Status. If you see a message that says "The TPM is ready for use" then the PC Health Checker has misdiagnosed you, and the steps below won't help. At this point, there are several reasons you might be receiving the wrong error message from Microsoft, so your best bet is to get a professional to take a look at your machine.
If you don't see that message, and instead see "Compatible TPM cannot be found" or another message indicating the TPM may be disabled, follow the next steps.

How do I enable TPM 2.0?
You're going to need to get to your BIOS menu so you can get to your TPM switch, and there are two ways to do that. We'll cover both here. The first is for much newer PCs, the second method for those a few years older. Regardless of which you choose, though, you're going to need to restart your machine. So save any work and close any open windows or programs before proceeding.
From Windows 10's Start menu
If you have a newer machine running Windows 10, your boot time may be too fast for you to try the traditional method of hitting a particular key to get to your BIOS menu before Windows can fully load. Here's how to get to it from inside your normal desktop.

Brett Pearce/CNET
1. Start your computer normally and open the Start menu by clicking on that Windows button on the far left bottom of your screen. Click on the gear-shaped Settings icon on the left side of the menu.
2. Within the Settings window that appears, click Update & Security. On the left-side pane that appears, click Recovery. Under the Advanced startup header, click Restart now.
Your computer will immediately restart, and instead of restarting and bringing you to your normal desktop screen, you'll be brought to a blue screen with a few options.
3. Click Troubleshoot, followed by Advanced options, followed by UEFI Firmware Settings.
Your device will restart again.
From here, go to Step 2 in the section below and follow the remaining steps.
From start-up
You're going to need to move very quickly for Step 1. You'll only have a few seconds to get into the BIOS before your operating system loads. If you miss your window, no harm done, you'll just have to restart the computer and try again. After Step 1, though, feel free to take your sweet time.
1. Restart your computer, and as it's booting up you should see a message telling you to press a certain key to enter the BIOS, whether it uses that word or another. On most Dells, for instance, you should see "Press F2 to enter Setup." Other messages might be "Setup = Del" (meaning Delete) or "System Configuration: F2." Press whatever key the prompt tells you to and enter the Setup menu.
Depending on what kind of computer you have, a different key may be needed to enter your Setup menu. It could be F1, F8, F10, F11, Delete or another key. If there's no message on the screen with instructions, the general rule is to hit the key when you see the manufacturer's logo but before Windows loads. To find out which key will get you in, search online for your laptop's make and model along with the phrase "BIOS key."
2. In the BIOS or UEFI menu, there should be at least one option or tab labelled Security. Using your keyboard, navigate to it and hit Enter. On some systems, you might need to use the + key to expand a submenu instead.
3. Once you're inside the Security section, you're going to be looking for the TPM settings. This might be clearly labeled "TPM Device," "TPM Security" or some variation. On Intel machines, it will sometimes be labeled "PTT" or "Intel Trusted Platform Technology." It might also appear as "AMD fTPM Switch."
Warning: Stay alert here. Within most TPM settings menus, you generally have an option to clear your TPM, update it or restore it to factory default. Do not do that right now. Clearing the TPM will cause you to lose all data encrypted by the TPM and all keys to the encryption. This action can not be undone or reversed.
4. From inside the TPM settings menu, you're on one mission only: Find the switch that turns on the TPM. You're not touching anything else. Look through the options inside this menu for one that shows some form of toggle or switch beside the word "Enable" or "Unavailable" or even just "Off." Use your arrow keys to flip that toggle or switch.
5. Once you've kicked on the TPM, look around the screen for Save. Once you've saved this setting, restart the computer.

Microsoft
How do I enable Secure Boot?
You'll save yourself a headache if you keep one thing in mind about enabling Secure Boot. Sometimes after you enable Secure Boot on a machine that's running software incompatible with Secure Boot, the machine will refuse to load Windows properly on restart. If that happens, don't panic. You didn't break anything.
No matter which method you've used to get to the boot menu to begin with -- either via Windows 10's Start menu, or by the traditional method of hitting a specific key during start-up -- you can still use the traditional method to get back to the boot menu and disable Secure Boot again.
From Windows 10's Start menu
Follow the steps above to access the UEFI Firmware Settings.
1. Once you're in the UEFI, you're going to be looking for the Secure Boot setting. There are a few possible places this could be -- check under any tabs labelled Boot, Security or Authentication.
2. Once you've checked the tabs and found the Secure Boot setting, toggle the switch beside it to turn it on or enable it.
3. Find your Save feature and, after you've saved your changes and exited the menu, your computer should reboot and bring you back to a normal Windows desktop.
There are some PCs on which you may not be able to readily find the Secure Boot setting. Some computers will load Secure Boot keys under a Custom tab. Some computers won't allow you to enable Secure Boot until certain factory settings are restored. If you're unable to access Secure Boot, or get roadblocked here, it's best to get help from a professional rather than take chances.
From start-up
If you're not working with UEFI, then you should be able to just enable Secure Boot in BIOS.
1. Just as you did when enabling your TPM, hit F2 (or whichever key your manufacturer specifies) as your computer is booting up and enter the BIOS menu.
2. Go to the tab or option that says BIOS Setup, and then select Advanced.
3. Next, select Boot Options and a list of them should appear.
4. In that list, find Secure Boot. Enable it.
5. Hit Save, exit the menu system, and restart your computer if it does not restart automatically.
What if I don't have a TPM chip?
As noted by CNET sister publication ZDNet back in 2017, motherboard manufacturers sometimes skimp on installing the actual TPM chip and instead send the boards out with only the part that allows the chip to connect to the board. If you find out that you were shorted on your TPM chip when you bought your PC, and you don't have a virtual or firmware TPM version, you still have a few options.
Your first option is to try to return your machine via your manufacturer warranty. That is, of course, assuming your machine's manufacturer is willing to install the chip it already sold you, or replace your model with one that has a chip. Your second, and most expensive, option is to simply buy a newer machine after verifying that it does, indeed, have an actual TPM 2.0-capable chip.
If your warranty is already voided, your third option -- less expensive, but perhaps more difficult -- is to buy a whole new motherboard with a TPM 2.0 chip installed, then either swap out the boards yourself or have your local aftermarket repair shop handle the job. Be warned, however, that the ongoing global chip shortage has squeezed the world's supply of motherboards, making them more difficult to find and pushing prices to upward of $300 to $400 dollars for some brands. That's another place your local repair shop may be able to help.
Finally, either you or your repair shop can try your fourth option: hunting down a TPM chip with the right specifications for your motherboard and installing it. Depending on the type you go with and where you get it from, a TPM 2.0-capable chip can run you anywhere from $70 up. Luckily, the basic structures of the boards and chips are similar enough that -- if you'd like to get your hands dirty under the hood -- it's possible to install a TPM chip yourself. ZDNet has step-by-step instructions (with a helpful gallery of pictures to guide you).
Whichever route you go, we strongly advise you to first consult either your manufacturer or a device repair specialist before you try to take apart your machine. Spending a few moments with a knowledgeable professional could be all it takes to turn your upgrade nightmare into a quick fix, and spare you excessive replacement costs.
For more, check out how to download Windows 11, and the best new Windows 11 features and how to use them.
Original article written by: Rae Hodge | CNET
Read the full article
0 notes
Last Seen Blogs

peufille
Emmy

top3nhacai
Top 3 nhà cái uy tín Đông Nam Á

richardhdent
All Things Myopia

dat-silvers-girl
We stan Rakepick here

olssonstudios
Olsson