#twine tutorial
Text
youtube
hey friends! here's my first video tutorial on using twine, it covers what passages are, links, the <<set>> and <<if>> macros.
I hope you enjoy!
253 notes
·
View notes
Text
Using Git for Twine Games
A while back, I somehow managed to copy the contents of one file and overwrite a different file, meaning the entire section of the map was lost for good. I had to reconstruct it from snippets of prose written in separate documents. It sucked. And that motivated me to try something that would stop that problem from ever happening- hosting my project on GitHub!
Git sounds really fancy and hard to understand, but it's really not! So I'm going to walk you through how to use it to back up your files and do much, much more.
This tutorial expects you to have an already set up Tweego folder and VSCode. If you don't know how to get that started, @manonamora-if has an excellent ready-to-use folder with an explanation of how to use it.
What is Git?
In short, git is a kind of version control. Say you're working on a coding project with somebody else, and you need to work on the same file they were working on. But how do you know you're working on the right version of that file? Maybe they forgot to send you the newest version. Or maybe you both have to make changes at the same time. It would take a lot of effort to manually splice together everybody's changes, let alone identify what each of you had changed. That's what git's job is. Git identifies what has changed about a file, notes those changes, and updates the "main" files to match. That way, everything stays consistent, and big files can be updated easily.
Okay, but what benefit does git provide to you, somebody who's just working on a solo project with very little code? Well for one, it would have completely fixed my problem. Instead of overwriting all of my work, git would have shown me that the file had been changed. Then, I could simply click a button to revert the change. Neat! It also means you can keep working on the same project from multiple locations without losing progress. Say you're working on your game on your home computer, but then you want to keep working on your school laptop. All you'd have to do is "push" your changes to save them to your master file, and then "pull" the changes when you get to school. Neat
The Basics of Git
Okay, but what does "push" and "pull" mean? Git's confusing, but the basic terms you'll be encountering don't have to be! Here's some terminology:
Git - This is the program that goes on your computer to manage your files. It does all of the version control.
GitHub/GitLab/BitBucket - These provide servers you can host your git repositories on.
Repositories - This is a fancy word for a folder that's being maintained by git. Every file in a repository is getting analyzed by git for changes.
Local vs Remote - Your local repository is the one hosted on your computer, and it's the one you're editing. The remote one is the one hosted on a site like GitHub.
Stage - When you stage a file, you're getting it ready to commit it.
Commit - A commit is like saving your progress as a new update. You can go back to a commit later if you messed something up.
Push - When you "push" your commits, git will look at your changes, go into the remote repository, and individually change all of those things in the "main" branch.
Pull - Just like pushing, when you pull, you're taking changes from the remote repository and updating your local one to match it.
Under the cut, I'll show you full step-by-step (with photos!) of how to set up your game with GitHub using VSCode!
Setting Up Git With VSCode
Lucky for you, VSCode has built in integration with GitHub, which means you don't have to download any new programs other than git itself. You'll just have to set it up. A note- I'm not sure at what point exactly in this process VSCode prompts you to install git, because I'm not going to install it on another computer just for this tutorial haha. VSCode will provide the installation, just go along with the default settings and you'll be fine.
So first, make a Github account. It's free!
Now, open VSCode. Here's our project! You're going to want to click on that third button down in the side menu, the Source Control tab.

Under source control, you'll see this option. Click it.


Aaaaand it's done! That was easy, right? Now your folder is a git repository. Crazy!
Before you can put all of this up in GitHub, you'll need to push all of your files. Type a brief message (try "Initializing" to feel like a real cool coder), press commit, and VSCode will ask if you want to skip staging and just commit everything. Yes! Yes you do!
Now that all of your "changes" have been committed, let's publish your new repository to GitHub. Click on the new button that says "publish branch." When the popup appears, click "Allow" to give VSCode access to your GitHub account and sign in. Back in VSCode, you'll see this:

You're probably going to want it to be private, otherwise anyone on the internet could see all of your writing! Which is cool if it's a public coding project that people might want to download and use for their own projects, but if you're not a fan of code diving, leave it private.
Using Git To Help You Write
Now that you've got your folder set up as a git repository, it'll change the way VSCode looks. VSCode is using git's info to know where you've made changes, and it'll represent those changes in the UI. Here's what those look like:

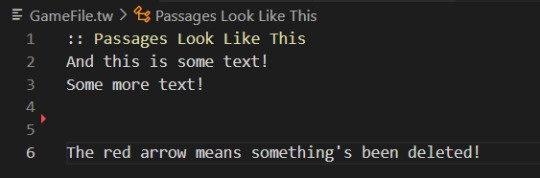
If you click on those lines, you'll get to see this fancy new panel that highlights all of your changes:

So let's say we have a scene, and we aren't happy with how it's looking, but we aren't sure if we want to make one change or a different change. Instead of backing up all of your stuff or copy and pasting it to test it, you can just make whatever change you want and click that backwards facing arrow to revert it back if you aren't happy with it. You can do the same for things like CSS- when you've made some good progress and want to save your changes, commit them. Then any more changes you make will be easy to revert back if they don't look right. Groovy!
Now that everything's set up, it's as easy as committing your changes when you're satisfied with them and pushing those commits to back up your work.
Pat yourself on the back! You just learned (the very basics of) how to use git! You absolute genius!
If you have any questions while following this tutorial, feel free to ask! My askbox is always open!
#code help#twine tutorial#please don't ask me actual serious questions about git... i'm still a beginner lol#seriously though. use git!!!!! it's so useful
126 notes
·
View notes
Text
Sugarcube, flat stats and setter links
As I spent an unspecified time trying to figure it out, maybe it will spare someone the trouble or build towards intuition for how stats work. Or maybe this is bait to see if anyone knows a better solution 😏
First of all, flat stats vs fairmath stats. Fairmath stat accumulation is designed to represent stat gain as inversely relative: the higher your stat value, the smaller your absolute gain would be expressed by the same relative number. E.g. 10% gain at 90 is different from 10% at 15. A bonus (and very important) effect of this is that the stat value increased or decreased via fairmath will never fall below 0 or rise above 100, doing all the stat clamping for you.
Fairmath is easy to test and observe in ChoiceScript, where you can run thousands of tests automatically. You cannot do that in Twine. This is my primary motivation for going with flatmath for my SugarCube project. Which means that someone has to handle clamping, as a gain of 10 at stat value 95 will set the value above 100.
The frequent code for handling that is during change:
<<set $stat to Math.clamp($stat + 5, 0, 100)>>
which, in this example, increases variable $stat by 5 and makes sure the result is not smaller than 0 and not greater than 100: clamping.
My problem with it is how much code repetition is there and how incredibly copy paste error prone this is. You will no doubt be copy pasting this code all over your game files and will need to make sure you are replacing the variable name twice each time, lest one variable will end up with the value of another in an oversight that is way too easy to miss. Ideally we want to specify not only the name of the variable, but also our bounds (0 and 100 respectively) only once.
There are two answers to this problem: widgets and JavaScript. A widget for this is one and done, but it is more fuss to integrate it into code, I found. In the JS solution you would need to figure out a function that works for your variable storage schema.
Let's cover the widget solution first:
<<widget "modify">>
<<print '<<set ' + $args[0] + ' to Math.clamp(' + $args[0] + ' + ' + $args[1] + ', 0, 100)>>'>>
<</widget>>
Not only will the above check that each resulting value is within the [0; 100] range, it accepts the variable name as a parameter, meaning it will work for any stat (though you would need to pass the variable name as a String) and for subtraction too:
<<modify "$stat" -18>>
Now to problems. For my links between passages in the format for Twine I use, SugarCube, I strongly prefer the structure of setters:
[[Link text|NextPassageName][stat modifications]]
Calling a widget is not possible inside a setter link though. You would either need to do that in the next passage, which is inconvenient if you do not need that passage for anything else, or to marry two syntaxes in this unholy matrimony:
<<link [[Link text|NextPassageName]]>>
<<set $otherstat to "wowza">>
<<modify "$stat" -18>>
<</link>>
And this is just one link/option.
Now, for the price of extra JS code you can avoid all this. Depending on how you store your game variables, flat or in objects, you can employ tricks to save you time and code lines.
window.modifyStatA = function(value) {
State.variables.StatA = Math.clamp(State.variables.StatA + value, 0, 100);
}
This anywhere in your custom JS file for the game will allow to do the following:
[[Link text|NextPassageName][modifyStatA(-18), $otherstat to "wowza"]]
and will change the value of $StatA by subtracting 18 upon clicking that link/option.
You can also do the following:
window.modifyStat = function(statName, value) {
State.variables[statName] = Math.clamp(State.variables[statName] + value, 0, 100);
}
which creates a more generic function:
[[Link text|NextPassageName][modifyStat("StatA", -18), $otherstat to "wowza"]]
As you can see, this is suitable for flat stat storage (which I personally do not do). I suppose for the nested stats you could specify the object names as inputs in their order of hierarchy and access them so for a generic function, but I am not sure yet how to do that for a variable number of levels, e.g. Parent.StatGroup.statA vs Parent.statB
I believe this is geared to the very specific way I personally structure my passages and links, so I am ready to be proven wrong 😅
Cheers!
#twine#sugarcube#twine tutorial#I realized the generic JS function solution as I was typing this so for this alone it was a very useful exercise lmao#I feel like there should be a way to modify the prototype of the JS object but everything I tried led to an error
17 notes
·
View notes
Note
Heyyy! I have a twine sugarcube coding question and I have no eloquent way of asking it so here it is: I want the user to be able to click on a word and a description pops out from underneath and then I want them to be able to re-click that same word and the description is hidden again. sos pls do you know how :) is what im asking even a thing
Hey Veirse!
That's totes possible. And there different ways of going at it (depending on what you want to do with your page, and how far you want the description to appear).
As always, the code below can be found on my PasteBin account.
How To Toggle a Description!
Chapel's Message Macro
The MVP of SugarCube custom macros has something to help: the << message >> macro. It allows you to toggle a part of text by clicking on a link. Click once, it appears. Another time and it disappear. It's pretty much the << linkappend >> macro, but you can hide the text again.
You just need to add the Macro code to the JavaScript, and use the macro as such:
<<message "Clickable Text">>
Description Text/Message to appear
<</message>>
Note: by adding btn after the "Clickable Text", the links become a button instead.
This method is nice if you want the text to appear just below the link. If you want a working example, check the Drawers section in Scene 1 of CRWL.
CyCy's Liveupdate Fix
Technically, not specific to your case, but still works. I've used it for the toggable menu of Exquisite Cadaver (which uses the Simple Book Template). This method is similar to Chapel's macro, but the toggled text doesn't have to be just below the link.
You can find CyCy's Liveupdate Custom Macro here, just need to add that to your JavaScript. Then it is just a matter of creating a link and some conditions:
<<link "Clickable Text">>
<<if not $trigger>>
<<set $trigger to true>>
<<else>>
<<set $trigger to false>>
<</if>>
<<update>>
<</link>>
<<liveblock>>
<<if $trigger>>Description Text/Hidden Message<</if>>
<</liveblock>>
Note: if you have multiple << liveblock >> on the page, the << update >> macro will trigger them all.
Maliface's On/Trigger Macro
Works like Cycy's but you can target one block rather than all of them. You can find the JavaScript code here, and the manual there. And it goes something like this:
<<link "Clickable Text">>
<<if not $trigger>>
<<set $trigger to true>>
<<else>>
<<set $trigger to false>>
<</if>>
<<trigger 'blockname'>>
<</link>>
<<on 'blockname'>>
<<if $trigger>> Description Text/Hidden Message<</if>>
<</on>>
Note: Chapel's Event Macro uses the same macro name. These two macros cannot be used together, unless the name of one of them is modified in the JavaScritpt (Macroadd line)
Span, Link and Replace
And finally, if you want to go OG Sugarcube Code, here's the thing: using the << replace >> macro. It's essentially Maliface's On/Trigger Macro, but with the Base SugarCube Macros.
I have used this option in TTATEH (asking questions) and La Petite Mort (doing actions).
You will need: a span (div works too) with a defined ID/Class, a link, a conditional statement and the replace macro.
<<link "Clickable Text">>
<<if not $trigger>>
<<set $trigger to true>>
<<replace "#target" t8n>>Description Text/Hidden Message<</replace>>
<<else>>
<<set $trigger to false>>
<<replace "#target" t8n>><</replace>>
<</if>>
<</link>>
<span id="target"></span>
Notes: the t8n adds a transition effect to make the new block appear. If you want to target a class instead of an idea, change the # into a . and the id into class.
Overall Notes: for all options, aside from Chapel's, you can use a temporary variable (_var) instead of a permanent one ($var).
52 notes
·
View notes
Note
hi!!! sorry to bother but i was wondering how you did the interactable buttons in the middle of the passages? for example, choosing your hair and eye colour in the beginning of the game!
those are called <<cycle>> choices, and are one of my favorite things about using Twine versus choicescript
you set it to a specific variable and list out your options, and then whenever you click on the word it cycles through them and automatically saves whichever result you've picked when you go to the next passage
so if you were using it for something like eye color it would be like:
Your eyes are <<cycle "$eyecolor" autoselect>>
<<option "blue">>
<<option "brown">>
<<option "green">>
<</cycle>>
so clicking on the cycle twice would set the $eyecolor variable to "green"
you can also use a second set of quotes inside the <<option>> tags to change the flavor text. so changing up that above example a little:
You have <<cycle "$eyecolor" autoselect>>
<<option "blue" "blue eyes">>
<<option "brown" "brown eyes">>
<<option "green" "green eyes">>
<</cycle>>
with that, the sentence reads "You have blue eyes" but the $eyecolor variable would only be set to "blue"
@idrellegames does a wonderful job of explaining it in this tutorial here and goes into a lot more detail about the different uses for it, I highly recommend checking it out! I've learned a lot about coding from their tutorials
#code stuff#idrelle is a lovely person and an incredibly talented writer and game dev#if you're interested in learning twine I strongly suggest perusing her tutorials they're a lifesaver
134 notes
·
View notes
Note
So Im a complete newbie to twine and i was wondering how could a i add like a stats value that adds and subtracts depending on an option you pick but all make it appear in the sidebar. Try to explain it like your talking to a kindergartener lol.
Hi! Unfortunately I am not answering coding questions any more. You can check my list of guides here, which have all the tutorials I have written over the past couple of years. These two guides may help:
Basic stat coding
Adding elements to the default SugarCube sidebar
#folks please remember that I am not making tutorials anymore#if I haven't written a tutorial on the subject then your ask will be deleted#coding in twine#answered
37 notes
·
View notes
Text
honestly my biggest hurdle when it comes to gamedev nowadays is sticking to a single engine. i know bits and pieces of godot, unity, renpy, twine and even godsforsaken unreal, but do i know enough to make good stuff in any of them? no
#godot is fun to use but it has the same problem as other general purpose engines like unity or unreal: most tutorials and resources online+#are not targeted to vn/if devs so usually you are left scrambling#or having to pay $80-100 for a bunch of plugins#nvm unitys naninovel is like $135#which is a goddamn arm and a leg when you are in the global south#i really like renpy but going beyond the standard vn there is so freaking painful#and twine is.... twine. i guess.#vndev#gamedev#ren.txt
19 notes
·
View notes
Text
@nyehilism replied to your post “Hey okay so like Twine authors, let's...”:
SORRY I came in real hot there rant over<3
See mine is a vertical issue !! Like why is HALF my screen task bar I don't USE the task bar !! and like...I get it was a huge jump but all my problems with it were problems that were posted day ONE on the forums. No space on screen, tutorials always toggled on, huge task bar to perform tasks that can easily be typed (kind of grouped into the "tutorial is always on" thing). I also find sometimes that the search and replace feature....doesn't work? I can't really like consistently find what's breaking it but something's breaking it.
#nyehilism#talkForge#and like I don't find that Twine itself is super good at tutorials in the first place so like there's a tutorial that's confusing new users#and annoying old users.....bruh I just want space#working on my laptop is IMPOSSIBLE two passages open to cross reference WHO
5 notes
·
View notes
Video
youtube
Rosary Army's original instructions for making an all-twine knotted Rosary using 20-feet of nylon twine and a metal Crucifix. Make Them. Pray Them. Give Them Away. Visit www.RosaryArmy.com to get a free Rosary and printed instructions to start making your own to GIVE AWAY.
#catholic#rosary#knotted twine rosary#rosary army#i know nothing about these people#just looking for a tutorial
2 notes
·
View notes
Text
DIY Diamond Macrame Wall Hanging
DIY Diamond Macrame Wall Hanging

View On WordPress
#Boho Coaster#Boho Decor#Coaster DIY#Coaster tutorial#decor DIY#Decor Tutorial#DIY Boho#DIY Boho Coaster#DIY Boho Decor#DIY Coaster#DIY Coasters#DIY craft#DIY decor#DIY Macrame#How to macrame#How to make coasters#macrame#Macrame and Twine Coasters#Macrame How to#Twine Coasters
2 notes
·
View notes
Note
For those of us who are new to twine/find it daunting. What would be the easiest way to set side character genders? I know if statements will likely come into play I just find it so daunting. Any information would be helpful.
hi friend! apologies this took me several months to answer--askbox was on lockdown for a little bit, hope you're still curious.
i'm actually in the process of writing/scripting a couple new videos that I'm going to post next week (because a year later I don't really like how the old video looks) so--if it's easier, I'll cover it in video form for visual/audio learners there--but for now--this is what I'll say.
the best way to set genders for any character is to use variables, this is true across all different languages of twine, but i'm most familiar with sugarcube twine.
for example, in my game, larkin, i have two characters Ace and Hollis that the player can select the gender/pronouns of in the beginning of the game.
setting their genders is something as simple as creating links with <<set>> macros in them. you can do that a couple of ways. my favorite way is the bracket method, but I know there is like, annoying discourse in the coding community (because what other kind of coding discourse is there, if not annoying) over which method is better--so I'll show you both.
say I wanted to set Ace's gender at the beginning of the game. I'm going to first go into my StoryInit passage in twine--you won't have this when you first open your twine game, so you'll have to create it--by simply creating a new passage and labeling it 'StoryInit' exactly as written there, with the capital 'S' and the capital 'I' no spaces.
from there you're going to create a gender variable to keep track of your character's gender throughout the game. because ace's name starts with an 'a' i'm going to simply call my variable '$agender' it is important that a '$' or a dollar sign proceeds the title of your variable--in order for the game to keep track of the variables value throughout the game.
so basically, in StoryInit I'm going to create a set statement--this is done by typing out the following:
<<set $agender to "male">>
right now, i've set ace's gender to male. this doesn't really mean anything--I'm just using male as a default for right now--you can make it anything you want really, female, non-binary, or even just 'null' for the moment. but know that whatever you set their gender to now, if you type out $agender for it to print in the text of your game, it's going to say "male" or whatever else you've set their gender to.
this isn't really a necessary step but I've found that giving my variables some sort of value before I really set them has always helped me keep organized, and allow the game to run a little smoother.
now onto setting their genders.
if I want to give the player an option to select their gender choosing from the options male/female/non-binary, I'm going to set up my links either like this:
[[set ace's gender to male | 2.0][$agender to "male"]]
[[set ace's gender to female | 2.0][$agender to "female"]]
[[set ace's gender to non-binary | 2.0][$agender to "non-binary"]]
or like this:
<<link "set ace's gender to male" "2.0">><<set $agender to "male">><</link>>
<<link "set ace's gender to female" "2.0">><<set $agender to "female">><</link>>
<<link "set ace's gender to non-binary" "2.0">><<set $agender to "non-binary">><</link>>
both of these essentially accomplish the same thing: they create three links, all that lead to a passage entitled '2.0' and depending on the link selected, they set the gender of Ace to either male, female or non-binary.
To go a little deeper into explanation:
[[set ace's gender to male | 2.0][$agender to "male"]]
<<;link "set ace's gender to male" "2.0">><<set $agender to "male">><</link>
the pink text is what the player will see in the text of the game, the blue text is the destination to which the passage is taking you, and the yellow text is the value that's being set. the purple, for context is just coding language that's necessary for the links in that format to function.
with that, you could have a sentence structured like this in the passage labeled '2.0' to demonstrate which gender you've selected for ace's character.
'Ace identifies as $agender'
$agender in this case will print with whatever you've selected for their gender.
as for pronouns, that's a simple as setting multiple variables in one link. in this case, I do find the <<link>> method much easier, as it's a lot less complicated to set multiple variables with this one--((to be strictly honest with you, i haven't found a good way to do that with the bracket method))
say you want a male identifiying ace to go by he/him pronouns and a non-binary Ace to go by they/them--all you have to do is make links that look like this:
<<link "set ace gender to male" "2.0">><<set $agender to "male">><<set $a_he to "he">><<set $a_him to "him">><</link>>
<<link "set ace gender to non-binary" "2.0">><<set $agender to "non-binary">><<set $a_he to "they">><<set $a_him to "them">><</link>>
in this example I've got variables for each time I'd use the subject and possessive adjective pronouns for ace--again, he/him in the variable name are just because it's the simplest convention for me to remember--you can name your variables whatever you like. you can also add more variables for the different types of pronouns (ex. he/him/himself/his)
you can do a lot more with this, of course, setting multiple pronouns for the characters, for example would be something as simple as creating a variable like $secondarya_he so that your character could sometimes go by "he" and sometimes by "they" -- it's really up to what you want to do with your characters. also i should note, you could also create like separate links for pronouns and gender ((as gender doesn't automatically define your pronouns in the Real World))
as for how they present in the game, it's as simple as typing out the variable and including it in your text.
for example if I have this in my text, and Ace's gender is set to nonbinary it'd look like this on my end:
Ace was over there, $a_he sat at $a_his desk.
would come out looking like this in game:
Ace was over there, they sat at their desk.
now of course, this can sometimes be tricky with grammar, because there's going to be different cases in english where you'd use one word to proceed or follow he or she but a different word to proceed/follow they--this is a simple fix too--just use if statements.
if I wanted to say 'he was doing something' for the male version of ace, but I wanted to say, 'they were doing something' for the non-binary version--I'd simply set it up like this:
$a_he <<if $a_he is "he" or $a_he is "she">>was<<elseif $a_he is "they">>were<</if>> doing something.
and my text would be fixed according to the different pronouns!
all that said, I hope this helped--and if you or anyone else has any coding questions feel free to send them here--plus look out for the video component of this lesson coming next week.
44 notes
·
View notes
Text
How to Keep Your Twine Project Safe
It is a tale as old as time. The app crashes, your cache is cleared, your laptop breaks, and hours or days or weeks of work is lost. It's a terrible experience, and you never think about what to do in that situation until it happens to you- and by that time, it's already too late. So here's your prompt to get ahead of things and keep your project protected before something goes wrong.
So here, I'll be going over some layers of security you can use...
1. NEVER use the web app
I know this one's gonna be controversial. I know, a lot of people use the web app! It exists for a reason! But if you do, you're leaving your work very vulnerable.
When you use a local installation of Twine, your files are being saved to local storage. That means that everything is saved on your hardware, and with the exception of a freak event, it's not going anywhere. Don't get me wrong, those freak events aren't rare enough to dismiss (we'll talk about that later), but it's not quite as bad as the web app.
Instead of saving your files locally, the web app saves your progress to your browser's cache- the same thing that saves your cookies and keeps you logged in on websites. If your cache is cleared for any reason, your games will be gone.
2. Write your documents in a separate program
Chances are, if you're using Twine, there's a lot of stuff you can do outside of Twine before moving it into the program itself. A common practice is to write prose in a separate program, and then move it all into Twine when you're finished and write the code in Twine. This is a great way to back up your work, because if Twine has an error, you'll still have all the source files to reconstruct what you had before.
I'd recommend trying to use a stable program to write in. That means something that saves locally and doesn't frequently crash. In other words, do not use Google Docs. Instead of Docs, try one of these:
Microsoft Word (expensive, subscription, but stable)
LibreOffice (free, stable)
Scrivener (one time purchase, stable)
3. Back EVERYTHING up
I can not stress this enough. Back up your damn work. Back it up in multiple places if possible.
"Oh, but I'm using Google Docs, it's already backed up!" NO. No it is not. To keep your work truly safe, you need multiple copies hosted on multiple pieces of hardware. If one of those is a Google server, great! But if it's just one, that means that one single failure in that hardware (or the software associated) will mean everything is lost.
You can back up your files from the Twine program by going under the Build tab and selecting Publish to File or Export as Twee. Saving that to your device is already better than having it saved by the Twine app, but you'll be even safer if you back that file up to an external hard drive (or just a cheap USB drive) and a cloud hosting service like Dropbox or Google Drive. To make it extra safe and minimize lost progress, make sure you replace these files regularly.
That seems like a lot of work though, right? Yeah. So here's my final piece of advice...
4. Use Git
Git is how I've been backing up my latest project, Signal Hill. It's intimidating at first, but there are simple and easy ways to use platforms like Github to keep your work safe and fix big errors. To teach you how, I've created a whole separate tutorial, which you can find here.
#twine tutorial#well... not a tutorial so much s just a reminder lol#but hopefully somebody will see this and back up their work before the twine web app crashes on them lol
84 notes
·
View notes
Text
🎮 HEY I WANNA MAKE A GAME! 🎮
Yeah I getcha. I was once like you. Pure and naive. Great news. I AM STILL PURE AND NAIVE, GAME DEV IS FUN! But where to start?
To start, here are a couple of entry level softwares you can use! source: I just made a game called In Stars and Time and people are asking me how to start making vidy gaems. Now, without further ado:
SOFTWARES AND ENGINES FOR PEOPLE WHO DON'T KNOW HOW TO CODE!!!
Ren'py (and also a link to it if you click here do it):
THE visual novel software. Comic artists, look no further
✨Pros: It's free! It's simple! It has great documentation! It has a bunch of plugins and UI stuff and assets for you to buy! It can be used even if you have LITERALLY no programming experience! (You'll just need to read the doc a bunch) You can also port your game to a BUNCH of consoles!
✨Cons: None really <3
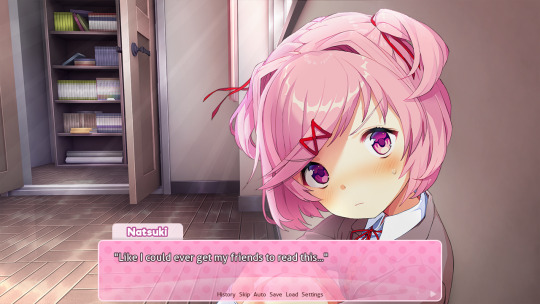
Some games to look at: Doki Doki Literature Club, Bad End Theater, Butterfly Soup
Twine:
Great for text-based games! GREAT FOR WRITERS WHO DONT WANNA DRAW!!!!!!!!! (but you can draw if you want)
✨Pros: It's free! It's simple! It's versatile! It has great documentation! It can be used even if you have LITERALLY no programming experience! (You'll just need to read the doc a bunch)
✨Cons: You can add pictures, but it's a pain.
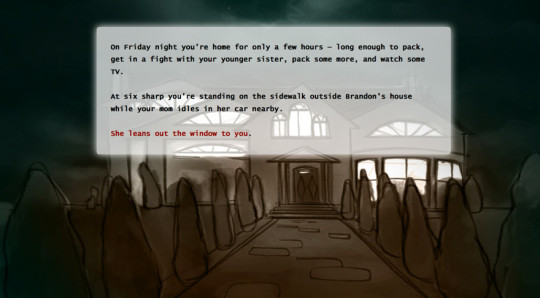
Some games to look at: The Uncle Who Works For Nintendo, Queers In love At The End of The World, Escape Velocity

Bitsy:
Little topdown games!
✨Pros: It's free! It's simple! It's (somewhat) intuitive! It has great documentation! It can be used even if you have LITERALLY no programming experience! You can make everything in it, from text to sprites to code! Those games sure are small!
✨Cons: Those games sure are small. This is to make THE simplest game. Barely any animation for your sprites, can barely fit a line of text in there. But honestly, the restrictions are refreshing!
Some games to look at: honestly I haven't played that many bitsy games because i am a fake gamer. The picture above is from Under A Star Called Sun though and that looks so pretty
RPGMaker:
To make RPGs! LIKE ME!!!!!
NOTE: I recommend getting the latest version if you can, but all have their pros and cons. You can get a better idea by looking at this post.
✨Pros: Literally everything you need to make an RPG. Has a tutorial inside the software itself that will teach you the basics. Pretty simple to understand, even if you have no coding experience! Also I made a post helping you out with RPGMaker right here!
✨Cons: Some stuff can be hard to figure out. Also, the latest version is expensive. Get it on sale!
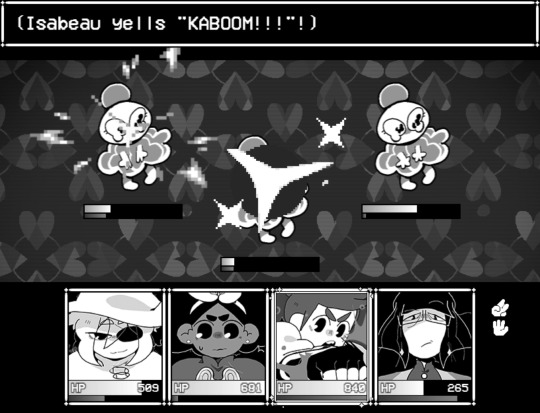
Some games to look at: Yume Nikki, Hylics, In Stars and Time (hehe. I made it)
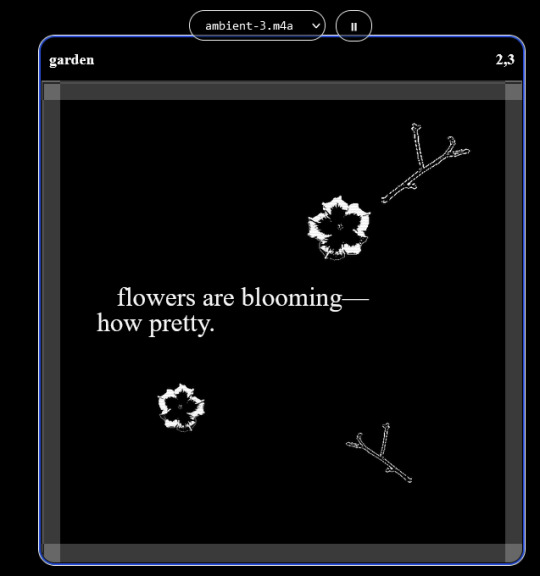
engine.lol:
collage worlds! it is relatively new so I don't know much about it, but it seems fascinating. picture is from Garden!
NOTE: There's a bunch of smaller engines to find out there. Just yesterday I found out there's an Idle Game Maker made by the Cookie Clicker creator. Isn't life wonderful?
✨more advice under the cut. this is Long ok✨
ENGINES I KNOW NOTHING ABOUT AND THEY SEEM HARD BUT ALSO GIVE IT A TRY I GUESS!!!! :
Unity and Unreal: I don't know anything about those! That looks hard to learn! But indie devs use them! It seems expensive! Follow your dreams though! Don't ask me how!
GameMaker: Wuh I just don't know anything about it either! I just know it's now free if your game is non-commercial (aka, you're not selling it), and Undertale was made on it! It seems good! You probably need some coding experience though!!!
Godot: Man I know even less about this one. Heard good things though!
BUNCHA RANDOM ADVICE!!!!
-Make something small first! Try making simple: a character is in a room, and exits the room. The character can look around, decide to take an item with them, can leave, and maybe the door is locked and you have to find the key. Figuring out how to code something like that, whether it is as a fully text-based game or as an RPGMaker map, should be a good start to figure out how your software of choice works!
-After that, if you have an idea, try first to make the simplest version of that idea. For my timeloop RPG, my simplest version was two rooms: first room you can walk in, second room with the King, where a cutscene automatically plays and the battle starts, you immediately die, and loop back to the first room, with the text from this point on reflecting this change. I think I also added a loop counter. This helped me figure out the most important thing: Can This Game Be Made? After that, the rest is just fun stuff.
So if you want to make a dating sim, try and figure out how to add choices, and how to have affection points go up and down depending on your choices! If you want to make a platformer, figure out how to make your character move and jump and how to create a simple level! If you just want to make a kinetic visual novel with no choices, figure out how to add text, and how to add portraits! You'll be surprised at how powerful you'll feel after having figured even those simple things out.
-If you have a programming problem or just get confused, never underestimate the power of asking Google! You most likely won't be the only person asking this question, and you will learn some useful tips! If you are powerful enough, you can even… Ask people??? On forums??? Not me though.
-Yeah I know you probably want to make Your Big Idea RIGHT NOW but please. Make a smaller prototype first. You need to get that experience. Trust me.
-If you are not a womanthing of many skills like me, you might realize you need help. Maybe you need an artist, or a programmer. So! Game jams on itch.io are a great way to get to work and meet other game devs that have different strengths! Or ask around! Maybe your artist friend secretly always wanted to draw for a game. Ask! Collaborate! Have fun!!!
I hope that was useful! If it was. Maybe. You'd like to buy me a coffee. Or maybe you could check out my comics and games. Or just my new critically acclaimed game In Stars and Time. If you want. Ok bye
#reference#gamedev#indie dev#game dev#tutorial#video game#ACTUAL GAME DEVS DO NOT INTERACT!!!1!!!!!#this is for people who are afraid of coding. do not come at me and say 'actually godot is easy if you just--' I JUST WILL NOT.#long post
27K notes
·
View notes
Note
Twine support please Super Manon🙏
How do I make the title at the top of the chapter flicker?
YAY an animation question :D
Preface: animations are great and fun to add to the ambiance of the project, BUT are not always accessibility-friendly. Try to consider this when starting a project (and include a toggle for animation, similar to the notification toggle here).
There are many many different ways to make a text flicker, it really depends what you mean by flickering:
SugarCube Add-On shaking the text
Greyelf had compiled a bunch of different text animation here, that you can find in Harlow. A handful makes the text flicker/move.
HiEv's glitchy code (can have subliminal messages)
HiEv's drunk code (less flickering, more blurry)
HiEv's blinking code (flickering, but not forever, can be made so)
And then, there are probably hundreds of codepens or the-like on the internet animating text to flicker (search "CSS flicker text" for a few results, here's one making it look like a neon sign!).
Note: whatever CSS/JS code you will find online that is not created specially for Twine will need to be tweaked. This has to do with the built-in CSS/JS code in the format used.
But, let's do a simple flickering animation as an example to talk about the base of CSS animation.
As always, the basic code can be found in my Paste-Bin (because Tumblr sucks).
CSS ANIMATIONS - The Basics
Animations created with CSS needs essentially two things: a '@ keyframes' (damn you Tumblr) and the 'animation' CSS rule. The first defines the way the animation will go, the second will link that animation to the relevant block and indicate other information (how long it lasts, whether it loops, whether there is a delay, etc...).
And for it to work, you'd need a container to target (like a span or a div) wrapping the text.
Keyframes
All keyframes are built in the same way:
@ keyframes animation-name {
keyframes-selector {css-styles;}
}
You will need to indicate :
a name. Here, let's take flicker.
a selector a.k.a the percentage of the animation duration where something changes. It can be done in percentage (0-100%, you can have whatever number you want) or with "from/to" (same as 0 and 100, any other stop needs to be in percentage). Here, let's have the flicker happen half-way through.
a css-rule which changes the style. It can be anything, from changing the colour, to the size, to its placement*. Here, flickering the text will mean changing the opacity.
So, for the example, we will get this:
@ keyframes flicker {
0% { opacity:1; }
50% { opacity:0; }
100% { opacity:1; }
}
*Note: some CSS animation (like placement or rotation or transform) will need for the target item to be displayed as a block or positioned in absolute. The more complex the animation, the more you will need to test and tweak.
Animation Rule
Now that we have an animation, let's link it to the targeted item. The animation CSS rule is a compiled version of 8 different rules (animation-[insert rule name]). the most important ones are the following:
animation: name duration iteration-count;
Here's what you need to define:
name [also animation-name]: the name of the keyframe animation. Here, we defined it as flicker.
duration [also animation-duration]: the duration of the whole animation. Let's make it 1 second here.
iteration-count [also animation-iteration-count]: how many times the animation goes. Since we would want it to flicker forever, let's make it infinite.
If you want to go further, you can also defined the following aspects:
timing-function [also animation-timing-function]: indicates the curve of the animation speed (slow start, slow end, etc...)
delay [also animation-delay]: delaying the start of an animation.
direction [also animation-direction]: whether an animation should be played forward, backward, or alternating.
fill-mode [also animation-fill-mode]: define whether an animation takes the styling in the start of the animation or the one at the end.
play-state [also animation-play-state]: define whether the animation is playing or paused.
Going back to out example, we have defined the animation rule as such:
animation: flicker 1s infinite;
In the meantime, I have wrapped my text in a div:
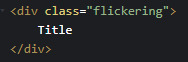
And included the css rule to my stylesheet:
.flickering {
font-size: 50px;
animation: flicker 1s infinite;
}
Now to check if it works!

Yay!
Now go forth an create weird animations :D
88 notes
·
View notes
Text
ohKAY
so now that i've 1) played a handful of twine games and 2) made a script/draft of what i wanna do (yes its gonna be a lupin thing), all i gotta do is teach myself how to use the actual program. that's 3.
4 is... posting it?? oh god
#twine#i guess im giving updates now :confetti:#just gotta avoid tutorial hell and i'll be fine. i'll be fiiiine--
1 note
·
View note
Text
so anyway. how do you learn coding from scratch
#that aspect intimidates me sm#thats why im procrastinating like crazy#i need a twine tutorial for helpless little babies
1 note
·
View note
Last Seen Blogs

svdmag
Science&Vie découvertes

tinysoriku
jun

advanturers-blog
Advanturers

miasansom
Mia Tyrannosaurus Rex

pastellich
Pastel Lich