#vinventure
Text
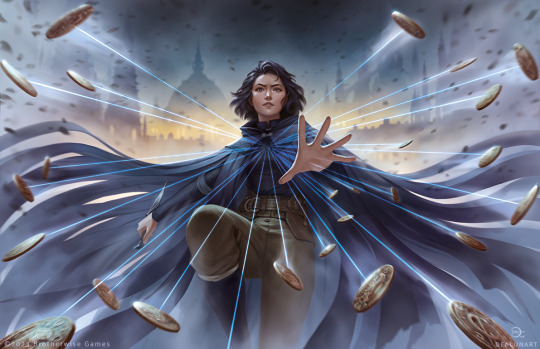
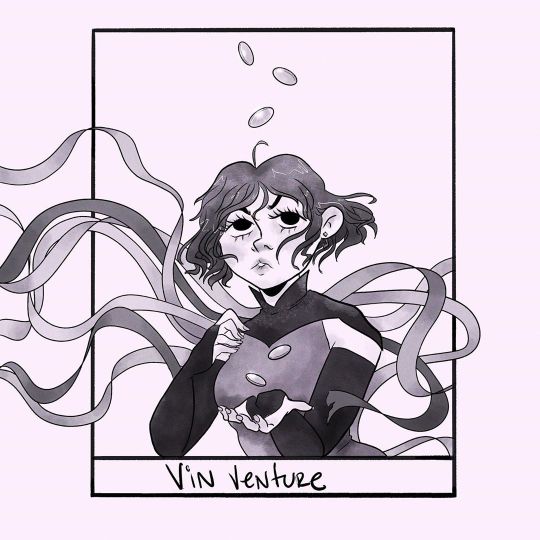
Vin illustration for the Mistborn Deckbuilding Game!
So, it seems I get to share this one a bit earlier than expected since it was shown at Dragonsteel 2023 last week! Stormlight and Mistborn (and the Cosmere as a whole) are some of my favourite stories of all time so it's been incredible (and very surreal) getting to work on both this and the Stormlight Archive RPG. Huge thank you to Johnny O'Neal and Brotherwise Games for the opportunity!
#brandonsanderson#mistborn#deckbuildinggame#vinventure#vin#cosmere#cosmereart#mistbornera1#fantasyillustration#books#fantasybooks#illustration#artists on tumblr#character art#semirealism#myart#commission art#mistborn fanart#cosmere fanart
886 notes
·
View notes
Photo
Happy Koloss Head Munching Day. Here's a picture of Vin. #kolossheadmunchingday #brandonsanderson #cosmere #mistborn #thefinalempire #wellofascension #theheroofages #vinventure #hoid #kelsier #stormlightarchive #dragonsteel #ברנדוןסנדרסון #cosmerefanart #קוסמיר #הערפילאים #פנארט https://www.instagram.com/p/CmU7vaGD0F9/?igshid=NGJjMDIxMWI=
#kolossheadmunchingday#brandonsanderson#cosmere#mistborn#thefinalempire#wellofascension#theheroofages#vinventure#hoid#kelsier#stormlightarchive#dragonsteel#ברנדוןסנדרסון#cosmerefanart#קוסמיר#הערפילאים#פנארט
0 notes
Text
Mistborn Cosplay PART 1

Inspiration
I want to cosplay a specific Mistborn in the books named Vin. We'll go over the rest of her costume later. The two images I'm using as inspiration are below:
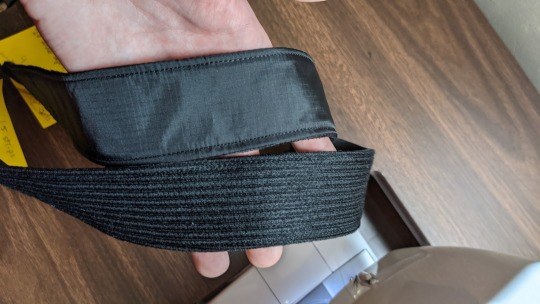
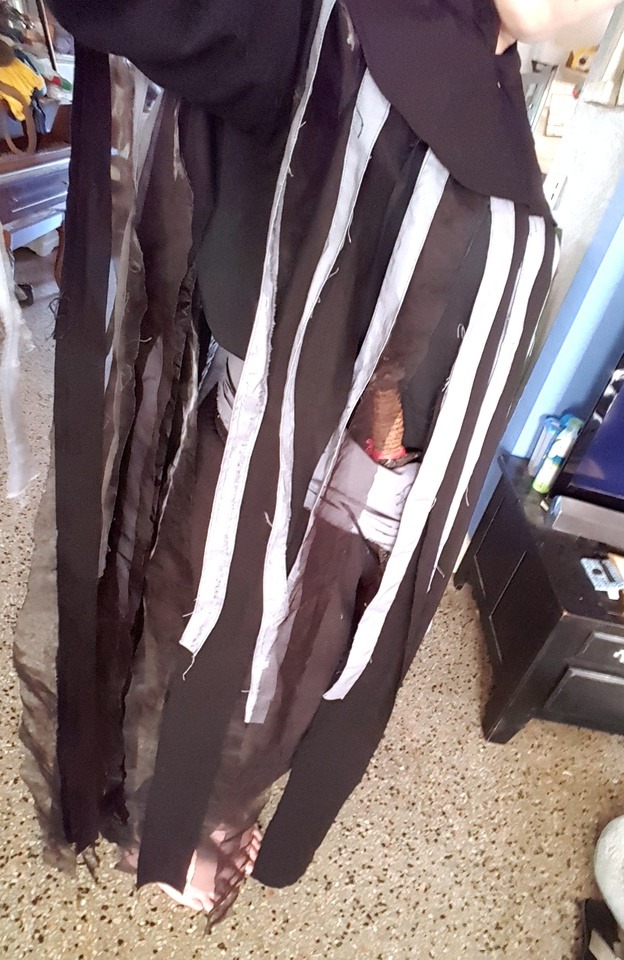
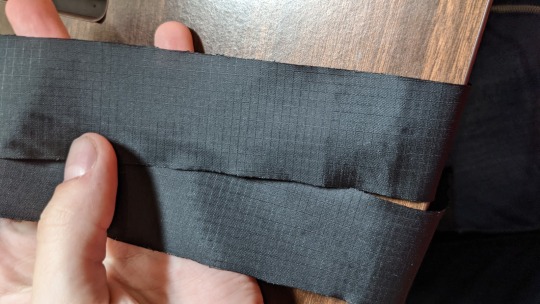
Brandon has mentioned he imagines the strips being individually sewn with a softer inside and heavier inside, which I did for the top layer of strips. As far as length, he said within an inch or two of each other. So when trimming my strips I wasn't particular about them being exact. He also mentioned he imagines the strips being ½-1 inch wide, but I went with 1.5 inches just to save some sanity. Remember you can play with this and do whatever you want!
What you'll need:
-6.5 yards of a dark grey or black fabric like cotton, denim, or a lightweight wool. I got this black sweater/wool fabric at my local fabric store.
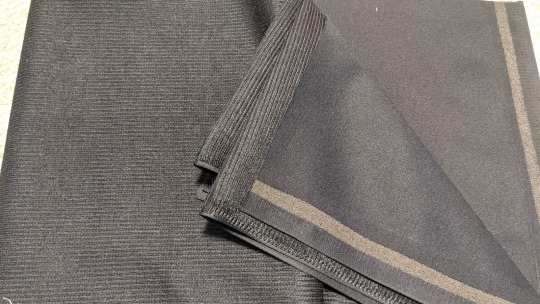
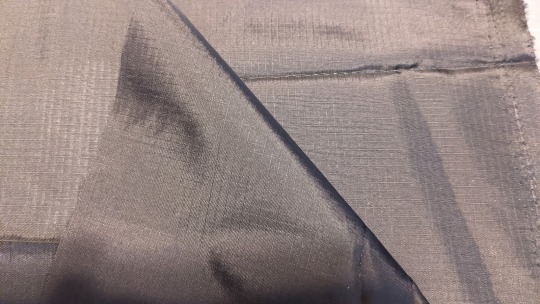
-15 yards of a dark grey or black lining, like silk, satin, or nylon ripstop. I got this ripstop online at Fabric Wholesale Direct.
-Two buttons
-Black or grey all purpose thread
-A sewing machine
-Simplicity 5794 cloak pattern (we're using pattern A)
-Fabric scissors
-A rotary cutter and mat
-A sewable seam adhesive (I used HeatnBond Lite)
-Lots of time and patience!! The strips alone probably took me a good 30-35 hours. I listened to WOK and some of WOR while making this.
I should also note that I was very generous with the fabric, partly because I didn't know what was necessary for the project. I cut my strips along the width and my fabric was 60" wide, so I had 60" strips. I ended up trimming them to probably 40-48 inches. If you have wide fabric you could cut lengthwise to save fabric, or find fabric that's already 48" wide instead of 60".
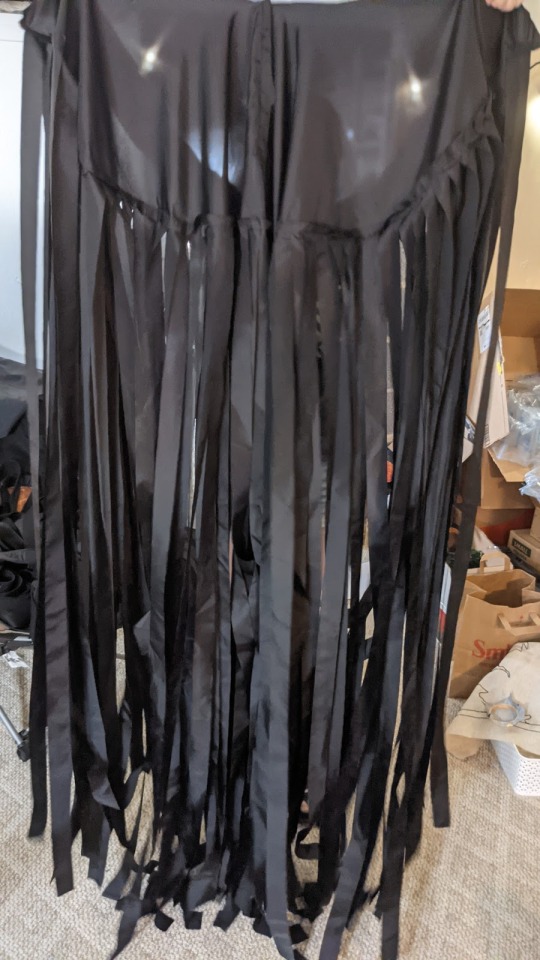
Making the cloak
Drawing from the inspiration photos, I wanted to create a cloak where the strips were all attached to a capelet. The black and white image has two capelets if you look closely, with strips attached to both, which is what I decided to go for using Simplicity pattern 5794 A.
I want to have one layer of the heavier fabric strips on the top capelet, with a layer or two of lining strips underneath, and another layer on the bottom capelet.
Quick disclaimer- the lighting in my basement craft room isn't great, sorry! I also forget to take pictures at every step.
Start by cutting out just the capelets and hood pieces for pattern A out in your heavier fabric. If your fabric has a pattern or grain like mine, make sure they line up. I’m cutting mine in size XS but in hindsight would have used size S. I'm 5'9" for reference.
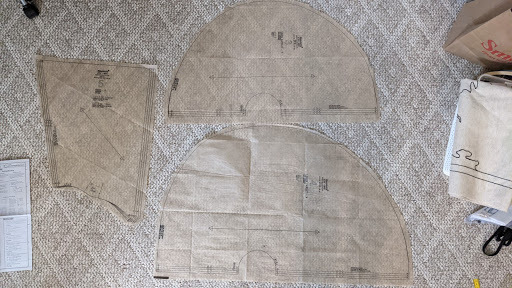
Cut out the same pieces in your lining.
Follow the directions to sew the pieces together. You should have three separate pieces (upper capelet, lower capelet, hood). Do the same for the lining. Don't sew any of the capelets or hood to each other yet. If your fabric doesn't like to iron flat at the seams like mine, you can do a top stitch.

Then, measure the circumference or outer edge of the top capelet (minus a seam allowance for sewing them together) and divide by the width you want your strips to be. I measured with a string, then measured how long the string was. I went with 1.5 inches for my strip width. The resulting number is how many strips of your heavier fabric will be on the top layer (64.5 for me. I made 65 but ended up only fitting 63.) Cut out strips of your heavier fabric to that width including a seam allowance (so 2.25 inches for me), and 50-60 inches long. We'll trim them later. Cut out the same strips out of your lining.
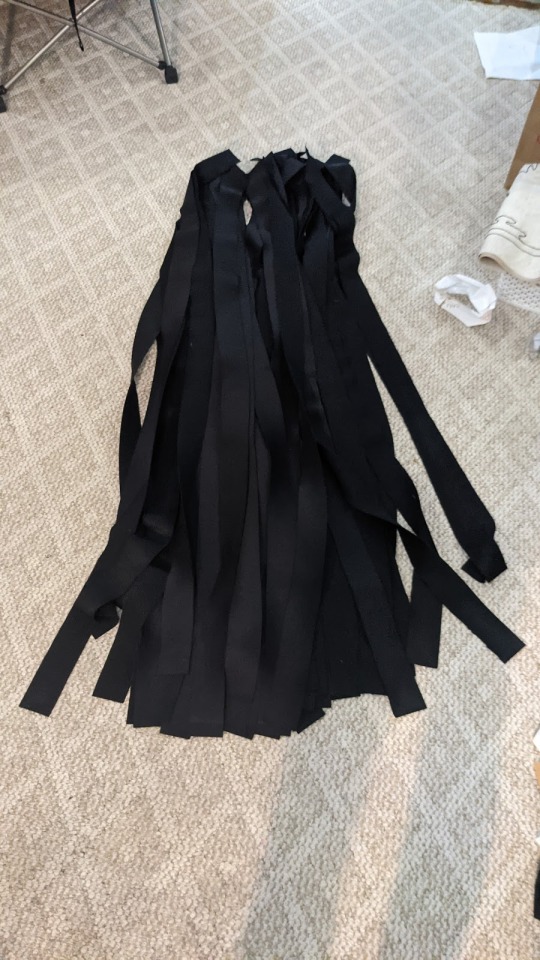
I folded my fabric in half lengthwise and used this video to help me with cutting the strips. He explains it better than I could here.
youtube
Then right sides together, sew your heavier fabric strips to your lining strips. Leave both short ends open. Turn your strips right side out with a chopstick or knitting needle. Iron flat if needed. If your fabric is heavier and won't lay flat, sew around the edges in a top stitch.
LINK TO PART 2
27 notes
·
View notes
Text
They’re the best 🥺
#brandon sanderson#cosmere#mistborn#vinventure#elendventure#thefinalempire#thewellofascension#theheroofages
114 notes
·
View notes
Photo

#TheHeroOfAges, book 3 of the #Mistborn series written by #BrandonSanderson (@brandsanderson), first published #OnThisDay in 2008 #FirstEdition #coverArt by #JonFoster (@jonfosterstudios) #CoolArt #Art #Books #BookCover #BookCoverArt #Vin #VinVenture #Luthadel #Cosmere https://www.instagram.com/p/CGVV_tFgtmR/?igshid=f04x6gnyzm3w
#theheroofages#mistborn#brandonsanderson#onthisday#firstedition#coverart#jonfoster#coolart#art#books#bookcover#bookcoverart#vin#vinventure#luthadel#cosmere
10 notes
·
View notes
Text
Honestly one of the best things Brandon Sanderson did in Mistborn was look a love triangle squarely in the face, spit on it, and say no. God bless him.
31 notes
·
View notes
Photo

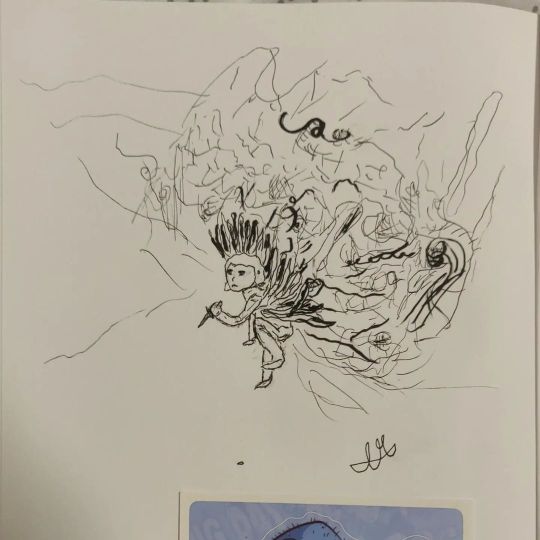
This is just a WIP, I misplaced this piece (along with my pens) so I decided to upload *something* as I complete other works. This WIP is Vin, the Final Empress, and Ascendant Warrior from Mistborn.
#heroofages#blackandwhite#ink#finalempire#vin#mistborn#vinventure#art#cosmere#cfsbf#drawing#wip#wellofascension#pens#uinferno#sketchbook#uinferno-art#uinfernoart#uinferno art
62 notes
·
View notes
Photo
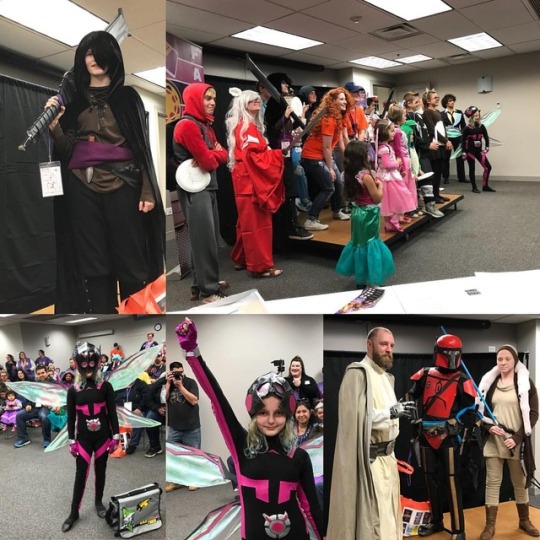
#FandomFest18 at @plainfieldlibrary! The winners of the #cosplay contest. There was some crazy talent there for such a small town! #mindblown #vinventure #mistborn #wasp #marvel #unstoppablewasp #starwars #skywalker (at Plainfield Public Library District)
1 note
·
View note
Photo
3/6 of the characters that remind you of me challenge thing. Vin Venture from @brandsanderson’s Mistborn trilogy(the first one anyway). My favy character in his Cosmere universe. She’s a tough cookie who has good taste in nerds 👀 #mistborn #cosmere #mistbornmonday #vinventure #sixfanarts #artchallenge2020 #brandonsanderson https://www.instagram.com/p/CESov8SFsTa/?igshid=pzile9uxmd8l
0 notes
Photo

Found the time to finish The Hero of Ages. 😊 What a read. What's heartbreaking is that the scene this particular artwork depicts never had the chance to happen. 💔 Let me just go stare at nothing for a couple of days before I start exploring the rest of the brilliance that is Brandon Sanderson's Cosmere. (Wish I could credit the owner of the artwork but I found it on Pinterest, which led me to Tumblr, where I never even saw the original post after endless scrolling ✌🏼) #TheHeroOfAges #Mistborn #BrandonSanderson #ElendVenture #VinVenture
1 note
·
View note
Photo


I totally lied, I took more (completely out of character) pictures
24 notes
·
View notes
Text
Wein-Notizen: Sekt aus dem großen Rotweinglas, zwei Online-Projekte und Blogs und Riparbello aus der Toskana
Wein-Notizen: #Sekt aus dem großen Rotweinglas, zwei Online-Projekte und Blogs und #Riparbello aus der #Toskana #Wein
Wieder einige Notizen rund um meine kleine Wein-Welt. Letztes Wochenende haben wir an zwei Abenden nochmals Freunde eingeladen. Noch können wir im Spätsommer oder frühen Herbst auf Balkonien sitzen und das nutzen wir natürlich aus. Mit einem befreundeten Paar haben wir einen Griesel Rosé Sekt von der Bergstraße getrunken, mit den anderen Freunden einen Wilhelmshof Rosé Sekt aus der Pfalz. Beides…
View On WordPress
0 notes
Photo
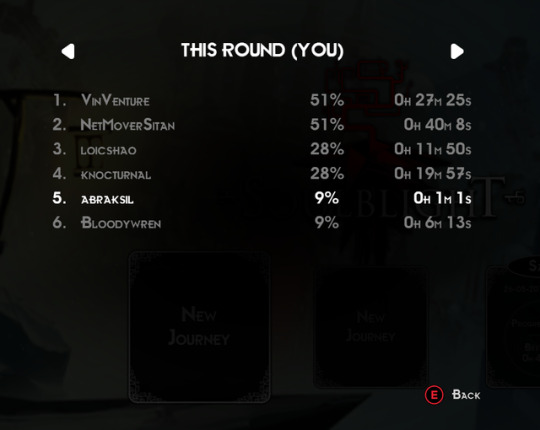
hohhohoh we have a first few runners in this weeks challenge. I see VinVenture is on the lead :)
0 notes
Text
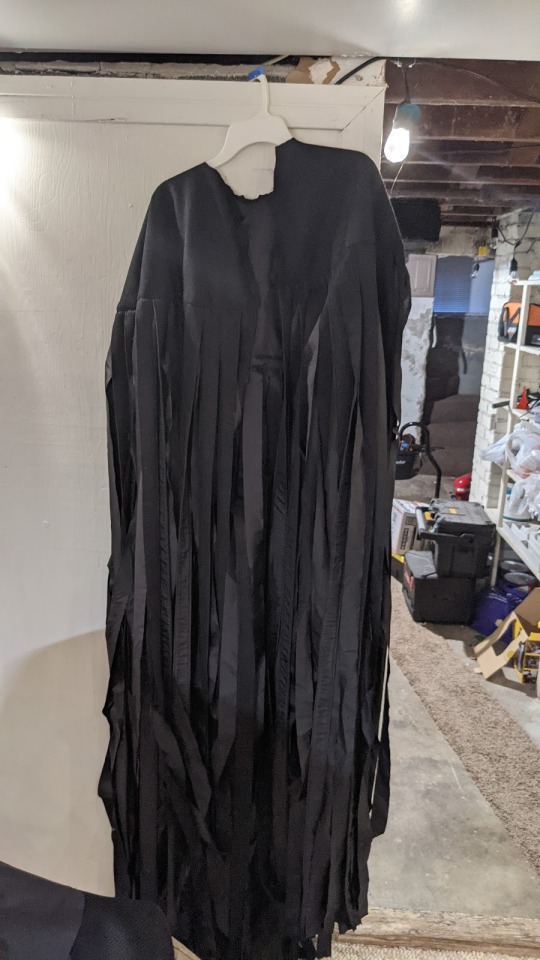
Mistcloak Cosplay PART 2
link to part one
On the right side of your top capelet, lay out the end of the strips you just sewed to the circumference, one next to each other, right side down. I found it easier to pin and sew just a few at a time, rather than pinning all of them. The strips should be pointed in towards the neck hole. Sew the strips on.

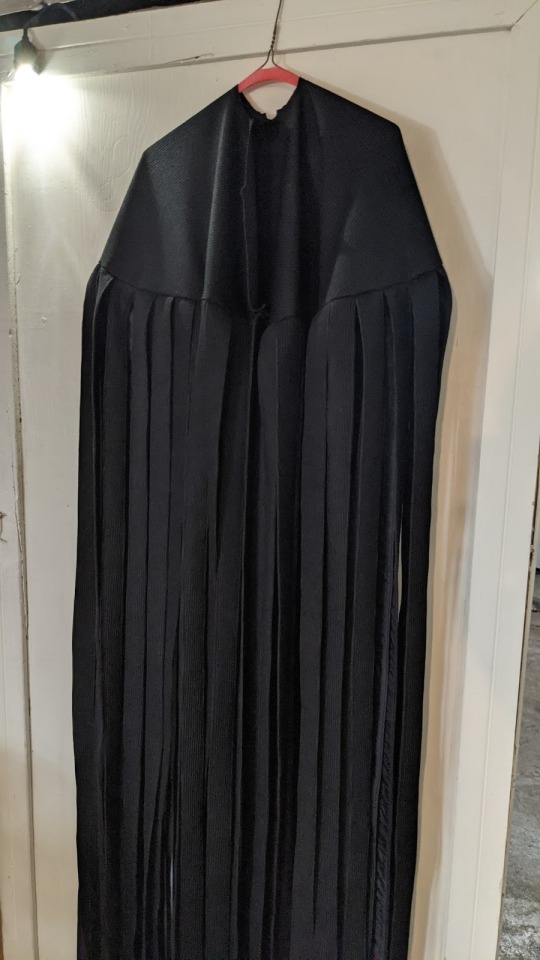
Also cut out strips out of the rest of your lining, but with no seam allowance (so 1.5 inches for me). If the edges fray you can hem them (so include an allowance if hemming) or if it’s nylon like mine you can set the edges by quickly passing them over a candle flame. Iron flat.
I originally decided to do one layer on the top capelet and two on the bottom, if I overlap them, placing a strip every inch, that puts me at about 96 strips on top (not including the thicker strips) and 240 for the bottom. I ended up actually only doing one layer on the bottom (120 strips). I cut out however many I needed but did end up with a few extras.
Repeat the same capelet and strip assembly with the lining, but with the inner strips, overlapping. The ripstop lining fabric was slippery, so instead of pinning I secured strips with a sewable seam tape before sewing them on, 10 at a time.
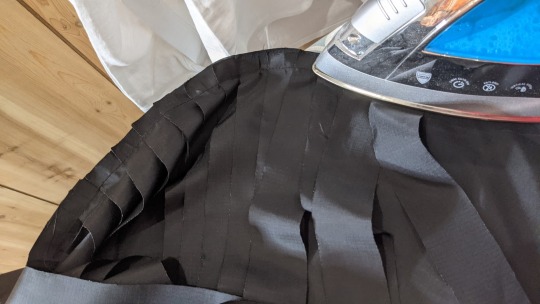
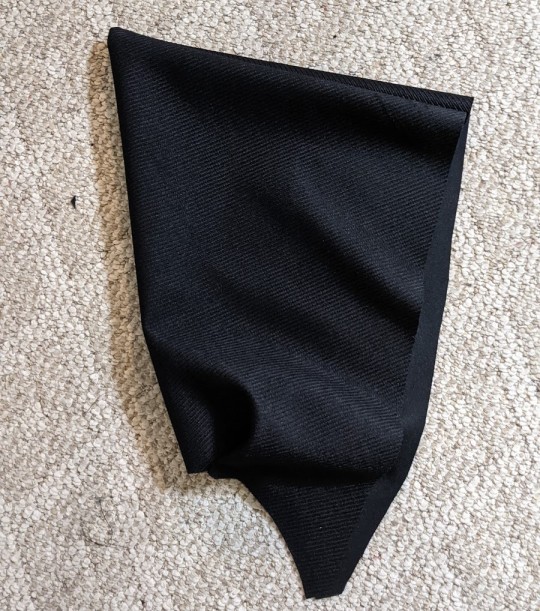
Then, pin the capelet lining on top of the top layer face down, pulling all the strips toward the middle, then sew around the circumference edge, sewing the lining and the outer layer together, leaving the neck and sides of the capelet open. Turn right side out. Iron flat or topstitch. I did half at a time.


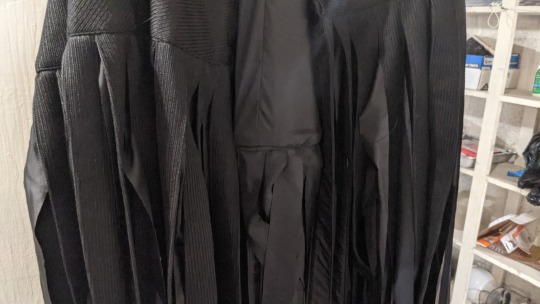
You could probably actually stop here if you wanted to, and skip the bottom capelet and next layers of strips. If you only make one capelet, sew the flat front edges right sides together also, when you're sewing the capelet and lining together.
Do the same to the bottom capelet, but with just lining strips. I ended up doing only one layer since the top layer was so full already. I forgot to get a picture of the second capelet on its own but it's pretty much like the first one without the heavy strips.
Now you can continue to sew the pattern as directed. Sew the capelets together and line and sew the hood on. Use bias tape or some extra fabric to hide the seam between capelets and hood.
link to part 3
3 notes
·
View notes
Text

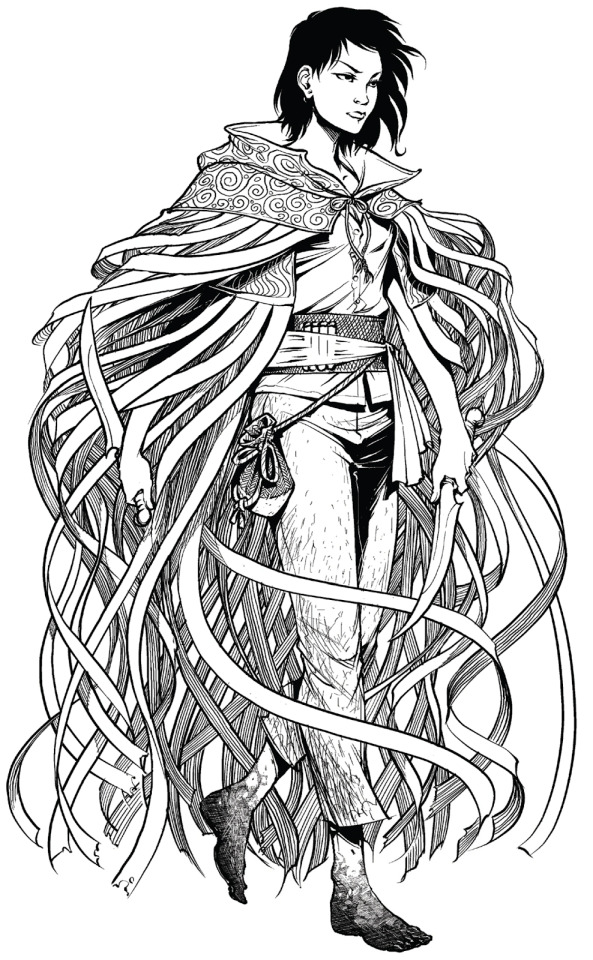
A weird doodly-doo of Vin, who doesn’t get the appeal of reading. I’ll probably do some more later.
86 notes
·
View notes
Photo

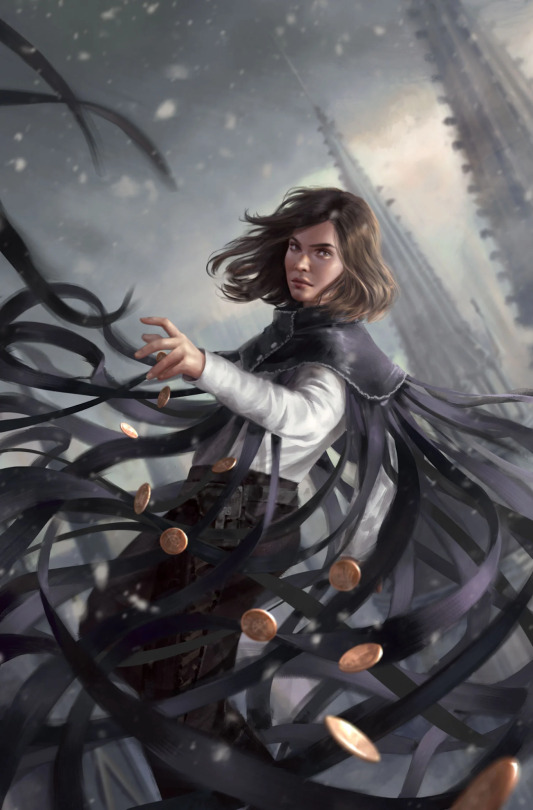
More digital stuff! I decided to practice digital painting and this was the first time painting the human face. I decided to do a character I already done, so once again, I did Vin Venture from Mistborn.
#finalempire#cosmere#cfsbf#uinferno#heroofages#digitalpainting#mistborn#art#vinventure#vin#painting#digitalart#wellofascension#digital#uinferno-art#uinferno art#uinfernoart
26 notes
·
View notes
Last Seen Blogs

kakbloggaren-blog
Kakbloggaren

owlmessages
Owl are you today?

manforaesthetics
TheMirror

yoursingersunny
Sunny Sayno
cloudy-raven
Cloudy Raven