#wheel spacer safety
Text

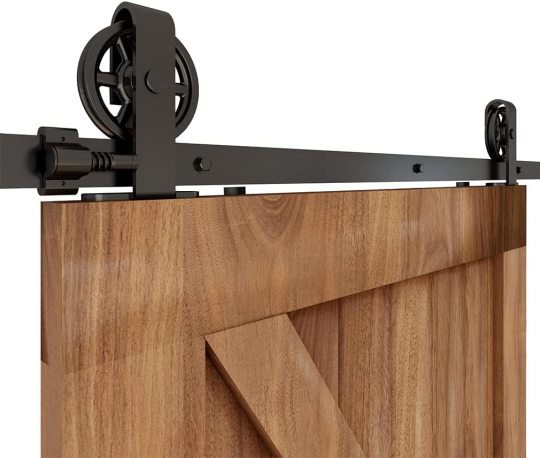


Barn Door Hardware Kit Features:
→ Space-saving: Makes your room look more spacious.
→ Easy to Install: Includes detailed, easy to follow graphic manual.
→ Very Quiet: Robust roller made of carbon steel, premium nylon wheel, slide smoothly and silently.
→ Spraying Process: Black frosted, anti-corrosion, anti-rust, anti-scratch.
→ Ensure Safety: Heavy duty construction, Solid carbon steel hanger, high purity bearing steel Gcr15, High strength industrial grade tracks.
→ Widely use: Ideal for kitchen, storage room, bedroom, study room, dressing room, Laundry room, closet, cabinet, storage, wardrobe, wine cellar, garage, farm etc.
Barn Door Hardware Kit Specifications:
→ Work for concrete wall, brick wall, wood wall etc. solid wall.
→ Fit Door Thickness: 1.18" - 1.96" (30mm - 50 mm).
→ Load Bearing: Can hang Max 330lb (150kg) Door.
Barn Door Hardware Kit Includes:
15.5ft rail (rail is spliced, not one piece)
rail spacers
2x rollers
2x door stoppers
2x anti-jump disks
1x T-shape floor guide
1x install instruction
Note: Only Hardware kit, No Door Panel Included.
#barn door#slidingdoorhardware#diy#design#fashion#savespace#architecture#home & lifestyle#doorhardware#ccjh
5 notes
·
View notes
Text
5 Common Alloy Wheel Damages and How to Prevent Them

Alloy wheels are more than just functional components; they add like a precious jewel, a touch of individuality and style to your car, elevating its overall appearance. However, these attractive additions are susceptible to various types of damage, impacting their aesthetics and potentially compromising performance and safety.
At JR Alloy Wheel Repair, we understand the frustration caused by damaged wheels. We’ve seen it all, from minor scratches to deep gouges and even cracks. That’s why we’re dedicated to not only providing expert wheel repair services but also empowering drivers with the knowledge to prevent these issues in the first place.
Here are 5 common types of alloy wheel damage and practical tips on how to keep your wheels looking their best:
1.Curb Rash: Unwanted Contact with the Curb

This is the most common type of damage, occurring when your wheel makes contact with a curb while parking or maneuvering. The severity can range from light scratches that affect the paint or clear coat to deeper gouges that expose the metal underneath, and in extreme cases, even cracks that compromise the wheel’s structural integrity.
Prevention:
Practice safe driving. Maintain a safe distance from curbs and avoid tight maneuvers that could lead to accidental contact.
Invest in parking sensors. These provide audible or visual warnings when you’re getting too close to a curb, offering valuable assistance to both experienced and novice drivers.
Consider using rim guards or wheel spacers. These act as an extra layer of protection, creating a buffer zone between your wheels and the curb.
2.Corrosion: The Silent Threat

This occurs gradually due to exposure to harsh elements like salt, moisture, and chemicals. Over time, this silent process breaks down the wheel’s outer layer, leading to pitting and bubbling of the surface. This not only impacts the aesthetics of your wheels but can also weaken their structure, potentially posing a safety hazard.
Prevention:
Wash your wheels regularly. Regular cleaning, especially after exposure to harsh elements, removes dirt, salt, and other contaminants that contribute to corrosion.
Use the right cleaning tools. Choose a car wash soap specifically formulated for wheels. These soaps are generally gentler and won’t strip away the protective waxes that act as a barrier against corrosion.
Consider applying a wheel wax or sealant. This adds an additional layer of protection, shielding the wheels from moisture and contaminants.
3.Brake Dust Buildup: The Unsightly Residue
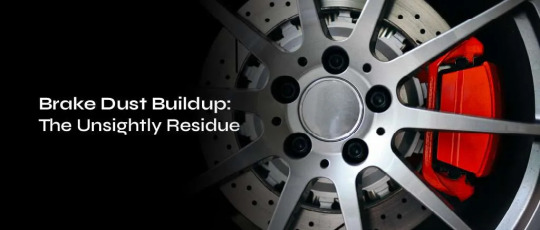
Every time you press the brakes, fine dust generated from the brake pads settles on your wheels. This dust can be difficult to remove and can dull the wheel’s finish over time. In extreme cases, it can even cause permanent pitting on the wheel’s surface.
Prevention:
Clean your wheels regularly. Pay particular attention to the inner portion of the wheel, where brake dust tends to accumulate most heavily.
Use a wheel cleaner specifically designed for brake dust. These cleaners are formulated to break down the dust particles for easier removal.
Maintain your brakes according to the manufacturer’s recommendations. Worn-out brake pads generate more dust, so keeping your brakes in good condition helps prevent excessive buildup.
4.Bent or Cracked Wheels: A Potential Safety Risk
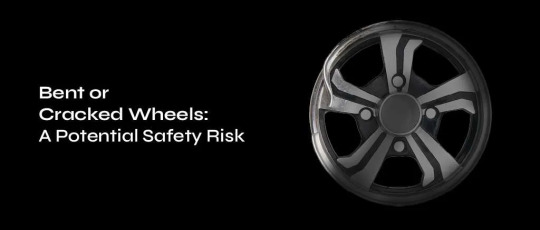
This type of damage typically occurs due to significant impacts, such as hitting a pothole at high speed or colliding with an object. Bent or cracked wheels can have serious consequences, compromising your car’s handling, affecting tire wear, and potentially posing a safety hazard.
Prevention:
Avoid potholes and road hazards whenever possible. Stay alert and avoid uneven or poorly maintained roads to minimize the risk of encountering these hazards.
Maintain proper tire pressure. Properly inflated tires act as a cushion, absorbing some of the impact and reducing stress on the wheels in case you do encounter a pothole.
Drive at safe speeds, especially on uneven roads. Higher speeds amplify the impact of any potholes or road hazards you encounter, increasing the risk of damage to your wheels.
5.Clear Coat Damage: The Fading Protection

The clear coat acts as a transparent shield over the wheel’s paint or finish. However, this shield isn’t invincible. Over time, exposure to harsh sunlight and elements can cause the clear coat to fade, crack, or peel, leaving the underlying paint vulnerable. This not only affects the aesthetics but also exposes the paint to further damage and accelerates corrosion.
Prevention:
Park in the shade: Whenever possible, park your car in a shaded area to minimize direct sunlight exposure, which can accelerate the breakdown of the clear coat.
Use gentle car wash soap: When washing your car, opt for a car wash soap specifically formulated for wheels. These soaps are generally gentler and won’t strip away the protective waxes beneath the clear coat. Avoid harsh detergents or abrasive cleaning tools that can scratch or damage the clear coat.
Consider a UV protectant: Applying a UV protectant to your wheels adds an extra layer of protection against the sun’s harmful rays. This helps preserve the clear coat and maintain the vibrant look of your wheels for longer.
Conclusion
Remember, prevention is key. By understanding the different types of damage and taking proactive steps, you can significantly reduce the need for costly repairs and keep your alloy wheels looking their best for years to come. This includes not only following the specific tips mentioned but also maintaining regular cleaning practices for your wheels and ensuring proper tire care. Taking these steps will go a long way in maintaining the overall health and appearance of your wheels.
If you do notice any damage to your wheels, don’t hesitate to seek professional help. At JR Alloy Wheel Repair, our team of experienced technicians is equipped to handle various types of wheel damage. We use the latest tools and techniques to ensure flawless and long-lasting repairs, restoring your wheels to their former glory and keeping your car looking its best.
Contact JR Alloy Wheel Repair today for a free consultation and let us help you protect your precious jewels and keep your car rolling in style.
FAQ
1.I have a small scratch on my wheel. Can I fix it myself?
Minor scratches on the clear coat or paint can sometimes be buffed out using a scratch removal compound specifically formulated for wheels. However, for deeper gouges, cracks, or extensive damage, it’s recommended to seek professional help from a qualified wheel repair shop like JR Alloy Wheel Repair.
2How often should I clean my wheels?
Ideally, you should clean your wheels every two weeks or more frequently if you drive in dusty or salty conditions. Regular cleaning removes dirt, brake dust, and other contaminants that can contribute to corrosion and other types of damage.
3What type of tire pressure should I maintain to protect my wheels?
Maintaining proper tire pressure, as recommended by your car manufacturer, is crucial for your wheels’ health. Properly inflated tires absorb some of the impact from potholes and road hazards, reducing the stress on the wheels and minimizing the risk of damage.
4What are the signs of a bent or cracked wheel?
Signs of a bent or cracked wheel can include:
Visible bends or cracks on the wheel.
Vibrations in the steering wheel while driving.
Uneven tire wear.
A pulling sensation while driving.
If you experience any of these symptoms, it’s important to have your wheels inspected by a professional immediately.
5How much does it cost to repair alloy wheel damage?
The cost of repairing alloy wheel damage depends on the severity of the damage and the type of repair required. Minor scratches may cost less than $100 to fix, while more extensive damage like cracks or bends can cost several hundred dollars or more. At JR Alloy Wheel Repair, we offer competitive pricing and free consultations to discuss your specific needs and provide an accurate estimate.
Article Source : https://jralloywheelrepair.co.uk/5-common-alloy-wheel-damages-and-how-to-prevent-them/
0 notes
Text
How to Cut Tile With a Dremel: Master the Art of Precision Cutting

To cut tile with a Dremel, you need to use a diamond wheel attachment.
Choosing The Right Dremel Tool For Tile Cutting
When it comes to cutting tile with precision and ease, using a Dremel tool can be a game-changer. But with so many different Dremel models available, how do you know which one is the best choice for your tile cutting needs? In this section, we will explore the considerations for tile cutting and provide a comparison of different Dremel models to help you make an informed decision.
Considerations For Tile Cutting
Before diving into the different Dremel models, it's important to consider a few key factors when selecting a tool for tile cutting:
- Power: The power of the Dremel tool is crucial for cutting through tough tile materials. Ensure that the model you choose offers sufficient power to handle your specific tile cutting tasks.
- Speed: Tile cutting requires precise and controlled cuts. Look for Dremel tools with variable speed settings, allowing you to adjust the cutting speed based on the material and desired results.
- Attachments and Accessories: To simplify tile cutting, some Dremel models come with specialized attachments and accessories. These can include tile-cutting wheels, diamond-coated bits, and tile guides. Evaluate whether these additional features align with your cutting needs.
- Ease of Use: Cutting tile can be a delicate process, so choosing a Dremel tool that is comfortable to hold and easy to maneuver is essential. Consider the ergonomics of the tool and ensure it fits comfortably in your hand.
Comparison Of Different Dremel Models
Now let's dive into a comparison of a few popular Dremel models for tile cutting:
Model
Power (Watts)
Speed Range (RPM)
Attachments and Accessories
Dremel 3000
130W
5,000 - 32,000
Tile-cutting wheels, diamond-coated bits
Dremel 4000
175W
5,000 - 35,000
Tile-cutting wheels, diamond-coated bits, tile guides
Dremel 4300
175W
5,000 - 35,000
Tile-cutting wheels, diamond-coated bits, tile guides, flex shaft attachment
These models offer a range of power and speed options, allowing you to find the right balance for your tile cutting projects. The attachments and accessories also provide added versatility and precision during the cutting process.
By considering these factors and comparing the different Dremel models, you can confidently choose the right tool for your tile cutting needs. With the right Dremel tool in hand, you'll be able to achieve clean and accurate cuts for your tiling projects.

Preparing The Work Area
Preparing the work area is an essential step before you start cutting tile with a Dremel. By gathering the necessary tools and materials and setting up a safe and clean workspace, you can ensure a smooth and efficient process. Let's dive in to learn more about each aspect in detail.
Gathering The Necessary Tools And Materials
Before you begin cutting tile with a Dremel, it's important to gather all the tools and materials you'll need. Having everything on hand will save you time and frustration later on. Here's a list of items you should have:
- A Dremel rotary tool
- Diamond cutting wheel attachment
- Tape measure or ruler
- Pencil or marker
- Safety glasses
- Dust mask
- Clamps (optional, for securing the tile)
- Tile adhesive or double-sided tape (if needed)
- Tile spacer (if needed)
Make sure you have all these tools and materials ready before you start the tile cutting process. It's always better to be prepared!
Setting Up A Safe And Clean Workspace
Creating a safe and clean workspace is vital to avoid accidents and maintain the quality of your work. Follow these simple steps to set up your work area:
- Cover the area: Use a drop cloth or plastic sheet to protect the floor or workbench from tile debris and dust.
- Secure the tile: If required, use clamps to secure the tile in place. This step will help you maintain stability and accuracy while cutting.
- Put on safety gear: Always remember to wear safety glasses and a dust mask to protect your eyes and respiratory system from flying debris.
- Clear the surroundings: Keep the work area free from any obstacles or unnecessary objects that may hinder your movement or cause accidents.
- Good lighting: Ensure you have adequate lighting to clearly see the tile and your cutting line. Proper lighting will enhance precision and reduce the chances of errors.
By following these steps and setting up a safe and clean workspace, you're ready to begin cutting tile with your Dremel. Remember, a well-prepared work area is the foundation for a successful and enjoyable tile cutting experience.
Selecting The Right Cutting Bit
Cutting tile with a Dremel requires selecting the right cutting bit. It's important to choose a bit specifically designed for tile to ensure clean and precise cuts.
Understanding Different Types Of Dremel Cutting Bits
When it comes to cutting tile with a Dremel, selecting the right cutting bit is crucial for achieving precise and clean cuts. Dremel offers a variety of cutting bits that can be used for different materials, including tile. Understanding the different types of Dremel cutting bits will help you choose the best one for your tile cutting needs.
Here are some of the most commonly used Dremel cutting bits for tile:
- Diamond Wheel: With its abrasive surface, the diamond wheel cutting bit is ideal for cutting through hard materials like ceramic or porcelain tile. Its tough and long-lasting design ensures clean and accurate cuts.
- Carbide Cutting Bit: The carbide cutting bit is suitable for cutting softer materials like ceramic or glass tiles. It features a sharp, pointed tip that helps to score the tile before making the final cut.
- Cut-Off Wheel: The cut-off wheel cutting bit is perfect for making straight cuts on tiles. It is designed to cut through both ceramic and porcelain tiles with ease. With its high-speed rotation, it delivers smooth and precise cuts.
- Sanding Drum: While not specifically a cutting bit, the sanding drum attachment can be used to smoothen the edges of the cut tiles. It helps to remove any rough edges or burrs left after cutting.
Choosing The Best Bit For Your Tile
Now that you have a better understanding of the different types of Dremel cutting bits available, it's time to choose the best one for your tile cutting project.
The type of tile you are working with will play a significant role in determining the most suitable cutting bit. For hard materials like ceramic or porcelain, the diamond wheel cutting bit is the ideal choice. Its durability and effectiveness in producing clean cuts make it a top pick for these materials.
On the other hand, if you are working with softer materials like ceramic or glass tiles, the carbide cutting bit is a better option. Its ability to score the tile prior to cutting ensures precise and accurate results.
For making straight cuts on both ceramic and porcelain tiles, the cut-off wheel cutting bit is your go-to choice. Its high-speed rotation provides smooth and controlled cuts, allowing you to achieve the desired shape effortlessly.
Remember, always wear safety goggles and protective gloves when operating the Dremel tool, regardless of the cutting bit you choose. Safety should never be compromised when working with power tools.
Step-by-step Tile Cutting Process With A Dremel
Cutting tiles can be a tricky and time-consuming task if you don't have the right tools. One tool that can make the job easier and more precise is a Dremel. A Dremel is a versatile rotary tool that can be used for a variety of projects, including cutting tiles. In this step-by-step guide, we will walk you through the process of cutting tiles with a Dremel, ensuring a clean and accurate cut every time.
1. Marking Your Cutting Line
Before you start cutting, it is important to mark the cutting line on the tile. This will guide you and ensure that you make an accurate and straight cut. To mark your cutting line, use a pencil or a marker to draw a line on the surface of the tile. Make sure the line is straight and clearly visible.
2. Securing The Tile
Once you have marked your cutting line, it's time to secure the tile. Place the tile on a flat and stable surface, such as a workbench or a table. Use clamps or a tile holder to secure the tile in place. This will prevent it from moving while you are cutting and ensure a clean and precise cut.
3. Wearing Protective Gear
Before you start cutting, it is important to prioritize safety. Make sure to wear the necessary protective gear, such as safety glasses and gloves, to protect your eyes and hands from any potential hazards. It is also a good idea to wear a dust mask to prevent inhaling any dust or debris that may be produced during the cutting process.
4. Using The Dremel To Make The Cut
Now it's time to use the Dremel to make the cut. Start by inserting a tile cutting bit into the Dremel. These bits are specifically designed for cutting through tiles and will provide a clean and precise cut. Adjust the speed of the Dremel to a medium setting.
Hold the Dremel firmly and position the cutting bit on your marked cutting line. Slowly guide the Dremel along the line, applying gentle and steady pressure. Let the Dremel do the work and avoid pushing or forcing it through the tile. Continue cutting until you have made a complete cut.
It is important to note that cutting through tiles can generate heat, which may cause the tile to crack. To prevent this, you can dip the cutting bit in water periodically while cutting. This will help to cool down the bit and reduce the risk of cracking.
Once the cut is complete, remove the clamps or tile holder and carefully lift the tile off the surface. You can then smooth out any rough edges with a sanding attachment on the Dremel, if needed.
Don't forget to clean up any dust or debris that may have accumulated during the cutting process. This will ensure a clean and tidy workspace.
By following these step-by-step instructions, you can confidently cut tiles with a Dremel and achieve professional-looking results. Remember to prioritize safety, use the right tools and techniques, and take your time to ensure a clean and precise cut every time.
Finishing Touches And Tile Care
Once you've successfully cut your tile with a Dremel, it's time to focus on the finishing touches and maintaining the tile surface for long-lasting beauty. In this section, we will discuss smoothing the cut edges and cleaning and maintaining the tile surface to ensure your project is flawless and stands the test of time.
Smoothing The Cut Edges
After cutting the tile, you may notice that the edges are rough and uneven. To refine the edges and achieve a professional finish, follow these steps:
- Start by using a 400-grit sandpaper to gently sand the cut edges. This will help remove any sharp or jagged edges.
- Next, switch to a 600-grit sandpaper and continue sanding the edges until they are smooth to the touch.
- For an even smoother result, finish off with a 1200-grit sandpaper to achieve a polished look.
Cleaning And Maintaining The Tile Surface
To keep your tiles looking their best and ensure they last for years to come, it's essential to follow proper cleaning and maintenance practices. Here are some tips to help you:
- Regularly sweep or vacuum the tile surface to remove dirt and debris that can scratch the surface over time.
- Mop the tiles with a mild detergent or a pH-neutral cleaner. Avoid using abrasive or acidic cleaners that can damage the surface.
- Wipe up spills immediately to prevent staining, especially with substances like wine, coffee, or oil-based products.
- Use a non-abrasive brush or sponge when cleaning to avoid scratching the tile surface.
- To maintain the shine, apply a high-quality tile sealer according to the manufacturer's instructions.
By following these steps and incorporating them into your tile care routine, you can keep your newly cut tile looking beautiful and extend its lifespan.

Tips And Tricks For Precision Cutting
When it comes to cutting tile with a Dremel, precision is key. Whether you're a beginner or an experienced DIY enthusiast, mastering the art of precise cutting can elevate your projects to a whole new level. In this section, we'll share some valuable tips and tricks to help you achieve precise cuts with your Dremel. From mastering speed and pressure control to avoiding common mistakes, and even experimenting with different cutting techniques, these insights will help you enhance your tile-cutting skills.
Mastering Speed And Pressure Control
One of the most important factors in achieving precise cuts with a Dremel is mastering speed and pressure control. The speed at which you operate the Dremel and the pressure you apply can significantly affect the outcome of your cuts.
- Start with a low speed: When cutting tile, it's best to begin with a low speed setting on your Dremel. This will allow you to have better control over the tool and prevent accidental slips.
- Gradually increase the speed: As you gain confidence and control, you can gradually increase the speed to achieve smoother cuts. Experiment with different speeds to find the one that works best for you.
- Apply consistent pressure: While cutting, it's crucial to apply consistent pressure to ensure an even and precise cut. Avoid exerting too much force, as it can cause the tile to crack or break. Remember, slow and steady wins the race!
Avoiding Common Mistakes
Avoiding common mistakes is essential when it comes to precision cutting. By being aware of potential pitfalls, you can save time and effort while achieving accurate and clean cuts.
- Using inappropriate attachments: Selecting the right cutting attachment is crucial for precise results. Make sure to choose a cutting wheel specifically designed for tiles, as using the wrong attachment can lead to ineffective or uneven cuts.
- Not marking your tiles: Before cutting, always mark the area you intend to cut. This will help you visualize the desired shape and avoid mistakes. Use a pencil or a marker designed for tile surfaces.
- Skipping safety precautions: Precision cutting involves working with sharp tools and potentially hazardous materials. Always wear safety goggles and gloves to protect your eyes and hands. Additionally, work in a well-ventilated area to avoid inhalation of dust or debris.
Experimenting With Different Techniques
Every project has its own unique requirements, and sometimes, trying different techniques can make a world of difference in precision cutting. By experimenting with alternative approaches, you can find the one that suits your project best.
Technique
Description
Score and snap:
This technique involves scoring a line on the tile's surface using the Dremel, then applying pressure to snap it along the scored line. It works well for smaller tiles and those that don't require complex cuts.
Smooth edge cuts:
If you need to create smooth edge cuts, try using a tile cutting bit in conjunction with a straight edge guide. This method provides more control and precision for intricate cuts.
Conclusion
Cutting tiles with a Dremel has never been easier thanks to the techniques and tips shared in this blog post. By following the step-by-step instructions and using the right accessories, you can achieve clean and precise cuts in your tile projects.
From intricate designs to simple straight cuts, a Dremel is a versatile tool that can handle it all. So, get your Dremel ready and start cutting those tiles with confidence!
Read the full article
0 notes
Text
Improving Your Driving Experience: An All-Inclusive Guide to Customization and Accessories for Cars
Introduction:
Driving is more than just a means of transportation; it’s an experience. Car enthusiasts understand the importance of personalizing their vehicles to reflect their style and preferences. One way to achieve this is through the world of car accessories and customization. In this article, we will explore the diverse range of car accessories available in the market and delve into the realm of car interior and exterior modification shops.
I. The World of Car Accessories:
Essential Car Accessories:
a. Floor Mats and Seat Covers: Protecting your car’s interior from wear and tear.
b. Car Covers: Shielding your vehicle from the elements.
c. Phone Mounts and Chargers: Ensuring a safe and connected driving experience.
d. Emergency Kits: Being prepared for unexpected situations on the road.
Convenience and Comfort:
a. GPS Navigation Systems: Making your journeys more efficient.
b. Smart Car Gadgets: Integrating technology for a smarter driving experience.
c. Car Organizers: Keeping your car clutter-free and organized.
d. Heated Seats and Steering Wheel Covers: Adding warmth during colder seasons.
Aesthetics and Style:
a. Interior LED Lighting: Enhancing the ambiance of your car’s interior.
b. Custom Shift Knobs and Steering Wheels: Adding a personal touch to your driving experience.
c. Decals and Stickers: Showcasing your personality on the exterior.
Performance Upgrades:
a. Air Filters and Intake Systems: Improving engine performance.
b. Exhaust Systems: Enhancing sound and optimizing airflow.
c. Performance Chips: Boosting horsepower and fuel efficiency.
d. Suspension Upgrades: Improving handling and ride comfort.
II. Car Interior Modification Shops:
Custom Upholstery:
a. Leather and Fabric Options: Exploring materials that suit your style.
b. Color and Design Choices: Personalizing your seats and interior surfaces.
c. Steering Wheel and Dashboard Customization: Adding unique details.
In-Car Entertainment Systems:
a. Upgrading Audio Systems: Installing premium speakers and subwoofers.
b. Infotainment Systems: Incorporating the latest in-car technology.
c. Rear-Seat Entertainment: Keeping passengers entertained on long journeys.
Luxury and Comfort Enhancements:
a. Ambient Lighting: Creating a luxurious and comfortable atmosphere.
b. Massage Seats: Adding a touch of luxury to your driving experience.
c. Premium Carpeting: Elevating the overall interior aesthetics.
Advanced Safety Features:
a. Collision Warning Systems: Alerting drivers to potential collisions.
b. Lane Departure Warning and Lane-Keeping Assist: Enhancing road safety.
c. Parking Assistance: Simplifying parking in tight spaces.
III. Car Exterior Modification Shops:
Body Kits and Aero Parts:
a. Front Lips and Splitters: Improving aerodynamics and aesthetics.
b. Side Skirts and Rear Diffusers: Enhancing the overall look of the car.
c. Spoilers and Wings: Adding a sporty and aggressive touch.
Paint and Vinyl Wraps:
a. Custom Paint Jobs: Choosing unique colors and finishes.
b. Vinyl Wraps and Graphics: Expressing creativity through exterior design.
c. Ceramic Coating: Protecting the paint and enhancing its longevity.
Lighting Upgrades:
a. LED Headlights and Taillights: Improving visibility and style.
b. Under glow and Wheel Lights: Adding a vibrant and dynamic look.
c. Fog Lights and Light Bars: Enhancing visibility in various driving conditions.
Wheel and Tire Customization:
a. Alloy Wheels and Rims: Upgrading the aesthetics of your wheels.
b. Low-Profile Tires: Achieving a sportier and more aggressive stance.
c. Wheel Spacers and Adapters: Customizing the fitment of your wheels.
Conclusion:
Car accessories and customization not only enhance the functionality and aesthetics of your vehicle but also provide a unique and personalized driving experience. Whether you’re focused on essential accessories, comfort and convenience upgrades, or a complete interior and exterior overhaul, the world of car customization has something for every enthusiast. Visit reputable car modification shops to explore the possibilities and turn your vehicle into a true reflection of your personality and style.
0 notes
Photo

New Post has been published on https://www.vividracing.com/blog/are-wheel-spacers-bad-explained-in-60-seconds/
Are Wheel Spacers Bad? Explained In 60 Seconds
youtube
Wheel spacers can be a hotly debated topic among car enthusiasts, so let’s dig deeper into their purpose, potential benefits, and considerations before installation.
Wheel spacers are usually fit over a vehicle’s holding bracket to increase the space between the wheel and the car’s body. Their main purpose is to push the wheels outward, providing a wider stance which in turn enhances the vehicle’s stability, handling, and appearance.
Why You Should Install Wheel Spacers:
1. Fitment Correction: One of the primary reasons for using wheel spacers is to adjust the fitment of the wheels. They are employed to increase the space between the wheel hub assembly and the wheel itself, thereby altering the offset and pushing the wheels further out. This can rectify issues with inadequate clearance for suspension components or inner wheel well areas, allowing for a more flush or aggressive appearance.
2. Improved Handling: By widening the track width, wheel spacers can enhance vehicle stability and cornering performance. A wider track can provide better stability during turns, especially in high-performance driving scenarios.
3. Customization: Wheel spacers offer a cost-effective method of achieving a specific aesthetic look by altering the stance or appearance of the vehicle. They can provide a more aggressive stance without the need to purchase new wheels with different offsets.
4. Improved Appearance: Spacers can give your vehicle a more aggressive and visually appealing stance by pushing the wheels outward.
5. Clearance for Upgraded Brakes: If you plan to, or you’ve upgraded your brakes, wheel spacers can provide additional clearance for larger brake components.
Click Here to Buy Wheel Spacers from Our Shop
Things to Consider Before You Install Wheel Spacers
1. Quality and Material: Opting for high-quality spacers made from durable materials like aluminum or steel is crucial. Cheap or low-quality spacers might compromise safety and structural integrity, potentially leading to issues like warping, breakage, or even welding themselves to the hub assembly.
2. Proper Torque: Correctly torquing the spacer to the hub and the wheel to the spacer is vital for safety. Insufficiently tightened spacers can lead to wheel detachment, posing a severe safety risk. Conversely, over-tightening can damage components.
3. Sizing and Load Bearing: Choosing the right size of spacers is essential to avoid load-bearing problems. Excessive spacer width can exert additional stress on the wheel bearings, suspension components, and other parts, potentially leading to premature wear or failure.
The decision to install wheel spacers depends on various factors, including the vehicle’s setup, intended use, and personal preferences. It’s crucial to weigh the potential benefits against the safety considerations and potential risks associated with their installation. For some, spacers might be a convenient solution to achieve the desired fitment or aesthetic, while others might prefer alternative methods to address fitment issues. Prior research, quality components, and proper installation are key factors in making an informed decision about using wheel spacers on a vehicle.
@vividracing
Should you install wheel spacers on your car? #vividracing #carparts #carknowledge #wheelspacers
♬ original sound – Vivid Racing
0 notes
Text
Mitsubishi Wheel Spacers
Wheels UK understands the importance of safety, which is why their Wheel Spacers are designed and manufactured to the highest quality standards, ensuring optimal performance and reliability Mitsubishi Wheel Spacers.
0 notes
Text
What Is Hex Machine Nuts? Makes Use Of, Dimensions And Properties
The hexagon form is among the most popular shapes in nature, from honeycomb patterns to hexagon tiles for mirrors – its makes use of are virtually infinite. Here we explain not only why the 6-sided polygon is so popular but in addition how to attract hexagon sides accurately. We additionally answer the question "what is a hexagon?" utilizing the hexagon definition. When putting in and removing hex machine nuts, they can be done by hand or with instruments such as wrenches and sockets, depending on their measurement and utility requirements. For instance, small-sized hex machine nuts might require solely your fingers for set up, but bigger ones may require a wrench or socket set for proper installation and removal. The thread is the usual right-hand sequence unified and imperial coarse (UNC, unified national coarse) or unified imperial fine (UNF, unified national fine).
Just as a reminder, the apothem is the gap between the midpoint of any facet and the center. You can view it as the peak of the equilateral triangle shaped by taking one facet and two radii of the hexagon (each of the colored areas in the picture above). Alternatively, one can also think about the apothem as the space between the center, and any aspect of the hexagon because the Euclidean distance is outlined utilizing a perpendicular line. Our research spans a massive number of industries together with Energy, Technology, Manufacturing and Construction, Chemicals and Materials, Food and Beverages, etc. Having serviced many Fortune 2000 organizations, we deliver a wealthy and reliable expertise that covers all types of research wants. We additionally offer insights into strategic and progress analyses and knowledge essential to achieve company goals and critical income selections.
machine screw nuts
The hexagonal outer surfaces are burnished to resist abrasion and corrosion. Open-ended lug nuts are threaded the size of the nut and wouldn't have a closed finish. This allows you to run the lug nut on longer wheel studs the place you could be running a wheel spacer, without worrying about working out of thread on the wheel studs. Although less widespread today than the spline drive, the tuner with hex nut can be used in aftermarket wheel functions and for added safety.
Hex Cap Nuts are six sided hexagon blind nuts, used for covering the threaded end. Hex cap nuts are used for enclosing the threaded end of the bolt or screw thus enhancing the aesthetics of the bolting joint. Hexagon cap nuts, blind nuts, hex blind nuts are other alias of hex cap nuts.
Simply, choose the product you are interested in and click on ‘Add to purchasing cart’ below the product preview image and ‘Request quote’. You might need to create a free account when you haven’t accomplished so already. These have a hex formed head and a round/dome formed finish for the a half of the lug that makes contact with the wheel.
This makes changing the brake rotor straightforward however an added trouble of lining up the wheel and brake rotor when mounting wheels/tires. A tuner fashion lug nut contains a conical seat with a 60 degree taper however a major differentiating function is the requirement of a special key/tool to put in and take away the nut. Tuner nuts are sometimes much smaller in diameter than other kinds of lug nuts. The mag kind with flat seat washer may be discovered on many OEM wheel functions with a chrome plated end. A wide variety of nuts exists, from family hardware versions to specialized industry-specific designs which are engineered to satisfy various technical standards.
All different ASME digital PDFs sorts only require Adobe Reader/Acrobat to view after download. ASME Digital Standards - Digital PDFs are a single-user product with a license granted by ASME for private use only. The digital PDFs are encrypted and require both the Acrobat plug-in and the FileOpen Acrobat plug-in. Entice prospects to join for your mailing list with discounts or exclusive offers. The STAUFF web shop allows industrial customers and users to buy and order the products displayed on this class on-line – rapidly, simply, safely and economically priced. You have a regular demand for pipework gear and hydraulic parts and you would possibly be looking for particular person pricing for our product range, please contact STAUFF.
#stainless steel nuts#machine screw nuts#stainless steel hexagon nuts#hexagon nuts#nylon insert lock nuts#acorn cap nuts#coupling nuts#wing nuts#thin nuts#kep nuts#barrel nut#serrated flange nut#316 stainless steel nuts#stainless steel metric nuts
1 note
·
View note
Text
5 Benefits of Using Conical Lug Bolts for Your Car's Wheels
When it comes to the safety, performance and longevity of your car, every detail matters including lug bolts. This article will give you clarity on the various benefits of Conical Lug Bolts for your car's wheels. They can make a difference and give you an amazing driving experience.
A Conical Lug Bolt is a specially crafted fastener designed to protect your car's wheels to the hub. Especially, the conical shape of these bolts enables a comfortable fit between the wheel and the hub. It lessens the chances of vibrations and uneven wear.

Top Benefits Of Conical Lug Bolts-
Enhanced Stability and Safety- This is the primary advantage. The conical design ensures a precise fit that reduces the risk of wheel misalignment during high-speed driving and tight turns. It offers a safer driving experience for you on the road.
Enhanced Performance- These Lug Bolts have a positive impact on driving dynamics. It removes the wheel vibrations and wobbling which can improve handling and responsiveness. Be it city streets or a thrilling track day, these bolts can lead to a smoother and more controlled ride.
Easing of Wear and Tear- To prevent premature wear and tear on your tires, consider proper wheel alignment. A Conical lug bolt helps with the right alignment. With properly aligned wheels, tire wear is distributed evenly. It enhances the durability of your car tires and saves you money on replacements.
Installation and Maintenance- Installing these lug bolts is easy, but it needs careful attention to detail. Seek the help of professionals to ensure the correct installation. In addition, regular maintenance is equally important to get the best results.
Moreover, high quality Conical Lug Bolts provides various benefits for your car's wheels. They play a key role in streamlining your driving experience.
However, you should choose the right Conical Lug Bolt carefully to ensure excellent value for your money. A reliable supplier is your right stop for the best deal.
How can Car Owners Choose the Right Conical Lug Bolts?
Evaluating Compatibility- It is the first step to consider. Seek professional help or guidance to determine the right measurements and thread specifications required for your vehicle. It ensures stability and prevents any problems.
Material Matters- These lug nuts are usually made of steel, aluminum, and titanium. You can choose the right material as per your needs. However, steel is the mostly used material.
Length and Seat Type- Make sure about the length of these bolts that ensures a secure connection between the wheel and the hub. Consider the seat type (the meeting point of the bolt and the wheel) that should match your wheel's seat type.
Top Suppliers – Shop for high-quality lug bolts from reputable brands. Quality products ensure the safety and durability of your wheels. Verify the brands, read the reviews, etc.
As a responsible car owner, you should make an informed choice when it comes to conical lug bolts and Billet Wheel Spacers online. This is where E Century, Inc. comes in. We work directly with our manufacturers and can offer you quality products at competitive prices. Visit www.ezaccessory.com today!
0 notes
Text
Enhancing Performance And Style: Choosing The Right Aluminum Alloy Spacers For Your Exotic Car
Introduction:
When it comes to customizing and enhancing the performance of your exotic car, every detail matters. One important component that can make a significant difference is aluminum alloy spacers. These precision-engineered spacers not only offer improved handling and stability but also add a touch of style to your vehicle. In this article, we will guide you through the process of selecting the perfect aluminum alloy spacers for your exotic car.
Understanding the Benefits of Aluminum Alloy Spacers:
Enhanced Handling: Aluminum alloy spacers provide increased track width, improving stability during high-speed maneuvers and cornering.
Wheel Fitment: Spacers create more clearance between the wheel and suspension components, allowing for a wider range of wheel fitment options.
Improved Appearance: The use of aluminum alloy spacers can give your exotic car a more aggressive and muscular stance.

Factors to Consider when Choosing Aluminum Alloy Spacers:
Material: Look for spacers made from high-quality aluminum alloy, ensuring durability, strength, and resistance to corrosion.
Thickness: Consider the required thickness to achieve the desired wheel fitment and clearance.
Bolt Pattern: Ensure that the spacers match the bolt pattern of your exotic car's wheels.
Hub Centric Design: Opt for hub-centric spacers that provide a precise fit and minimize vibrations.
Stud Length: Check if the stud length of the spacers is compatible with your wheel setup.
Customization Options with Carbon Fiber:
Custom Carbon Fiber Spacers: For those seeking a unique and lightweight option, custom carbon fiber spacers are available. These spacers combine strength with a distinct carbon fiber weave pattern, adding a touch of exclusivity to your exotic car.
Importance of Professional Installation:
Seek Expert Advice: Consult with professionals who specialize in exotic car customization, such as exoticcargear.com, to ensure proper fitment and installation.
Safety Considerations: Improperly installed spacers can lead to wheel misalignment, uneven tire wear, and compromised handling. Professional installation ensures safety and performance.
Conclusion:
Choosing the right aluminum alloy spacers for your exotic car is crucial for enhancing both its performance and visual appeal. By considering factors such as material, thickness, bolt pattern, hub-centric design, and carbon fiber customization options, you can achieve the perfect fit for your vehicle. Remember to rely on professional expertise for installation to ensure optimal safety and performance. Visit exoticcargear.com to explore a wide range of high-quality aluminum alloy spacers and customization options for your exotic car.
0 notes
Text
LIUGONG WHEEL LOADER SPARE PARTS 106

SP170775 IDLER GEAR SHAFT
SP170776 IDLER GEAR ASSEMBLY
SP170777 CLAMP
SP170780 HEXAGON NUT
SP170781 AIR COMPRESSOR ASSEMBLY
SP170782 FLYWHEEL CONNECTING RING
SP170783 FUEL COARSE FILTER
SP170784 WATER PUMP PULLEY ASSEMBLY
SP170785 HEXAGON FLANGE BOLT
SP170788 VALVE STEM SEAL
70C1545 CAB HARNESS
SP171536 HEXAGON PLUG
SP151245 SPIRAL BEVEL GEAR
27C1258 COUNTERWEIGHT
49C5445 HOSE
05C7254 HOSE AS
66C8073 HOSE AS
20C3197 TRANSMISSION OIL COOLER
SP178543 DAMPING
SP178544 VALVE BODY
SP178545 ELEMENT ASSEBLY
SP178546 INDICATOR
SP178547 O-RING
SP178549 THE PLASTIC CUP BODY HEIGHT (M85X2.5)
25D0682X1 FORK BODY
14D0883 PISTON ROD
SP170795 BOLT M8X65
56A5358 WASHER
47C3722 DOOR LOCK
45C0704T0 CLAMP AS
55A9219 SPACER SLEEVE
53A3182 CAP
66C8374 HOSE AS
41A0881 GEAR
08D0365 TUBE AS
08D0364 TUBE AS
90A8161 TAG
90A8159 TAG
05C9036 HOSE AS
05C9037 HOSE AS
67C1308 HOSE AS
20C3204 WATER RADIATOR
67C1309 HOSE AS
67A0793 PIPE
67A0794 PIPE
SP178553 LOCKWASHER
09D9460 TUBE AS
12C6846 CONTROL VALVE
18D3697 MOUNTING PLATE GP
07C9022 HOSE AS
07C9023 HOSE AS
07C9025 HOSE AS
09D9855 TUBE AS
SP167254 FLYWHEEL
SP166361 SCREW HEX FLANGE HEAD
SP166352 SENSOR POSITION
SP166408 ISOLATOR VIBRATION
35C1584 SEAL RING
35C1583 SEAL RING
30B1364 REV SENSOR
07C8995 HOSE AS
67C1001 HOSE AS
39Y0150X0 FORK AS
SP176058 STUDDED FLANGE CAP SCREW
SP176077 SEALING WASHER
82A3957 LUBRICATION CHART
07C8999 HOSE AS
07C9000 HOSE AS
SP166188 OIL PAN
SP166189 PLUG
07C9014 HOSE AS
04C1431 HOSE AS
SP169344 BOLT M6×15
SP169345 CONNECT THE HOSE
SP169347 OIL PRESSURE TEMPERATURE SENSOR
SP169348 WATER TEMPERATURE SENSOR
SP169349 CRANKSHAFT SPEED SENSOR
SP169350 INTAKE MANIFOLD PRESSURE SENSOR
SP169352 WIRING HARNESS FASTENER Ⅳ
SP169353 WIRING HARNESS FASTENER(Ⅰ)
SP169354 THE ADJUST PAD
SP169355 RIGHT-ANGLED HOSE
SP169356 THE COVER OF DRIVE RETAINER
SP169358 DRIVE RETAINER Ⅰ
SP169360 AIR COMPRESSOR GEAR
SP169361 GEAR HOUSING
SP169362 THE ENGINE SOFTWARE TAB
SP169363 ADJUSTER
SP169365 ECU
SP169366 WIRING HARNESS FASTENER Ⅳ
SP169368 COVER BOARD
49C5914 CONTROL BOX
07C7168 HOSE AS
SP168421 SEAL KIT
SP167996 TURBOCHARGER
SP163921 POSITION BRAKE BULB
SP163930 GASKET GEAR HOUSING
SP163931 REGULATOR SHELL
SP163933 CUSHION PLATE
SP163934 SUPPORT BASE PLATE
SP163935 INSTALLING BASE PLATE
SP163940 SENSOR
SP163943 SET MAIN BEARING
21C1304X0 HYDRAULIC OIL TANK
21C1305X0 HYDRAULIC OIL TANK
67C1408 HOSE AS
67C1407 HOSE AS
85A5438X0 SIDE HOOD
38Y0316X0 BUCKET
SP171513 RELIEF VALVE
SP171514 THE PILLOW BALL BEARING
SP171515 CROSS ASSEMBLY MAINTENANCE-FREE
SP171516 SLIDE FORKS
SP171517 UNIVERSAL JOINT ASSEMBLY MAINTENANCE-FRE
SP171518 SEAL KIT
SP171520 SEAL KIT
SP171521 SAFETY VALVE
SP171522 PILOT OVERLOAD VALVE
SP171523 SEAL KIT
SP171525 SEAL KIT
SP171535 HEXAGON FLANGE BOLT HEAVY SERIES
SP182365 SPRING WASHER
SP182366 PLAIN WASHER
SP182367 INNER HEXAGON SOCKET HEAD CAP SCREW
SP182368 INNER HEXAGON SOCKET HEAD CAP SCREW
SP182369 HEXAGON NUTS STYLE 1
67C2004 HOSE AS
67C2003 HOSE AS
67C2025 HOSE AS
97A0726 CUTTING EDGE
67C1536 HOSE AS
70C1340 HARNESS
70C1341 CAB HARNESS
66C8351 HOSE AS
70C1629 CABLE
08D0305 TUBE AS
51C0786 MIDDLE DRIVE SHAFT
51C0788 FRONT DRIVE SHAFT&BRG AS
35B0603 INSTRUMENT
66C2375 HOSE AS
09D4476 TUBE AS
32A4195 HOSE
15D1594 TUBE
18A8132 CUTTING EDGE
04A4325 FLANGE
30D3637 REAR FRAME
70C1133 CAB HARNESS
SP171579 INNER HEXAGON SOCKET HEAD CAP SCREW
SP171592 SQUARE TAPER SCREW PLUG
SP171595 HEXAGON HEAD BOLT
SP171598 CRANKSHAFT PULLEY
SP171599 ALTERNATOR BRACKET
SP171602 TENSIONER ASSEMBLY
SP171609 FIRST COARSE AIR FILTER
40C6589 PLUG
04B1465 SCREW
66C9808 HOSE AS
27A4248 MOUNTING PLATE
59A0007 PLATE
79A1330 DECAL
34C8262 SPACER RING
24C3386 BOOM
24C3387 LINKAGE
97A0850 CUTTING EDGE
97A0835 CUTTING EDGE
22D1944 BUCKET
SP126823 TUBE
11C2722 TRAVEL MOTOR
SP163412 OIL PUMP
60C0905 AIR FILTER MAIN ELEMENT
60C0906 AIR FILTER SAFETY ELEMENT
51C0764 FRONT DRIVE SHAFT&BRG AS
34B1820 START SWITCH
05C8993 HOSE AS
SP166342 INJECTOR
SP168713 FLANGE YOKE
SP168716 OUTER HEXAGON BOLT
SP168719 SPRING
37B2747 CIRCUIT BREAKER
85A5705X0 SIDE HOOD
SP168720 SHUT-OFF VALVE
11C2723 TRAVEL MOTOR
SP168442 PISTON
SP168448 PISTON ROD
48A6819 PLATE
58A4301 PLATE
70C1582 HARNESS
70C1109 HARNESS
SP161752 TEMP SENSOR
SP161764 BOLT
27C1109X0 COUNTERWEIGHT
38Y0431X0 BUCKET
48C5212 TOP COVER
30D3441 FRONT FRAME
10C4659X1 BUCKET TILTING CYLINDER
10C4658X1 BUCKET TILTING CYLINDER
32E2048X0 BUCKET AS
SP176116 HEXAGON FLANGE HEAD CAP SCREW
44D0885 COVER
70C2009 CAB HARNESS
05C9360 HOSE AS
52C0219T2 HOUSING
24C3367 BOOM
24C3368 LEVER
24C3369 LINKAGE
32A4271 WATER HOSE
38Y0471X0 BUCKET AS
SP164083 RIGHT HANDRAIL
SP164084 LEFT HANDRAIL
53C1144 SECONDARY FILTER AS
60A6020 LOWER PIN
21C1260X0 HYDRAULIC OIL TANK
18D3598 COVER
18D3599 BRACKET
34C7720 LOCKNUT
18D3597 BRACKET
60C0974 DIESEL ENGINE
76A1184 SNAP RING
53A3183 CYLINDER HEAD
01C1603 TUBE AS
18D4403 BRACKET
SP171501 TENSIONER ASSEMBLY
SP176117 HEXAGON FLANGE HEAD CAP SCREW
SP176123 HEXAGON FLANGE NUT
SP176128 HEXAGON FLANGE HEAD CAP SCREW
SP176129 HEXAGON FLANGE HEAD CAP SCREW
SP176130 HEXAGON FLANGE HEAD CAP SCREW
SP176133 HEXAGON FLANGE HEAD CAP SCREW
SP176134 HEXAGON FLANGE HEAD CAP SCREW
SP176135 HEXAGON FLANGE HEAD CAP SCREW
SP176136 HEXAGON FLANGE HEAD CAP SCREW
SP176137 HEXAGON FLANGE HEAD CAP SCREW
SP176140 HEXAGON FLANGE HEAD CAP SCREW
SP176142 HEXAGON FLANGE HEAD CAP SCREW
SP176143 HEXAGON FLANGE HEAD CAP SCREW
SP161378 COVER
70A0959T2 HOUSING
41C0788T0 DIFFERENTIAL
41C1612T0 OPEN DIFFERENTIAL
07C9529 HOSE AS
32A4288 WATER HOSE
08D0748 WATER HOSE
67C1766 HOSE AS
67C1814 HOSE AS
66C8373 HOSE AS
38Y0579X0 BUCKET AS
07C9423 HOSE AS
70C1488 CAB HARNESS
70C2006 GRID HEATER HARNESS
10C4772X0 BOOM CYLINDER
13D2282X1 CYLINDER BODY
10C4771X0 BOOM CYLINDER
13D2281X1 CYLINDER BODY
10C4757X0 BUCKET TILTING CYLINDER
13D2277X1 CYLINDER BODY
14D0943X0 PISTON ROD
13D2257X1 CYLINDER BODY
49C6600 HOSE
45D2781 SHROUD AS
12C7047 CONTROL VALVE
20C3175 WATER RADIATOR
SP172934 SEAL KIT
SP172935 SEAL KIT
38Y0492X0 BUCKET AS
27A4238 PLATE
27A4237 PLATE
24C3136 LINKAGE
04C1429 BELLOWS
24C3137 LINK
24C3147 LINK
32A4072 INTAKE PIPE
67C1505 HOSE AS
79A0838 DECAL
SP168166 CONNECTION OIL SUCTION
SP168209 GASKET OIL PAN
SP168239 BOWL PLUG
22D1957 BUCKET
67C2291 HOSE AS
00A8724 JOINT
70C2061 HARNESS
70C2060 HARNESS
48A7984 PLATE
35C1591 CUSHION
SP182370 HEXAGON FLANGE BOLT
09D9555 TUBE AS
67C0731 HOSE AS
49C5444 HOSE GP
30D3325 REAR FRAME
90A8093 TAG
SP175049 SEAL KIT
20C2469P01 AIR COOLER
20C2469P02 AIR COOLER
20C2469P03 AIR COOLER
20C2469P04 AIR COOLER
20C2470P01 WATER RADIATOR
20C2470P02 WATER RADIATOR
90A8101 TAG
20C2470P03 WATER RADIATOR
20C2470P04 WATER RADIATOR
20C2471P04 TRANSMISSION OIL COOLER
20C2472P04 OIL COOLER
90A8102 TAG
SP139444 EXHAUST WASHER
SP171601 PLUG
49C6356 CONTROL BOX
70C1935 HARNESS
40D1664 FRONT FENDER-LH
40D1665 FRONT FENDER-RH
40D1667 FENDER
38Y0524X0 BUCKET AS
67C0361 HOSE AS
56A5359 SHIM
57A2741 WASHER
12C6745 CHECK VALVE
18A7721 CUTTING EDGE
70C1106 CAB HARNESS
48A1285 PLATE
SP170172 CONTROL BOX AS
SP170182 SEAL KIT
SP170205 HOUSING FLYWHEEL
SP170206 DOWEL RING
01Y0562X0 FRONT AXLE AS
38Y0472X0 BUCKET
SP173361 PLANET CARRIER ASSY
SP173362 PLUG SCREW JB/ZQ4444-1997 M20×1.5
SP173363 OIL SEAL GB9877.1-88 62×93×20
SP173364 BOLT GB/T5785-86 M12×1.5×25
SP182371 HEXAGON HEAD BOLT
SP182372 HEXAGON HEAD BOLT
SP182373 HEXAGON HEAD BOLT
SP182374 HEXAGON PLUG
SP182375 INNER HEXAGON SOCKET HEAD CAP SCREW
SP182376 HEXAGON HEAD BOLT
SP182377 HEXAGON HEAD BOLT
SP182378 HEXAGON FLANGE BOLT
SP182379 TURBOCHARGER
SP182380 CRANKCASE ASSEMBLY
SP182382 BRACKET
SP182383 GAS PIPE
SP182384 HEAT EXCHANGER COOLANT PIPE
SP182385 BACK-UP BLOCK
SP182386 HEAT EXCHANGER BRACKET
SP182387 HARNESS ADAPTER
SP182388 PARKER FUEL FILTER
Read the full article
0 notes
Text

CCJH Bypass Sliding Barn Door Hardware Kit Double Track

Pre-purchase Information
Doors are not included, only the hardware kit is for sale.
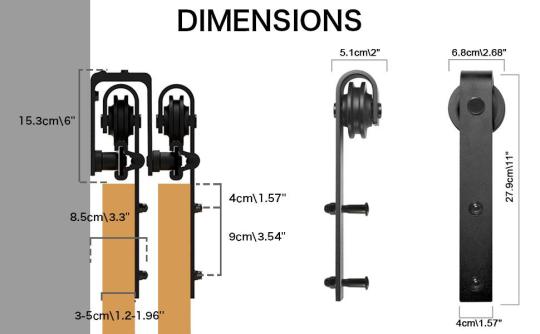
Q: What is the compatible door thickness?
A: 1- 3/16"-2"(3-5cm).
Q: What is the minimum clearance required above door?
A: At least 6".
Q: How to choose size?
A: Track's length should be at least of total door width or the opening (you can use the track which is a little bit longer).For example, if you have two doors that are each 36'' wide, you will need 2*36'' = 72'' long track. or if your opening is 72'' wide, you will need at least 72'' long track
Q: What should I do if I have a doorway trim?
A: Add a wood plate on wall,then install hardware on wood plate.
Q: My studs don't line up with the pre-drilled holes in the rail?
A: Add a wood plate on wall,then install hardware on wood plate.
Safety-ensuring Measures

Support Bracket: It is made of thick carbon steel,connecting two tracks. The longer the track, the more bracket, super solid and steady.
Rails: Rail is made by Aviation-grade aluminum, frosted black surface, corrosion and oxidation resistance. The width is 1.57’’; the thickness is 0.16".
Hangers: The hanger plate is made of carbon steel and the wheel is made by POM nylon, very durable, quiet and smooth.
Rail Supporter: With lag bolts and the spacers, the rail can be securely attached to the studs and can hold 220lbs comfortably. Our bolts can be used to both wooden wall and concrete wall.
Door Stops: Upgraded door stops with spring, reducing vibration for a quiet close.
Anti-jump Disks: Protect your door from falling off the track.
Floor Guide: Protect your door from swinging, keeping it stable.
Package List
2 Set Spliced Rails
4 x Hanger
4 x Door Stop
4 x Anti-jump Disks
2 x Floor Guide
1 x Installation Instructions
Rail Accessories (Reference Track Size)
Bypass bracket (The amount depends on the track size)
0 notes
Text
Essential Motorcycle Racing Parts: A Guide to R6/R7 Rear Wheel Spacers
When it comes to motorcycle racing, having the right parts is crucial for both safety and performance. One of the Motorcycle Racing Parts that is often overlooked is the rear wheel spacer. These spacers play a critical role in maintaining proper alignment and clearance of the rear wheel, ensuring a smooth and stable ride. In this blog, you will discover the importance of R6/R7 rear wheel spacers and why buying them online can be a smart choice.
Importance of R6/R7 Rear Wheel Spacers
R6 R7 Rear Wheel Spacers are specially designed for Yamaha R6 and R7 models and are essential components for any serious motorcycle racer. These spacers provide the necessary clearance for the rear wheel to move freely while ensuring proper alignment with the swingarm.
Without proper alignment, the bike may experience handling issues and even pose a safety risk to the rider. By using high-quality R6/R7 rear wheel spacers, riders can be confident that their bike will perform at its best on the track and on the road.
Why Buy R6/R7 Rear Wheel Spacers Online?
• Buying R6/R7 rear wheel spacers online can be a convenient and cost-effective option for many motorcycle enthusiasts.
• Online retailers often offer a wide range of options, allowing riders to find the perfect spacers for their specific needs.
• Additionally, online shopping eliminates the need to visit a physical store, saving time and effort.
• Finally, buying online can often result in cost savings due to lower overhead costs for the retailer, which can be passed on to the customer.
In conclusion, R6 R7 Rear Wheel Spacers are essential for any serious motorcycle racer. Maintaining proper alignment and clearance of the rear wheel, these spacers help ensure a smooth and stable ride.
When purchasing Motorcycle Racing Parts, buying online can be a smart choice. Not only does it offer convenience and cost savings, but it also provides a wide range of options to choose from. So, whether you're a professional racer or an avid enthusiast, consider purchasing your R6/ R7 Rear Wheel Spacers online for the best experience.
Blog Source: https://artofracingeu.wordpress.com/2023/02/21/essential-motorcycle-racing-parts-a-guide-to-r6-r7-rear-wheel-spacers
#Motorcycle Parts in Europe#Europe Motorcycle Parts#Motorcycle Racing Parts#Art of Racing#Motorcycle Racing Shops
0 notes
Text
Lift Kits – Knowledge for You
What exactly is a lift kit?
Vehicles that have been modified with a lift kit are raised slightly above ground level. It is usually tailored to the make and model of a given automobile.
You Can Choose Between These Two Major Varieties
Body lift kits
Suspension lift kits
Body lift kits need the removal of the vehicle's body from its chassis, the installation of spacers or blocks, and the subsequent use of longer bolts to reassemble the car.
Suspension lift kits are a more comprehensive method of raising the ride height of an automobile, as they work to lift the car at its wheels and axles.
It's common for body raise kits to add roughly five inches to the height of a car, while suspension lift kits can add anywhere from two to twelve.
Why Are These Settings Important?
The most noticeable advantage is the improved visual appeal of an elevated car, but there are also several functional advantages. First, with the higher ride height, off-road driving is made much simpler.
Driving off-road or on poorly maintained roads is simplified by the option of installing larger wheels and tyres (both off-road tyres and larger street tyres). (Upgrading your suspension and shocks is highly advised when you elevate your vehicle.)
Another perk is improved visibility while behind the wheel, which is useful both on and off-road. Everyday driving safety can be improved as a result of this enhanced ability to detect potential hazards sooner.
It will be easier to transport your goods. Towing will be easier because of the increased "squat" without bottom-out on the road.
Last but not least, the undercarriage of your car is considerably easier to inspect and fix.
Just a heads up, the longer stopping distances you'll have to cover with your larger tyres will increase the wear and tear on your braking system. You may find that your acceleration is irregular and your speedometer is off. It's also possible that your towing capacity will be somewhat altered.
In some cases, installing lift kits will cause the loss of the vehicle's original warranty. You should look at your unique case because this differs by manufacturer and warranty details (rather than relying on what someone else experienced with their vehicle).
One of the numerous benefits of these raise kits is the enhanced aesthetic appeal they provide to your car. You can weigh the potential drawbacks against your specific requirements and make an informed choice.
Please Explain How These Vary From Leveling Kits
A lift kit will increase the height of a truck or SUV more than a levelling kit. Why? A levelling kit, like a lift kit, lifts the vehicle's body off the axles to increase ground clearance and accommodate larger tyres, although the effect is not as dramatic.
With the help of a levelling kit, the front of the car can be raised up to two inches so that it is level with the back.
Who Setups Lift Kits?
Take action and you will see! Places where you can have it set up are listed below. In order to avoid stress ball joints breaking under the added weight, it is essential to have professional installers perform the job.
It's possible that modifying the car will be necessary as part of the installation process. Brake lines and drive shafts, for instance, may need to be lengthened. Some upgrades, like a new steering damper and/or a sway bar, could be helpful in maintaining a steady vehicle.
1 note
·
View note
Text
Rating The 10 Best Nissan Sports Cars Ever
The Z continued its transfer towards refinement when the Z32-generation 300ZX hit the market in April of 1989. This car was far more fashionable and one of many first production vehicles to be designed with CAD software. It had a cleaner look, a brand new multi-link rear suspension, and a dual-overhead cam three.0-liter V-6 with variable-valve timing. The new engine upped the output to 222 hp, cut the 0-60 mph run to about six seconds, and dropped the quarter-mile time to nissan sports car models 15.0 seconds. A 5-speed handbook and 4-speed automatic had been the transmission selections, and two-seat and 2+2 physique styles returned. At simply eight.5 inches longer than the previous era on a 4.7-inch longer wheelbase, the 2+2’s rear seat was tiny, and all models featured T-tops.
Ever since its 1992 launch, the Nissan Altima often provides a luxury option for the mid-size car class within the motoring market. With a relentless impressive sales figure for every model launched, the Nissan Altima proves that its safety-first and spectacular design philosophies are a hit amongst differing types of drivers. Power is robust, hustling the Z out of corners with its handbook gearbox offering fluid shift motion and an easy-to-work clutch.
It wasn't with out its drawbacks, as due to its low price, many of the supposedly premium interior finishes were really created from cheaper supplies, but consumers simply weren't bothered. They bought the 240Z in droves, and their reputation and continued desirability have meant that they are still relatively easy to supply on the used market right now. The Nissan Skyline R34 GTR holds the distinction of being the ultimate iteration of the long-running Skyline nameplate.
There aren't a complete lot of Nissan sports automobiles entering the market of late, with the Japanese automaker as an alternative channeling its assets into present models. It could be a strange approach for a typical producer, however the causes behind this strategy are obvious when you consider these in question. Starting with the crown jewel of Nissan sports models, the 2020 GT-R is a product of years of improvement and iconic builds.
A giant 9.0-inch infotainment display might be available to pair with the Z’s recent 12-3-inch digital gauge cluster, and three driver-focused analog gauges will present data like increase stress , battery voltage, and turbo speed. Not everything has changed though, as there are nonetheless fairly a couple of carryover elements within the interior that hint at how Nissan was able to ship the car at an reasonably priced price level. The Nissan Motor Company is probably certainly nissan sports car models one of the Japanese Big Three automotive OEMs, and it persistently ranks among the top 10 largest car makers in the United States. In the US market, the company sells models underneath its two main model names of Nissan and Infiniti, in addition to the high efficiency Nismo vehicles. With sleek seems, twin-turbo V-6 engine, optional stick shift, and rear-wheel-drive, the 2023 Z promises a mid-priced driver’s car for the Nissan lineup to go with the $100,000-plus GT-R supercar.
Adding a plenum spacer is also in style however a strut brace must be retained. Nissan, at one point of time, additionally used to promote the Bluebird, Fairlady and 240Z underneath the Datsun model. The name was phased out in the eighties and is now used to market price range automobiles in South Asian countries. In addition to the GO-based models, for Russia Datsun additionally provided the on-DO saloon and more practical mi-DO, each being badge-engineered models primarily based on the Lada Granta, with VAZ Lada forming part of the Renault-Nissan Alliance. The first ‘new-era’ 21st Century Datsun model to be introduced was the GO, a Fiesta-sized 1.2-litre hatch sharing many features in common with the more expensive Nissan Micra, including its engine and far of its inside. In the formative Nineteen Sixties, Nissan cunningly commissioning Pininfarina to design its mass-market Datsun saloons to tempt abroad consumers with its engaging ‘Euro’ family automobiles such because the second-generation Bluebird and Cedric.
The 2020 Nissan 370Z Coupe comes commonplace with the identical engine as the Roadster, nevertheless it also provides a Nismo engine, which is the most highly effective Nissan Z engine to date. The 350-horsepower engine will get 276 pound-feet of torque with a six-speed handbook transmission and an Exedy high-performance clutch, for smoother shifting. With the base nissan sports car models trim, you presumably can expect normal features corresponding to 18-inch alloy wheels and LED headlights. The Performance trim offers 19-inch cast Rays wheels, a rear spoiler, bigger brakes, a performance exhaust, and heated aspect mirrors.
0 notes
Text
Alloy wheels are wheels that are made from an alloy of aluminum
Alloy wheels are wheels that are made from an alloy of aluminum and magnesium. They are typically lighter and provide better heat conduction and improved cosmetic appearance over steel wheels. Such types of China three wheel motorcycle Suppliers wheels are used for truck, motorcycle and car thus enhances the handling and speed of the vehicle. These come in many intricate designs and give you vehicle a lot of character. By searching on the internet, you can find the reliable service providers that are recognized for selling a diverse range of high quality alloys. However, there are many companies available in the market that supply outstanding quality alloys. They are one of the UK's leading alloy wheel specialists. With over three decades of experience, they have a dedicated team of experts with a wealth of knowledge in tyres and alloy wheels.
The firm was established in 2004 in the Coventry, West Midlands and have been providing an unrivaled service with a personal touch ever since. Being a small company, they pride on providing the best alloys at unbeatable prices. At their website, you can get a diverse range of alloy wheels from all across the globe. Not only are their items of outstanding quality but of leading brand too. The experts use the latest machinery and supreme weights from Trax to ensure your wheels are perfectly balanced and fitted correctly.These are strong, durable yet stylish. The site is user-friendly and will guide you through whom alloys will fit according to the make and model of your vehicle.
Some other services that they provide are: Alloy Wheel Refurbishment, Tyres, Wheel Spacers, Wheel Accessories, Arch Rolling, Free Tyre Safety Check and Supertracker 4 wheel alignment. The team undergoes regular training to ensure they are up-to-date and fresh with skills and knowledge in the sector. Feel free to call staff that is always ready to give you advice and answer your inquiries you may have. They regularly monitor their prices against other companies to bring you the best value for money. They are the trusted seller to clients worldwide. Apart from this, they take your feedback seriously and strive to provide better service to their customers. The following are the reasons to choose them: top quality products, receive expert professional assistance and get your items delivered quickly and directly to your door.
0 notes
Photo

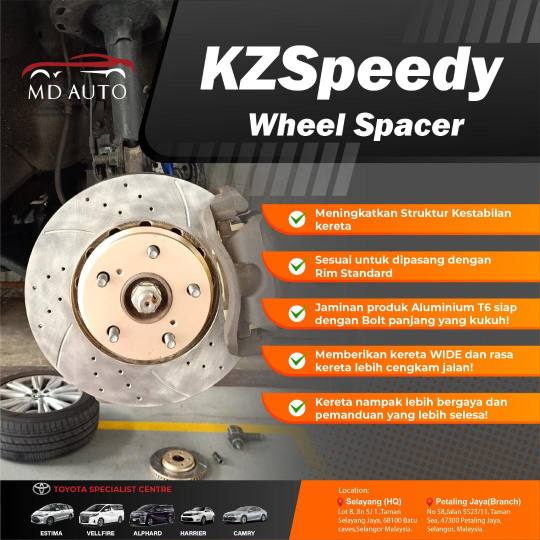


WELCOME TO TOYOTA/LEXUS SPECIALIST SERVICES - MD AUTO SELAYANG JAYA
TOYOTA MPV MODEL'S RECOMMEND 3 TYPES OF UPGRADES⁉️
Here we have tips for all Toyota MPV Alphard, Vellfire or Estima drivers on how to improve your comfort and safety without major modifications!
If you want to go back home or on holidays in Malaysia, you must want a wide space so that the children are comfortable. But the problem faced by many is that the driver does not feel confident or the car sways while driving on the highway. Therefore, we would like to recommend 3 types of upgrades that are most suitable for everyone!
✅ Vehicle Safety Bar (Ultra Racing Bar)
✅ EVA Coil Spring Buffer
✅ KZSpeedy Wheel Spacer
MD AUTO PETALING JAYA
011-33053231
Whatsapp : www.wasap.my/601133053231
Waze : https://waze.com/ul/hw2838r82k
MD AUTO SELAYANG JAYA
016-5243231
Whatsapp : www.wasap.my/60165243231
Waze : https://waze.com/ul/hw2863jk4g0
www.mdauto.com.my
#toyotaspecialist #mdauto #wurth #evacoilspringbuffer #eva #toyota #vellfire #alphard #estima #repair #service #recon #upgrade #comfort
0 notes
Last Seen Blogs

succubusimonerps
The Succubus WantsTo Play~

serefki
Serefki

pasajero-del-viento-blog
Pasajero del Viento

vehanlysterne
incorrect quotes

psychonautics
Modern Psychonautics