
urban-homesteading
Urban Homesteading
Zerowaste home steading tips for the city dweller
and the land blessed
714 posts
Don't wanna be here? Send us removal request.
Last Seen Blogs


Text
Oh hey, do you know what time it is? It is highly specific resource time!
Today we have the Royal School of Needlework Stitch Bank! There are HUNDREDS of stitch types in the RSN Stitch Bank.
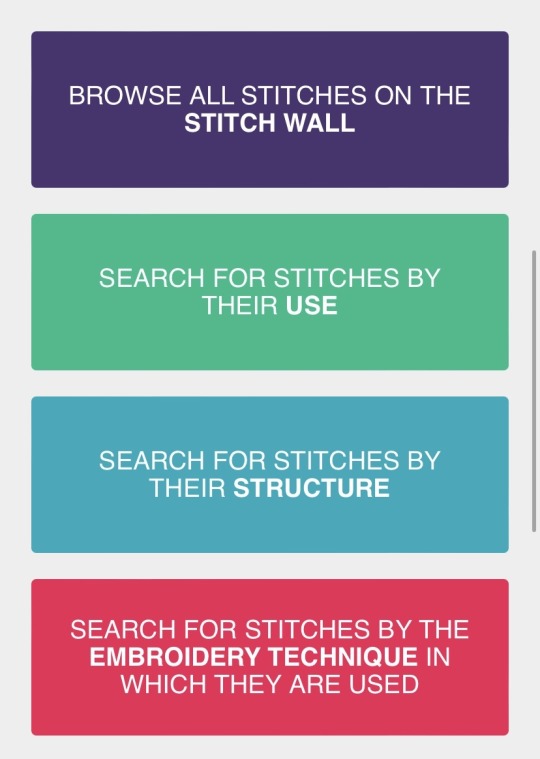
And more added regularly, let’s look at a recent addition


I picked the first one in the 25 recently added Elizabethan stitches, the Elizabethan French Stitch


The stitch bank provides written and photo tutorials as well as a video option to learn to do it yourself. There are examples of the stitch in use, resources, references, everything but a needle and thread!
rsnstitchbank.org
13K notes
·
View notes
Text
Rose hips are the fruit of the rose plant. Every rose blossom that is left unpicked will eventually develop a berry-like hip after the flower fades away. Each hip contains rose seeds inside, along with hundreds of little fuzzy hairs. Rose hips are edible and have medicinal values.
15 notes
·
View notes
Text
The gist:
1. Start seeds indoors. Do this about six to eight weeks before the last frost date. It can help to soak your seeds in water 24 hours prior to planting. This will help soften the hard outer shell around each seed and make it easier for them to germinate.
2. Harden off indoor seedlings before taking outdoors full time.
2. Plant them in mounds. You should plant your seeds in little hills, each of which should be about a foot apart along a fence or something else that your loofah vines can climb.
3. If growing directly outside, once each plant is about two inches tall, thin to a single plant (choose the healthiest one and cull the rest).
4. If you’ve already planted your loofah gourds and a cold snap threatens, put a cloche over your seedlings. This can be as simple as a plastic soda bottle cut in half with a few air holes.
5. Prevent deformed fruits by checking them as they grow and making sure they aren't getting trapped in a fence.
6. Choose the right variety. There are actually two species of gourds that are referred to as loofahs - Luffa aegyptiaca and Chinese okra. You want luffa acuntangular, also known as smooth luffa, Egyptian luffa, gourd luffa, or dishrag gourd.
7. Use diatomaceous earth in the late summer. In the late summer and early fall, when your plants have produced fruits that are almost ready for harvest, you may want to apply a light dusting of diatomaceous earth. This will help prevent squash beetles, creatures who can decimate loofah plants.
8. When it comes time to harvest, make sure you know the ideal time to do so. Usually, you will want to harvest once the vines have died back, before the first frost in the fall. To remove your loofahs, pinch or cut them off at the vine. This will leave the plant in good stead if there are other gourds that will need to ripen. If a frost threatens, harvest your loofah sponges. Even if they are still green, it’s better to harvest them before the frost hits, as this will lead to premature rot.
9. Prepare your sponges. You will need to do a bit of prep work to get your gourds ready for clean-up. Position your luffa gourd on a solid, flat surface. Use a stone or a rolling pin to remove the dried exterior skin. After you’ve removed both the seeds and the skin, there will be a black, brown, or yellow material underneath. Then soak this material in a solution of bleach water. Rinse them afterward with a few squirts from a hose at high pressure. This will remove any remaining seeds, mold, or rotten material. Allow the loofahs to dry in direct sunlight and a light breeze for a couple of days. Turn them regularly to make sure they dry evenly.
18 notes
·
View notes
Text
The gist of the article:
1. Check frost dates. Some plants, like asparagus, kale, and spinach, can be hardened off while there’s still a risk of frost, most can't though.
2. Stop watering and fertilizing one week ahead of time.
3. Keep them in trays and add some wind with a fan. Start with the low setting.
4. Choose the right spot and pick your timing carefully. The best time is after the risk of frost has passed, on a day it is cloudy, warm, and with little wind.
5. If you don't have a shady, sheltered spot outside, use your garage or even a screened-in, unheated porch.
6. Cold frames can also be used instead of the perfect spot.
7. Start with putting them outside for just one hour. Set an alarm so you don't forget. Continue to add more time of them being outside each day.
8. Provide protection as needed. Even if you put them in the ground, if an unexpected frost or storm happens, you can protect your plants with covers.
9. Get them used to the daytime first, then they can start staying out overnight.
10. Some wilting immediately after planting or even on the first day or so is normal. Continue to water as normal.
#Why is it only ten bullets when the article says fifteen?#Because they really drew it out when it didn't need to be#garden#plant#planting#grow your own food#gardening
16 notes
·
View notes
Text
Five seconds of waiting for the packige in the rain
9 notes
·
View notes
Text


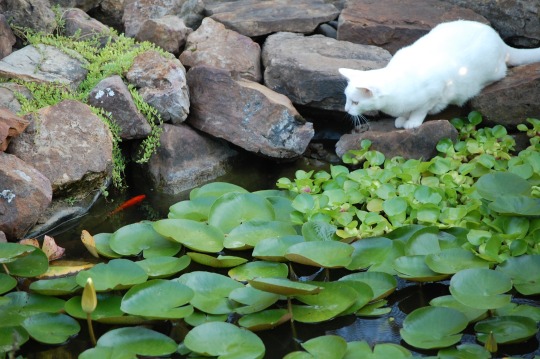


𝖼𝗎𝗋𝗂𝗈𝗎𝗌 𝖼𝖺𝗍 𝖻𝗒 𝗃𝖾𝖿𝖿𝗋𝖾𝗒𝗐 ♡
13K notes
·
View notes
Text
i like the convenience of cup noodles in terms of being able to make lunch using nothing but the hot water dispenser at work, but i hate the amount of trash. but whenever i look up diy cup noodles it's all fancy recipes for healthy alternatives to cup noodles, which i do not give a shit about. so i finally cracked a brick of ramen into quarters and shoved it in a mason jar, then poured 180F water in there to see if it would work. it seemed like it should but so many websites were telling me to parboil my noods that i was starting to doubt myself.


it worked! my only note is that i shook the sealed jar at the end to disperse the flavor packet and in retrospect i should also have done that at the beginning. i could probably do this with better bouillon and some tasty spices if i wanted. also there is room in there for frozen veggies. but mostly this an easy way to convert a 30¢ ramen packet to a 52¢ cup noodle without any extra trash.
3K notes
·
View notes
Text


today I learned about "thumb book holders" in my search for ways to read giant fantasy paperbacks without injuring myself, and then I realized I could make one out of the 20-year-old polymer clay that I had lying around... so I did.
and god DAMN it's more effective than I ever expected, so I thought everyone should know about them. You can get really cheap mass-produced ones but this was fun to make and I'll probably make more ᕕ( ᐛ )ᕗ
8K notes
·
View notes
Text
Things I wish I had read in "beginner" sewing tutorials/people had told me before I started getting into sewing
You have to hem *everything* eventually. Hemming isn't optional. (If you don't hem your cloth, it will start to fray. There are exceptions to this, like felt, but most cloth will.)
The type of cloth you choose for your project matters very much. Your clothing won't "fall right" if it's not the kind of stretchy/heavy/stiff as the one the tutorial assumes you will use.
Some types of cloth are very chill about fraying, some are very much not. Linen doesn't really give a fuck as long as you don't, like, throw it into the washing machine unhemmed (see below), whereas brocade yearns for entropy so, so much.
On that note: if you get new cloth: 1. hem its borders (or use a ripple stitch) 2. throw it in the washing machine on the setting that you plan to wash it going forward 3. iron it. You'll regret it, if you don't do it. If you don't hem, it'll thread. If you don't wash beforehand, the finished piece might warp in the first wash. If you don't iron it, it won't be nice and flat and all of your measuring and sewing will be off.
Sewing's first virtue is diligence, followed closely by patience. Measure three times before cutting. Check the symmetry every once in a while. If you can't concentrate anymore, stop. Yes, even if you're almost done.
The order in which you sew your garment's parts matters very much. Stick to the plan, but think ahead.
You'll probably be fine if you sew something on wrong - you can undo it with a seam ripper (get a seam ripper, they're cheap!)
You can use chalk to draw and write on the cloth.
Pick something made out of rectangles for your first project.
I recommend making something out of linen as a beginner project. It's nearly indestructible, barely threads and folds very neatly.
Collars are going to suck.
The sewing machine can't hurt you (probably). There is a guard for a reason and while the needle is very scary at first, if you do it right, your hands will be away from it at least 5 cm at any given time. Also the spoils of learning machine sewing are not to be underestimated. You will be SO fast.
I believe that's all - feel free to add unto it.
21K notes
·
View notes
Text
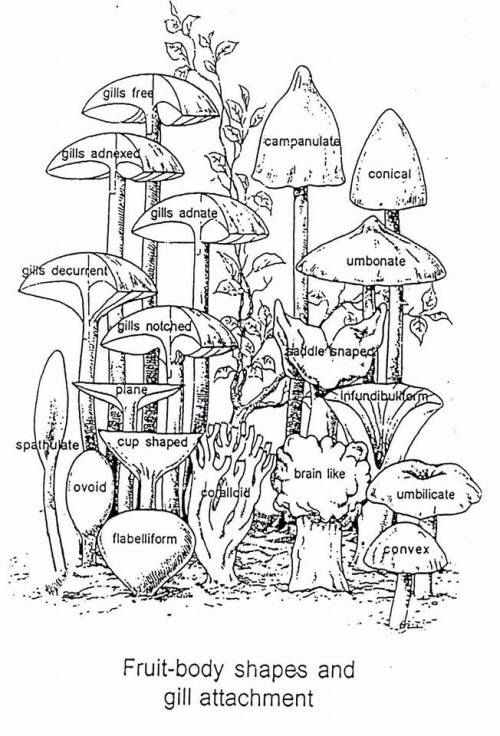
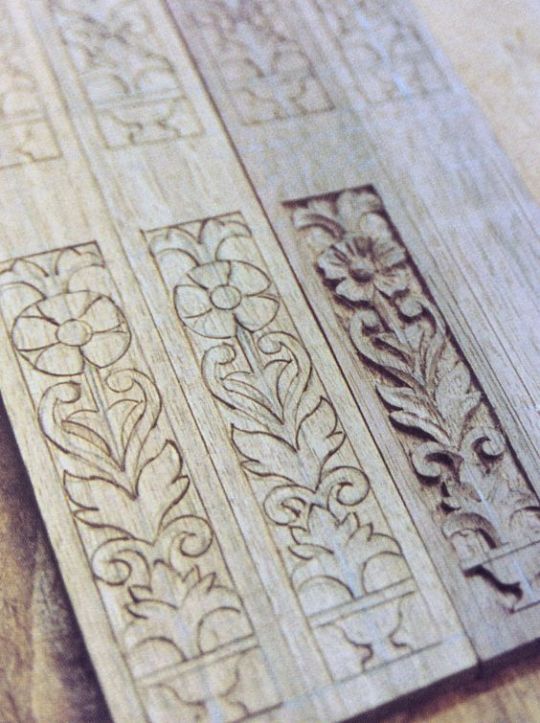
More medieval dyes for y'all!

43K notes
·
View notes
Text
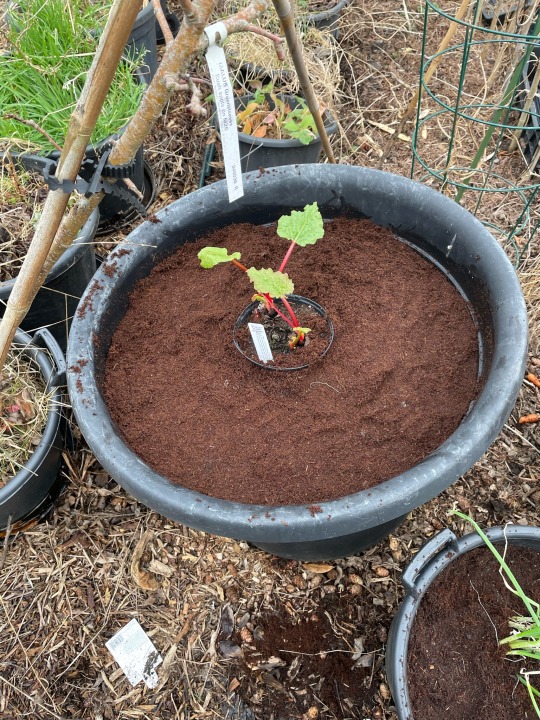
Winter in the garden
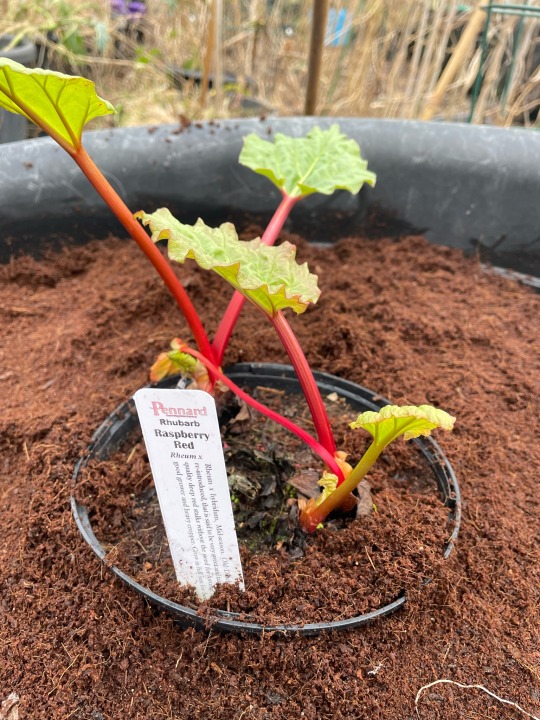

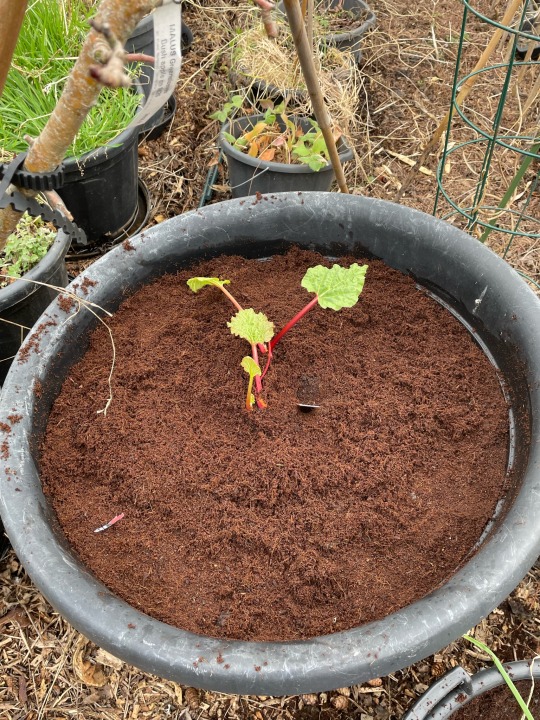
Planting out my new rhubarb; red raspberry
6 notes
·
View notes
Text
12 notes
·
View notes