
anafeest20
Ana Feest - Blog
I'm always passionate about the things I like most. I'm a professional writer and graphic designer. I've completely finished almost 1500+ projects at Color Experts International Inc.. This is one of the best photo editing service provider companies with a highly experienced post-production team. That's the reason why I like them the most. And I'm continuously taking their high-quality clipping path service from them. And here you'll able to get photography-related content. So, please stay with us.
59 posts
Don't wanna be here? Send us removal request.
Last Seen Blogs

kurauchiryuko-works
DRAGONずワークス


imaginationplaytime
Play Time

belllite319
Free Download

acepalindrome
you're going to be something extraordinary
Text
The Photographer’s Guide to Client Satisfaction: Best 13 Practices and Tips
As a photographer, you know that your skills and creativity are essential for producing stunning images. But do you also know that your service and communication are equally important for satisfying your clients and growing your business? In this article, we will share with you some of the best practices and tips for providing exceptional service to your photography clients, from the initial inquiry to the final delivery.
1. Respond promptly and professionally to inquiries

When a potential client contacts you, whether by email, phone, or social media, you should reply as soon as possible and in a courteous and friendly manner. This shows that you value their interest and that you are reliable and professional.
You should also answer any questions they may have and provide them with relevant information about your services, pricing, availability, and portfolio. By doing this, you will create a good first impression and establish rapport with your potential client. You will also increase your chances of converting them into a paying customer.
According to a study by Lead Response Management, the odds of contacting a lead decrease by over 10 times in the first hour after they submit an inquiry. Therefore, responding promptly and professionally to inquiries is crucial for your photography business success.
2. Set clear expectations and boundaries
Before booking a client, you should make sure that both parties have a clear understanding of what to expect from each other. You should communicate your policies, terms and conditions, contract, payment schedule, cancellation policy, turnaround time, delivery method, and any other details that are relevant to the project.
You should also establish your boundaries and limitations, such as how many revisions you offer, how many images you deliver, how long you keep the files, etc.
This way, you can avoid any misunderstandings or conflicts later on. By doing this, you will create a clear and fair agreement with your client and protect your rights and interests as a photographer. You will also ensure that your client knows what they are paying for and what they can expect from you.
According to a survey by The Freelancer’s Union, 71% of freelancers have had trouble getting paid by their clients at some point in their careers. Therefore, setting clear expectations and boundaries is crucial for your photography business success.
3. Prepare well for the shoot

Once you have booked a client, you should start preparing for the shoot. You should do some research on the client’s needs, preferences, style, and personality. You should also scout the location, check the weather, plan the lighting, test your equipment, pack your backup gear, and create a shot list.
You should also confirm the date, time, and place of the shoot with the client a few days before the session. By doing this, you will ensure that you are ready and confident for the shoot and that you can meet your client’s expectations and vision. You will also avoid any potential problems or delays that could affect the quality of your images or the satisfaction of your client.
According to a study by Professional Photographers of America, 83% of clients say that preparation is one of the most important factors in choosing a photographer. Therefore, preparing well for the shoot is crucial for your photography business success.
4. Be friendly and respectful during the shoot
You should introduce yourself and anyone else who is working with you, such as an assistant or a second shooter. You should also make sure that your client is comfortable and relaxed. You can do this by engaging them in small talk, complimenting them, giving them positive feedback, and directing them gently.
You should also respect their privacy and boundaries, and ask for their consent before touching them or moving their belongings. By doing this, you will create a friendly and respectful atmosphere for the shoot and make your client feel valued and appreciated. You will also help your client to pose naturally and confidently for the camera and capture their best expressions and emotions.
According to a study by Psychology Today, 93% of communication is nonverbal, which means that your body language, tone of voice, and facial expressions can have a huge impact on how your client perceives you and responds to you. Therefore, being friendly and respectful during the shoot is crucial for your photography business success.
5. Deliver high-quality images on time

After the shoot, you should edit your images carefully and professionally. You should select the best images that meet your client’s expectations and match your style. You should also apply any necessary adjustments, such as cropping, color correction, retouching, etc. You should then deliver your images on time or even earlier than promised.
You can use online platforms such as Dropbox or Google Drive to share your images with your client. You should also provide them with instructions on how to download, view, and print their images. By doing this, you will ensure that you deliver high-quality images that showcase your skills and creativity. You will also impress your client with your efficiency and reliability.
According to a study by PhotoShelter, 76% of clients say that image quality is the most important factor in hiring a photographer, and 68% say that delivery time is the second most important factor. Therefore, editing and delivering your images carefully and professionally is crucial for your photography business success.
6. Follow up and ask for feedback
Once you have delivered your images, you should follow up with your client and ask for their feedback. You should thank them for choosing you as their photographer and express your appreciation for their cooperation.
You should also ask them if they are happy with their images and if they have any questions or concerns. You should also invite them to leave a review or testimonial on your website or social media pages. This will help you improve your service and attract more clients in the future.
7. Stay in touch and build relationships
The last tip for providing exceptional service to your photography clients is to stay in touch and build relationships with them. You should not treat them as one-time customers but as long-term partners.
You should keep them updated on your latest work, promotions, events, etc. You should also send them greetings on special occasions such as birthdays or anniversaries. You should also offer them incentives such as discounts or referrals for repeat bookings or referrals. By doing this, you will create loyal clients who will trust you and recommend you to others.
8. Be flexible and adaptable
Sometimes, things may not go as planned during a shoot. You may encounter unexpected challenges such as bad weather, equipment failure, uncooperative subjects, etc. In such situations, you should be flexible and adaptable.
You should not panic or complain, but try to find solutions and alternatives. You should also communicate with your client and explain the situation and your actions. You should also be open to their suggestions and requests, as long as they are reasonable and within your scope of work.
9. Be honest and transparent
Another important aspect of providing exceptional service to your photography clients is to be honest and transparent. You should not make false promises or exaggerate your abilities or results.
You should also not hide or cover up any mistakes or issues that may arise during or after the shoot. You should admit your errors and apologize sincerely. You should also offer compensation or correction if necessary. By being honest and transparent, you will earn your client’s respect and trust.
10. Be respectful and courteous
You should also treat your client with respect and courtesy at all times. You should not be rude, arrogant, or condescending. You should also not criticize or judge your client’s appearance, choices, or opinions.
You should also respect their culture, religion, beliefs, and values. You should also use appropriate language and tone when communicating with them. You should also address them by their preferred name and title.
0 notes
Text
Product Photography Styling Tips: Using Common Household Items
Product photography is a skill that can help you showcase your products in an attractive and professional way. Whether you are selling on online platforms, social media, or your own website, having high-quality product photos can make a big difference in your sales and brand image.
However, product photography can also be challenging and expensive, especially if you don’t have access to a studio, lighting equipment, or props. Fortunately, you don’t need to spend a lot of money or time to create stunning product photos. You can use common household items to style your products and enhance your images.
In this article, we will share some product photography styling tips using items that you probably already have at home. These tips will help you create more engaging and appealing product photos without breaking the bank.
1. Use a white sheet or paper as a backdrop

One of the simplest and most effective ways to create a clean and professional-looking background for your product photos is to use a white sheet or paper.
You can hang a white sheet on a wall, a door, or a window, and place your product in front of it. Alternatively, you can use a large piece of white paper or cardboard and lay it on a flat surface, such as a table or a floor.
A white backdrop will help you eliminate any distractions and make your product stand out. It will also reflect light and create a soft and even illumination for your product.
You can also adjust the brightness and contrast of your images in post-processing to make the white background look more crisp and pure.
2. Use books as props or stands

Books are versatile and useful items that you can use to style your product photos in different ways. You can use books as props to add some interest and context to your images.
For example, you can place books next to your product to create a cozy and intellectual vibe, or stack them under your product to create some height and dimension.
You can also use books as stands to prop up your product or your camera. For example, you can place your product on top of a book to make it more visible and prominent, or use books to adjust the angle and position of your camera. You can experiment with different sizes, colors, and genres of books to find the ones that match your product and brand aesthetic.
3. Use plants or flowers as accents

Plants or flowers are natural and beautiful elements that you can use to add some color and life to your product photos. You can use plants or flowers as accents to complement your product and create a fresh and inviting atmosphere.
For example, you can place a plant or a flower next to your product to create some contrast and balance, or arrange them around your product to create a frame or a backdrop.
You can choose plants or flowers that suit your product and brand identity. For example, you can use succulents or cacti for a minimalist and modern look, or roses or orchids for a romantic and elegant look. You can also use artificial plants or flowers if you don’t have access to real ones.
4. Use kitchen utensils or food items as props

Kitchen utensils or food items are common household items that you can use to style your product photos in a creative and fun way. You can use kitchen utensils or food items as props to showcase your product’s features or benefits, or to create a story or a scenario for your product.
For example, you can use a knife or a spoon to demonstrate how easy it is to cut or scoop your product, or use an apple or a cake to show how delicious or healthy your product is.
You can also use kitchen utensils or food items as props to add some texture and variety to your images. For example, you can use a cutting board or a plate as a base for your product, or sprinkle some salt or sugar on top of your product to create some sparkle and detail.
Here are some more product photography styling tips using common household items:
5. Use fabrics or clothes as backdrops or props

Fabrics or clothes are another easy and inexpensive way to create a different look and feel for your product photos. You can use fabrics or clothes as backdrops or props to add some color, texture, or pattern to your images. For example, you can use a scarf or a sweater as a backdrop to create a cozy and warm mood, or use a shirt or a dress as a prop to show how your product can be worn or styled.
You can choose fabrics or clothes that match your product and brand personality.
For example, you can use silk or velvet for a luxurious and elegant look, or cotton or denim for a casual and simple look. You can also mix and match different fabrics or clothes to create contrast and interest.
6. Use candles or fairy lights as light sources

Candles or fairy lights are common household items that you can use to create a different light source for your product photos.
You can use candles or fairy lights as light sources to add some warmth, glow, or sparkle to your images. For example, you can use candles or fairy lights behind your product to create a bokeh effect, or place them around your product to create a festive and romantic atmosphere.
You can choose candles or fairy lights that suit your product and brand mood. For example, you can use white or yellow candles or fairy lights for a natural and soft look, or colorful or patterned candles or fairy lights for a fun and playful look.
You can also adjust the brightness and distance of the candles or fairy lights to create different effects.
7. Use mirrors or reflective surfaces as props or effects

Mirrors or reflective surfaces are common household items that you can use to create a different perspective or effect for your product photos. You can use mirrors or reflective surfaces as props or effects to add some depth, symmetry, or drama to your images. For example, you can use a mirror or a reflective surface behind your product to create a reflection, or place it in front of your product to create a double exposure.
You can choose mirrors or reflective surfaces that suit your product and brand style. For example, you can use a round or oval mirror for a classic and elegant look, or a geometric or irregular mirror for a modern and edgy look. You can also experiment with different angles and positions of the mirrors or reflective surfaces to create different results.
8. Use jewelry or accessories as props or accents

Jewelry or accessories are common household items that you can use to style your product photos in a glamorous and sophisticated way. You can use jewelry or accessories as props or accents to add some sparkle, detail, or contrast to your images.
For example, you can use jewelry or accessories next to your product to create a matching or contrasting set, or place them on top of your product to create some texture and interest.
You can choose jewelry or accessories that match your product and brand theme. For example, you can use gold or silver jewelry or accessories for a luxurious and refined look, or colorful or quirky jewelry or accessories for a fun and playful look. You can also mix and match different jewelry or accessories to create variety and harmony.
9. Use toys or figurines as props or models
Toys or figurines are common household items that you can use to style your product photos in a cute and fun way. You can use toys or figurines as props or models to add some personality, humor, or scale to your images.
For example, you can use toys or figurines next to your product to create a scene or a story for your product, or place them on top of your product to show how big or small your product is.
You can choose toys or figurines that suit your product and brand character. For example, you can use plushies or dolls for a soft and sweet look, or action figures or Lego for a cool and adventurous look. You can also use toys or figurines that are related to your product’s theme or niche, such as animals, cars, superheroes, etc.
10. Use mugs or glasses as props or effects

Mugs or glasses are common household items that you can use to style your product photos in a creative and practical way. You can use mugs or glasses as props or effects to add some texture, shape, or color to your images. For example, you can use mugs or glasses next to your product to create a cozy and relaxing mood, or place them in front of your product to create a filter or a distortion.
You can choose mugs or glasses that match your product and brand style. For example, you can use plain or colorful mugs or glasses for a simple and elegant look, or patterned or quirky mugs or glasses for a fun and unique look. You can also experiment with different sizes, shapes, and materials of mugs or glasses to create different results.
These are some of the product photography styling tips using common household items that you can try at home. You don’t need to spend a lot of money or time to create stunning product photos. You just need to be creative and resourceful with the items that you already have. Have fun and happy shooting!
Conclusion
Product photography is a skill that can help you showcase your products in an attractive and professional way. However, you don’t need to spend a lot of money or time to create stunning product photos. You can use common household items to style your products and enhance your images.
We hope you enjoyed this article and learned something new. If you have any questions or feedback, please let us know in the comments below.
0 notes
Text
0 notes
Text
0 notes
Text
30+ Portrait Poses: How to Pose for Portrait Pictures
Learn more: https://www.colorexpertsbd.com/blog/portrait-poses/
1 note
·
View note
Text
Creating Visually Compelling Product Photos

High-quality product photography is invaluable for ecommerce success. However, great images don’t happen by accident. Crafting product photos that make buyers stop scrolling and spur purchases requires skillful photo editing. From perfecting studio product shoots to retouching and optimizing images, mastering photo editing helps your products stand out online.
This comprehensive guide explores the art and science of editing ecommerce product images that sell. Follow these pro tips and techniques for product photo editing mastery. Learn how to shoot and style quality product photos, edit images for visual impact, and adapt photos for every sales channel. With strategic editing, you can spotlight your products’ unique features, tell a compelling brand story, and resonate with your target audience. Let’s dive into how to capture profitable product photos through purposeful image editing.
Set the Stage with a Professional Photo Shoot
Before editing can even begin, quality product photos must be captured upfront. Setting up a streamlined product photography workflow lays the groundwork for editing success.
Build Out a Home Photography Studio
Investing in basic studio equipment pays off through radically improved product shots. Here are the photography fundamentals to assemble:
Backdrops — Seamless paper backdrops in colors like white, black, and gray provide clean backgrounds.
Lighting — Continuous studio lighting sets up bright, even lighting from multiple angles.
Tripods — Sturdy tripods allow stable product framing and positioning.
Remote triggers — Remote shutter releases reduce camera shake for tack-sharp shots.
Reflectors and diffusers — Bounce cards and diffusers refine lighting.
Product platforms — Small risers stage and angle products.
Prop styling tools — Props add lifestyle context.
This affordable home studio setup enables consistently lit, professional-grade product photography. For more advanced product shoots, invest in pro lighting kits, backdrops, and camera gear.
Dial In Camera Settings for Optimal Photos
Configuring camera settings for product specificity ensures the cleanest, sharpest possible original photos:
Manual focus for razor sharpness on small products.
Low ISO and tripods eliminate blur from camera shake.
Small apertures widen depth of field to keep all product details in focus.
Lighting is angled 45 degrees to brightly yet evenly illuminate all sides.
RAW or high-quality JPEG for maximum editing flexibility.
Custom white balance prevents color casts under studio lighting.
Technical photography skills and the right camera settings prevent issues that are difficult to correct in post-production.
Methodically Style Products for Compelling Compositions
Careful product styling generates interest and directs visual focus:
Coordinate prop and background colors to complement products’ colors and materials.
Use props and posed hands to demonstrate scale and real-world product size.
Arrange products to specifically highlight key features, parts, or designs.
Add lifestyle context through environmental props and settings.
Adhere to on-brand styles, color schemes, and tones.
Thoughtful product arrangements maximizes how appealing and informative the resulting images will be.
Maintain Consistency Across All Product Photos
Consistent lighting, angles, framing, and camera settings ensure a cohesive product catalog:
Use the same studio lighting setup for all images in a catalog.
Photograph 3–5 standard angles — front, back, sides, close up detail, top down, 45 degree.
Frame all product images identically with consistent negative space.
Keep backgrounds consistent, changing only when appropriate.
Shoot all photos from the same distance, perspective and focal length.
Adhering to a structured formula results in professional, interchangeable product images primed for conversion-focused editing.
Editing Techniques to Make Products Pop
Purposeful post-processing elevates good product images into great ones ready to drive sales. These are the editing steps that add visual appeal and get attention:
The Power of Cropping
Cropping is one of the most effective yet underutilized techniques for dramatically improving product photos. The way an image is framed and the amount of negative space surrounding the product can totally transform the visual impact.
Getting in close to cut out extraneous background elements helps the product pop as the sole point of focus. Tight cropping also creates an intimate feel that allows the textures, colors and details of the product to shine. Additionally, cropping to align the product to rule of thirds intersection points or on diagonal lines adds dynamism and energy.
Playing with vertical or horizontal orientations or trying square crops opens up creative possibilities. Even simple tweaks like cropping out the edge of a surface the product sits on to imply infinite space makes a striking difference. With all these relatively simple edits, cropping gives photographers immense power to turn dull, flat product images into eye-catching visuals.
Color Correct for Brand Consistency
Maintaining consistent coloring across product photos is crucial for brand image. When shooting photos in different locations and lighting conditions, colors can shift and vary. However, customers expect to see the same familiar product hues that align with the brand, regardless of minor photographic variables.
That’s where color correcting comes in. Adjusting temperature, tint, hue, saturation and vibrance enables photographers to neutralize lighting imbalances and align colors to match the brand’s signature palette.
For example, an Instagrammable lifestyle brand may want all their product images to share a bright, warm and cozy filter look. Or an edgy fashion label may favor cooling down tones for an icier, more detached aesthetic.
Having a clear creative direction for ideal color treatment and correcting systematically helps strengthen brand recognition. With the power of color correcting, product photos can better evoke the intended style and identity.
Background Removal to Simplify
One highly effective technique for creating clean, attention-grabbing product photos is to eliminate the background altogether.
Removing distracting or cluttered backgrounds is an impactful way to simplify images and make the product the unmistakable hero. Using photo editing software, it’s possible to carefully cut out and delete backgrounds to isolate the product on a white, gray or colored backdrop. The sharper separation of the product from its surroundings draws the eye directly to it.
Image background removal also provides flexibility for more dramatic digital backgrounds, like gradients or splashes of color that complement the product. Additionally, it helps unify product series with a cohesive look when the background is stripped away. For web stores and advertisements where products are displayed together in rows, removing backgrounds delivers a cleaner, gallery-style effect. With this trick, product photos transform into strong, graphic images that put the product front and center.
Targeted Retouching
Though excessive photoshopping should be avoided, targeted retouching can greatly enhance product photos. Instead of aiming for unrealistic perfection, the goal should be to subtly polish and bring out the best qualities of the product. For example, adjusting tone, highlights and shadows to create a more balanced exposure draws attention to the right details.
Eliminating minor blemishes and dust specks cleans up the image. Sharpening edges and details makes features crisp and clear. The product itself can also be retouched — a garment may be ironed out digitally, or small adjustments could improve how a product sits. Used with a light hand, these edits build focus on strengths and remove minor flaws and distractions.
When done right, retouching almost invisibly enhances the product image for maximum appeal. The product shines while looking natural and realistic. With strategic retouching, product photos come to life.
Web Optimization
In today’s digital marketplace, product photos need to be tailored for online viewing conditions. Images that work in print catalogs may not translate well to ecommerce sites and apps.
Photos intended for the web should be edited with visibility on screens in mind. This includes resizing images for optimal page load speeds, yet preventing pixelation even when images are enlarged. Touch-ups like increasing contrast compensate for the tendency of screens to dull details. Sharpening and noise reduction also help maintain clarity and quality on monitors. Additionally, keeping file sizes small through compression optimization ensures fast performance.
Choosing appropriate image formats like JPG over PNG or TIFF balances visual quality and speed. Finally, providing multiple cropped ratios tailored to different layout needs enables seamless, responsive display across various web interfaces. Following web-specific best practices allows product photos to look stunning online, a key consideration in modern photography.
Streamline Editing Workflows
Editing product images can be incredibly tedious. However, leveraging process efficiencies can help you scale production.
Unlock the Power of Batch Processing
Post-processing product photos one by one can be extremely tedious and time-consuming. Batch processing unlocks powerful time-saving efficiency for photographers through automated editing workflows. Programs like Adobe Bridge and Lightroom allow photographers to apply edits like cropping, color correction, sharpening, resizing and more to a group of selected image files all at once.
This makes it easy to maintain consistent style and branding across product lines. Batch editing also frees up time, allowing volume output of photos optimized for ecommerce needs. With practice, batch workflows can be fine-tuned for one-click polished final exports. Smart use of actions and presets boosts productivity further.
While batch processing does limit individual adjustments, the tradeoff for radically enhanced efficiency and productivity gains is worthwhile in high-volume product photography. Embracing this automation can take product photo output to the next level.
Lean on Outsourcing and Services
Photographing an extensive product catalog can be daunting, especially for sellers without an in-house studio and team. Outsourcing product photos or utilizing specialist online services provides helpful alternatives for beautiful, high-volume product imagery. Ecommerce brands can hire trusted freelance photographers to handle shoots and post-production work.
Outsourcing to affordable overseas providers is another option, made simpler through services that manage the process virtually.
These services leverage automation and professional post-production to deliver finished product photos at scale. Taking advantage of outsourcing gives ecommerce sellers access to polished, commercial-grade product photography without the costs of owning a studio. The time and quality gains can be invaluable.
Upgrade to Pro Editing Software
Relying on limited basic apps for editing product photos can hamper both quality and efficiency. Investing in advanced professional software pays dividends through more powerful tools, automation options, and time savings.
Programs like Adobe Photoshop and Lightroom provide sophisticated features for precision edits and enhancements. Layer editing in Photoshop facilitates detailed retouching and background removal. Batch processing in Lightroom speeds up large volumes of photos. Programs offer advanced color correction tools critical for polished product images. They also integrate AI features like one-click background removal.
For more industrial products, 3D rendering software like Keyshot creates sophisticated CGI visuals. Though pricier, upgrading unlocks substantial new capabilities. The productivity and quality gains over basic apps make professional software well worth the investment for serious product photographers and ecommerce businesses. Partnered with photography skills, pro software is the key to next-level product images.
Shoot Photo Variations for Diverse Usage
Having a variety of images showcasing products in different contexts gives you content flexibility across sales and marketing initiatives.
Hero Product Images
Clean, centered hero shots ideal for product pages. Shoot square and off-center.
Alternate Angles and Close-Ups
The standard front-on product photo only reveals so much. Taking shots from multiple angles and perspectives allows customers to understand the complete product design. Capturing the back, sides and interior builds a more immersive view of the product details. Close-up macro shots that showcase specific features and textures bring important, yet easily overlooked fine points front and center.
Alternate angles like low angle and overhead shots add visual variety and energy. Details and unflattering angles can even be hidden strategically. Using clips and animations to display the product rotating gives a lively 3D effect. Zooming in on different areas engages viewer attention.
With a mix of angles and close-ups, the product story comes together and customers gain confidence in quality. This variety captures interest and inspires visual product exploration. Alternate vantage points allow product photos to reveal much more than what meets the front-facing eye.
Cropped Views
Strategic cropping creates artistic, abstracted views that provide visual intrigue. By framing tight, cropped compositions within a product photo, interesting geometric shapes, colors, patterns and textures come forward. For example, a apparel product image may focus in on an original button detail or cropped pants hem.
Food packaging can be cropped to highlight a flavor accent ingredient. Using cropping to divide a product into sections tells a progressive story. Cropped views also build anticipation and suspense when key features are intentionally hidden at first. Dramatic angles like overhead crops encourage visual exploration.
Alternating cropped views with full product shots keeps a sense of wholeness. With imagination, cropping opens up many possibilities for fresh, unexpected and memorable visions of a product. Cropped views turn product photos into works of art unto themselves.
Flat Lay Shots
Flat lay photography provides an appealing way to showcase entire product collections in one artful arrangement. Flat laying involves displaying products tidily together against a neutral background, shot from directly above. Often accessories, textures and props are added to complement the products aesthetically.
The orderly composition looks great on ecommerce category pages and social media. Flat lays also excel when products have intricate details that are best viewed from straight above, like shoe soles or bag interiors. The consistent style creates cohesive product line branding and helps products pop surrounded by negative space. Products can be color coordinated for further visual impact.
Flat lays work for almost any type of merchandise. They straddle the line between product photography and artistic still life, creating engaging visual content. Flat laying products strikes an ideal balance between showcasing an entire collection while highlighting individual items.
Animated GIFs
Animated GIFs bring product images to life through motion. Short moving GIFs are highly engaging for social media and web marketing. They allow key aspects of products to be displayed interactively.
For example, a bag can be shown from multiple angles as it rotates. Electronics can be demonstrated turning on. The motion of mechanisms, interactions and transformations can be depicted. Bursts of a model interacting with a product, like swiping makeup or unfolding sunglasses, inject personality. Subtle motion GIFs like flowing textiles add organic dynamism. GIFs Catch the eye and hold attention longer with an endlessly looping product interaction.
With the popularity of auto-play videos declining, compact GIFs deliver focused motion in a convenient format. Though GIF length requires editing down key moments, the accessible motion effect is worth the limitation. Animated GIFs empower product photos to tell a captivating visual story in seconds.
Optimize Images for Every Platform
To maximize performance, product images must be adapted and optimized for each sales and advertising channel.
Product Pages
Product pages are the centerpiece of ecommerce sites, and optimizing product photos for this specific use case elevates the customer experience. Product pages require clear, crisp imagery that details the product from all angles.
A primary hero image should be shot on white background to focus entirely on the product. Supplementary lifestyle images showcase product use and style. Close-up detail shots provide enhanced views of features, materials and branding. Images should be formatted correctly for page layouts, aligned to product information. Descriptive filenames help match images to copy.
Every product photo on the page has a purpose, like demonstrating scale or showcasing color options. Images are sized for quick loading but not so small that zooming becomes necessary. Overall, product pages need a strategic imagery plan tailored to display the product in the best possible light.
Email Campaigns
Email marketing campaigns offer a prime opportunity to strategically highlight products through compelling photography. Featured product spotlights with bold, eye-catching images encourage engagement and sales. Close-up photos cropped for maximum impact make products irresistible.
Animated GIFs of products in motion add interest to images in the inbox. Behind-the-scenes product photos convey storytelling and personality. Consistent image styles strengthen branding across campaigns. Image file sizes should be kept small to prevent linking out, and key product details should be noticeable without full image downloads. Optimized subject lines with “peek” product images boost open rates.
Products can be tied to seasonal campaigns or customized to match subscriber segments and interests. Most importantly, images should create desire and urgency to click through to the product page and purchase. With smart incorporation of product photos, email campaigns turn subscriber inspiration into conversions.
Fundamentals of Professional Image Editing
Consistently generating product images that stop scrollers and drive sales requires diligence and skill. Keep these best practices in mind:
Always shoot originals with optimal camera and lighting techniques.
Style products methodically to highlight selling points.
Learn to expertly use editing software like Photoshop and Lightroom.
Take advantage of batch processing, automation and outsourcing.
Create supplemental lifestyle and detail shots beyond hero images.
Adapt images for fast loading web resolutions and individual contexts.
Edit subtly and authentically. Don’t overly process images.
Work with professional product photographers when needed.
Wrap-up
Selling with product images takes equal parts creativity and strategy. By honing your photo editing skills, you gain the power to make products irresistible online. Follow these tips to step up your editing game. With practice, you can master the art of image post production and create visuals that drive conversions.
1 note
·
View note
Text
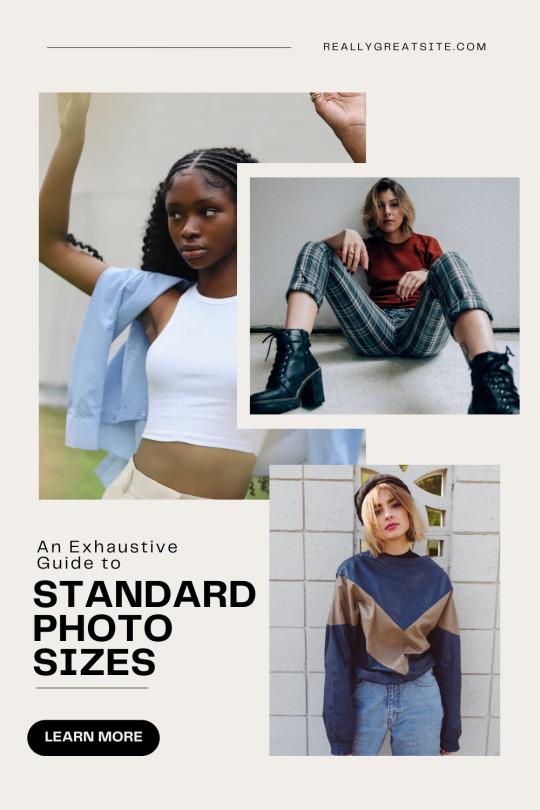

Learn More - A Guide to Standard Photo Sizes
1 note
·
View note
Text

Top 16 Highest Paid Photographers in the World
Learn more: https://www.colorexpertsbd.com/blog/highest-paid-photographers-in-the-world/
0 notes
Text

Learn more: 10+ Photo Editing Styles
2 notes
·
View notes
Text
Professional Car Photo Editing Service
1 note
·
View note
Text
0 notes
Text
Looking for the best action camera flashlight to take your photoshoot or videoshoot to the next level. Well! Here it is.
Click on the title to learn more.
2 notes
·
View notes