
Last Seen Blogs

musical-theatree
no such thing as too much les mis

douglydesign
Doug Wohlfeil

sqlilps
sqlilps

captainitza
Captain Itza

floofle-poofle
Just another fuckin blog
Text
Configuration Files and Settings: Ensuring a Smooth Transition

Introduction:
Moving your website to a new hosting environment or server can be a daunting task, fraught with potential pitfalls and risks. However, with meticulous planning and a systematic approach, you can ensure a seamless migration that minimizes downtime, data loss, and potential issues. In this comprehensive guide, we'll delve into the intricate details of website migration, covering everything from pre-migration checklist to post-migration optimization.
Part 1: Pre-Migration Planning and Preparation
1.1 Assessing Your Current Website
- Conduct a thorough audit of your website's structure, content, and functionality
- Identify any custom code, third-party integrations, or dependencies
- Document all plugins, themes, and software versions
1.2 Choosing the Right Migration Method
- Manual migration (suitable for smaller, less complex sites)
- Migration plugins or tools (recommended for most websites)
- Managed migration services (ideal for large, complex sites or non-technical users)
1.3 Creating a Comprehensive Backup
- Backup your website's database, files, and configurations
- Consider using backup plugins or your hosting provider's backup tools
- Store multiple backup copies in secure locations
1.4 Setting Up a Staging Environment
- Create a staging site on the new server for testing purposes
- Replicate your live site's configuration and content on the staging site
Part 2: Executing the Migration
2.1 Migrating Your Website's Files
- Transfer your website's files to the new server using FTP, SFTP, or migration plugins
- Ensure file permissions and ownership are correctly set
2.2 Migrating Your Database
- Export your database from the current hosting environment
- Import the database to the new server or staging site
- Use search and replace tools to update URLs and paths if necessary
2.3 Updating Configuration Files
- Update your website's configuration files (e.g., wp-config.php for WordPress)
- Modify database credentials, URLs, and paths to reflect the new environment
2.4 Testing and Troubleshooting
- Thoroughly test your migrated website on the staging site
- Check for broken links, missing files, functionality issues, and compatibility problems
- Resolve any issues before proceeding to the live migration
Part 3: Live Migration and Post-Migration Tasks
3.1 Migrating to the Live Environment
- Once satisfied with the staging site, migrate your website to the live environment
- Update DNS settings and propagate changes if necessary
3.2 Final Testing and Checks
- Test your live website for any remaining issues or discrepancies
- Verify that all functionality, plugins, and third-party integrations are working correctly
3.3 Performance Optimization
- Implement caching solutions and performance optimizations
- Minify CSS, JavaScript, and HTML files
- Optimize images and other media files
- Enable Gzip compression and browser caching
3.4 Security Hardening
- Update all software, plugins, and themes to the latest versions
- Implement security best practices (e.g., strong passwords, two-factor authentication)
- Configure web application firewalls (WAFs) or security plugins
3.5 Monitoring and Maintenance
- Set up monitoring tools to track website performance and uptime
- Establish a regular maintenance schedule for updates and backups
- Document the migration process for future reference
Conclusion:
Website migration can be a complex and challenging endeavor, but with the right preparation, tools, and systematic approach, you can navigate the process successfully. By following the steps outlined in this guide, you'll be well-equipped to migrate your website seamlessly, minimizing downtime, data loss, and potential issues. Remember, proper planning, thorough testing, and attention to detail are key to a successful website migration.
0 notes
Text
Elevating Customer Experiences: The Role of WooCommerce ERP Integration
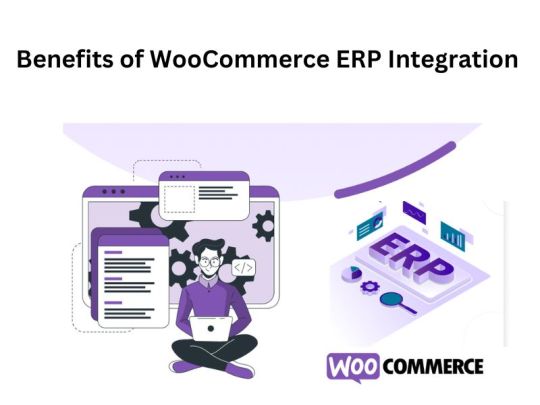
In the dynamic realm of e-commerce, success hinges on the ability to adapt to changing market trends, streamline operations, and deliver exceptional customer experiences. As businesses strive to achieve these objectives, the integration of WooCommerce, a leading e-commerce platform, with an Enterprise Resource Planning (ERP) system emerges as a game-changing solution. In this comprehensive guide, we delve into the intricacies of WooCommerce ERP integration, exploring its benefits, implementation best practices, and the transformative impact it can have on your business.
Understanding WooCommerce ERP Integration
At its core, WooCommerce ERP integration involves the seamless synchronization of data and processes between WooCommerce, the e-commerce platform, and an ERP system, which serves as the central hub for managing various aspects of business operations. This integration facilitates the exchange of critical information such as orders, inventory levels, customer data, and financial transactions in real-time, enabling businesses to operate more efficiently and effectively.
Benefits of WooCommerce ERP Integration
1. Efficient Inventory Management: Real-time synchronization between WooCommerce and ERP ensures accurate inventory tracking, reduces stockouts, minimizes excess inventory, and optimizes reorder points.
2. Automated Order Processing: Orders placed on WooCommerce are automatically synced with the ERP, streamlining the order fulfillment process, reducing errors, and enhancing customer satisfaction.
3. Centralized Data Management: Integration eliminates data silos by consolidating data from multiple sources into a centralized platform, providing businesses with comprehensive insights into sales, inventory, and financial metrics.
4. Enhanced Customer Experience: Accurate product information, personalized recommendations, and timely order updates contribute to a seamless customer experience, fostering loyalty and driving repeat purchases.
5. Streamlined Financial Management: Integration simplifies financial processes such as invoicing, billing, and reconciliation, enabling businesses to generate accurate financial reports and ensure compliance with accounting standards.
6. Scalability and Flexibility: Integrated systems can scale to accommodate growing transaction volumes, expanding product catalogs, and evolving business needs, providing businesses with the flexibility to adapt to changing market conditions.
7. Cost Savings: While the initial investment may be required for implementation, the long-term cost savings associated with automation, reduced errors, and improved resource utilization justify the investment in WooCommerce ERP integration.
8. Improved Decision-Making: Data-driven insights derived from integrated systems empower businesses to make informed decisions swiftly, identify growth opportunities, and mitigate risks effectively.
9. Regulatory Compliance: Integration facilitates compliance with regulatory requirements such as taxation, data protection, and product safety, minimizing the risk of non-compliance penalties and ensuring business sustainability.
10. Competitive Advantage: By optimizing operations, enhancing customer satisfaction, and fostering innovation, WooCommerce ERP integration provides businesses with a strategic advantage in a competitive market, driving sustainable growth and success.
Implementing WooCommerce ERP Integration: Best Practices
- Assess Business Needs: Conduct a thorough assessment of your business requirements and objectives to determine the scope and scale of integration.
- Choose the Right ERP Solution: Select an ERP system that aligns with your business goals, scalability requirements, and budget constraints.
- Seek Professional Assistance: Engage experienced developers or consultants specializing in WooCommerce ERP integration to ensure a smooth and successful implementation.
- Data Migration and Mapping: Plan and execute data migration and mapping processes meticulously to ensure data accuracy and consistency across integrated systems.
- Testing and Validation: Conduct comprehensive testing and validation procedures to identify and rectify any issues or discrepancies before deploying the integrated solution.
- Training and Adoption: Provide training and support to employees to facilitate seamless adoption of the integrated system and maximize its benefits.
Conclusion
WooCommerce ERP integration represents a transformative opportunity for businesses to optimize efficiency, enhance profitability, and deliver exceptional customer experiences. By leveraging the power of integration, businesses can streamline operations, gain actionable insights, and stay ahead of the competition in today's rapidly evolving e-commerce landscape. Embrace WooCommerce ERP integration today and unlock the full potential of your business.
0 notes
Text
Simplifying WooCommerce Payment Gateways: Your Roadmap to Success
Introduction:
In the bustling world of e-commerce, one of the most critical aspects of running a successful online store is ensuring smooth and secure payment transactions. Enter WooCommerce Payment Gateways – the backbone of every digital storefront. If you're new to the world of online payments or looking to enhance your understanding, you're in the right place. In this comprehensive guide, we'll take you on a journey through the ins and outs of WooCommerce Payment Gateways, from what they are to how to choose the right one for your business.
What is a Payment Gateway?
Let's start with the basics. A payment gateway is like the cashier of an online store – it facilitates the transfer of funds from the customer's payment method to the merchant's bank account. In simpler terms, it's the technology that enables secure online transactions by encrypting and transmitting payment details between the customer, the merchant, and the financial institutions involved.
Understanding WooCommerce Payment Gateways:
WooCommerce, a powerful e-commerce plugin for WordPress, offers a plethora of payment gateway options to suit various business needs. Whether you're selling physical products, digital downloads, or services, there's a payment gateway for you. Here's a breakdown of the main types:
1. Hosted Payment Gateways:
Hosted gateways like PayPal Standard and 2Checkout redirect customers to a secure payment page hosted by the gateway provider. Customers enter their payment details here, and the transaction is processed externally before redirecting them back to the merchant's site.
2. Self-Hosted Payment Gateways:
Self-hosted gateways such as Stripe and Authorize.Net allow customers to input their payment information directly on the merchant's website. The sensitive data is securely transmitted to the payment gateway provider for processing, offering greater customization and control over the checkout experience.
3. Direct Post Gateways:
Direct post gateways like CyberSource and Worldpay send payment data directly from the customer's browser to the gateway provider's servers, bypassing the merchant's servers altogether. This reduces the risk of data interception and compromise, although it requires careful implementation for security and compliance.
4. API-Based Gateways:
API-based gateways like Braintree and Square provide merchants with the flexibility to integrate payment processing directly into their websites or applications using APIs. This allows for seamless integration with the checkout process and enables customization of the user experience and additional features such as tokenization and recurring payments.
Choosing the Right Payment Gateway for Your WooCommerce Store:
Now that you understand the types of payment gateways available, how do you choose the right one for your business? Consider the following factors:
1. Customer Preferences:
Take into account your target audience's preferred payment methods. Offering popular options like PayPal and credit/debit card payments can enhance customer convenience and satisfaction.
2. Security and Compliance:
Prioritize payment gateways that adhere to strict security standards and compliance regulations, such as PCI DSS compliance. Look for features like encryption, fraud detection, and secure tokenization to safeguard sensitive customer data.
3. Integration and Compatibility:
Ensure that the WooCommerce Payment Gateway API integrates seamlessly with WooCommerce and supports the features and functionalities you require, such as recurring billing, subscription management, and multi-currency support.
4. Fees and Pricing:
Consider the transaction fees, setup costs, and ongoing fees associated with each payment gateway. Compare pricing structures and evaluate the overall cost-effectiveness based on your transaction volume and business model.
5. Support and Reliability:
Choose a payment gateway provider that offers reliable customer support and maintains high uptime rates. Quick and responsive support can be invaluable in resolving issues and ensuring uninterrupted payment processing for your customers.
Implementing a Payment Gateway with WooCommerce:
Once you've selected the right payment gateway for your WooCommerce store, it's time to implement it. Here's a basic overview of the steps involved:
1. Install and Activate the Payment Gateway Plugin:
Install the plugin for your chosen payment gateway from the WooCommerce Extensions marketplace. Activate the plugin within your WordPress dashboard.
2. Configure Gateway Settings:
Navigate to the WooCommerce settings and locate the payment gateways section. Enable the desired payment method and enter the necessary credentials and settings provided by your gateway provider.
3. Test Transactions:
Conduct test transactions using test payment credentials provided by the gateway provider to ensure that payments are processed correctly and that the integration is functioning as expected.
4. Monitor Performance:
Monitor the performance of your payment gateway regularly, keeping an eye on transaction volumes, success rates, and any issues or errors that may arise. Address any issues promptly to minimize disruption to your customer's shopping experience.
Conclusion:
WooCommerce Payment Gateways play a crucial role in facilitating secure and seamless online transactions for e-commerce businesses. By understanding the different types of payment gateways available, considering key factors in the selection process, and implementing the chosen gateway effectively, you can ensure a smooth payment experience for your customers while maximizing conversion rates and driving business growth. So, go ahead, explore your options, and embark on your journey to e-commerce success with WooCommerce Payment Gateways by your side. Happy selling!
0 notes
Text
Crafting Digital Masterpieces: A Beginner's Journey with Elementor

Introduction:
In today's digital landscape, establishing an online presence is paramount for businesses and individuals alike. A visually appealing and user-friendly website serves as the cornerstone of online success. Elementor, a leading page builder plugin for WordPress, has revolutionized website design by offering a powerful yet intuitive platform for creating stunning websites without coding expertise. In this comprehensive beginner's guide, we will delve into the intricacies of Elementor, equipping you with the knowledge and skills to become an Elementor Expert and unleash your creativity in building captivating websites effortlessly.
1. Understanding Elementor:
Overview of Elementor: Introduction to Elementor's history, features, and popularity in the WordPress ecosystem.
Key Features Deep Dive: Exploring Elementor's drag-and-drop interface, real-time editing capabilities, extensive widget library, and responsive design options.
Compatibility and Integration: Understanding Elementor's compatibility with various WordPress themes, plugins, and third-party tools.
2. Getting Started with Elementor:
Installation and Setup: Step-by-step instructions for installing and configuring Elementor on your WordPress website.
Interface Tour: A comprehensive walkthrough of Elementor's user interface, including the canvas area, toolbar, panel structure, and settings options.
Creating Your First Page: Practical guidance on creating a new page with Elementor and understanding the basic building blocks like sections, columns, and widgets.
3. Building Blocks of Elementor:
Sections and Columns: Explaining the concept of sections and columns and how to customize their layout, width, and height.
Widgets Explained: In-depth exploration of Elementor's extensive widget library, covering essential widgets for text, images, buttons, forms, and advanced elements like slideshows and testimonials.
Templates and Blocks: Leveraging Elementor's template and block library to kickstart your design process with professionally designed layouts and content blocks.
4. Designing Your Website:
Customization Techniques: Advanced customization options including typography settings, color schemes, spacing controls, and global style settings.
Responsive Design Principles: Strategies for ensuring your website looks great on all devices by optimizing responsiveness and using Elementor's device preview modes.
Animation and Effects: Incorporating animation effects, hover effects, and entrance animations to enhance user engagement and visual appeal.
5. Optimizing Performance and SEO:
Performance Optimization Strategies: Tips for improving website performance by optimizing images, minimizing CSS and JavaScript files, and leveraging caching plugins.
SEO Best Practices: Implementing SEO-friendly practices within Elementor, including optimizing page titles, meta descriptions, headings, and structured data.
6. Going Beyond the Basics:
Theme Building: Harnessing Elementor's Theme Builder functionality to design custom headers, footers, single post layouts, and archive pages.
Dynamic Content and Conditional Logic: Utilizing dynamic content widgets and conditional logic to create personalized user experiences and dynamic page layouts.
Third-Party Integrations: Exploring integrations with popular third-party services, including email marketing platforms, e-commerce solutions, and CRM systems.
7. Troubleshooting and Support:
Common Issues and Solutions: Identifying and troubleshooting common issues encountered while using Elementor, such as styling conflicts, layout discrepancies, and plugin compatibility issues.
Community Resources and Support: Accessing Elementor's extensive documentation, community forums, tutorials, and official support channels for assistance and guidance.
Conclusion:
Elementor empowers beginners and seasoned professionals alike to design visually stunning and highly functional websites with ease. By mastering Elementor's features, techniques, and best practices outlined in this comprehensive guide, you have the tools and knowledge to become an Elementor Expert and create captivating websites that resonate with your audience and achieve your online objectives. Whether you're a business owner, freelancer, or aspiring web designer, Elementor opens doors to limitless possibilities in web design and development. Embark on your journey to mastering Elementor today and elevate your web presence to new heights of success. Understanding Elementor's compatibility with various WordPress themes, plugins, and third-party tools.
0 notes
Text
Optimize and Automate: Integrating Third-Party APIs with WordPress

In the ever-evolving landscape of web development, the integration of third-party APIs (Application Programming Interfaces) has become a fundamental aspect of creating dynamic and feature-rich websites. With WordPress powering a significant portion of the internet, mastering the art of integrating third-party APIs into custom WordPress plugins can unlock a world of possibilities for developers and website owners alike. In this comprehensive guide, we'll explore the ins and outs of integrating third-party APIs into your custom WordPress plugins, empowering you to leverage external services and functionalities seamlessly.
Understanding Third-Party APIs
Before diving into integration, it's essential to grasp the concept of third-party APIs. Third-party APIs are interfaces provided by external services or platforms that allow developers to interact with their functionality and data. These APIs enable developers to extend the capabilities of their applications by integrating features such as social media login, payment gateways, mapping services, and more.
Benefits of Integrating Third-Party APIs in WordPress Plugins
1. Enhanced Functionality: By integrating third-party APIs, developers can add a wide range of functionalities to their WordPress plugins without reinventing the wheel. Whether it's adding social sharing buttons, integrating e-commerce features, or embedding multimedia content, APIs provide an efficient way to enhance the capabilities of your website.
2. Time and Cost Efficiency: Leveraging third-party APIs can significantly reduce development time and costs by eliminating the need to build complex features from scratch. Instead of dedicating resources to developing and maintaining proprietary solutions, developers can rely on well-established APIs that offer robust functionality out of the box.
3. Scalability and Reliability: Third-party APIs are maintained by external service providers who specialize in their respective domains. This means developers can benefit from the scalability, reliability, and security measures implemented by these providers, ensuring a stable and seamless user experience for website visitors.
4. Access to Data and Services: Integrating third-party APIs allows WordPress plugins to tap into vast repositories of data and services offered by external platforms. Whether it's accessing real-time weather forecasts, retrieving geolocation data, or fetching product information from an e-commerce platform, APIs enable plugins to enrich their functionality with up-to-date information.
Steps to Integrate Third-Party APIs into Custom WordPress Plugins
1. Research and Choose the Right API: Start by identifying the third-party API that best suits your plugin's requirements. Consider factors such as functionality, documentation, pricing, and user reviews to ensure compatibility and reliability.
2. Register and Obtain API Credentials: Most APIs require developers to register for an account and obtain API credentials such as API keys, access tokens, or OAuth tokens. Follow the provider's documentation to register and obtain the necessary credentials for authentication and authorization.
3. Understand API Documentation: Familiarize yourself with the API documentation provided by the third-party service. Pay close attention to endpoints, parameters, request methods, authentication methods, and response formats to understand how to interact with the API effectively.
4. Implement API Integration: Use WordPress hooks and functions to integrate the third-party API into your custom plugin. Depending on the API's requirements, you may need to make HTTP requests using functions like `wp_remote_get()` or `wp_remote_post()` to communicate with the API endpoints. Handle authentication and error handling according to the API's specifications.
5. Test and Debug: Thoroughly test the integration to ensure proper functionality and error handling. Use tools like Postman or cURL to test API requests manually and simulate various scenarios. Monitor API responses and debug any issues that arise during testing.
6. Optimize Performance: Optimize API requests to minimize latency and improve performance. Implement caching mechanisms to store and reuse API responses where appropriate, reducing the number of redundant requests and enhancing the overall responsiveness of your plugin.
7. Handle Rate Limits and Quotas: Respect rate limits and quotas imposed by the API provider to avoid exceeding usage limits and incurring additional costs. Implement rate limit handling and backoff strategies to gracefully handle rate limit exceeded errors and prevent service disruptions.
8. Stay Updated: APIs evolve over time, with providers releasing new features, endpoints, and updates. Stay informed about changes to the API by monitoring changelogs, subscribing to developer newsletters, and following the provider's official channels. Update your plugin accordingly to maintain compatibility and take advantage of new features.
Best Practices for Integrating Third-Party APIs in WordPress Plugins
1. Keep Credentials Secure: Store API credentials securely using WordPress's built-in options for storing sensitive data, such as the `wp_options` table or the `wp-config.php` file. Avoid hardcoding credentials directly into your plugin files to prevent security vulnerabilities.
2. Handle Errors Gracefully: Implement robust error handling mechanisms to gracefully handle API errors, timeouts, and connection issues. Provide informative error messages to users and log detailed error information for debugging purposes.
3. Follow API Terms of Service: Adhere to the API provider's terms of service and usage policies to avoid violations and potential repercussions. Respect usage limits, data usage restrictions, and any other guidelines specified by the provider.
4. Document Your Integration: Document your API integration thoroughly, both for your own reference and for other developers who may work on the plugin in the future. Include information about API endpoints, parameters, authentication methods, and usage examples to facilitate understanding and troubleshooting.
5. Monitor API Usage: Monitor your plugin's API usage and performance regularly to identify any anomalies or issues that may arise. Set up alerts and notifications to notify you of potential problems, such as exceeding usage limits or encountering errors.
Case Study: Integrating Google Maps API into a WordPress Plugin
As an example of integrating a third-party API into a custom WordPress plugin, let's consider the integration of the Google Maps API to add interactive maps to a travel blog plugin.
1. Research and Choose the API: Identify the Google Maps API as the most suitable solution for embedding maps into the plugin.
2. Register and Obtain API Credentials: Sign up for a Google Cloud Platform account and create an API key for accessing the Google Maps API services.
3. Understand API Documentation: Study the Google Maps API documentation to understand how to use the Maps JavaScript API to embed interactive maps into web pages.
4. Implement API Integration: Use the Google Maps JavaScript API to embed maps into the plugin's frontend interface, allowing users to visualize travel destinations and points of interest.
5. Test and Debug: Test the integration by adding maps to sample blog posts and verifying their functionality across different devices and browsers. Debug any issues and refine the implementation as needed.
6. Optimize Performance: Implement caching for map tiles and optimize the loading of map resources to enhance performance and reduce page load times.
7. Handle Rate Limits and Quotas: Monitor API usage to ensure compliance with Google Maps API usage limits and quotas. Implement rate limit handling to prevent service disruptions due to exceeding usage limits.
8. Stay Updated: Keep abreast of changes to the Google Maps API and update the plugin accordingly to maintain compatibility and leverage new features and improvements.
Case Study 2: Integrating Third-Party ERP System with WooCommerce
Consider a scenario where a business wants to integrate its ERP (Enterprise Resource Planning) system with WooCommerce, a popular e-commerce platform built on WordPress. By integrating the ERP system with WooCommerce, the business can synchronize inventory, orders, and customer data between the two systems, ensuring seamless operations and improved efficiency.
To achieve this integration, the business can develop a custom WordPress plugin that communicates with the ERP system's API. The plugin can fetch product data from the ERP system and sync it with WooCommerce, update inventory levels in real time, and send order information back to the ERP system for processing.
Key steps in this integration process may include:
API Authentication: Obtain API credentials (e.g., API key, OAuth tokens) from the ERP system provider and authenticate requests to access its functionalities securely.
Data Synchronization: Implement endpoints in the WordPress plugin to fetch product, inventory, and order data from the ERP system via API requests. Map fields between the ERP system and WooCommerce to ensure data consistency and accuracy.
Real-Time Updates: Use webhooks or scheduled tasks to trigger data synchronization between the ERP system and WooCommerce, ensuring that inventory levels and order statuses are updated in real-time.
Error Handling and Logging: Handle errors gracefully and log relevant information to track API requests, responses, and any encountered issues. Provide feedback to users and administrators on the status of data synchronization processes.
Performance Optimization: Optimize API requests and responses to minimize latency and improve overall system performance. Implement caching mechanisms to store frequently accessed data locally and reduce the need for repetitive API calls.
By integrating its ERP system with WooCommerce using a custom WordPress plugin, the business can streamline its operations, reduce manual efforts, and provide a seamless shopping experience for customers.
Conclusion
Integrating third-party APIs into custom WordPress plugins opens up a world of possibilities for developers seeking to enhance the functionality and capabilities of their websites. By following best practices, understanding API documentation, and implementing robust integration strategies, developers can seamlessly integrate external services and data into their WordPress plugins, enriching the user experience and expanding the capabilities of their websites. Whether it's adding social media integrations, payment gateways
0 notes
Text
Crafting Your Online Identity: The Top Website Builders for Small Enterprises
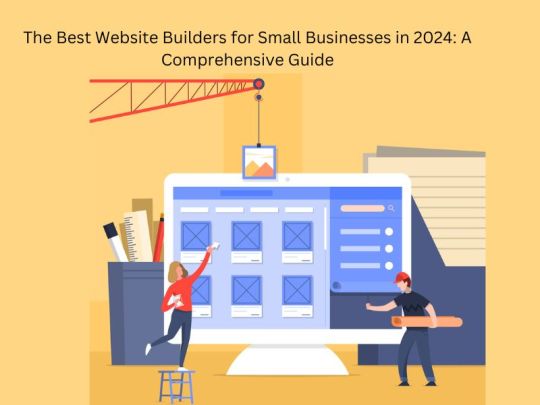
Having a strong online presence is essential for small businesses to thrive. With numerous website builders available, it can be challenging to choose the right one that suits your specific needs. To help you navigate through the options, we've curated a list of the five best website builders for small businesses in 2024, with WordPress.com taking the top spot.
1. WordPress.com: Best Website Builder for Content-Focused Companies
WordPress.com stands out as the top choice for small businesses looking to create content-focused websites. With its user-friendly interface and extensive library of customizable themes, WordPress.com offers unparalleled flexibility and control over your website's design. Whether you're a beginner or an experienced user, WordPress.com caters to all skill levels.
Key Features:
- Optimized for SEO: WordPress.com comes with built-in SEO features, making it easier for your website to rank higher in search engine results pages (SERPs).
- Customization Options: Choose from over 11,000 mobile-responsive themes and customize them to match your brand's identity.
- Knowledge Base: Access WordPress.com's extensive knowledge base, including tutorials, videos, and a community forum, to guide you through the WordPress Development and website-building process..
- Pricing and Plans: WordPress.com offers a range of pricing plans to suit different budgets, starting from a free plan with limited features to premium plans with advanced functionalities.
Pros:
- Simple setup process with thousands of customizable templates
- SEO-friendly features to improve your site's visibility
- Unlimited storage and bandwidth on premium plans
- Affordable pricing options for small businesses
Cons:
- Steeper learning curve compared to other website builders
- Limited customization options on certain themes
2. Wix: Best Website Builder Overall
Wix is renowned for its simplicity and versatility, making it an ideal choice for small businesses across various industries. With its drag-and-drop editor and AI-powered design tools, Wix empowers users to create professional-looking websites with ease.
Key Features:
- Purpose-Built Templates: Choose from a wide range of templates tailored to different industries and goals, including blogs, e-commerce stores, portfolios, and more.
- SEO Tools: Wix offers numerous SEO features out of the box, helping small business owners optimize their websites for better search engine visibility.
- AI-Managed Social Media Ads: Subscribe to Facebook Ads by Wix to create, launch, and track Facebook and Instagram ads directly from your Wix dashboard.
- Email Marketing Campaigns: Utilize Wix's email tools to drive more visitors to your site and automate your email marketing campaigns.
Pros:
- Intuitive drag-and-drop editor for easy website customization
- Advanced marketing tools for SEO, social media ads, and email marketing
- Affordable pricing plans with a free option available
Cons:
- Limited design flexibility compared to other website builders
- Automatically generated mobile version may require manual adjustments
3. Squarespace: Best Website Builder for Creatives and Small Online Sellers
Squarespace stands out for its visually stunning templates and robust e-commerce features, making it an excellent choice for creatives and small online sellers. With its emphasis on design and user experience, Squarespace enables businesses to showcase their products and services effectively.
Key Features:
- High-Quality Templates: Choose from professionally designed templates optimized for image-heavy websites, blogs, and e-commerce stores.
- SEO Optimization: Squarespace offers built-in SEO features, including mobile-responsive designs, auto-generated sitemaps, and clean URLs.
- Social Media Marketing: Integrate your social media accounts with Squarespace to promote your products and engage with your audience effectively.
- Email Marketing Campaigns: Create and automate email marketing campaigns using Squarespace's customizable email templates and tracking tools.
Pros:
- Focus on branding and design with award-winning templates
- Unlimited storage and bandwidth on all plans
- Seamless integration with social media platforms
Cons:
- Less design flexibility compared to other website builders
- Editor may not be as intuitive for beginners
4. Shopify: Best for E-commerce
Shopify is the go-to choice for small businesses looking to establish or expand their online stores. With its comprehensive e-commerce features and user-friendly interface, Shopify empowers entrepreneurs to sell products seamlessly across multiple channels.
Key Features:
- E-commerce Integration: Create and manage your online store with ease, including real-time inventory updates, order management, and shipping options.
- SEO Tools: Shopify offers essential SEO features, such as responsive themes, auto-generated sitemaps, and meta tag optimization, to improve your store's visibility.
- Social Media Marketing: Connect your Shopify store with social media platforms to create shoppable posts and manage social orders directly from your dashboard.
- Email Marketing: Utilize Shopify's email marketing tools to create and automate email campaigns, driving more traffic to your store and increasing sales.
Pros:
- Easy setup process with no coding required
- Advanced marketing and analytics tools for e-commerce businesses
- Seamless integration with third-party apps and payment gateways
Cons:
- Limited customization options compared to other website builders
- Transaction fees when using third-party payment providers
5. Webflow: Best No-Code Website Builder for Customization
Webflow stands out for its advanced customization features and powerful CMS, making it an ideal choice for businesses seeking complete control over their website's design and functionality. With its intuitive interface and extensive range of design elements, Webflow empowers users to create professional-grade websites without writing a single line of code.
Key Features:
- Customization Options: Design your website with precision using Webflow's drag-and-drop editor and advanced styling features, including parallax scrolling, multi-step animations, and micro interactions.
- SEO Optimization: Webflow offers robust SEO tools, such as responsive design, auto-generated sitemaps, and meta tag optimization, to improve your site's search engine visibility.
- Knowledge Base: Access Webflow's extensive knowledge base, including tutorials, videos, and a community forum, to learn how to leverage the platform's features effectively.
- Pricing and Plans: Webflow offers a range of pricing tiers for general and e-commerce websites, with options starting from a free plan to premium plans with advanced functionalities.
Pros:
- Freedom to customize your site without coding knowledge
- Extensive range of templates and design elements to suit your needs
- Excellent knowledge base with comprehensive tutorials and support resources
Cons:
- Steeper learning curve compared to other website builders
- Limited integrations and marketing options
Conclusion:
Choosing the right website builder is crucial for small businesses looking to establish a strong online presence. Whether you prioritize ease of use, design flexibility, or e-commerce capabilities, the options listed above offer something for every business need. Consider your specific requirements and budget constraints to select the website builder that best aligns with your goals. With the right tools and strategies in place, you can create a professional-grade website that helps your business thrive in the digital landscape of 2024.
0 notes
Text
Crafting Tomorrow's Plugins: A Guide to 2024's Trends in WordPress Development

Introduction:
As we embark on a new journey into 2024, the realm of WordPress plugin development is poised for exciting advancements. With WordPress powering a significant portion of the web, staying informed about emerging trends is paramount for developers and website owners alike. In this comprehensive blog, we'll delve deeper into the key trends shaping WordPress plugin development in 2024, providing insights into the evolving landscape of website customization and functionality.
1. Embracing Headless WordPress:
Headless WordPress architecture, which decouples the content management system from the front-end presentation layer, continues to gain traction. In 2024, we anticipate a surge in the adoption of headless WordPress plugin development. Developers are leveraging this approach to create highly dynamic and interactive web applications, combining the robust content management capabilities of WordPress with modern JavaScript frameworks like React and Vue.js for unparalleled flexibility and performance.
2. Enhanced Security Protocols:
In light of escalating cybersecurity threats, enhancing the security of WordPress plugins remains a top priority. In 2024, we expect to witness a paradigm shift towards implementing more robust security protocols within plugins. This includes adopting industry-best encryption standards, bolstering authentication mechanisms, and implementing proactive measures such as automated vulnerability scanning to fortify websites against potential breaches and attacks.
3. Integration with AI and Machine Learning:
The integration of artificial intelligence (AI) and machine learning (ML) technologies is poised to revolutionize WordPress plugin development in 2024. Plugins leveraging AI and ML algorithms will empower website owners with advanced functionalities such as intelligent content recommendations, automated customer support through chatbots, and predictive analytics for personalized user experiences. This trend is set to redefine the way websites engage with visitors and optimize content delivery strategies.
4. Accessibility and Inclusivity Initiatives:
Accessibility and inclusivity have become paramount considerations in web development, and WordPress plugin developers are increasingly embracing these principles. In 2024, we anticipate a greater focus on implementing accessibility features within plugins to ensure that websites are usable by individuals with disabilities. This includes adhering to web content accessibility guidelines (WCAG), optimizing keyboard navigation, and enhancing compatibility with assistive technologies to foster an inclusive online environment.
5. Sustainability and Performance Optimization:
With growing concerns about environmental sustainability, WordPress plugin developers are shifting their focus towards optimizing performance and resource efficiency. In 2024, expect to see an emphasis on sustainability-driven plugin development, with a focus on minimizing carbon footprint through efficient code optimization, server resource management, and streamlined caching mechanisms. These efforts will not only enhance website performance but also contribute towards a greener and more eco-friendly web ecosystem.
6. Voice Search Integration and Conversational Interfaces:
The rise of voice search technology and conversational interfaces is reshaping user interactions with websites. In 2024, WordPress plugins will increasingly incorporate voice search capabilities and conversational UI components to facilitate seamless interactions across devices. This trend will enable website owners to deliver personalized experiences and enhance user engagement through intuitive voice-enabled interfaces.
Conclusion:
As we peer into the future of WordPress plugin development in 2024, it's evident that the landscape is evolving rapidly, driven by innovation and a relentless pursuit of excellence. By embracing headless WordPress architecture, prioritizing security measures, integrating AI and ML technologies, championing accessibility initiatives, optimizing performance for sustainability, and incorporating voice search capabilities, developers are poised to unlock new realms of possibility in website customization and functionality. By staying attuned to these emerging trends and leveraging cutting-edge technologies, WordPress plugin developers can chart a course towards creating truly transformative digital experiences that resonate with audiences across the globe.
0 notes
Text
Safe and Sound: Protect Your WordPress Website with These Plugins

Introduction
Website security is paramount. With cyber threats on the rise, ensuring the safety and integrity of your WordPress website is crucial to protecting your data, your users, and your reputation. Fortunately, WordPress offers a plethora of security plugins designed to fortify your website against malicious attacks and vulnerabilities. In this comprehensive guide, we'll explore the top WordPress plugins for website security to help you safeguard your online presence effectively.
1. Wordfence Security:
Wordfence Security is one of the most popular and feature-rich security plugins for WordPress. It offers firewall protection, malware scanning, login security, and more. With real-time threat defense feeds and a comprehensive firewall rule set, Wordfence effectively blocks malicious traffic and prevents unauthorized access to your website. Additionally, its malware scanner thoroughly scans your site for known vulnerabilities and malicious code, ensuring that your website remains free from threats.
2. Sucuri Security:
Sucuri Security is another robust security plugin that provides comprehensive website protection. It offers website firewall protection, malware scanning, security hardening, and incident response services. Sucuri's website firewall acts as a barrier between your website and potential threats, filtering out malicious traffic before it reaches your server. Its malware scanner detects and removes malware, blacklists, and other security issues, keeping your website safe and secure.
3. iThemes Security:
Formerly known as Better WP Security, iThemes Security is a powerful plugin that offers over 30 ways to secure and protect your WordPress website. It includes features such as brute force protection, file integrity monitoring, two-factor authentication, and strong password enforcement. iThemes Security also helps you fix common security vulnerabilities and strengthen your website's defenses against potential attacks.
4. Jetpack Security:
Jetpack Security is a comprehensive security solution offered as part of the Jetpack plugin suite. It includes features like downtime monitoring, brute force attack protection, spam filtering, and security scanning. Jetpack Security's automated scanning checks your website for security vulnerabilities and notifies you of any potential threats, allowing you to take action promptly. Additionally, its downtime monitoring feature alerts you if your website goes offline, ensuring maximum uptime and availability.
5. All-In-One WP Security & Firewall:
All In One WP Security & Firewall is a user-friendly security plugin that offers a wide range of features to protect your WordPress website. It includes firewall protection, brute force attack prevention, file system security, and more. With its intuitive interface and customizable security settings, All In One WP Security & Firewall makes it easy to enhance your website's security without compromising performance or usability.
Reference:- https://wpeople.net/the-impact-of-wordpress-plugins-on-website-security/
Conclusion
Safeguarding your WordPress website against security threats is essential to maintaining its integrity and protecting your online presence. By leveraging the top WordPress security plugins mentioned above, you can fortify your website's defenses and mitigate the risks associated with cyber-attacks. Whether you're a small business owner or a seasoned web developer, investing in website security is a proactive measure that can save you time, money, and headaches in the long run.
0 notes
Text
The Complete Guide to Mastering WordPress Development

Introduction:
WordPress has evolved from a simple blogging platform to a versatile content management system (CMS) powering millions of websites worldwide. Its flexibility, ease of use, and robust ecosystem make it a top choice for developers. However, mastering WordPress development requires more than just basic knowledge. In this comprehensive guide, we'll delve into essential tips and techniques to help you become a proficient WordPress developer.
1. Understanding WordPress Architecture:
- Familiarize yourself with the core components of WordPress, including themes, plugins, and the database structure.
- Learn about the WordPress loop and template hierarchy to efficiently display content on your website.
- Explore the roles of functions.php, wp-config.php, and other key files in customizing WordPress functionality.
2. Utilizing Child Themes:
- Always use child themes when customizing existing WordPress themes to prevent losing modifications during theme updates.
- Learn how to create and activate child themes effectively, ensuring seamless integration with parent themes.
- Utilize child themes to override CSS styles, template files, and even PHP functions without modifying the parent theme files directly.
3. Leveraging Custom Post Types and Taxonomies:
- Understand the concept of custom post types and taxonomies to create unique content structures tailored to your website's needs.
- Use plugins like Custom Post Type UI or code snippets to register custom post types and taxonomies effortlessly.
- Explore advanced techniques such as creating custom meta boxes and utilizing custom fields to enhance the editing experience for custom post types.
4. Optimizing Performance and Security:
- Implement caching mechanisms like caching plugins (e.g., W3 Total Cache, WP Super Cache) and content delivery networks (CDNs) to improve website speed.
- Follow best practices for WordPress security, including keeping themes, plugins, and WordPress core up to date, using strong passwords, and limiting login attempts.
- Consider implementing security plugins like Wordfence or Sucuri to enhance website security and mitigate potential threats.
5. Mastering Theme and Plugin Development:
- Dive into theme development by learning HTML, CSS, JavaScript, and PHP, along with WordPress-specific functions and template tags.
- Explore starter themes like Underscores or Sage to kickstart your theme development process with clean, well-structured code.
- Develop custom plugins to extend WordPress functionality according to specific requirements, following the WordPress coding standards and best practices.
6. Enhancing User Experience with Responsive Design:
- Prioritize responsive design to ensure optimal user experience across various devices and screen sizes.
- Utilize CSS frameworks like Bootstrap or Foundation to streamline the responsive design process and create visually appealing layouts.
- Test website responsiveness using tools like Google's Mobile-Friendly Test and browser developer tools to identify and fix compatibility issues.
7. Implementing SEO Best Practices:
- Optimize website content for search engines by incorporating relevant keywords, meta tags, and descriptive alt attributes for images.
- Install and configure SEO plugins such as Yoast SEO or Rank Math to manage on-page SEO elements effectively.
- Create XML sitemaps, optimize website speed, and focus on high-quality, authoritative content to improve search engine rankings.
8. Continuous Learning and Community Engagement:
- Stay updated with the latest WordPress trends, developments, and best practices by following reputable blogs, attending WordCamps, and participating in online communities.
- Contribute to the WordPress community by sharing knowledge, contributing to core development, or volunteering at local WordPress events.
- Network with fellow WordPress developers, designers, and enthusiasts to exchange ideas, seek advice, and collaborate on projects.
9. Avoiding Common Development Mistakes:
Avoiding common development mistakes is crucial for successful WordPress projects.
- Not Using Version Control: Always use version control systems like Git to track changes in your codebase, collaborate with team members, and revert to previous versions if needed.
- Ignoring WordPress Coding Standards: Adhering to WordPress coding standards ensures consistency, readability, and compatibility with future updates. Use tools like PHP_CodeSniffer to validate code against WordPress standards.
- Overlooking Security Vulnerabilities: Neglecting security best practices can leave your website vulnerable to attacks. Regularly audit and update themes, plugins, and WordPress core to patch security vulnerabilities.
- Not Testing Across Different Environments: Test your website thoroughly across various environments, including different web browsers, devices, and screen sizes, to ensure consistent performance and user experience.
- Relying Too Much on Plugins: While plugins can extend WordPress functionality, excessive reliance on plugins can bloat your website, impact performance, and introduce compatibility issues. Evaluate the necessity of each plugin and consider custom solutions where appropriate.
- Ignoring Performance Optimization: Neglecting performance optimization techniques such as image optimization, lazy loading, and code minification can lead to slow page load times and poor user experience. Prioritize performance optimization throughout the development process.
- Not Backing Up Your Website Regularly: Failure to regularly backup your website leaves you vulnerable to data loss in the event of server crashes, hacks, or accidental deletions. Implement automated backup solutions and store backups securely offsite.
- Skipping Documentation: Documenting your code, including functions, hooks, and customizations, is essential for maintaining code clarity, facilitating collaboration, and troubleshooting issues. Invest time in comprehensive documentation to streamline future development and maintenance.
- Underestimating User Experience (UX) Design: Focusing solely on functionality without considering user experience can result in confusing navigation, cluttered layouts, and high bounce rates. Prioritize intuitive UX design principles to enhance user engagement and satisfaction.
- Neglecting Accessibility (ADA) Compliance: Failure to make your website accessible to users with disabilities not only excludes a significant portion of the audience but also exposes you to potential legal liabilities. Follow accessibility guidelines and tools like WAVE or Axe to ensure ADA compliance.
- Ignoring Analytics and User Feedback: Disregarding analytics data and user feedback prevents you from understanding user behavior, identifying areas for improvement, and making data-driven decisions. Utilize tools like Google Analytics and user feedback forms to gather insights and refine your website continuously.
Conclusion:
Mastering WordPress development requires dedication, continuous learning, and hands-on experience. By understanding WordPress architecture, leveraging child themes, custom post types, and taxonomies, optimizing performance and security, mastering theme and plugin development, prioritizing responsive design, implementing SEO best practices, avoiding common development mistakes, and engaging with the WordPress community, you can elevate your skills and build exceptional websites with WordPress. Keep exploring, experimenting, and pushing the boundaries of WordPress development to unlock its full potential.
0 notes
Text
Unlocking the Power of Responsive Design: WordPress Theme Integration Techniques
Having a responsive website is no longer just a luxury; it's a necessity. With the vast array of devices available to users, from smartphones to tablets to desktops, ensuring that your website looks and functions seamlessly across all screen sizes is crucial for user experience and search engine optimization.
WordPress, one of the most popular content management systems (CMS) in the world, offers a plethora of themes to choose from, each with its own design and features. However, integrating these themes into your WordPress site while maintaining responsiveness can be challenging without the proper guidance.
In this comprehensive guide, we'll explore the dos and don'ts of responsive design in WordPress theme integration, helping you create a website that adapts beautifully to any device.
The Dos
1. Choose a Responsive Theme
When selecting a WordPress theme for your website, opt for one that is explicitly labeled as responsive. These themes are designed to adjust their layout and content dynamically based on the screen size, ensuring a consistent user experience across devices. By starting with a responsive theme, you lay a solid foundation for your website's responsiveness.
2. Test Across Devices
Before finalizing your theme integration, thoroughly test your website across various devices and screen sizes. Use tools like Google's Mobile-Friendly Test or browser developer tools to preview your site on different devices. Testing ensures that your website looks and functions as intended, allowing you to identify and address any responsiveness issues before launch.
3. Optimize Images for Performance
Large images can significantly impact your website's loading speed, especially on mobile devices with slower connections. Optimize your images by compressing them without sacrificing quality. Utilize plugins like WP Smush or Imagify to automatically compress images upon upload, ensuring fast loading times across all devices.
4. Prioritize Content Hierarchy
On smaller screens, space is limited, making it essential to prioritize content hierarchy. Place your most critical content, such as headlines and calls-to-action, front and center, while less important elements can be displayed further down the page or hidden behind menus. This ensures that users can quickly access the information they need without excessive scrolling or tapping.
5. Implement Responsive Navigation
Navigation is a vital aspect of user experience, particularly on mobile devices where screen space is limited. Implement responsive navigation menus that adapt to different screen sizes. Consider using a hamburger menu icon or collapsible accordion menus to conserve space while still providing access to all site sections.
6. Use Media Queries for Custom Styling
Media queries allow you to apply custom styles based on the user's device characteristics, such as screen size, resolution, and orientation. Leverage media queries in your CSS to create responsive designs that adjust seamlessly across various devices. Focus on fluid layouts, flexible typography, and optimized spacing to ensure a consistent and visually appealing experience for users.
7. Leverage WordPress Plugins Wisely
WordPress offers a vast library of plugins that extend the platform's functionality. When integrating themes, be selective about the plugins you install, as they can impact your site's performance and compatibility. Choose lightweight plugins that are actively maintained and compatible with your theme to avoid conflicts and ensure smooth operation.
8. Regularly Update Your Theme and Plugins
WordPress themes and plugins are regularly updated to address security vulnerabilities, add new features, and improve performance. Stay vigilant by keeping your theme and plugins up to date with the latest versions. Regular updates not only enhance security and stability but also ensure compatibility with newer versions of WordPress and web browsers.
9. Monitor Site Performance
Responsive design isn't just about how your site looks; it's also about how it performs. Monitor your site's performance metrics, such as page load times, bounce rates, and conversion rates, using tools like Google Analytics or WordPress performance plugins. Identify areas for improvement and optimize your site for speed and usability to deliver an exceptional user experience across all devices.
The Don'ts
1. Avoid Fixed Width Layouts
Fixed-width layouts are rigid and do not adapt well to different screen sizes, resulting in horizontal scrolling and poor user experience on smaller devices. Avoid using fixed-width layouts in your WordPress theme design. Instead, opt for fluid or responsive layouts that adjust dynamically to accommodate various screen sizes, ensuring a seamless experience for all users.
2. Don't Overlook Touchscreen Optimization
With the increasing prevalence of touchscreen devices, it's essential to optimize your website for touch interactions. Avoid using tiny buttons or links that are difficult to tap accurately on touchscreens. Instead, ensure that clickable elements are adequately sized and spaced to accommodate finger taps, enhancing usability and accessibility for touchscreen users.
3. Don't Forget About Accessibility
Accessibility is a fundamental aspect of responsive design, ensuring that your website is usable by individuals with disabilities. Avoid neglecting accessibility considerations when integrating WordPress themes. Adhere to accessibility standards, such as the Web Content Accessibility Guidelines (WCAG), by providing alternative text for images, semantic HTML markup, and keyboard navigation support. Making your site accessible benefits all users, regardless of their abilities or devices.
4. Avoid Excessive JavaScript
While JavaScript can enhance interactivity and functionality, excessive use of JavaScript libraries or scripts can negatively impact your site's performance, especially on mobile devices with limited processing power. Avoid unnecessary JavaScript dependencies in your WordPress theme design. Opt for lightweight alternatives or consider deferring non-essential scripts to improve loading times and responsiveness.
5. Don't Sacrifice Performance for Aesthetics
While visually stunning designs can captivate users, they shouldn't come at the expense of performance. Avoid sacrificing site performance for aesthetics when integrating WordPress themes. Optimize your theme assets, including CSS, JavaScript, and images, to minimize file sizes and reduce loading times. Strive for a balance between aesthetics and performance to deliver a fast and engaging user experience across all devices.
6. Don't Rely Solely on Device Emulators
While device emulators and browser developer tools are valuable for testing responsiveness, they may not always accurately reflect real-world user experiences. Avoid relying solely on emulators when testing your WordPress theme integration. Instead, conduct thorough real-device testing across a diverse range of devices and screen sizes to ensure compatibility and usability for all users.
7. Don't Forget About SEO
Search engine optimization (SEO) plays a crucial role in driving organic traffic to your website. Don't overlook SEO considerations when integrating WordPress themes. Ensure that your theme generates clean, semantic HTML markup, utilizes proper heading tags, and incorporates responsive images to enhance SEO performance across all devices. Additionally, prioritize mobile-friendliness, as Google's mobile-first indexing favors responsive websites in search rankings.
Conclusion
Responsive design is essential for creating modern and user-friendly websites, particularly in the WordPress ecosystem. By following the dos and don'ts outlined in this guide, you can successfully integrate responsive themes into your WordPress site, ensuring a seamless and engaging experience for users across all devices. Prioritize user experience, performance, and accessibility to deliver a website that stands out in today's competitive digital landscape.
0 notes
Text
Creating Dynamic Themes: Harnessing Custom Shortcodes in WordPress
WordPress, with its vast ecosystem of themes and plugins, empowers millions of websites worldwide. One of its most powerful features is shortcodes, which enable users to add complex functionality to their sites with minimal effort. Shortcodes are essentially shortcuts that allow users to insert predefined content or execute specific functions within their WordPress posts, pages, or widgets. In this blog post, we'll explore the art of creating custom shortcodes for seamless integration into WordPress themes.
Understanding Shortcodes:
Before delving into custom shortcode creation, let's grasp the basics. Shortcodes in WordPress are enclosed in square brackets, like `[shortcode]`, and can accept parameters to customize their behavior. For example, `[gallery]` is a built-in shortcode that displays an image gallery, and `[gallery id="123" size="medium"]` allows specifying additional parameters like the gallery ID and size.
Why Create Custom Shortcodes?
While WordPress offers a plethora of built-in shortcodes and plugins with shortcode support, there are scenarios where custom shortcodes become indispensable:
1. Unique Functionality: Custom shortcodes enable you to implement functionality specific to your website or theme that isn't covered by existing shortcodes.
2. Consistency: By creating custom shortcodes tailored to your theme's design and functionality, you ensure a consistent user experience across your site.
3. Ease of Use: Custom shortcodes simplify complex tasks for content creators, allowing them to add dynamic elements effortlessly without delving into code.
Creating Custom Shortcodes:
Now, let's dive into the process of creating custom shortcodes for seamless integration into your WordPress theme:
1. Define the Functionality:
Identify the specific functionality you want your shortcode to perform. Whether it's displaying a custom post type, embedding multimedia content, or showcasing dynamic data, clarity on the shortcode's purpose is paramount.
2. Write the Shortcode Function:
In your theme's `functions.php` file or a custom plugin, define the PHP function that executes when the shortcode is encountered. This function will generate the desired output or execute the specified functionality.
```php
function custom_shortcode_function( $atts ) {
// Process shortcode attributes if needed
// Generate shortcode output
$output = '<div class="custom-shortcode">Your content here</div>';
return $output;
}
add_shortcode( 'custom_shortcode', 'custom_shortcode_function' );
```
3. Customize Output with Shortcode Attributes:
Utilize shortcode attributes to make your shortcode versatile and customizable. Parameters passed within the shortcode declaration can modify its behavior or appearance. For instance, `[custom_shortcode attribute="value"]`.
4. Style the Output:
Ensure your shortcode output adheres to your theme's styling guidelines for seamless integration. Apply CSS classes and styles as needed to maintain visual consistency across your site.
5. Document Your Shortcode:
Document your custom shortcode, including its purpose, available attributes, and usage instructions, for the benefit of other users and developers working on your theme.
Best Practices for Custom Shortcodes:
Prefix Your Shortcodes: Prefix your custom shortcode names to prevent conflicts with other plugins or themes. For example, use `[yourtheme_custom_shortcode]`.
Keep it Simple: Aim for simplicity and clarity in your shortcode implementation to enhance usability and maintainability.
Sanitize and Validate Inputs: Always sanitize and validate user inputs within your shortcode function to prevent security vulnerabilities.
Conclusion:
Custom shortcodes are a powerful tool for extending the functionality of your WordPress theme, offering flexibility, consistency, and ease of use for content creators. By understanding the fundamentals of shortcode creation and adhering to best practices, you can seamlessly integrate custom functionality into your WordPress site, enhancing its capabilities and user experience. Embrace the art of creating custom shortcodes, and unlock new possibilities for your WordPress theme development endeavors.
0 notes
Text
The Art of WordPress Plugin Fortification: 15 Proven Methods
WordPress is undeniably one of the most popular content management systems (CMS) globally, powering millions of websites across diverse industries. Its flexibility and ease of use make it a top choice for businesses and individuals alike. However, with great popularity comes great risk, particularly concerning security vulnerabilities. Custom WordPress plugins, while offering tailored functionality, can sometimes introduce security risks if not developed and managed properly. In this blog post, we'll delve into some essential tips and techniques to secure your custom WordPress plugins effectively.
1. Follow Best Practices in Plugin Development:
The foundation of a secure WordPress plugin lies in its development process. Adhering to best practices ensures that your plugin code is robust and less susceptible to vulnerabilities. Some key practices include:
- Sanitize and Validate Input: Always sanitize and validate user inputs to prevent SQL injection, cross-site scripting (XSS), and other common attacks.
- Escape Output: Escaping output data before rendering it in HTML prevents XSS attacks. WordPress provides functions like `esc_html()`, `esc_attr()`, and `esc_js()` for this purpose.
- Use Nonces: Implementing nonces (number used once) helps verify that the authenticated user intended to perform a specific action, preventing CSRF (Cross-Site Request Forgery) attacks.
- Follow WordPress Coding Standards: Adhering to WordPress' coding standards ensures consistency and readability while also minimizing the risk of introducing vulnerabilities.
2. Regularly Update and Maintain Your Plugins:
Keeping your plugins up to date is crucial for staying ahead of security threats. Developers frequently release updates to patch vulnerabilities and improve functionality. Make it a habit to check for updates regularly and apply them promptly. Additionally, if you're no longer actively maintaining a plugin, consider finding alternatives or discontinuing its use altogether to avoid potential security risks.
3. Limit Plugin Permissions:
Minimize the potential damage a compromised plugin can cause by limiting its permissions. Only grant the plugin access to resources and capabilities necessary for its functionality. Avoid granting excessive privileges that could be exploited by malicious actors.
4. Implement Role-Based Access Control:
WordPress provides a robust role-based access control system that allows you to assign specific capabilities to different user roles. Ensure that your plugin respects these roles and capabilities, granting permissions appropriately. This helps prevent unauthorized users from accessing sensitive functionality within your plugin.
5. Utilize Security Plugins and Tools:
Consider using reputable security plugins and tools to bolster your WordPress site's overall security. These tools often offer features such as malware scanning, firewall protection, and login attempt monitoring, helping you detect and mitigate security threats proactively.
6. Regular Security Audits and Penetration Testing:
Conduct regular security audits and penetration testing to identify and address vulnerabilities in your custom WordPress plugins. This proactive approach allows you to discover potential security weaknesses before they can be exploited by attackers.
7. Stay Informed About Security Best Practices:
The field of cybersecurity is constantly evolving, with new threats and vulnerabilities emerging regularly. Stay informed about the latest security best practices and trends by following reputable blogs, attending security conferences, and participating in relevant online communities. Continuously educating yourself and your team is essential for maintaining a secure WordPress environment.
Conclusion
securing your custom WordPress plugins requires a proactive and multi-faceted approach. By following best practices in plugin development, keeping your plugins updated, limiting permissions, implementing role-based access control, utilizing security plugins and tools, conducting regular security audits, and staying informed about security best practices, you can significantly reduce the risk of security breaches and protect your WordPress site and its users from harm. Remember, when it comes to security, vigilance is key.
0 notes
Text
Empower Your Website: Expert Insights on WordPress Theme Integration
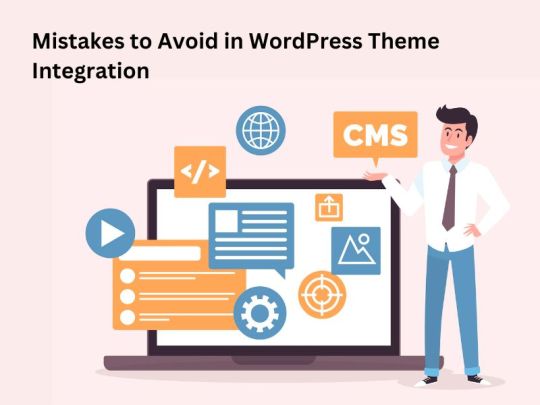
WordPress theme integration plays a crucial role in the overall design and functionality of your website. A well-integrated theme can enhance user experience, improve performance, and boost your site's visibility. However, several common mistakes can undermine the effectiveness of theme integration, leading to issues such as poor functionality, slow loading times, and compromised security. In this blog, we'll explore some of these common mistakes and provide tips on how to avoid them.
1. Ignoring Responsiveness
With the majority of internet traffic coming from mobile devices, ensuring your WordPress theme is responsive is essential. Failing to prioritize responsiveness can result in a poor user experience on smartphones and tablets, leading to high bounce rates and decreased engagement. Always choose a theme that is mobile-friendly and test its responsiveness across different devices and screen sizes before integration.
2. Overlooking Page Speed Optimization
Page speed is a critical factor in both user experience and search engine rankings. Integrating a theme with bloated code or large media files can significantly slow down your website, frustrating visitors and negatively impacting your SEO efforts. Opt for lightweight themes that prioritize speed optimization, and utilize tools like caching plugins and image compression to further enhance performance.
3. Not Customizing Default Settings
Many WordPress themes come with default settings and configurations that may not align with your website's specific needs and branding. Failing to customize these default settings can result in a generic-looking website that lacks personality and fails to stand out from the competition. Take the time to customize colors, fonts, layouts, and other settings to create a unique and cohesive design that reflects your brand identity.
4. Neglecting SEO Considerations
Search engine optimization (SEO) is essential for driving organic traffic to your website. Unfortunately, many website owners overlook SEO considerations when integrating a WordPress theme, resulting in subpar rankings and visibility. Ensure your theme is optimized for SEO by choosing one with clean code, proper heading structure, fast loading times, and compatibility with SEO plugins like Yoast SEO or Rank Math.
5. Skipping Theme Updates
WordPress themes, like all software, require regular updates to patch security vulnerabilities, fix bugs, and add new features. Failing to update your theme regularly can leave your website vulnerable to security breaches and compatibility issues with the latest WordPress version and plugins. Enable automatic updates whenever possible, and regularly check for theme updates to ensure your website remains secure and up-to-date.
6. Overloading with Plugins
While plugins can add functionality and enhance your website's capabilities, overloading your site with too many plugins can have the opposite effect. Each additional plugin increases the risk of conflicts, security vulnerabilities, and performance issues. Before integrating a theme, carefully assess its built-in features and consider whether additional plugins are necessary. Choose quality over quantity, and regularly audit your plugin list to remove any unnecessary or outdated ones.
7. Ignoring Cross-Browser Compatibility
Your website should be accessible and functional across all major web browsers, including Chrome, Firefox, Safari, and Edge. Failing to ensure cross-browser compatibility can result in layout inconsistencies, broken features, and a poor user experience for visitors using different browsers. Test your website thoroughly on multiple browsers and devices during the theme integration process, and address any compatibility issues promptly.
Conclusion
WordPress theme integration is a critical step in building a successful website, but it's essential to avoid common mistakes that can compromise its effectiveness. By prioritizing responsiveness, optimizing page speed, customizing default settings, considering SEO implications, staying up-to-date with updates, managing plugins wisely, and ensuring cross-browser compatibility, you can create a seamless and engaging user experience that drives traffic and achieves your website goals.
0 notes
Text
Seamless Integration: A Pro's Guide to Mastering WordPress Themes
Introduction:
Welcome to our comprehensive guide on mastering WordPress theme integration! If you're looking to build a stunning website that perfectly reflects your brand or business, understanding how to seamlessly integrate a WordPress theme is crucial. In this step-by-step guide, we'll walk you through the process, covering everything from selecting the right theme to optimizing performance and beyond. By the end, you'll have the knowledge and confidence to master WordPress theme integration like a pro.
Step 1: Choose the Right Theme
The foundation of successful theme integration starts with choosing the right WordPress theme for your website. Consider factors such as design aesthetics, features, responsiveness, and compatibility with plugins. Look for themes from reputable sources like the official WordPress theme directory or trusted theme marketplaces.
Step 2: Install and Activate the Theme
Once you've selected your theme, it's time to install and activate it on your WordPress site. Navigate to the Themes section in your WordPress dashboard, click on Add New, and then upload the theme's ZIP file. After installation, activate the theme to make it live on your website.
Step 3: Customize Your Theme
Customization is where you can truly make your website stand out. Most WordPress themes come with customization options that allow you to tweak colors, fonts, layouts, and more. Use the WordPress Customizer tool to experiment with different settings until you achieve the desired look and feel for your site.
Step 4: Configure Theme Options
Many themes include additional options or settings that you can configure to tailor the theme to your specific needs. This may include settings for header and footer layouts, typography, widget areas, and more. Take the time to explore these options and adjust them according to your preferences.
Step 5: Create and Customize Pages
With your theme installed and customized, it's time to create and customize the individual pages for your website. Use the WordPress editor to add content, images, videos, and other elements to your pages. Depending on your theme, you may have access to different page templates that you can use to create unique layouts for your content.
Step 6: Optimize Performance
Performance optimization is essential for ensuring that your website loads quickly and provides a smooth user experience. Optimize your images, enable caching, minify CSS and JavaScript files, and consider using a content delivery network (CDN) to improve page load times.
Step 7: Test Responsiveness
With the rise of mobile browsing, it's crucial that your website is responsive and looks great on all devices. Test your website on various devices and screen sizes to ensure that it adapts seamlessly to different environments. Make any necessary adjustments to improve the mobile experience for your visitors.
Step 8: SEO Optimization
To improve your website's visibility in search engine results, optimize your site for SEO. This includes optimizing meta titles, descriptions, headings, and image alt tags, as well as creating high-quality, relevant content that incorporates your target keywords.
Conclusion:
Congratulations! You've now mastered the art of WordPress theme integration. By following this step-by-step guide, you've learned how to choose the right theme, customize it to suit your needs, optimize performance, and ensure a seamless user experience. Armed with this knowledge, you're well-equipped to build a stunning website that captivates your audience and achieves your goals. Happy integrating!
#wordpress#web development#WordPress Theme Integration Service#wordpress development#wordpress themes
0 notes
Text
WordPress Wonders: The Top 10 Advantages of Leaving Sitecore Behind
Introduction

In the ever-evolving landscape of web content management systems, businesses often find the need to reassess their platforms to ensure they are aligned with current trends and goals. One such transition that has gained momentum is the migration from Sitecore to WordPress. This move presents a myriad of benefits, ranging from cost-effectiveness to enhanced usability. Let's delve into the advantages that organizations can reap through Sitecore to WordPress migration.
1. Cost Efficiency:
- WordPress, being an open-source platform, eliminates licensing fees associated with Sitecore. This cost-effective nature makes it an attractive option for businesses looking to optimize their budget without compromising functionality.
2. User-Friendly Interface:
- WordPress boasts an intuitive and user-friendly interface that simplifies content management. The transition allows content editors and administrators to seamlessly navigate and update the website without extensive technical knowledge, fostering increased efficiency.
3. Vast Plugin Ecosystem:
- WordPress offers a vast repository of plugins that extend functionality and features. Organizations migrating from Sitecore can leverage this extensive plugin ecosystem to easily integrate third-party tools, enhance SEO capabilities, and add various functionalities tailored to their specific needs.
4. Widespread Community Support:
- WordPress has a massive and active community, ensuring continuous development, updates, and support. Migrating to WordPress opens up access to a wealth of resources, forums, and expert advice, streamlining problem-solving and fostering collaboration.
5. Responsive Design and Mobile Optimization:
- WordPress themes are designed with responsiveness in mind, ensuring optimal performance across various devices. This migration allows businesses to enhance their online presence by automatically adapting to the diverse range of screen sizes and resolutions used by today's audiences.
6. SEO-Friendly Structure:
- WordPress is renowned for its SEO-friendly architecture. The platform incorporates clean code, customizable permalinks, and effective tagging, contributing to improved search engine rankings. Migrating from Sitecore to WordPress can lead to enhanced visibility and discoverability on the web.
7. Simplified Content Migration:
- The process of migrating content from Sitecore to WordPress can be streamlined, preserving the integrity of existing data. With proper planning and execution, businesses can efficiently transfer pages, posts, and multimedia elements, minimizing downtime during the transition.
8. Scalability and Flexibility:
- WordPress is highly scalable, accommodating the growth of businesses over time. Its flexibility allows organizations to adapt to changing needs, whether it involves expanding the website's functionality or incorporating new features to stay ahead in a dynamic digital landscape.
9. Ease of Integration:
- WordPress facilitates seamless integration with various third-party services and applications. Whether it's e-commerce, analytics, or social media platforms, businesses can effortlessly connect their WordPress site with tools that enhance overall functionality and user experience.
10. Elevated Security Standards:
- WordPress has a robust security infrastructure, and regular updates ensure the mitigation of potential vulnerabilities. Migrating to WordPress provides organizations with the benefit of a secure environment, safeguarding against potential threats and vulnerabilities.
Conclusion
The Sitecore to WordPress Migration is a strategic move that empowers businesses with a cost-effective, user-friendly, and feature-rich platform. The transition opens up new opportunities for growth, customization, and improved online presence, setting the stage for a digital transformation that aligns seamlessly with the evolving needs of the modern online landscape.
0 notes
Text
Smooth Sailing: 8 WordPress Migration Plugins for Effortless Site Transfer
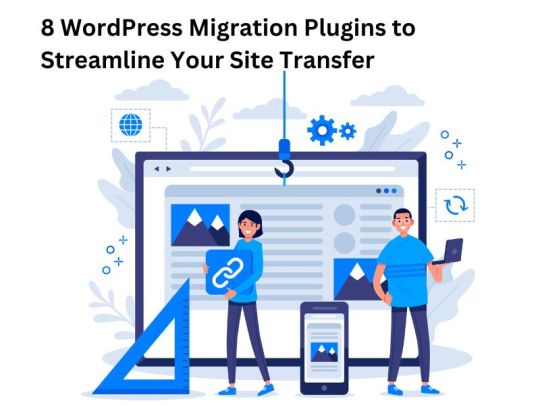
Successfully migrating a WordPress website is no longer a complex task, thanks to the array of specialized plugins available. Whether you're shifting to a new hosting provider, changing your domain, or upgrading your server, leveraging the right WordPress migration plugin can streamline the process and ensure a smooth transition. In this blog, we'll delve into eight top-notch plugins trusted by both users and developers, focusing on the key features that make them stand out.
1. Duplicator
Duplicator has rightfully earned its place among the most popular WordPress migration plugins. Simplifying the migration process, it allows you to effortlessly clone, backup, and migrate your site. Duplicator handles both the database and the entire WordPress directory, ensuring a comprehensive transfer. With Duplicator, creating a package of your site, downloading it, and installing it on the new location becomes a hassle-free experience.
2. All-in-One WP Migration
All-in-One WP Migration stands out as an extremely user-friendly migration plugin that caters to both beginners and experienced users. Its drag-and-drop functionality makes the process straightforward. This plugin offers features like URL and serialized data replacement, making it a reliable choice for seamless migrations.
3. Migrate Guru
Migrate Guru excels in handling hassle-free, one-click migrations, particularly beneficial for large websites. Performing the migration on its own servers eliminates the need for manual backups or complex configurations. Migrate Guru supports a variety of hosting providers, making it a versatile solution for website owners.
4. UpdraftPlus
UpdraftPlus is more than just a migration plugin; it's a comprehensive backup solution. While its primary function is to back up your site, it also excels in restoring and migrating websites. With UpdraftPlus, you can schedule automatic backups and store them on cloud services like Dropbox, Google Drive, or Amazon S3, providing an added layer of security to your migration process.
5. BackupBuddy
BackupBuddy is a premium WordPress migration plugin known for its versatility. Beyond migration, it offers robust backup and restoration features. BackupBuddy enables you to schedule backups, store them remotely, and then migrate your site effortlessly. Its intuitive interface and additional security features make it a favorite among developers and website administrators.
6. VaultPress
Developed by Automattic, the company behind WordPress.com, VaultPress is a subscription-based service that provides real-time backups and security scanning. While primarily a backup plugin, VaultPress's easy restore and migration features make it an excellent choice for users seeking an all-in-one solution for website protection and migration.
7. WP Migrate DB
WP Migrate DB is a specialized plugin designed to handle database migration efficiently. It allows you to push and pull your databases between different WordPress installations. This lightweight plugin is particularly useful when you need to sync databases between a local development environment and a live website or move your site to a new domain.
8. Shipper
Shipper by WPMU DEV is a versatile migration plugin that simplifies the process with its user-friendly interface. It supports both one-time migrations and continuous syncing between multiple WordPress sites. Shipper also provides advanced options for handling serialized data and URLs, ensuring a smooth transition.
Various Technologies Migrating to WordPress for Enhanced Capabilities
Many technologies and content management systems (CMS) are frequently migrated to WordPress for various reasons, including user-friendliness, extensive plugin support, and a robust community. Here are some examples:
- Drupal to WordPress Migration: Transition from Drupal to leverage WordPress’s user-friendly interface and extensive plugin ecosystem.
- Joomla to WordPress Migration: Move from Joomla to WordPress for a more flexible and customizable platform.
- Magento to WordPress Migration: Migrate from Magento to WordPress for a simplified and cost-effective e-commerce solution.
- Wix to WordPress Migration: Shift from Wix to WordPress for increased customization and SEO capabilities.
- Squarespace to WordPress Migration: Transfer from Squarespace to WordPress for more advanced features and control over your website.
- Blogger to WordPress Migration: Upgrade from Blogger to WordPress for enhanced blogging capabilities and a wider range of plugins.
- Ghost to WordPress Migration: Transition from Ghost to WordPress for a more versatile and feature-rich blogging platform.
- HubSpot to WordPress Migration: Move from HubSpot to WordPress for greater control and customization options.
- Weebly to WordPress Migration: Migrate from Weebly to WordPress for a more scalable and powerful website solution.
Choosing the Right Plugin for Your Migration
When selecting a WordPress migration plugin, consider factors such as the size of your website, your technical proficiency, and the specific features you need. Each plugin mentioned here offers unique advantages, so it's essential to choose one that aligns with your migration requirements.
Tips for a Successful WordPress Migration Using Plugins
1. Backup Your Site First: Before initiating any migration, create a complete backup of your website. While these plugins are reliable, having a safety net is crucial.
2. Follow the Plugin Documentation: Each plugin comes with documentation. Familiarize yourself with it to understand the specific features and functionalities of the plugin you choose.
3. Test the Migration: After using the plugin to migrate your site, thoroughly test the new environment to ensure everything is working correctly. Check for broken links, missing images, and any potential issues.
4. Update Permalinks and Settings: After migration, update your permalinks and other settings to match the new environment. This helps in maintaining the SEO integrity of your website.
Conclusion
WordPress migration plugins have revolutionized the process of moving websites from one location to another. Whether you're a novice or an experienced developer, these plugins offer a range of solutions to meet your migration needs. From simple drag-and-drop interfaces to advanced features for serialized data replacement, these plugins ensure that your WordPress migration is efficient, secure, and stress-free.
Selecting the right plugin depends on your specific requirements, so take the time to explore their features and functionalities. With the help of these top-notch WordPress migration plugins, you can confidently embark on the journey of moving your site to a new and improved destination."
0 notes
Text
Drupal to WordPress Migration Guide
Effortlessly Drupal to WordPress Migration in 2024. Explore a comprehensive guide, step-by-step instructions, and post-migration tips for a seamless transition and digital growth.
0 notes