oliverm-3dgame
oliverm-3d
Process of me designing and developing my 3D puzzle-platformer 'Laserscape'
70 posts
Don't wanna be here? Send us removal request.
Last Seen Blogs

feedthispiggy
I’m Elly😊

rowan-hussein
Rowan Hussein

forelsketparadise
Calamars1016

callsatmidnight
Midnight Calls

portions-4foxes
chamomile
Text
Final Evaluation
What went well?
I really enjoyed working on this project and am happy with the result, I also managed to make an itch.io page where I did a bit of logo designing. I think I managed to one-up my last game as I was able to make this game feel much more complete by giving it an options menu, a prologue and some other small things. The thing I enjoyed the most would have to be designing the levels and assets because I learnt a lot of new skills in Unreal which allowed me to create things such as moving platforms and realistic physics.
3D modeling in Maya was also a fun skill to get started on, I definitely prefer it over MagicaVoxel as it has much more flexibility despite it being quite complicated. Maya allowed me to produce the results I wanted much more accurately, and I ended up using it for all the designs of my game.
Not so well?
During playtesting, I didn't really get much criticism or negative feedback, and as a result I didn't find it particularly useful. Although it's good that I got lots of positive feedback, I wanted to use playtesting to find faults in my game and improve/fix them. To work around this I will probably add some more precise questions into my questionnaire for the next project so I can get opinions on specific things.
I also feel like I could've added more detail into my levels such as filling in the background with stars or planets, because currently the levels are a tad empty other than the platforms. This is something I'd probably do in a project where I have more time.
What next?
For my next project, I'd like to continue making my games more code-based than art-based. To do this while still developing my Unreal skills I will try to add more UI elements such as an in-game shop or a way of spending 'points'.
Another thing I'd like to do next time is spend more time researching designs, as I think that's something I lacked a little bit of this time round.
Play-through of the game here: https://youtu.be/f6abYKRuh0w
0 notes
Text
Posting game on itch + Game art
Now that my game is done, I decided to publish it on itch.io so I could design a logo and other things to just polish the game up a bit more.
Game Icon
When you load the game, it current just has the default Unreal Engine icon. I wanted to create my own icon for my game so I did this on Photoshop.
I used a colour similar to the title text 'Laserscape' on my main menu and surrounded this in a circle as a border. I took a screenshot of my game's sky background and added this as a magenta-looking background for the logo.

To add this icon to my unreal project, I first had to convert it to an ICO file. ICO files are images containing small-size computer icon images. I converted my PNG to an ICO on a converter website and downloaded it.
In my unreal project, I opened up Project Settings and went to Platforms > Windows. From here you can find the icon tab and change your game's icon (which by default will be the Unreal logo). I imported my ICO file here.

Splash screen
A splash screen is an image which typically appears when you launch an app/program, and is commonly referred to as a launch screen.
I made a small splash screen in photoshop with resolution 600x200 pixels containing my title text and some 'Loading...' text so the player would know what's going on.

To import the splash screen, you go to the same tab in the project settings as I did with the icon (Platforms > Windows). From there you can just import the screen as a PNG.
There's two options - Editor and Game Splash. Editor splash is the screen which shows up for loading the unreal project, and game splash is for the game itself.

Packaging project
To make my game downloadable as its own file, I went to File > Package Project > Windows (64-Bit). After my game was packaged I sent it to a compressed zip folder where I could then attach it to itch and upload it.

On itch: https://otdx.itch.io/laserscape

0 notes
Text
How I planned out my gameplay
Planning out my levels was something I spent a lot of time considering. I've already explained the thought process and how I came up with all of the ideas, but in this post I wanted to discuss how I planned the game as a whole to make it work. Overall, there were three main mechanics which made up a good amount of my game's content:
Laser beams & using mirrors to direct them
Picking up and moving blocks
Using levers to control moving platforms
The inspiration for laser beams came from Portal and The Talos Principle, both of which I looked into and researched near the start of this project. Portal also grabbed my attention with the player's ability to pick up and move blocks as part of gameplay progression.

How are gameplay mechanics introduced?
As I've previously said, I wanted to make this game much easier than my previous one. Therefore I decided that I would introduce mechanics slowly, and not overload the player with too much stuff in a single level - introducing assets one at a time.
Lever
My intentions for the first level were to show the use of a core mechanic in a very basic scenario - a lever controls two moving platforms which must be stopped in order to jump across to a button. I let the player know that the lever is of use by displaying the 'Interact' text on the HUD.

Block
Along with the introduction if the lever on the first level, after a couple of simple jumps the player finds a block on the ground which they can pick up. A robot nearby gives a hint that the block might be of use - guiding the player if they get a bit stuck. Blocks are used to activate pressure plates, and I wanted the player to know this by having the plate light up upon activated. I think that this, along with a sound effect, was enough to let the player know the purpose of these level assets.

Laser beams
The laser beam mechanic in my game was a much more complex feature than anything else, and as a result I decided to not introduce it until the final third of the game - levels 7-10. In it's first appearance, I used the moveable block mechanic and gave them a mirror material which reflects the laser beam. The goal is to send the laser into the emitter.

Ending
As the game is called 'Laserscape', I wanted the ending level to have a primary focus on the laser beam mechanic. I did this by adding a second laser emitter which is more powerful than the normal one. The player will find this out after talking to robots which give some brief information on it.
In regards to the storyline, I wanted the game to end by fixing what happened at the start - the civilization originally destroyed by the gamma ray blast would finally be restored after some fine use of lasers.
Other assets
Other assets such as the physics seesaw and launchpads were also introduced slowly. In addition to this I started to combine mechanics/assets after a few levels. One of the first occurrences of this that the player will find out is in the third level where they must place a block on one end of a seesaw to weigh it down - elevating the platform to access higher ground.

Another thing which took a lot of thought was that, in later levels, I wanted the same block to have multiple purposes. The aim of this was to express the puzzle genre of my game by making the player really have to think about what to do.
One of my favourite examples of this is in my 9th level. The platform circled in red only spawns in for as long as the pressure plate on it's right has a block weighing it down. The mirror block must be placed on this plate to be able to access the button on the far left. This button activates a launch pad which is required to reach the end of the level, but you may notice a second block on the left. The second block must replace the mirror that's currently on the weighted plate, because the mirror has to be used to redirect a laser beam. The other block has to go back on the pressure plate because this plate is also responsible for spawning in the platform circled in blue - a platform that must be present to reach the level's end.

0 notes
Text
3D Platformer Research #2
Conker's Bad Fur Day
Conker's Bad Fur Day is a 2001 platform game developed by Rare, also known for developing games such as Donkey Kong 64 and Banjo-Kazooie. This game is quite different from the other two though, as this is intended for more mature audiences with it's graphic violence, alcohol and vulgar humour.
Gameplay
The game features Conker, a greedy squirrel who must return home to his girlfriend. Most of the game requires the player to complete a bunch of platformer-like challenges such as jumping over obstacles and solving puzzles.

Why was it unsuccessful?
The game was originally intended for a family audience, but was remade into an adult-orientated product after it was poorly received for its kid-friendly tone and resemblance with Banjo-Kazooie. This is quite true - after looking at both games it's clear to see that they are indeed very similar. Both game's mascots look similar in colour and style, and much of the platforming gameplay seems awfully similar.
Things like this are another reason why it's important to have a mascot which stands out when making a mascot platformer. A game might end up receiving negative feedback if the mascot is too similar to something that's already existing.


Kirby 64
Kirby 64: The Crystal Shards is a 2000 platform game published by Nintendo for the Nintendo 64. It's the first Kirby game to feature 3D graphics and follows Kirby as he attempts to reassemble a sacred crystal.
Gameplay
Despite the environments and characters being in 3D, gameplay is restricted to a 2D plane. Gameplay includes typical features from Kirby such as inhaling objects to spit them out as bullets and flying.
Kirby 64 introduces power combos, the option to combine Kirby's copy abilities. This allows for 28 possible combinations of powers -creating a lot of possible gameplay.

Style
After looking at this game for a little bit, the style greatly reminded me of Super Mario 64 - full of vibrant colours and wildlife, along with similar-looking level design.

One thing I do like is the HUD - It's simple and tells you all you need to know. The two icons on the right represent the player's current copy abilities, and there is also a clear health bar.

Reception - was it bad?
The game received mixed reviews. It was likened to other existing 2.5D platformers on the Nintendo 64 at the time. A common opinion was that the game suffered from a lack of innovation in the midst of other Nintendo franchises in the growing 3D game market, and that there is not enough to do and the difficulty isn't very good.
Although the gameplay received some negative feedback, the design was better received with critics liking the use of 'bright' and 'clean' colours. This again shows that it's important to use an appropriate choice of colour for a mascot platformer, as it's got to have that lively feel to it to feel immersive.
1 note
·
View note
Text
3D Platformer Research
Super Mario Galaxy
Super Mario Galaxy is a 2007 3D-Action-Platformer by Nintendo. The game consists of galaxies filled with many planets, each with different amounts of gravity - the core element of gameplay.
Gameplay
Mario has a bunch of abilities similar to Super Mario 64 such as long jumps, wall jumps and somersaults.
The perspective of this game is something I find really unique - I love how Mario can just walk around any planet upside down and I don't really think it's been done so well in any other game.

A 'spin' utility has many functions in the game such as attacking enemies and flying through the sky. When the player gets close to a 'launch' star they are greeted with a pop-up telling them how to use the launch pad and they then go flying into space.

Style
The game shares a theme with my own - being set in space, and as a result there are some things that I could see fitting in well in my game. For example, I could take Galaxy's 'Launch star' and recreate a more futuristic version of it, maybe in the form of a holographic teleporter.
I also really like how clear the HUD is. In the above screenshot we can see Mario's lives, coins and a few other important things that the player should know. All data is clearly marked with an appropriate icon so you can tell what it means.
Banjo-Kazooie
Banjo-Kazooie is a platformer developed by Rare and is the first game of the Banjo-Kazooie franchise. It apparently runs on a modified version of Unity's game engine. The player controls the two protagonists Banjo and Kazooie and must venture through a bunch of levels to stop the witch from stealing Banjo's younger sister.

Gameplay
Each world consists of a number of challenges that involve solving puzzles, jumping over obstacles using a range of tactics. After looking at some of the gameplay, one of the things I like the most was the player's roll ability which can be used to slam into enemies:

Style
When the player kills enemies, some of them have a cool animation where they fall apart into many pieces which is a nice touch. It's nothing unique but adds a lot more action to your game if it has a bunch of fighting to it.

Games like these are also kid friendly. They're made up of bright, colourful levels with iconic animal characters. Kids will be more intrigued by a game with an iconic character as they will likely want to know more about that character.
Mascot platformers
A mascot platformer is where a game has a clear main character who makes their way through a colourful world. This term was brought to life by Super Mario Bros - everyone knows Mario and it's partly why all of Nintendo's Mario games were so successful.
With all of Nintendo's Mario games, they never disappoint. The consistency of characters such as Mario and Bowser are seen in many of the games, and younger audiences will be attracted to this.
Mario games are certainly not the only mascot platformers though. Many other games have become successful due to their attention-drawing mascots. Examples include Spyno the Dragon, where the main protagonist is a dragon which you will immediately find out. You also have Super Lucky's Tale - another animal-like character as the protagonist.
It's clear to see the use of bright lively colours in all of these mascots, it brings a joyful feeling which will attract younger audiences. Also, kids are more likely to be interested in an animal-like character compared to a person, hence why the choice is so popular.


Another reason why these types of games were so well received was because of their controls. Mario Galaxy is a prime example - the game was super well received and became known for its excellent controls. Everything ranging from flying into space to doing a roll just fits in brilliantly with the game's theme .
0 notes
Text
Polishing up game - Final changes
Now that I've made all of my gameplay and levels, I went through and changed a few things to make it as complete as possible.
Shadows
There's a few light emitting objects in my game such as laser beams, in reality these wouldn't have a shadow. I turned off shadows for these things by searching 'Cast Shadow' in the details panel of the selected component. I also did the same with any glass-like materials.

Difficulty
I added an option for a harder difficulty. The only difference is that in the harder one you have less time to complete levels. I created an integer variable in my game instance called 'Difficulty'.
My game's main menu is where the player will choose the difficulty. They will do this by choosing one of two buttons - Normal / Experienced (the two difficulties). To change the difficulty I cast to the instance and set the value of 'Difficulty' when the player clicks the button.
Note: The values should be the other way round but an Unreal bug prevented me from doing this - it doesn't make a lot of sense.

Once the difficulty is set, in each level blueprint the value of the difficulty variable will be read and the player's time will be set accordingly. A 'select' node is used with 'Difficulty' as the index to check what difficulty the player has selected.

0 notes
Text
Playtesting #2
Another round of playtesting - I kept my questions in my form the same as I didn't really need any more information than I'm already requesting.
In most of these list ignore the first four entries as they are from the previous playtesting session.
Closed questions
All of the ratings of controls, SFX and style were very positive.
Good parts?
Once again, people really liked the interaction side of things - such as moving objects and using levers. Like I said before, I'm glad people like all of these things as I spent a lot of time trying to implement them in different ways so they weren't repetitive.

Bad parts?
Quite a lot of people said there were no bad parts. But it was mentioned that there was too much dialogue. I tried to keep the dialogue minimal, and the only real bulk of it was at the start where you are introduced to the game's storyline.
I don't really know how I could minimise the dialogue further as I already took this into consideration - a lot of the gameplay is learnt by actually doing it rather than being spoon-fed information.
Someone also said that the timer was too short on the first level, but noone else commented on that so I think the opinion is a bit skill-based. However I do understand that the timer might be alarming for new players on the first level so I could maybe increase it slightly.

Difficulty
Once players had to got to grips with the controls and how to interact with the level's assets, noone found the game too hard which was really good to hear.
A few people said it was hard at the start, but others say it became easier once they had played more so I think it just involves developing skill over time.

Overall, noone got stuck either which was good - I tried to not add any unnecessary features which would redirect the player's attention onto something that doesn't even matter.

Summary
To conclude, I think the playtesting went pretty well as I received generally positive feedback and was able to make a few minor tweaks to my game to improve it. However I think I could get better feedback if I asked the player to talk about specific parts of my game - so I can work out if any small thing is bad, and then work on that.
0 notes
Text
My game's final level
Like my last project, I wanted to invest a bunch of time into my final level - making it more grand than the others with a clear end goal. Last time I had a simple boss fight where the boss moves around a giant labyrinth.
The idea
I wasn't going to have a boss fight as the game is puzzle and physics themed. That doesn't mean to say I couldn't have done a boss fight though - perhaps you could use moving platforms and lasers to take out spaceships. However I went for a much less chaotic option.
On the last level there is a 'Plasma Beacon' which is responsible for powering the entire robot civilization. However, the beacon has been deactivated since the gamma ray blast - which the player knows about at the start of the game in a brief conversation with a chief robot. In the last level, the goal is to direct a powerful laser beam into the beacon to reboot it and restore the civilization.
Design
I'll use all of my existing assets to create the bulk of the gameplay in this level, however I wanted to spend a bit of time designing the beacon - as it will lie in the center of the level. The majority of the level will be built up of moving platforms, moveable cubes and moving mirrors.
I created the original design in Maya. After importing the 3D object I used Unreal's material editor to add some translucent and emissive materials.
The main beacon will be surrounded in glass, and some glowing objects will spin around inside the cylinder. These glowing objects are pretty much just 'particles' to give off an effect. A small device sticking out of the glass container will mark where the player has to direct the laser beam in order to power up the beacon.


Win state
Once the player directs the laser at the beacon, the game's overall win state will occur. There will be a brief cutscene and finally a game overview will pop up - displaying stats such as deaths & difficulty.
The cutscene is just made up of a few things which I've done before - camera shakes and changing cameras.
To make a camera shake I created a new blueprint with a 'MatineeCameraShake' class. In this blueprint I can adjust the shake's strength and other variables. I just want a short abrupt shake so I set the duration to something short.
Oscillations are essentially the shake's movements, to create a short and abrupt shake I played a lot of low shakes at a fast rate. Amplitude controls the strength of the shake, and frequency controls their speed.

A 'Start Matinee camera shake' node will play the shake, using the player's camera manager as it's target (It needs a valid camera manager reference). A set view target node will pan the camera over a given amount of time, this camera focuses the player on the beacon as it's about to activate.

A sound plays which kind of builds up a bit of tension before the beacon activates. To amplify this feel I used a timeline with a float lerp to decrease the camera's FOV - giving off a zoom-in effect.
Finally, an ending widget is displayed showing the player their game stats.

Charging laser beam
Inside the beacon a beam will charge up once it's activated - kind of like what you'd see coming out of a UFO except the other way round. To make a beam expand I would have to expand its vertical scale. I used a static mesh and changed the static mesh to a cylinder so that its pivot would be at it's base. From there a timeline and vector lerp increase its scale:

Ending widget
The ending widget displays some text notifying the player that their 'work here is done' (they've got nothing more to do/beat the game). From there their stats are displayed and are given the option to quit or return to menu via buttons.

Everything has a fade-in animation also:

Here is the result - game ending scene:
0 notes
Text
Playtesting #1 - Fixing/Editing game
Skip button
I decided to add a 'Skip level' feature for playtesting to allow players to see more of the game. This will be in the form of a button in my pause menu.
This works by having an array of names in the widget's blueprint. This array contains the names of all the playable levels in my game, in order.

When the player clicks the skip level button the value of the current level is read, and is then converted into a name. I then use a 'Find' array node to return the index of that level in the array. From this index, I add 1 which essentially goes to the next item of the list (e.g. level 4 is the index after level 3). I then get the value of the next index from the array and open that level.

Player feedback
I got a few bits of feedback regarding things to fix:

Robot fix
My character is on a time limit - you have to beat the level before it runs out. The robots who talk to the player to assist them with their progress open up a widget displaying text. While talking to a robot the timer still counts down, but the player has 0 control over their movement, so it would be a good idea to pause the timer.
I fixed this by only running the timer code if the character did not have a 'talking' tag by using an 'Actor has tag' node:

The talking tag gets given to the player once they interact with the robot. I casted to the character to be able to give it a tag from outside its blueprint, and added a tag by targeting 'Tags' and using an add node.

The tag gets removed using the same concept, except a 'Remove' rather than 'Add' node. It gets removed when the player closes the widget that appears when talking to the robot.

Buggy blocks?
Blocks glitching out was a visual glitch I had been aware of since I added the mechanic. It didn't really have an impact on the gameplay so I left it. It's not something I want to look in to as I'm approaching the end of this project, and it's not an easy fix.
Critical error?
A 'critical error' message appears when the player is dieing. However I'm not sure how it appears too often as it already hardly appears.
0 notes
Text
Playtesting #1
Now that my game is basically finished, it was time for playtesting. I created a google form containing a bunch of questions that each playtester will fill in after playing. These results should give me a good idea of my game's strengths, weaknesses and what to improve.
My questions were:
What level did you get to?
Were controls good/bad?
Were SFX good/bad?
How was the art style?
Favourite part of the game? Why?
Any part of the game you didn't like? Why?
How hard was the game? What was hard about it?
Did you know what you needed to do? Got stuck?
Describe what you did in the last level you played.
Closed questions
Each playtesting session lasted around 4 minutes. Players reached as far as the fourth level which gave me a hint that the game wasn't too hard - what I was going for.
On the whole, the controls, SFX and style were all rated very good.
Favourite parts of the game?
I decided to add this question as it would give me a good idea of what I've done particularly well in the project. Something that multiple people said was they like the ability to interact and flick levers. Someone also liked the cutscenes. I'm happy with these results as the cutscenes and play interaction were two of the things I spent the most time on, so I'm glad I got positive feedback on them.
Problems with the game?
This question is a no-brainer - with feedback it's crucial to know what player's don't like so you can adapt and improve your game. I will go into more detail about these problems in another post where I'll go and fix these issues in unreal.
Difficulty?
After feedback from my previous project, everyone found my game extremely difficult and couldn't really access much more than the first third of the content. I wanted to do the opposite in this project and make a game much more accessible to everyone. Noone who playtested in this session found it too difficult, with two people saying it had a good linear difficulty. Something else which was brought up was that it was difficult as they didn't know what to do, however this was contrasted by someone else - saying that the robots were enough to guide them. Therefore I don't really think there's much I need to change in terms of difficulty.

What did they do?
My 'describe what you did in the last level question' was to see if people were actually able to keep track and understand what they were doing, and by looking at the results I was able to see that everyone knew what to do on the levels they played.

0 notes
Text
How lerps are used in video games
Lerps are used throughout many of the most popular games, and there's an unlimited amount of ways you can use them. Here are some examples of where you'd see lerps used in video games:
Ziplines
Ziplines are a common mobility asset in shooter games such as Fortnite and Apex Legends. The player gets on the zipline and travels along it until they reach the end. A lerp would be used here to smoothly move the player along the zipline from their start point to the end point.
In Fortnite, there's a magnet-looking component of the zipline that moves with the player. This movement could also be controlled by a lerp.


Pendulum
A pendulum is a weight suspended from a pivot so that it moves freely. It may sound a bit boring by itself, but you could turn it into a wrecking-ball style obstacle or even just a mysterious prop. Either way, a pendulum's movement could be controlled by using a lerp to adjust its rotation, and the result would be that it appears to swing back and forth.
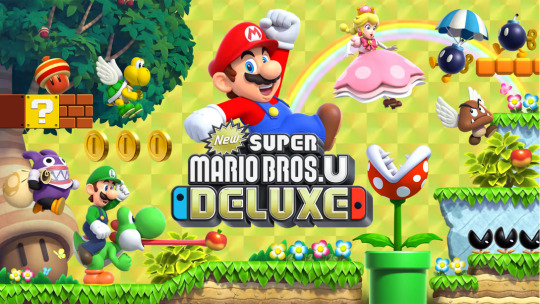
Super Mario Bros U has a good example of this - Mario must run under the spiked pendulum trap while its rotation leaves a big enough gap to walk under.


Dropped items
In games like Minecraft, when you drop an item on the ground it constantly rotates and gently bobs up and down. Both of these movements could be done by lerps - the rotating would just be a looping lerp. The bobbing up and down could be a lerp controlling an item's vertical position, and the lerp could maybe ease in and out rather than being completely linear to add a smoother effect.


0 notes
Text
Designing a physics-based level asset
I had the idea of creating a seesaw type asset for my game. It would be used by having the player place blocks on it to give them access to higher ground (for example).
The design
The design will just consist of a simple base and board, and the board's pivot will be just above the base so that it rotates realistically.

Physics
To give the board physical rotation, I first added a physics constraint. A physics constraint allows you to essentially create a joint between two bodies and from there you can limit/lock movements.
In the constraint tab of the physics constraint, I set the two constrained components to the Base and Board. We can see that they have been linked by this constraint because they're highlighted in the viewport.

To stop any jerky movements of the board, under 'Constraint Behavior' I disabled collision. This disables any collision between the two constrained components so they can move without getting stuck between eachother.

A physics constraint's linear limits are how much the components can slide in the X, Y or Z direction. Because I want the board to rotate in place, I will leave all of the linear limits locked.
The constraint's angular limits control its rotation. For the angular limits, I will leave them all locked except Swing 2 which is left on limited. I limited the swing 2 motion to 45 degrees as this is how far I will want the board to rotate - you wouldn't want to leave it free as the board would just start spinning round in a full circle.

To fix any stability and adjust the wobbling with the seesaw, I went to the angular motor tab and set the drive mode to 'Twist and Swing'. I then increased the strength to prevent as much wobbling from occurring.

0 notes
Text
Changes to my game's lose states
I've already worked out what the lose states for my game will be - The player takes the role of a robot, and they will lose if unable to complete the level before they run out of power. Their amount of remaining power is clearly visible in each level on a massive billboard.
The animation
I had the idea of the screen going black once the robot dies - as if their eyes have shut down and there's no longer any way to see. To create this animation, I made a new widget blueprint.
Within this widget, I added two black boxes which would represent the robot's field of view as its eyes start closing. A red box covers the entire screen and repeatedly fades in to add a sense of warning. Thirdly, some text saying 'CRITICAL ERROR' in red will blink.
The animation is done by using render opacity tracks to fade the text and red background in and out, and the black boxes move up and down on the Y axis using a translation track.

Death sound effects & code
The character's lifespan obviously shortens every second as it's displayed on a timer. This is done by subtracting 1 from the current lifespan every second and clamping the value between 0 and 'Countdown Maximum'. Once this value reaches 0, the robot will shut down.

The shutdown widget gets added to the viewport and the animation plays. For the SFX, they will go in the 'Death' audio category (see more in earlier post).
There are two sounds - one which is more of a beeping sound which plays during the animation, and finally a shutdown noise which plays after the animation (using a delay). Finally, the level gets reopened.

------------------------------------------------------------------------------
------------------------------------------------------------------------------
Difficulty decrease
Another thing I did was make the player respawn and lose power rather than completely shut down if they fall off the map. I felt like this was a good change as I wanted this game to be a lot easier than my last - my last game was very difficult and as a result players weren't able to get very far nor see much content.
Setting player spawn
On begin play in each level blueprint, I use a 'Get Actor of class' node to access the level's killbox. Within each killbox, there is a 'Player Spawn' and 'Player Spawn Rot' variable which is set to the character's location and rotation at the beginning of the level.

Respawning player
On character overlap with the killbox, the player's location is set to the value of 'Player Spawn'. At first I used 'SetActorRotation' to set the player's respawn rotation but that didn't work. Because the player rotation is controlled by the mouse (a player controller), you have to use 'Set Control Rotation' instead as otherwise the value will be ignored.

When the player falls off the map, they will lose 15 seconds of power instead of dieing to make the game a bit easier and less frustrating.

0 notes
Text
Adding sound to my game
After developing the game for a while, I felt like I had enough content to start adding in sound effects. I wanted sound effects for the majority of UI interactions, in-game interactions and background music.
For the most part, I used a variety of different Sci-Fi SFX packs off YouTube. I chose wisely though, as I didn't want any sounds to be too high pitched or piercing.
To import sounds into Unreal, I first converted their file type in Adobe Audition from mp3 to .wav so that they were actually compatible. Once the sound is a wav file, you can import as many as you'd like into the content browser.

Interactable object sounds
Things in my levels such as buttons, pressure plates and levers all could do with sound.
To play the sounds, I used a 'Play sound at location' node. The location the sound will be played will be the location of the actor in world space. For my lever, I had different sounds for flicking it on and off to make it less repetitive.

Soundtrack
For my game's soundtrack, I didn't want it to be anything too fast-paced nor dramatic as it's a puzzle game - the player shouldn't be distracted by background music. I ended up going for some ambient space music as I felt like it would set the scene of my game quite well considering it's set in space and centuries in the future.
I play the soundtrack in each level blueprint on Event BeginPlay. There's no need to play the BGM in a specific location so a 'Play Sound 2D' node is the better option.

UI sounds
In my previous post, I made a main menu. I wanted to add sound effects to this UI on button hovering + clicking. It took me quite a while to find an appropriate sound for button hovering, as it really shouldn't be a very loud sound at all. The clicking sound will be a bit louder. I also added a second soundtrack exclusive to the main menu. It's still space ambience, just a different track.
As this is UI, all the sounds can be played in 2D.
Sound settings
I wanted to give the player the option to toggle specific sound effects within the main menu. For this, I split my sound effects into four different categories:
Background
Death
Interacting
UI
My original plan was to create four sound classes and give each sound its appropriate class. A sound class allows you to group multiple sounds together. However, I could not find a way to adjust the volume of specific sound classes so I had to find an alternative option.
Boolean stuff
For each of the four sound categories, I created a Boolean in the game instance. This will determine whether or not the given sound category is toggled on or off, and the value will be stored between levels as it's in the game instance.
On clicking any of the four sound buttons, a cast to the Instance will change the value of its matching Boolean to toggle specific sounds.
A messy solution
The only thing left to do now was to have the sounds not play if their category was toggled off. As I previously said, I couldn't find a way to do this with sound classes so I used the 'Select' node.
A select node can be used for any type of variable, and will return a value based on the given index. The index can be either a Boolean, Byte or Integer(64).
In my case, I will be using the four Booleans stored in the game instance as the index to play sounds. This also meant I had to cast to the Instance on event tick in every blueprint that has a sound effect. After casting, I get one of the Booleans and plug it into a select node's index. If the Boolean is false, no sound plays (don't select a sound). If true, the given sound plays.


The video below is a brief overview of some of the sound effects in my game, along with a bit of the soundtrack:
0 notes
Text
Adding UIs - Main Menu
To add more practicality to my game, I added a main menu which will appear on startup.
To display the main menu, I created a new, empty level with nothing in it. The world doesn't need anything it because the only thing the player will see will be the menu - a widget displayed on the viewport.
The player would still essentially have controls though, so to work around this I created a new pawn class. This would act as a possessable pawn which the player will take control of instead of the character. In the pawn's settings, I changed the 'Auto possess' settings so that the player takes control of this pawn rather than the first person character.
No code is needed for this pawn - simply dragged it into the world and it will be possessed automatically.

Main Menu
My main menu will have three buttons:
Play
Options
Quit
Currently, the only thing I have added to the options menu is sound control, but I might add it more to it in the future.
Background images
I wanted to add a background to the main menu rather than a static colour, to make it look less boring. For this, I dragged a bunch of assets into an empty level and took a couple of screenshots. These screenshots would cross-fade between eachother on the main menu screen to give the player a brief preview of what to expect when playing.


The backgrounds fade between eachother using an animation with render opacity tracks. Every 5 seconds, the images will swap over a period of 1 second.

Play button
I intend on adding a pause menu aswell as a main menu, in the pause menu you will be able to go back to the main menu. I originally just had the play button go to the first level, but I want progress to be stored.
To do this, on begin play in each level blueprint, I casted to the game instance and set a variable 'Current Level' which I made. This name variable will be used to track the level the player is on, and will be the level launched when using the play button. By default, this will be the prologue level.


Options
On the main menu, the options button will open a new menu - displaying completely different buttons. To change which buttons are being displayed without creating a separate widget, I used a 'Set Visibility' node to toggle the visibility of specific buttons. For controller compatibility, I also set the focus after clicking each button.

Button hover animation
If the mouse hovers over any button, an animation will play and increase the button's scale slightly. Once the button is no longer being hovered on, the same animation will play in reverse so it shrinks.


0 notes
Text
Physics bug/gameplay fixes
After my first short amount of playtesting, I ran into a few gameplay flaws and some code errors.
Falling off while holding an object
If the player falls off the map while holding a moveable object, they still hold that object after being respawned. This could be problematic as you could instantly carry an object back to a certain area.
To fix this, I had to modify the killbox blueprint. The killbox is a simple collision box which lies under each level which sends the player back to their spawn point. In this blueprint, I casted to the FPCharacter on overlap and ran my drop moveables function. This function breaks the physics constraint between the player and the held object, so that the player drops the object.

There was an error which occurred though - if the player walks off without holding an object then you get an 'Accessed none' error.

This is because within the function, I'm changing the collision response of the held object. So if there's no object being held, this value will be invalid, resulting in an error.

To fix this error, in the killbox blueprint I used an 'Is Valid' node to check whether the held object was valid or not. Now the drop function will only run if the object is valid.

Respawning blocks
Moveable blocks play a key role in mobility and puzzle solving in my levels, and it's quite easy to accidentally drop a block off the edge of the map, with no way of getting it back. Therefore I wanted to respawn the blocks if they fall off.
I first needed to check when the block has fallen off the map. I did this by getting the cube's world location and checking the Z (vertical) value. If this is below -500, it will respawn.
A 'SetWorldTransform' node will teleport the block back up to the level with its original location, rotation and scale. The transform will be a variable which gets set in the construction script to set the block's spawn point.
Another problem I had after playtesting this was the block would go flying after it respawns, this is because it has built up velocity from when it was falling off the map. To resolve this I disabled then re-enabled physics on the cube so that the velocity gets reset.


0 notes
Text
Game prologue
My game is full of robots and is in outer space - a very Sci-Fi feel. To make the game more interesting, I wanted to add some more story. So I did this by adding a prologue which the player will go through before beginning the first level.
Overview
My rough idea was to have a cinematic leading to an interaction with a robot, who gives the player some context and then the prologue ends.
Designs
I will be using the robots I've previously created, along with a few new things. The cinematic needed to have a bit of life to it, otherwise it would look boring and empty. In Maya, I created a UFO and space rocket. I wanted to place these throughout the cinematic to add some robotic life to it.
I also made the designs look much nicer in unreal, where I gave the light blue material an emissive look, along with making some of the body more metallic.


Coding the space vehicles
These two models will move around the world the same way moving platforms would - by using a timeline and lerping between two vectors to set the actor's rotation. The amount each actor moves will depend on an exposed vector variable, so each can move in different directions at different speeds. In addition to this, I also gave the UFO a rotating movement component, so that it is always spinning.

Time frame
To set the scene a little bit more, I wanted to set the time frame. Due to the futuristic feel of my game, I decided it will be set around 1000 years from now.
My goal here was to have some text displaying 'Year: 2021', and then the number would rapidly increase to simulate a fast-forward in time. To make the number increase rapidly, on every tick the value of 'Year Text' increases by 6.
I also added a gate so that this only happens after a certain amount of time. This is so that it gives enough time for the widget to fade in, as I added this in an animation.

The binding for this piece of text is just an append to show the 'Year Text':

This widget's animation consists of a bunch of fade-ins and outs, along with the text scaling in size when the year starts to rapidly increase in order to amplify the feel.

Making the cinematic
In the level blueprint, I set the view target to a new camera which I placed in the world. This camera would then move around by a timeline. I also added the widget to the viewport so that the player would immediately be told the time frame, and this widget gets removed after a certain delay (the delay is around the length of the animation).
Widgets can be removed by using a 'Remove from parent' node, with the widget as the target.

Once the camera reaches its end position, a large robot will start talking to the player, giving them context and a brief objective.
Normally, the player talks to robots by interacting with them, but I wanted this one to start talking immediately. To do this, I created the robot's text widget automatically, and gave it an array which contains the text it will display to the player.
This text is also what gives the player the story - a gamma ray blast destroyed the robot population and civilization, so they are left with minimal resources, but the player has the ability to fix it all.

Once the player has finished talking to the robot, they will be sent to the first level.
Here's the final result, and I may add sound effects to this later:
0 notes