#bunjinbonsai
Text
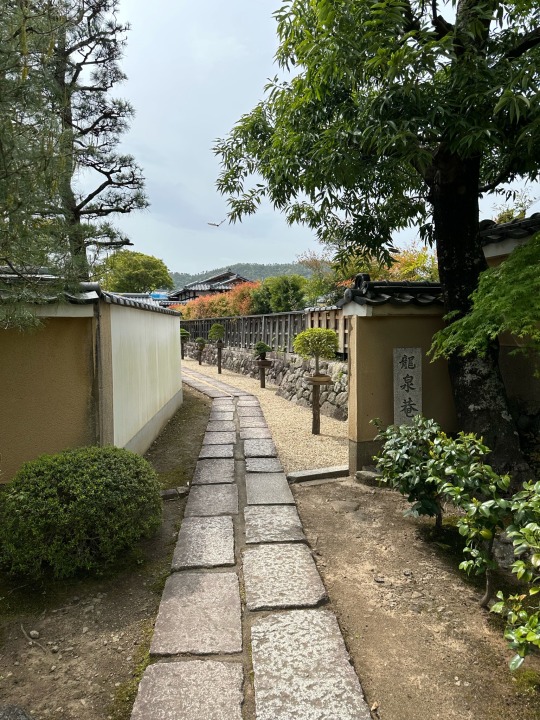
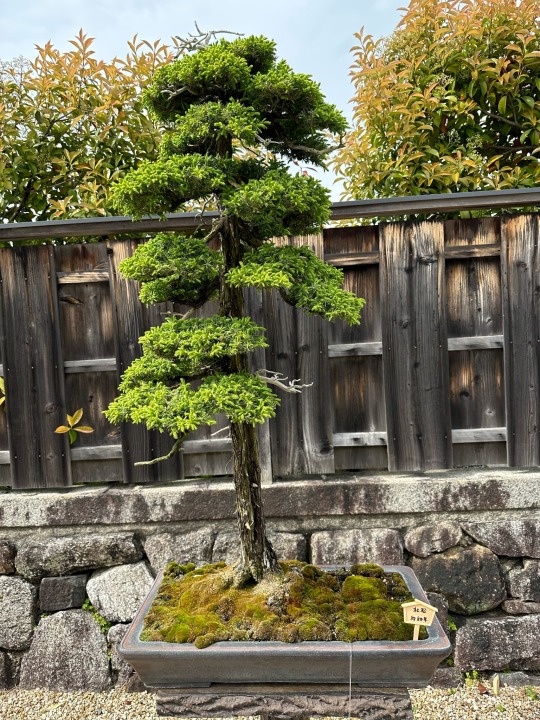
During my visit to Japan this spring, I visited the new Bonsai Exhibit at Hoshun-In in Kyoto. No surprise that I took a lot of photos. Tumblr only allows me to share 10 at a time, so watch for installments over the next week. Here are the trees that line the walkway to the main exhibition area.
Enjoy…


#bonsai#bonsaipenjing#penzai#penjing#scottmrodell#scottrodell#swordsmanbonsai#bunjinbonsai#japan travel#japanesemaplebonsai#bonsaitree#kyoto
18 notes
·
View notes
Text
Thought the morning light looked particularly nice this day.
#bonsaipenjing#bonsai#penzai#swordsmanbonsai#penjing#scottmrodell#scottrodell#bonsaitree#bunjinbonsai
2 notes
·
View notes
Photo
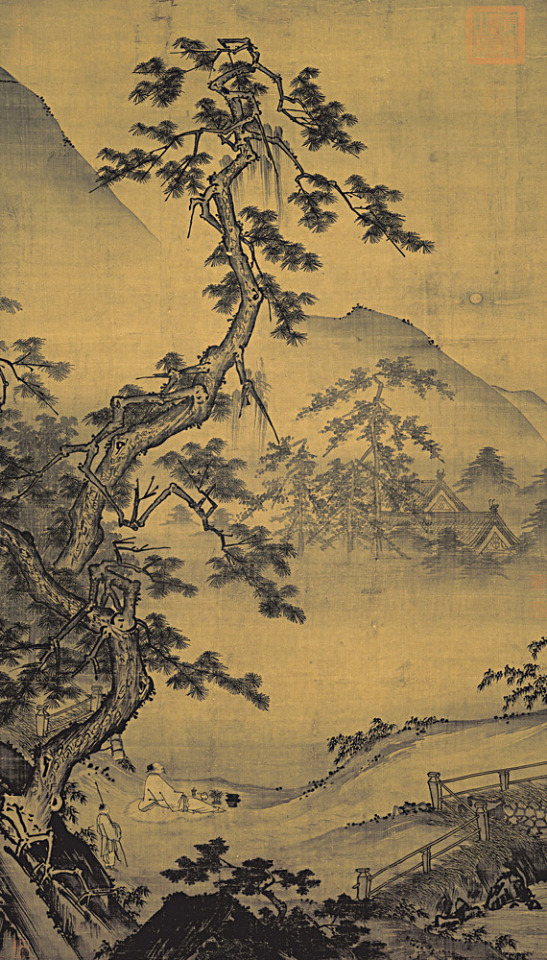
Watching the Moon
Under the Pine
Another of Ma Yuan's paintings of pines for inspriation. The fewer bends of this tree would certainly be easier to follow working them into a Bonsai/Penzai... We'll see...
http://www.chinaonlinemuseum.com/painting-ma-yuan-2.php
7 notes
·
View notes
Text
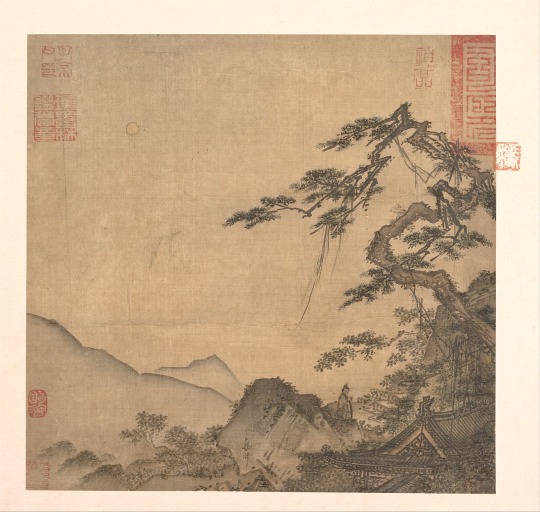
Avoid the “S”… ?
It is simply too easy to fall into the cliche “S” curve trunk. You want to add movement to your Bonsai tree’s trunk, so you bend it this way a bit. Then of course, it’s leaning too far off to one side, feeling unbalanced. So you do what anyone would, and bend the portion above your first bend back the other direction, and “S” curve. Just like a million other uninteresting trees.
This has to be the most classic, common problem facing every Bonsai/Penzai artist. The way I’ve found out of this conundrum is to add smaller curves along the “S”. Some sharp, crisp bends, some gentle wiggles, and the big “S” disappears into the movement of the overall action along the trunk line.
Looking through classic Chinese Song dynasty paintings, the very paintings that inspired the Bunjin style of Bonsai, I came across this masterpiece by Ma Lin that captures this feeling. This way of styling a trunk, with many small turns along the “S” is beautifully captured by Ma’s brush. (Note, I enhanced Ma’s painting to roll back the years. To see the original please follow the link below).
Source: https://www.metmuseum.org/art/collection/search/36055
#bonsai#bonsaipenjing#penzai#penjing#scottmrodell#scottrodell#swordsmanbonsai#bonsaitree#bunjinbonsai
4 notes
·
View notes
Photo
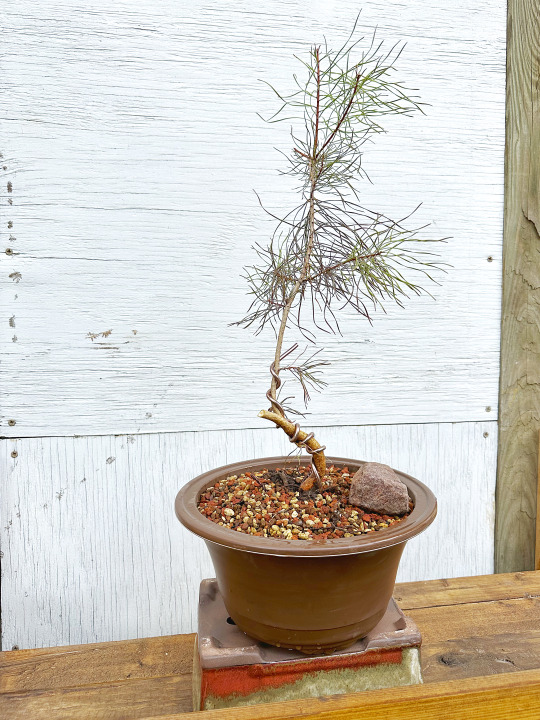
Virginia Pine Bunjin, Wire Removed~
Just a bit of an update on this collected Virginia Pine. Removed the wire around the trunk just in time. It was just about to start biting in, and leave scars. Really gotta keep an eye on the wire. One day everything looks fine. The next week, scarring. As the seasons roll by, I’m beginning to get a better sense of how long the wire has to stay on.
I’m leaving all the needles and small branches in place on this pine for now. I want to ensure it gets the energy required to recover from being dug this winter. Never spring I’ll clean it up. Will wire the very top in the near future to get some movement in that section.
#bunjinbonsai#bunjin#scottrodell#scottmrodell#swordsmanbonsai#bonsai#bonsaitree#penzai#penjing#bonsaipenjing#yamadori#pineyamadori#virginiapine
2 notes
·
View notes
Photo
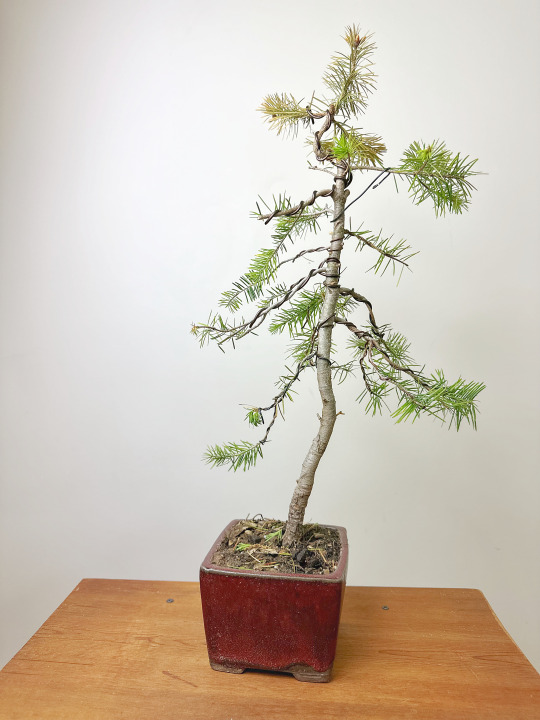
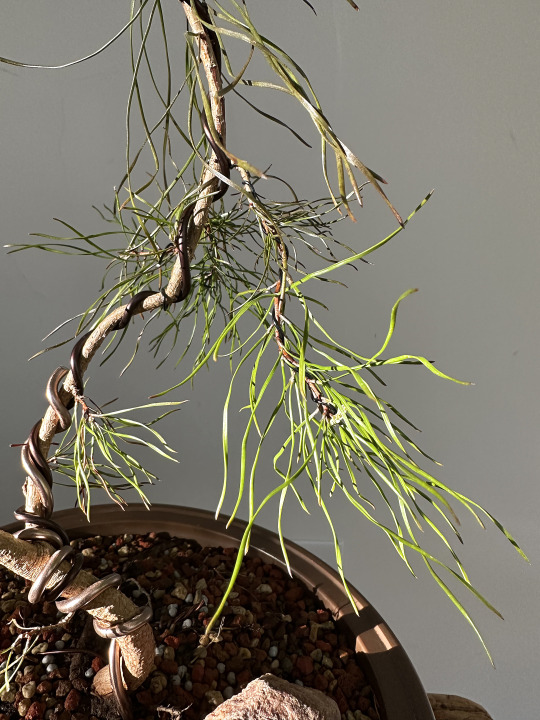
Sitka Bungjin, Branches Wired~
Put some very tight bends in the trunk this spring (see: “Sitka Fir First Styling” below for a look). When I checked a few days ago, the wire was beginning to cut in. So I carefully clipped off the thick wire. Happily, it didn’t spring right back, but held its shape, at least for a few days. That provided an opportunity to wire and place the branches. A few more will have to come off, but I will wait to see which are stronger as they develop. I will also have to re-wire the trunk when I get back from my UK Seminars in a couple of weeks, to get some of bends back where they were. The top needles are dying off, but I’m not concerned about it as new buds are opening with bright green needles.
#bunjinbonsai#bunjin#bonsai#penzai#penjing#bonsaitree#bonsaipenjing#douglasfir#swordsmanbonsai#scottmrodell#scottrodell
2 notes
·
View notes
Photo
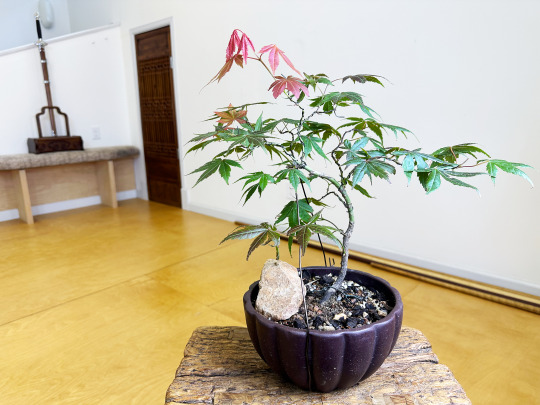
2nd Styling of my Twisted Maple~
A few days ago I posted a photo of how this tree grew out unexpectedly while I was traveling in Japan. The new branches most certainly changed the tree’s shape and the direction I could go if I didn’t want to just remove the new growth. Sitting down with the tree, I found the new growth balanced it is a new way.
I’ve kept 2 sacrifice branches lower down on the trunk. I’ll let them grow out until mid-summer to thicken the trunk and improve the sense of taper. They could be left on longer, but I’m not going for the “sumo” tree look. I’m striving to keep the slender natural feel to the trunk and entire tree.
Also working on getting better photos that capture the sense of depth of the branches. Got some work to do there with lighting.
#bonsai#bonsaitree#japanesemaplebonsai#japanesemaple#penzai#penjing#bonsaipenjing#bunjinbonsai#swordsmanbonsai#scottmrodell#scottrodell
6 notes
·
View notes
Photo
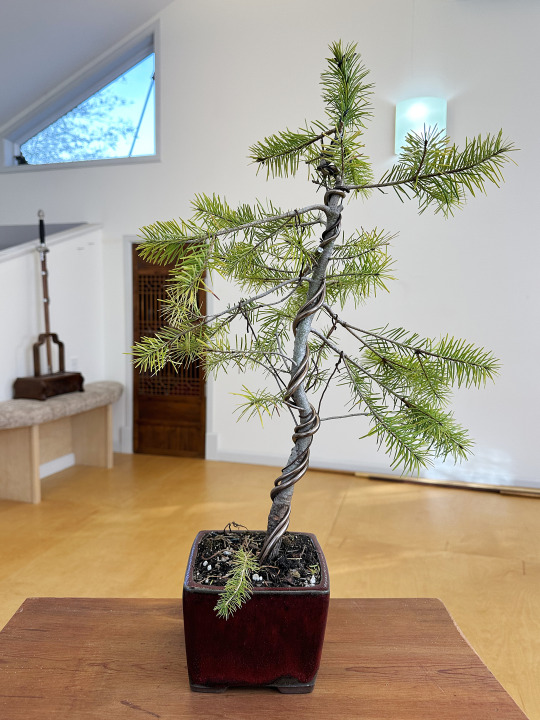
Sitka Fir First Styling~
I was able to following my initial idea for this tree fairly closely. Some of the bends I envisioned might be a bit too extreme to achieve (See 2nd photo).
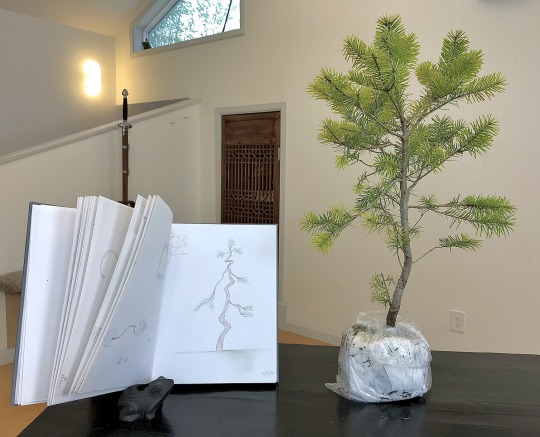
I purchased this Sitka Fir online. It is a collected tree, a yamadori. Before deciding to acquire it, I first studied the photos online, following the trees curves, I arrived at what you see in the drawing below next to the tree when it arrived.
For the moment, I’ve left more branches than I intend to keep, giving myself options. I’ve wired the larger ones very roughly down, close to where those that stay will end up. Another way Bonsai/Penzai is like swordplay, you may see a clear path to follow in the moment, but keep your options open, ready to change.
See close up of twist at the crown of the tree just below-
#firbonsai#bonsai#bunjin#bunjinbonsai#penzai#penjing#bonsaitree#scottrodell#scottmrodell#swordsmanbonsai#bonsaipenjing
4 notes
·
View notes
Photo
Close up of twist at the crown of my Dragon Sitka Fir.
#fir#douglasfir#firbonsai#bonsaipenjing#bunjinbonsai#bunjin#bonsai#penzai#penjing#scottrodell#scottmrodell#swordsmanbonsai
2 notes
·
View notes
Video
This is the direction I following with my few Japanese Maples. The upright, formal style is beautiful. But there are literally tens of thousands of examples formal upright Japanese Maple Bonsai. For me, time to take a different path… Video from 岭南盆景之家LingNan PenJing’s FacCrook Page- https://www.facebook.com/profile.php?id=100048607822308
#japanesemaplebonsai#japanesemaple#bonsai#penjing#penzai#bunjin#bunjinbonsai#bonsaitree#lingnanpenjing
4 notes
·
View notes
Photo
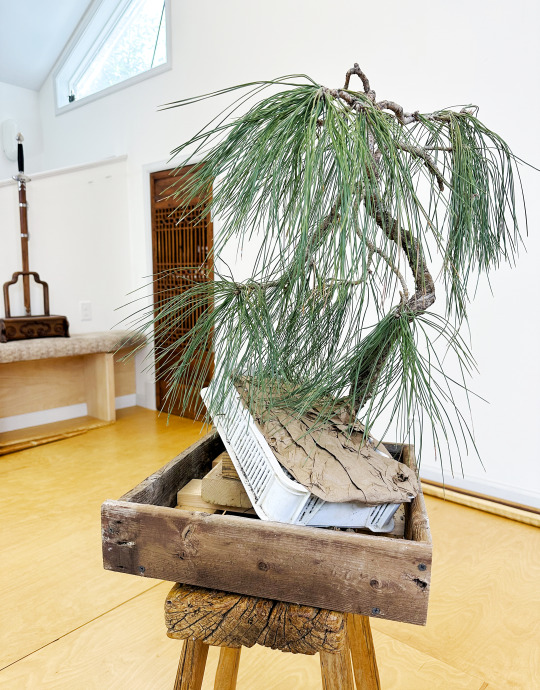
Ponderosa Pine Yamadori Progress 1~
Yesterday I received this wonderful mountain collected (yamadori) Ponderosa Pine. So this morning a built a frame to hold it at the angle I will repot it. It needs another year to recover from being dug before repotting. By setting it in this frame, I can begin to wire and style it without having to worry about it falling off blocks wedged under the pot to hold it in place.
I constructed the frame entirely out of salvaged materials, including boards from the crate it was shipped in. I even reused screws from the crate.
Looking forward to working with this tree...
2 notes
·
View notes
Photo
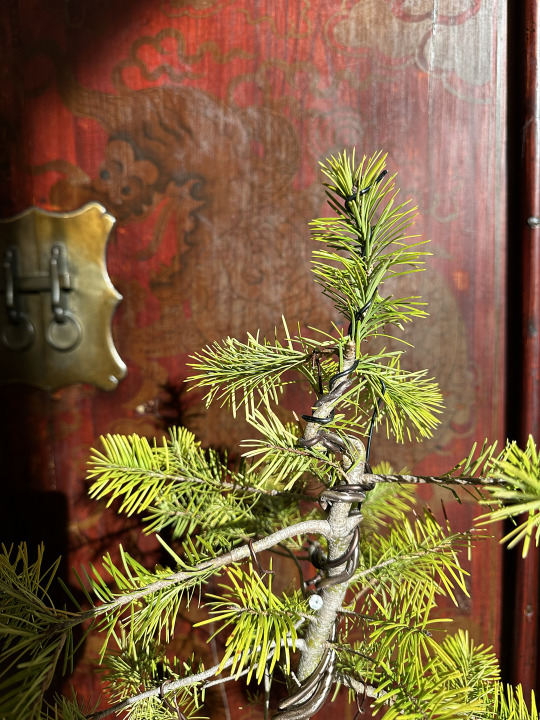
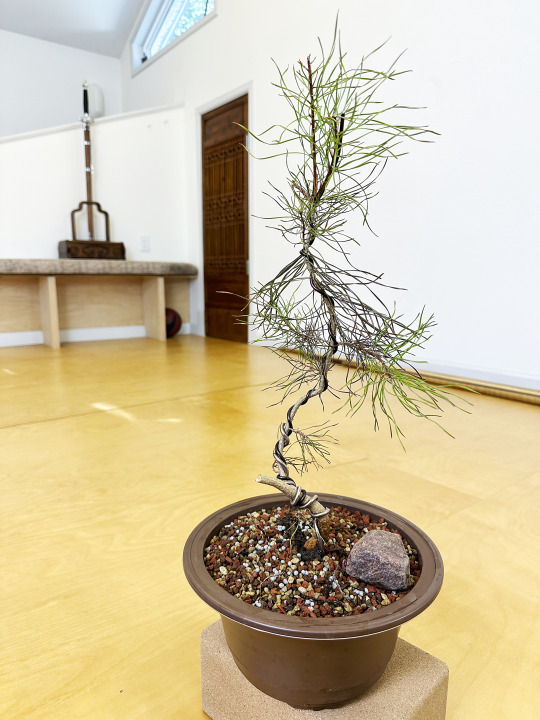
Wiring
Slowly styling my Bunjin style Virginia Pine. After letting it rest after the major movement put into the trunk, wiring the few small branches.
#bunjinbonsai#bunjin#bonsaitree#bonsai#penzai#bonsaipenjing#penjing#scottrodell#scottmrodell#swordsmanbonsai
3 notes
·
View notes
Photo

Bunjin Shadow~
As the morning light crept into the Wuguan.
#bunjinbonsai#bunjin#bonsaitree#pinebonsai#penzai#bonsaipenjing#penjing#scottrodell#scottmrodell#swordsmanbonsai
3 notes
·
View notes
Photo
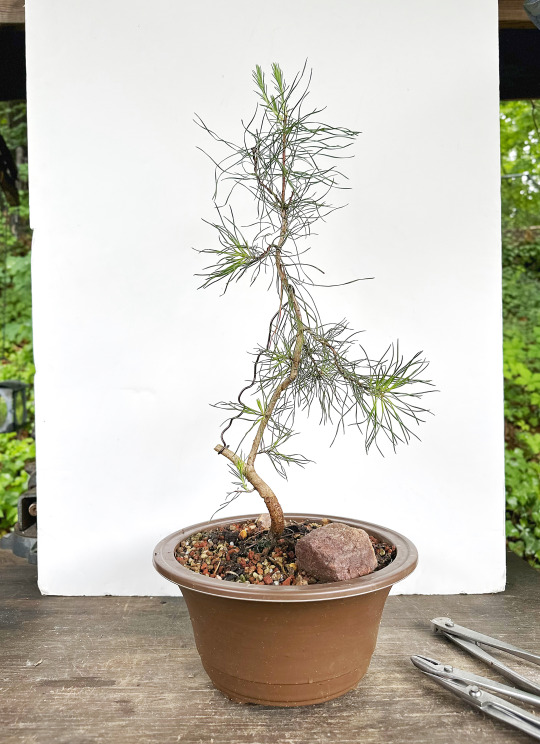
Just dug, Virginia Pine Yamadori. I’ve had my eye on this little tree for a bunjin style bonsai for awhile. I bent the lower portion of the trunk this winter.
It came out surprisingly easy, no big tap root to cut.
Watch for updates…
#bunjinbonsai#bonsaitree#bonsaipenjing#bonsai#penzai#penjing#scottmrodell#scottrodell#swordsmanbonsai
2 notes
·
View notes
Photo
Virginia Pine Yamadori Initial Styling
I jumped the gun styling this tree so early. Really taking a risk that it will survive. It’s difficult to resist that creative moment. I certainly hope it does well, I quite like this tree. The standard advice is to wait for the next spring before working on a collected tree. That’s no doubt wise advice. But that is the “standard” advice and addresses trees collected far from home that are packed out and potted hours after being dug. And for trees where there was a trunk chop. I had this pine in the pot in less than 30 minutes from being dug.
I went ahead with shaping the trunk when I was just having a quiet look at it and the shape just came to me, following natural curves that were there. I’ll really baby it from here on…
There are a variety of thoughts concerning post dig care. Some are in the wait for growth before beginning fertilizing camp. Others start straight away. I’m in the later camp. The important thing is to not fertilize too heavily as the fertilizers are salts. And naturally, keep the growing medium damp, but don’t over water it drowning the roots.
On the plus side, it didn’t have a tap root that required cutting. The native soil it was growing in fell away quite easily, so it is mostly in the standard bonsai mix of equal parts pumice, lava, akadama. Happily, I was able to preserve most of the fine roots.
#bunjinbonsai#bonsaitree#bonsaipenjing#bonsai#scottrodell#scottmrodell#swordsmanbonsai#penzai#penjing
1 note
·
View note
Last Seen Blogs

incorrect-bridgerton-family
Incorrect Quotes

garagedoorinstallationlakefo
Garage Door Installation Lake Forest IL

isad-chan
IsadCater

human-puckerman
♪ Jake Puckerman & Kitty Wilde ♪

svtsmau
svt’s vernon social media au