
taimio
taim.io
Learn how to grow vegetables!
485 posts
Don't wanna be here? Send us removal request.
Last Seen Blogs

abelshot
compassion as a chest wound

vannttae-blog
TaeTae Corner

hothoneyhole
Looking For Lust In All The Wrong Places

serviceclone01
Untitled

scotty24
Untitled
Text
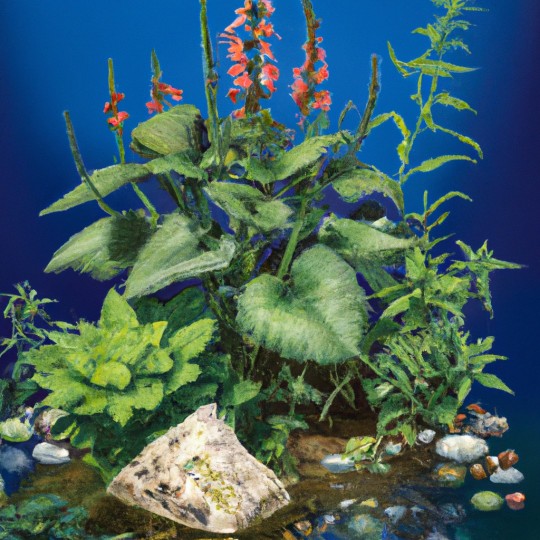
Cultivating Stunning Foxgloves: A Step-by-Step Guide to Growing this Beautiful Flower in Your Garden

Foxglove is a beautiful, fragrant flower that is not only pleasing to the eye, but also beneficial to people. The plant is known to have a sweet, honey-like taste, and can be used to make medicine that helps treat a variety of ailments. It also is a great addition to gardens, adding a colorful touch to your landscape. Foxglove is a wonderful plant to grow, as it provides beauty and medicinal benefits for those who tend to it.
How To Grow Foxglove
So you’ve decided to add some foxglove to your garden? Congratulations, you’re in for a treat! These stunning flowers are not only beautiful to look at, but they also attract pollinators like bees and butterflies. Here are some tips to help you successfully grow foxglove in your own garden.
Remember that foxglove prefers partial shade and well-drained soil. Make sure to plant them in an area where they can get some sunlight but also have some shade during the hottest parts of the day.
When it comes to planting foxglove, start by preparing the soil. Mix in some organic matter like compost to help improve drainage and provide nutrients for your plants. Foxglove seeds can be sown directly in the garden or started indoors and transplanted once they’ve grown a bit.
Water your foxglove plants regularly, making sure to keep the soil moist but not waterlogged. Be mindful of overwatering, as this can lead to root rot. A layer of mulch around the base of the plants can help retain moisture and keep weeds at bay.
One thing to keep in mind with foxglove is that they are biennials, meaning they will flower in their second year and then die off. To ensure a continuous display of these gorgeous blooms, consider planting new foxglove seeds every year.
Deadhead spent flowers to encourage new growth and prolong the blooming period.
Watch out for pests like aphids and slugs, which can damage your foxglove plants. Use natural remedies or insecticidal soap to keep them at bay.
Support tall foxglove plants with stakes to prevent them from toppling over in strong winds.
Overall, growing foxglove can be a rewarding experience for any gardener. The key is to provide the right growing conditions and care for your plants diligently. Before you know it, you’ll be enjoying a vibrant display of foxglove flowers in your garden.
If you’d like to learn more about growing foxglove, check out this comprehensive guide for additional tips and tricks. Happy gardening!
Learn more about gardening with Taim.io!
0 notes
Link
In a world where food shortage is increasingly becoming a concern, cultivating your own vegetable garden is an empowering and practical response. This article, titled "Vegetable Gardening in The Times of Food Shortage", equips you with all the necessary information on starting and maintaining a productive vegetable garden right in your backyard. Start today and contribute positively in combating food shortage in your own small, yet potent way. With an expanded emphasis on sustainability and self-sufficiency, gardening your own food becomes not just a hobby, but a lifeline in uncertain times. Offering a comprehensive guide to crop selection, planting techniques, and pest control, this guide is a must-read for anyone who wishes to take control of their food supply while enjoying the rewarding process of gardening. From beginners looking for a green thumb to seasoned gardeners looking to optimize, there’s plenty to dig into. So, grab a spade, roll up your sleeves and let's get planting. Learn more about gardening with Taim.io or try our gardening app!
0 notes
Text
Comprehensive Guide to Recognizing and Managing Plant Pests and Diseases

Have you ever noticed strange spots on your plants or seen them wilt for no apparent reason? Identifying and dealing with plant pests and diseases can be a daunting task for any gardener, but fear not! In this comprehensive guide, we will explore the world of plant pests, from the sneaky aphids to the menacing fungi. You'll learn how to identify common signs of infestation, understand the damage they can cause, and discover effective techniques to combat them. Don't let these pests get the upper hand in your garden! Keep reading to become a master at identifying plant pests and protect your precious greenery.
Identifying Plant Pests And Diseases: An In-Depth Guide
As a seasoned plant enthusiast, I've encountered my fair share of pesky pests and troubling diseases that can wreak havoc on my beloved green friends. Identifying these issues early on is crucial in preventing them from spreading and causing irreparable damage to your plants.
1. Look closely at your plants - Take the time to inspect your plants regularly, paying close attention to the leaves, stems, and soil. Look for any abnormalities such as discoloration, holes, webs, or wilting.
2. Research common plant pests and diseases - Familiarize yourself with the common culprits that may be plaguing your plants. Aphids, spider mites, powdery mildew, and root rot are just a few examples to be on the lookout for.
Early detection is key in successfully treating plant pests and diseases. Don't wait until it's too late to take action!
3. Seek advice from fellow plant lovers - Don't be afraid to reach out to other plant enthusiasts for guidance. Online forums, social media groups, and local gardening clubs can be great resources for identifying and treating plant issues.
4. Use natural remedies whenever possible - Before reaching for harsh chemical pesticides, consider trying natural solutions such as neem oil, diatomaceous earth, or companion planting to help combat pests and diseases.
5. Consult with a professional if needed - If you're unsure about what's plaguing your plants or if the issue seems to be worsening despite your efforts, don't hesitate to seek help from a plant professional or local nursery.
By taking a proactive approach to identifying and treating plant pests and diseases, you can help ensure the health and vitality of your beloved greenery. Remember, prevention is always better than a cure!
For more in-depth tips and tricks on identifying plant pests, check out my related article on Common Plant Pests: A Comprehensive Guide.
Learn more about gardening with Taim.io!
0 notes
Text
Enhance Your Aquarium with the Art of Aquascaping
Welcome to the wonderful world of aquascaping! Whether you own an aquarium or are thinking of starting one, learning how to aquascape can make all the difference to the look and feel of your aquatic home. Aquascaping is the process of using specialized techniques to create an underwater landscape or scene within an aquarium. When done well, this process can create a stunning and beautiful aquarium, full of life, movement and eye-catching features that will transform your space into a tranquil underwater experience. In this article, we explore the tricks and techniques used in aquascaping, and how you can use them to create your own incredible aquarium. So, join us to embark on an aquascaping journey and learn to create a captivating aquatic landscape!
Transform Your Aquarium With Aquascaping
As a long-time aquarium enthusiast, I've discovered the magic of **aquascaping** - the art of creating stunning underwater landscapes. It's like painting with plants and rocks, turning your tank into a work of art.
Remember, **aquascaping** isn't just about aesthetics - it also benefits your fish by providing them with natural habitats to explore and hide in.
Start by researching different styles like Dutch, Japanese, or Nature Aquarium, and decide on a theme that speaks to you. Then, choose plants and decorations that fit your vision and the needs of your aquatic friends.
Don't be afraid to get creative with your layout, using different heights, textures, and colors to create depth and movement in your underwater world. And remember, **aquascaping** is a living art form, so be prepared to tweak and adjust as your plants grow.
Patience is key in **aquascaping** - let your tank evolve over time, and enjoy the process of watching your creation come to life.
Invest in quality equipment like good lighting, substrate, and CO2 systems to help your plants thrive. And don't forget to regularly maintain your tank by trimming plants, cleaning algae, and monitoring water parameters to keep everything healthy and balanced.
Join online **aquascaping** communities and forums to connect with fellow enthusiasts, share tips and tricks, and get inspiration for your next project. And most importantly, have fun with it - **aquascaping** is a rewarding hobby that brings beauty and tranquility into your home.
Ready to dive into the world of **aquascaping**? Check out my related article on choosing the right plants for your aquarium to get started on your aquatic masterpiece!
Learn more about gardening with Taim.io!
0 notes
Text
Aquaponics: Revolutionizing Agriculture with Sustainable and High-Efficiency Practices
Aquaponics is a revolutionary and sustainable method of agriculture that combines the best of aquaculture (raising fish) and hydroponics (growing plants in water without soil) to create a highly efficient and environmentally friendly food production system. The primary keyword for this article is aquaponics, and the secondary keywords are recirculating aquaculture, hydroponics, and indoor farming.
Aquaponics: A Sustainable And Efficient Method Of Agriculture
When I first heard about aquaponics, I was skeptical. How could fish and plants work together to create a sustainable ecosystem?
But after diving into the world of aquaponics, I quickly realized the genius behind this method of agriculture.
By combining aquaculture and hydroponics, aquaponics uses the waste from fish to fertilize plants, creating a closed-loop system that maximizes efficiency.
This symbiotic relationship not only reduces water usage but also eliminates the need for synthetic fertilizers, making it an environmentally friendly option for growing food.
As someone who has always been passionate about sustainable living, aquaponics felt like a natural fit for me.
Setting up my own aquaponics system was a learning experience, but the rewards were worth it.
Choosing the right fish and plants to cultivate
Maintaining water quality and nutrient levels
Adjusting the system to optimize growth
Seeing my plants thrive and knowing that I was contributing to a more sustainable future was incredibly rewarding.
If you're interested in learning more about aquaponics and how you can start your own system, check out this related article for in-depth information and tips.
Learn more about gardening with Taim.io!
0 notes
Text
Troubleshooting Yellowing Tomato Leaves: Simple Solutions for a Healthier Garden
Welcome to your quick-fix guide to combat tomato leaves yellowing! Are your vibrant green plants showcasing a pinch of yellow? Don't fret! Rolling up our sleeves, we'll delve into the causes and ensure your tomatoes get back to their healthy state. Yellow leaves can be a sign of several issues such as nutrient deficiency, overwatering, or even a disease. Fear not, fellow gardeners, armed with the right knowledge, you can restore your plants' vitality and enjoy a robust, fruitful harvest. Strap in and keep scrolling as we get to the root of the problem and explore some easy solutions to give your tomatoes the care they truly deserve. Transform your garden into a towering field of red, healthy veggies with this handy guide on treating yellowing tomato leaves.
Help, My Tomato Leaves Are Yellowing (Easy Fixes)
So, your tomato plants are looking a little under the weather, huh? Don't worry, we've all been there. It can be frustrating to see those once vibrant green leaves turning a sickly shade of yellow. But fear not, there are simple solutions to get your tomatoes back on track.
First things first, **check the soil**. Yellowing leaves can be a sign of nutrient deficiencies, so make sure your soil has the right balance of nitrogen, phosphorus, and potassium. A good **organic fertilizer** can work wonders for your plants.
Remember, healthy soil equals healthy plants. Make sure to **test your soil** regularly to ensure your tomatoes have everything they need to thrive.
Another common culprit of yellowing leaves is **overwatering**. Tomatoes like their soil to be consistently moist, but not waterlogged. Make sure your plants are getting enough water, but be careful not to drown them.
**Prune** your plants to improve air circulation and reduce the risk of diseases.
**Mulch** around the base of your tomatoes to help retain moisture and regulate soil temperature.
**Check for pests** like aphids or spider mites, which can also cause yellowing leaves.
Lastly, **proper sunlight** is key for healthy tomato plants. Make sure your tomatoes are getting at least 6-8 hours of sunlight per day. If they're not, consider moving them to a sunnier spot in your garden.
By following these simple tips, you can help your tomato plants bounce back and produce a bountiful harvest. Remember, a little TLC goes a long way in the world of gardening. Happy growing!
For more in-depth information on caring for your tomato plants, check out this informative article.
Learn more about gardening with Taim.io!
0 notes
Text
Mastering the Art of Cultivating Manioc: A Comprehensive Guide

The staple of most tropical regions, manioc, also called yuca or Cassava, is a fast-growing, annual plant with a moisture-loving root system. It thrives in less-than-ideal growing conditions and can be grown on almost any type of soil. The plant has a tall stature and grows to between 15–40 feet. Manioc is an excellent source of carbohydrates and essential nutrients such as protein, zinc, iron, calcium, and vitamins A and B6. Although cassava is often considered an invasive species in some areas of the world because it crowds out native vegetation and spreads quickly by seeds (it germinates quickly) when disturbed. In other lands, it has been cultivated since ancient times for food and fiber. The cultivation and processing of cassava spread to many parts of the world during the Atlantic slave trade era beginning in the 15th century. Today’s commercial farming methods have increased manioc production further while reducing its invasiveness. Read on to learn more about how you can grow manioc at home! Growing manioc is a rewarding experience that requires patience and care. I'll share my tips on how to cultivate this versatile root vegetable successfully. First, choose a sunny location with well-drained soil for your manioc plants. **Ensure the soil is rich in nutrients** to support healthy growth. Plant manioc cuttings in rows, spacing them about 1-2 feet apart. **Water regularly** to keep the soil moist, but not waterlogged. After 8-12 months, your manioc plants should be ready for harvest. **Carefully dig up the roots** and remove the outer skin before consuming. In conclusion, growing manioc can be a fulfilling and satisfying endeavor. **By following these tips, you can enjoy a bountiful harvest of this nutritious staple**. For more in-depth information, check out this related article on growing manioc. Learn more about gardening with Taim.io!
0 notes
Text
The Ultimate Guide to Understanding the Sapote Fruit

Renowned for its soft, edible flesh and diverse uses, the sapote fruit holds a cherished place in culinary traditions across the world. Derived from the Nahuatl language, the term 'sapote' is used to denote several unrelated fruit-bearing plants native to southern Mexico, Central America, and northern parts of South America. Also known in Caribbean English as 'soapapple', the sapote fruit's rich history and wide-ranging uses make it a fascinating subject of study.
The Sapote Fruit: A Comprehensive Guide
As a lover of all things horticulture, I have found a special place in my heart for the sapote fruit. Its sweet, custard-like flavor and creamy texture make it a favorite among fruit enthusiasts.
When it comes to growing sapote, there are a few key things to keep in mind. **First**, choose a sunny location with well-draining soil for optimal growth. **Second**, sapote trees thrive in tropical or subtropical climates, so be sure to provide adequate warmth and humidity.
Growing sapote requires patience and dedication, but the rewards are well worth the effort.
One of the most important aspects of caring for sapote trees is proper watering. **I have found** that sapote trees prefer consistent moisture, so be sure to water regularly, especially during dry periods.
Pruning is another essential task when it comes to growing sapote. **Be sure to** remove dead or diseased branches, and shape the tree to encourage healthy growth and fruit production.
Harvesting sapote is a true delight. **I recommend** waiting until the fruit is slightly soft to the touch before picking, as this is a sign of ripeness. Enjoy the fruits of your labor in a variety of dishes, from smoothies to desserts.
For more in-depth information on growing sapote, check out this informative article on The Ultimate Guide to Growing Sapote Trees. Happy gardening!
Learn more about gardening with Taim.io!
0 notes
Text
Exploring the Ins and Outs of Organic Farming: A Comprehensive Guide

Organic farming is an increasingly popular method for growing fruits, vegetables, and other crops without the use of pesticides and other toxins. As it continues to grow in popularity, many people are beginning to ask the fundamental questions about organic farming: What is organic farming? How is it different from traditional farming methods? What are the benefits of organic farming? If you'd like to learn more, this article will provide a complete breakdown of organic farming: what it is, its advantages and disadvantages, and more. From the types of crops grown to the restrictions placed on organic farmers, here is a comprehensive guide to one of the most popular trends in modern agriculture. Prepare to have your mind opened and questions answered, as we break down the complexities of organic farming and uncover its many advantages…
A Complete Breakdown Of Organic Farming
Organic farming isn't just a trend, it's a way of life that promotes sustainable agriculture and healthy ecosystems. As a farmer who has dedicated years to cultivating organic crops, I can attest to the numerous benefits it brings to both the environment and consumers. Let's break down what exactly organic farming entails.
Organic farming relies on natural methods to fertilize and control pests, without the use of synthetic chemicals or genetically modified organisms. This not only promotes soil health, but also reduces the risk of harmful residues ending up in our food.
One of the key principles of organic farming is biodiversity, which involves planting a variety of crops to create a balanced ecosystem. This not only helps to naturally control pests and diseases, but also enhances soil fertility and promotes a healthier environment.
**Organic farmers prioritize soil health, using practices such as crop rotation and composting to maintain a healthy balance of nutrients in the soil. This results in crops that are not only more nutritious, but also have a better taste and texture.**
Organic farming also prohibits the use of synthetic hormones and antibiotics in livestock, ensuring that animals are raised in a humane and healthy manner.
By supporting organic farming practices, consumers can help reduce their carbon footprint and support local farmers who prioritize sustainability.
**In a world where industrial agriculture is the norm, organic farming offers a refreshing alternative that puts the health of the planet and its inhabitants first.**
Overall, organic farming is more than just a method of growing food – it's a philosophy that respects the interconnectedness of all living things. By supporting organic farmers and choosing organic products, we can contribute to a healthier planet for future generations.
If you're interested in learning more about the benefits of organic farming, check out this related article. It's a fascinating read that dives deeper into the world of sustainable agriculture.
Learn more about gardening with Taim.io!
0 notes
Text
Mastering the Art of Cultivating Black Nebula Carrots: A Comprehensive Guide

"Discover the secrets to growing your own nutrient-rich Black Nebula Carrot in this comprehensive guide. Understanding how to cultivate Black Nebula Carrots is not as complex as you might think; in fact, with the right guidance, you'll soon have these health powerhouses sprouting in your very own garden. Let us help you journey into the fascinating world of Black Nebula Carrot cultivation, providing you with expert tips and practical advice. This article goes beyond just the basic steps; we delve into everything you need to know, from optimal growing conditions, to common pests and disease management, ensuring your Black Nebula Carrots thrive. Don't miss out on this opportunity to add a unique, nutrient-packed veggie to your garden, read on to find out more."
How Do You Grow Black Nebula Carrot?
So, you’ve decided to try your hand at growing the mysterious and captivating Black Nebula Carrot. Let me tell you, it’s not as intimidating as it may seem. In fact, with a little patience and care, you can experience the joy of cultivating these striking vegetables in your own garden.
One of the key things to remember when growing Black Nebula Carrots is to ensure they have well-draining soil. These carrots don't like to have their feet wet, so be sure to choose a spot in your garden that allows water to flow freely.
When it comes to planting Black Nebula Carrot seeds, it’s best to sow them directly into the ground rather than starting them indoors. The seeds should be planted about ½ inch deep and spaced about 3 inches apart. Don’t worry if the seeds take a little longer to germinate compared to other carrot varieties.
Once your Black Nebula Carrots start to sprout, it’s important to thin them out to prevent overcrowding. You’ll want to space the young plants about 1-2 inches apart to give them room to grow properly. Thinning also helps promote healthier and larger carrots in the long run.
Remember to keep your Black Nebula Carrots well-watered, especially during dry spells. These carrots thrive in consistently moist soil, so be sure to check the moisture levels regularly and water as needed. However, be careful not to overwater as this can lead to rotting.
As your Black Nebula Carrots continue to grow, be on the lookout for any pests or diseases that may affect them. Inspect the leaves and stems regularly for signs of trouble, and take action promptly if you notice any issues. It’s always better to catch problems early on before they become a bigger headache.
Harvesting Black Nebula Carrots is a rewarding experience, as you get to enjoy the fruits of your labor. These carrots are ready to be harvested when they reach about 7-8 inches in length and have a deep, dark color. Use a garden fork or trowel to gently loosen the soil around the carrot before pulling it out.
Now that you know the basics of growing Black Nebula Carrots, it’s time to roll up your sleeves and get started. With a little TLC and some patience, you’ll soon be enjoying these unique and beautiful vegetables straight from your garden.
For more tips and tricks on growing Black Nebula Carrots, check out this comprehensive guide. Happy gardening!
Learn more about gardening with Taim.io!
0 notes
Text
Learn Simple Steps to Successfully Grow a Spearmint Plant
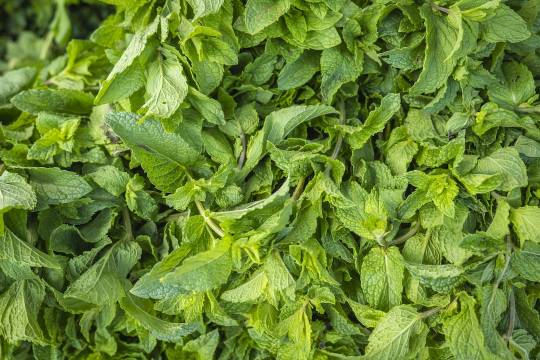
Do you have a small corner of your garden that you'd like to fill with something that smells wonderful, looks great, and can be used in the kitchen? If you answered yes, then grow a spearmint plant! Spearmint is easy to maintain, can be grown nearly anywhere, and has a wide variety of uses in culinary and medicinal remedies. Not sure how? Read on to find out the simple steps you can take to easily grow your very own spearmint plant!
Grow Spearmint Plant Easily With Easy To Follow Steps
If you're like me and enjoy adding a touch of freshness to your dishes, then growing your own spearmint plant is a must! Not only does it add a pop of flavor to your meals, but it also has a host of health benefits.
Spearmint is known for its ability to aid in digestion and alleviate nausea, making it a handy herb to have in your kitchen.
To get started, find a sunny spot in your garden or a spot with indirect sunlight if you're growing indoors. Spearmint loves the sun, but it can also thrive in partial shade.
Make sure to plant your spearmint in well-draining soil to prevent waterlogging, which can lead to root rot. I like to mix in some compost to enrich the soil and provide nutrients for the plant.
Water your spearmint plant regularly, keeping the soil moist but not soggy. Overwatering can be detrimental to the plant, so make sure to let the top layer of soil dry out slightly before watering again.
Harvest your spearmint leaves by pinching off the top leaves, starting from the top of the stem. This will encourage new growth and ensure a steady supply of fresh leaves.
Use your freshly harvested spearmint leaves in teas, cocktails, salads, or as a garnish for desserts. The possibilities are endless!
With these easy-to-follow steps, you'll be able to grow your own spearmint plant in no time. Enjoy the process and reap the rewards of having fresh spearmint at your fingertips!
For more tips on growing herbs, check out my article on Herb Gardening 101. Happy growing!
Learn more about gardening with Taim.io!
0 notes
Text
Exploring the World of Plant Breeding: Understanding Hybrids, Cultivars, and Varieties

Dive into the captivating world of plants and discover how creating new plants through hybrids, cultivars, and varieties can add an exciting twist to your gardening journey. In our comprehensive guide, you'll unravel the intricacies of innovative plant breeding techniques, transforming your garden into an efflorescence of distinctive beauty. You’ll learn not only how these plant varieties are made, but also how they can contribute to a more vibrant and healthier garden. Overflowing with insider advice and expert-favoured tips, this article demystifies the art of creating new plants, be it for increased pest resistance, better growth habits, or just for the sheer thrill of creating something unique. So, green-thumbs and budding garden enthusiasts, prepare to branch out into horticultural creations that are perhaps more daring, diverse, and delightful than you previously thought possible!
Creating New Plants: Navigating Hybrids, Cultivars, and Varieties
When it comes to creating new plants, there are a few key terms to understand: hybrids, cultivars, and varieties. Hybrids are the result of crossbreeding two different plant species, creating a plant with unique characteristics. Cultivars, short for cultivated varieties, are plants that have been selected and bred by humans for specific traits. Varieties, on the other hand, are naturally occurring variations within a species.
Understanding the differences between hybrids, cultivars, and varieties can help you choose the right plants for your garden. **Hybrids** are often prized for their vigor and resilience, while cultivars are selected for their beauty or flavor. Varieties, on the other hand, offer a wider range of characteristics due to natural genetic variations.
It's important to remember that creating new plants is a process that requires patience, experimentation, and a touch of creativity.
When creating new plants, it's important to consider the climate, soil conditions, and sunlight requirements of your garden. Different plants thrive in different environments, so it's important to do your research before selecting new additions. **Experimentation** is key when it comes to creating new plants – don't be afraid to try out different combinations and see what works best for your garden.
One of the most exciting aspects of creating new plants is the opportunity to contribute to biodiversity. By selecting and breeding plants with unique traits, you can help create a more diverse and resilient ecosystem. **Biodiversity** is essential for a healthy garden, as it helps protect against pests, diseases, and environmental stressors.
Resources:
Related article on The Art of Plant Breeding
Learn more about gardening with Taim.io!
0 notes
Text
Optimal Spacing for Cucumber Plants: Tips for a Bountiful Harvest
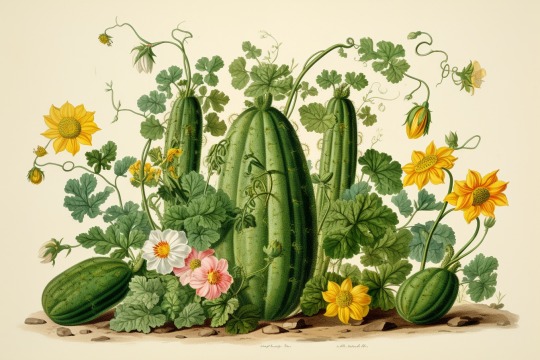
Growing tasty, crisp cucumbers in your backyard can be a rewarding experience, but knowing the proper cucumber planting spacing is key to a healthy and fruitful harvest. When cucumbers are too close, they can compete for light, water, and nutrients, affecting their growth and yield. Achieving the right distance between your cucumber plants not only ensures their survival but also helps optimize their productivity.Through this article, you'll gain a comprehensive understanding of the nuances and importance of appropriate cucumber planting spacing. Learn about different cucumber varieties and their specific requirements. Unearth the secret to garden layout maximizing space for your cucumber plants and get tips on how to prevent common gardening challenges.So whether you are a first-time gardener venturing into growing your cucumber patch, or a seasoned green thumb looking for improved crop performance, this detailed guide can serve as your trusted companion. Let's get started on the journey towards bountiful and healthy cucumber harvests!
How Should You Space Cucumber Plants?
When it comes to spacing cucumber plants, it's crucial to give them enough room to thrive. I've learned the hard way that overcrowding can lead to stunted growth and poor fruit production.
For traditional varieties, aim for a spacing of **12-24 inches** between plants in rows that are **3-4 feet** apart. This allows for proper air circulation and prevents the spread of disease.
Remember, healthy cucumber plants need room to spread out their vines and soak up sunlight. Don't overcrowd them!
For compact or bush varieties, you can plant them a bit closer together, typically **8-12 inches** apart in rows that are **2-3 feet** apart. These plants don't vine as much, so they can be spaced more tightly.
Proper spacing not only promotes healthier plants, but it also makes it easier to harvest cucumbers. Trying to navigate through a jungle of crowded vines is no fun, trust me.
Overcrowding can also lead to competition for nutrients and water, which can result in smaller fruits and overall weaker plants.
So, before you start planting your cucumbers, take the time to plan out your spacing properly. Your plants will thank you with bountiful harvests and healthy growth. And if you need more tips on growing cucumbers, check out this article for more insights.
Learn more about gardening with Taim.io!
0 notes
Text
Tips for Successfully Cultivating Oyster Leaf Plants
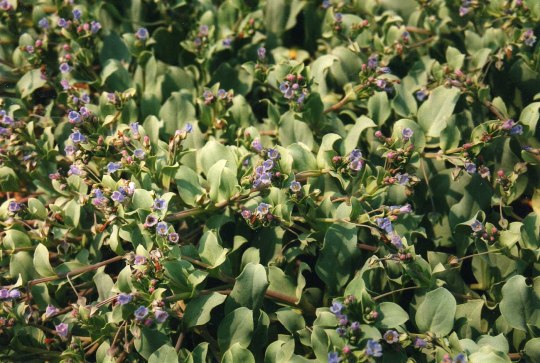
Welcome to our comprehensive guide on 'How Do You Grow Oyster Leaf?'. If you've never heard of Oyster Leaf before, you're in for a garden revelatory experience! Oyster Leaf, or Mertensia maritima, is known for its distinctive flavor that remarkably tastes like oysters. This unique garden gem is perfect for culinary enthusiasts seeking to add a touch of the ocean to their garden without the briny water. Transforming your garden into a gourmet haven can be as simple as planting this splendid greenery. Join us as we delve into the wonderful world of Oyster Leaf, guiding you through the tips, tricks and techniques needed to successfully grow and care for this appetizing plant. You'll be harvesting your homegrown Oyster Leaves in no time! So, why not broaden your gardening horizons and come explore the wonders of growing your very own Oyster Leaf?
I recently discovered the joys of growing oyster leaf in my garden. It's a unique and flavorful herb that adds a subtle brininess to dishes.
To grow oyster leaf, start by planting seeds in well-draining soil in a sunny spot. Keep the soil consistently moist, but not waterlogged. The seeds should germinate in about 1-2 weeks.
Remember to thin out the seedlings to avoid overcrowding, allowing the plants to grow to their full potential.
Once the oyster leaf plants have reached a few inches in height, you can start harvesting the leaves. Simply cut the leaves close to the stem for the freshest flavor.
**For more detailed information on growing oyster leaf, check out this informative article on how to grow oyster leaf.**
Learn more about gardening with Taim.io!
0 notes
Text
Using Cream of Tartar to Safely Ward off Garden Pests

Ants are probably one of the worst pests in the garden and your kitchen pantry. They’re a nuisance to both your crops and your kitchen cabinets, and in fact they seem to find their way everywhere You may have tried synthetic pesticides to rid of them, and are now looking for an organic alternative. Here's a hack that’s sure to get the ants out of your kitchen and your garden. Cream of Tartar goes beyond making meringue perfect in the kitchen – it also repels pesky ants from attacking your pantry or garden. How exactly does that work? Cream of Tartar contains an acid salt in its mixture, which happens to be a known natural repellant for ants. The salt is a kind of alkaline poison for most insects that have with an exoskeleton; like ants.
Cream Of Tartar Against The Pests In Your Garden
As a devoted gardener, I'm always on the lookout for natural solutions to keep my plants thriving. One surprising ally in my green oasis has been cream of tartar, a common kitchen ingredient that packs a powerful punch against garden pests.
When I discovered the effectiveness of cream of tartar in repelling pests, I was thrilled to have a safe and affordable solution at hand.
One of the most common pests in my garden is ants, and they can wreak havoc on delicate plants. To deter these pesky invaders, I mix equal parts cream of tartar and powdered sugar and sprinkle it around the base of my plants.
In addition to ants, cream of tartar can also help keep aphids at bay. A simple solution of 1 tablespoon of cream of tartar and 1 quart of water can be sprayed directly onto affected plants to deter these tiny sap-sucking insects.
Another surprising use for cream of tartar in the garden is as a natural fungicide. A mixture of 1 tablespoon of cream of tartar and 1 gallon of water can help prevent powdery mildew on plants.
For gardeners looking to boost their plants' nutrient uptake, cream of tartar can also be used as a foliar spray. Just mix 1 teaspoon of cream of tartar with 1 gallon of water and spray it directly onto the leaves.
By incorporating cream of tartar into my gardening routine, I've been able to maintain a healthy and thriving garden without relying on harsh chemicals. Plus, it's a versatile ingredient that I always have on hand in my kitchen!
If you're looking for more tips on natural gardening solutions, check out my related article on Harnessing the Power of Cream Of Tartar in Your Garden. Happy gardening!
Learn more about gardening with Taim.io!
0 notes
Text
Unlock the Secret to Successful Gardening: Discover the Benefits of Companion Planting

Have you ever heard of companion planting? It’s a gardening practice in which plants are grown close together to benefit each other. Companion planting has been around for centuries, but is gaining more and more popularity as gardeners look for ways to make their gardens more sustainable and productive. In this article, we’ll explore what companion planting is, the types of companion plants, the benefits of companion planting, and the best companion plants for vegetables. Read on to learn how to get the most out of your vegetable garden and reap the rewards of companion planting!
I discovered the magic of companion planting in my own garden last year. **Companion planting** is the practice of planting certain crops next to each other to benefit both plants. It's like a natural support system for your garden!
Think of it as giving your plants their own little squad to help them thrive.
For example, planting basil next to tomatoes can improve the tomatoes' flavor and repel pests. **Marigolds** are also great companions for many plants, as they deter pests with their strong scent.
Experimenting with companion planting has not only improved my garden's health, but also its diversity. I've seen a decrease in pests and an increase in overall yield. It's like creating a mini ecosystem right in my backyard!
Try planting **nasturtiums** near cucumbers to repel pests.
Consider planting **garlic** near roses to ward off aphids.
Companion planting is a way to work with nature, rather than against it. It's all about finding harmony in your garden and letting plants support each other naturally. So next time you're planning your garden, consider the power of companion planting and watch your garden flourish!
Want to learn more about the benefits of companion planting? Check out this article for more insights.
Learn more about gardening with Taim.io!
0 notes
Text
The Ultimate Guide to Successfully Growing Beans: Step-by-Step Instructions for Bean Growing Success

Growing the plant Bean is an enjoyable and rewarding experience that yields delicious plants that can add flavor to meals. Beans are an excellent source of protein, fiber and other important vitamins, minerals, and antioxidants, making them an excellent choice for a variety of recipes. When planted correctly, beans can produce intriguing colors and textures that can be enjoyed in salads and stews. Growing beans is an especially fun and rewarding experience for children, as they are easy to grow anyone can enjoy the process of caring for and harvesting a tasty crop.
Bean Growing 101: A Step-By-Step Guide To Growing Successful Beans
As a seasoned bean grower, I've learned a thing or two about cultivating these versatile legumes. Here's a comprehensive guide to help you on your journey to bean-growing success.
Patience and attention to detail are key when it comes to growing beans. Remember, Rome wasn't built in a day, and neither are thriving bean plants.
1. Choose the Right Variety of Beans
Before you start planting, consider the type of beans you want to grow. Bush beans are great for small spaces, while pole beans require some sort of support to climb.
2. Prepare the Soil
Beans thrive in well-drained soil with a pH level between 6.0 and 7.0. Ensure your soil is rich in organic matter and free from weeds.
3. Planting
Plant your beans when the soil temperature reaches around 60°F. Sow seeds 1-2 inches deep and space them accordingly based on the variety you choose.
4. Watering and Care
Keep the soil consistently moist but not waterlogged. Mulch around your plants to retain moisture and suppress weeds. Regularly check for pests and diseases.
5. Harvesting
Harvest your beans when they are plump and firm, but before they become tough and fibrous. Pick them regularly to encourage more production.
By following these steps, you'll be well on your way to growing a bountiful bean harvest. Happy planting!
For more in-depth tips and tricks on growing beans, check out my related article The Art of Bean Cultivation.
Learn more about gardening with Taim.io!
0 notes