
Last Seen Blogs

ernmydollars-blog
ErnMyDollar$

swiftthought
Swift Thoughts

ammazi
AMMAZI

pollkholsarab
Untitled

some-hayley-atwell
Hayley Atwell

Photo

Fully 3D printed Crossguard Lightsaber, all parts of the saber are 3D printed including the telescopic blades.
The hilt was all printed in the same grey plastic, I spray painted the black for all the visible black parts of the hilt.
0 notes
Photo
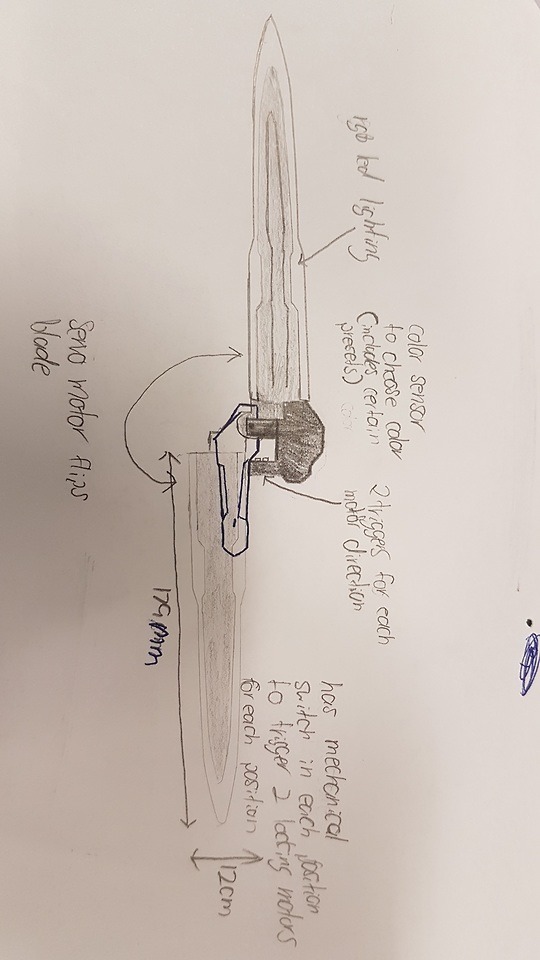

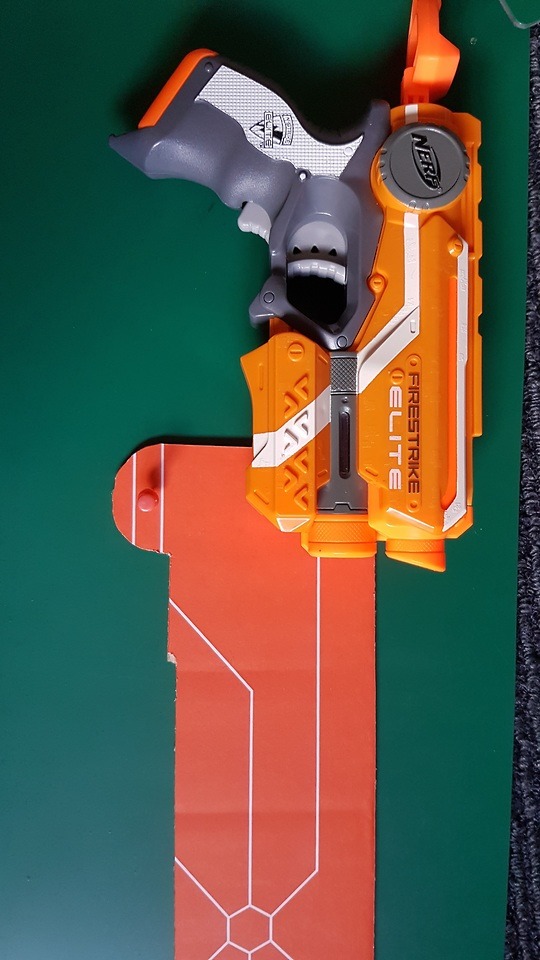
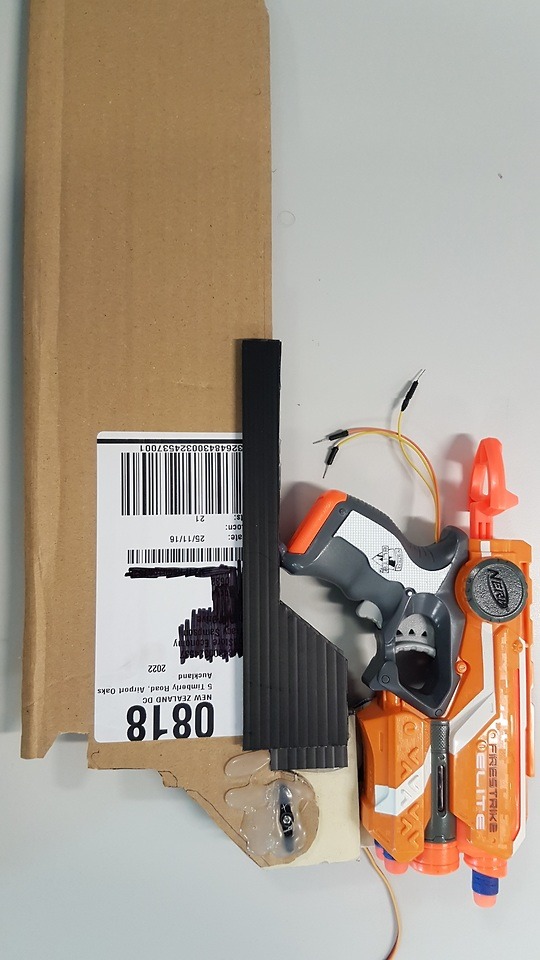
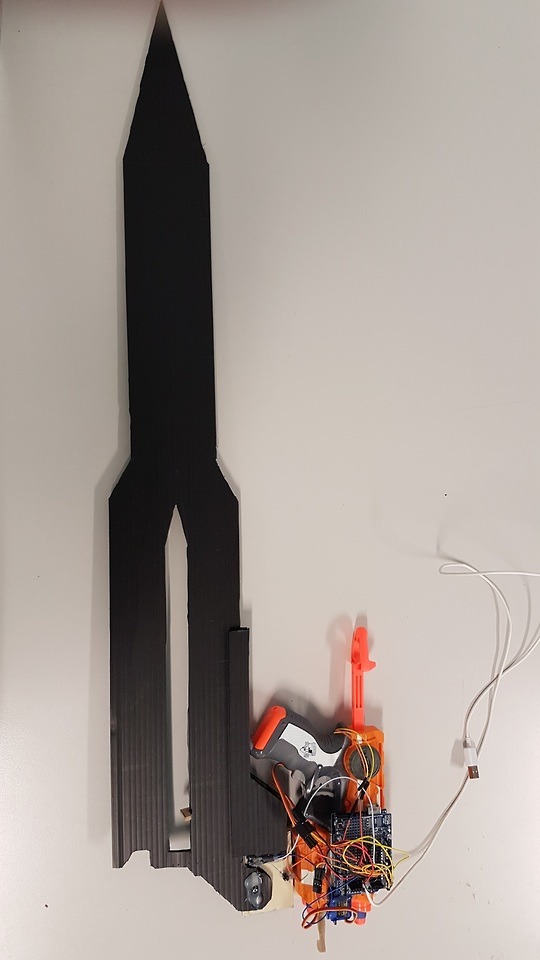

Here is my prop motorized Gn Sword 1 from Gundam Exia.
I used the laser light trigger from the nerf gun for the sword switch, allowing the nerf gun to be fully functional with the extra sword stuff attached.
I started with a cardboard blade to work out how the whole thing would come together. Then I used a Correx blade with sensors triggering locks to hold the blade in each position.
0 notes
Photo
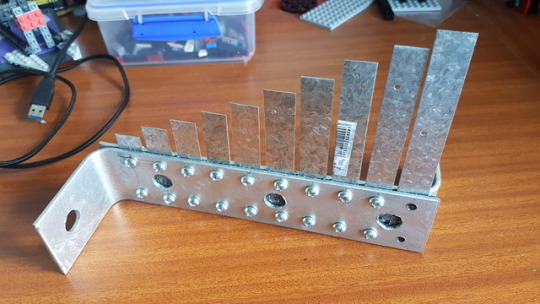
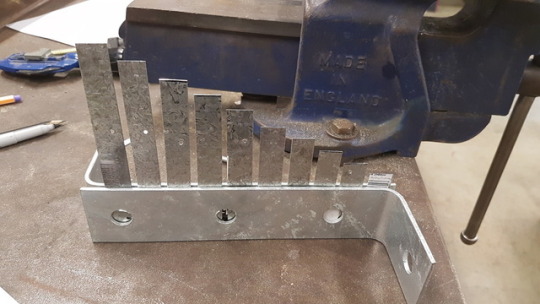

Metal instrument I made for Creative Tech. It sounded like a guitar of all things.
0 notes


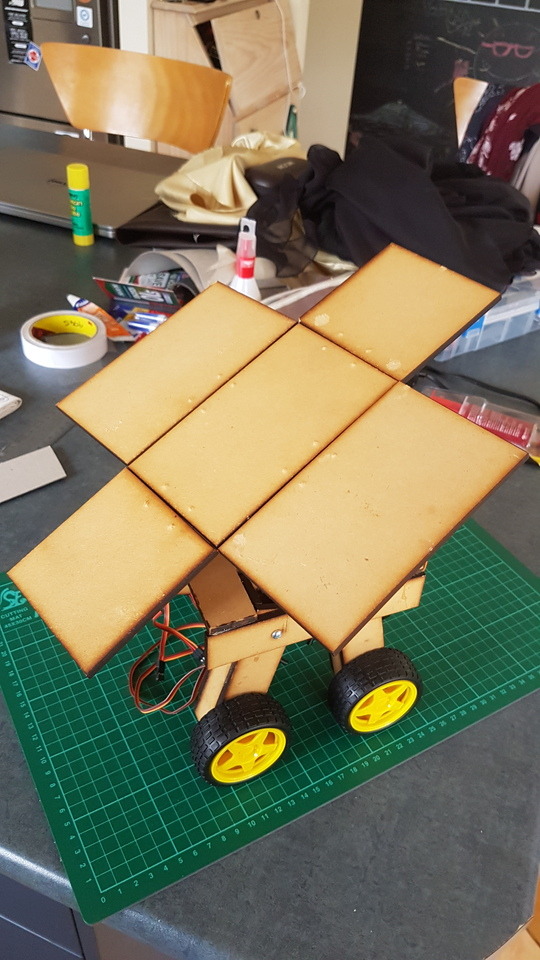
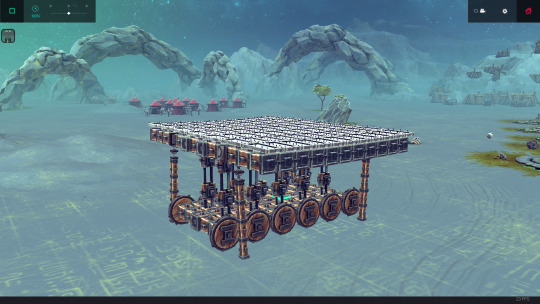
Photo

New full covering panels now built, now i will print off some solar panel textures to make them actually look like solar panels. I also need to program and setup the control box for the rover. This should hopefully allow and viewers of the project to interact and transform the rover for themselves.
1 note
·
View note
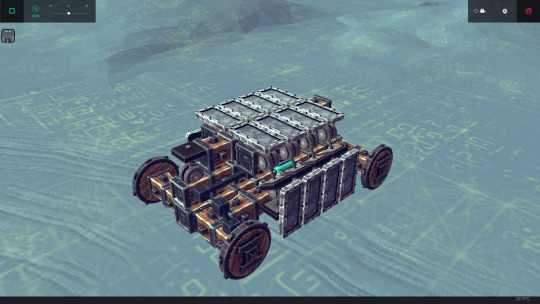
Photo

Top panels base now fully attached. This means there is no more laser cut parts needed to be build anymore. I will now build some panels to fully cover the rover mode since there is currently a lot of unused space as you can see in the corners in particular.
1 note
·
View note
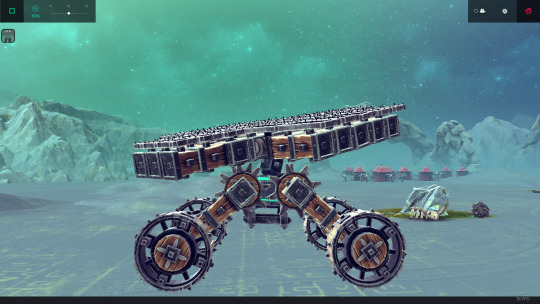
Photo

The Panel arm now attached to the base and can turn horizontally easily. Also since the leg motors are no longer needed i can use the old servos from the legs to open panels automatically instead of having them spring loaded. This will mean all parts of the transformation can be completed without any needed human manipulation.
1 note
·
View note
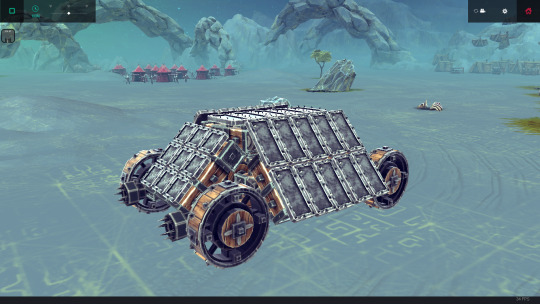
Photo


Leg rotation limiter added in the same manner as the cardboard prototype needed one. I found out i needed one with the cardboard prototype since besiege as rotation limiters so i did not have that issue there. The panel arm has been fully built and the servo is able to move easily. The top panels have now been built using standard hinges, they shall be opened through springs since there is not enough ports available on the arduino.
1 note
·
View note
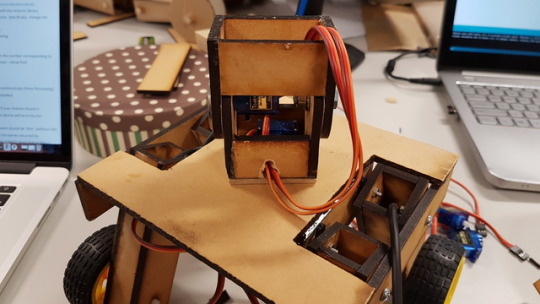
Photo

The first servos that we used to lift the rover up were way to weak. They were likely rated to 0.6kg torque each at there center point, and thus couldn’t lift even the base at all. We have now gotten much more powerful servos that have 10kg of torque, and one servo is able to lift the body by itself. so hopefully it shall work when fully assembled.
1 note
·
View note


Photo


Sorted the panels not folding out and staying folded out problem.
1 note
·
View note
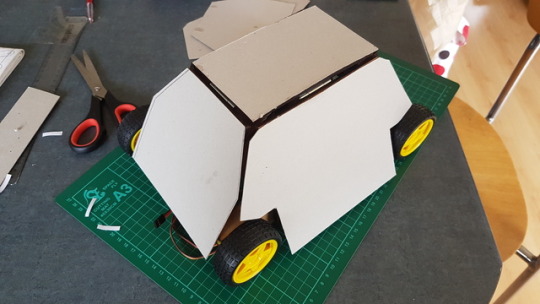
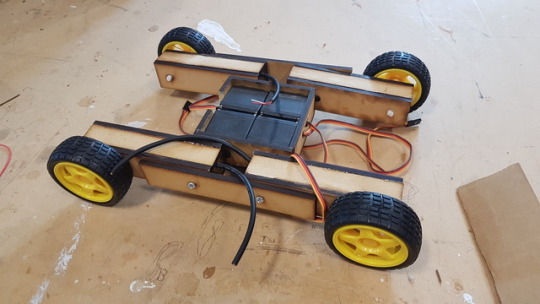
Photo


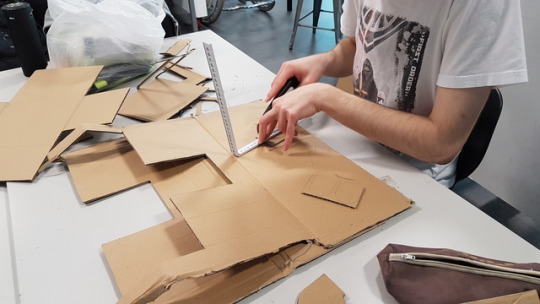


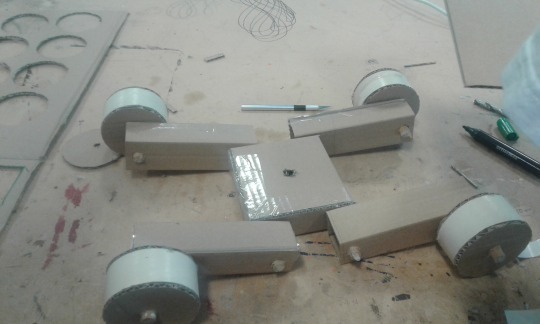

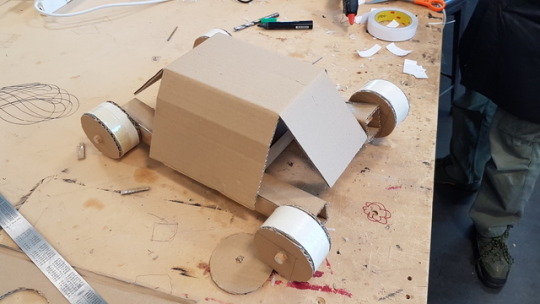
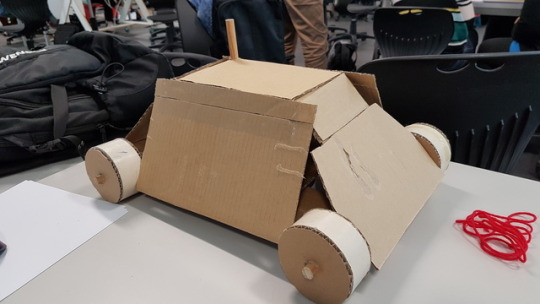
Here is the stages of me building the first Cardboard Solar Rover/Solar Array prototype.
Goes from custom cardboard cutout to working frame to full build. The final version is able to only sit on its wheels and not need any extra support. the solar panels are also full size to maximize power gain.
To minimize the amount of parts to glue together I made the templates have as many folds as possible. This means the whole model should be sturdier, be it made of cardboard.
2 notes
·
View notes
Text
Reblog of the blog for my Creative Tech course.
Stages of development
Solar Rover Mk1


Solar Rover Mk2

Solar Rover Mk3

Solar Rover Mk4 (final)

Cardboard Rover Mk1


1 note
·
View note