
evesunit5fashion
unit 5
the up - cycle project the human body
96 posts
Don't wanna be here? Send us removal request.
Last Seen Blogs

retroarama
Retro-A-Rama

gobeepmyself
idiot child of someone's loins

lost69soul
"Honey am home!"


artnerd1123
~a dream with teeth~
Text
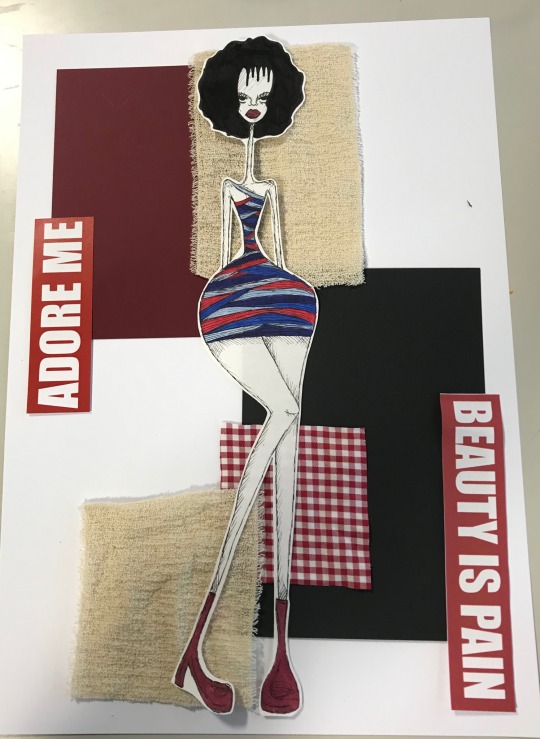
garment description
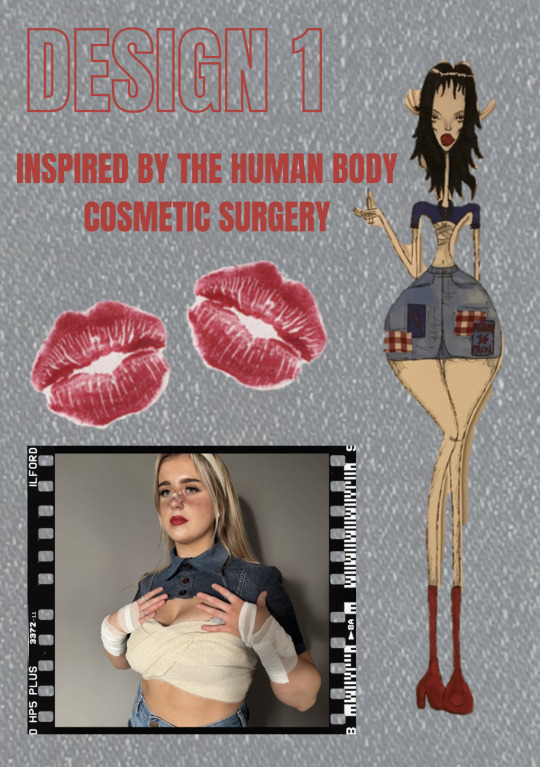
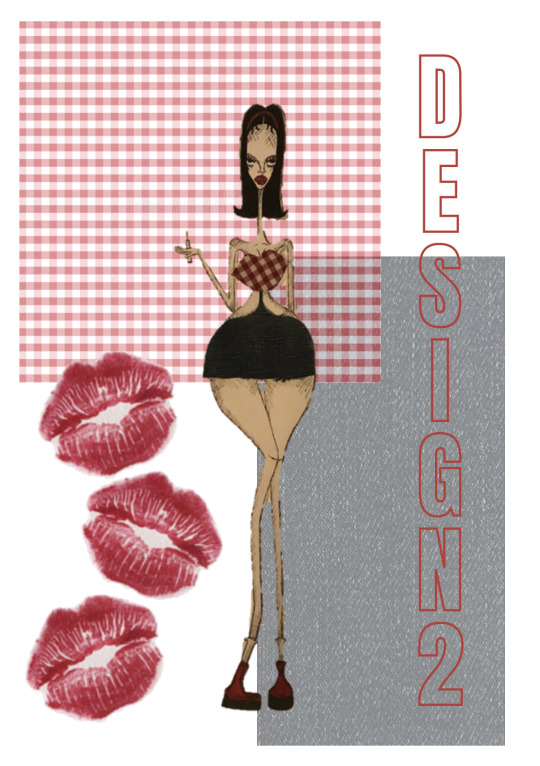
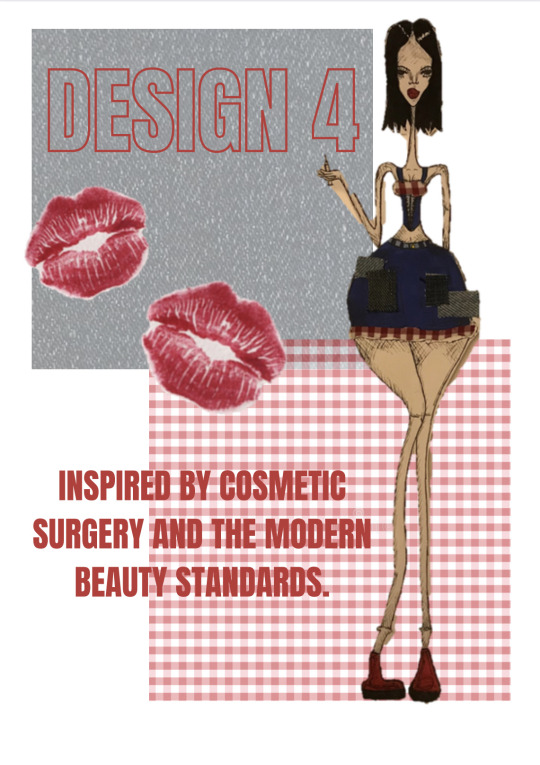
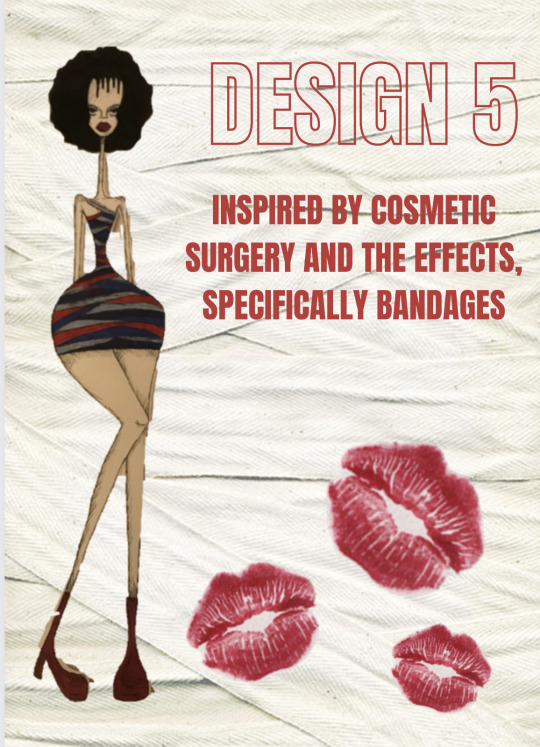
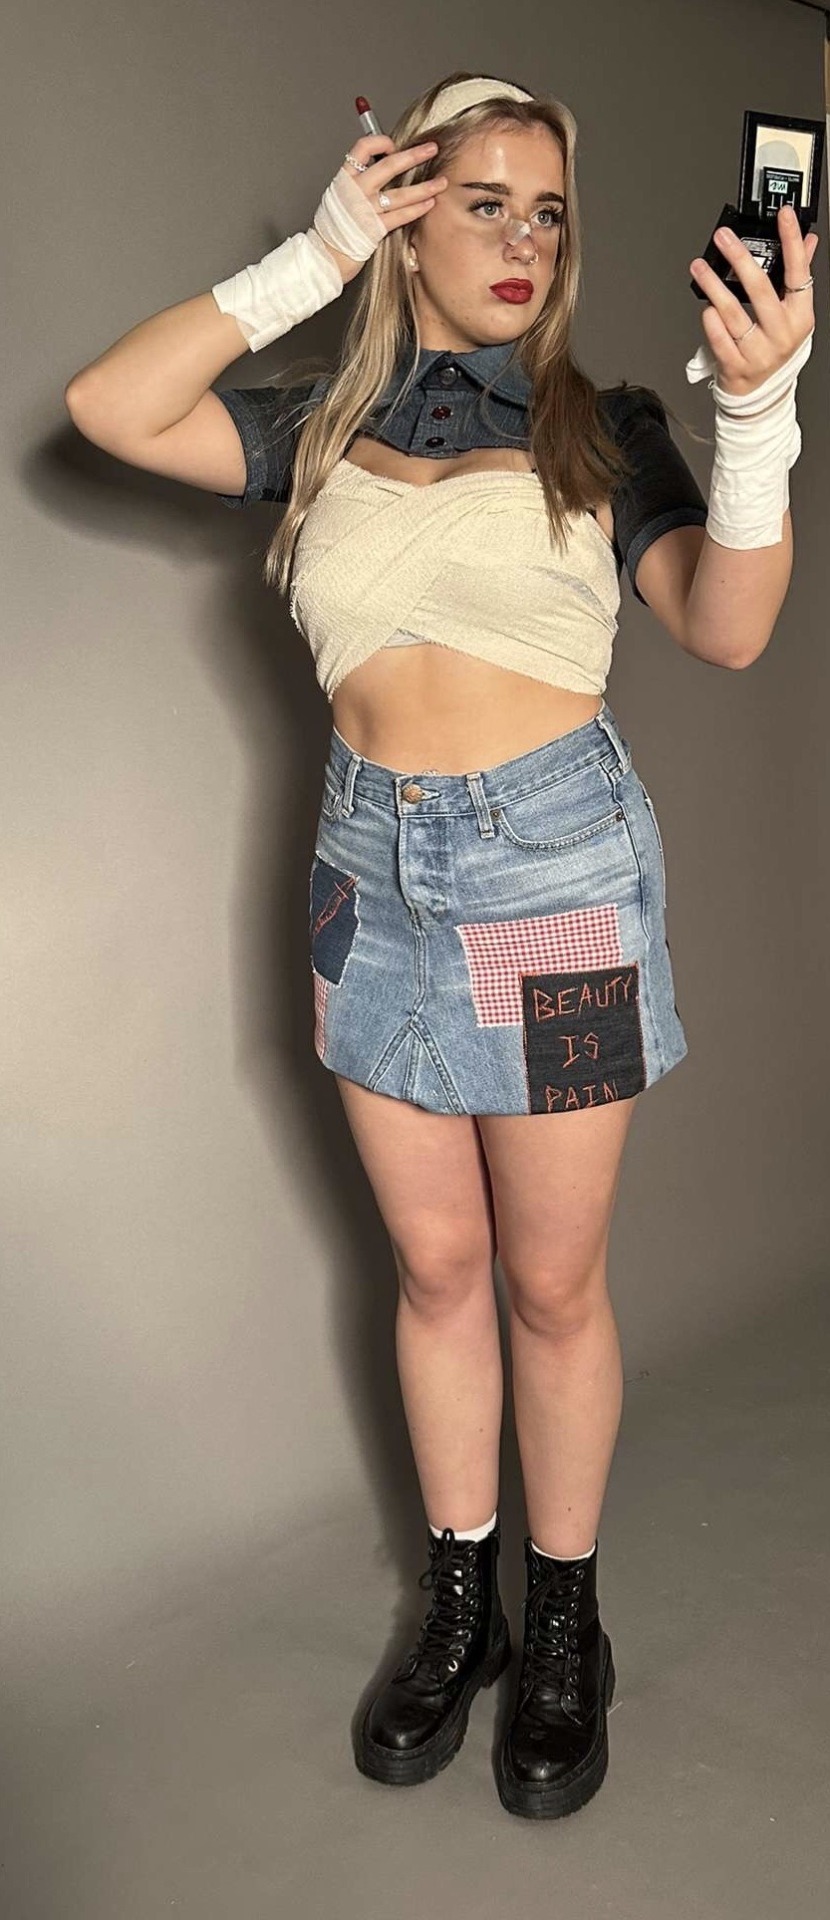
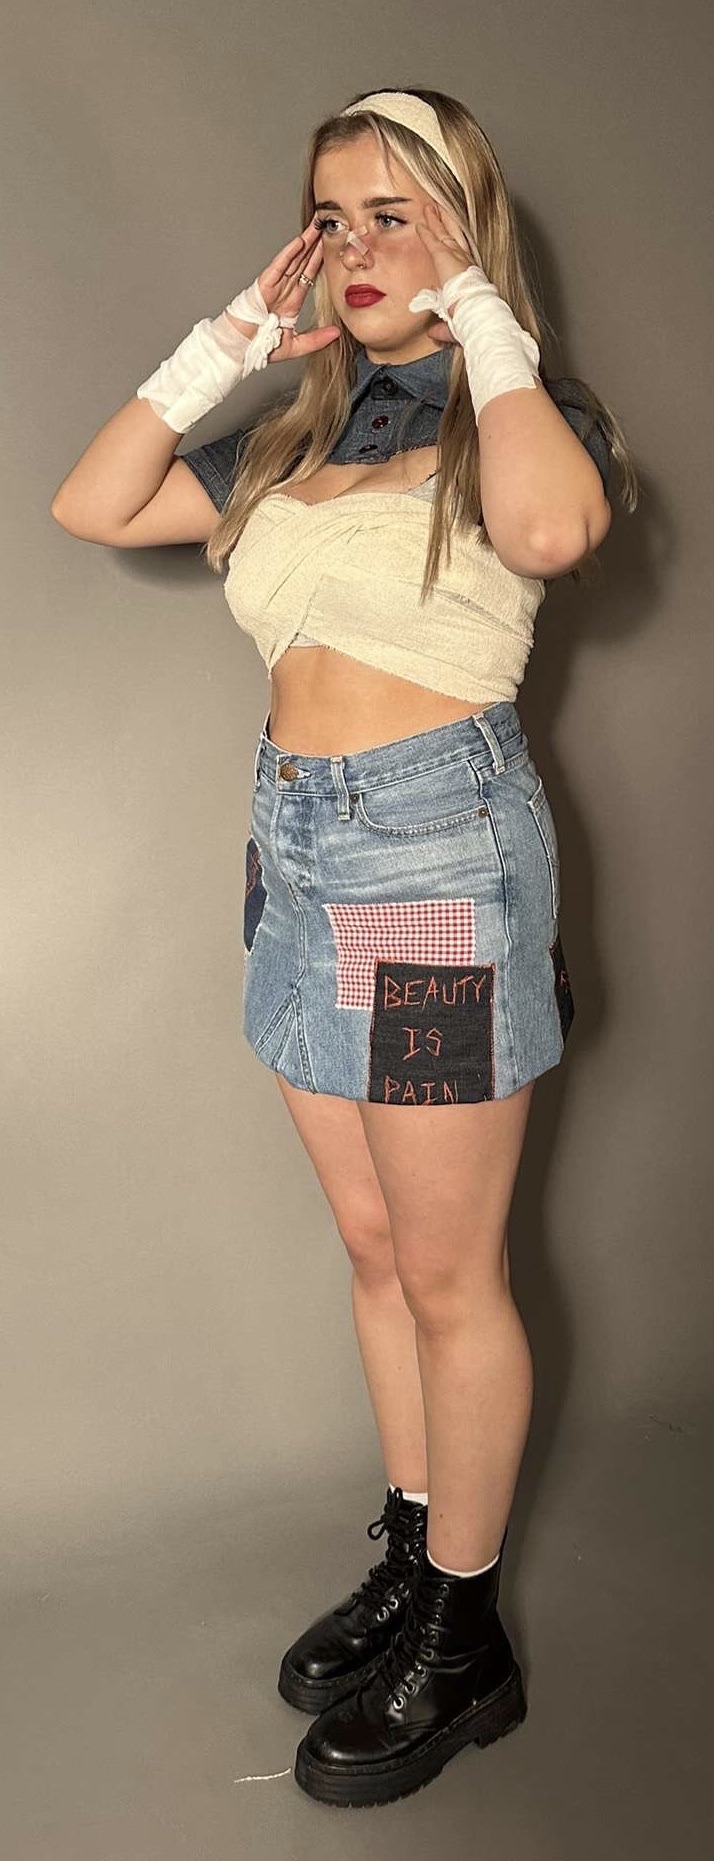
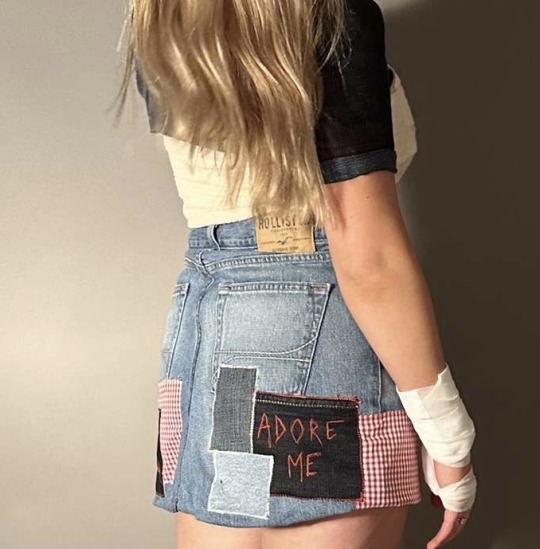
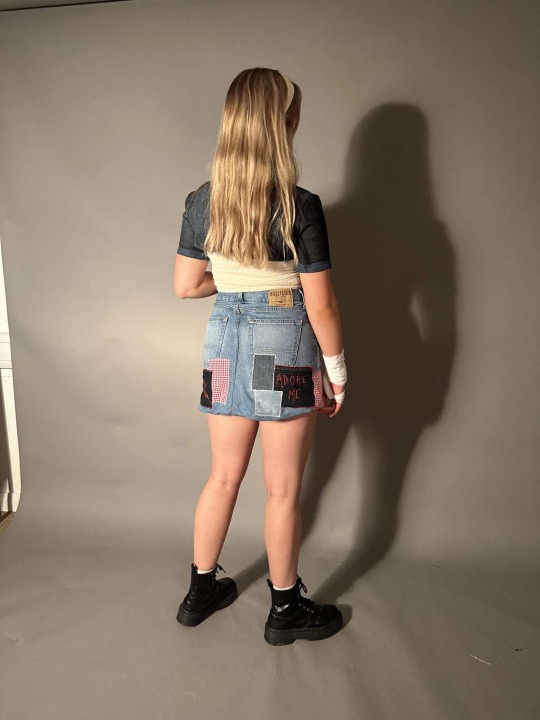
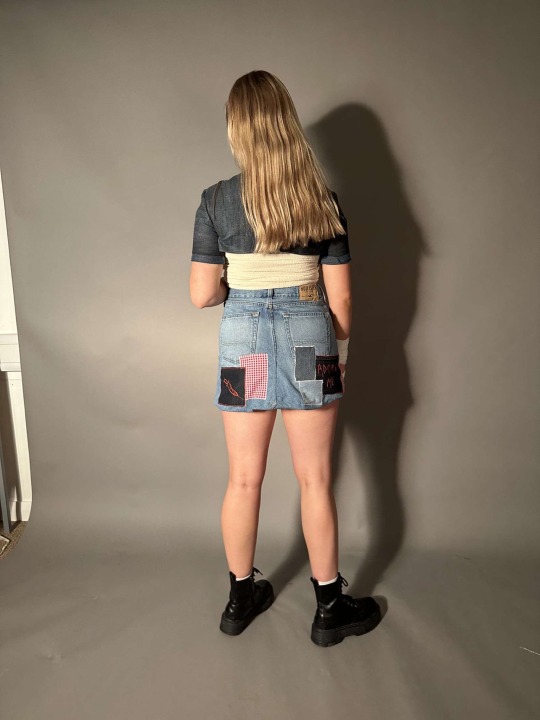
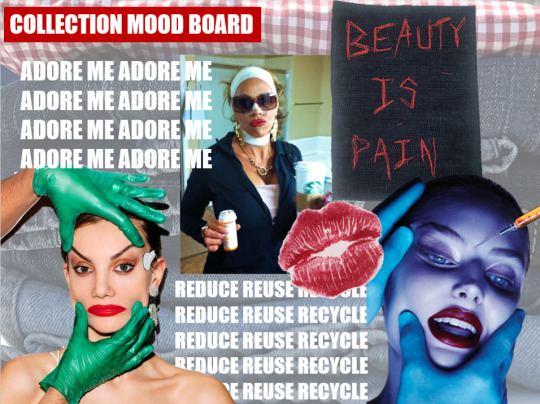
ADORE ME: A collection directly inspired by the human body and cosmetic surgery, highlighting the shape of the body and capturing the glamour and beauty of the human body, wether real or fake. Using fully up cycled materials, with shades of blue denims with deep red accents, patchwork details represent the procedure of surgery, and how we alter our bodies to fit the toxic beauty standards. This collection is a painful reminder that pain is beauty.
0 notes
Text
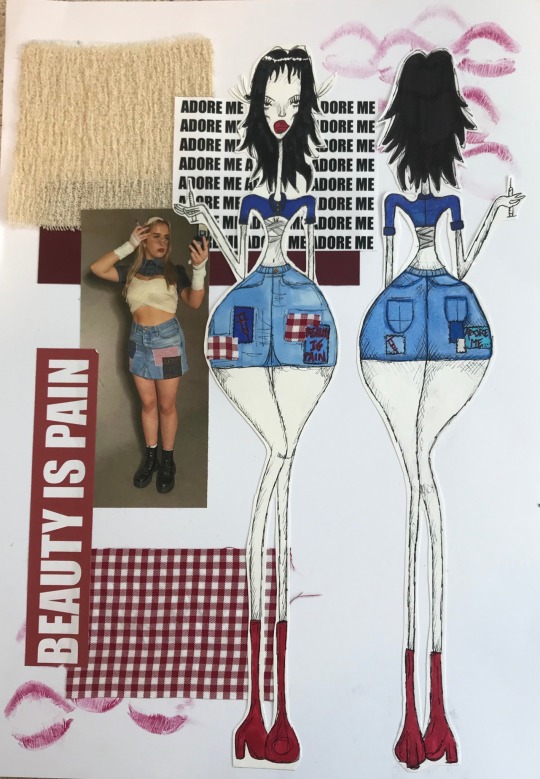
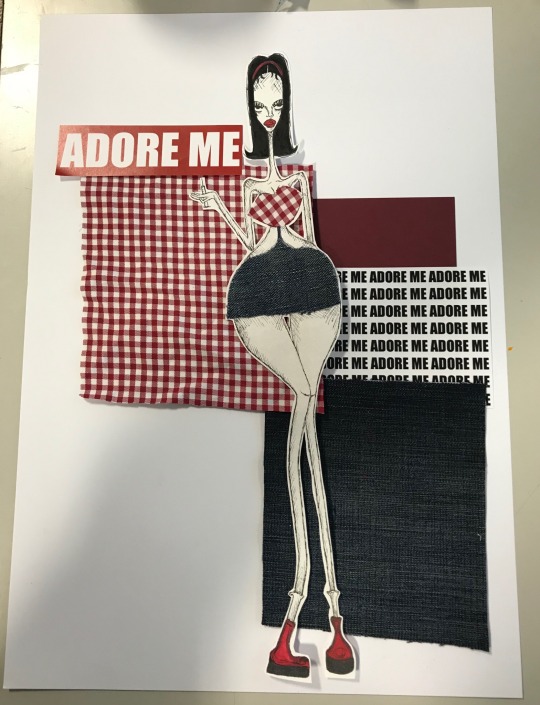
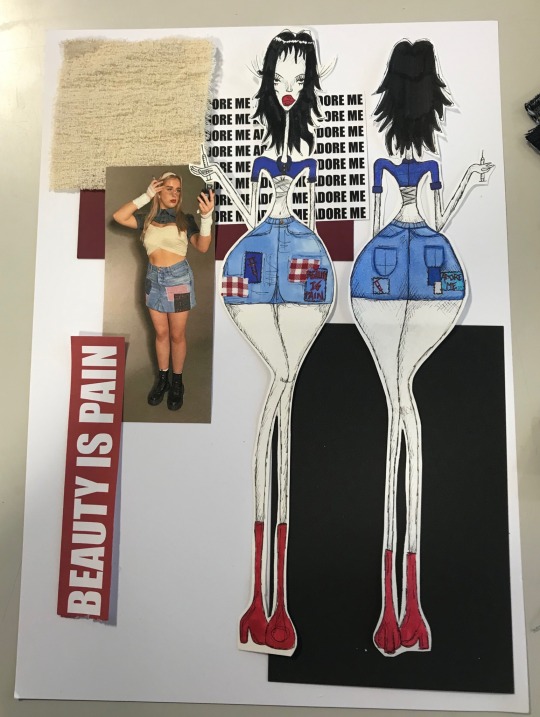
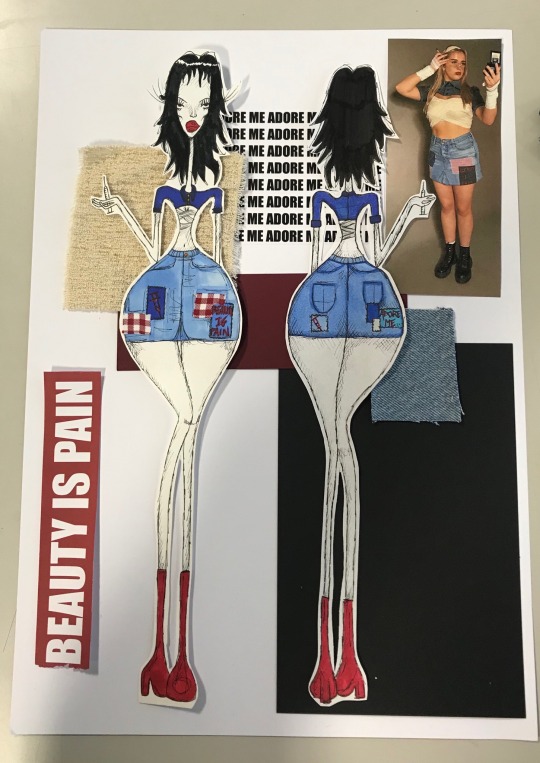
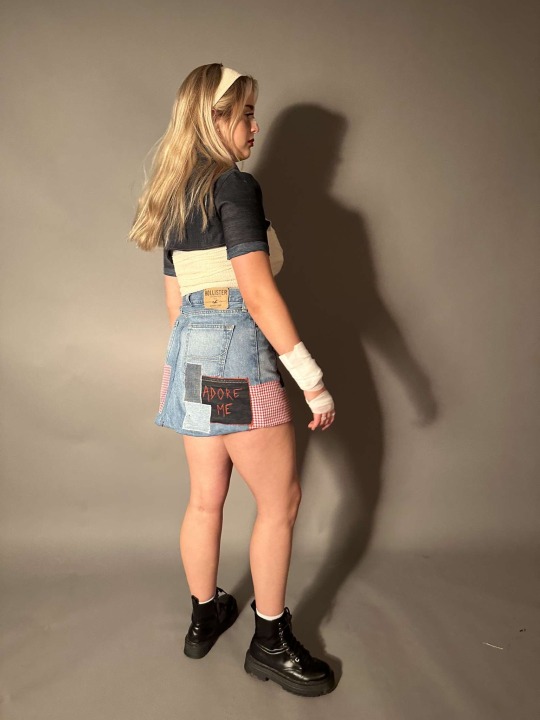
final design boards
Below is the design board of my final design, including images from my photoshoot and a back view of my design.

0 notes
Text
digital design boards
To further inspire myself within the design and appearance of my final physical design boards, and to also develop my skills further within marketing, I decided to create some digital designs boards to accompany my collection. To do this, I used the app Canva, which I had never used before. As I had never used this app, I wasn’t sure if my design boards would be as visually appealing as I hoped, however, after experimenting within the app, I was very happy with the results.

0 notes
Text
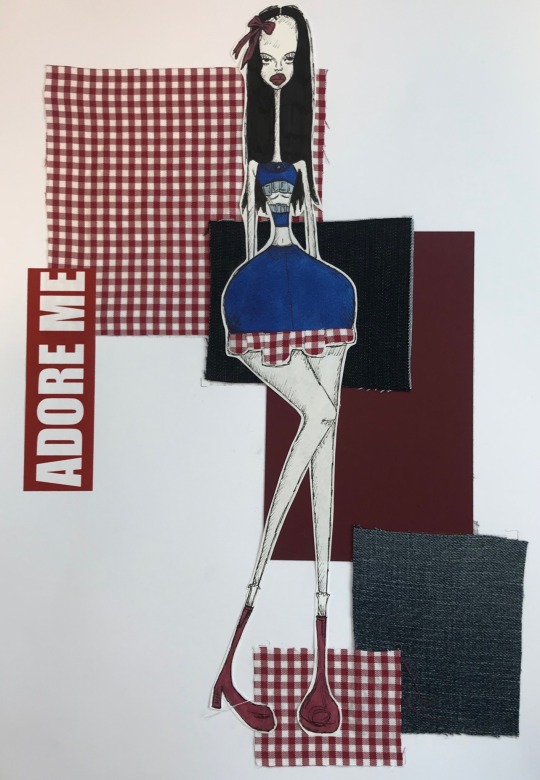
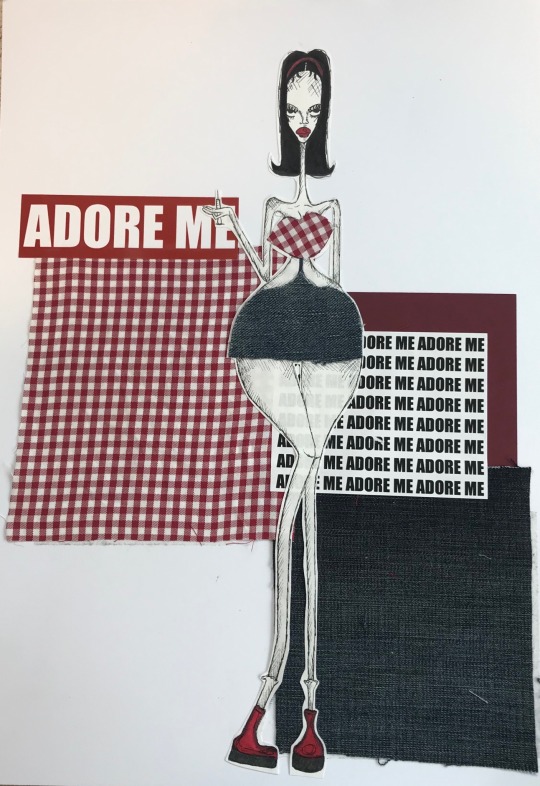
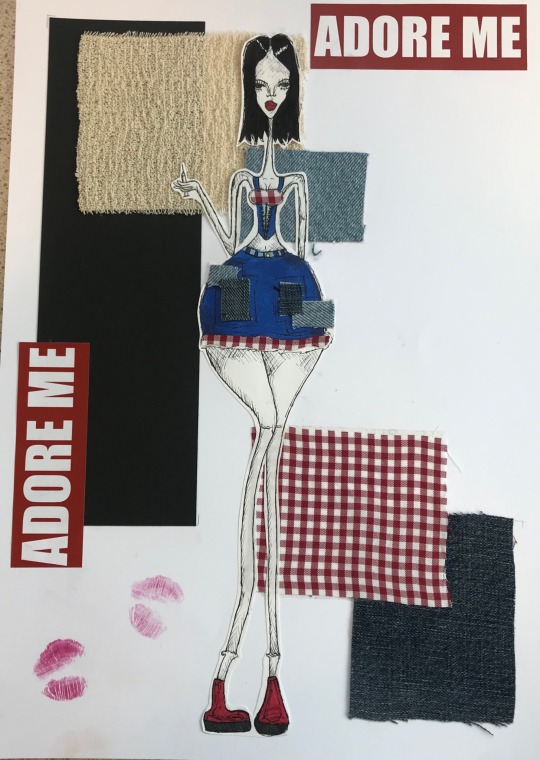
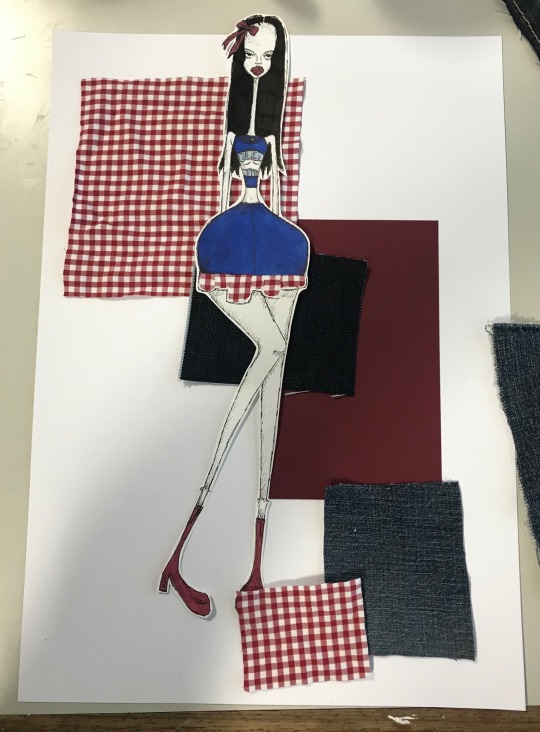
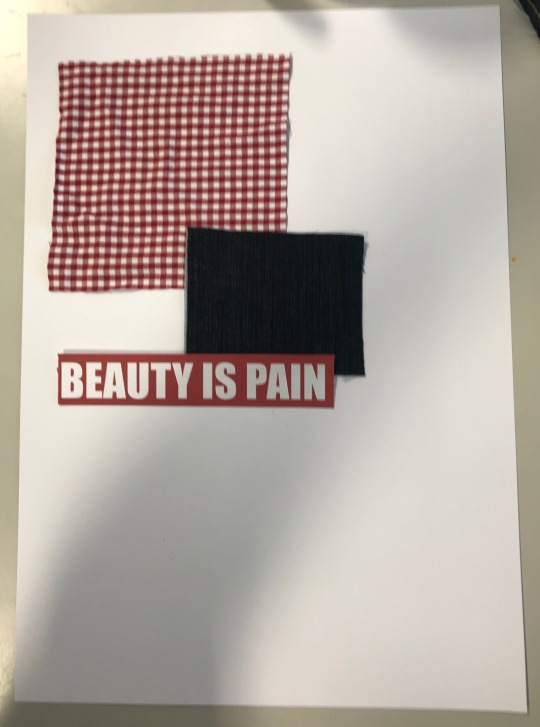
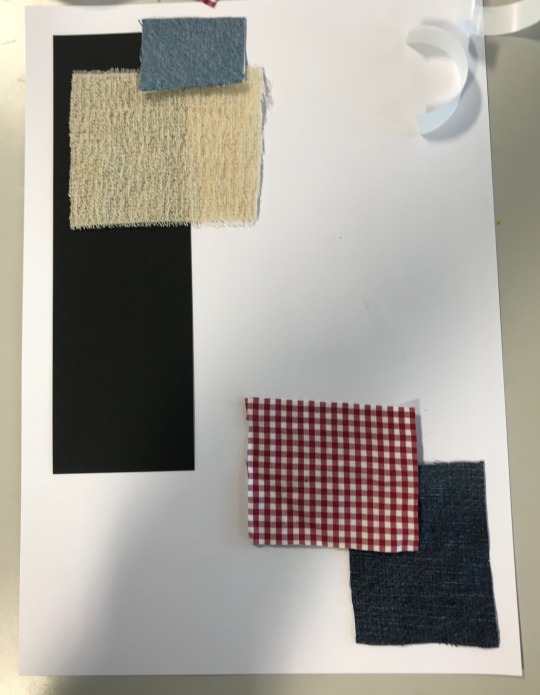
experimentation with design boards
Below are some images showing my experimentation with the layout and appearance of my design boards. To fully capture and translate the vibe of my collection further through my design boards, I wanted to include different aspects of my inspiration. This included patches of the materials I had used, such as my extra chosen garment and different denims, as well as coloured card and bandages. I also printed some text off to include in my design boards, inspired directly by the artist Barbara Kruger. I wanted to keep my design boards a little more simpler this unit, as I felt it would look better appearance wise with my designs, and allow the focus to ultimately be on my designs.
0 notes
Text
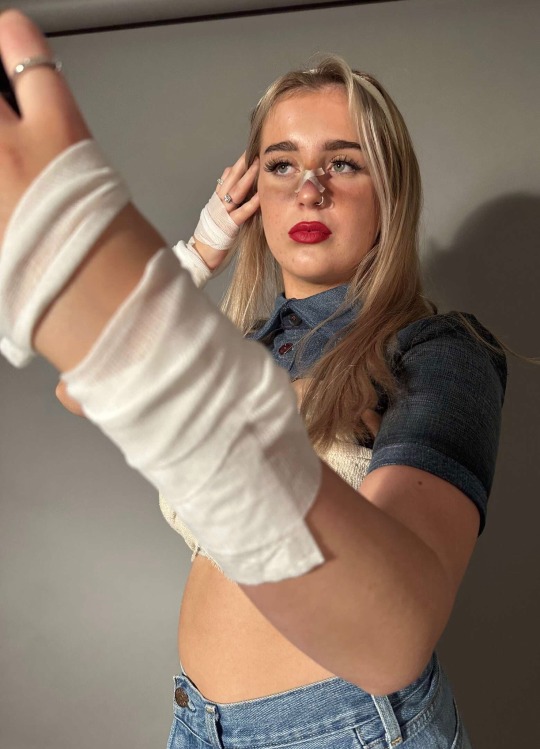
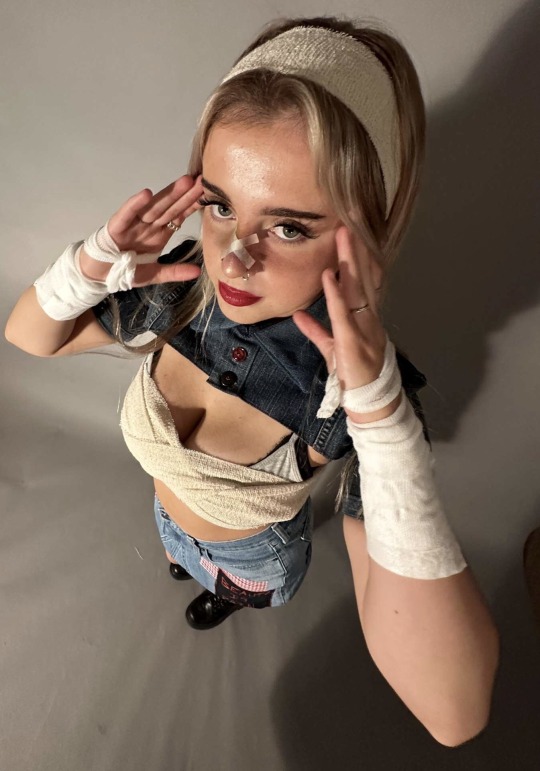
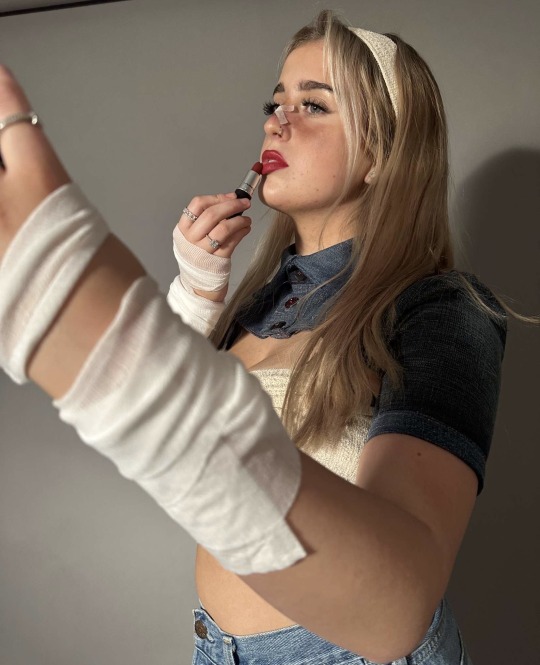
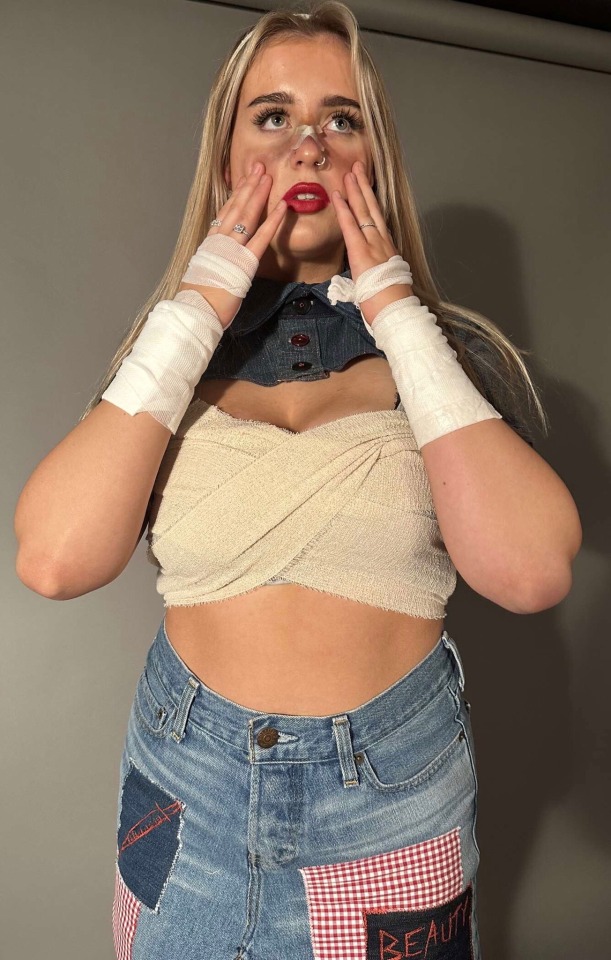
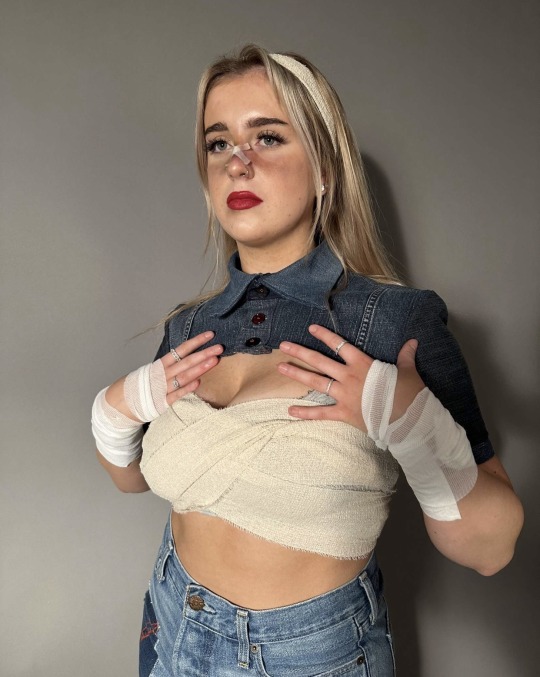
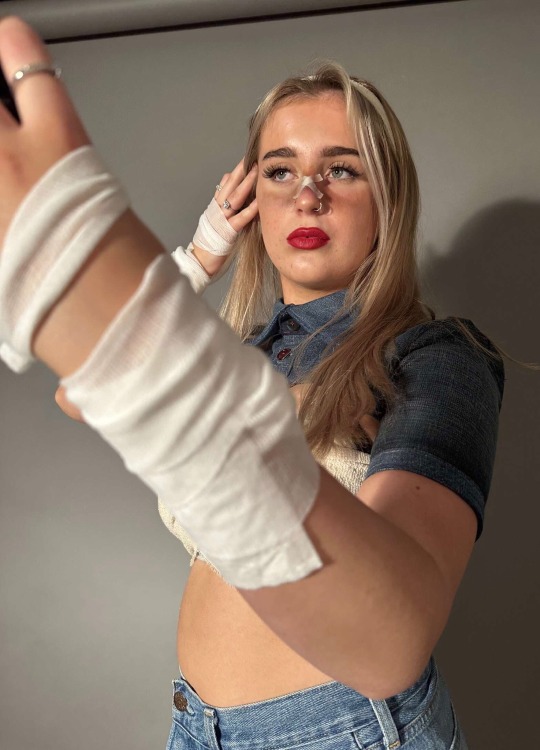
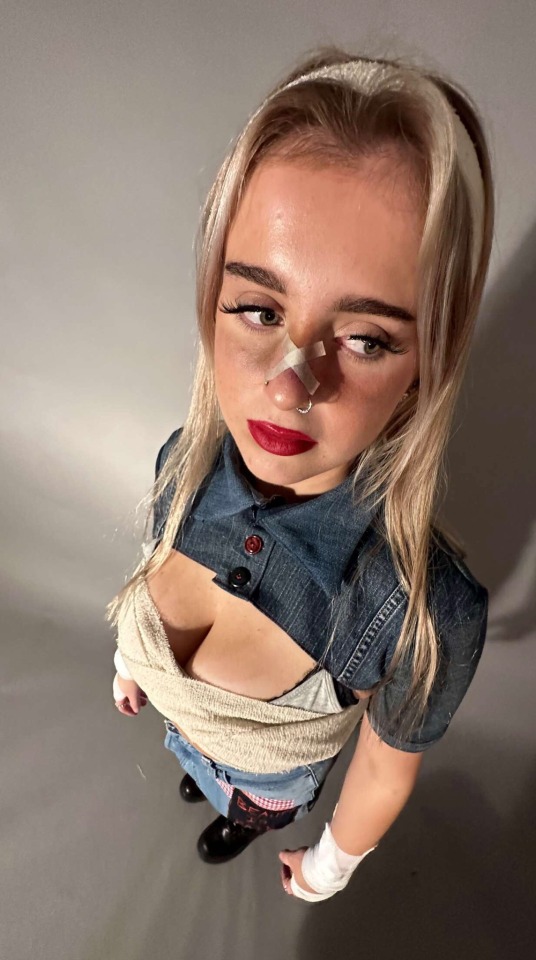
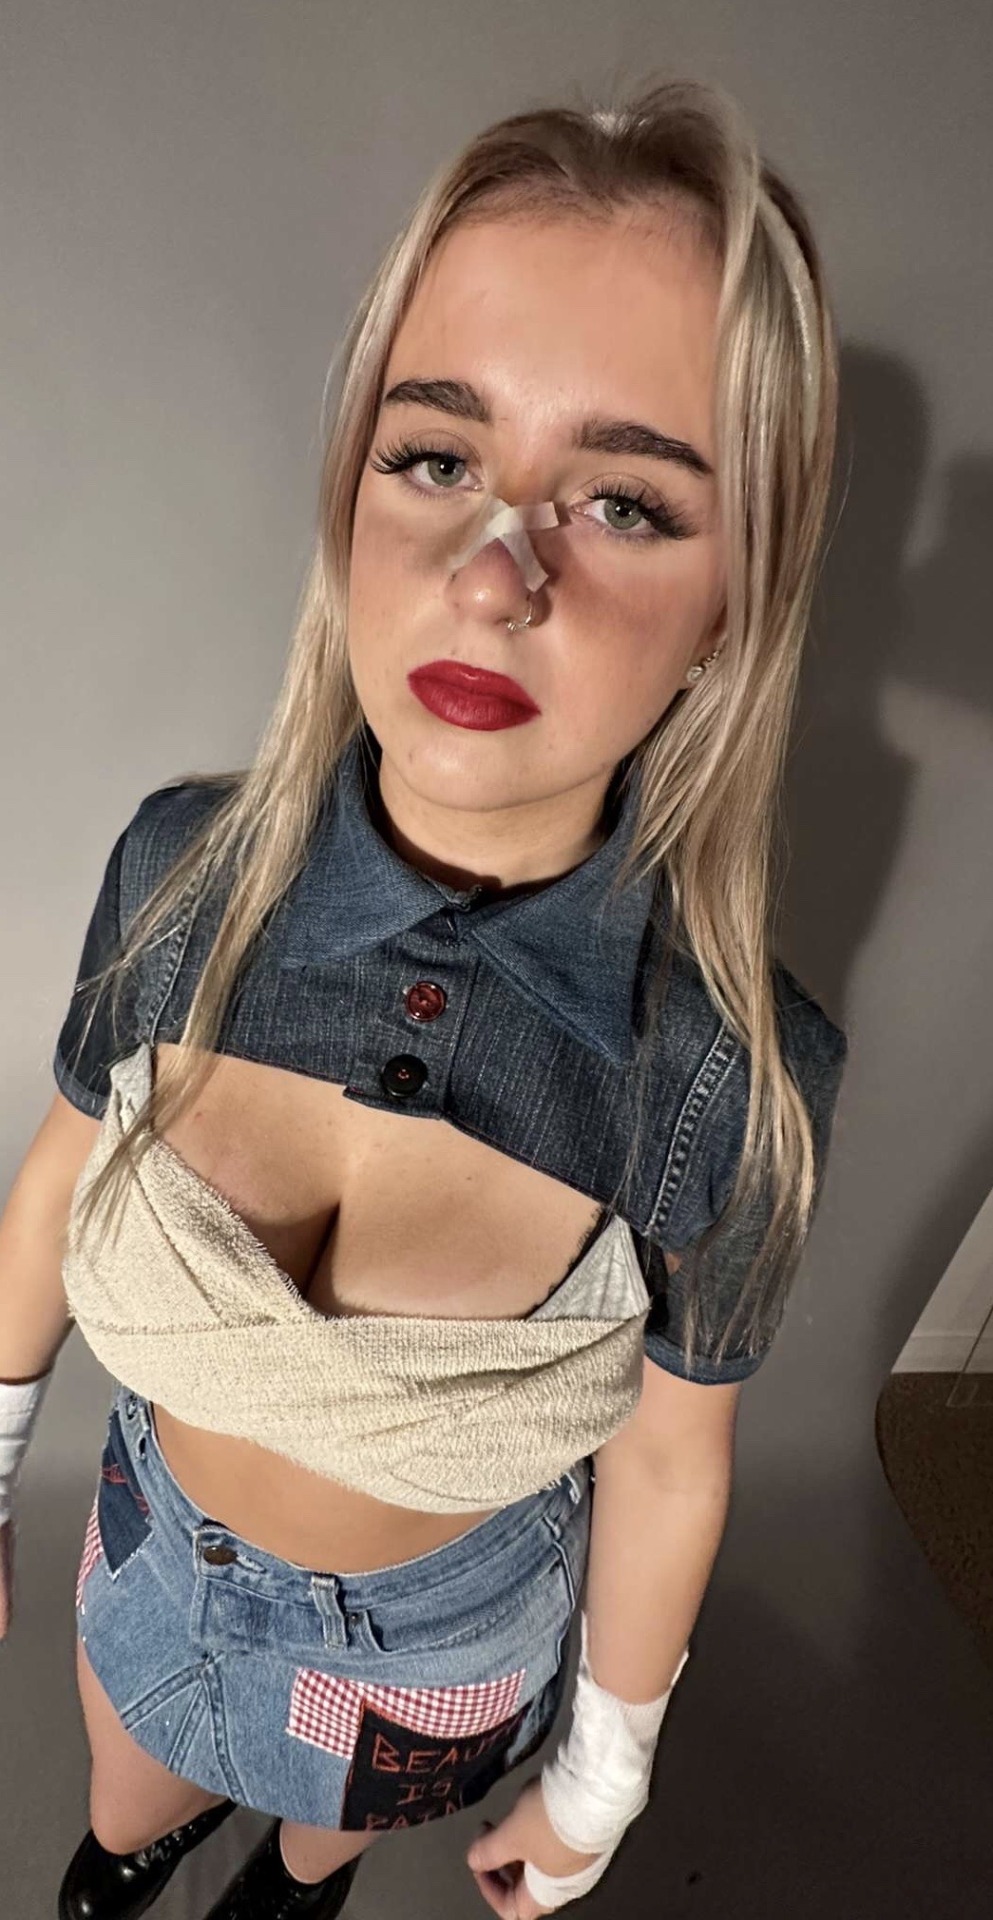
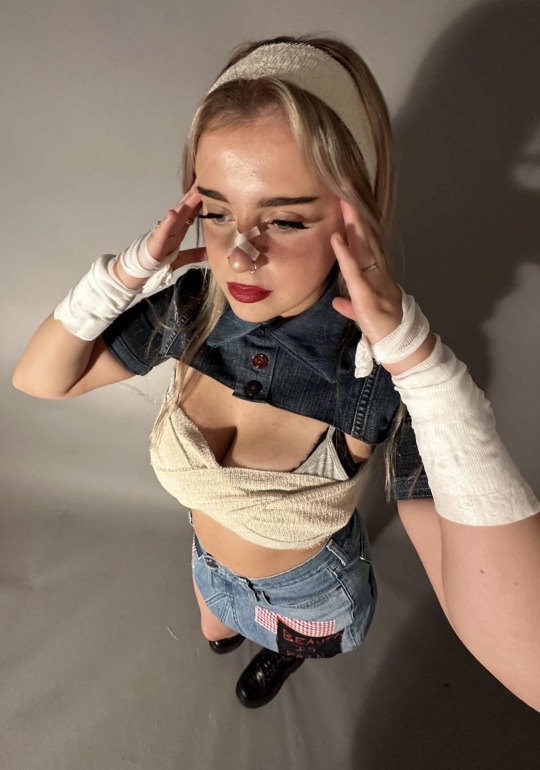
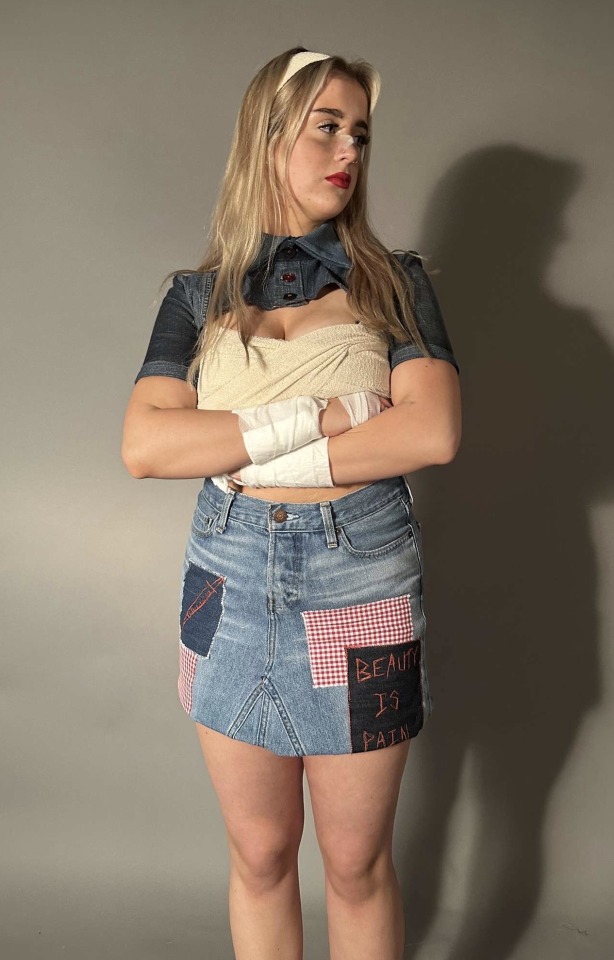
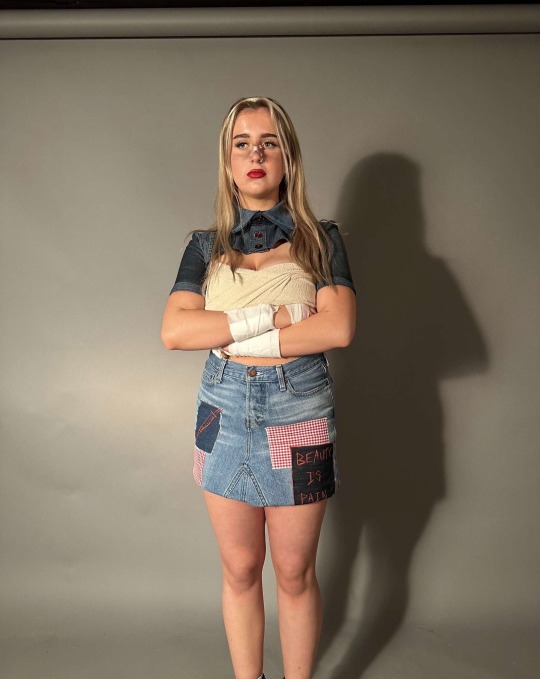
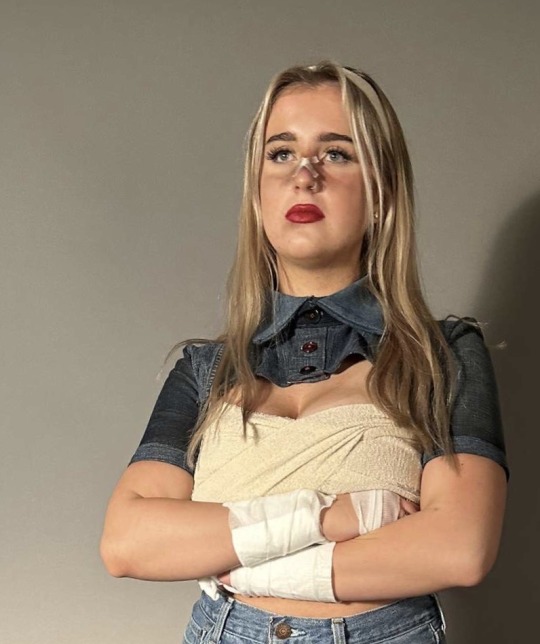
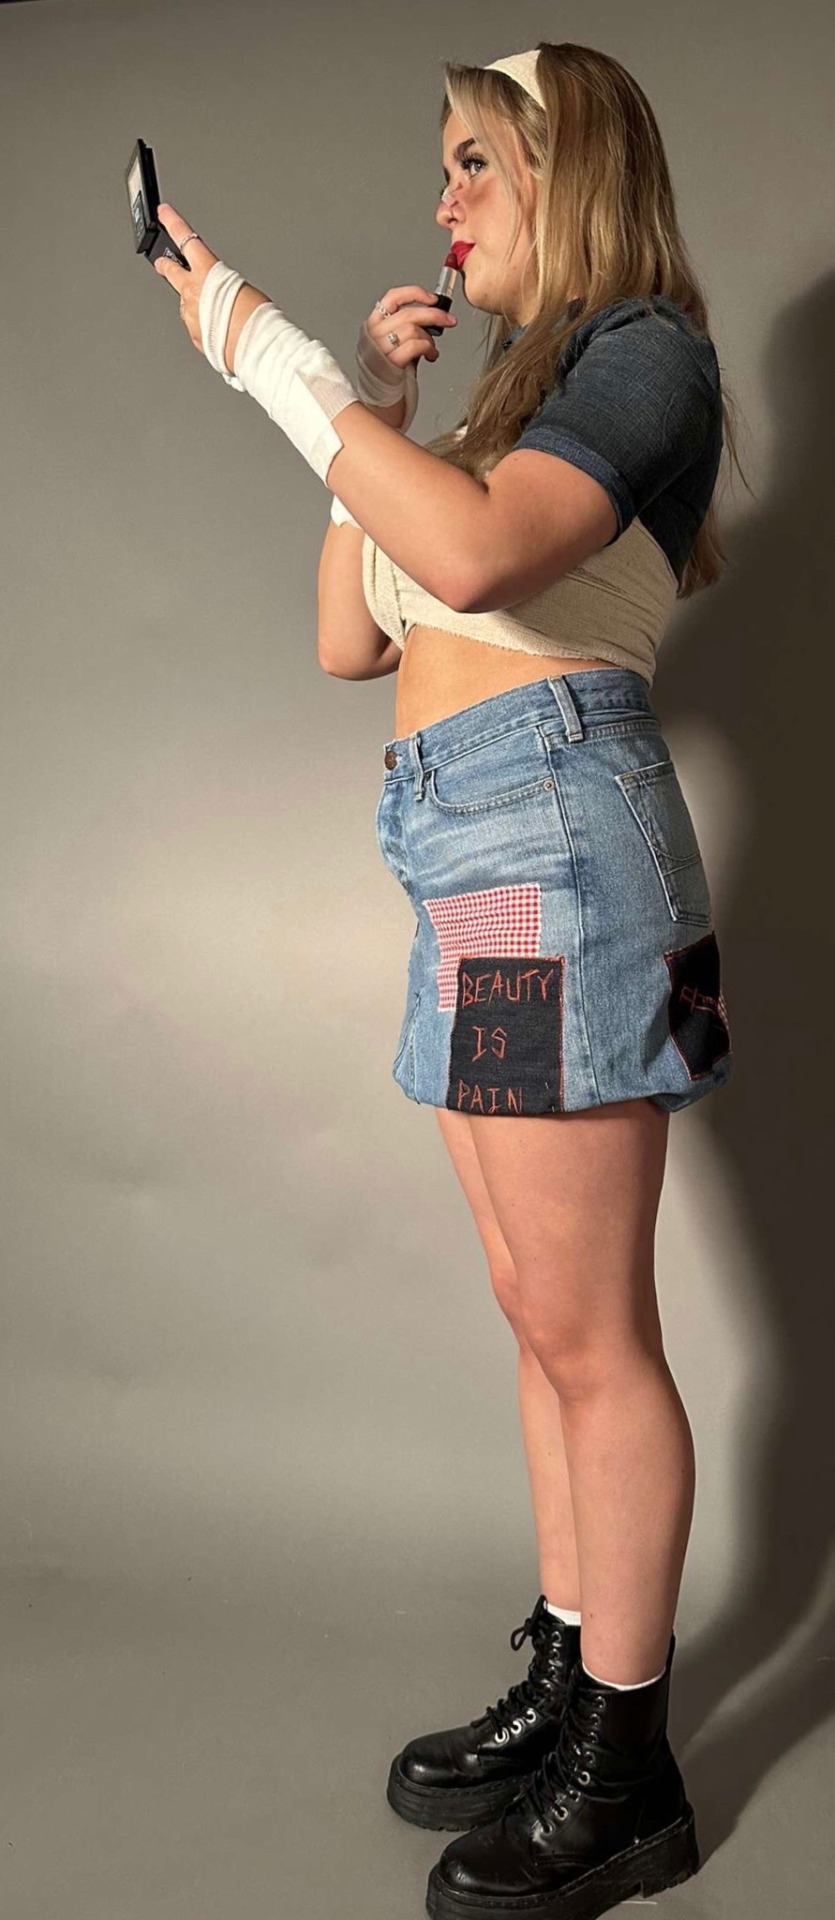
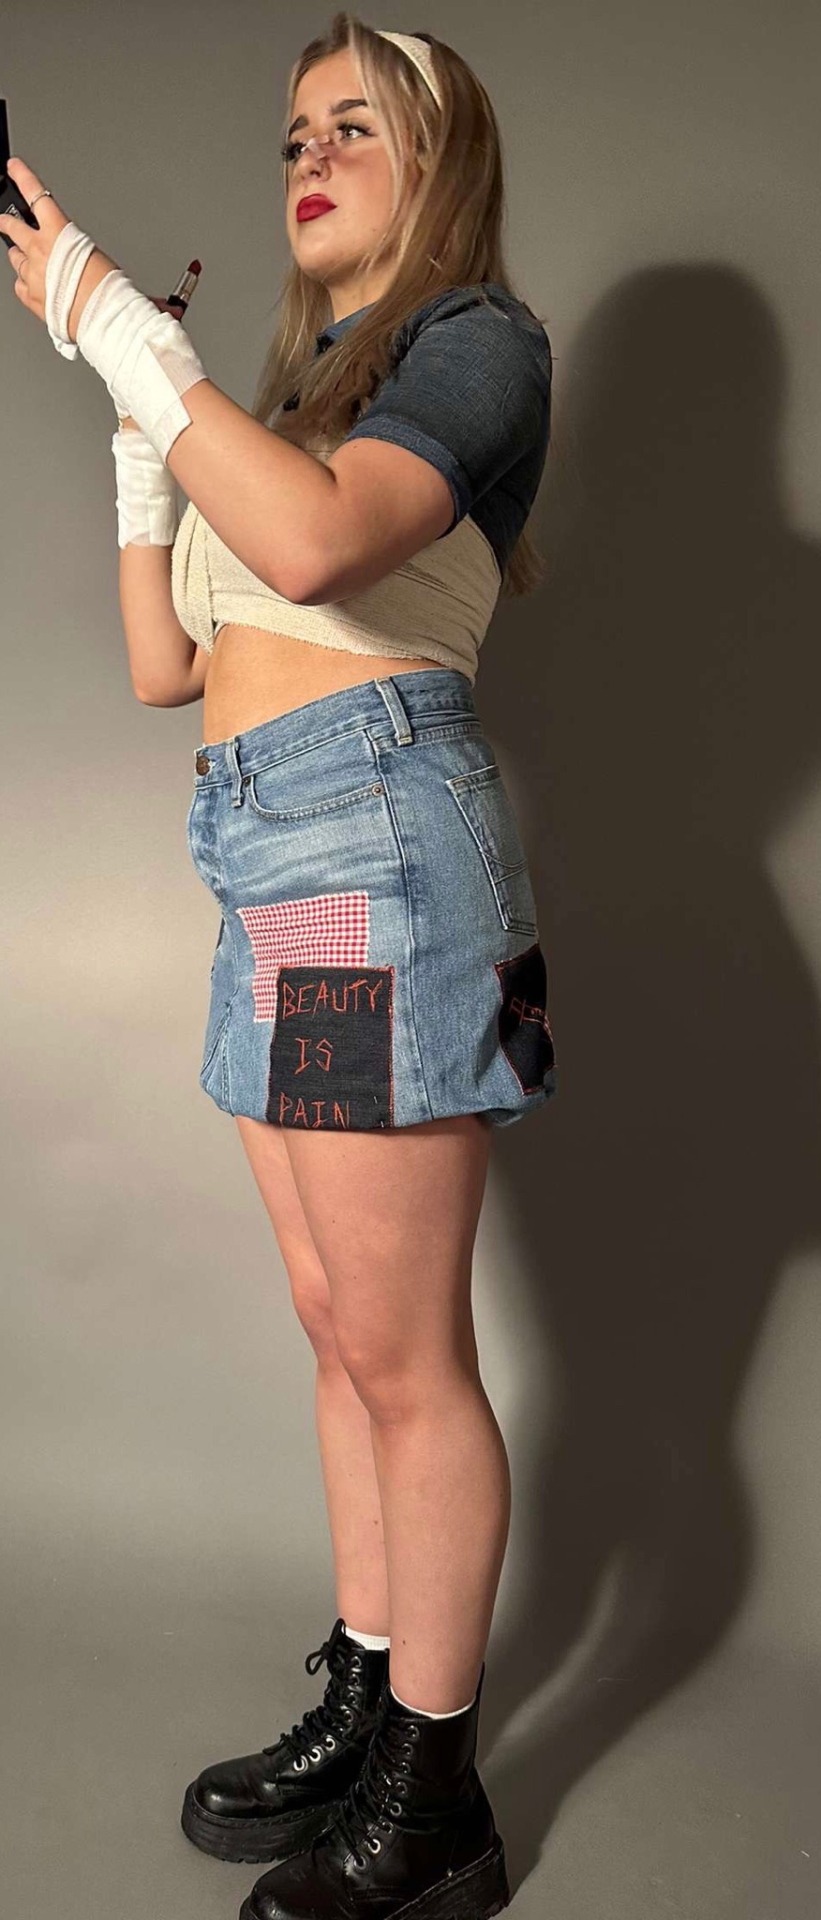
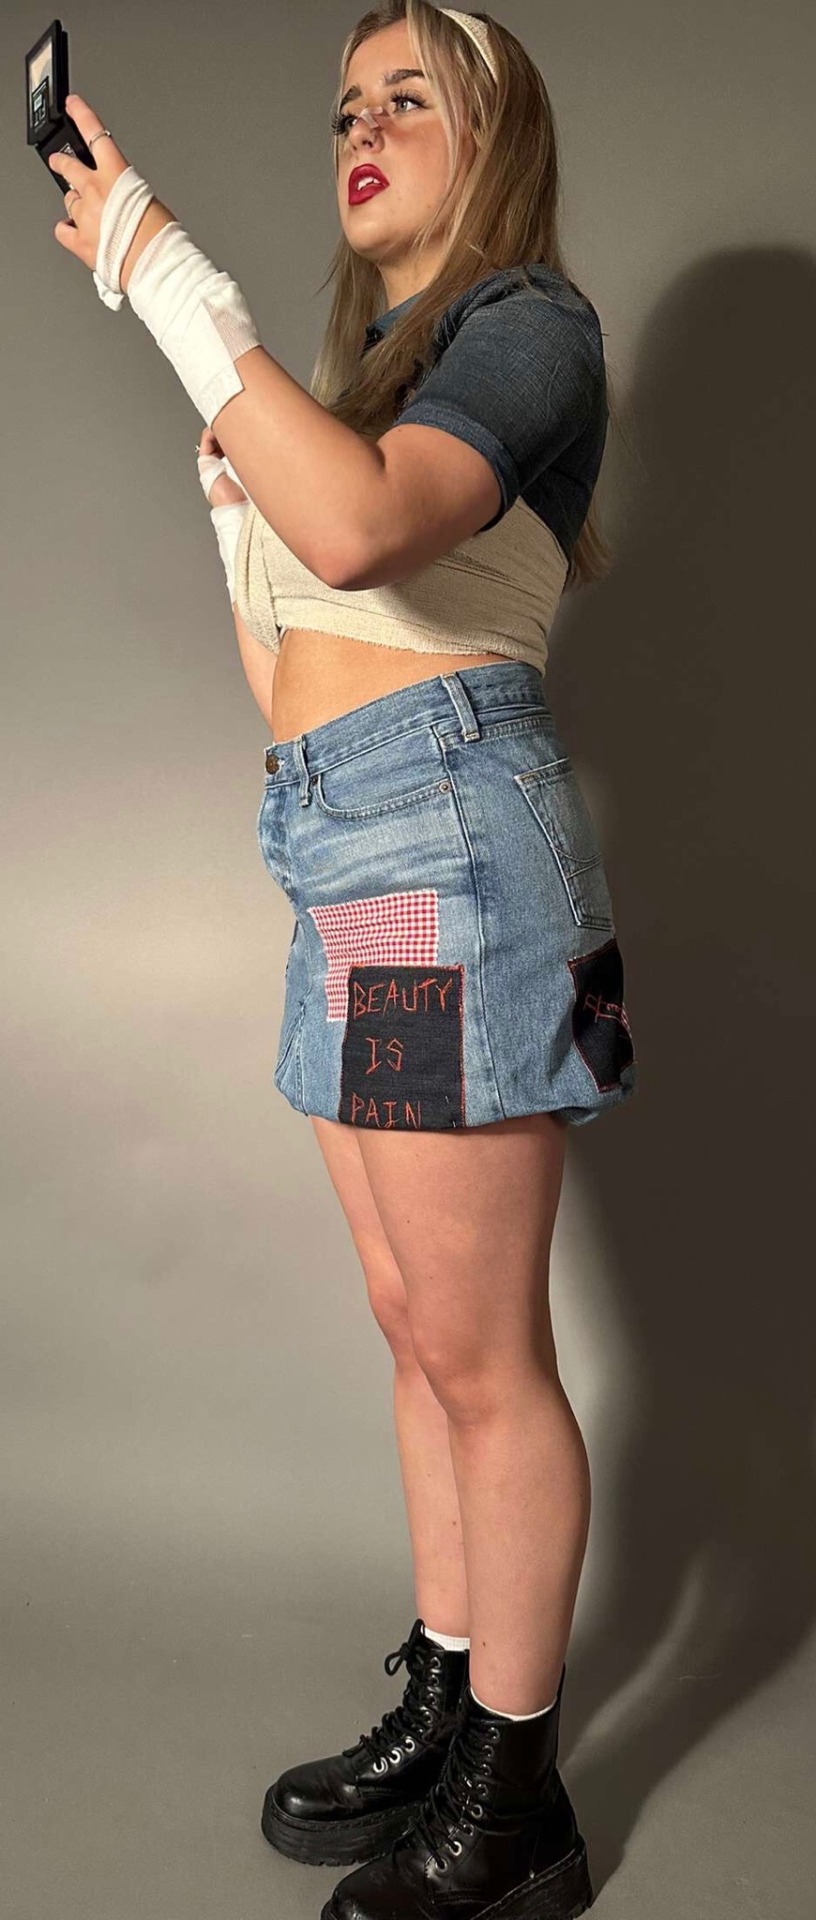
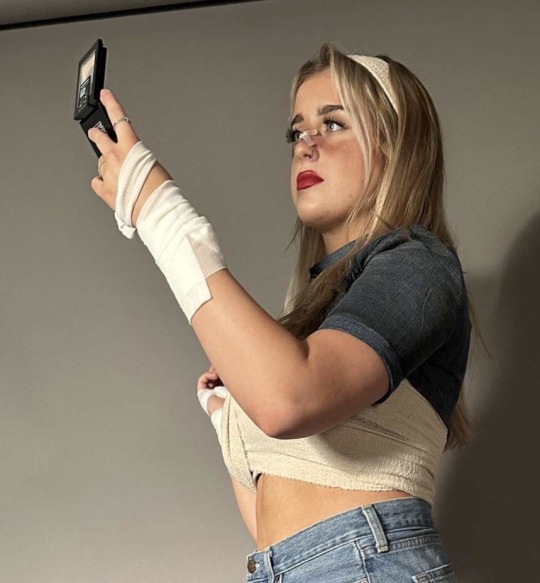
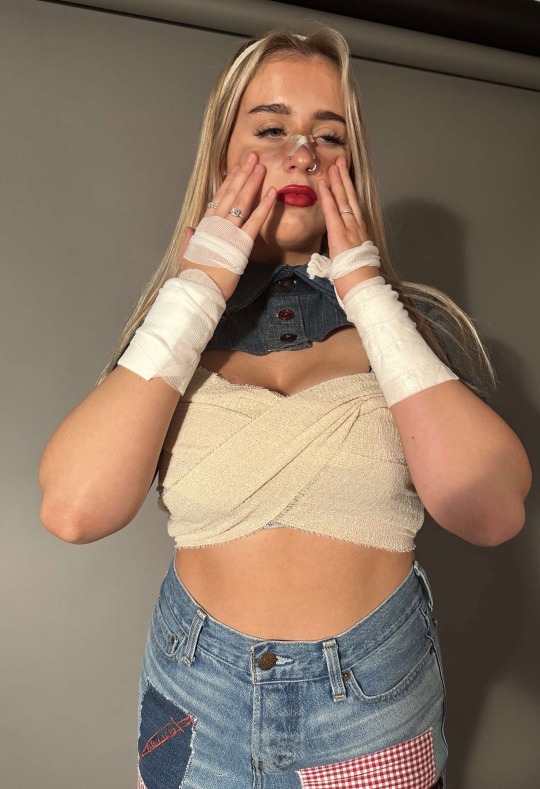
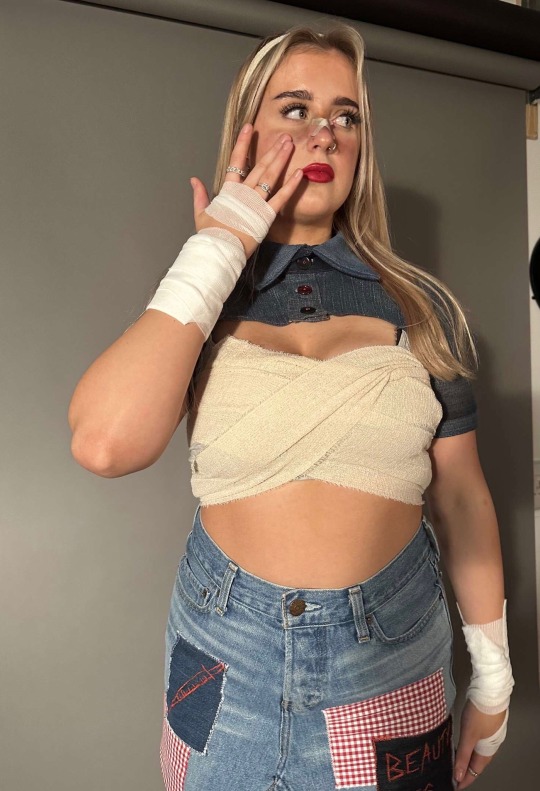
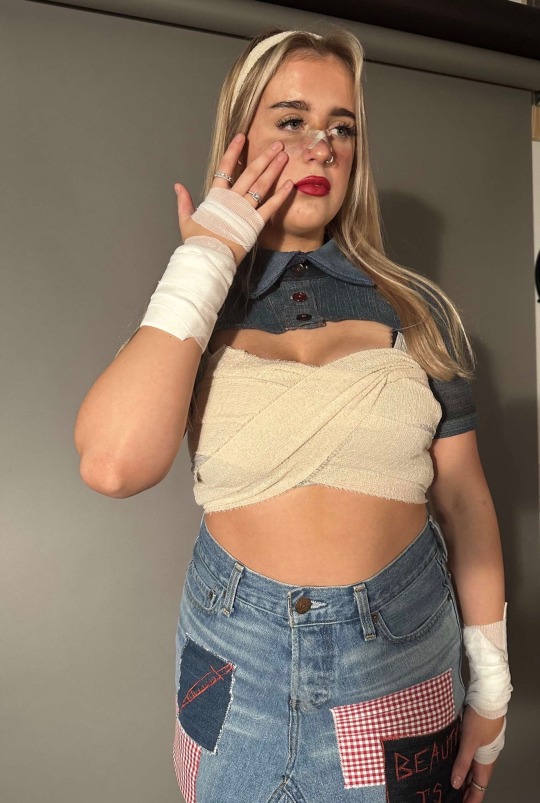
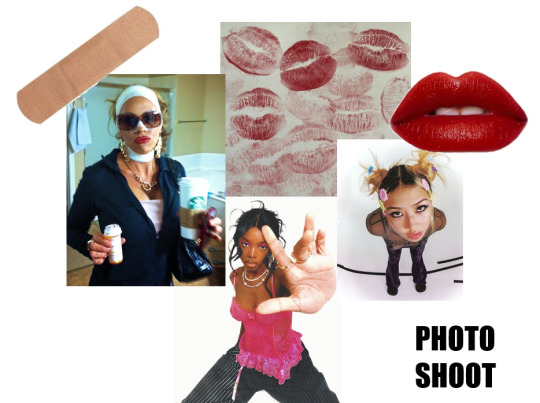
favourite images from photoshoot
Overall I was very happy with the results from my photoshoot, as I feel it captured the vibe of my collection perfectly. Below are my favourite images from the shoot.

0 notes


Text
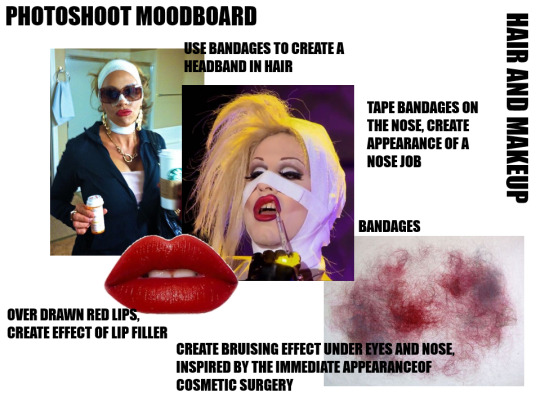
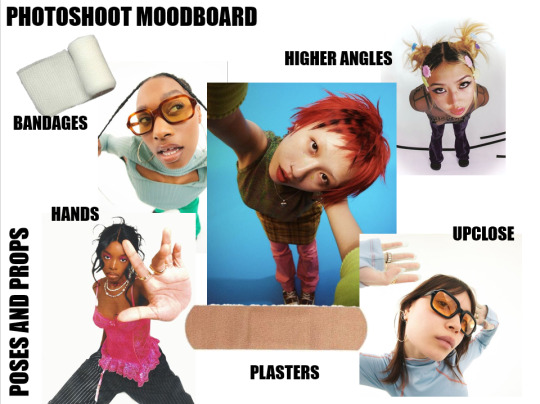
photoshoot mood boards
Below is the mood board for my photoshoot, showing inspiration I wanted to use for my photoshoot. This includes hair, makeup and poses.
Mood board for hair and makeup in my photoshoot:
In my photoshoot, I want to achieve a very glamourous look inspired by the after effects of cosmetic surgery. To achieve the stereotypical surgery look, I plan to buy bandages, which I will wrap around my models face. I also plan to use eyeshadow to create a bruising effect on the nose and beneath the eyes, which is common within many facial cosmetic procedures, specifically nose jobs. I plan to pair this with a bold red lip, to create a glamorous look, which I feel will fully tie the look together, as it will pair well with the red details throughout my garments.
Mood board for poses and props within my photoshoot:
0 notes
Text
method for my final constructed garment
SKIRT:
1. Unpicked middle seam to open jeans
2. Add left over denim from rest of jeans
3. Topstitch
4. Cut to the length wanted
5. Create patches for skirt.
6. Experiment with where patches will be placed by pinning them on skirt.
7. Use stitch 2 (zig zag stitch) to attach patches on to skirt.
TOP:
1. Draw around pattern pieces.
2. Cut out with 1cm seam allowance on denim.
3. Attach together side and shoulder seam of front and back pieces( right sides together).
4. Fold button stand piece in half and press. Then fold over 1cm on each side and press
5. Attach button stand to front opening of bodice.
6. Fold over 1cm using fold as guide and top stitch as close to side as possible.
SLEEVES:
1. To create sleeves, fold sleeve piece in half (right sides together) and sew along the side.
2. Position sleeves in bodice (line up seams and notches to match) and attach.
3. Attach cuff to sleeve.
COLLAR:
1. Fold collar piece 1cm and press.
2. Attached sides and curve side of both pieces ( right sides together.)
3. Sandwich collar piece between collar stand pieces and attach.
4. Flip over and attach to bodice.
0 notes
Text
final mood board
Below is the final mood-board for my collection, showing different aspects of my theme and what has inspired me throughout the design process.
0 notes