
fibrespace
Here Be Yarns
knitting, crocheting, and quilting | he/him | follows from gainux
2871 posts
Don't wanna be here? Send us removal request.
Last Seen Blogs


w2nv
To all Cloud-Seers

lamartulasblog
LaM4rtu

r6shippingdelivery
KIKI'S PEACH DELIVERY

pokemermaidartzine
PokeMermaid Art Zine
Text
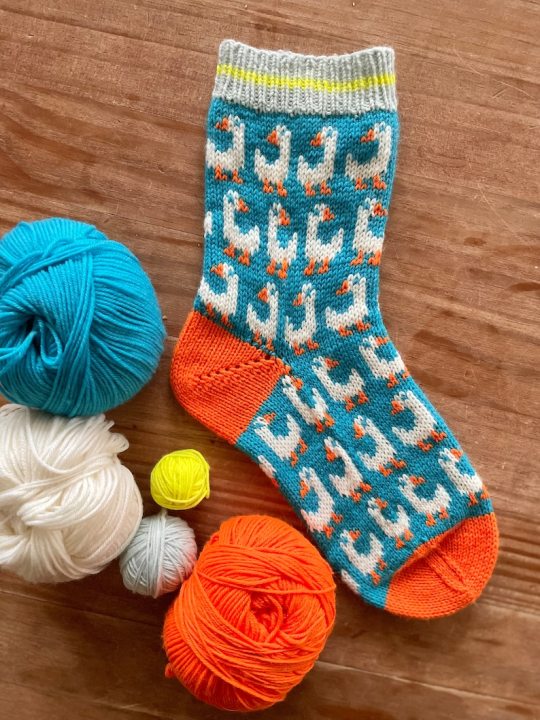

Knit a Pair of 'You Silly Goose' Socks Designed By Charlotte Stone: 👉 https://buff.ly/3JzhpM2 🤪
55 notes
·
View notes

Text

Had a little play with colourwork. 3 greens for a moss stitch washcloth, making the pattern live up to its name
114 notes
·
View notes

Text
I have been working on this project for 8 years and it's FINALLY DONE!!!

Look. Look at my labor of 8 years. LOOK AT IT.


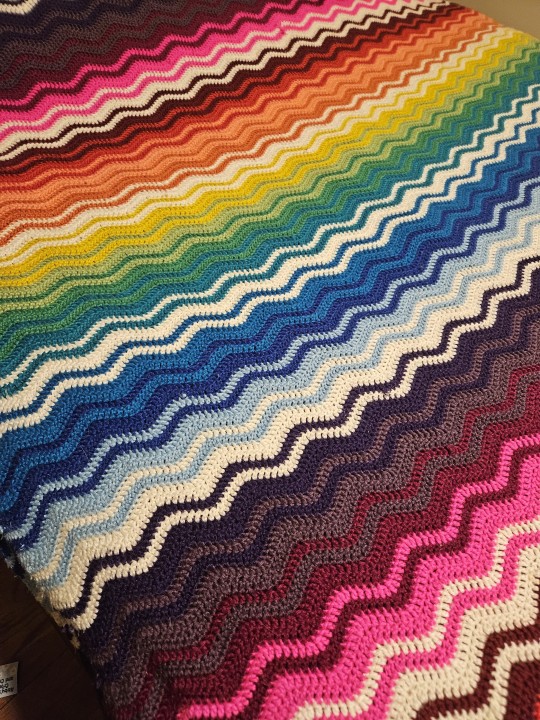
The pattern is Neat Ripple. I used Knit Picks Mighty Stitch in lots of various colors. If you'd like specific color names, let me know. I'm fairly certain the lighter orange is discontinued, named "Conch".
39K notes
·
View notes
Text
🧡🩷 GROOVY BABY! 🩷🧡
This was my second ever foray into crochet and quite a bold project, both in color and scope. So, so many ends to weave in, and no set pattern for this one, though there are others online who have given recreating from the screen a go and who have been very helpful - see my Ko-Fi post (link in bio) for more details, including my attempt at writing it up.
Though definitely shagadelic, it's not perfect - l'd love to try blocking it to get some of the trim to sit with some more flounce but ran out of time before the event I wore it to. I may add a layer or two to the sleeves to make them more dramatically 60s flared, but for now, I'm thrilled!
I secured the dress to my shoulders with clutch fashion glue (not sponsored, just happy to have a product that works!) and it seemed to work a treat- can't wait to have a play with this some more, especially for temporary hemming and other fun textile work.
290 notes
·
View notes
Text
I came across this in a book I'm currently reading and it's really stuck in my mind and I wanted to share

'Sheep in Wolf's clothing' by Judith Duffey 1986
I don't know if anyone on here is going to be interested I'm this piece or anything but I wanted to share as it struck me an an amazing piece of textile art
2K notes
·
View notes
Text

Final update! Temperature blanket 2: Electric Boogaloo!
Second half of the year, made of King Cole Big Value Chunky (acrylic yarn). Took over 1 yr to finish knitting. I love it unconditionally.
53 notes
·
View notes
Text
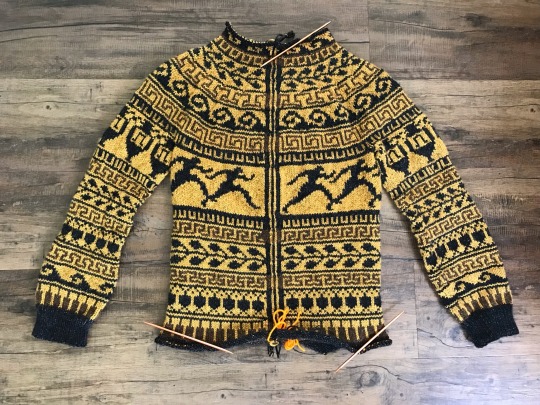
I have finished the colourwork for my greek pottery inspired cardigan! Next step is gentle blocking, then into steeking, and finally finishing of the edges and button band. The pattern is Greek Amphora Cardi and this is the same cardigan that the Roomba tried to eat back in the fall.
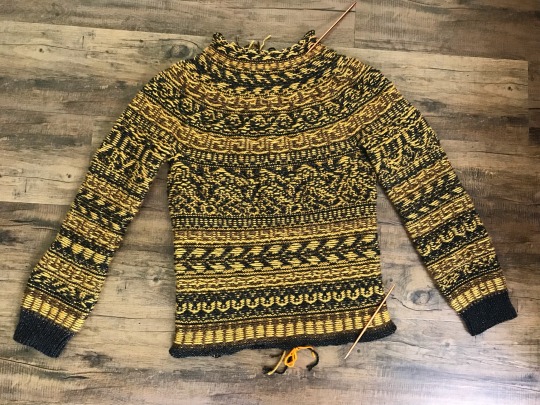
Bonus image of all my floats. I am very happy with how it has been turning out. Took ages to sew in all the ends on the sleeves. Very glad I decided on the second sleeve to leave the longer floats between motifs and save on ends to weave in.
162 notes
·
View notes
Text
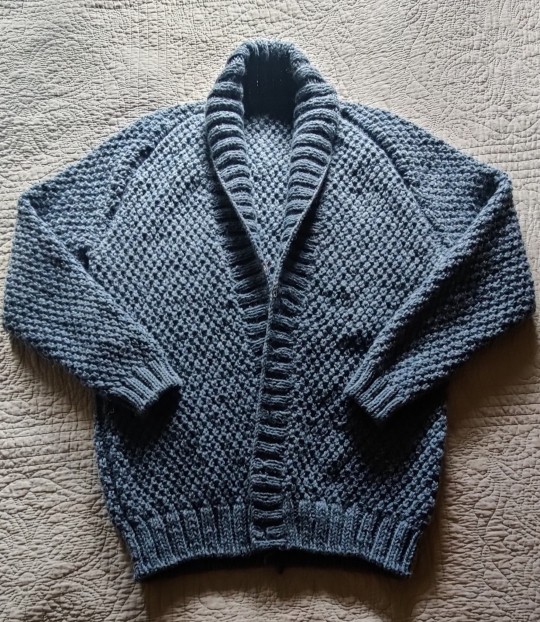
Still need to block this beauty, but got it off the needles and needed to share the texture
-
Pattern is Tamarack Classic
86 notes
·
View notes
Text
Some knitting affirmations:
I know how to count
I know how to read
whatever I am making will be wearable and if it's not then I will learn something
4K notes
·
View notes
Text
4K notes
·
View notes
Text
Last week I posted a review of Woolly Wormhead's new Colorwork Short-row Knitting book. I made a small swatch of a pattern and mounted it like a painting to hang on my wall. I thought some of you would want to see how to mount a knitted painting.
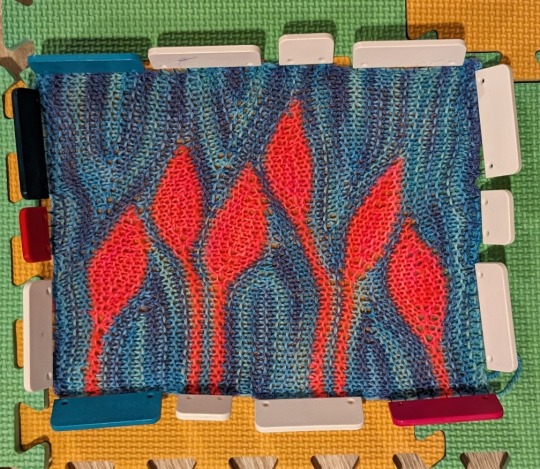
First, I steam blocked my swatch.
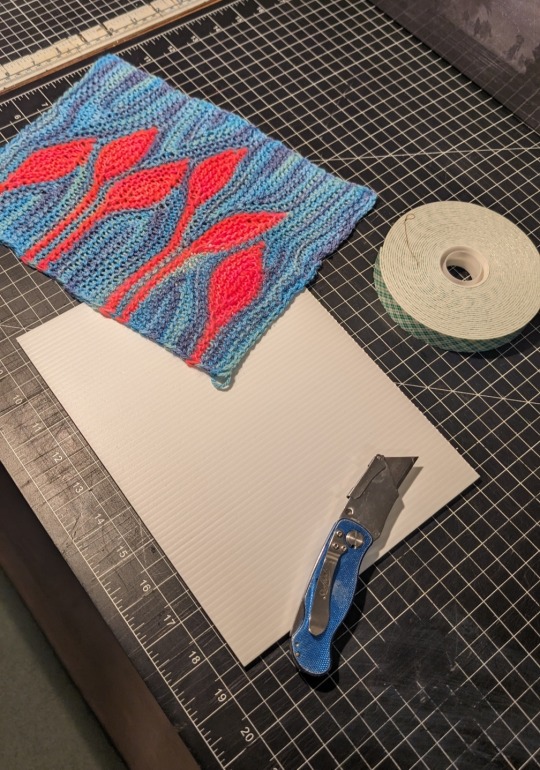
I then measured and cut a piece of corrugated plastic .5" smaller than the swatch. Any sturdy board such as foam core or corrugated cardboard will work. I opted for white plastic over brown cardboard so my tape strips would blend in.

I cut 4 strips of 3M foam double sided tape to fit around the edge of the board. You can see the sides of my swatch aren't perfectly square, that's the nature of this short row pattern. When you stick the swatch to the board, carefully adjust each edge so it is nice and even. You also want to make sure the knitting extends slightly over the edges of the board. When everything looks good, press the fabric firmly into the tape.
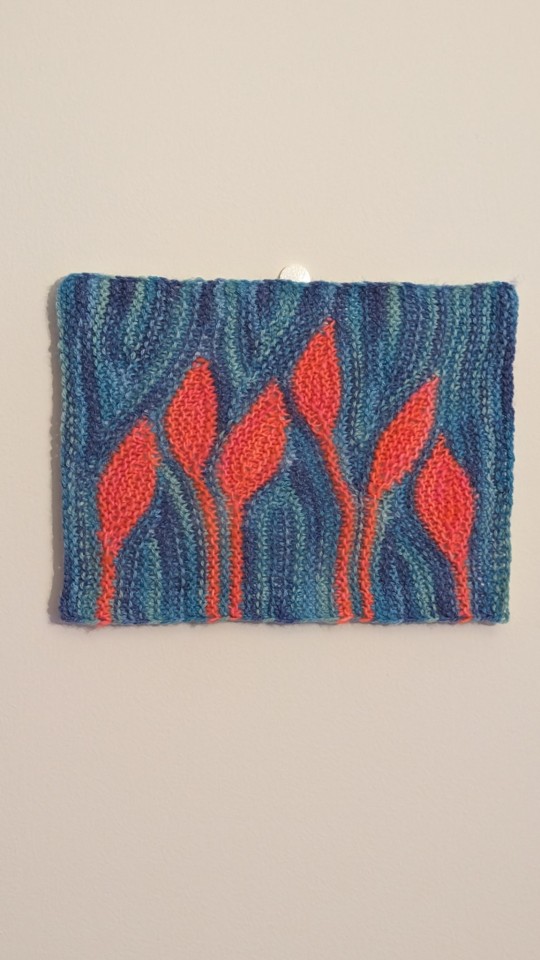

That's how I mounted this little picture. It's light weight, so I hung it using a command strip. I am going to make a few more knit pieces to hang in the spare bedroom.
Reminder that the book will be available in the US on April 16th and in the UK on May 14th. More info is available on Woolly's website and you can preorder a copy of the book on Amazon.
83 notes
·
View notes
Text

self drafted pattern (Sweater Socks) (also happy to share my charts if someone wants to test knit)
52 notes
·
View notes
Text
Literally learning new knitting techniques is like learning spells
587 notes
·
View notes