
graidesigns
Grai Designs
Hamish Visser, George Merwood, Zed Ng
7 posts
Don't wanna be here? Send us removal request.
Last Seen Blogs

trusteddentistservices
Dentistry

fuckyeahpipesofpan
Pipes of Pan

reallyshadygiver
Grace Lily

luwten
tibby/29/lesbian

Text
Fabrication

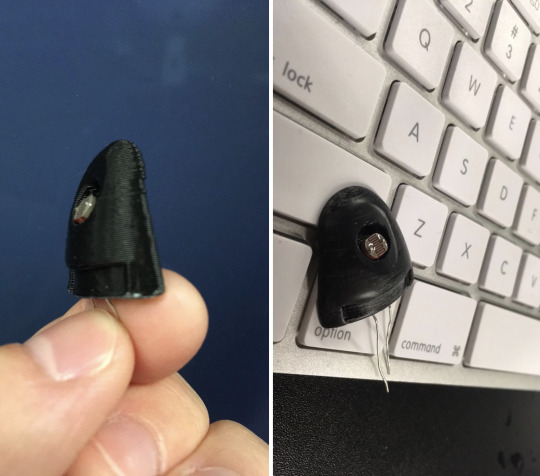


The Arduino Nano is still too big for our device thus at this stage it is hidden in our palm along with the battery.
0 notes

Text
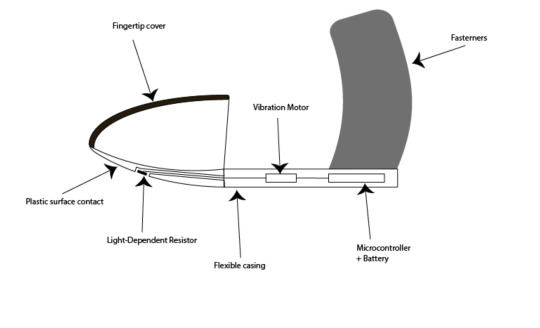
User interaction
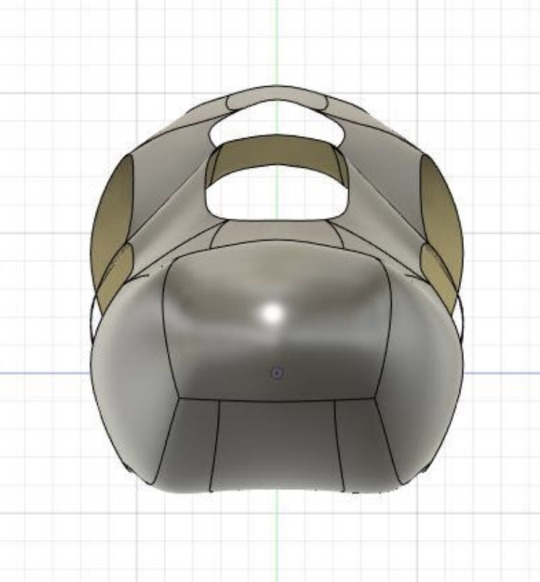
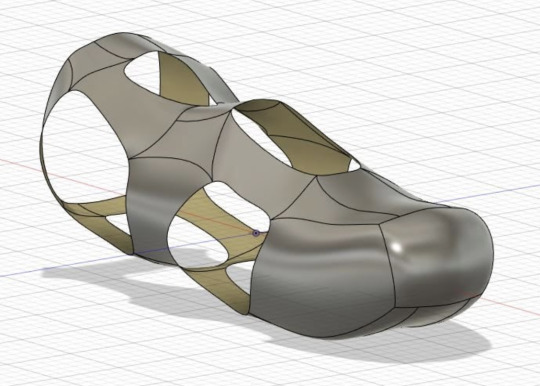
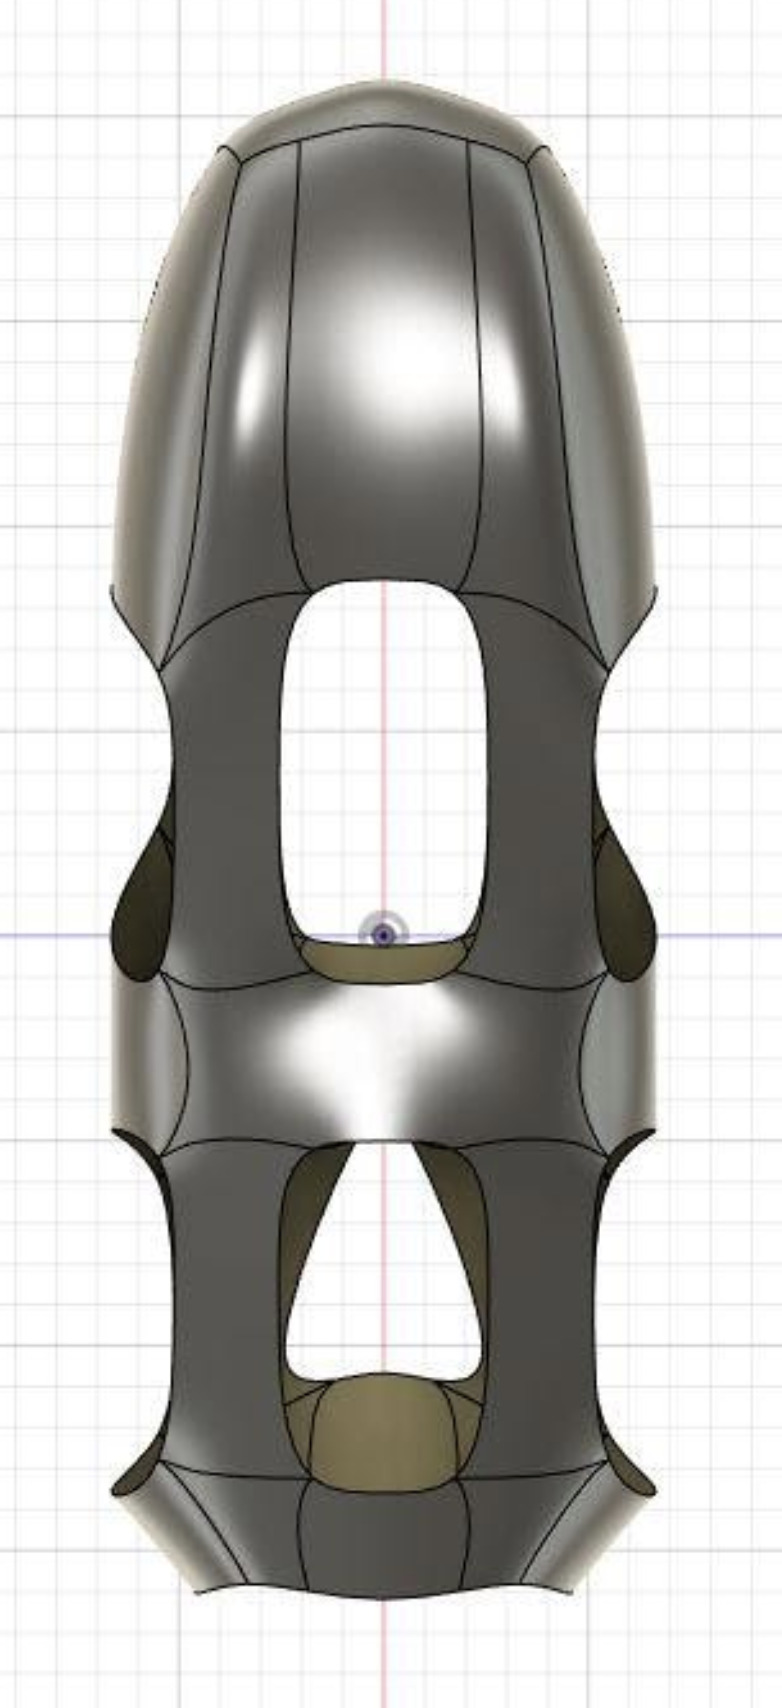
We wanted to create a design that would accurately depict the idea of user interaction and what approach we would use. Our group landed on the idea of either a glove or sleeve for your finger, this would help the user navigate the greyscale map and this design would also conceal most of the wiring and components. Originally, we were unsure as to how many fingers would be used in the glove or sleeve and began designing rough sketches and fusion models to experiment with the form. Our first design was a sleeve for a single finger that would be 3D printed and split into 3 sections that would change with the movement of the user’s finger. However, we had to take into consideration the different sized fingers of our target audience and we needed to use a more versatile material to allow the device to fit multiple users. We then used a glove approach where we cut fingers that we wouldn't use and tested out the feel of the glove which wasn’t quite what we were hoping for.
Finally, we redesigned the end product into a simple sleeve for the index finger that consisted of a 3D print on the bottom side and a leather cover that held the finger in place.

0 notes
Text
Experimentation with Components

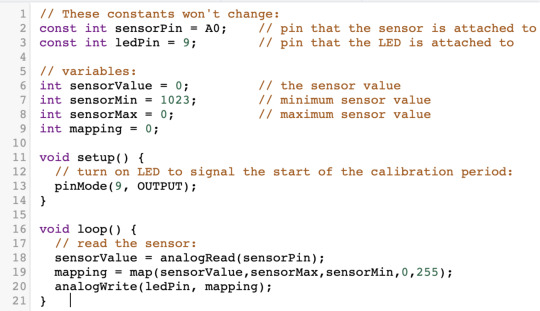
The initial setup is done using the TinkerCAD circuit design website as we were still waiting for the physical component to arrive(shipping duration is delayed due to COVID-19).
The basic item is to use the grayscale sensor as a “listener” and produce an analog data range from 0 to 1023 and remap that value to the 0 to 255 pulse-width modulation output to the motor through the digital pin.
https://www.tinkercad.com/things/dyDFZTnEW7Q
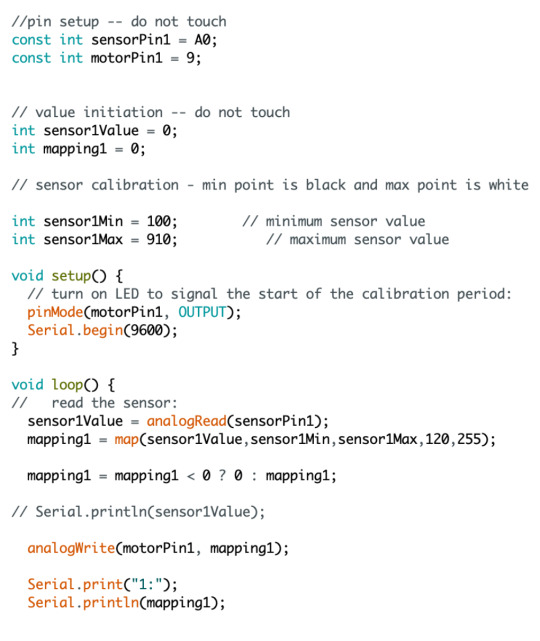
Once the parts arrived, we figured out that we would not require a transistor as tested on TinkerCAD. This makes the components required for the device much simpler.
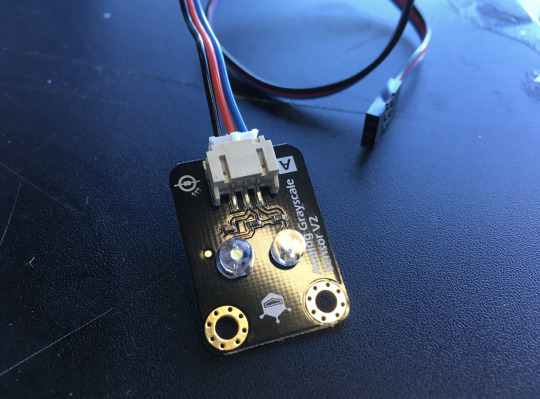
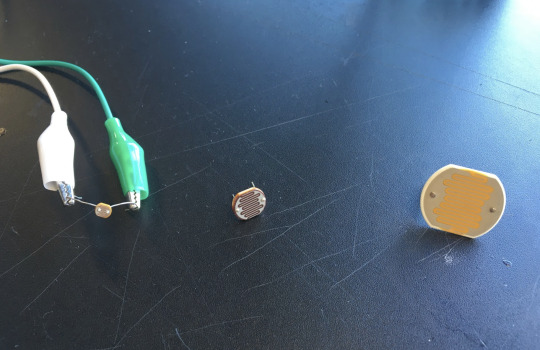
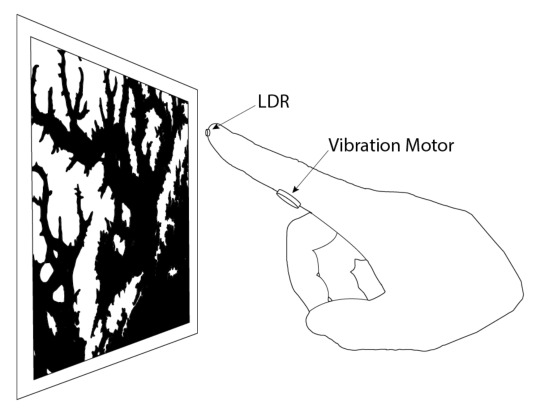
We were also able to obtain a grayscale sensor and figured out that it is just a light dependent resistor with a white LED that provide basic lighting to the LDR. As we are working with screen displays, we do not need the LED as the screens are backlit. The form factor of the grayscale sensor is also too large for our liking.
We tested LDR of 3 different sizes and found out that the smallest LDR provides the best data as the smaller surface area enables it to read the smaller finer details that are in the topology maps. The placement of the motor also does not disturb the reading of the sensor.


0 notes
Text
Maps and User interaction
We looked at various sources for downloading maps and converting them to black and white.
https://johnflower.org/tutorial/finding-heightmaps-web
http://ablesw.com/r2v/contour.html
https://koordinates.com/data/?page=7
https://www.floodmap.net/Elevation/CountryElevationMap/?ct=NZ
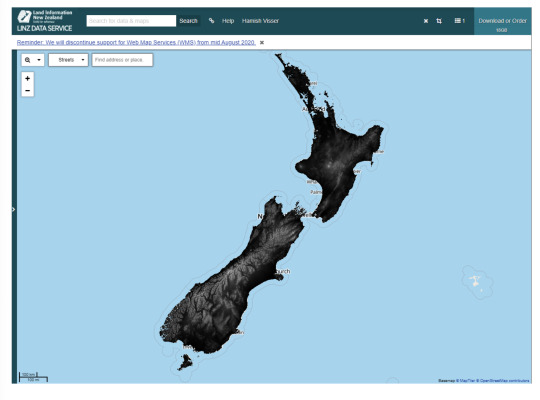
https://data.linz.govt.nz/layer/51768-nz-8m-digital-elevation-model-2012/
After research and experimentation of converting maps we found that LINZ has the best data on the maps we are looking for (NZ ONLY). They provide a black and white map created by the interpolation of 20m contours. Although, the only download options are small PDFs and large GIS files that are hard to work with without proper understanding. Our chosen path is to download pdfs from LINZ and adjust the contract, black and white of the image to be optimised best for our product.
0 notes
Text
Recap and First Meeting
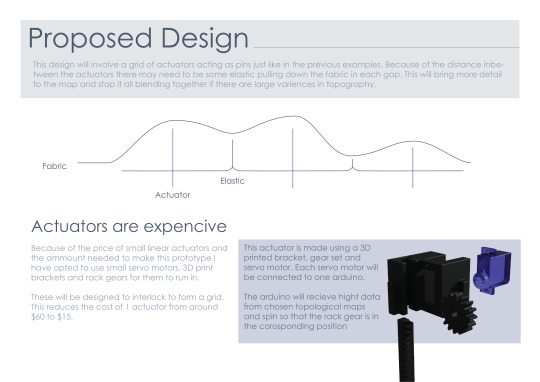
The chosen project is Hamish’s, it uses micro servo to push pistons to form a 3D representation of a map.


Higher res slides here
Similar project have been done all over the world:
TRANSFORM by MIT
MIT Research Paper
Hyper-Matrix by Hyundai
Feel the View by Ford
In our first meeting, we realise that in order to get a good enough resolution to decipher the visualisation, we would require at least a 6 x 6 setup. This would require a 36 separate micro servos that would cost about $11 each, and that would give us a costing of nearly $400 just from the servo alone.

We wanted to achieve higher resolution effectively and cheaply so it is easily producible and easier assembled to get a quicker turnaround time. We thought about using other visualisation methods such as making hydraulic pistons using syringes or using vibration motors to communicate the change in topology or values of the image. Ultimately we decided to go with micro-vibration motors as they are easy to program, require low voltage to operate, cheaper to procure and we would require less of it.
We also needed to figure a way to process the image so the microcontroller would be able to process the data and provide useful feedback. We came up with a simple solution of using a grayscale sensor to read a contrast adjusted grayscale height map(similar to a displacement map used in 3D modeling software) that is casted on a backlit screen.
Our new solution is to attach the sensors and motors to the finger of the user. As the user touches the screen that is casting the grayscale image, the sensor will receive electronic reading based on the black/white value of the image of the vibration motors would react accordingly to using pulse-width modulation.
For the microcontroller, we went with an Arduino Nano as most of us were familiar with the Arduino software and the small form factor provides more opportunities with the overall design of the device.
0 notes