
Last Seen Blogs
db-2
Different beauty

the-descolada
I will write your name in the ruin of them
dweemeister
Sometimes I lie awake at night...

hellonoblesky
It's Always Been You. It Has To Be

onetiredb0y
mostly boy, partially stars
Text
Week 10 Reflection
During the course of IDES1262 I gained various techniques including technical drawing, physical and computer modelling. Looking back to those months I’m grateful to have Robert, Max, and Gonz as our tutor, and gave huge thanks to those students who had helped me during tutorial.
One of the things that went well for me was the part of technical drawing. I learned how to do works that are precise and accurate. The perspective drawing was confused at first, but with practice I was able to complete the task. I followed the standard, taking my time to make every line straight and clean. I found that when you presenting something on the paper, it’s easy to tell how much effort you have put on it. The clean and well-drawn technical drawing made me happy and satisfied. It encouraged me to do as best as I can, regularly check details and small flaws in my work.
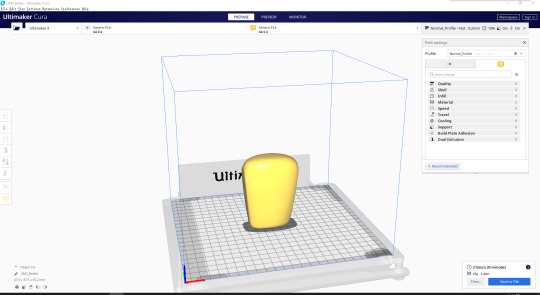
I also enjoyed making models with 3dx Max. Unlike my physical model, which I struggled a lot to modify into the shape I want, the computer just done things perfectly. I realized there were gaps between a 2D design and 3D model. Something looked good on paper may not work well when they were made into 3D. Through the making of Olay bottle, I learned how to test my ideas while finding possible solutions with internet. As a result, I am able to used those experience and skills on my future project.
There were difficulties, and If I’m honest to myself, this difficulty did knock me down and affect my learning during this course. Just after the school have transferred all courses online, I started to feel depressed and anxious everyday. I locked myself from friends and family, failed to balance my health condition with my study. If I had to start again I would seek help before I lost control on the situation. I realized that in order to help people and solve problem, a designer need to take care of their own problem first.
Overall, IDES1262 was a worthy journey. I’m ready to take all those knowledge to my second year learning. A Chinese designer used to say that “persistent study is the source of design, responsibility is the principle of design, and inspiration is the sublimation of design”, I found I have more understanding of this phrase now.
2 notes
·
View notes
Text
Week 9 Reflection
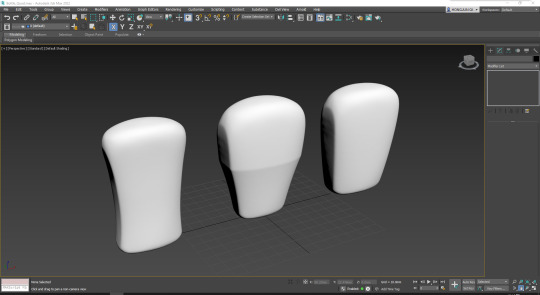
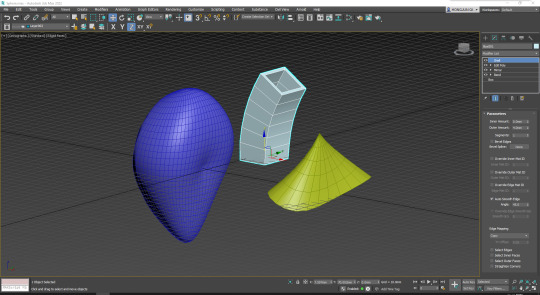
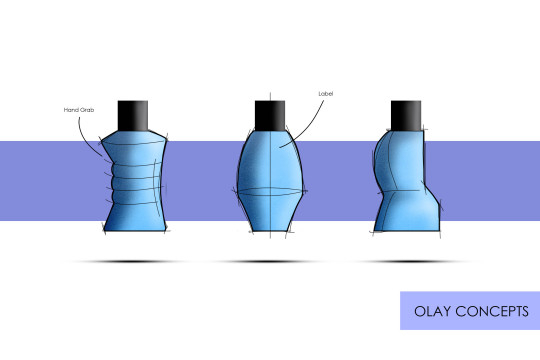
Taking experience from week 8 I began developing my Olay Bottle in 3dx Max. Just after I began my task I found the techniques in the video was not enough to create the shape I wanted (The rightmost design from image below). I had few ideas about how to construct the bottle in Rhino, but would it work in 3dx Max too?

To find out the answer I searched some basic modelling video on Youtube, majority of them were introducing taper and other modifiers. I tried them but it did not work. The shape I want to create was the combination of several geometric shapes: two half hemispheres, trapezoid and rectangles. I thought I could only make it by 1. extrude from a shape 2. create those primitives and stack them together 3. Make a block and remove parts until it looked like the design.
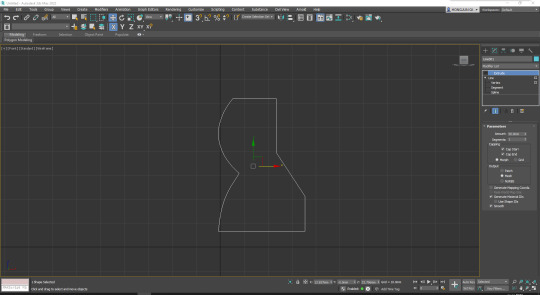
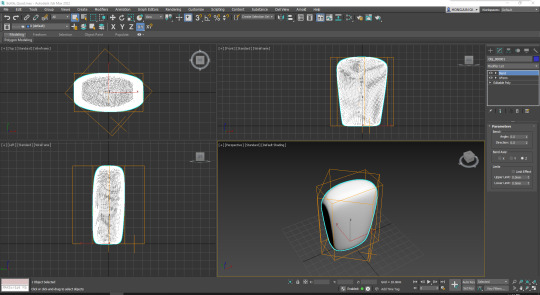
After some test I made based on those hypothesis, I found the easiest way was extrude from a shape. I managed to find the tutorial about how to extrude blocks from line in 3dx Max. I drew the outline with the line tool, using Bezier to adjust the two curves on the left side. Then I weld all vertexes together, extrude the to make it a editable poly.

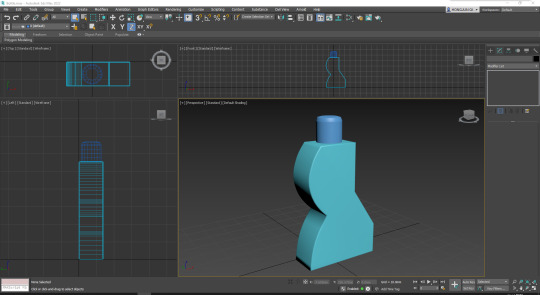
The following edit was easy comparing to the beginning. I applied some chamfer to make the bottle look close to reality. Through this exercise, I realized that the hardest part of the design was to get it start. In the beginning, I have nothing but bunch of questions and hypothesis about the product. I didn’t know which would work or they would work at all. Though tests and lots of angst I somehow achieved the outcome. I gained the valuable experience about 3dx Max, and it gave me confidence to the situation like this.
0 notes
Text
Week 8 Reflection
This week we finally got hands on 3dx max. I was pretty excited using computer modelling software because it could provide variety of effects that was hard to make with hands.
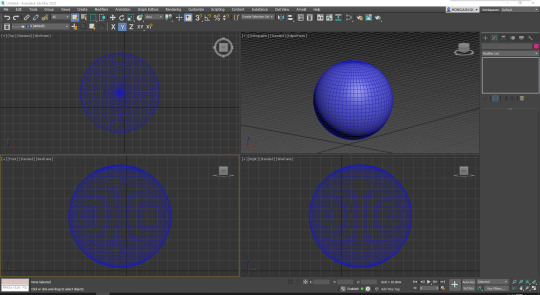
For part 1. I went through the tutorial and got used to the UI and menus for 3dx max. I found there were great similarities between 3dx, Rhino and Solid Works, which means I could use some of the same idea to proceed the making. For example, I knew that I could model a bowl by creating a sphere, then cut, apply shells, etc., in Rhino, I could do it same in 3dx Max, the only problem was that I need to find the right button instead of simply typing the command.
I tried different modifiers on the primitives I created. I was amazed by how easily 3dx Max could create organic shapes. When doing Solid Works, It always made me headache to make something like a mouse, here I just add modifer and change the number and it’s done.
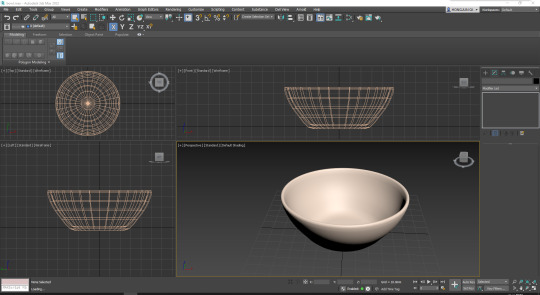
Moving toward part 2, I tried to use some of the techniques that was demonstrated in the video. When doing the fruit bowl, I used shell modifier after cutting the sphere to half. I used scale tool to create a flat base as well as raise the edge of the bowl to make it smoother.
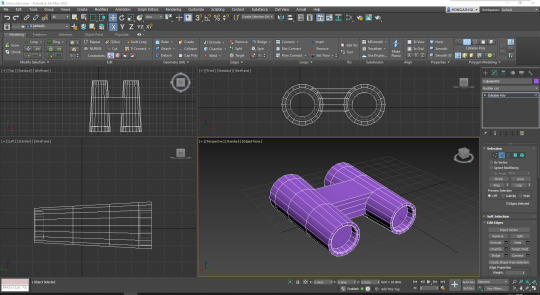
For the binoculars, I met problem about scaling. The cylinder I firstly created has many height segments, which enabled me scale it to make one end thinner than the other. To solve the problem, I reduced the height segments to 1, adding swift loop to where I want the bridge connected after I did the scale. I was happy about the outcome.
To conclude. I learnt various techniques about 3dx Max this week. The major finding was that “All roads lead to Rome” in computer modelling. For the binoculars, instead of scale the end of the cylinder, I could just make a cone at beginning, or apply taper modifier to the primitive, and the outcome would be the same. I thought that one of the difference between me and those skilled designer was they could achieve that outcome though shortest route. I still need to practice a lot to able to do that.
0 notes
Text
Week 7 Reflection
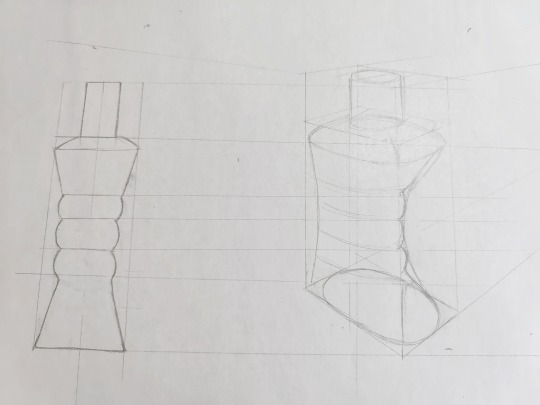
The learning objective of week 7 was to make the physical model for the Olay Bottle. Although this was not my first time making foam model, I found it difficult to control.

I decided to make the model for the concept in the middle. It has an organic shape but not too difficult to handle, without the access to hot wire cutter I had foreseen the difficulty of carving.
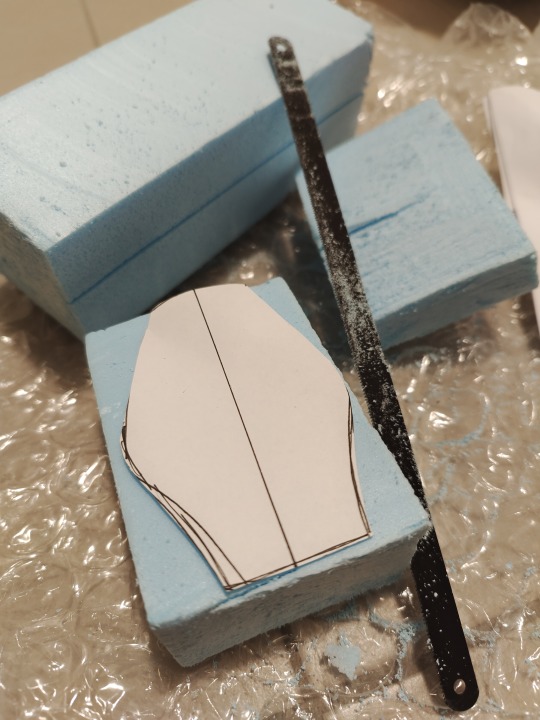
I cut out the template and stick it on the foam to do the rough shaping. This helped me control the outline of the model, keeping the two sides symmetrical. At first I used snap knife to shape the foam, but soon the blade stuck inside it. I then tried fruit knife but it did the same. Because the fruit knife has thicker blade, it buried deep inside the foam and it took me 5 minutes to take it out.
The final solution was the saw blade in my tool kit. It was thin, sharp, and can remove foam efficiently. I wrapped some paper at one end and used it to cut along the template, leaving several millimetres for further adjustment.
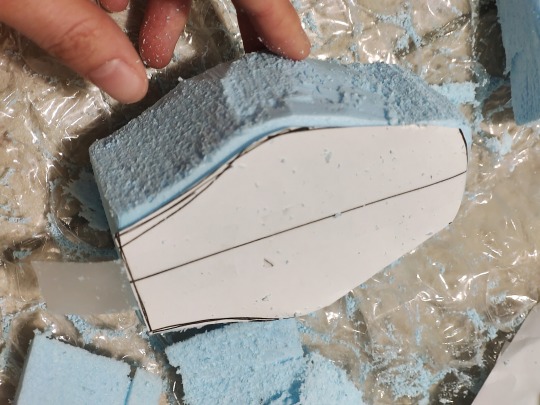
I choose P60 sandpaper for sanding. Sandpaper with rougher surfaces would remove large debris from the surface, sometimes destroy the part I have already completed, while those with smoother surfaces took ages to shape the model. P60 was just fine. I also found that instead of holding small piece of sandpaper in hand, stick a large piece on the edge of table was more efficient and offered more control to the making process.
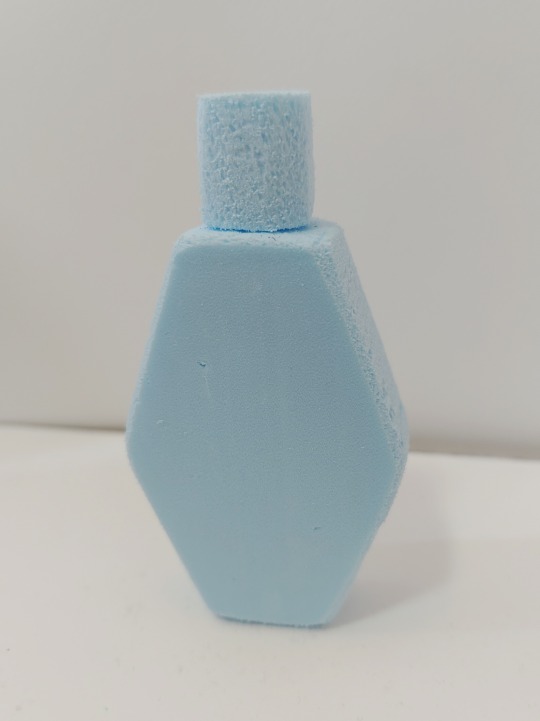
Because this design did not include a change in the profile, I only made one template for the front view and cut the foam into desirable thickness. I realized this made the model less interesting. If I had my time again I would make some change to the design, such as add tapering to the side view, making it thinner at top and thicker at bottom. I learnt that I should consider more about the outcome in reality when doing the 2D concept.
0 notes
Text
Week 6 reflection
Behance and Pinterest are two platforms that I like to look at and get inspirations. Below are some of my saved posts and artists.
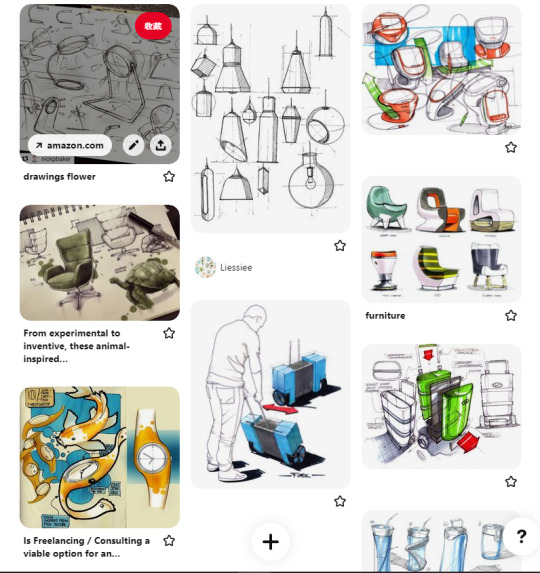
Designers:
https://www.behance.net/gallery/1176939/ID-SKETCHING-MARKER-RENDERING/modules/264032209
Begüm Tomruk. Her sketches are so vivid that at the first sight I thought it was computer rendering.
https://www.behance.net/gallery/122380423/Quick-Projects-II/modules/695903567
Robbie Lillquist. Beautiful sketches reveal every details of the product. The arrangement of the page is effective. The sketch also clearly shows the usages of the product.
https://www.behance.net/gallery/46514901/automotive_sketchbook-III/modules/277773361
HERMAN FRANCISCO DELOS SANTOS. The sketch of automobile is beautiful.
Part 3. Digital Rendering:
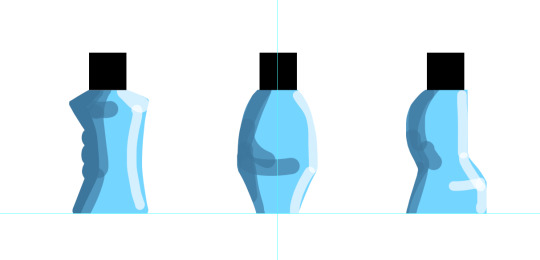
I was glad that I brought my graphics tablet to Australia. before I only use it to draw some fan art to entertain myself, but now it made this task a lot easier. It helped me erasing the unwanted part from the square and create those bottles. I chose three designs from my previous 12 designs. In addition to the steps in the tutorial, I add an extra layer to apply texture to the bottles. I choose matte plastic(or frosted plastic?) as material because I thought it would be less slippery if someone want to use the moisturizer in the shower.
To conclude. I’m satisfied with the outcome of the bottles. Although I have been sick this week, I managed to execute the task for my best. The PS is convenient to make mirrored structure and creating effects. I would like to learn more about it in my spare time.
1 note
·
View note
Text
Week 5 Reflection
This week we finally got opportunity to do some real design sketches. I found it quite interesting drawing those bottles and using markers to color it. I thought I have achieved the the learning objective, but there are still improvements I need do, especially on 2 point perspective drawing.
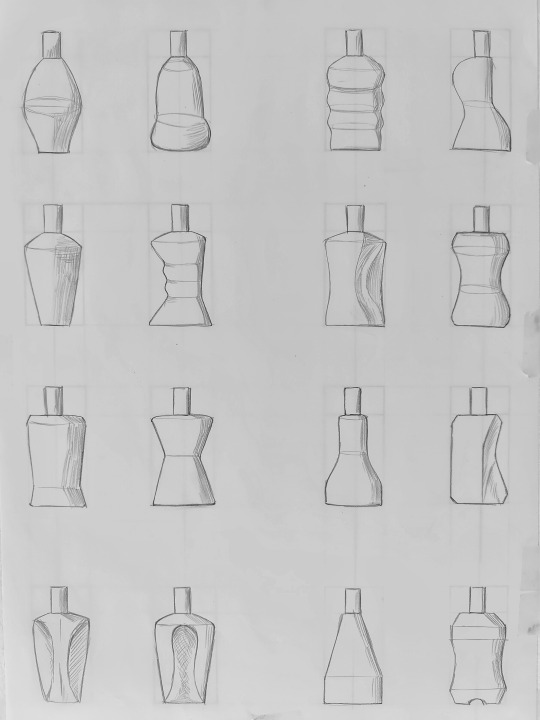
For Part 1 I followed the task and did 12 design sketching for the Olay moisturizer bottle. I thought it’s a simple task because it did not require drawing from different angles. To keep the paper clean, I tried to only draw lines that are needed. There’re not much shading because I believe the sketch was meant to communicate ideas, not creating artwork. I also did emphasis on the outlines of the bottle to make the form clear.
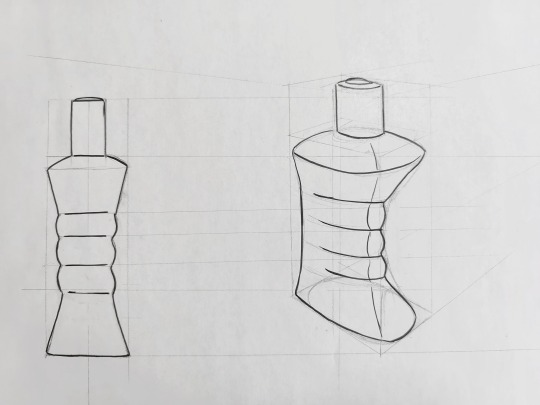
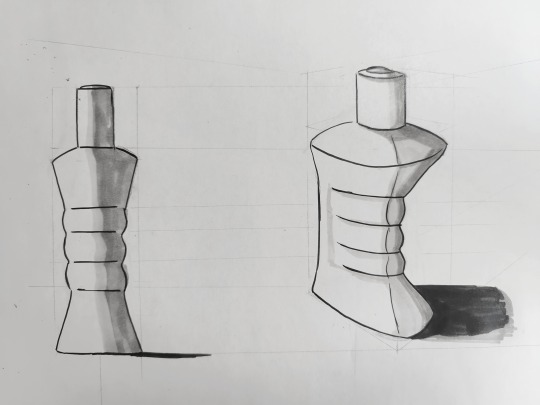
Moving towards part 2. I found myself stuck with the form of the bottle. The design I did was quite organic. It has fillet on every corner with hardly any straight lines on the body. I construct the fillet directly from the square hoping it would look good, but it appeared a little off way from the perspective. In addition, I have no idea what would the shadow would be like for this design, so it appeared just some black color beside the bottle. If I’m going to improve this task, I would practice more in 2 perspective drawing as well as coloring. I would also do some research on drawing the shadow for the right scale.
1 note
·
View note
Text
Week 4 Reflection
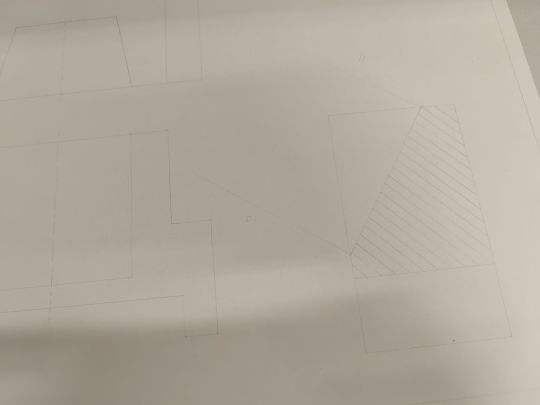
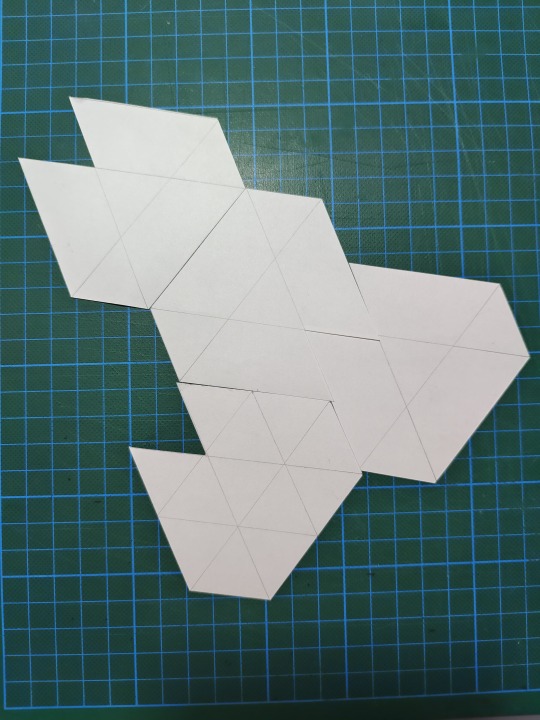
This week’s exercise was so far the most challenging task for me. The tutorial became online again made the 2 point perspective even more confusing. Although I still could not memorize the meaning of each construction lines, I learned how to construct the box using 2 point perspective methodology. This experience made me realized that sometimes it’s better doing than thinking.

Above was my first attempt for the chamfered box. I made the mistake for not drawing the ∠ α and ∠ β at viewer’s position (SP). I thought the left and right vanishing point just 2 points that randomly picked by the drawer, but actually it depends on the position of the object relative to picture plane(PP).
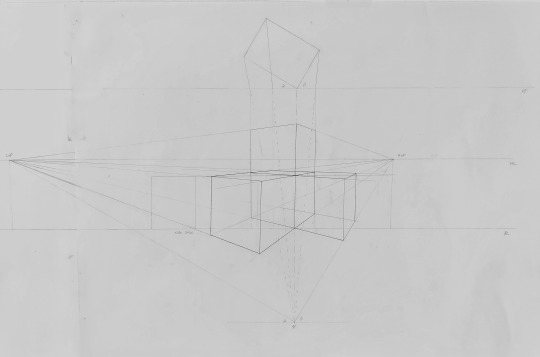
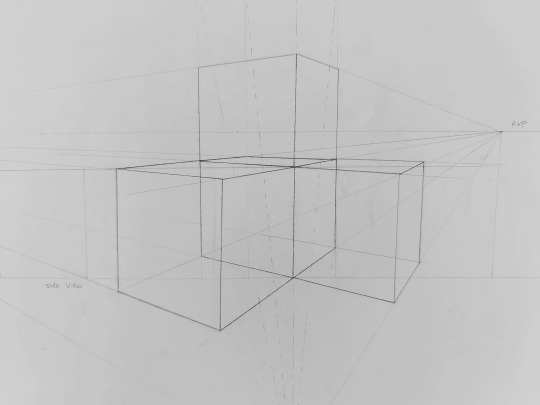
For part 2 I corrected my mistake and drew the left and right vanishing point according to ∠ α and ∠ β. However, because I positioned the SP further away from HL, I have to attach another piece of paper to the left in order to draw the left vanishing point. I observed that changing position of SP made the upper face of the box smaller.
The extension of the three faces was tricky too. I drew more construction lines for the left and right faces and tried to construct the box based on them. The box extended from horizontal faces was larger than original one, while the box extended from upper face looks the same size as original.
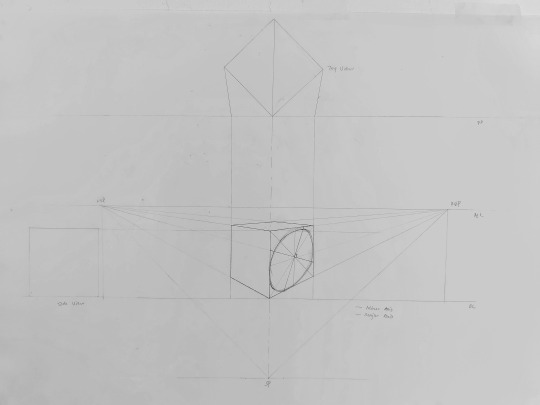
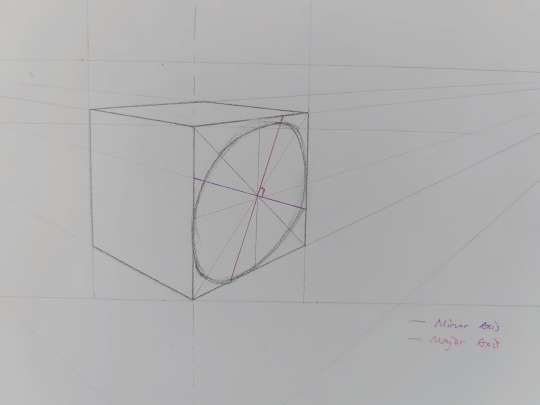
It was almost a relief to get into part 3. At that time I felt more confident drawing with 2 point perspective. I was surprised that the formal way to construct a circle was similar to the strategy I learned in middle school. I always linked the diagonal and middle points of the square in order to draw a circle. But the learning module offered two extra axis to further identify it. I would defiantly do more sketching practice using the method I learned today.
0 notes
Text
Hi!
I'm Hongjun. I'm from Shanghai, China. I'm interested in contemporary art and cooking and caaaaats. My avatar is my 6-year old boy named Master Kwai, isn't he cute? :D
I choose to study industrial design because I want to help people. During the foundation course of UNSW, I learned how design solving problems and improving the living standard for people around the world, then I decided to do this myself!
0 notes
Text
Week 3 Reflection
This week we focused on the auxiliary views and also further practiced engineering drawing. I learned how to “cut” the object with
Firstly, I drew separate views of the object onto paper with a pencil. I found that A3 is a bit small for the exercise because I need to place the auxiliary view at the side of the section view. I observed that one of my classmates apply construction lines to locate each view on the paper before he actually draws them. I thought it was useful and I could use that technique for my next drawing.
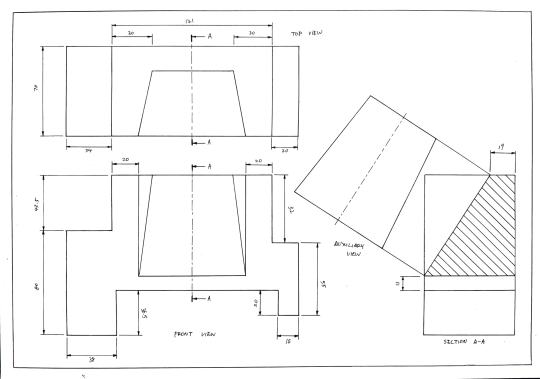
Above was my final drawing for this week. The most difficult part for me was making auxiliary view. Although I thought I understand the video and lecture I was not sure how to draw rotated face. I asked Tom during the tutorial and he explained to me about making extending lines and construct the shape based on it, then I felt I fully understood that.
To conclude, this week’s class was rewarding and I found myself more confident making engineering drawing.
2 notes
·
View notes
Text
Week 2 Reflection
During this week’s tutorial I learned how to construct third angle projection and start my first hand-drawn engineering drawing. Different from using SolidWorks, I need to remember all of the line weight and gaps and dimensions in order to apply them onto paper. I almost lost my patience in the process because I draw it really slow.
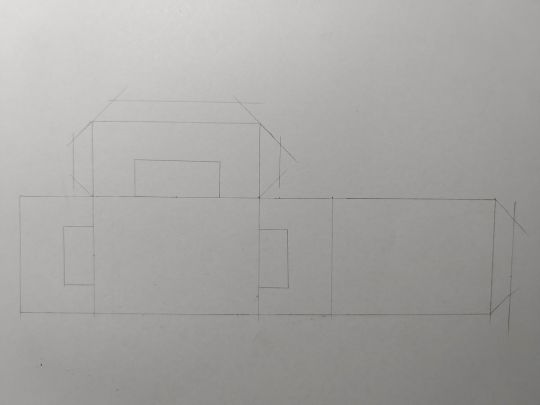
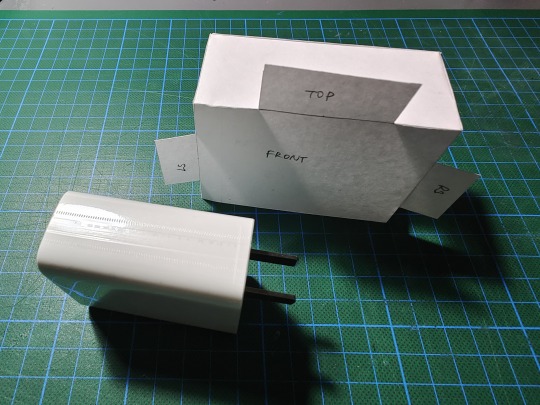
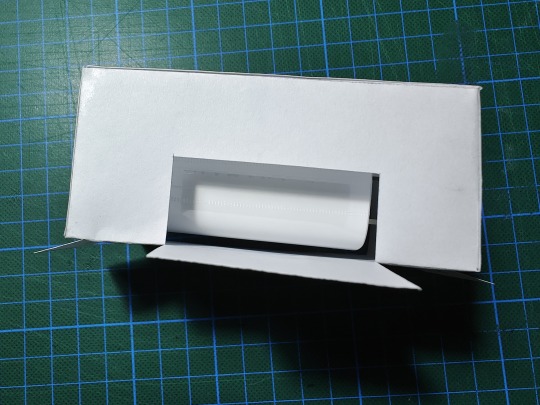
Above was my first exercise. It wasn’t very hard to me except that I forgot to include the metal plug into the length of the box at first place. After I found the mistake, I erased the wrong sketch and made it correct size. I thought it clearly shown what the third angle projection would look like.
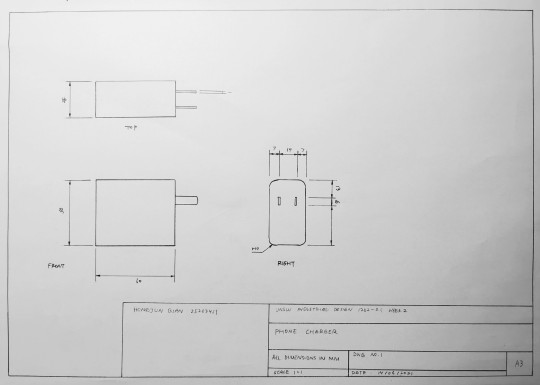
The engineering drawing made me painful. I found that in order to make the drawing clear and professional, I need to align every line and view. Although the charger was basically a simple block, it took me a lot of time drawing all the dimensions. For the title block, It confused me that the reading material shown that A3 required the same size of title block with A1 and A2, while A3 is smaller and have less place to draw the object.
To sum up, those exercises did make me remember most of the standard size that appeared in the reading material. I felt like I need more practice to increase the accuracy as well as speed.
2 notes
·
View notes
Text
Week 1 Reflection
During the first tutorial of IDES1262 I practiced using drawing instruments to create shapes. It was the first time for me to use T square and circle template, and it was enjoyable to see the shape become exactly symmetrical.
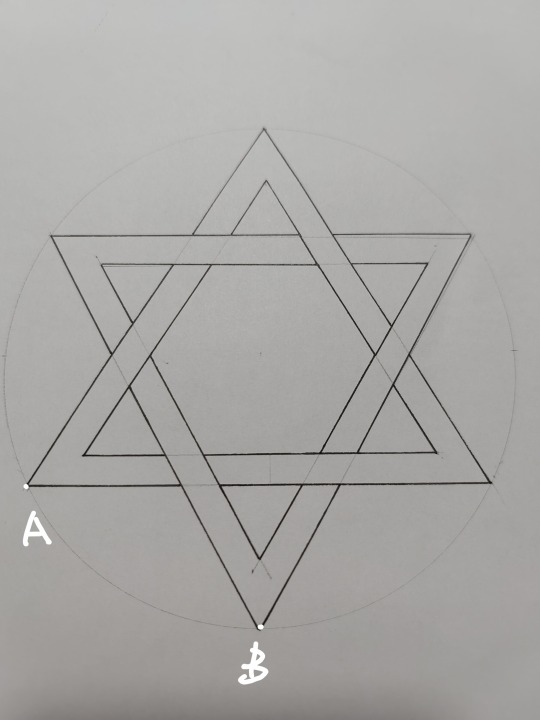
The picture above was my first sketch. I started doing it by mount the paper to the desk. T-square was helpful to make it horizontal to the table. Then I drew a circle with the compass, trying to find the two vertexes of the hexagram that were perpendicular to the T-square (I used square set for this).
Once I located those vertexes, I met problem finding the remaining four vertexes because I could not see the relationship between them. I struggled for a while, playing with the compass, then I found that the distance between AB was just as the radius of the circle! I immediately constructed the hexagram and apply thickness to it. The first sketch was completed.
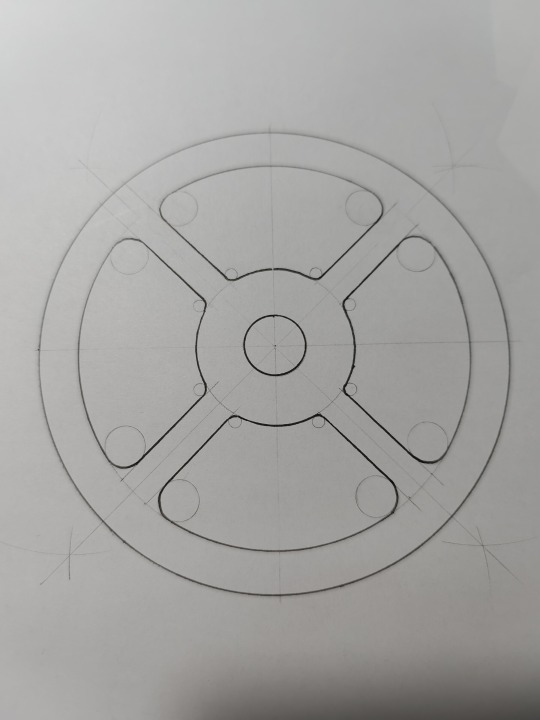
For the second sketch, I also started with a circle and cut it into four. Based on the coordinate I constructed, I further divided them into 8 parts, with each angle 45 degree (compass was used for this). The rest of the process was just apply details to the frame.
I found the circle template difficult to use when you pick the small circle because the pencil itself has thickness. the circle I drew appeared a little bit smaller than r3. What I could do next time is using a mechanical pencil or a pencil sharpener to sharpen the wooden pencil.
I completed the final task at home because of time. The light in my room is terrible. My lamp cast ruler's shadow on the paper that I could not see clearly when drawing lines and using the snap blade. Next time instead of mount paper to the table I might stick it to the cutting mat so I could spin it under the lamp.
To conclude. I gained valuable experience doing those exercises. I’m looking forward to learn more about technical drawing in the upcoming classes.
1 note
·
View note