jessileerusselluni
Digital Sketchbook
Uni Work
93 posts
Don't wanna be here? Send us removal request.
Last Seen Blogs
ya200d
yazeed

knolarge
BETTER THAN NOTHING

theguywithaoriginalname
HahaNoName

svartkattikappa
Vincent

paolita-2303qv-blog
Sin título


Text
222 3D 6/6
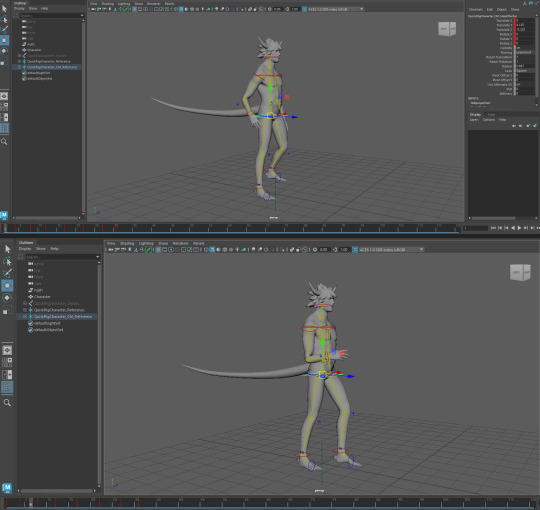
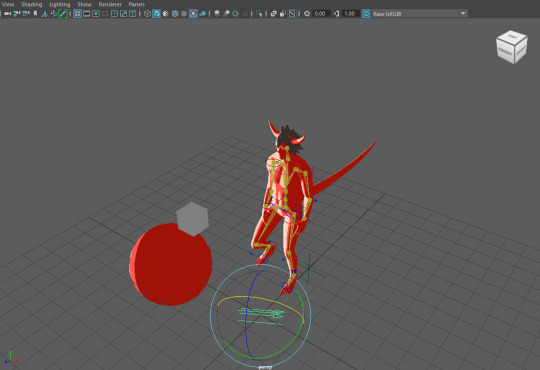
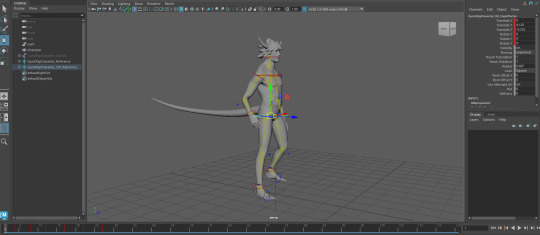
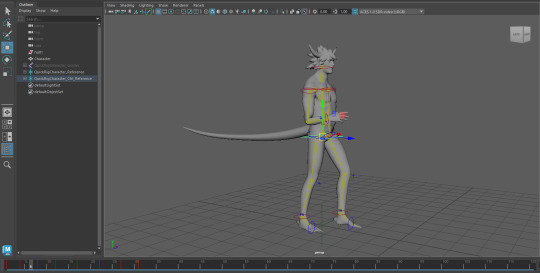
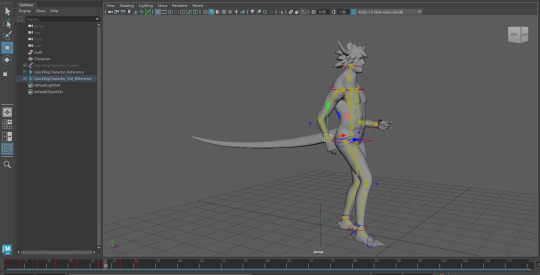
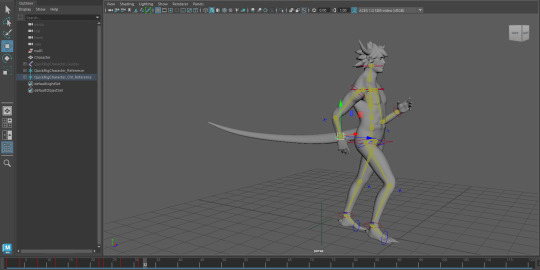
Animating:
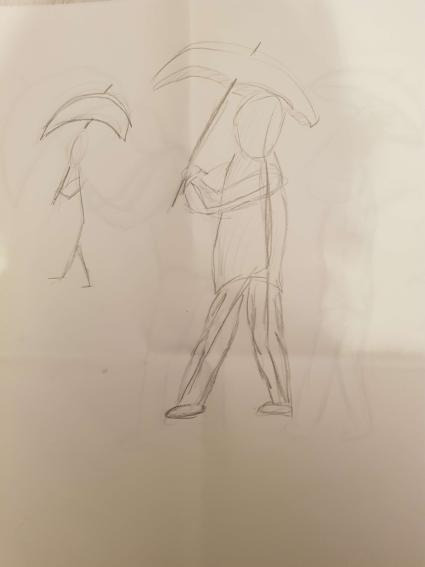
I animated his first steps, it’s tedious but I prefer animating to the modelling-

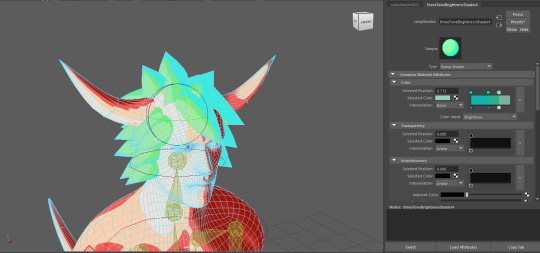
Texturing:
I found a new technique for texturing and I like it a lot. It feels more Godly and reminds me of the God brothers which were part of the inspiration for this character-
The brothers:

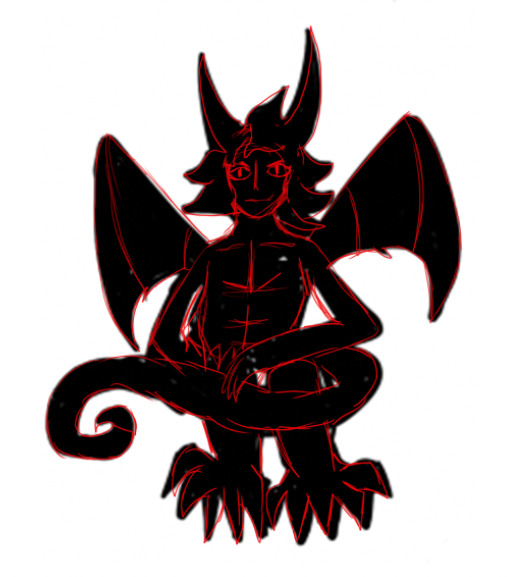
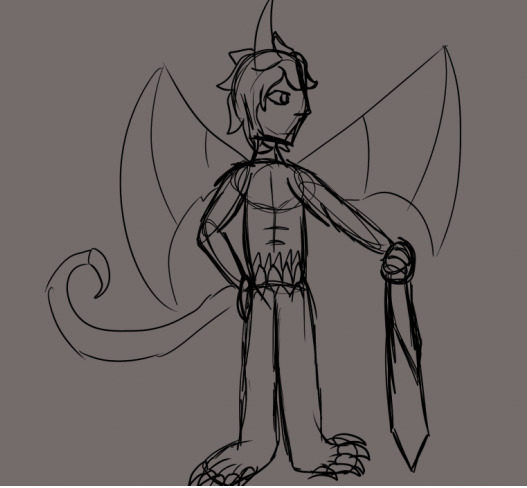
Character:

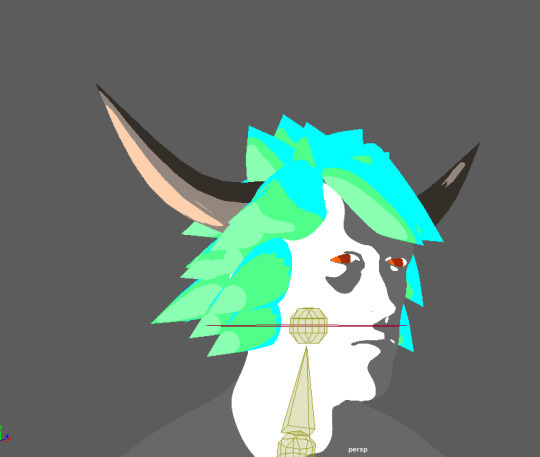
I wanted to use light the make a more 2D sort of look to my character, it makes it appear more stylised and spiritual. This was a tester changing the skin and hair-


Changed the hair to a nice ice blue mix green. The blue is in the shade, cold and bitter, but the green is shown in the light, earthly and lively-

I also changed the hair a bit so there’s no bald spots anymore and the whole head is filled-


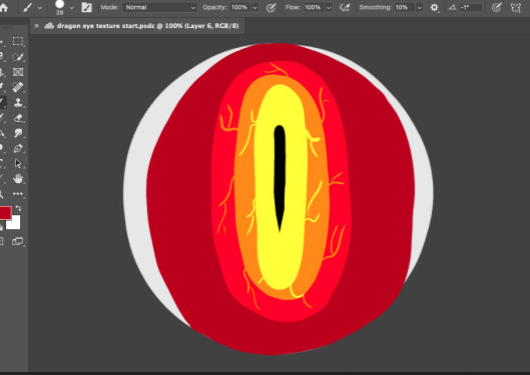
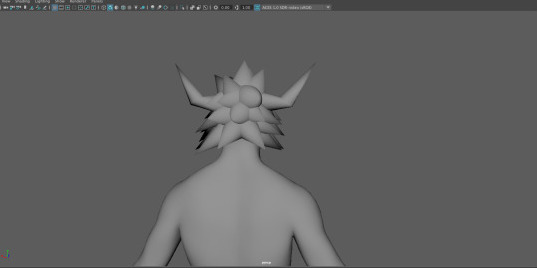
The horns are now silver/grey and the skin is pale white, like a light source. The eyes are fiery orange so he resembles/embodies multiple elements.


0 notes
Text
222 3D 5/6
The rig was no longer on the model, the hair, horns and body weren’t connected and there was a long stitch pattern up the length of the face. I had to basically start from scratch again with the rigging and had to figure out how to re attach the body parts and hair-


Managed to combine the pieces again-

Re doing UVs again, also smoothed out the tail-


Tail fixed, smoothed and attached-

Rigging had to be re done because the save didn't work and it ended up broken again. I calibrated it and the parts started moving properly again.
0 notes
Text
222 3D 4/6
Finished model:
Added the toes, foot spikes and tail with finished UV’s. The toes have shaped claws and spikes in the back of his heels-


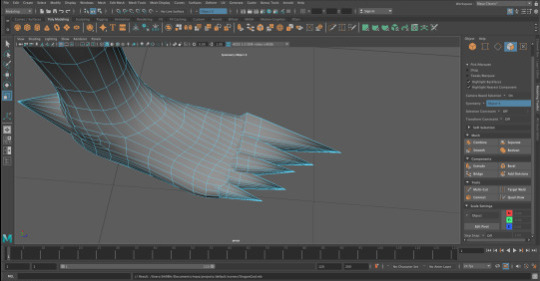
I had cut and shaped a triangle to get a tail like shape with a jagged point-


By this point I had finished the main body, eyes, horns and hair. The tail and feet had their UV’s.
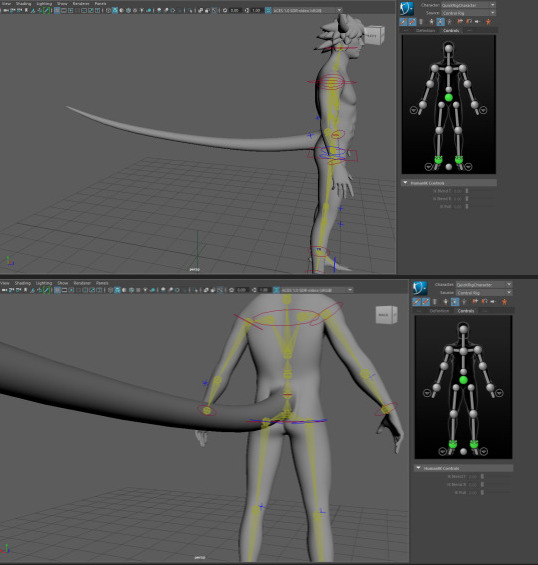
Rigging:
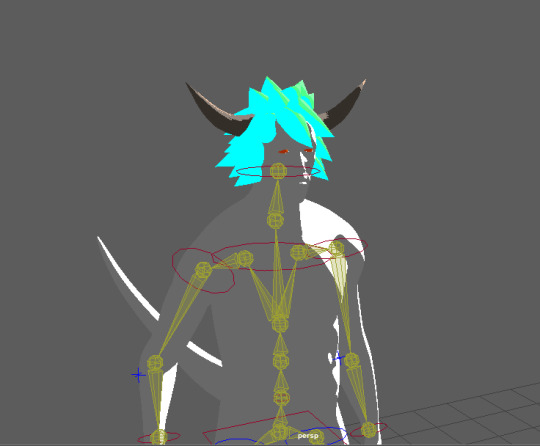
There were a few issues at the start, it kept breaking a few times but I started to get the hang of it-


Tutorials helped me learn how to rig the body so it wont break-
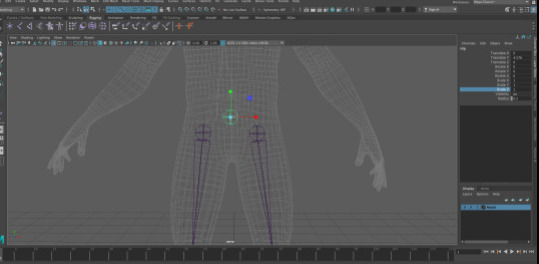
Added hip-

I connected the left leg to the hip, then mirrored the joint for the right.
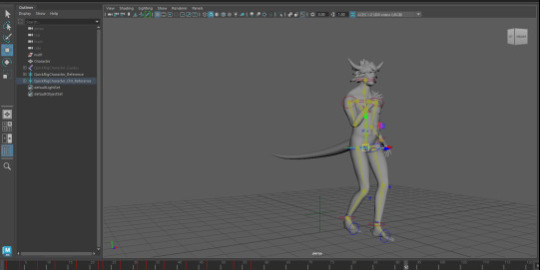
Auto rig:
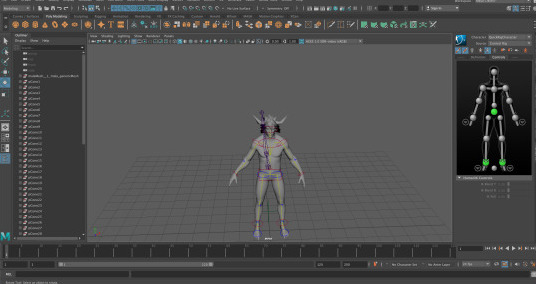
I managed to fix the auto rig problem and fixed it in place to the model. I needed to fix the tail but so far all the joints worked on the main body, limbs and head. He was janky but moveable and could be animated-


0 notes
Text
222 3D 3/6
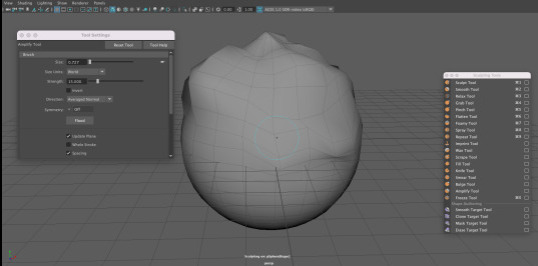
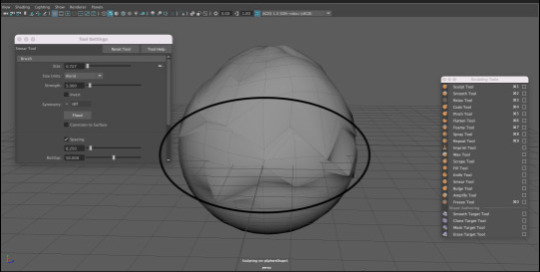
Sculpting Tests:
I wanted to sculpt over the model to give him dragon feet and scales up half his body. I tested out some tools in Maya. They were a little tricky to handle-


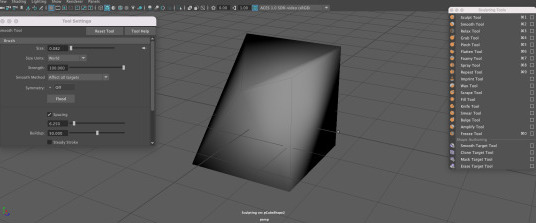
Test shape changes, cubes:

The model:
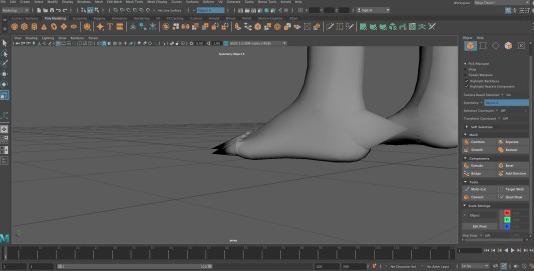
For the model, the toeas and feet were elongated to resemble a dragon/beasts talons, with slight claw/hooks at the end-

The sculpting smear tool looked close enough to resemble scales which is what I was originally going for-
0 notes
Text
222 3D 2/6
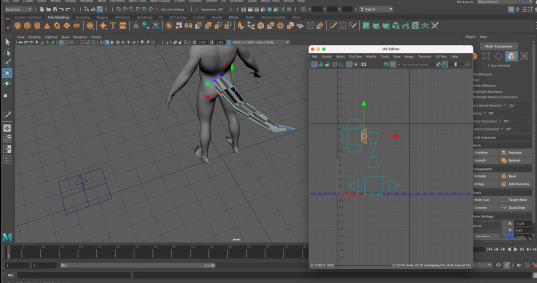
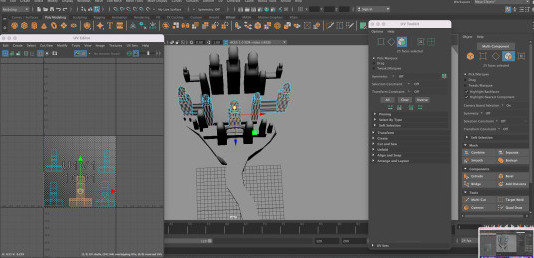
Model UVs:
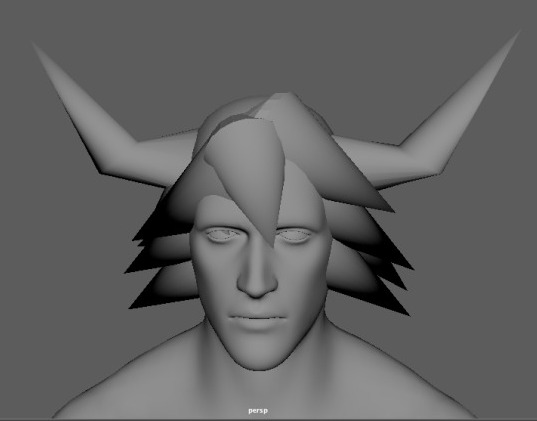
I have made the hair and now eye textures. I work better with Krita so I was going to make the rest on there. I combined all the hair pieces together and now they’re separate from the head and horns, I also added in eyes. I added his muscles and the abs were slowly coming along-
Separating the pieces-


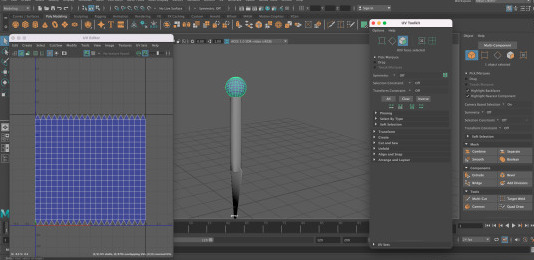
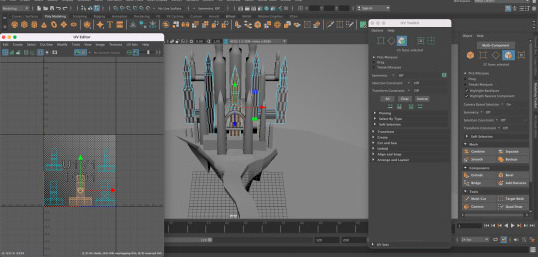
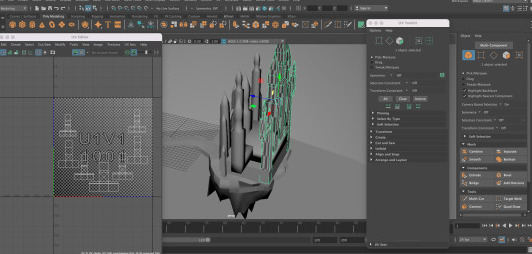
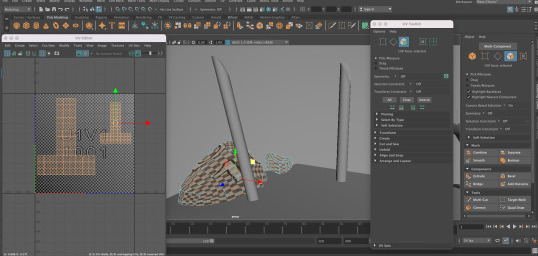
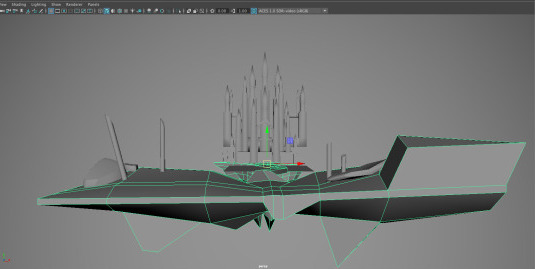
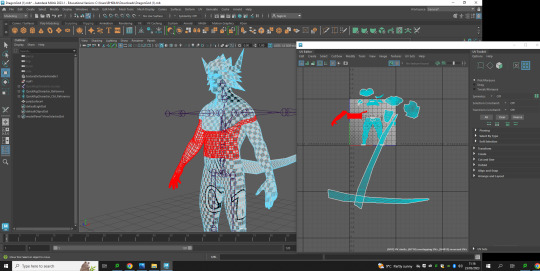
Prop UVs:
The staff was a little tricky but got there in the end-


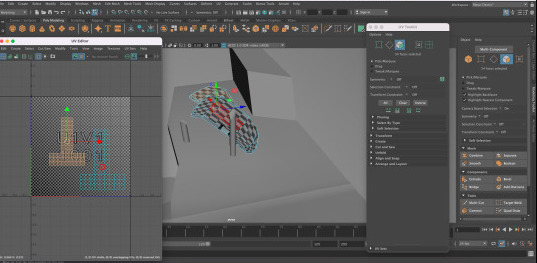
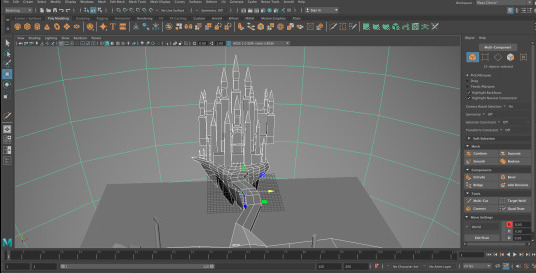
Environment UVs:
I combined sections of the castle to make it easier when it came to UV-ing. While UV-ing I had proper sections to work with so I knew which parts needed doing and which ones looked off or weren’t done yet-


0 notes
Text
222 3D 1/6
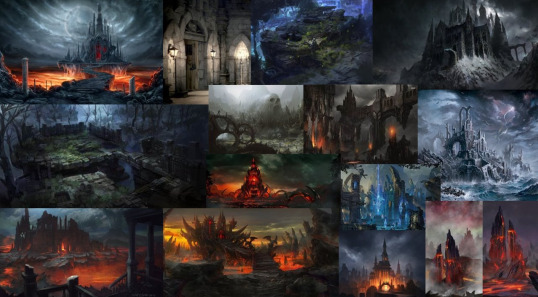
Mythology mood board:
I wanted to do something related the mythology, specifically dragons and Gods. I looked up different types of beasts and Gods as inspiration for the design, followed by castles made from various elements. For the prop I didn’t want to do just a simple tool or weapon so I merged the idea of a sword and a staff-
Character:


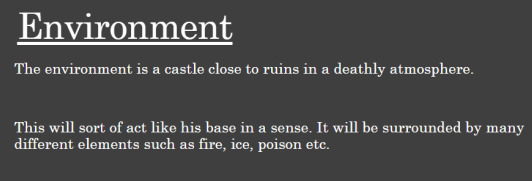
Environment:
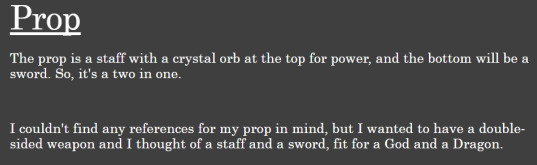
Prop:

Concept desgns:
These were the first sketches of my character in Photoshop-

Favourite -

Another redesign-
Detail on what was the final design:

Texture concept:
These were my chosen textures I put together in Photoshop to get a better visual understanding of my Dragon God character, prop and environment. It is a little tricky to sketch a castle but I have got the basic character and prop prepared.
It was difficult trying to pick the right textures for the sword/staff prop, I changed my mind over the types of gem stones and metal type for the blade multiple times. These materials suit them and I’m happier with the amethyst design for the prop, it makes it less boring and dull-

With added wings and tail-

Prop-

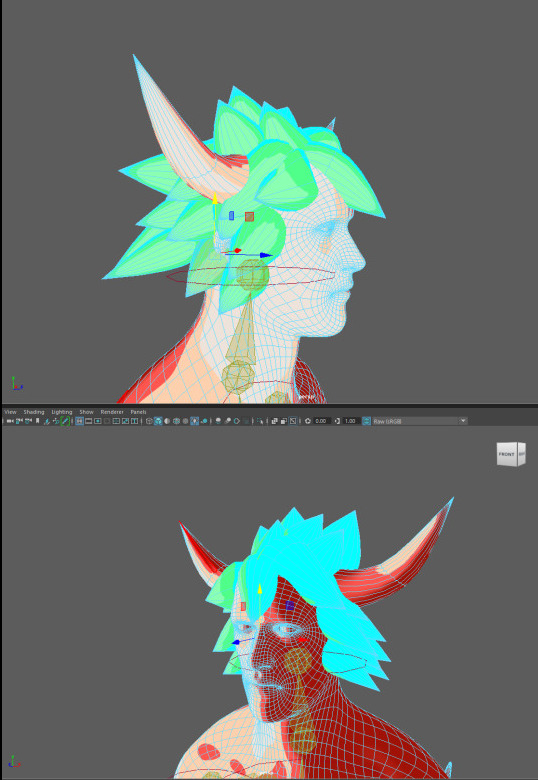
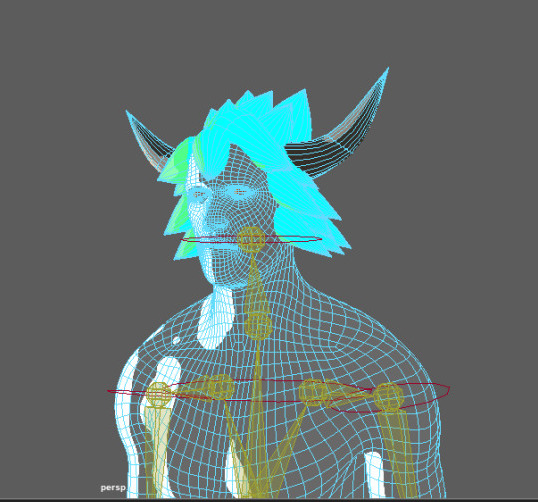
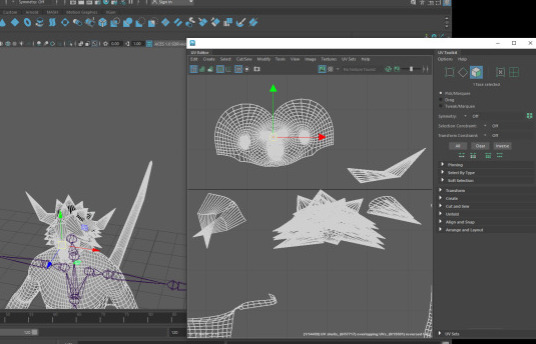
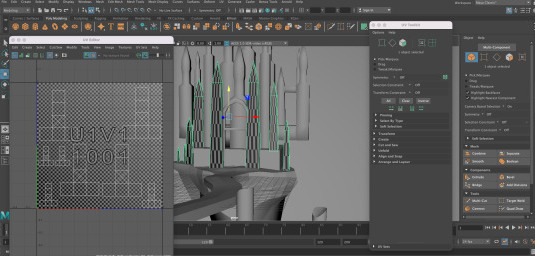
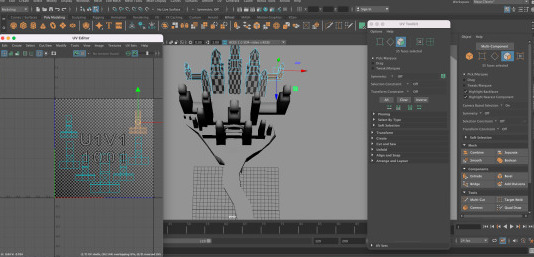
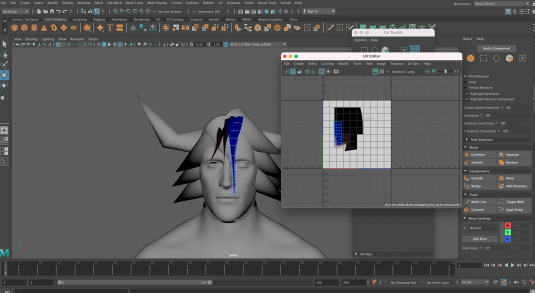
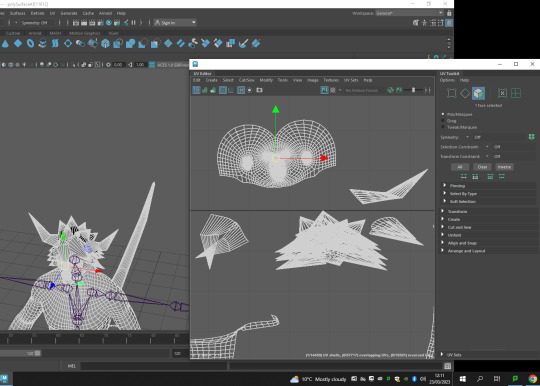
UV Mapping:
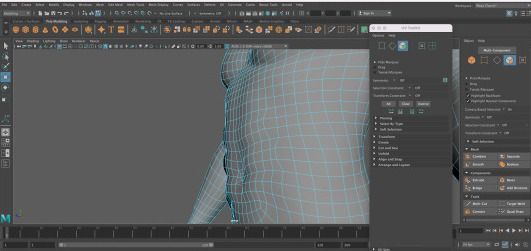
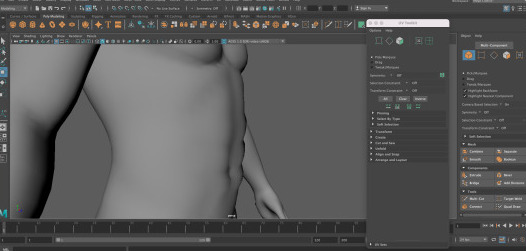
UV mapping in 3D modelling is generally pretty difficult. With this model provided I had to try and unwrap the UVs which is what’s done to add textures smoothly. With some help I made separations in parts of the body, making the UVs a lot cleaner and easier to texture. UVs are really difficult but I slowly got the hang of it, it’s still tricky and I’m not used to 3D at all-


While looking online at references I found some helpful tips on how to get the UVs right on the head/face of the model-
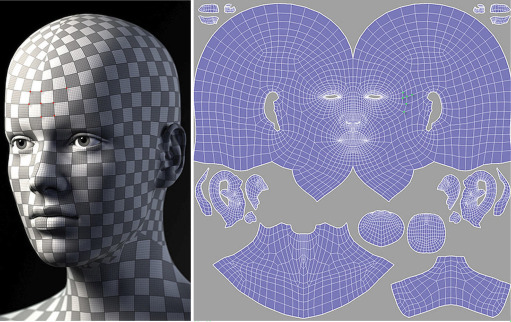
It’s tricky trying to figure out the right way to slice them, but these images helped me figure out they should at least look when cut.
Environment:
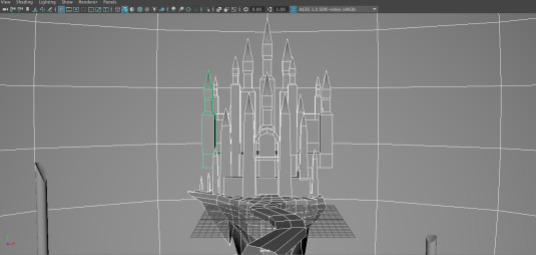
When I was making the castle I forgot to take pictures of the process, but this is basically my first attempt at making the castle. With some help to get started I added more to the pathways, I added the towers and structure and tried not to overdo it.
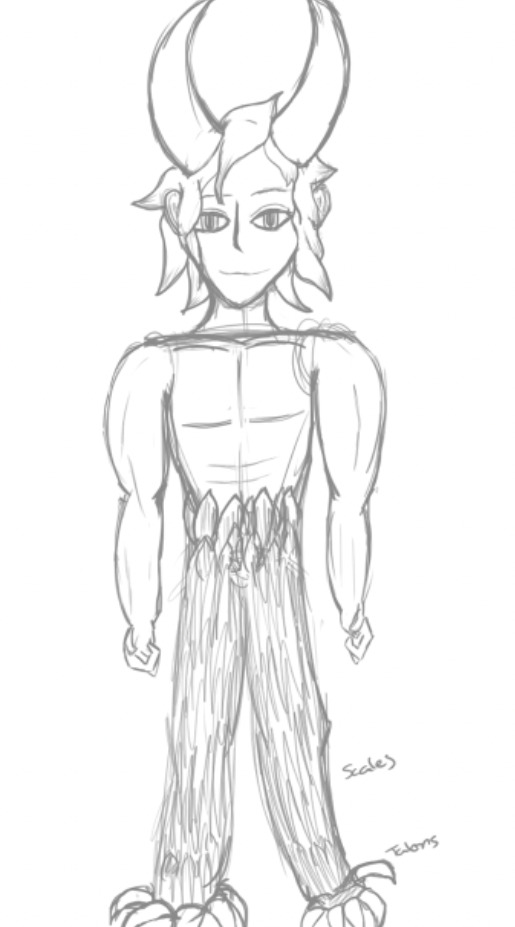
Models:
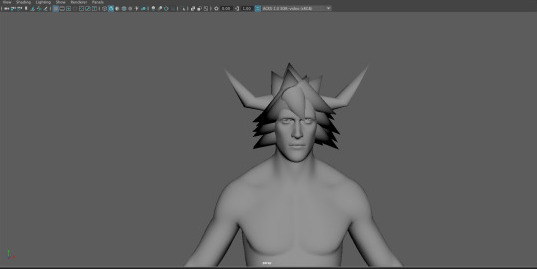
My model for the Dragon God. I used the basic model as a base because I couldn’t make a person for the life of me, but I managed to make him my own with the added details and more which I added later.
One technique I was shown was how to add textures from images imported to Photoshop and made into a PNG for the UV texture. I was also shown a technique on how to make clothing by duplicating the model and adding and subtracting from the top layer to leave behind clothing-
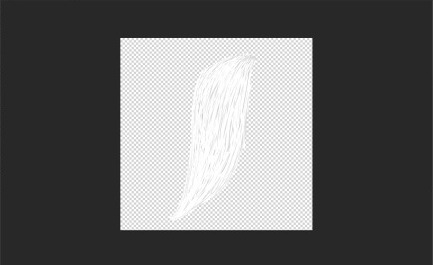
A texture I made for his hair in Photoshop-
The castle was pretty much complete by this point for the modelling phase. I got a helping hand with the layout of the ground and bridge. The building itself is fully mine and I modified parts of the ground and bridge, I just needed extra help to make sure nothing was clipping or would end up breaking-
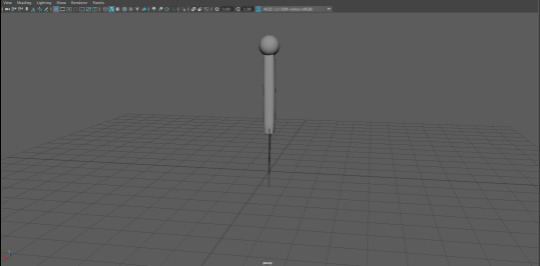
This was my first attempt at the prop. It’s just the basic shape first for the blade and orb at the top-

Modifications:
I added more hair to the character and all that was left was to do the scales and texture him, though I still didn’t know how to go about texturing him. I thought I should sculpt on the scales and sculpt the dragon feet before doing any texturing. UV-ing would be the most difficult thing for all of them-
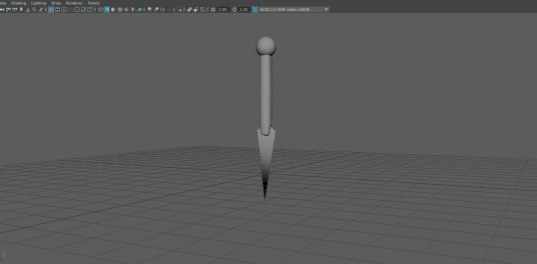
I updated the prop model. The blade is thinner and longer. The staff is thinner too. It looks close to my idea for the prop-

The castle has been smoothed and other platforms had been changed to make it more organic looking. I looked for different texturing techniques for the castle and backgrounds which I wanted to virtually draw. The background was a large sphere which encased the environment, it makes it easier to add a background. I want to make it dark with a black and red sky, bright enough to see it however. The bottom will be a type of element, I was thinking along the lines of lava or water, the lava matched the look of the environment and the look I had in mind for the background-

0 notes
Text
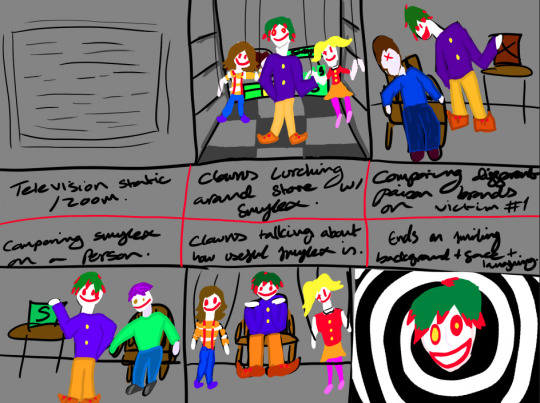
224 Smylex 2/2
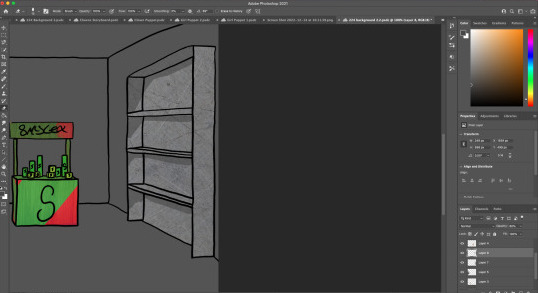
Backgrounds:
Using the 3D models I made in Maya, I put them into Photoshop and drew over them to create a 2D environment -


Adding wooden textures:
I added metal textures to the shelves and drew in the shadows over top. Using the opacity I made the shading -

The textures are subtle but become more noticeable when the rest of the scene is completed. I added textures to the floor as well. At first I liked the floor but then it started to bug me so I changed it later on-
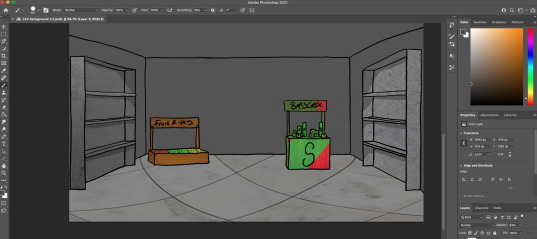
Final backgrounds:
These are my scenes with the last textures and images added to them. First I did the aisle and added the ceiling. I got the metal textures for the walls and added those in to give more depth. I like how the background shelves blends in to the ceiling -

With walls -

I wanted this to look more like a set, with the only colours coming from the poison and the food which could be contaminated by Smylex. The simplicity of the set gives of an eerie ness and uncanny valley vibe, this will be played up more with my audio I was making at the same time, it just needed some last minute tweaks.
With the floor bugging me I decided to change it so it blended in better -
In the editing process of the video I wanted to add in static images and darker areas to add a horror factor. I have edited video before for projects and I really love editing more than anything else, other than concept designing. The audio has sounds from both the movie and added music and effects free from YouTube. I had to edit pieces of the movie audio to cut out the talking over the broadcast in the movie.
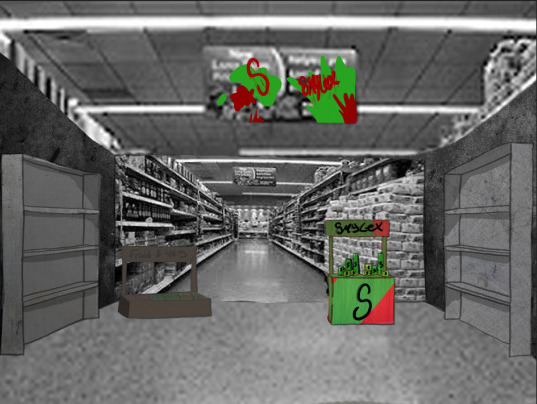
The second background had been changed. I didn’t like the walls in the draft so I got a brick texture to edit and apply into the scene I will be changing around a few things with the rooms again -

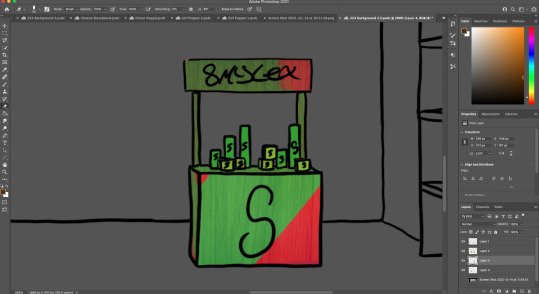
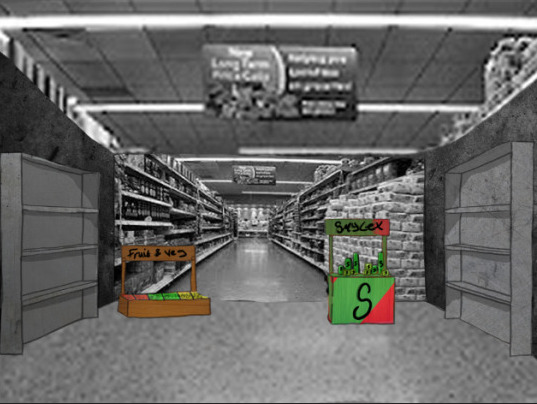
I decided to grey out the food in the first scene so it fits better with the narrative and the environment. The colours are slightly visible but it could still show it’s tampered with. I also added graffiti to the sign with the letter S for Smylex and also stained with the product itself. It makes the scene pop and pulls your attention towards the poisonous product -
I wasn’t able to complete as much as I’d have hoped because I have been struggling with health issues, but I managed to get the scenes, characters and audio all completed which I am happy with.
224 Audio:
After getting all my designs completed for the characters, scenes and props I managed to create my audio which I tweaked with Blender, I was more confident using Blender since I edited videos with this for my own projects. This is the mix of the edited movie audio, added sound effects and horror & circus music which I got from YouTube, copyright free -
https://va.media.tumblr.com/tumblr_roe9vyLnnI1ztoifh_720.mp4
I wanted a goofy animation with music but with sinister undertones. I t’s for an advertisement inside of a teaser trailer for a game or possibly series about killer clowns/demons who poisons people. I used three royalty free sounds for the music and ambiance and static effect for the ending. The animation will have static on screen which should let the viewer know they’re watching this from a TV screen playing a broadcast video. The main clown, Carnival will be speaking, the two female voices are the puppets. The looping laugh at the end which I also edited to make a longer loop, will show Carnivals head spinning on a spiral background until the screen is corrupted with white noise and static, until errors take over and it closes.
I feel the audio is decent for what I’m going with, it’s the first time I have edited audio or done editing in this way before, and I really enjoyed it. I feel as though I could do better now since then because I have learnt more with editing and I’ve moved onto a better software for my editing. There are tweaks that could be done to this sound here and there but overall I’m okay with the result of the audio.
1 note
·
View note
Text
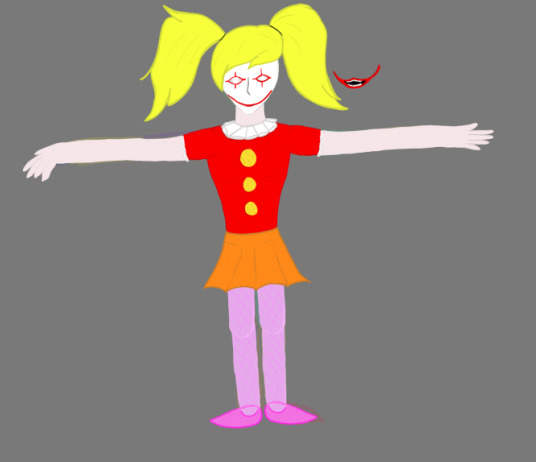
224 Smylex 1/2
Promotional Trailer Pitch:
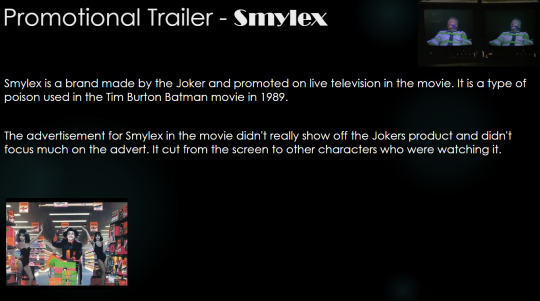
This was my pitch for a promotional trailer/advertisement for the fictional product Smylex. A product featured in Tim Burtons Batman in 1989. Tim Burton is a big inspiration for me and I love his twisted style in the 2D movies and his feature films.


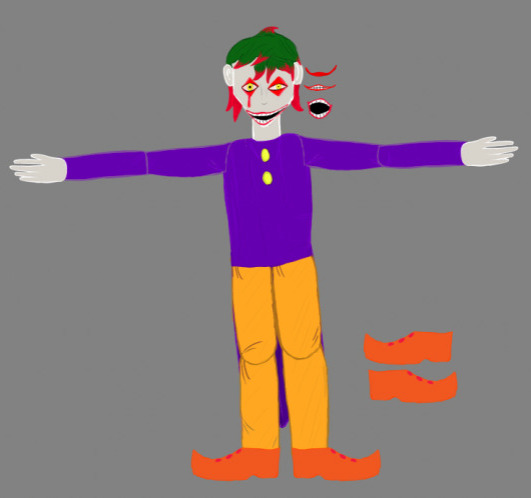
Characters:
These are the drafts of the clown/demon characters which I used for the promotional video. Starting with the main character followed by his puppets-

Puppets-


Character Puppets:
These are the complete drawings I made of the characters which I will use as the move-able puppets with separate pieces-

The third one was in its sketch phase. This is how I drew each of the pieces and knew how each piece should look connected to the other-

The different mouths are for all the characters and the shoes are for the main character who will be able to walk around, unlike the puppets who are stuck on their strings.
Update:
I made changes to the main character, dying the tips of his hair. I also completed the 3rd puppet-

Her hands were too big so I scaled them down and made her legs bigger, which looks better-

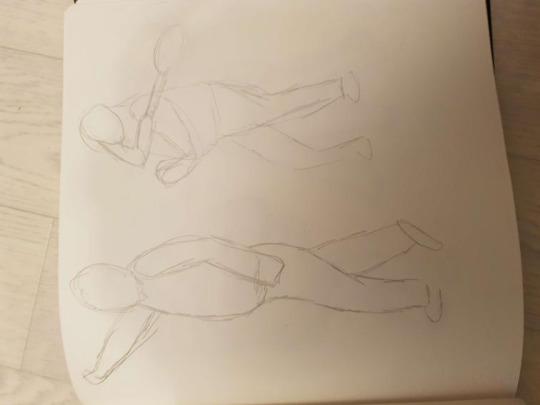
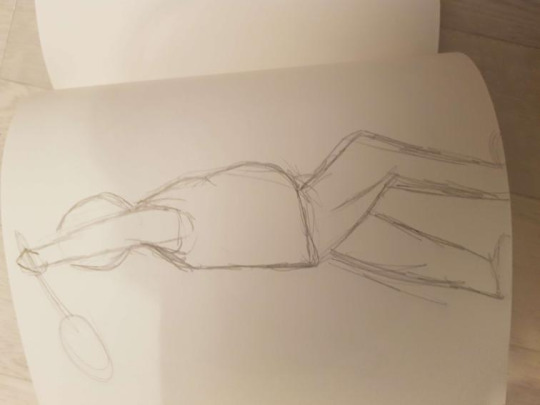
Props:
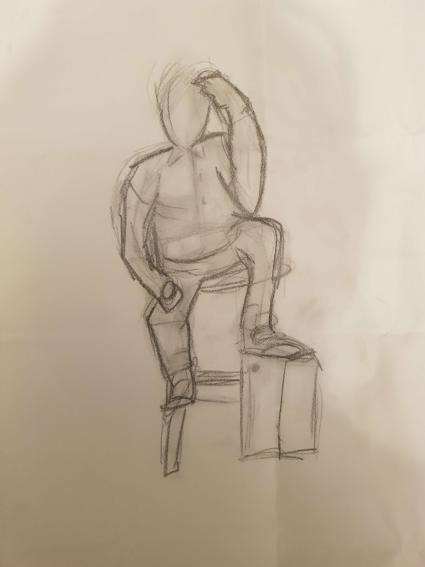
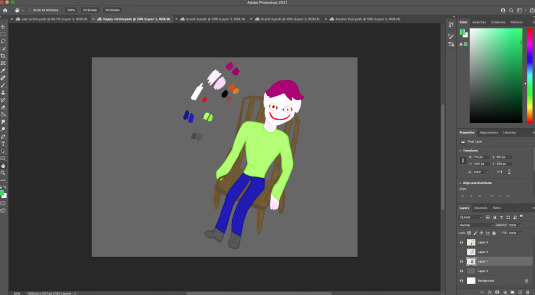
In the promotional video I wanted to make an eerie scene with a victim of the product sitting in a chair. So I have drawn a quick sketch of a wooden chair I want to use in the video. I wanted something with an old style but without any references -

More props:
Using the chair I made as a reference I made two victims. The Brand X victim and the Brand S victim. Brand X is basic poison, Brand S is the Smylex. The can of Smylex will be promoted at the end of the commercial-
Brand X:
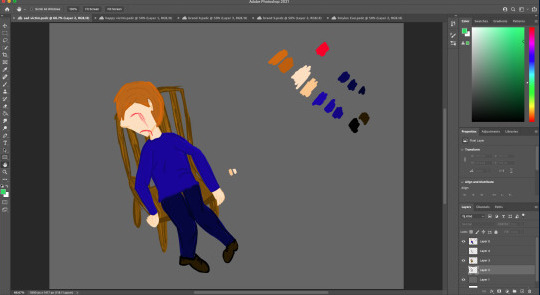
Brand S (Smylex):
Brand X box:

Brand S box:
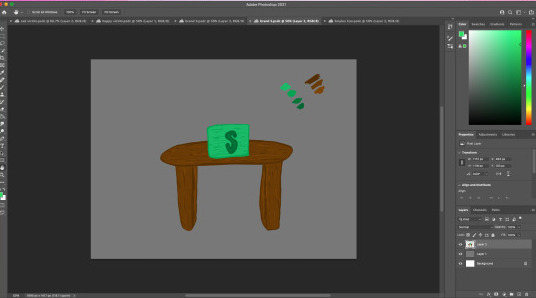
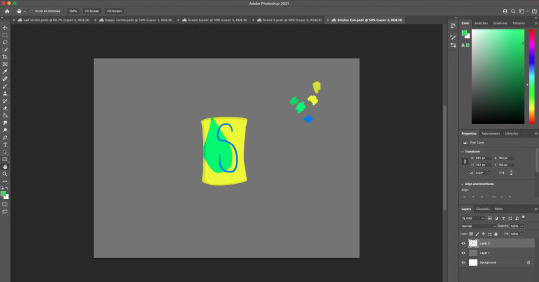
Can of Smylex. The teal droplet was an accident but ended up working well:
Environment:
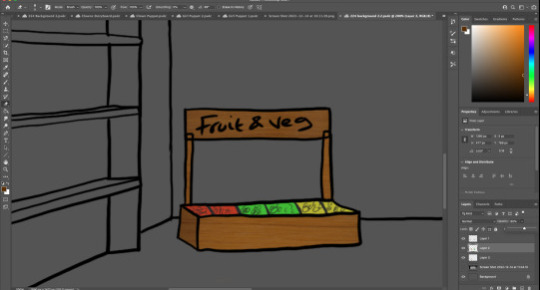
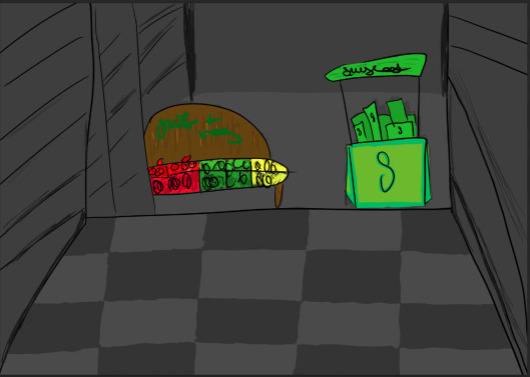
These are the background drafts I made in Photoshop, which everything else was made in too. The wonky style matches the characters well, so using my bad drawing “skills” I managed to make something which works. It is meant to look childlike since it’s about clowns and puppets. This is the first scene I made which will be the second act:

This one is the supermarket which the beginning of the video will take place in:

More detail and colours:
Animation Story Board:
This was my first storyboard for the promotional video-
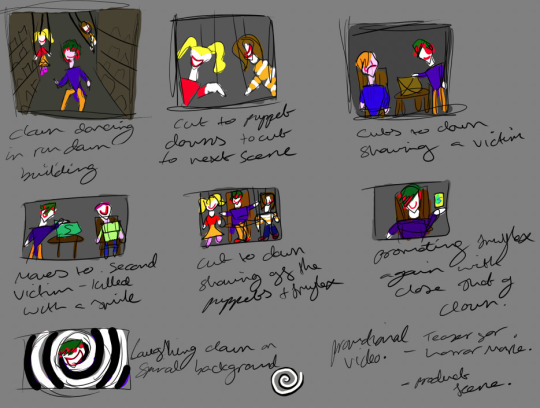
I was thinking about using Duik in After Effects to animate the video, making a skeleton rig and animating the movements. I also made a more defined storyboard so it would be easier to understand:
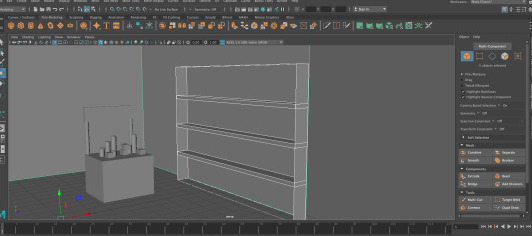
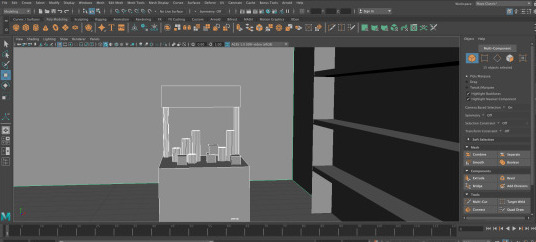
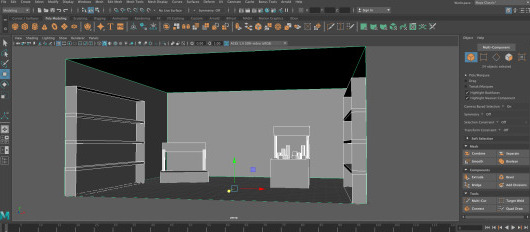
Modelling:
I used Maya to make a 3D background so drawing a 2D background would be easier and more accurate. I made the whole market scene with shelves and products-


Inspiration:
This is my inspiration for 224. As it is based around Tim Burtons Batman movie, I wanted to incorporate more of his style into the animation -
I really didn’t know what to do for this assignment at first, then I remembered the Smylex scene from the 1989 Batman film by Tim Burton, who I take a lot of inspiration from when it comes to style and story.
I wanted to add to this scene with my own characters and a different story. Instead of the Joker vs Batman this is Carnival, a killer clown/demonic entity who kills with poison, two of the victims/puppet monsters are also homage to the victims in the Jokers advert with the two models.
I wanted to make it kinda creepy, an advertisement used in a horror movie but drawn out like a cartoon, so friendly and childlike at first, but gradually gets darker and more unsettling.
0 notes
Text
222 Texturing

I decided to use light to make a more 2D sort of look to my character. I want it to look more stylized. This is a tester, changing the skin and the hair.

Changed the hair to a nice ice blue mix green
I changed the hair a bit so there’s less bald spots and it’s filled his entire head


The horns are now silver/grey and the skin is pale white, eyes are orange. I want to separate the top and bottom so the bottom half is black.


0 notes
Text
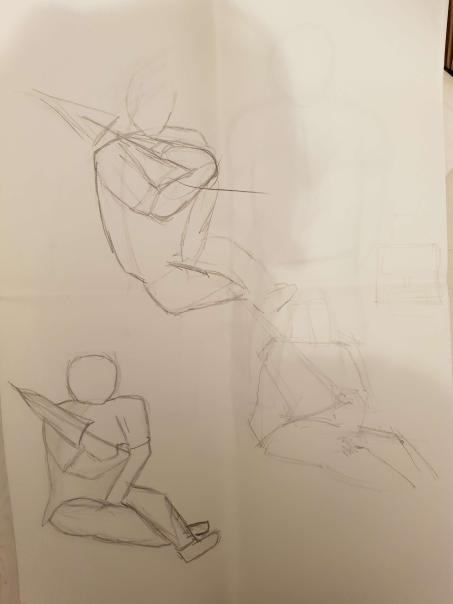
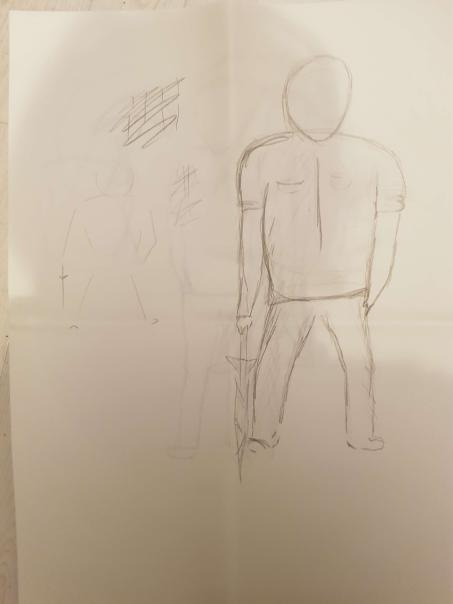
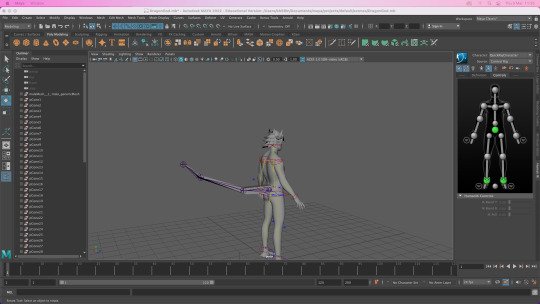
Animating
I have animated his first steps. It’s tedious but I prefer animating to modelling.

0 notes
Text
222
Tail is fixed, smoothed and attached


Also had to redo the rigging because it didn’t save properly and ended up broken, so I calibrated it again and now the parts move properly.
0 notes
Text
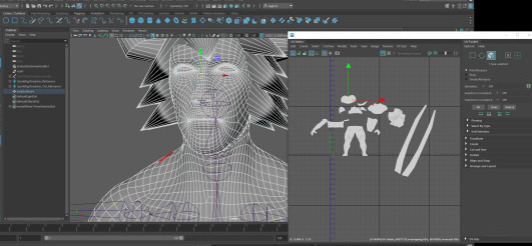
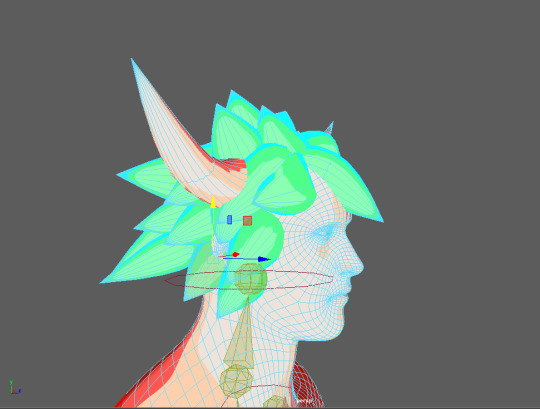
222
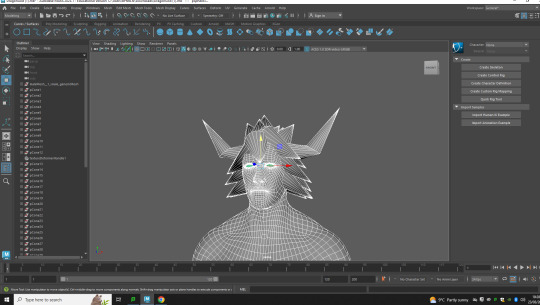

The rig is no longer on the model, the hair, horns and body aren’t connected, and there’s a stitch pattern up the length of the face. I now have to basically start from scratch again with the rigging and figure out how to re attach the body parts and hair.

Managed to combine everything again. Now I need to re do the rigging.
Re-doing UVs again


0 notes
Text
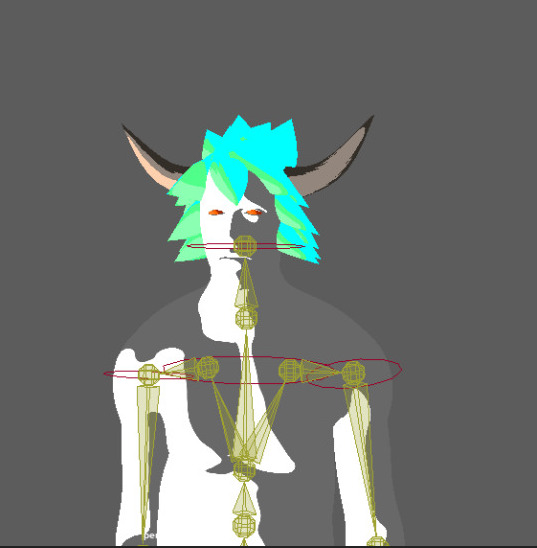
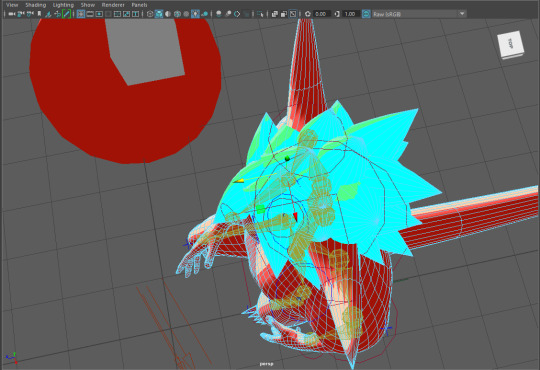
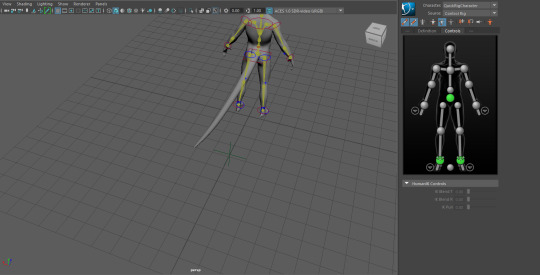
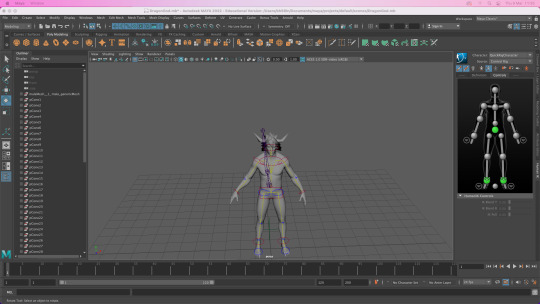
222 Rig
I managed to fix an automatic rig, fixing it in place to the model. I will need to fix the tail but as of now the joints are working on the main body, limbs and head. Even if he’s a little janky, he’s still movable and can be animated, he just won’t be perfect. He won’t need to move that much anyway.


0 notes