
Last Seen Blogs

storagechoiceascot
Untitled

kingofdiamonds069
Things I Like. You dont have to.

setupbep
Untitled

sorayax
Whosethis

soolarissss
the spleen
Text
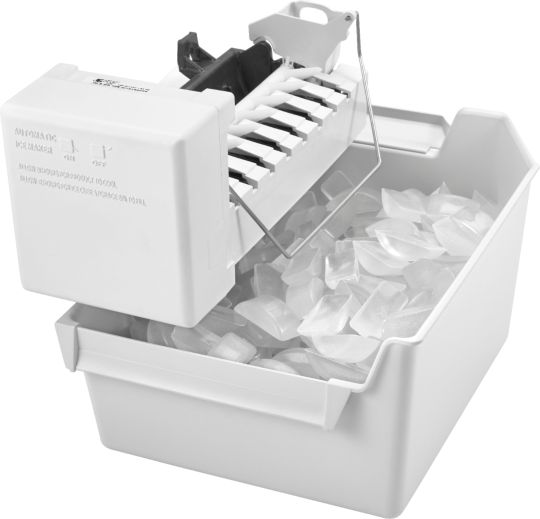
How Long Should It Take My Icemaker Bin to Fill Up?

Your ice maker should dump a tray of ice every 1-2 hours. Depending on the size of your ice maker bin, it should take about 24-48 hours for your ice maker bin to fill up completely.
If you suspect that your ice maker isn’t producing ice at the speed mentioned above, keep this in mind: One cycle only produces enough ice for 1-2 beverages (depending on how much ice you use and the size of the cup), so if you have a large family or constant use, your ice maker may have a difficult time keeping up with your demand. It may only take one or two rounds of drinks to empty out your refrigerator’s ice maker.
However, if your ice maker isn’t producing ice as quickly as it should be, there are several troubleshooting methods you can use to figure out the problem:
Temperature
The first thing to suspect is that the temperature is too high. If you have an interior thermometer, check the temperature inside your freezer. The temperature should be below 10 degrees or lower to produce ice. If you use an air thermometer, be sure to leave the door closed for at least 30 minutes before opening it and checking the thermometer for accuracy. A simpler and more delicious way of checking your ice maker temperature is with ice cream. If the ice cream is soft and mushy, it’s too warm. If it’s hard and difficult to scoop, the temperature is just right.
Water Valve
There are two water valves. One from your home, which supplies water to the refrigerator. The refrigerator also has a water valve that supplies water to the ice maker. If you have hard water or on a well, these valves can easily clog with sediment or sand. If your ice maker is going through the harvest mode, but is not filling with water many times this means that the refrigerator water valve is clogged and needs to be replaced.
Feeler Arm
The feeler arm is the sensitive metal wire that extends down from your ice maker and “feels” whether there is ice at the top of the bin. It stops your ice bin from overfilling. If the arm isn’t working right, it will tell the ice maker the bin is full even if it isn’t. Make sure the ice bucket is installed correctly. If the ice bucket is not installed correctly, the feeder arm might hit the bucket during harvest of the ice and stop the ice maker.
Ice Maker Cycle
If your ice maker stops in the middle of the cycle, this could mean that something is wrong with the electronics, or it could mean that something is wrong with the ice maker, which includes thermostat, motor, or heater. If you suspect an issue with the electronics or motor, call a technician so they can find the problem and advise you on what parts need to be repaired or replaced.
0 notes
Text
What happens when you use too much soap in your washing machine?
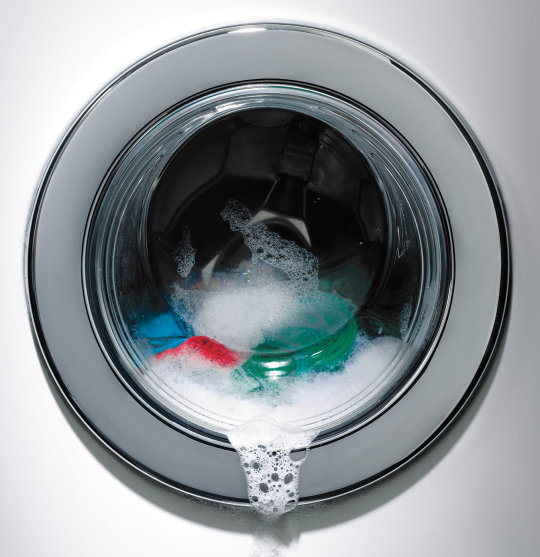
Many of our customers are surprised (and sometimes doubtful) when we explain that the problem with their washing machine was caused by using too much laundry detergent—not a manufacturer defect. Most customers don’t want to hear this, but the reality is that a large number of the washer repair problems we encounter are caused by improper use of laundry soap. To fully understand this concept, you first have to understand why too much soap leads to washer problems.
Warning Signs You’re Using Too Much Laundry Soap
Over the last decade or so, federal regulations have required washing machine manufacturers to reduce the amount of water that is used per load. If you’re still using as much soap as you did with your older machine, the new machine won’t use enough water per load to break down the soap. The residual soap is causing some huge problems for owners of newer, “efficient” washing machines.
You can attempt to bypass the low water level by selecting an extra rinse and pre-wash cycle—this will help ensure that the soap if fully rinsed from the load. However, it is best to simply cut the soap down to a tablespoon per load. Here are the top signs that you’re using too much laundry soap:
1. Your washer boot feels slimy.
2. Your washer has a strong odor.
3. You notice dark spots on the door boot.
Common Repair Complaints and Causes.
Complaint # 1: “My washer won’t drain, stops mid-cycle, and/or has an error code.”
If you’re getting the SUD or ND error code, the problem may be the result of too much soap. On the Whirlpool Duet, the SUDS LOCK means that there is an overdose of detergent detected during the Wash Cycle. The motor control unit senses a suds lock condition by analyzing the current draw on the drive motor. If “Sud” is displayed, a potential suds lock is detected. This may signify a bad pump, an extra heavy load, excessive detergent, or excessive suds. If your machine is too old to detect an error code, it will likely just turn off.
Clearing the SUD error can be as simple as running an extra load without soap to clean the machine, but this is not always the case. Too much suds may damage the machine. Your machine has a water level pressure switch attached to a hose near the bottom of the tub. When you use too much laundry soap, the foam travels up the hose and may eventually come in contact with the switch. When this happens, the wet, foamy soap destroys the switch, forcing
you to call for repair. As a rule of thumb, you should never use more than a tablespoon of soap to avoid this problem.
Complaint #2: “My washing machine has a foul odor and/or causes a pungent odor in my clothing”
The nasty odor coming from your washing machine is very likely the result of using too much liquid fabric softener and soap over an extended period of time. Some laundry detergents and nearly all fabric softeners contain a small amount of animal fat. When you use too much of these products, the fat will congeal and gum up on the lower part of the machine under the tub. In most cases, this area of the machine is not accessible to consumers, so it is very difficult to clean. Using too much soap over a period of 6 months to 1 year will cause this goo to grow.
As the congealed soap scum forms, mold, dirt, and bacteria stick to the goo, which in turn creates a very nasty odor. You may start to notice the odor when you open the washer door, but over time the odor can affect your clothing if you don’t remove them as soon as the cycle ends. Once you’ve reached this level of stink, it can be very difficult to eliminate the odor without the help of a skilled repair professional.
Complaint #3: “My washing machine leaves dark spots / rust on my clothing”
If your front loading washing machine seems to be leaving dark spots or rust on your clothing, the problem is likely the result of using too much laundry soap. In most cases, the dark spots are caused by the mold growing on your washer’s door boot. As the soap scum collects on the door boot (and possibly other areas of the machine), humidity allows the mold to grow. As soon as you notice the mold growing, you’ll want to have the boot cleaned or replaced ASAP.
Start by inspecting your door boot. You’ll want to lift up the boot to inspect the areas you can’t see. If you notice mold, call our office with your washing machine’s model number in hand to request an estimate to have the door boot replaced. This will make the machine smell nice and fresh, and stop the machine from leaving spots on your clothing.
0 notes
Text
Solutions for Dishwasher isn’t Drying Dishes
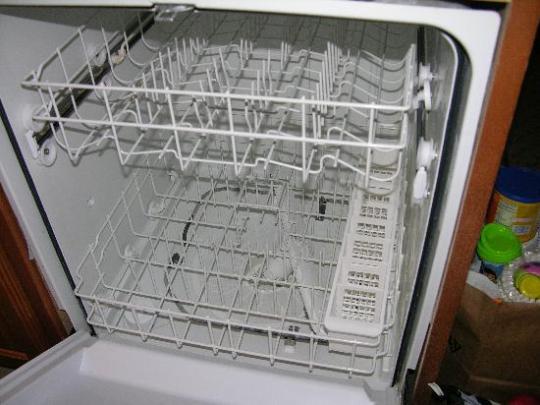
If your dishwasher is brand new, then you need rinse aid! If you just purchased your dishwasher and the dishes aren’t dry at the end of the cycle, then the problem is likely related to the lack of rinse aid coating in your machine. Rinse aid must be used for at least 30-45 cycles to season the inside of the tank to improve drying. Be sure to add rinse aid to your machine, and keep the rinse aid reservoir full.
If the dishes are still wet after the tub has been properly seasoned, there are a few tricks you can use to help improve your dishwasher’s drying efficiency (which will help you avoid a service call).
What to do and look for when a dishwasher isn’t drying dishes
Keep the Rinse Aid Reservoir Full
Especially if you’ve never used rinse aid in your appliance, the fix could be as easy as adding a rinse aid in your dishwasher. Most rinse aids, like Jet Dry, are advertised as a cleaning agent that makes your dishes shinier, but they also help a lot with the drying process. When released in your dishwasher, a rinsing aid makes the dishes water repellent which in turn helps the water evaporate more effectively.
What’s in your dishwasher?
Separate your glassware and your plastic dishes and wash those in different loads. Glass retains heat very well, which helps it dry much more effectively. Plastic, on the other hand, is not so great at retaining heat, which is why you see little drops of water left over when unloading these dishes. Another good idea to ensure dry dishes is to load the dishwasher correctly. Bowls and cups should face downward in order to not fill up with dirty dishwater.
Adjusting cleaning time
New models of dishwashers have sensors built-in that sense how clean dishes are, adjusting cleaning times. Cleaner dishes get a shorter clean time, at a lower temperature, which then leads to less effective drying. There are also “eco-friendly” settings that also speed up wash times, so be aware of your dishwasher’s settings. A great thing to remember for any of these factors is the dirtier the dishes, the better. Don’t rinse dishes before loading them; just scrape excess food into the trash and load.
Is the water temperature hot enough?
Another reason why your dishwasher isn’t drying dishes could have to do with the water in your machine. Dishwashers can heat water up anywhere from 130-170 degrees. It’s important to get the water to this temperature in order for it to eventually evaporate. An important tip for the winter season is to run hot water before running your dishwasher. This can help heat the water faster so that the temperature can get hot enough to evaporate and dry dishes.
If you’ve tried these solutions, but still have issues with your dishwasher not drying properly, contact Premier Appliance Repair for fast dishwasher service.
0 notes
Text
What happens when you use too much soap in your washing machine?

Many of our customers are surprised (and sometimes doubtful) when we explain that the problem with their washing machine was caused by using too much laundry detergent—not a manufacturer defect. Most customers don’t want to hear this, but the reality is that a large number of the washer repair problems we encounter are caused by improper use of laundry soap. To fully understand this concept, you first have to understand why too much soap leads to washer problems.
Warning Signs You’re Using Too Much Laundry Soap
Over the last decade or so, federal regulations have required washing machine manufacturers to reduce the amount of water that is used per load. If you’re still using as much soap as you did with your older machine, the new machine won’t use enough water per load to break down the soap. The residual soap is causing some huge problems for owners of newer, “efficient” washing machines.
You can attempt to bypass the low water level by selecting an extra rinse and pre-wash cycle—this will help ensure that the soap if fully rinsed from the load. However, it is best to simply cut the soap down to a tablespoon per load. Here are the top signs that you’re using too much laundry soap:
1. Your washer boot feels slimy.
2. Your washer has a strong odor.
3. You notice dark spots on the door boot.
Common Repair Complaints and Causes.
Complaint # 1: “My washer won’t drain, stops mid-cycle, and/or has an error code.”
If you’re getting the SUD or ND error code, the problem may be the result of too much soap. On the Whirlpool Duet, the SUDS LOCK means that there is an overdose of detergent detected during the Wash Cycle. The motor control unit senses a suds lock condition by analyzing the current draw on the drive motor. If “Sud” is displayed, a potential suds lock is detected. This may signify a bad pump, an extra heavy load, excessive detergent, or excessive suds. If your machine is too old to detect an error code, it will likely just turn off.
Clearing the SUD error can be as simple as running an extra load without soap to clean the machine, but this is not always the case. Too much suds may damage the machine. Your machine has a water level pressure switch attached to a hose near the bottom of the tub. When you use too much laundry soap, the foam travels up the hose and may eventually come in contact with the switch. When this happens, the wet, foamy soap destroys the switch, forcing
you to call for repair. As a rule of thumb, you should never use more than a tablespoon of soap to avoid this problem.
Complaint #2: “My washing machine has a foul odor and/or causes a pungent odor in my clothing”
The nasty odor coming from your washing machine is very likely the result of using too much liquid fabric softener and soap over an extended period of time. Some laundry detergents and nearly all fabric softeners contain a small amount of animal fat. When you use too much of these products, the fat will congeal and gum up on the lower part of the machine under the tub. In most cases, this area of the machine is not accessible to consumers, so it is very difficult to clean. Using too much soap over a period of 6 months to 1 year will cause this goo to grow.
As the congealed soap scum forms, mold, dirt, and bacteria stick to the goo, which in turn creates a very nasty odor. You may start to notice the odor when you open the washer door, but over time the odor can affect your clothing if you don’t remove them as soon as the cycle ends. Once you’ve reached this level of stink, it can be very difficult to eliminate the odor without the help of a skilled repair professional.
Complaint #3: “My washing machine leaves dark spots / rust on my clothing”
If your front loading washing machine seems to be leaving dark spots or rust on your clothing, the problem is likely the result of using too much laundry soap. In most cases, the dark spots are caused by the mold growing on your washer’s door boot. As the soap scum collects on the door boot (and possibly other areas of the machine), humidity allows the mold to grow. As soon as you notice the mold growing, you’ll want to have the boot cleaned or replaced ASAP.
Start by inspecting your door boot. You’ll want to lift up the boot to inspect the areas you can’t see. If you notice mold, call our office with your washing machine’s model number in hand to request an estimate to have the door boot replaced. This will make the machine smell nice and fresh, and stop the machine from leaving spots on your clothing.
0 notes
Text
How Long Should It Take My Icemaker Bin to Fill Up?
Your ice maker should dump a tray of ice every 1-2 hours. Depending on the size of your ice maker bin, it should take about 24-48 hours for your ice maker bin to fill up completely.
If you suspect that your ice maker isn’t producing ice at the speed mentioned above, keep this in mind: One cycle only produces enough ice for 1-2 beverages (depending on how much ice you use and the size of the cup), so if you have a large family or constant use, your ice maker may have a difficult time keeping up with your demand. It may only take one or two rounds of drinks to empty out your refrigerator’s ice maker.
However, if your ice maker isn’t producing ice as quickly as it should be, there are several troubleshooting methods you can use to figure out the problem:
Temperature
The first thing to suspect is that the temperature is too high. If you have an interior thermometer, check the temperature inside your freezer. The temperature should be below 10 degrees or lower to produce ice. If you use an air thermometer, be sure to leave the door closed for at least 30 minutes before opening it and checking the thermometer for accuracy. A simpler and more delicious way of checking your ice maker temperature is with ice cream. If the ice cream is soft and mushy, it’s too warm. If it’s hard and difficult to scoop, the temperature is just right.
Water Valve
There are two water valves. One from your home, which supplies water to the refrigerator. The refrigerator also has a water valve that supplies water to the ice maker. If you have hard water or on a well, these valves can easily clog with sediment or sand. If your ice maker is going through the harvest mode, but is not filling with water many times this means that the refrigerator water valve is clogged and needs to be replaced.
Feeler Arm
The feeler arm is the sensitive metal wire that extends down from your ice maker and “feels” whether there is ice at the top of the bin. It stops your ice bin from overfilling. If the arm isn’t working right, it will tell the ice maker the bin is full even if it isn’t. Make sure the ice bucket is installed correctly. If the ice bucket is not installed correctly, the feeder arm might hit the bucket during harvest of the ice and stop the ice maker.
Ice Maker Cycle
If your ice maker stops in the middle of the cycle, this could mean that something is wrong with the electronics, or it could mean that something is wrong with the ice maker, which includes thermostat, motor, or heater. If you suspect an issue with the electronics or motor, call a technician so they can find the problem and advise you on what parts need to be repaired or replaced.
1 note
·
View note