
lilacharlie
Lila Charlie
Lila provides support on Tp-link, Zmodo Cam, Wyze Cam,Amped, & Netgear device setup and login. Get guaranteed resolution on errors that affect your day-end productivity.
https://linktr.ee/lilacharlie
31 posts
Don't wanna be here? Send us removal request.
Last Seen Blogs

gwmworshipsasianalphas
ASIAN ALPHA WORSHIP

unhonestlymirror
РУС - НІ PEACE -ДА

lordsmaf
It's Over(soul)

pacinobooty
Now @purelypacino

hyowhs7le
¡reqs: open!
Text
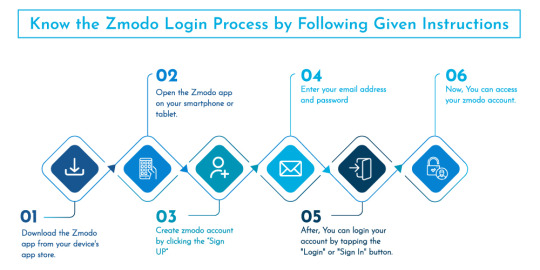
Know zmodo login process by given instructions in image.
0 notes
Text
How to Login to Asus Router?
Logging into your router is essential, as you’ll gain access to the router’s admin panel. You can login to Asus router within a few easy steps. Once you are logged in, you can configure the settings of the router accordingly. Afterward, you can make changes to the router, as you see fit. Therefore, it’s important to log into the router.
If you want to know the procedure for the Asus router login process, keep reading! Further, we’ll go over the login procedure thoroughly.
Procedure to Login to Asus Router
For the login, you require the IP address, username, and password of the router. You can find the login credentials on the router only. You won’t be able to log in using the incorrect details. Follow the steps below to log into Asus router:
Firstly, you need to connect a device to the router’s network.
On that device, open a web browser and enter the IP address or the router.asus.com in the web address.
After that, the login page of the router will appear. Enter the username and password of the router to log in completely.
Now, you can configure the settings of the router.
This is how you can login to Asus router. If there are any difficulties you are facing with the router, you can contact us for an instant solution.
0 notes
Text
Steps of Belkin wifi extender setup
The Belkin wifi extender setup process helps you to connect your extender to your router’s network. The web browser should be running on the latest version or else you will face issues while attempting to go about the Belkin wifi extender setup.
Here are the steps that you can refer to in order to set up a Belkin wifi extender.
First of all, connect your computer to the Belkin range extender’s network.
Open a web browser and enter the default web address http://belkin.range in the address bar.
After that, press Enter and you will be redirected to the Belkin wifi extender setup page.
Click Get Started and the setup wizard will start walking you through the instructions.
Thereafter, configure the wireless settings of your range extender and follow the on-screen instructions to set up your wifi extender.
Finally, the device will be set up successfully.
You don’t have to use any software or a setup CD to configure your range extender with the router. You just have to use the default web address belkin.range. The web address lets you get inside the Belkin wifi range extender and configure or modify the settings as per your requirements.
0 notes
Text
Mesh Wi-Fi System Setup
A Mesh Wi-Fi network amplifies an internet connection’s range by setting various connection points throughout the house or building. Generally, Mesh Wi-Fi systems include a device identified as the main router that is directly connected to the modem. It also includes one or two satellite nodes. These nodes are placed around the house, each node requires an electrical hook-up.
If a single Mesh Wi-Fi system isn’t sufficient for your house or workplace, you can buy more nodes. These nodes will effortlessly blend into your Mesh system. Just make certain that you have executed the Mesh Wi-Fi system setup process properly. If you have no idea about the process, don’t worry! In this blog, we’ll discuss the correct procedure thoroughly.
Steps for the Mesh Wi-Fi System Setup
The setup of a Mesh Wi-Fi system is incredibly important. Because if you want to make the best out of your system, you need to install it accurately as well. The procedure for the Mesh Wi-Fi system setup is as follows:
First, you need to choose a system, most appropriate for you. If you have already chosen a system, install its app on your phone.
Next, unplug the router and connect it to the main node using an Ethernet cable.
Plug the router and wait till the node and the router power up.
Then, create an account on the app with the Mesh network.
After creating the account and logging in, link the primary node to the account. To form the connection, scan the QR code of the primary node or enter a serial number.
Next, when prompted, enter a name or the node’s location. Add the number of satellite nodes, you can edit this later as well.
Then, plug in all the nodes one by one. When a node is added, you’ll be asked for its location in the house.
Once you’re done adding the nodes, go to every room and the outdoor areas to check the network.
This is the final procedure for the Mesh Wi-Fi system setup. If you are facing any issue with the setup of the Mesh system, get in touch with our team.
0 notes
Text
How to Reset the Zmodo Camera?
It is pretty easy to reset Zmodo camera to the factory default settings. If you want to learn how to reset the Zmodo camera, you are on the right page. This page will teach you how to restore the factory default settings on your Zmodo home security camera without any fuss. Resetting the Zmodo home security camera to its original settings is not very complex, and even beginners or new users can do it without any hassle.
In this post, we will help you learn how to reset Zmodo camera. Most people want to learn about it in order to resolve any issues that they face with their devices. Although Zmodo home security cameras are some of the finest cameras on the market, coming across some problems with your device is totally common.
So let’s start with the Zmodo camera reset guide.
Steps to reset Zmodo camera
In this section, we will explain to you how to reset Zmodo camera to the factory default settings. Make sure you follow the instructions very carefully in order to avoid any issues with your device.
First of all, make sure you turn On your Zmodo camera.
Make sure you connect it to the power supply and turn it On properly.
After that, locate the reset button on your Zmodo home security camera.
You may need a sharp object to press the button as the reset button is located a little inside the Zmodo camera’s frame.
Thereafter, press and hold the reset button for about 10 seconds.
After that, release your Zmodo camera’s button and wait for a few seconds.
The main light of your camera will blink for a few seconds and then it will stop.
At last, the Zmodo camera will be reset to the factory default settings.
Why you should reset Zmodo camera?
Restarting your Zmodo home security camera is not the best option to fight certain problems such as WiFi connectivity issues. However, resetting your Zmodo camera to the factory default is one of the best options to remove any issues or glitches from the device By doing so, you are resetting your home security camera’s settings as well as putting it back on default and setting it again.
Some problems can affect your Zmodo camera options that can result in a technical problem, resetting your device can help fix those problems proactively. But make sure you set up your Zmodo camera with utmost care.
Final thoughts
This post was all about how to reset Zmodo camera to the factory default settings. The factory default settings are the original settings of your device with which it is supplied to you. Once you reset your Zmodo home security camera, you need to set up the camera once again.
We recommend that you follow the aforementioned steps very carefully while attempting to reset Zmodo camera. We hope this page helped you bring your Zmodo camera back to its default settings. If you need further assistance, please feel free to reach out to our support team.
0 notes
Text
How to Reset Tp Link Router to Factory Defaults?
Wondering how to go about the Tp Link router reset without any fuss? There are two main yet widely-used methods using which you can learn how to reset Tp Link router. The first method needs you to press the reset switch or button that is located on your Tp Link WiFi router. The second Tp Link reset method is all about using the web interface to reset your router.
Prior to discussing these two methods, it is important that we show you something that is crucial about the Tp Link router reset process. Resetting your Tp Link WiFi router helps you bring your device back to its original state.
In simple words, the Tp Link WiFi router will restore its factory default settings that are present on your device when you purchase it from the seller. Still, there’s a main thing that is yet to be shared with you all. Resetting your router will remove everything from its internal memory, which means that all your configurations and settings will be erased.
In this post, we will discuss how to reset Tp Link router to its factory default settings with the help of the aforementioned two methods.
Tp Link router reset using the reset button
The Tp Link router’s reset button is located on the Tp-Link WiFi router. The reset button method is the easiest way of resetting your WiFi router to its factory default settings. This Tp Link router reset method is also known as the hard reset method as it completely restores your device to the original or factory default settings. Kindly follow the steps below:
First of all, you need to find the reset button on your WiFi router.
It will be there on the backside of the WiFi router.
The Tp Link router reset button is installed a little inside the frame of your Tp Link router.
Press your router’s reset button with the help of a paperclip or a needle.
After that, hold down the Tp Link router reset button for good 15 seconds.
Release your router’s button once all the LEDs on your router start flashing.
Finally, wait for your router to finish the Tp Link router reset process.
Bonus tip - Make sure you do not power Off your device in the middle of the Tp Link router reset proces. If you do so, the device may get stuck and you might land into some serious trouble. So make sure the power outlet in which the router is plugged is working properly.
Tp Link router reset fails. How to fix it?
If you can’t reset your Tp Link router, make sure you do not panic. First of all, make sure the TP Link router is powered On and in a working state. In case the power outlet in which the router is plugged in is faulty, you need to change the power socket. If you can’t reset your device using this method, you can use the web interface method. For that, you need to login to the Tp link router using the default web address tplinkwifi.net.
Bottom line
This post was all about the Tp Link router reset using the reset button method. We hope you liked this post and that it helped you learn how to reset Tp Link router to its default factory settings. If any issues come up on your router or you are unable to reconfigure the router, kindly get in touch with our support team for further assistance. Our support team consists of technicians who can resolve your issue in the best way possible.
0 notes
Text
How to Change WiFi on Wyze Cam?
Are you looking for some online information about how to change WiFi on Wyze cam? Well, you have landed the right page, and here, we will put down the easiest way of pairing your Wyze camera to a new WiFI connection or network. The solution to this query is taking the whole task as if you are connecting to a new WiFi connection. Although you are using your old camera to connect to a new network, you need to treat use the steps that you would use in case of a new camera.
Wyze home security cameras are very reliable yet affordable, and ensure to safeguard your premises from intruders. While some new users or old may find it easy to change WiFi on Wyze cam, some may find it difficult or complicated. However, you don’t have to worry about it.
In this post, we will discuss how you can change the WiFi network on your Wyze home security camera using the Wyze app. So let’s start with the instructions.
Steps to change WiFi on Wyze cam
This part of the post will deal with the steps to change WiFi on Wyze cam. It is important that you follow these steps with utmost care and precision. Even a minor error can lead you to a serious trouble and you may want to seek professional help;
Firstly, download and installl the Wyze app on your smartphone or tablet.
Make sure to download the application from a trusted source.
The Wyze camera app is available on both iOS and Android.
Launch the Wyze mobile app on your device.
Login to the Wyze camera and you will see the home screen.
Andequate power supply to the Wyze camera shall be ensured at all times.
After that, find the Setup button on your Wyze home security camera.
Press and hold the Setup button for good 5 seconds.
Therafter, you will hear a sound “Ready to connect.”
Launch the Wyze app and click on the three-dot icon.
After that, tap the “Add a Product” button.
To change WiFi on Wyze cam, go to the Wifi settings page.
Hereon, you can easily change the wireless settings of your Wyze camera.
At last, scan the QR code placed on your Wyze home security camera.
Finally, follow the in-app instructions and you will successfully change WiFi on Wyze cam without any hassle. If you face any issues, please abort the process and restart.
Can’t change WiFi on Wyze cam. How to fix it?
If you are unable to change the wireless network settings on your Wyze home security camera, please follow the steps below:
Firstly, ensure that the WiFi router is powered On.
Make sure you don’t enable the MAC filtration service on your network.
If it is enabled already, please disable it as soon as possible.
After that, ensure that the router or network is not experiencing frequent network drop-offs.
If the issue persists, you can seek professional help to resolve the issue instantly.
Bottom line
This was all about the instructions to change WiFi on Wyze cam. We hope you found this post very helpful and that it helped you change wireless settings on your Wyze home security camera.
If you face any issues with your device or can’t change WiFi settings on your camera, we recommend that you reach out to our support team for further assistance. Our Wyze-dedicated support team consists of experts who bring years of experience in resolving complex user issues.
0 notes
Text
How to view zmodo cameras on pc?
You may monitor your real estate at your home or place of business from anywhere in the globe with the help of the user-friendly ZMODO app for smartphones and tablets. Getting a Zmodo camera adds an extra degree of protection. There is a Zmodo home security camera for you, no matter your budget. This camera is a terrific deal since it is simple to set up and has a tonne of amazing capabilities. What happens, however, if you wish to see the footage from a zmodo camera on computer or that of a zmodo camera on PC? We'll go through easy methods to connect your Zmodo camera to a computer in this post.
How to view zmodo cameras on pc:
You will need internet connectivity on your PC or laptop in order to watch your Zmodo camera on that device. To see all live content anywhere in the globe, launch the browser on your laptop, go to the zmodo user login page, and register or sign in with your current account.
user.zmodo.com is the webpage is viewed your zmodo cameras online i.e zmodo camera on pc or zmodo camera on a computer. This will allow you to control the device from your computer’s web browser. We have seen how to view zmodo cameras on pc or zmodo cameras on a computer. For more information regarding the same, get in touch with our team.
0 notes
Text
How to Reset Asus Router?
Want to learn how to reset Asus router? Asus router factory reset is one of the most useful functions that you would want to learn. You may occasionally have hardware or software difficulties with your router, as well as sluggish internet on end devices linked to the router’s network. The majority of the problems can be fixed with a simple power cycle.
Resetting the Asus router to the factory default settings will remove all the configurations, connections, wireless logs, and passwords from your router. You might need to reconfigure the Asus router in order to access the internet through the wireless network. So let’s learn how to reset Asus router.
Firstly, locate the reset button on the Asus router’s back or side panel.
Secondly, take a paperclip and press the reset button for 5-10 seconds.
Hold the button with the paperclip until the power LED light starts to blink.
Next, your Asus wifi router will restart and the LED lights will turn on.
The Asus device is reset and you need to login to the router’s web GUI to reconfigure it.
There are two ways through which you can learn how to reset Asus router to the factory default settings. The easiest method to factory reset Asus router is using the reset or push button. Make sure you reconfigure your router after restoring the factory default settings.
0 notes
Text
Simple Steps to Orbi login
The Orbi login process allows you to access the Netgear Orbi WiFi router using multiple ways. In this post, we wil learn the two most widely used methods to login to Orbi. You can either perform the Orbi login through the Orbi app or use the web interface with the help of orbilogin.net.
Orbi login through the Orbi app
Firstly, install the Orbi app on your smartphone or tablet.
As the app installation completes, open the app and agree to the Terms & Conditions.
Thereafter, the Orbi app will ask you to approve a few permissions if this is your first time with the Orbi app.
Tap Get Started to log in to Orbi router. In case you don’t have an Orbi account, you need to create a new one.
Follow the in-app instructions to create your new Netgear account.
After that, enter the Orbi WiFi login details and tap Submit.
At last, you will be logged into the Orbi router using the Orbi app on your device.
Orbi login through orbilogin.net
The default web address also lets you get access to your device and modify its wireless settings. For this, you just need to have an up-to-date web browser on your computer or smartphone.
Connect your device to the Orbi wifi network.
Open a web browser and type the default address www.orbilogin.net in the address bar.
The web browser will now take you to the Orbi router login page.
The Orbi login page will prompt you to put down the username and password.
Put down the Orbi login username and password, and click the Login button.
Finally, you will log into the Orbi router successfully.
See more orbi blogs
0 notes
Text
iRobot Roomba 675 WiFi Setup
The iRobot Roomba 675 WiFi setup and configuration is easy and quick - all thanks to the iRobot Home app. You can easily connect multiple robots to a WiFi network using the app on your mobile or tablet. Connecting the Roomba 675 to a WiFi network allows you to access and manage your device remotely through the iRobot Home app.
The iRobot Home app lets you access multiple robots without any hassle. Through this app, you can set the cleaning schedules for your Roomba robots. You can even stop them abruptly or command them to clean the floor as per your liking.
In this post, we will learn how to go about the iRobot Roomba 675 WiFi setup and configuration using the mobile app.
Firstly, download the iRobot Home app on your mobile.
Make sure your mobile is connected to a 2.4GHz WiFi network because most Roomba models don’t support the 5GHz WiFi network.
After that, go to the Main Menu and tap “Add a Robot”.
Once you add your Roomba to the app, you need to connect it to a WiFi network.
The app will ask whether you want to proceed with the same network your mobile is connected to.
Finally, follow the in-app instructions to complete the iRobot Roomba 675 WiFi setup and configuration.
Once your device is connected to a WiFi network, you can also integrate it with Alexa. We hope you liked this post!
See more blog
0 notes
Text
Method of Zmodo camera setup
Zmodo cameras are relatively new to the market, and with the complete options now in stock with the brand, it is eager to expand its customers even more. If you already have already got a Zmodo camera setup at home, or you are looking to buy one to use at home, knowing about the setup and configuration is essential. Also, learning about how to get access to the Zmodo camera setup page is necessary and will be helpful when trying to log into the camera configuration and management wizard online.
To gain access to setup pages, you must always make use of the smartphone app and the internet browser. Connect your device to the network in your home, and then connect your smartphone to the application connected to this network. When that is done you will be able to open the application and the login screen will appear. It is possible to sign in to your Zmodo account with the credentials you signed up using. After you have registered, you are able to follow the remaining Zmodo camera setup instructions and finish the steps quickly. The setup wizard that you can access will guide you through the steps to complete the login procedure effortlessly.
If you need assistance with the Zmodo camera setup or login process, you are able to always contact our team on our end. Contact us via our toll-free helplines and contact them. Check out our website for assistance on the Zmodo camera registration procedure.
0 notes
Text
Guide for Wyze Cam V2 Setup
This guide for Wyze Cam V2 setup will help you configure your new Wyze camera V2 device on your own. It is very easy to set up the Wyze camera with the help of the Wyze app. If you have the Wyze app installed on your smartphone, you can easily start with the configuration.
The Wyze app is one of the best home security camera applications that is dedicated to Wyze cameras only. The app lets you see the video recordings of your camera and even access the live video feed. You can watch everything happening around your premises in real-time.
So let’s start with the Wyze Cam V2 setup and installation:
Firstly, unbox your Wyze camera and connect it to the power supply.
After that, download and install the Wyze camera app from the App Store or the Play Store.
Open the Wyze cam app on your mobile and start with the setup.
Press the Setup button on your camera and then follow the in-app instructions.
You need to scan the QR code on your camera through the Wyze camera app.
After that, connect your camera to a WiFi network.
Finally, the Wyze cam V2 setup will be completed successfully.
Now you can install your device anywhere at your premises and make sure you don’t place it far away from the router.
#Wyze Cam V2 setup#Wyze camera#Wyze camera login#Wyze camera setup#wyze camera setup#setup wyze camera
0 notes
Text
Wyze Camera not Recording Events
If your Wyze camera not recording events and you're stumped as to what to do. Try These Troubleshooting Procedures to fix wyze camera not recording events.
1. In the Wyze App, enable Event Recording.
By default, your Wyze Outdoor Camera does not record events. You must enable event recording in the Wyze app if you want the camera to record events whenever it detects motion.
2. Improve Motion Detection Sensitivity
Another reason your Wyze Outdoor Camera isn't recording events is a low motion detection sensitivity.
3. Reduce your camera's recording cooldown time.
The Recording Cooldown time is the amount of time it takes the camera to pause between recording events. Your camera may miss certain events if the Recording Cooldown time is too long.
4. Bring Your Router Nearer to the Camera
Because it isn't receiving enough Wi-Fi signals, your Wyze Outdoor Camera may be failing to record events. If your Wi-Fi signal is weak, you should move your router closer to the camera.
5. Restart your router.
What if your camera's signal strength remains low after bringing your router closer? If this is the case, you may need to reboot the router to resolve connectivity issues.
6. Reboot Your Wyze Outdoor Camera
Power cycling your Wyze Outdoor Camera is another option if it isn't recording events. Power cycling the camera should resolve any loading errors or unseen glitches that are preventing it from functioning properly.
7. Update the Firmware on Your Wyze Outdoor Camera
If your Wyze Outdoor Cam is running on an outdated firmware version, it may malfunction. If the event recording problem persists, check to see if your camera's firmware needs to be updated—and then update it.
8. Turn off Counteractive Rules
If your Wyze Outdoor Camera is not recording events, you may have enabled some rules that are interfering with the device's operation.
9. Disable Detection Zones
If your Wyze Outdoor Camera isn't recording specific events, it's possible that the events are taking place outside of the camera's detection zones. Solving these may assist you in resolving the issue.
0 notes
Text
Method to login Asus router
If you've recently purchased a new ASUS router or have had it for some time and want to know how to login to it, here's a step-by-step explanation to help you comprehend the procedure of asus router login.
Ensure LAN or wireless connectivity.
After turning on your ASUS Router, make sure it is linked to an internet-capable device such as a computer, smartphone, or tablet. This will allow you to effortlessly launch the ASUS router login process and access its GUI.
There are two methods for doing so:
Connect via a LAN
Connect an Ethernet wire between your ASUS router and computer to accomplish this. Because mobile/tablet devices do not often have Ethernet connectors, this manner of connectivity is not possible.Wirelessly connect
To connect to your ASUS Router wirelessly, navigate to the Network icon in the bottom right corner of your computer screen.
Simply select the right connection from the list and enter your ASUS login credentials, i.e., SSID username and password.
If you're connected from a mobile device, open the Settings Pane and tap and hold "Wi-Fi" to see a list of available connections. Locate the internet connection powered by your ASUS Router and connect to it using your user credentials.
Router ASUS Login Using Your IP Address in a Browser
After connecting the device, you can access the ASUS router GUI.
To accomplish this, launch a web browser program/app on your device and tap/click on the address bar. To begin Asus router login, enter the default IP address, 192.168.1.1.
If this does not work, go to http://router.asus.com/ and choose your router model from the list.
Using the Default Login Information, connect to the Router
At this point, you will be prompted for admin credentials, i.e., username and password, in order to advance and access the ASUS router's settings pane.
The default username for first-time logins is Admin. You must create your own password and then confirm it by clicking Next.
In the case of past logins, the default login username and password for the ASUS router will be set to Admin.
#asus router login#asus login router#login to asus router#router.asus.com#router.asus.login#default asus router login
0 notes
Text
Arris Router Login
The Arris router login process can be performed on your PC and mobile as well. We recommend that you use your PC in order to login to the Arris wireless router. Firstly, connect your router to the PC using a LAN cable. You can also connect through WiFi, however, we recommend that you use the wired method. The wired method is a safe and secure way of connecting to the network.
Make sure you don’t use any installation disk of software to get inside your router. The default IP 192.168.0.1 will help you access your wireless router successfully. So here are the steps that you need to refer to while attempting to login to your router:
Make sure your router is connected to the PC using an ethernet cable.
After that, open a web browser on your device and type the default IP.
Type 192.168.0.1 and press Enter to reach the Arris router login page on the screen.
Thereafter, put down the Arris login credentials in the respective fields.
Type “admin” as the username and “password” as the password.
Click Login and you will be successfully logged into the Arris wireless router.
0 notes
Text
Xfinity router login
Xfinity router login is the very first step in accessing your router and configuring its settings. Once you login to the Xfinity wireless router, you can access all the wireless settings and many features of our Xfinity router.
You don’t have to use any installation CD or setup CD to interact with your Xfinity router and manage its wireless settings. Simply, connect your PC to the Xfinity router’s network, and with the support of a web browser, login to your router. Kindly follow the steps given below to go about the Xfinity router login process:
Connect your PC to the Xfinity network using WiFi.
After that, go to a web browser on your PC.
You need to enter the default internal IP of your Xfinity wireless router.
Type http://10.0.0.1 in the address bar and press Enter.
Thereafter, the Xfinity router login page will ask you to put down your router’s username and password.
Enter username as “admin” and password as “password”.
Click Login and you will get inside your Xfinity wireless router successfully.
If you find it difficult to login to the Xfinity wireless router, kindly abort the process and restart.
#Xfinity router login#xfinity default router login#login to router xfinity#xfinity router blinking orange
0 notes