shushi-comics
Shushi in dis tumblr
Hey guys! Shushikitty here. Some of you may know me from Deviantart and Furaffinty. Decided to get a Tumblr and found myself addicted. I hope you enjoy what I post for you guys to see.
For those who would like to see mature and even some porn arts please click the button below. Dont like porn? Then dont click.
544 posts
Don't wanna be here? Send us removal request.
Last Seen Blogs

sheamidala
bia

princess-xeon
princess alien archive

imagininggintama
Oh no, another one.
big-waifu
Big Waifu's Old Art Retrospective

vocaloid-simp
kagamine rin stan
Photo
I made my own version of this meme so send me a character and a number! (inspired by the incredible artist @grumpsies)
25K notes
·
View notes
Photo

CAMPAIGN: Get Picarto.TV into Discord!
Today, we got informed about a simple voting on Discord to get Picarto.TV integration for all Discord users. Now we need your HELP to make this happen!
You can vote up for this feature at: https://goo.gl/AWyUg5
Please help us to get Picarto.TV into the feature set of Discord! This would be awesome and a benefit for all Picarto users who also use Discord. :)
RAFFLE AMONG REBLOGGERS
Among all REBLOGGERS of this post we will raffle off
10 PREMIUM accounts (lasting 12 months).
The deadline will be the 10th of May 2017!
One more thing: Tumblr and Discord are not hosting this challenge.
So please reblog this post and vote up with the link above.
We would highly appreciate your effort! :3
Your Picarto.TV team
9K notes
·
View notes
Photo


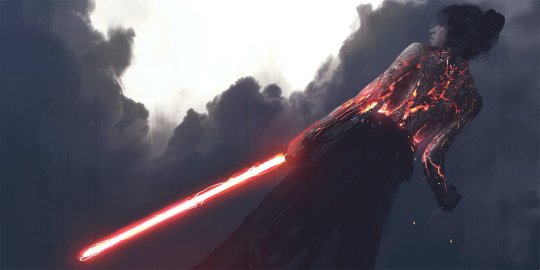

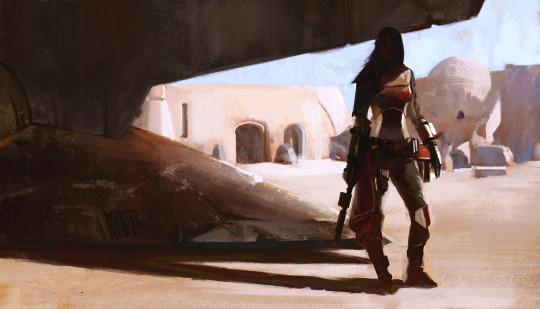


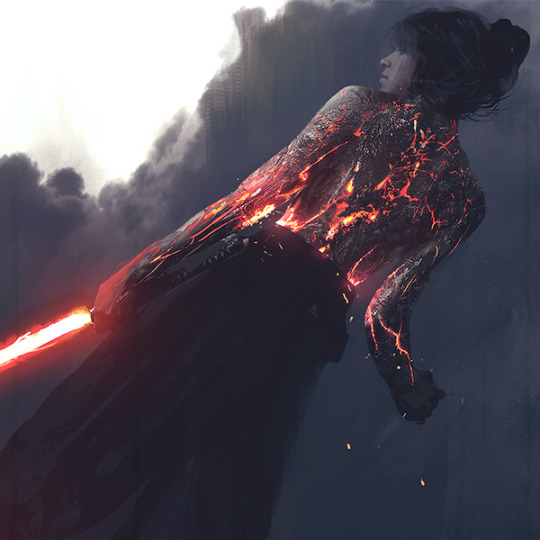


Girls of Star Wars Concept Art - Created by Wotjek Fus
Read more about the project here.
35K notes
·
View notes
Video
This is possibly the best Parks and Recreation blooper
782K notes
·
View notes
Text
Pokemon GO PSA
Fire types can be found at gas stations and during sunny days
Water types at lakes and other bodies of water as well as while it’s raining
Electric types are found near transforming stations and during thunderstorms
Ghost types can be found at night
Grass, bug, and normal types can be found in parks and other green landscapes
Normal types can also be found in urban areas
184K notes
·
View notes
Photo


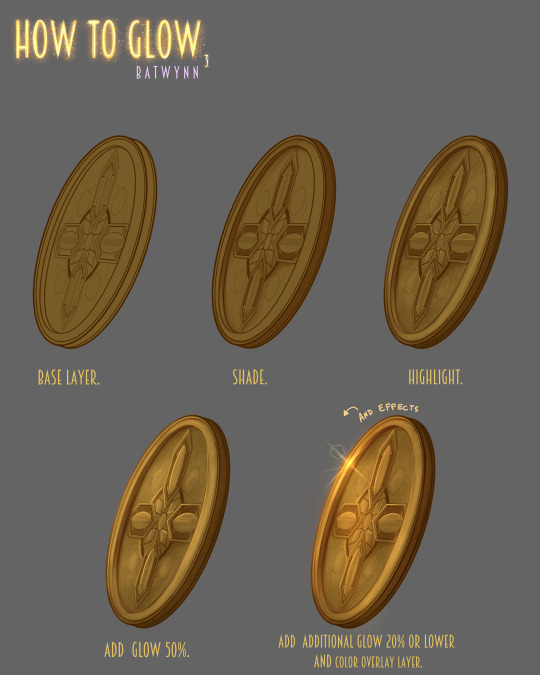
Someone asked how I do the glowy thing, soooo, here’s some how to do the glowy thing in Manga Studio. :3
For more tutorials, please check out my Patreon to help keep me funded.
72K notes
·
View notes
Photo

fun fact! google image search allows you to search for images that you are legally allowed to use for example as textures for your art or as assets for your blogs and websites
228K notes
·
View notes
Photo

Popcorn Chicken Recipe
Ingredients:
4 boneless skinless chicken breasts (cut into small chunks)
2 cups all purpose flour
2 ½ teaspoons salt
¾ teaspoon pepper
1/8 teaspoon paprika
1/8 teaspoon garlic powder
1/8 teaspoon baking powder
1 egg (beaten)
1 cup milk
2 cups panko bread crumbs
oil (for deep frying)
Cooking Instructions:
In a shallow bowl beat together 1 egg and 1 cup of milk. In another shallow bowl (or pie plate) combine flour, salt, pepper, paprika, garlic powder, and baking powder. Mix well. In another shallow plate add panko bread crumbs.
Roll each piece of chicken first in the flour mixture, then dip in the egg mixture and then roll in panko bread crumbs. Once the chicken pieces are coated once repeat the process by rolling the chicken bits in the flour mixture, dipping in the egg mixture and rolling in the panko bread crumbs.
Heat oil in a deep fryer for 375 degrees. Deep fry chicken in batches until golden brown and fully cooked (the internal temperature has reached 165 degrees). Drain on paper towels.
(Makes 4 Servings)
2K notes
·
View notes

Text
How to pay artists for digital-only commissions through Goods or Services
Quick tutorial on how to pay artists for digital-only commissions ( which means no shipping)
If you choose the shipping option when the artists is only doing a digital commission, and paypal sees that the artist didn’t ship anything, it creates trouble for the artist, to put it simply. So let’s not do that!
1.)

2.)

for those paying through MOBILE

and you’re good!
31K notes
·
View notes
Photo


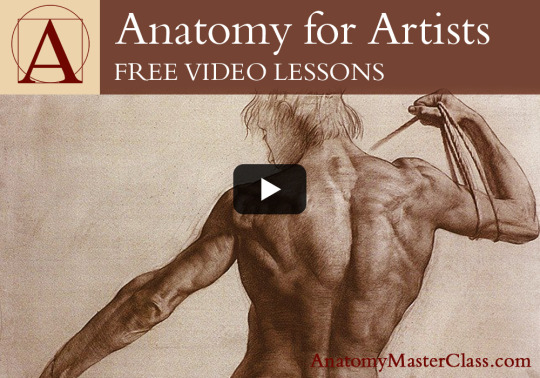

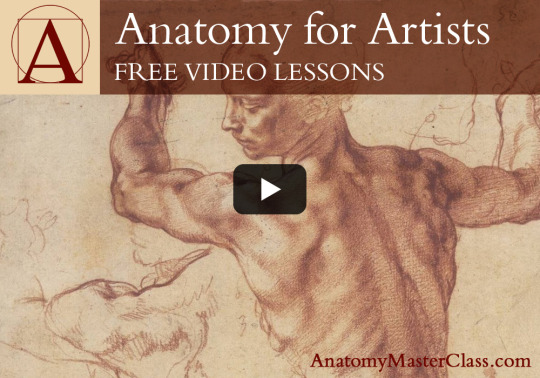


Anatomy Master Classes: Free Online Videos.
Sponsoring Supersonic this week is Drawing Academy and as a super special offer they’re giving Supersonic readers access to FREE online video tutorials that every artist will find helpful, Anatomy Master Classes.
This class is an incredible treat as it covers all the complexities of human anatomy for artists to create realistic figure drawings with step by step video instructions.
To get started and receive your free video lessons simply head over to Drawing Academy’s Anatomy Master Class sign up page.
11K notes
·
View notes

Text
How to repair Wacom Intuos 4 USB port

The wacom Intuos 4 is known for having issues with poorly attached mini-USB ports, and my tablet (Intuos 4 Large) finally broke down completely, as explained here wacom wanted hundreds of dollars to fix it.
Being a total newbie and never having soldered anything in my life I still managed to fix it for free. Instead of using the USB-connector I chose to bypass it completely and instead hard-wire the USB cables directly to the circuit board. This is a small guide for how to do that:
What you need:
Soldering iron and solder.
Tiny screw driver
Plastic card (like a credit card)
Wire cutter. (or anything to cut an USB wire)
Glue.
How to do it:
- Screw open the wacom tablet. Remember the screws under the rubber feet.
- There are internal plastic clips located by the buttons. Use your plastic card to disengage them. Be careful not to snag any wires.
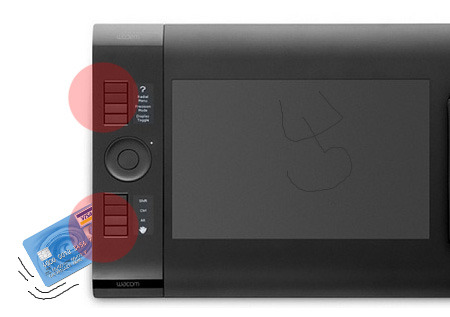
- Remove the back cover of the tablet. Find the broken USB port you want to bypass.
- Cut the USB connector off your USB cable, we won’t be needing it.
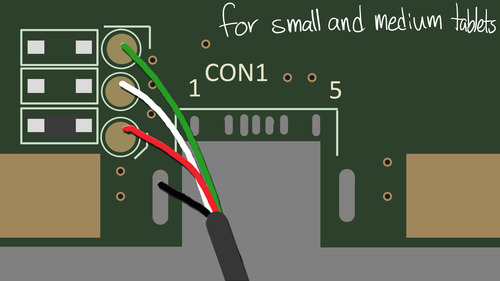
- Strip the wire to expose 4 smaller wires inside it. One red, green, black and white.
- Strip a tiny bit of the smaller wires to expose the metal inside them. I melted away the plastic
- Put some solder on the end of each wire and then solder them exactly like this diagram shows.
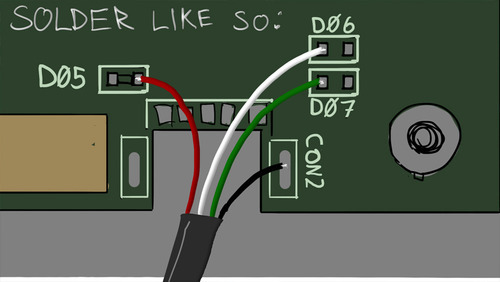
The circuit board of course have a lot of different stuff on it, chips, transistors and whatnot. But in this image I just drew the important ones that we will work with. Make sure you do not short circuit by using too much solder or having exposed metal from the wires touching each other.
- Glue the large USB wire to the plastic of the wacom tablet.
- Screw it back together.
Done and done!
Update: Do you have a Medium or Small tablet? In that case solder like this:
8K notes
·
View notes
Photo


PERSPECTIVE & WARPED PERSPECTIVE TUTORIALS with Samples
Please consider REBLOG and not just like, cause you’re not only supporting me but help others with getting use to perspective drawing!
I’ve archived series of perspective & warped perspective tutorials that I made in the past with minor revisions and added samples. I believe some people have struggle with perspective probably because of the impression of complexity and the fancy terms that comes with it. I’ve met many artists that just didn’t want to deal with the all fancy terms like “3 point/4 point” perspective and walked away from it and I understand that feeling. Personally these terms are quite useless and that the important part of perspective drawing is really just capturing the dimension and getting use to it. (When I do perspective drawing I put very little consciousness in points & lines but towards how my brain is seeing the depth and dimension.)
When I first learned perspective drawing in elementary school art class, my teacher taught me the conventional method with ruler, lines and dots. While it provide accuracy, it tends to require alot of lines and wide space where your starting points existing way off the page and perhaps this might be the reason why some people find it tedious and hard to deal with. So I’m going to ditch using ruler and the fancy term and demonstrate them in much simpler approach.
I purposely build these tutorials in raw pencil rather than the nice looking digital tutorials because I want to show you that it’s not about the precision and accuracy that makes convincing perspective but a daily scribble and eye-balling. Treat them like any other drawing practice, doing tons of freehand and eye-balling to grasp the dimension in your head. I wont stop you from making a use of a ruler, however perspective drawing is a vital practice to improve your line work as well. (Personally when I use a ruler, my perspective looses the sense of dynamics and objects would look too uniform. Besides clean straight lines has no personality and can look dull at times.)
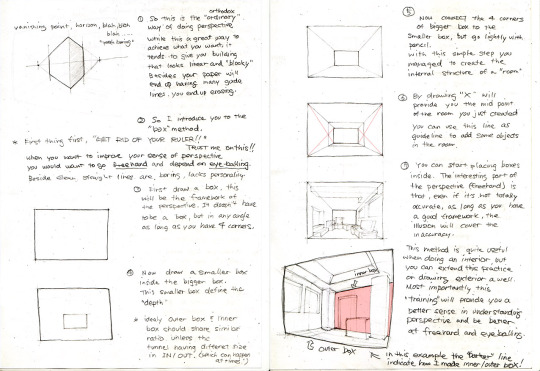
1 BOX - Method
The idea is that when drawing 2 squares with different size (having same or similar ratio) you have already managed to create an illusion of dimension. By connecting each corners with four lines you are dealing with perspective. The key to this practice is that you’re trying to place your consciousness on dimension and not towards drawing a nice looking box. Train your eye-balling by making use of the four extending lines from each corners to get the perspective line without the need of referencing the focal (center) point.
2 & 3 PLANE - Method (The lower portion of third image)
Basically it’s the reverse of conventional point based perspective. You’re not drawing from the point but towards the imaginary point. When you draw a square shape in an angle, you manage to create first step of illusion that suggest dimension, so this tutorial is trying to take advantage of that situation. (Tho it’s heavily dependent towards your EYE-BALLING SKILLS!)
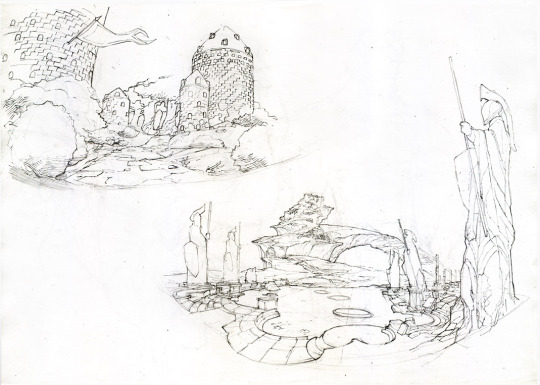
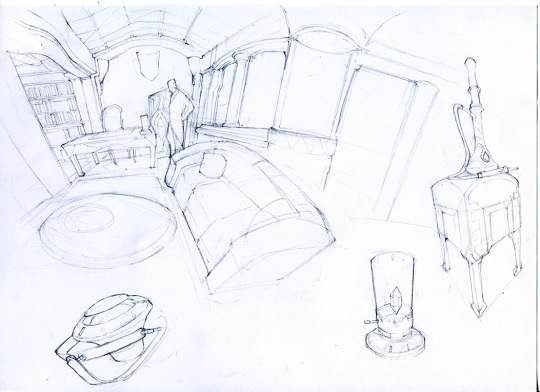
4 FISH - EYE TUTORIAL
This is pseudo “Fish-Eye” tutorial that is trying to simulate fish-eye lens on a camera. The idea is that the object close to the center has fewer distortion and will cause more distortion as it gets further towards the edge of the lens (sphere). I believe that warped perspective requires a bit of confidence in handling normal perspective drawing. More so the sense in eye balling is needed, so get use the normal perspective drawing first and then start mixing warped perspective into your practice.
My 2 cent is that rather than using a big space on an empty page/canvas, draw a frame and then start drawing. (You can see me do that on few of my samples.) This tip apply to general drawing as well since “big empty canvas” can be a bit intimidating. By setting a frame or a border, it’s actually you’re first attempt on creating an illusion in a 2D space.
My final note is that even though you’re doing a freehand, a sloppy lines will break the illusion, so pay attention to where the line starts, how it flow and where it ends.
Support me on Patreon so I can create more artworks and tutorials!
MY PATREON PAGE –> www.patreon.com/toshinho
19K notes
·
View notes
Photo

❥ TITTY TALK ❥
I think about this alot so I thought I’d share.
23K notes
·
View notes
Text
affordable plus size clothing masterpost
bold is for my favs
G-stage (only ships to US)
Boohoo
Plussizefix
Torrid (only ships to US)
Newlook (only ships to EU)
Forever 21+
OldNavy
Rosegal
Rainbow (only ships to US)
Rue21
Fashiontofigure
Target+ (only ships to US)
Kmart+
Alight
Debshops (only ships to US)
Dressbarn (only ships to US)
Helloplus
Lovedrobe
Yours
6pm
Alloy
Amazon
Cato (only ships to US)
Christopher & Banks
Cool Gal
Dr. Jays
Evans
Honourable mentions (aka not cheap but i still love it)
Keep reading
8K notes
·
View notes