
straybullet
From the heavens above
These eyes have seen the strangest things. Passin' by, no-one noticed my angel wings. Sideblog, can't follow back but ily and I will reblog
3465 posts
Don't wanna be here? Send us removal request.
Last Seen Blogs

cums
Untitled

exxtra-smooth
The Gifted Klutz
outpours
Overflow

good-burrito-boy
✧Grumpy boy✧

teenj12
teenj12's Blog
Text
this is going to be difficult -> i am capable of doing difficult things -> i have done everything prior to this moment -> this difficulty will soon be proof of capability
122K notes
·
View notes
Text
I want his attention soooo bad
Choose me love me want me
Aaaaaaaaaaaaaaa
0 notes
Text
for all the artists out there, here are my favorite resources i use to learn!
Files
The Complete Famous Artist Course
Art Books and Resources
Art, Anatomy, and Color Books
PDF Files of Art Books
YouTube
My YouTube Playlist of Tutorials
How to Draw Facial Features
Drawing and Art Advice
Drawing Lessons
Art Fundamentals
Anatomy of the Human Body
2D Animation
Perspective Drawing
Websites
Pinterest Board for Poses
Another Pinterest Board for Poses
Reference Angle
Figurosity
Sketch Daily
Human Anatomy
Animal Photo References
Humanae - Angélica Dass
Fine Art - Jimmy Nelson
Character Design References
CDR's Twitter Account
iamagco's Twitter Account
taco1704's Twitter Account
takuya_kakikata's Twitter Account
EtheringtonBro's Twitter Account
Drawabox
Color Wheel
Color Palette Cinema
Free Images and Pictures
Free Stock Photos
FILMGRAB
Screen Musings
William Nguyen Light Reference Tool
Animation References - sakugabooru
Animation References - Bodies in Motion
16K notes
·
View notes
Text

Titania and Puck with Fairies Dancing by William Blake
4K notes
·
View notes
Photo

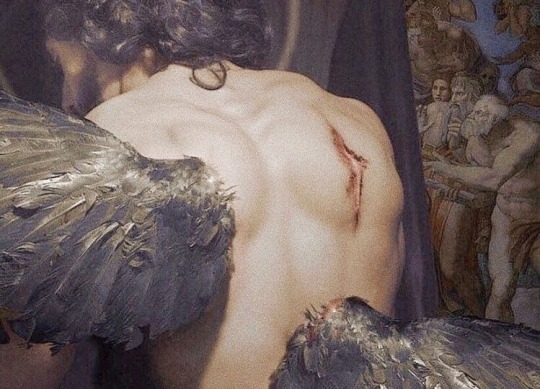
I Am the Law and the Law Is Not Mocked - submitted by @meowstic-seer-of-the-future
#833741 #35323D #5E5570 #7F7F8B #D9C9D3 #8484C0
3K notes
·
View notes
Text
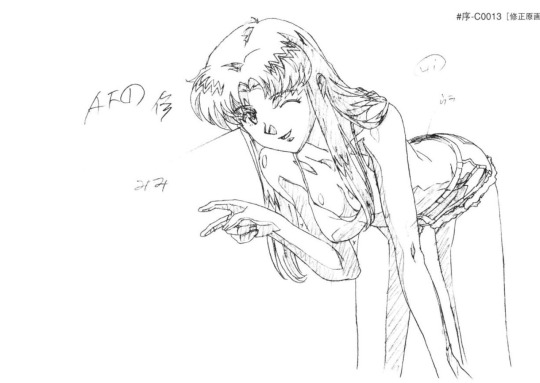

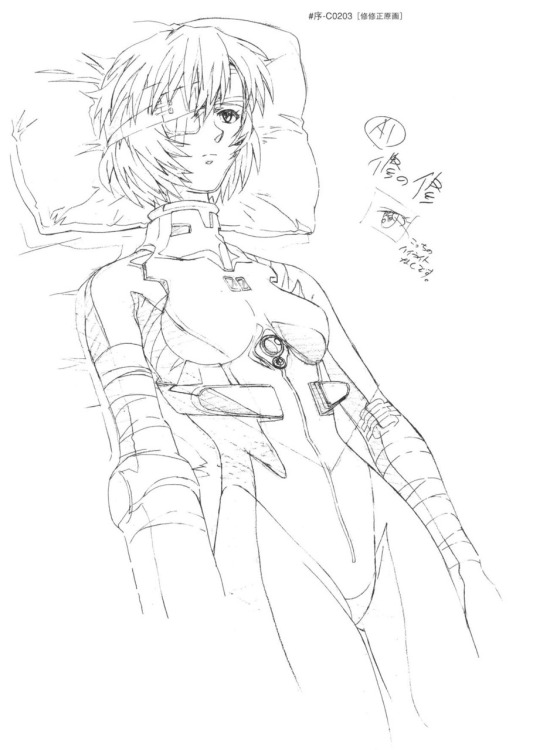
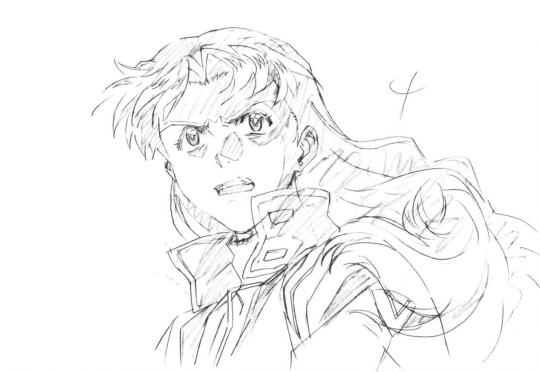

Neon Genesis Evangelion (1995) Creator: Hideaki Anno
619 notes
·
View notes
Text
I'm so intimidated by the teacher's assistant. I think we need to fuck nasty about it
0 notes
Text
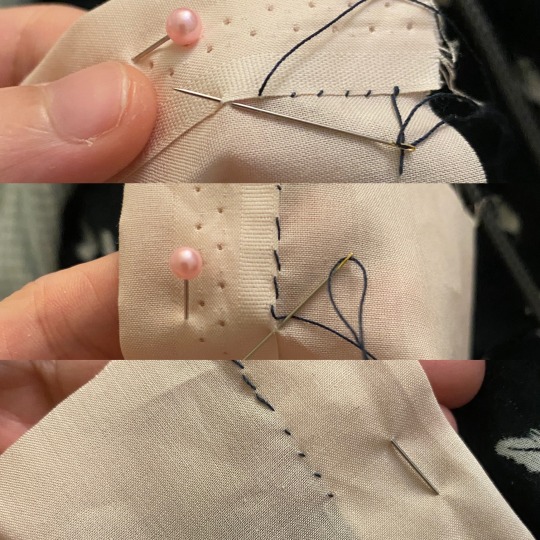
Pancake’s Guide to Basic Handsewing (with pictures!)
Aka things you could find elsewhere on the internet but here’s my own take. Note that while the running and back stitches are historically accurate, my felling stitch is not done how you would find it taught to a Victorian schoolgirl.
Holding the needle and fabric:

Modern sewing guides often overlook this because it’s sort of intuitive if you’ve been doing this since childhood. For beginners it might not be so obvious. I hold the needle between my thumb and index finger of my dominant hand. For running and backstitch I keep the worked (already sewn) fabric pinched between my index and middle fingers of my dominant hand, and the working (to be sewn) fabric pinched between my thumb and index or index and middle fingers of my non-dominant. I leave only about an inch gap between my hands. This keeps the fabric nice and taut while I work, and helps me keep an even stitch tension as well.
Construction stitches:
Running stitch:

This is the *most* basic stitch. You poke the needle down, you poke the needle up, you pull the needle through. It is a very efficient stitch because you can poke in and out multiple times and pull the thread through all at once, as I have in the above photos. This is the stitch you use for most hand-gathers and for some seams. For seams, use it where there won’t be any strain, like a vertical skirt seam.
Backstitch:
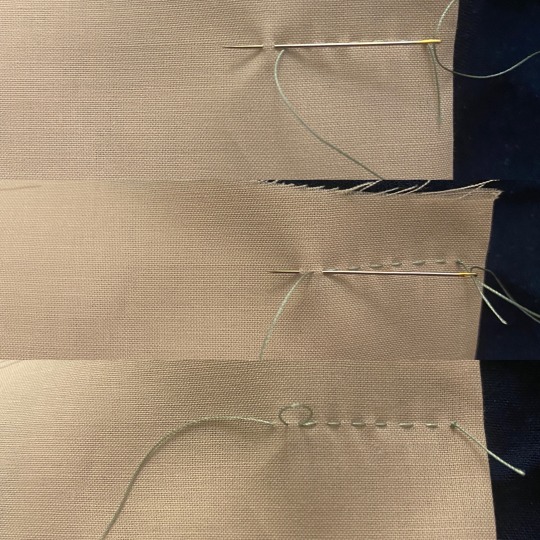
Insert needle, come up as if doing a single running stitch. Insert the needle back towards your dominant hand, and come up past the end of the current stitch. A continuous backstitch will insert the needle in the same hole as the end of the previous stitch. A spaced backstitch will take up more fabric coming up and leave a gap between the current and previous stitch when inserting. The specific size of the gap is dependent on your needs. I typically insert halfway. This is your workhorse stitch for seams that need to be strong.
Finishing stitches:

Finishing stitches are usually for hems and seam allowances. These are also the stitches you might use to take up a skirt hem or shorten a sleeve. To start I usually anchor my thread by taking a tiny stitch through both the folded-up hem or seam allowance and the main fabric. Reinsert through the same spot and tighten. Depending on how slick your thread is, you may want to repeat this a couple times, shifting over a bit each time.
Felling (fold on the outside):
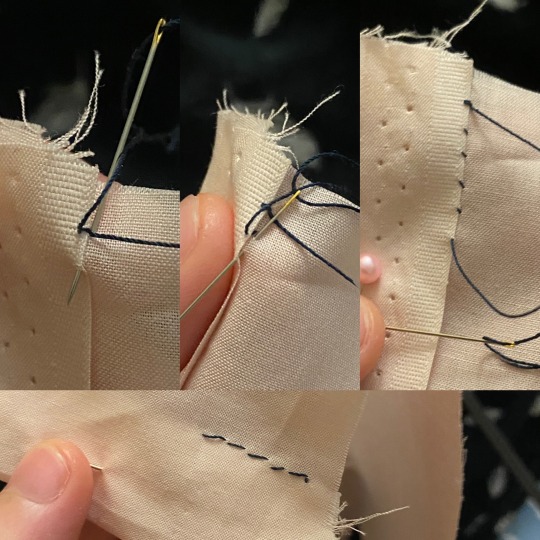
For felling where the fold is the only side that will be visible, take a long, slightly diagonal stitch across the back, barely catching the edge of the fold in the way up. Insert your needle next to the fold close to where you just came up and repeat. This is the fastest and easiest type of felling. This is also what I use for attaching lace.
Felling (fold on the inside):
When the fold will be on the inside and not visible, like a standard double-fold hem, you will want to take a tiny stitch across the “back”, either slightly diagonal or nearly vertical, catching the edge of the fold. You will end up with long stitches along the fold and tiny stitches on the other side. Note that the “back” in this case is actually the right side of the fabric.
Slip stitch:


This is for a finish that you want minimally visible on both sides. It is also the slowest finish. Insert your needle into the fold and exit the edge of the fold, catching a tiny bit of the outer fabric. Pull through. Insert your needle in the same spot or close to the same spot you exited the fold. Repeat. It’s called a slipstitch because you have to slip the needle inside the fold. You will have tiny stitches visible on both sides, which will be basically invisible if you match your thread to your fabric.
Decorative stitches:
Stem stitch:

This is basically the inverse of a backstitch. Like, in the most literal sense. It is worked toward the dominant hand, though you still insert the needle away from the dominant hand. You start by coming up from the wrong (back/under) side of the fabric then inserting the needle towards the dominant hand, about two backstitch lengths away from your start. Then you come up at the halfway point between where you started and where you just inserted the needle. Pull through. Insert the needle one back stitch length away from the end of the previous stitch, and come up in the same or close to the same spot as the end of the previous stitch. Pull through, repeat. This is my usual embroidery stitch for outlining.
(Reverse) Chain stitch:

I almost never use a regular chain stitch because it’s annoying and fiddly as hell. A reverse chain stitch is structurally identical but it worked completely differently. To start, make a single running stitch and come up one stitch-length away. Then slide your needle under the previous stitch and insert the needle into the same hole as the current stitch. Come up one stitch-length away. Continue sliding the needle under the previous stitch. I work it towards the body or away from my dominant hand, but I find working towards the body makes it easier to slide the needle under. It also does not matter from which direction you go under the previous stitch as long as it’s the same for every stitch in each continuous section. Make sure to catch both “legs” of each loop. I sometimes use this for decorative topstitching. It is very inefficient both in terms of time and thread, but it looks really nice when you get it right.
Those are all the basic stitches I use for my hand-sewing!
2K notes
·
View notes


Text
I will not rest until the unintentionally campy and extremely dramatic, vampiric Gothic Rock in the way it was done in the 90s when everyone was draped in red velvet and had candelabra in their shows/shoots/videos makes a full comeback.
6K notes
·
View notes


Text

Why Did You Bring Me Poisonous Flowers? — Submitted by nemethos-deamon
#FFEEE7 #F2D8D8 #D0ABAE #A69186 #6D6C5E #3E3C2B
4K notes
·
View notes