#i gif color and save and forget all about watermarks
Photo

here’s an updated tutorial on how i make my gifs!
featuring: oikawa tooru from haikyuu!!
warning: picture heavy
what i will be using:
- photoshop CC 2017
- handbrake (x)
- a media player (i use vlc and that’s what i will be referring to)
note: i’m on windows 10 so if you have a mac, the interface may look different.
1. i would like to thank sue for introducing me to handbreak bc it makes my life a whole lot easier :)
2. this may contain grammatical errors as i made this tutorial at 12am (if you added me on snapchat you’d know). i have no idea why 12am out of all times…
okay, now on to the tutorial :)
STEP 1: ISOLATING THE SCENE
using: vlc media player and handbrake
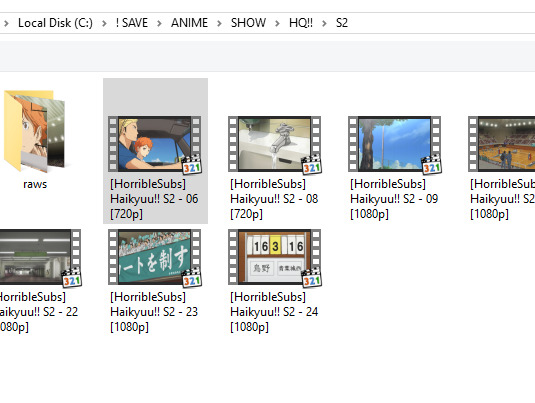
so here i have my video in vlc media player (haikyuu!! - s2 ep 6)

i’m just going to the exact scene that i want, making note of the timestamp near the play button.
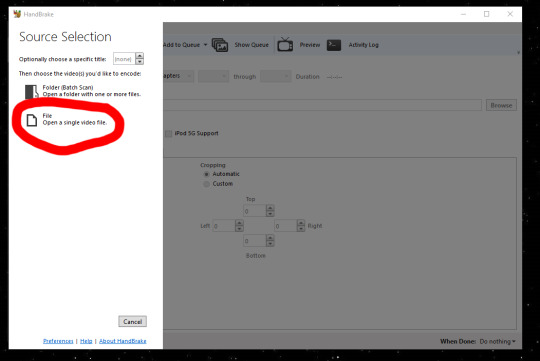
after i’ve found my scene, i open up handbrake and choose “file” as my source selection. you want to pick the same video file you used for vlc media player.
now that i have my file selected and it’s the right one, i can insert the time of the start of the scene and the time at the end of the scene here:

tip: record a few seconds before and after the scene you want to isolate. this ensures the you have the full scene intact and you aren’t missing any frames.
tip: make sure the scene is under 5 minutes or else it will take a while to download. i think that 30 seconds is enough to completely capture a scene.
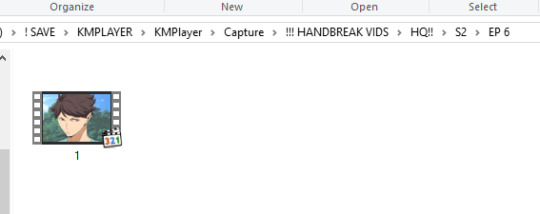
when you are saving a file in handbrake, you need to create a destination path. mine is just located in my kmplayer capture folder (bc that’s where all my old psds are), but you can determine where you want to put yours on your own. make sure to give the file a name as you are saving.

you can also do that in the destination bar.

now we are at the output settings. here are my settings that i use:
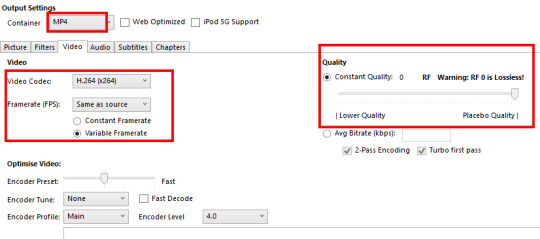
you want to save all your files as an mp4 file because that will definitely work on photoshop as i will be using convert video frames to layers (photoshop is not compatible with mkv files, a format that is abundant among anime)
you want the quality to be lossless because that produces the highest quality video.
i know there is a subtitle tab, but i’ve never had any issues with my videos (with subtitles) having subs after it’s been encoded, so i wouldn’t bother messing with it.
even if your video is already in an mp4 format, you want to use this to get the scene you want. if you go into photoshop with a 24 minute long episode, you will find it harder to get the exact scenes you want with photoshop’s crappy sliders.
i know there is another way of getting clips via vlc media player’s record function, but i tried to do it and couldn’t get it to work. for me, handbrake is the easiest way to isolate scenes.
okay! we can finally download our video file!
up at the top, there is a bar highlighted in blue.

start encode: begins to convert/process your new video file. if there is nothing in the queue, press this button.
add to queue: when you’re currently encoding something, “start encode” will transform into a “stop encode” so you use “add to queue” when there are more scenes you want to encode. once the preceding file is done being encoded, the next one will start.
show queue: displays everything that needs to be encoded or is currently being encoded
when your file is done, go to where you saved the video and it will be there!
STEP 2: MAKING THE GIF
using: photoshop
go to file > import > video frames to layers.

then load the video file you created in handbrake.

as i said before, you want to have bit of the scene before and after the actual scene you want to gif.

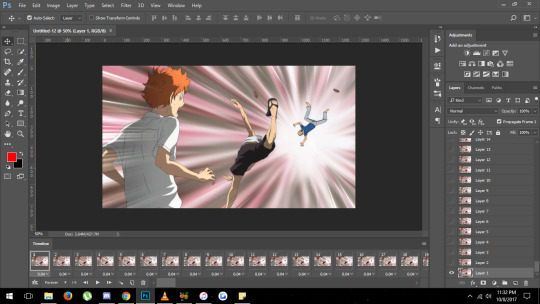
if photoshop brings you this pop-up:

do not click continue. press cancel and use the 2 trim controls to condense the range. remember to include frames from before and after the scene you want to gif. you can also limit it to every 2 frames as this will get rid of duplicates and reduce the frame count.
btw: this is from kimi no na wa. the haikyuu video wasn’t long enough lol.
after clicking okay, photoshop will look something like this:
basically, you will have a frame animation with the timing already set for you.
now i will just delete excess frames, layers, and crop my gif to be 540px.
i know it’s not important to delete layers you aren’t using, but it makes file saving so much faster, which is why i highly suggest you delete anything you wont be using.
here is what i have now:
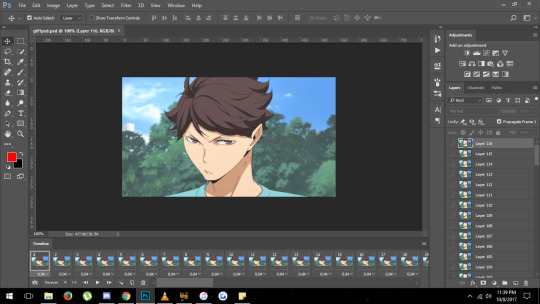
please please PLEASE make sure to save your files!!! especially if it’s something you know you’ll be working on later. this just allows for reediting and if you accidentally mess something up, you can always go back into the psd and fix it.
so that’s basically it for making the gif! now i’m just going to
color my gif
add my watermark
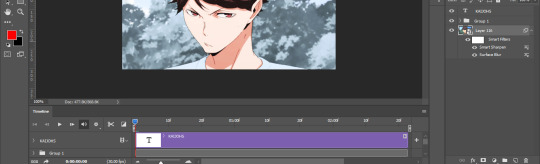
convert my frames to a timeline animation
select all my layers and convert them to a smart object (select them, then right-click for convert to smart object)
apply my sharpening and blur filters
save for web

i always group my adjustment layers so that my layers panel looks neater.
now it’s time to save the file as a gif by going to file > save for web.

sometimes i use diffusion, other times i use pattern; it really depends on what the gif looks like. if there’s a noticeable gradient in the gif (x), then i will use pattern over diffusion as the banding will not be as noticeable and everything will look smooth.
if you want a comparison between the 2, in this tutorial, the very first gif is saved with diffusion while the very last gif is saved with pattern. there’s truly not much of a difference (the pattern gif may be a little darker) except this:
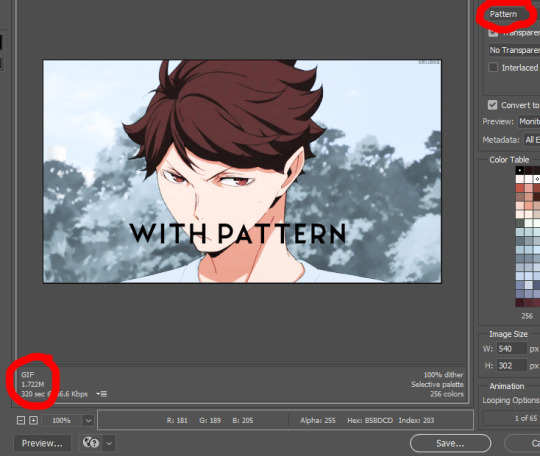
the file size is wayyy lower. this won’t always be the case in using pattern over diffusion so don’t automatically choose pattern over diffusion.
always go preview your gif in save for web to see what it would look like after it’s saved if you’re unsure about the timing of the gif. just go to save for web and click on the preview option. that will give you a good idea of how your gif will run when it’s finished. i recommend doing this after you’ve converted the frame animation to a timeline animation.
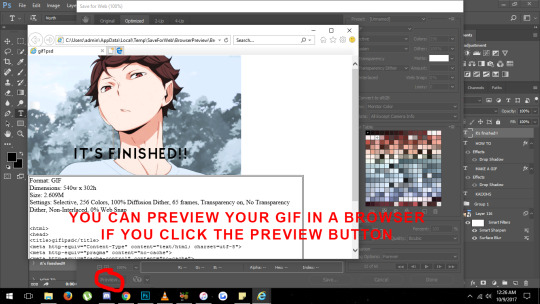
and now you’re done :)

i would highly recommend you make actions out of processes you do often (like cropping) and give them a keyboard shortcut.
keep your gifs under 3mb
always crop to tumblr’s current width dimensions (x). height is not a big deal, but if you find that your gif is over 3mb, cropping the height will lessen the file size.
if you have a very long scene, or one with lots of movement, consider limiting the frame capturing to every 2 frames. this just gets rid of duplicates and lessens the amount of frames you have, thereby reducing the gif’s file size (i’m sure i said it up there somewhere).
keep in mind that blurring reduces a file size and sharpening increases a file size. you may want to change your settings if you are just over the size limit.
have fun making gifs!! i’m hoping that i didn’t forget anything and if you have any questions or want more tutorials, feel free to send me an ask :)
if you found this helpful, please give it a like/reblog <3
#resourceanime#itsphotoshop#chaoticresources#peachresources#yeahps#my resources#my tutorial#gif tutorial#mine
365 notes
·
View notes
Last Seen Blogs

atd-sportscars-blog
ATD-Sportscars

montford-society
Montford Society Page
pizza-bots-for-real-justice
Animatronic Rights
jamesmcderp1990
McDerp's Nerd Shenanigans
mariailoveyou-guerin
rudathan?