#like you know if you render the same sketch 2x
Text
2019 Buyers Guide to Glass Countertops …Written by an Experienced Glass Fabricator Copy
Content
Interviewing Your Glass Fabricator
Author Qualifications
Glass Countertop Types and Terms
Textures for Glass Countertop
Glass Countertop Cutting and Polishing
Lighting Glass Countertops
Metal Support Brackets and Installation Techniques
Glass Countertops Cost
Installation and Shipping
Remodeling Trends
Conclusion
ERRATA: The Dumbest Glass Countertop Ideas on the Internet
Thick Glass countertops are one of the hottest design trends in Kitchen and Bath remodeling today. No other material enhances the visual beauty of your space like the translucent nature of glass. It offers endless creative possibilities which high-end designers demand when their projects require a luminous focal point.
This buyers guide will help you understand the many decorative options available to make it “POP” in your home.
As a buyer, we recommend you ask lots of questions of your glass fabricator after website visits followed by On-Site tours and first-hand inspection of product quality.
Do your reputation research. Know what you are getting for your money in writing upfront. Here are some good interview questions to start…
Questions for your Glass Countertop Fabricator
Where are your products Made… In the USA?
Are they responsive via phone, text and email? Speak with Who will Measure, Design, Fabricate and Install.
Share your Vision with your Fabricator in Sketches and Photos from e.g. Houzz
Are your Inputs taken when Designing Glass textures?
Do they Feel Passionate about their work…or are they just a slab exporter?
Are they Reputable ?
Get a written Quote with all options itemized with Installation.
Author Qualifications
This guide was written by Jeff Downing of Downing Designs, a professional design-build-install studio that has installed millions of dollars of custom Glass surfaces. He has an intimate understanding of glass countertop fabrication.
Downing Designs has a truly unique approach where human interaction and creative insight are fluidly aligned to imagine a brighter future for your space. Great things happen (e g. Prototypes) when we cross-pollinate our ideas with others. The result is a functional piece of glass art that has an emotional connection with their clients.
If you Google “Buy Glass Countertops” you will see many keyword-stuffed, ad-driven sites posting misleading statements and very odd glass high bar support ideas. Please enjoy our ERRATA section at the end where we’ve called them out for their misleading statements and expensive glass countertops installed in strange, half-baked ways. Buyer Beware!
Glass Types and Terms
Glass Countertops can be fabricated from a variety of glass. Float Glass is commonly used. Float glass is a flat sheet created by “floating” raw molten glass (a mix of raw material and recycled glass cullet) over a bath of molten tin.
Float Glass glass pieces up to 177” x 127” x ¾” thickness are available and are well suited for flat, back painted countertops and splashbacks.
3/4″ Low iron Glass Backpainted White
Low-Iron Glass is a Float glass with low amounts of iron which render a light bluish hue. This is critical when viewing the edge, as you will see the color intensity greatly magnified. Low-iron glass is well suited for countertops and backsplashes.
“Clear” Glass is a Float glass with higher iron content that renders it a greenish hue. The thicker the glass, the deeper the hue. Dont use “Clear” glass if you are back painting the glass as it will tint your final result.
Tempered Glass is created from Float Glass by heating in an oven and then quickly cooling. Tempered glass is about 4x stronger than annealed glass, allowing it to be used for thin glass applications e.g. shower doors, sneeze guards. Tempered glass must have all cuts completed before tempering. Usually, glass that is ¾” or thicker need NOT be tempered for use in bathrooms vanity tops, or kitchen glass counters.
Designer Note: Lighting flat glass with LEDs is generally a waste of money because it has no texture depth to deflect the light.
Slumped Glass is made by placing glass over a mold then thermoforming at ~1300 degrees F in Kilns until the glass “slumps” and to the shape of the mould. Slumping glass over large textured ceramic sand beds creates textured glass Sinks and Glass Backsplashes.
Fused Textured Glass is a process where sheets of float glass are thermoformed over a large ceramic sand bed or mould and fused at ~1450 degrees F, then annealed. The annealing process “heat-strengthens” the fused glass product to almost 2x annealed glass strength. Fused textured glass at 1.5” thick is very strong and is an extremely durable material that can be cantilevered to a much greater degree than most surfacing materials.
Glass Countertop Cantilevered 37″ from left Support
Designer note: 1” thick countertops do not have the visual depth on edge vs 1.5” glass but cost only fractionally less.
Textured glass hides the appearance of fingerprints and minor scratches.
Fused Glass with Colors is created using an inter-layer “paint” of glass frit and enamels and then fired. Vibrant colors are possible.
Glass With Colored Frit Fused in between Layers
Hot glass is the process of gathering and molten glass and twirling it into the artists final vision. Beautiful small artistic glass sinks and pieces can be formed this way. Examples include Dale Chihuly and “Big Wave” Dave Wight.
White Glass countertops (aka Nano glass, Crystallized glass) are a fusion of recycled glass and minerals created at 3000 degrees. It is poured, cooled then polished to a very high gloss shine. White glass countertops share a non-porous nature with Glass.
Pure White Glass countertops change the spatial relationship of every room they reside. In fact, they make kitchens and baths appear ~25% larger.
White Glass Countertops in Kitchen
From a 2019 survey on Houzz: White countertops continue to grow in popularity. Nearly one in three counters are done in white (22%, 27% and 31% in 2017, 2018 and 2019 studies, respectively) making them the #1 countertop choice for homes.
White glass is much harder on the Mohs hardness scale (7) vs glass (5.5) or granite (6.2) or engineered quartz (6.7). It is a superior countertop material for outdoors as it reflects much of the solar energy, is UV-proof, non-porous, stain-proof, requires zero maintenance or sealing, acid-proof and does not burn from cigarettes. White glass comes in slabs 120” x 60” x 1.2”
Black Glass countertops are similar to White glass…but a deep, pure opaque high gloss black. These will get hot in direct sunlight.
Recycled Glass Countertops is a matrix made up of small chips of colorful recycled glass chips in a binder and sold in slabs. A concrete based binder for your recycled glass countertops will require a sealant application. A resin-based binder will stand up to stains better, but can’t be used outdoors…UV light will degrade it. Many choices for colors and binders are available. Vetrazzo, IceStone, Geos are notable brands.
Textures for Glass Countertops
Texturing Glass Upon selection of the glass countertop to be used, fabrication can begin after measuring, templating, and texture design. A like a bespoke tailor, a full-service glass countertop designer-fabricator will demonstrate ALL of your options to accessorize your glass countertop to achieve the utmost in “wow” factor. These critical points include:
Stamped Textures provide a consistent textured look that is omni-directional. These can be interesting when selected for the right environment.
Hand Sculpted Textures are artistically carved into the kiln bed to create the texture you desire. Deep textures create drama and are spectacular when lit with LEDs and downlights. See our Fox News video showing some of this sculpting process.
Designer Tip: Communicate and review pattern suggestions, and refine these until happy. Select a glass texture that enhances the personality of your room “flow”. Don’t settle for a stamped textured piece of glass when for the same amount of money you can have a custom designed statement piece that flows elegantly with the lines in your home. Make sure your texture flows from one piece of glass to another across the seam in multi-sectional countertops. See Video below for a glass counter that flows well with the room.
vimeo
Hand Texturing Kiln Bed for Glass Countertops
Smooth texture transition at corner
Air Bubbles trapped between layers of glass are part of their endearing “flaws” since glass is not formed under a vacuum.
They enhance the visual interest and depth of thick glass countertops. More Bubbles can be creatively added to glass countertops (with chemicals) if that is your desire.
vimeo
Glass Cutting and Polishing
Kiln-formed glass must be cut to size and have holes drilled. Waterjets, wet saws and polishing tools with plenty of water are used. Make sure your glass fabricator has these in his shop to efficiently move your glass from kiln to cutting to polishing.
Designer Note: Make sure you inspect the quality of the edge polish of your glass countertop upon arrival. If it has lines from a worn out CNC bit, reject it! Your glass edge should offer a perfectly polished lens into your glass.
Also, 45 degree bevels present (2) sharp edges where the top meets the face. Gently rounded over edges are much more comfortable, and much less prone to chipping. See below picture illustrating those points.
Lines on Face due to Worn Out CNC bit…”Shiney but Liney”
Lighting Glass
Make sure you have a thorough Lighting plan for LED Edge Lighting, Down lighting and Ambient Lighting so they can all contribute to the WOW factor of your glass countertop.
LED Edge and Down lighted Glass Countertop…Note Dramatic Shadows on Floor
LED Edge Lighting is typically this is the best way to light textured glass countertops. Narrow LED strip lights on the edge of the countertop allow for high levels of striking high-contrast color. Done right, your glass countertop will “POP”…especially at night. Color and brightness are achieved with a controller, usually a smart phone app. This produces millions of stunning colors that can even dance to your music. You will need to run wires from the LED strips to a controller and transformer to a 110v power outlet. Use quality LEDs…this is not a place to save money as they can be tricky to replace once installed.
Designer Tip: Your LED cover and wiring should be minimalist and allow viewing into glass as well as reduce the pixel appearance from the front. Get a plan to conceal the LED wires through the supports and lower surface.
Minimalist LED Cover…no Visible Wires.
On A Lighter Side Note: Our “proprietary” research shows that properly lit Glass High Bars are in fact “Time Machines”. Apparently, a huge benefit of the upward angling and soft mood lighting from our glass high bars is that it “turns back the clock a few years”. (It makes my vintage 1959 wrinkles almost go away…we are not sure how to price that benefit just yet).
Down lighting from the ceiling will create a powerful mimic shadow upon the floor and lower surface. It is a perfect lighting technique for High bars to complement LED edge lighting.
Designer Tip: Modern LED downlights are available that create a tight, well-defined X-Ray shadow upon the floor. They are powerful, dimmable and consume very little electricity. Aim the light to project the shadows where you desire…preferably at an angle to make the shadows look bigger.
Ambient lighting allows the glass to pop naturally during the day in a sunny location. Low iron glass is naturally beautiful when lit with sunlight. See the pictures and video below.
Glass Countertop without LED in Daylight
Same Countertop Down lit at Night
vimeo
Under lighting Glass requires a tall structure on the underside of the textured glass to allow for even distribution of light…which may be unsuitably high for your countertop.
Designer Note: It also creates a very “flat” lighting effect that minimizes the contrast of shadow vs light and robs textures of their visual depth. It “highlights” the rib structure of the underlying panels…and is not pretty. (see below). This technique does however work well with onyx slabs.
Underlit Glass Countertop…Looks like an XRay!
Metal Support Brackets and Installation Techniques
Supports Metal support brackets of all shapes and sizes are available. Custom metal supports must often be fabricated to suit unusual installs e.g floor-mounted supports. Your metal fabricator should be able to offer you any custom design you wish…not just some one-size-fits-all support. Make sure your plan for your high bar is sturdy and elegant. Methods of attachment of the glass to the support include:
Silicone. Best used to attach textured glass to flat supports.
Metal Caps. Low Profile caps are best if caps are used.
UV glue. Fastest bond for flat glass to flat metal supports.
High Bar with (3) Low Profile Caps, No supports
High Bar with Low Profile Caps, Stainless Supports in Ground.
High Bar with Custom Supports…attached by Silicone
vimeo
Designer tip: Many designs are lazy and use ill-conceived support techniques. They often prevent you from freely rotating in your high bars stools because your knee hits the support. Or, they use “hockey puck caps” on top of the glass to prevent you from having an uninterrupted smooth flow across your high bar surface. Look for these “beauties” in the “Errata” section at the end of this article. Make sure your supports do not interact with your knees at your glass high bar. Look closely at the pictures above and below. They have a clean look owing to thoughtfully designed custom cantilevering brackets . They are concave on the high bar chairs side, thus making it very hard to hit your knee as you rotate your high bar chair.
Custom Bracket designed to Not Hit Your Knee
Back painting glass maximizes the visual depth of the textured glass countertop, backsplash or sink basin, while hiding the ability to see under or behind the glass.
Designer Tip: Back painting is preferred to laminating or painting your underlayment because gnats can find their way between the bottom of textured glass and the top of the laminate where their little carcasses will pepper the background forever. Not Pretty. Silver metallic and white back paint add depth. Back paint can be tinted to match your decor.
Textured 1/2″ Glass Backsplash Backpainted with LEDs
Installation and Shipping.
Expensive Glass requires skillful planning and experienced manpower to install.
Designer Note: We have been on a few time critical installations where cabinets, plumbing, electrical work, ceiling plastering were all being dome in the same kitchen at the same time! This is not good.
Please have a schedule that allows the glass counter to be one of the last installations...just like a valuable piece of wall art. Having too many tradesman in the room after installation increases the risk of damage to your artistic piece.
Crating for Shipping. Crates are specially fabricated for glass countertops with plenty of sturdy foam to cushion it during shipping. Make sure you purchase insurance t cover the cost of both the glass as well as the shipping costs.
Solid Crate for Shipping Glass Counters
Glass Countertops Cost:
As you can see, there is a wide range of options for glass countertops. It is impossible to conclude a precise cost but these numbers below can give you a start.
$100+/sq. ft. for ¾” flat low-iron glass. Backpaint, thermoforming, waterjetting custom shapes, holes, etc. adds to cost.
$350+/sq. ft. for 1.5” textured low-iron glass. LEDs, backpaint, custom shapes, size of piece, supports, installation, etc. add to cost.
White Glass and Recycled Glass are $125-175+/sq. Ft.
Installation and delivery costs add to the above.
Remodeling Trends
In an interesting article on Houzz, they show that homeowners are increasing their spending more on High-End countertops vs other kitchen elements.
Houzz Survey…Buyers are Splurging on Countertops
Conclusion
You are going to have to place your trust and money in someone to faithfully execute your glass countertop project. If your vendor cannot confidently lead you through each step in the design, template, custom textural sculpting, fabrication, lighting, back-painting, supporting, securing, shipping as well as installing, then find one who can …or…risk a poor outcome. Glass counters cost too much to risk a poor outcome in the hands of amateurs.
Find a passionate glass fabricator that can listen to you and bring out the best in your ideas, create a plan and lead you through the process. The result will be an unbelievable artistic “wow” piece in your home for many years.
Jeff Downing is the founder of Downing Designs in Downtown Tampa, FL. He has represented Hewlett-Packard and Philips Medical amongst others before quitting to open his custom design studio. His teachings and blogs help architects, designers, etc. to embrace creative new ways to use glass in their projects. He previously represented ThinkGlass for several years before purchasing his own kilns to bring his unique artistic glass visions to life.
ERRATA
STRANGE Glass statements we have scraped from the Internet…”Fake News”
“On average, the minimum cost for glass countertops per square foot is $75, while the maximum cost per square foot is around $105.”
Clearly they have never made a thick textured glass countertop.
“Annealed Glass—Similar to tempered glass, annealed glass has chemicals added to the resin mixture to increase its strength.”
A chemical added to the resin??? This is glass, NOT plastic.
“Nonetheless, there are many other factors that can increase or decrease the total cost of glass counters. Supplies such as sealants and adhesives add an average of $2.45 per finished square foot of surface area.”
Sealants???? Why do you need to seal glass? Its non-porous.
“Contact with acidic foods, drinks, and certain cleaners can affect the surface and require fixing”
Not unless you are serving hydrofluoric acid to your guests! Nonsense!
Odd Designs Ideas for High Bars
Underlit Glass Countertop…Looks like an XRay!
This ugly under lighting completely ruins an otherwise nice glass countertop. Very Odd looking.
Glass Countertop with Hockey Pucks and Archaic supports. Where am I supposed to sit ? Knee and Shin bashing will occur. Careful of those Hockey Pucks! Thanks, but I think I’ll stand…
Again, where am I supposed to sit? Knee bashing will occur. Shins are safe here. Robs the ability to seat people normally.
Posts to Floor Reduce Usable Bar Space
Glass Countertop with fat supports and LED covers
Where does my glass of wine and dinner plate sit? Look out for those hockey pucks! You cannot see the edge of the glass while cooking! Glass Counters should look great from all sides.
What is the Point? No Cantilever, Lots of Hockey Pucks,No room to clean under.
This client went with a slab vendor (Thinkglass) that merely took their money with no thoughtful advice (e.g. backpaint) to prevent this half-baked result. The result is a glass countertop that shows everything inside the cabinet. Thinking about themselves and not about getting this piece right!
Glass Countertop without BackPaint…NOT Pretty to see insides of cabinets
Thanks for making it this far. If you care to speak further, please call or text my cell phone at (813) 784 5211.
Jeff Downing
The post 2019 Buyers Guide to Glass Countertops …Written by an Experienced Glass Fabricator Copy appeared first on Downing Designs.
from Downing Designs https://downingdesigns.com/glass-countertops-buyers-guide-copy/
0 notes
Text
How to Use Font Awesome On Your WordPress Website
When given the choice between using a vector icon or a static image, it’s a good idea to go with the vector. They’re small and fast to load, and they can scale to any size without a loss of resolution. Font Awesome is a superb library of vector icons that you can use on your websites, and they probably have almost any shape or brand that you’d need. And best of all? It’s free. Second to best of all, it’s easy.
Font Awesome WordPress Icons
Using the Font Awesome library on your WordPress site is relatively painless. Once you follow these simple steps, you’ll be able to lower your page-load time and create some really clean, crisp designs using these icons as part of your work.
One thing to remember is that (most of the time) the Font Awesome icons are going to be delivered to your site as actual fonts. Hence the name Font Awesome. You will be able to style and manipulate them in every way that you normally could a font character, using CSS via @font-face and the Font Awesome font-family.
Because of that, you won’t have to worry about sizing or spacing for each individual browser or viewport. If it sounds great, that’s because it is. And here’s how you do it:
Installing Font Awesome
While there is a manual way to install and use Font Awesome, there’s a better way for WordPress users. The fine folks over at FA have released an official Font Awesome WordPress plugin, and it works beautifully.
With the plugin installed and activated, you now have access to the [[icon name]] shortcode as well as the HTML snippets. As long as you keep the handy-dandy FA icon list around so you know exactly what icon you need. You will see on the plugin’s settings page (found under Settings – Font Awesome) how things are set up by default. In general, these are fine to keep and use. Most people won’t need anything else.
The Method option is probably the most important for most folks. You can toggle between Webfont or SVG. While SVG gives you more power and features (such as power transforms and masking), the Font Awesome CDN will deliver the icons as SVG files and not as a font. While that is better in some ways, the SVG isn’t recognized by as many browsers, nor does WordPress always play well with SVG images. So we suggest playing it safe with the webfont version.
So does Font Awesome, for that matter: If you’re not sure of the difference, or don’t know why you’d need to use SVG, then sticking with the default webfont method is probably easiest.
To use the Font Awesome icons on your WordPress site, it’s simple. Just add <i class=”fab fa-wordpress”></i> anywhere you want an icon to appear. Make sure to check the icon library to know what name to put in.
Note: the shortcodes in the plugin are hit-and-miss. Some icons render perfectly well, while others show up blank. We recommend you stick to the HTML insertion unless you see that the shortcode works for you. See below for an example of the WordPress example above not rendering, while the camera icon does.
And you’re done. The Font Awesome WordPress plugin is great for folks who aren’t comfortable going into their theme or files to insert the otherwise required code. However, if you are comfortable doing that, you can follow these instructions to get the Font Awesome icons on your site.
Installing Font Awesome Icons Manually
The very first thing you need to do is go to the Font Awesome website. From there, click on the Start Using Free button. They do offer paid plans for folks who have high-traffic sites and need an enterprise solution, but the general public can get away with the free version. You get 1,500 icons for free, and over 5,000 variants on the Pro plan.
The next step is to simply copy/paste. But you will want to make sure that you’ve highlighted the webfont option, just like we discussed before.
Most themes have a place for you to insert code into the <head> of the site automatically. In Divi’s case, for instance, you would go into Theme Options – Integrations and paste this code into the field labeled Add code to the Head of your blog.
<link rel="stylesheet" href="https://use.fontawesome.com/releases/v5.7.1/css/all.css" integrity="sha384-fnmOCqbTlWIlj8LyTjo7mOUStjsKC4pOpQbqyi7RrhN7udi9RwhKkMHpvLbHG9Sr" crossorigin="anonymous">
When you hit save, you can start including any of the icons you want, just like we did above. Only, you do not have access to the shortcode by doing this.
If Your Theme Doesn’t Support Code Integration
If you can’t find a spot like this in your theme, it’s also just as easy to do manually. You will have to dig into the Core files of your theme to do so, however, but it’s a very quick copy/paste, and is (generally) pretty safe to do. Go to Appearance – Editor in your WP dashboard, and find the header.php file.
Find the line where </head> is written, and before it, you need to paste the same code from Font Awesome. Press Update File, and you will be able to begin using the FA icons immediately. Again, you don’t get a shortcode by installing Font Awesome this way.
Also, keep in mind that anytime you edit a theme file, you want to use a child theme. By doing so, you prevent the changes you’ve made from being overwritten when the theme updates.
More Options for Installation
And if you have other, more specific needs for Font Awesome, they do offer a slew of ways to get access to the library. From NPM and Yarn installs, to Sketch and React integration, they have a ton of options if you need it for more than WordPress.
Styling Font Awesome Icons
Now that you have them installed, it’s time to make the icons pop. You can do this using CSS because each of the icons is governed by a CSS class. The two most-often used styles are color and size. You can either include the CSS styling in your stylesheets, or you can do it inline. In general, you may want to use inline styling because icons like these don’t tend to be universal across a whole site.
The Font Awesome website has examples of how to do this. They show sizing using their igloo icon and the additional class like fa-xs or fa-xl or fa-2x for specific size.
Additionally, if you need the icon to be relative to a specific size and the absolute values won’t work, you can place it in its own <div> to make it work within your constraints.
<div style="font-size: 0.5rem;"> <i class="fas fa-igloo fa-10x"></i> </div>
Wrapping Up
And that’s it! Awesome, right? Whether you’re using the Font Awesome WordPress plugin or inserting the code manually, it doesn’t take more than a few steps to get your site up and running. Font Awesome is popular for a reason, and some of that comes from its ease of use. So get out there and be awesome!
What’s your favorite way to use Font Awesome icons?
Article featured image courtesy of Font Awesome
The post How to Use Font Awesome On Your WordPress Website appeared first on Elegant Themes Blog.
😉SiliconWebX | 🌐ElegantThemes
0 notes
Text
DIY Floating Deck, Part 1: Planning and Layout
I’m building a floating deck in my back yard! This is the very first post of this series, but you will be able to catch the whole thing, start to finish, right here.
Hey there! This post (or post series, rather) has been a long time coming. I’ve gotten started on my new floating deck (also sometimes called a freestanding deck), and I’m so excited to see this one finished! I want to first walk you through some of the decision-making details before I jump into the build. So, this post is going to cover a lot of topics regarding research, budgeting, and design.
With that in mind, bear with me as we go through. My main goal is to help clear the fog on the where/what/why, and a lot of these decisions are unique challenges of my yard (sloping, building over/around a concrete patio, etc.). If you wind up having questions as I go, I’ll try address them in future posts!
Legal disclaimer stuff: this is a personal recap and what I learn as I work on projects in my home. In hindsight, I often think of how I could have done something better. By no means is it a comprehensive guide for every scenario. No two houses are alike, and building codes/permitting rules vary. You will still need to research and make the best possible decision for your own home. I’m not a licensed professional. Reading and using any and all information is at your own risk. Power tools are dangerous and can kill you. Use protective safety gear, always. Don’t feed your dog chocolate, don’t stick keys in the electrical socket, and so on.
Backyard upgrades (to get to this point)
If you’ve been following along for a while, then you already know a lot of this. But for those that don’t, for the longest time with this house, I’ve been focusing a lot on the interior. I supposed that’s a pretty normal habit. We are more likely to first change the things we interact with everyday, like the kitchen, before we start fixing the part that can be more easily ignored, like the overgrown bushes in the back yard.
Each year, I dedicated a little time toward making progress. Baby steps! I killed off ivy, removed a bunch of pine trees, and filled in a sinkhole. Eventually, I made cosmetic improvements (a back hedge, fire pit, corner garden, etc.). All of a sudden, late last year, things really started to click; it was time to begin the two big projects I’ve always wanted to do. As with any project, it was a matter of money, time, labor, and research. It can all seem pretty overwhelming until you get started, and I am VERY good at procrastinating when I have a lot of logical reasons to postpone at my disposal!
Timing and budgeting: a juggling act
I knew I wanted to build a shed for extra storage toward the back of my lot and began planning for that last summer (which is also underway, but that build has its own separate series). I also wanted to eventually build a floating deck off of the existing concrete slab next to the house.
Originally, I thought these projects would happen in completely different timelines. But as I was planning, I managed to bring a sponsor onboard for the shed. That was a huge thing for me, since this has so many moving parts with weather/budget/etc. So, a huge thank-you to Wood Its Real for that help! I realized that, since I had been saving up for the shed and could redistribute that budget, I could basically maximize cost savings if I did both projects in one short, blazing summer of building. A lot of materials crossed over between the builds, so I could also use the new skills from one build to the next while it was still fresh in my mind. Then, I sketched up a quick version of how I thought everything would be done.
This seemed like a great option if I could also somehow convince K to help me design and plan it. It would be well worth the effort, I reasoned, provided that we didn’t manage to kill each other with all the sharp power tools at our disposal (thankfully, he’s a design engineer professionally and likes power tools as much as I do, so it was an easy sell). But to do any of it, we needed an actual, proper plan.
Design
I wanted the new build to create a natural flow from the patio door to the deck, from the deck to the fire pit, and so on. This would maximize the yard for an open, entertaining feel, while still giving everything separate zones.
Patio = grill spot
New deck = seating area
Fire pit = fire pit shenanigans
It’s kind of a lot to fit into a single space and around the only remaining tree in the yard. Even though I removed most of the trees, I kept the central one because it makes for a natural anchor for all the new lighting that will tie everything together (patio lights make everything better!). The sketch I created also mapped the new shed and room for a vegetable garden. But as I started marking things out in the yard, I realized that a patio as large as I sketched out would be WAY too big.
With K’s help, we came up with an even better plan:
Although this deck design doesn’t run the full length of the existing patio, I like that it sits perfectly between the patio and fire pit. The right corner of the new deck plan is at an angle, which allows for the mower to fit in between. This is a really. important. thing. for K; I won’t fight it, since I win by not having to mow. With this design, the shed/garden zone is a little more separate from the patio and deck, but still cohesive.
Slope challenges
As of 2016, my yard is filled in, but there is still a slope toward the back. I planned it this way for good reason: water runoff. The neighbor to my left is higher in elevation than all the others, so rainwater flows in a single direction in and out of my yard. If I had graded it any differently, I would risk disrupting that water flow, even jeopardizing the fill dirt by seeing it erode right back out of my yard. I planted a hedge line in the lower area as well to anticipate stemming future erosion problems, too.
Patios and just about anything in the yard have a slight slope for the same reason. I confirmed this with a level on my own patio, and the right corner is the lowest spot. The plan has been to continue that same slope on the new deck. So, it won’t be perfectly level, but it also won’t be noticeable.
Foundation
To help build the foundation but account for leveling, sloping, etc., I did some research and found that the best (and most readily-available) fit seemed to be precast pier blocks (aka deck blocks or Handi-blocks).
I also briefly considered TuffBlock (same concept, but more lightweight material). The biggest benefit with these is that it would involve less digging.
The main drawbacks were that I couldn’t find many examples of TuffBlocks in use on uneven ground, and the supply would have been a special order. Since the concrete version is in stock at Home Depot and Lowe’s, I did most of my research on those before choosing them. In hindsight, I would have liked to have tried one out for the shed and one for the deck and maybe compare. I’m sure at some point, I’ll be able to test it out (with a new house or working on a friend’s, etc.).
In either case, there’s a notch on top that fits a 2x- joist or 4×4 post. Since the floating deck will sit on or partially hover over the ground, I am putting them in for extra support. Where they are too high to sit on the ground, I’m digging them down partially into the dirt. On the farthest corner (closest to the fire pit), it’s actually not tall enough even when sitting on the ground, so one 4×4 post is needed there. On top of these, there will be a framework of 2×6 lumber and then the deck boards. And me, awkwardly doing bad yoga in celebration of a finished step.
Ground contact lumber
One important piece of info: since most of the new deck is touching the ground, the entire support structure (everything but the deck boards) will be made from “ground contact” lumber. You may already know of “pressure-treated” or “PT” lumber, which is lumber that has been chemically treated to withstand outdoor conditions better than bare wood. PT lumber is recommended for just about any project exposed to the elements. Now, there is a new standard, and stores are starting to carry more and more “GC” pressure-treated lumber. My nearest Home Depot has virtually all of their stock replaced with GC; Lowe’s has about half and half. You can see a slight color difference sometimes between the two.
The main difference is where you plan to use it. Here is a graphic that breaks it down depending on use (along with more details), but here’s an easy rule: if it’s anything touching the ground or within 6 inches of the ground, it should be made with ground contact lumber.
If it’s exposed to more moisture, use ground contact. If it’s something that will be difficult to reach or repair: ground contact. If it’s smarter than the average bear… ground contact.
I’ll cover a few more facts about GC lumber and even PT lumber in general as this series goes on, but there are so many details to cover! This is important enough to cover it in more depth, but I don’t want to throw too many details into this initial post until I can show more of the build as examples.
Partially covering the patio
As you can see from that digital rendering above, part of the new deck will cover a small corner of the existing patio. I found this tutorial from Family Handyman, and I plan to use some of the same ideas. Basically, I’ll be attaching some 2×4 supports to the patio (using ground contact lumber once again), and the deck will go over the whole thing.
Water buildup between the concrete pad and the wood will rot wood faster, even if it’s treated. So, I plan to make raise the framework in that spot with plastic shims.
Water is the enemy
Let’s see here: ground contact lumber, slope, plastic/flashing, drainage… basically every part of my plan has fighting moisture in common! So far, I’ve learned that water is my biggest concern. I may actually even be overdoing it, but I hope that regardless, the deck lasts a good long while.
Permits
I know this question will probably pop up a few times. I did not get a building permit for the deck. And, I didn’t appear to need one (after researching it for a long time). Even though there are standards (IRC and others) that are adopted by many states, the whole thing is rather complex; it took time to figure out the who/what/where/when (yes, that all matters):
What the codes are (there are multiple standards/guidelines that might be used to determine what is adopted)
Where they apply (city code, county code, etc.)
When they were adopted by your local ordinance
Who enforces it (there is often some discretion for the local code enforcement officer regarding approvals/violations)
I checked with my local guidelines prior to starting (if you don’t find one for your city, start researching the county, and so on). By comparison to what I’ve found, my county seems to be on the less restrictive side. This is definitely a situation where your best bet is to call your permit office and ask. Regardless, I’m doing my best to build things smart and structurally sound, permit or no (the shed as well).
Next
So, that was a really long intro, and we haven’t even started showing you the build process yet! But in the next post of the series, I’ll show you how I went from the initial layout:
To an actual framework:
Keep ya posted!
The post DIY Floating Deck, Part 1: Planning and Layout appeared first on Ugly Duckling House.
More Where That Came From
Quick Patio Patch
How to Identify Poison Ivy, Prevent Exposure, ...
4 Easy Tips for Growing Hydrangeas
How to Make Your Patio Look New Again for Less Tha...
.yuzo_related_post img{width:170px !important; height:170px !important;} .yuzo_related_post .relatedthumb{line-height:14px;background:#ffffff !important;color:#454747!important;} .yuzo_related_post .relatedthumb:hover{background:#ffffff !important; -webkit-transition: background 0.2s linear; -moz-transition: background 0.2s linear; -o-transition: background 0.2s linear; transition: background 0.2s linear;;color:#454747!important;} .yuzo_related_post .relatedthumb a{color:#102a3b!important;} .yuzo_related_post .relatedthumb a:hover{ color:#113f5e}!important;} .yuzo_related_post .relatedthumb:hover a{ color:#113f5e!important;} .yuzo_related_post .relatedthumb:hover .yuzo__text--title{ color:#113f5e!important;} .yuzo_related_post .yuzo_text, .yuzo_related_post .yuzo_views_post {color:#454747!important;} .yuzo_related_post .relatedthumb:hover .yuzo_text, .yuzo_related_post:hover .yuzo_views_post {color:#454747!important;} .yuzo_related_post .relatedthumb{ margin: 0px 6px 0px 6px; padding: 0px 0px 0px 0px; } jQuery(document).ready(function( $ ){ jQuery('.yuzo_related_post .yuzo_wraps').equalizer({ columns : '> div' }); });
DIY Floating Deck, Part 1: Planning and Layout published first on https://bakerskitchenslimited.tumblr.com/
0 notes
Text
DIY Floating Deck, Part 1: Planning and Layout
I’m building a floating deck in my back yard! This is the very first post of this series, but you will be able to catch the whole thing, start to finish, right here.
Hey there! This post (or post series, rather) has been a long time coming. It’s a little tricky to do a large project like this and then share it on the blog, mainly because the project itself can be quite tiring, and breaking it into beneficial chunks takes a little time to do it right. It’s almost like building it all a second time, except fewer last-minute changes and less muscle soreness.
All that just to say, bear with me as we go through these posts. My main goal is to help clear the fog on the where/what/why, and a lot of these decisions are specific to dealing with unique challenges of my yard (sloping, building over/around a concrete patio, etc.). But if you wind up having questions as I go, I’ll try address them in future posts!
Legal disclaimer stuff: this is a personal recap, and the evolution of what I learn as I work on projects in my home. In hindsight, I often think of how I could have done something better. By no means is it a comprehensive guide for every scenario. No two houses are alike, and building codes/permitting rules vary. You will still need to research and make the best possible decision for your own home. I’m not a licensed professional. Reading and using any and all information is at your own risk. Power tools are dangerous and can kill you. Use protective safety gear, always. Don’t feed your dog chocolate, don’t stick keys in the electrical socket, and so on.
Backyard upgrades (to get to this point)
If you’ve been following along for a while, then you already know a lot of this. But for those that don’t, for the longest time with this house, I’ve been focusing a lot on the interior. I supposed that’s a pretty normal habit. We are more likely to first change the things we interact with everyday, like the kitchen, before we start fixing the part that can be more easily ignored, like the overgrown bushes in the back yard.
Each year, I dedicated a little time toward making progress, but it was hard to see (pun-intended) the forest for the trees. I killed off ivy, removed a bunch of pine trees, filled in a sinkhole, and started making cosmetic improvements (a back hedge, fire pit, corner garden, etc.). All of a sudden, late last year, things really started to click; it was time to begin the two big projects I’ve always wanted to do. As with any project, it was a matter of money, time, labor, and research. It can all seem pretty overwhelming until you get started, and I am VERY good at procrastinating when I have a lot of logical reasons to postpone at my disposal!
Timing and budgeting: a juggling act
I knew I wanted to build a shed for extra storage toward the back of my lot and began planning for that last summer (which is also underway, but that build has its own separate series). I also wanted to eventually build a floating deck off of the existing concrete slab next to the house.
Originally, I thought these projects would happen in completely different timelines. But as I was planning, I managed to bring a sponsor onboard for the shed. It’s not always easy to have the right fit come along when you are trying to plan seasonally/budget/etc., so a huge thank-you to Wood Its Real for that help! I realized that, since I had been saving up the funds already, I could basically maximize the benefits of the budget if I did both projects in one short, blazing summer of building. A lot of materials crossed over between the builds, so I reasoned that purchasing bulk amounts would be cheaper and I could save on the cost of rentals, if any. Plus, working with the same materials, I would be able to cross over the skills from one build to the next. I sketched up a quick version of how I thought everything would be done.
This seemed like a great option if I could also somehow convince K to help me design and plan it. It would be well worth the effort, I reasoned, provided that we didn’t manage to kill each other with all the sharp power tools at our disposal (thankfully, he’s a design engineer professionally and likes power tools as much as I do, so it was an easy sell). But to do any of it, we needed an actual, proper plan.
Design
I wanted the new build to create a natural flow from the patio door to the deck, from the deck to the fire pit, and so on. This would maximize the yard for an open, entertaining feel, while still giving everything separate zones.
Patio = grill spot
New deck = seating area
Fire pit = fire pit shenanigans
It’s kind of a lot to fit into a single space and around the only remaining tree in the yard. Even though I removed most of the trees, I kept the central one because it makes for a natural anchor for all the new lighting that will tie everything together (patio lights make everything better!). The sketch I created seemed to make sense of everything, including the new shed, room for a vegetable garden, and so on. But as I started marking things out in the yard, I realized that extending the patio as large as I sketched out would be WAY too big.
With K’s help, we came up with an even better plan:
Although this deck design doesn’t run the full length of the existing patio, I like that it sits perfectly between the patio and fire pit. The right corner of the new deck plan is at an angle, which allows for the mower to fit in between (really. important. thing. for K; I won’t fight it, since I win by not having to mow). It keeps the shed/garden zone a little more separate from the patio and deck, but still cohesive. The step up from the existing patio and step down from the deck to the fire pit will be parallel.
Slope challenges
As of 2016, my yard is filled in, but there is still a slope toward the back. I planned it this way for good reason: water runoff. The neighbor to my left is higher in elevation than all the others, so rainwater flows in a single direction in and out of my yard. If I had graded it any differently, I would risk disrupting that water flow, even jeopardizing the fill dirt by seeing it erode right back out of my yard. I planted a hedge line in the lower area as well to anticipate stemming future erosion problems, too.
Patios and just about anything in the yard have a slight slope for the same reason. I confirmed this with a level on my own patio, and the right corner is the lowest spot. The plan has been to continue that same slope on the new deck. So, it won’t be perfectly level, but it also won’t be noticeable.
Foundation
To help build the foundation but account for leveling, sloping, etc., I did some research and found that the best (and most readily-available) fit seems to be precast pier blocks (aka deck blocks or Handi-blocks).
I also briefly considered TuffBlock (same concept, but more lightweight material). They seem much lighter and might avoid more digging, but I couldn’t find many examples of it in use on uneven ground and the supply would have been special order. Since the concrete version is in stock at Home Depot and Lowe’s, I did most of my research on these before choosing them. I think I’ll give them a try if I ever do this project again (with a new house or working on a friend’s, etc.).
In either case, these have a notch on top that fits a 2x- or 4×4 post. Since the floating deck will sit on or partially hover over the ground, I am putting them in for extra support. Where they are too high to sit on the ground, I’m digging them down partially into the dirt. On the farthest corner (closest to the fire pit), it’s actually not tall enough even when sitting on the ground, so one 4×4 post is needed there. On top of these, there will be a framework of 2×6 lumber and then the deck boards. And me, awkwardly doing bad yoga (completing steps on building a deck puts me in a goofy mood).
Ground contact lumber
One important piece of info: since most of the new deck is touching the ground, the entire support structure (everything but the deck boards) will be made from “ground contact” lumber. In my research for these projects, I discovered that there are new standards as of 2016 for treated lumber and outdoor projects. You may already know of “pre-treated/PT” lumber, which is lumber that has been chemically treated to withstand outdoor conditions better than bare wood (recommended for just about any project exposed to the elements). But now, there is a new standard, and stores are starting to carry more and more “gound contact” or “GC” pre-treated lumber.
The main difference is where you plan to use it. Here is a graphic that breaks it down depending on use (along with more details), but here’s an easy rule: if it’s anything touching the ground or within 6 inches of the ground, it should be made with ground contact lumber.
If it’s exposed to more moisture, use ground contact. If it’s something that will be difficult to reach or repair: ground contact. If it’s smarter than the average bear… ground contact.
I’ll cover a few more facts about GC lumber and even PT lumber in general as this series goes on, but there are so many details to cover! This is important enough to cover in more depth, but I don’t want to throw too many details into this initial post until I can show more of the build as examples.
Partially covering the patio
As you can see from that digital rendering above, part of the new deck will cover a small corner of the existing patio. I found this tutorial from Family Handyman, and I plan to use some of the same ideas. Basically, I’ll be attaching some 2×4 supports to the patio (using ground contact lumber once again), and the deck will go over the whole thing.
Water buildup between the concrete pad and the wood will rot wood faster, even if it’s treated. So, extra efforts will be made to raise the framework in that spot with plastic shims.
Water is the enemy
Let’s see here: ground contact lumber, slope, plastic/flashing, drainage… basically every part of this plan has fighting water in common! So far, I’ve learned that water is my biggest concern. I may actually overdo it with all of the ways I’m planning to handle it, but I hope through this process that my deck lasts a good long while.
Permits
I know this question will probably pop up a few times. I didn’t get a building permit for the deck and didn’t appear to need one (after researching it for a confusingly long time). Even though there are standards (IRC and others) that are adopted by many states, the whole thing is rather complex and took time to figure out the who/what/where/when (yes, that all matters):
What the codes are (there are multiple standards/guidelines that might be used to determine what is adopted)
Where they apply (city code, county code, etc.)
When they were adopted by your local ordinance
Who enforces it (there is often some discretion for the code enforcement officer regarding violations)
I checked with my local guidelines prior to starting (if you don’t find one for your city, start researching the county, and so on). By comparison to what I’ve found, my county seems to be on the less restrictive side. For example, one of my friends just informed me that he needed a permit in his city just to have a new range installed in his kitchen! So, this is definitely a situation where the best answer of whether or not a permit will be needed is, “it depends.” Regardless, I’m doing my best to build things smart and structurally sound, permit or no (the shed as well).
Next
So, that was a really long intro, and we haven’t even started building yet! But in the next post of the series, I’ll show you how I went from the initial design:
To an actual framework:
Keep ya posted!
The post DIY Floating Deck, Part 1: Planning and Layout appeared first on Ugly Duckling House.
More Where That Came From
How to Identify Poison Ivy, Prevent Exposure, ...
.yuzo_related_post img{width:170px !important; height:170px !important;} .yuzo_related_post .relatedthumb{line-height:14px;background:#ffffff !important;color:#454747!important;} .yuzo_related_post .relatedthumb:hover{background:#ffffff !important; -webkit-transition: background 0.2s linear; -moz-transition: background 0.2s linear; -o-transition: background 0.2s linear; transition: background 0.2s linear;;color:#454747!important;} .yuzo_related_post .relatedthumb a{color:#102a3b!important;} .yuzo_related_post .relatedthumb a:hover{ color:#113f5e}!important;} .yuzo_related_post .relatedthumb:hover a{ color:#113f5e!important;} .yuzo_related_post .relatedthumb:hover .yuzo__text--title{ color:#113f5e!important;} .yuzo_related_post .yuzo_text, .yuzo_related_post .yuzo_views_post {color:#454747!important;} .yuzo_related_post .relatedthumb:hover .yuzo_text, .yuzo_related_post:hover .yuzo_views_post {color:#454747!important;} .yuzo_related_post .relatedthumb{ margin: 0px 6px 0px 6px; padding: 0px 0px 0px 0px; } jQuery(document).ready(function( $ ){ jQuery('.yuzo_related_post .yuzo_wraps').equalizer({ columns : '> div' }); });
DIY Floating Deck, Part 1: Planning and Layout published first on https://vacuumpalguide.tumblr.com/
0 notes
Text
DIY Floating Deck, Part 1: Planning and Layout
I’m building a floating deck in my back yard! This is the very first post of this series, but you will be able to catch the whole thing, start to finish, right here.
Hey there! This post (or post series, rather) has been a long time coming. It’s a little tricky to do a large project like this and then share it on the blog, mainly because the project itself can be quite tiring, and breaking it into beneficial chunks takes a little time to do it right. It’s almost like building it all a second time, except fewer last-minute changes and less muscle soreness.
All that just to say, bear with me as we go through these posts. My main goal is to help clear the fog on the where/what/why, and a lot of these decisions are specific to dealing with unique challenges of my yard (sloping, building over/around a concrete patio, etc.). But if you wind up having questions as I go, I’ll try address them in future posts!
Legal disclaimer stuff: this is a personal recap, and the evolution of what I learn as I work on projects in my home. In hindsight, I often think of how I could have done something better. By no means is it a comprehensive guide for every scenario. No two houses are alike, and building codes/permitting rules vary. You will still need to research and make the best possible decision for your own home. I’m not a licensed professional. Reading and using any and all information is at your own risk. Power tools are dangerous and can kill you. Use protective safety gear, always. Don’t feed your dog chocolate, don’t stick keys in the electrical socket, and so on.
Backyard upgrades (to get to this point)
If you’ve been following along for a while, then you already know a lot of this. But for those that don’t, for the longest time with this house, I’ve been focusing a lot on the interior. I supposed that’s a pretty normal habit. We are more likely to first change the things we interact with everyday, like the kitchen, before we start fixing the part that can be more easily ignored, like the overgrown bushes in the back yard.
Each year, I dedicated a little time toward making progress, but it was hard to see (pun-intended) the forest for the trees. I killed off ivy, removed a bunch of pine trees, filled in a sinkhole, and started making cosmetic improvements (a back hedge, fire pit, corner garden, etc.). All of a sudden, late last year, things really started to click; it was time to begin the two big projects I’ve always wanted to do. As with any project, it was a matter of money, time, labor, and research. It can all seem pretty overwhelming until you get started, and I am VERY good at procrastinating when I have a lot of logical reasons to postpone at my disposal!
Timing and budgeting: a juggling act
I knew I wanted to build a shed for extra storage toward the back of my lot and began planning for that last summer (which is also underway, but that build has its own separate series). I also wanted to eventually build a floating deck off of the existing concrete slab next to the house.
Originally, I thought these projects would happen in completely different timelines. But as I was planning, I managed to bring a sponsor onboard for the shed. It’s not always easy to have the right fit come along when you are trying to plan seasonally/budget/etc., so a huge thank-you to Wood Its Real for that help! I realized that, since I had been saving up the funds already, I could basically maximize the benefits of the budget if I did both projects in one short, blazing summer of building. A lot of materials crossed over between the builds, so I reasoned that purchasing bulk amounts would be cheaper and I could save on the cost of rentals, if any. Plus, working with the same materials, I would be able to cross over the skills from one build to the next. I sketched up a quick version of how I thought everything would be done.
This seemed like a great option if I could also somehow convince K to help me design and plan it. It would be well worth the effort, I reasoned, provided that we didn’t manage to kill each other with all the sharp power tools at our disposal (thankfully, he’s a design engineer professionally and likes power tools as much as I do, so it was an easy sell). But to do any of it, we needed an actual, proper plan.
Design
I wanted the new build to create a natural flow from the patio door to the deck, from the deck to the fire pit, and so on. This would maximize the yard for an open, entertaining feel, while still giving everything separate zones.
Patio = grill spot
New deck = seating area
Fire pit = fire pit shenanigans
It’s kind of a lot to fit into a single space and around the only remaining tree in the yard. Even though I removed most of the trees, I kept the central one because it makes for a natural anchor for all the new lighting that will tie everything together (patio lights make everything better!). The sketch I created seemed to make sense of everything, including the new shed, room for a vegetable garden, and so on. But as I started marking things out in the yard, I realized that extending the patio as large as I sketched out would be WAY too big.
With K’s help, we came up with an even better plan:
Although this deck design doesn’t run the full length of the existing patio, I like that it sits perfectly between the patio and fire pit. The right corner of the new deck plan is at an angle, which allows for the mower to fit in between (really. important. thing. for K; I won’t fight it, since I win by not having to mow). It keeps the shed/garden zone a little more separate from the patio and deck, but still cohesive. The step up from the existing patio and step down from the deck to the fire pit will be parallel.
Slope challenges
As of 2016, my yard is filled in, but there is still a slope toward the back. I planned it this way for good reason: water runoff. The neighbor to my left is higher in elevation than all the others, so rainwater flows in a single direction in and out of my yard. If I had graded it any differently, I would risk disrupting that water flow, even jeopardizing the fill dirt by seeing it erode right back out of my yard. I planted a hedge line in the lower area as well to anticipate stemming future erosion problems, too.
Patios and just about anything in the yard have a slight slope for the same reason. I confirmed this with a level on my own patio, and the right corner is the lowest spot. The plan has been to continue that same slope on the new deck. So, it won’t be perfectly level, but it also won’t be noticeable.
Foundation
To help build the foundation but account for leveling, sloping, etc., I did some research and found that the best (and most readily-available) fit seems to be precast pier blocks (aka deck blocks or Handi-blocks).
I also briefly considered TuffBlock (same concept, but more lightweight material). They seem much lighter and might avoid more digging, but I couldn’t find many examples of it in use on uneven ground and the supply would have been special order. Since the concrete version is in stock at Home Depot and Lowe’s, I did most of my research on these before choosing them. I think I’ll give them a try if I ever do this project again (with a new house or working on a friend’s, etc.).
In either case, these have a notch on top that fits a 2x- or 4×4 post. Since the floating deck will sit on or partially hover over the ground, I am putting them in for extra support. Where they are too high to sit on the ground, I’m digging them down partially into the dirt. On the farthest corner (closest to the fire pit), it’s actually not tall enough even when sitting on the ground, so one 4×4 post is needed there. On top of these, there will be a framework of 2×6 lumber and then the deck boards. And me, awkwardly doing bad yoga (completing steps on building a deck puts me in a goofy mood).
Ground contact lumber
One important piece of info: since most of the new deck is touching the ground, the entire support structure (everything but the deck boards) will be made from “ground contact” lumber. In my research for these projects, I discovered that there are new standards as of 2016 for treated lumber and outdoor projects. You may already know of “pre-treated/PT” lumber, which is lumber that has been chemically treated to withstand outdoor conditions better than bare wood (recommended for just about any project exposed to the elements). But now, there is a new standard, and stores are starting to carry more and more “gound contact” or “GC” pre-treated lumber.
The main difference is where you plan to use it. Here is a graphic that breaks it down depending on use (along with more details), but here’s an easy rule: if it’s anything touching the ground or within 6 inches of the ground, it should be made with ground contact lumber.
If it’s exposed to more moisture, use ground contact. If it’s something that will be difficult to reach or repair: ground contact. If it’s smarter than the average bear… ground contact.
I’ll cover a few more facts about GC lumber and even PT lumber in general as this series goes on, but there are so many details to cover! This is important enough to cover in more depth, but I don’t want to throw too many details into this initial post until I can show more of the build as examples.
Partially covering the patio
As you can see from that digital rendering above, part of the new deck will cover a small corner of the existing patio. I found this tutorial from Family Handyman, and I plan to use some of the same ideas. Basically, I’ll be attaching some 2×4 supports to the patio (using ground contact lumber once again), and the deck will go over the whole thing.
Water buildup between the concrete pad and the wood will rot wood faster, even if it’s treated. So, extra efforts will be made to raise the framework in that spot with plastic shims.
Water is the enemy
Let’s see here: ground contact lumber, slope, plastic/flashing, drainage… basically every part of this plan has fighting water in common! So far, I’ve learned that water is my biggest concern. I may actually overdo it with all of the ways I’m planning to handle it, but I hope through this process that my deck lasts a good long while.
Permits
I know this question will probably pop up a few times. I didn’t get a building permit for the deck and didn’t appear to need one (after researching it for a confusingly long time). Even though there are standards (IRC and others) that are adopted by many states, the whole thing is rather complex and took time to figure out the who/what/where/when (yes, that all matters):
What the codes are (there are multiple standards/guidelines that might be used to determine what is adopted)
Where they apply (city code, county code, etc.)
When they were adopted by your local ordinance
Who enforces it (there is often some discretion for the code enforcement officer regarding violations)
I checked with my local guidelines prior to starting (if you don’t find one for your city, start researching the county, and so on). By comparison to what I’ve found, my county seems to be on the less restrictive side. For example, one of my friends just informed me that he needed a permit in his city just to have a new range installed in his kitchen! So, this is definitely a situation where the best answer of whether or not a permit will be needed is, “it depends.” Regardless, I’m doing my best to build things smart and structurally sound, permit or no (the shed as well).
Next
So, that was a really long intro, and we haven’t even started building yet! But in the next post of the series, I’ll show you how I went from the initial design:
To an actual framework:
Keep ya posted!
The post DIY Floating Deck, Part 1: Planning and Layout appeared first on Ugly Duckling House.
More Where That Came From
How to Identify Poison Ivy, Prevent Exposure, ...
.yuzo_related_post img{width:170px !important; height:170px !important;} .yuzo_related_post .relatedthumb{line-height:14px;background:#ffffff !important;color:#454747!important;} .yuzo_related_post .relatedthumb:hover{background:#ffffff !important; -webkit-transition: background 0.2s linear; -moz-transition: background 0.2s linear; -o-transition: background 0.2s linear; transition: background 0.2s linear;;color:#454747!important;} .yuzo_related_post .relatedthumb a{color:#102a3b!important;} .yuzo_related_post .relatedthumb a:hover{ color:#113f5e}!important;} .yuzo_related_post .relatedthumb:hover a{ color:#113f5e!important;} .yuzo_related_post .relatedthumb:hover .yuzo__text--title{ color:#113f5e!important;} .yuzo_related_post .yuzo_text, .yuzo_related_post .yuzo_views_post {color:#454747!important;} .yuzo_related_post .relatedthumb:hover .yuzo_text, .yuzo_related_post:hover .yuzo_views_post {color:#454747!important;} .yuzo_related_post .relatedthumb{ margin: 0px 6px 0px 6px; padding: 0px 0px 0px 0px; } jQuery(document).ready(function( $ ){ jQuery('.yuzo_related_post .yuzo_wraps').equalizer({ columns : '> div' }); });
from Ugly Duckling House https://www.uglyducklinghouse.com/diy-floating-deck-part-1-planning-and-layout/
0 notes
Text
DIY Floating Deck, Part 1: Planning and Layout
I’m building a floating deck in my back yard! This is the very first post of this series, but you will be able to catch the whole thing, start to finish, right here.
Hey there! This post (or post series, rather) has been a long time coming. It’s a little tricky to do a large project like this and then share it on the blog, mainly because the project itself can be quite tiring, and breaking it into beneficial chunks takes a little time to do it right. It’s almost like building it all a second time, except fewer last-minute changes and less muscle soreness.
All that just to say, bear with me as we go through these posts. My main goal is to help clear the fog on the where/what/why, and a lot of these decisions are specific to dealing with unique challenges of my yard (sloping, building over/around a concrete patio, etc.). But if you wind up having questions as I go, I’ll try address them in future posts!
Legal disclaimer stuff: this is a personal recap, and the evolution of what I learn as I work on projects in my home. In hindsight, I often think of how I could have done something better. By no means is it a comprehensive guide for every scenario. No two houses are alike, and building codes/permitting rules vary. You will still need to research and make the best possible decision for your own home. I’m not a licensed professional. Reading and using any and all information is at your own risk. Power tools are dangerous and can kill you. Use protective safety gear, always. Don’t feed your dog chocolate, don’t stick keys in the electrical socket, and so on.
Backyard upgrades (to get to this point)
If you’ve been following along for a while, then you already know a lot of this. But for those that don’t, for the longest time with this house, I’ve been focusing a lot on the interior. I supposed that’s a pretty normal habit. We are more likely to first change the things we interact with everyday, like the kitchen, before we start fixing the part that can be more easily ignored, like the overgrown bushes in the back yard.
Each year, I dedicated a little time toward making progress, but it was hard to see (pun-intended) the forest for the trees. I killed off ivy, removed a bunch of pine trees, filled in a sinkhole, and started making cosmetic improvements (a back hedge, fire pit, corner garden, etc.). All of a sudden, late last year, things really started to click; it was time to begin the two big projects I’ve always wanted to do. As with any project, it was a matter of money, time, labor, and research. It can all seem pretty overwhelming until you get started, and I am VERY good at procrastinating when I have a lot of logical reasons to postpone at my disposal!
Timing and budgeting: a juggling act
I knew I wanted to build a shed for extra storage toward the back of my lot and began planning for that last summer (which is also underway, but that build has its own separate series). I also wanted to eventually build a floating deck off of the existing concrete slab next to the house.
Originally, I thought these projects would happen in completely different timelines. But as I was planning, I managed to bring a sponsor onboard for the shed. It’s not always easy to have the right fit come along when you are trying to plan seasonally/budget/etc., so a huge thank-you to Wood Its Real for that help! I realized that, since I had been saving up the funds already, I could basically maximize the benefits of the budget if I did both projects in one short, blazing summer of building. A lot of materials crossed over between the builds, so I reasoned that purchasing bulk amounts would be cheaper and I could save on the cost of rentals, if any. Plus, working with the same materials, I would be able to cross over the skills from one build to the next. I sketched up a quick version of how I thought everything would be done.
This seemed like a great option if I could also somehow convince K to help me design and plan it. It would be well worth the effort, I reasoned, provided that we didn’t manage to kill each other with all the sharp power tools at our disposal (thankfully, he’s a design engineer professionally and likes power tools as much as I do, so it was an easy sell). But to do any of it, we needed an actual, proper plan.
Design
I wanted the new build to create a natural flow from the patio door to the deck, from the deck to the fire pit, and so on. This would maximize the yard for an open, entertaining feel, while still giving everything separate zones.
Patio = grill spot
New deck = seating area
Fire pit = fire pit shenanigans
It’s kind of a lot to fit into a single space and around the only remaining tree in the yard. Even though I removed most of the trees, I kept the central one because it makes for a natural anchor for all the new lighting that will tie everything together (patio lights make everything better!). The sketch I created seemed to make sense of everything, including the new shed, room for a vegetable garden, and so on. But as I started marking things out in the yard, I realized that extending the patio as large as I sketched out would be WAY too big.
With K’s help, we came up with an even better plan:
Although this deck design doesn’t run the full length of the existing patio, I like that it sits perfectly between the patio and fire pit. The right corner of the new deck plan is at an angle, which allows for the mower to fit in between (really. important. thing. for K; I won’t fight it, since I win by not having to mow). It keeps the shed/garden zone a little more separate from the patio and deck, but still cohesive. The step up from the existing patio and step down from the deck to the fire pit will be parallel.
Slope challenges
As of 2016, my yard is filled in, but there is still a slope toward the back. I planned it this way for good reason: water runoff. The neighbor to my left is higher in elevation than all the others, so rainwater flows in a single direction in and out of my yard. If I had graded it any differently, I would risk disrupting that water flow, even jeopardizing the fill dirt by seeing it erode right back out of my yard. I planted a hedge line in the lower area as well to anticipate stemming future erosion problems, too.
Patios and just about anything in the yard have a slight slope for the same reason. I confirmed this with a level on my own patio, and the right corner is the lowest spot. The plan has been to continue that same slope on the new deck. So, it won’t be perfectly level, but it also won’t be noticeable.
Foundation
To help build the foundation but account for leveling, sloping, etc., I did some research and found that the best (and most readily-available) fit seems to be precast pier blocks (aka deck blocks or Handi-blocks).
I also briefly considered TuffBlock (same concept, but more lightweight material). They seem much lighter and might avoid more digging, but I couldn’t find many examples of it in use on uneven ground and the supply would have been special order. Since the concrete version is in stock at Home Depot and Lowe’s, I did most of my research on these before choosing them. I think I’ll give them a try if I ever do this project again (with a new house or working on a friend’s, etc.).
In either case, these have a notch on top that fits a 2x- or 4×4 post. Since the floating deck will sit on or partially hover over the ground, I am putting them in for extra support. Where they are too high to sit on the ground, I’m digging them down partially into the dirt. On the farthest corner (closest to the fire pit), it’s actually not tall enough even when sitting on the ground, so one 4×4 post is needed there. On top of these, there will be a framework of 2×6 lumber and then the deck boards. And me, awkwardly doing bad yoga (completing steps on building a deck puts me in a goofy mood).
Ground contact lumber
One important piece of info: since most of the new deck is touching the ground, the entire support structure (everything but the deck boards) will be made from “ground contact” lumber. In my research for these projects, I discovered that there are new standards as of 2016 for treated lumber and outdoor projects. You may already know of “pre-treated/PT” lumber, which is lumber that has been chemically treated to withstand outdoor conditions better than bare wood (recommended for just about any project exposed to the elements). But now, there is a new standard, and stores are starting to carry more and more “gound contact” or “GC” pre-treated lumber.
The main difference is where you plan to use it. Here is a graphic that breaks it down depending on use (along with more details), but here’s an easy rule: if it’s anything touching the ground or within 6 inches of the ground, it should be made with ground contact lumber.
If it’s exposed to more moisture, use ground contact. If it’s something that will be difficult to reach or repair: ground contact. If it’s smarter than the average bear… ground contact.
I’ll cover a few more facts about GC lumber and even PT lumber in general as this series goes on, but there are so many details to cover! This is important enough to cover in more depth, but I don’t want to throw too many details into this initial post until I can show more of the build as examples.
Partially covering the patio
As you can see from that digital rendering above, part of the new deck will cover a small corner of the existing patio. I found this tutorial from Family Handyman, and I plan to use some of the same ideas. Basically, I’ll be attaching some 2×4 supports to the patio (using ground contact lumber once again), and the deck will go over the whole thing.
Water buildup between the concrete pad and the wood will rot wood faster, even if it’s treated. So, extra efforts will be made to raise the framework in that spot with plastic shims.
Water is the enemy
Let’s see here: ground contact lumber, slope, plastic/flashing, drainage… basically every part of this plan has fighting water in common! So far, I’ve learned that water is my biggest concern. I may actually overdo it with all of the ways I’m planning to handle it, but I hope through this process that my deck lasts a good long while.
Permits
I know this question will probably pop up a few times. I didn’t get a building permit for the deck and didn’t appear to need one (after researching it for a confusingly long time). Even though there are standards (IRC and others) that are adopted by many states, the whole thing is rather complex and took time to figure out the who/what/where/when (yes, that all matters):
What the codes are (there are multiple standards/guidelines that might be used to determine what is adopted)
Where they apply (city code, county code, etc.)
When they were adopted by your local ordinance
Who enforces it (there is often some discretion for the code enforcement officer regarding violations)
I checked with my local guidelines prior to starting (if you don’t find one for your city, start researching the county, and so on). By comparison to what I’ve found, my county seems to be on the less restrictive side. For example, one of my friends just informed me that he needed a permit in his city just to have a new range installed in his kitchen! So, this is definitely a situation where the best answer of whether or not a permit will be needed is, “it depends.” Regardless, I’m doing my best to build things smart and structurally sound, permit or no (the shed as well).
Next
So, that was a really long intro, and we haven’t even started building yet! But in the next post of the series, I’ll show you how I went from the initial design:
To an actual framework:
Keep ya posted!
The post DIY Floating Deck, Part 1: Planning and Layout appeared first on Ugly Duckling House.
More Where That Came From
How to Identify Poison Ivy, Prevent Exposure, ...
.yuzo_related_post img{width:170px !important; height:170px !important;} .yuzo_related_post .relatedthumb{line-height:14px;background:#ffffff !important;color:#454747!important;} .yuzo_related_post .relatedthumb:hover{background:#ffffff !important; -webkit-transition: background 0.2s linear; -moz-transition: background 0.2s linear; -o-transition: background 0.2s linear; transition: background 0.2s linear;;color:#454747!important;} .yuzo_related_post .relatedthumb a{color:#102a3b!important;} .yuzo_related_post .relatedthumb a:hover{ color:#113f5e}!important;} .yuzo_related_post .relatedthumb:hover a{ color:#113f5e!important;} .yuzo_related_post .relatedthumb:hover .yuzo__text--title{ color:#113f5e!important;} .yuzo_related_post .yuzo_text, .yuzo_related_post .yuzo_views_post {color:#454747!important;} .yuzo_related_post .relatedthumb:hover .yuzo_text, .yuzo_related_post:hover .yuzo_views_post {color:#454747!important;} .yuzo_related_post .relatedthumb{ margin: 0px 6px 0px 6px; padding: 0px 0px 0px 0px; } jQuery(document).ready(function( $ ){ jQuery('.yuzo_related_post .yuzo_wraps').equalizer({ columns : '> div' }); });
from Ugly Duckling House https://www.uglyducklinghouse.com/diy-floating-deck-part-1-planning-and-layout/
0 notes
Text
DIY Floating Deck, Part 1: Planning and Layout
I’m building a floating deck in my back yard! This is the very first post of this series, but you will be able to catch the whole thing, start to finish, right here.
Hey there! This post (or post series, rather) has been a long time coming. It’s a little tricky to do a large project like this and then share it on the blog, mainly because the project itself can be quite tiring, and breaking it into beneficial chunks takes a little time to do it right. It’s almost like building it all a second time, except fewer last-minute changes and less muscle soreness.
All that just to say, bear with me as we go through these posts. My main goal is to help clear the fog on the where/what/why, and a lot of these decisions are specific to dealing with unique challenges of my yard (sloping, building over/around a concrete patio, etc.). But if you wind up having questions as I go, I’ll try address them in future posts!
Legal disclaimer stuff: this is a personal recap, and the evolution of what I learn as I work on projects in my home. In hindsight, I often think of how I could have done something better. By no means is it a comprehensive guide for every scenario. No two houses are alike, and building codes/permitting rules vary. You will still need to research and make the best possible decision for your own home. I’m not a licensed professional. Reading and using any and all information is at your own risk. Power tools are dangerous and can kill you. Use protective safety gear, always. Don’t feed your dog chocolate, don’t stick keys in the electrical socket, and so on.
Backyard upgrades (to get to this point)
If you’ve been following along for a while, then you already know a lot of this. But for those that don’t, for the longest time with this house, I’ve been focusing a lot on the interior. I supposed that’s a pretty normal habit. We are more likely to first change the things we interact with everyday, like the kitchen, before we start fixing the part that can be more easily ignored, like the overgrown bushes in the back yard.
Each year, I dedicated a little time toward making progress, but it was hard to see (pun-intended) the forest for the trees. I killed off ivy, removed a bunch of pine trees, filled in a sinkhole, and started making cosmetic improvements (a back hedge, fire pit, corner garden, etc.). All of a sudden, late last year, things really started to click; it was time to begin the two big projects I’ve always wanted to do. As with any project, it was a matter of money, time, labor, and research. It can all seem pretty overwhelming until you get started, and I am VERY good at procrastinating when I have a lot of logical reasons to postpone at my disposal!
Timing and budgeting: a juggling act
I knew I wanted to build a shed for extra storage toward the back of my lot and began planning for that last summer (which is also underway, but that build has its own separate series). I also wanted to eventually build a floating deck off of the existing concrete slab next to the house.
Originally, I thought these projects would happen in completely different timelines. But as I was planning, I managed to bring a sponsor onboard for the shed. It’s not always easy to have the right fit come along when you are trying to plan seasonally/budget/etc., so a huge thank-you to Wood Its Real for that help! I realized that, since I had been saving up the funds already, I could basically maximize the benefits of the budget if I did both projects in one short, blazing summer of building. A lot of materials crossed over between the builds, so I reasoned that purchasing bulk amounts would be cheaper and I could save on the cost of rentals, if any. Plus, working with the same materials, I would be able to cross over the skills from one build to the next. I sketched up a quick version of how I thought everything would be done.
This seemed like a great option if I could also somehow convince K to help me design and plan it. It would be well worth the effort, I reasoned, provided that we didn’t manage to kill each other with all the sharp power tools at our disposal (thankfully, he’s a design engineer professionally and likes power tools as much as I do, so it was an easy sell). But to do any of it, we needed an actual, proper plan.
Design
I wanted the new build to create a natural flow from the patio door to the deck, from the deck to the fire pit, and so on. This would maximize the yard for an open, entertaining feel, while still giving everything separate zones.
Patio = grill spot
New deck = seating area
Fire pit = fire pit shenanigans
It’s kind of a lot to fit into a single space and around the only remaining tree in the yard. Even though I removed most of the trees, I kept the central one because it makes for a natural anchor for all the new lighting that will tie everything together (patio lights make everything better!). The sketch I created seemed to make sense of everything, including the new shed, room for a vegetable garden, and so on. But as I started marking things out in the yard, I realized that extending the patio as large as I sketched out would be WAY too big.
With K’s help, we came up with an even better plan:
Although this deck design doesn’t run the full length of the existing patio, I like that it sits perfectly between the patio and fire pit. The right corner of the new deck plan is at an angle, which allows for the mower to fit in between (really. important. thing. for K; I won’t fight it, since I win by not having to mow). It keeps the shed/garden zone a little more separate from the patio and deck, but still cohesive. The step up from the existing patio and step down from the deck to the fire pit will be parallel.
Slope challenges
As of 2016, my yard is filled in, but there is still a slope toward the back. I planned it this way for good reason: water runoff. The neighbor to my left is higher in elevation than all the others, so rainwater flows in a single direction in and out of my yard. If I had graded it any differently, I would risk disrupting that water flow, even jeopardizing the fill dirt by seeing it erode right back out of my yard. I planted a hedge line in the lower area as well to anticipate stemming future erosion problems, too.
Patios and just about anything in the yard have a slight slope for the same reason. I confirmed this with a level on my own patio, and the right corner is the lowest spot. The plan has been to continue that same slope on the new deck. So, it won’t be perfectly level, but it also won’t be noticeable.
Foundation
To help build the foundation but account for leveling, sloping, etc., I did some research and found that the best (and most readily-available) fit seems to be precast pier blocks (aka deck blocks or Handi-blocks).
I also briefly considered TuffBlock (same concept, but more lightweight material). They seem much lighter and might avoid more digging, but I couldn’t find many examples of it in use on uneven ground and the supply would have been special order. Since the concrete version is in stock at Home Depot and Lowe’s, I did most of my research on these before choosing them. I think I’ll give them a try if I ever do this project again (with a new house or working on a friend’s, etc.).
In either case, these have a notch on top that fits a 2x- or 4×4 post. Since the floating deck will sit on or partially hover over the ground, I am putting them in for extra support. Where they are too high to sit on the ground, I’m digging them down partially into the dirt. On the farthest corner (closest to the fire pit), it’s actually not tall enough even when sitting on the ground, so one 4×4 post is needed there. On top of these, there will be a framework of 2×6 lumber and then the deck boards. And me, awkwardly doing bad yoga (completing steps on building a deck puts me in a goofy mood).
Ground contact lumber
One important piece of info: since most of the new deck is touching the ground, the entire support structure (everything but the deck boards) will be made from “ground contact” lumber. In my research for these projects, I discovered that there are new standards as of 2016 for treated lumber and outdoor projects. You may already know of “pre-treated/PT” lumber, which is lumber that has been chemically treated to withstand outdoor conditions better than bare wood (recommended for just about any project exposed to the elements). But now, there is a new standard, and stores are starting to carry more and more “gound contact” or “GC” pre-treated lumber.
The main difference is where you plan to use it. Here is a graphic that breaks it down depending on use (along with more details), but here’s an easy rule: if it’s anything touching the ground or within 6 inches of the ground, it should be made with ground contact lumber.
If it’s exposed to more moisture, use ground contact. If it’s something that will be difficult to reach or repair: ground contact. If it’s smarter than the average bear… ground contact.
I’ll cover a few more facts about GC lumber and even PT lumber in general as this series goes on, but there are so many details to cover! This is important enough to cover in more depth, but I don’t want to throw too many details into this initial post until I can show more of the build as examples.
Partially covering the patio
As you can see from that digital rendering above, part of the new deck will cover a small corner of the existing patio. I found this tutorial from Family Handyman, and I plan to use some of the same ideas. Basically, I’ll be attaching some 2×4 supports to the patio (using ground contact lumber once again), and the deck will go over the whole thing.
Water buildup between the concrete pad and the wood will rot wood faster, even if it’s treated. So, extra efforts will be made to raise the framework in that spot with plastic shims.
Water is the enemy
Let’s see here: ground contact lumber, slope, plastic/flashing, drainage… basically every part of this plan has fighting water in common! So far, I’ve learned that water is my biggest concern. I may actually overdo it with all of the ways I’m planning to handle it, but I hope through this process that my deck lasts a good long while.
Permits
I know this question will probably pop up a few times. I didn’t get a building permit for the deck and didn’t appear to need one (after researching it for a confusingly long time). Even though there are standards (IRC and others) that are adopted by many states, the whole thing is rather complex and took time to figure out the who/what/where/when (yes, that all matters):
What the codes are (there are multiple standards/guidelines that might be used to determine what is adopted)
Where they apply (city code, county code, etc.)
When they were adopted by your local ordinance
Who enforces it (there is often some discretion for the code enforcement officer regarding violations)
I checked with my local guidelines prior to starting (if you don’t find one for your city, start researching the county, and so on). By comparison to what I’ve found, my county seems to be on the less restrictive side. For example, one of my friends just informed me that he needed a permit in his city just to have a new range installed in his kitchen! So, this is definitely a situation where the best answer of whether or not a permit will be needed is, “it depends.” Regardless, I’m doing my best to build things smart and structurally sound, permit or no (the shed as well).
Next
So, that was a really long intro, and we haven’t even started building yet! But in the next post of the series, I’ll show you how I went from the initial design:
To an actual framework:
Keep ya posted!
The post DIY Floating Deck, Part 1: Planning and Layout appeared first on Ugly Duckling House.
More Where That Came From
How to Identify Poison Ivy, Prevent Exposure, ...
.yuzo_related_post img{width:170px !important; height:170px !important;} .yuzo_related_post .relatedthumb{line-height:14px;background:#ffffff !important;color:#454747!important;} .yuzo_related_post .relatedthumb:hover{background:#ffffff !important; -webkit-transition: background 0.2s linear; -moz-transition: background 0.2s linear; -o-transition: background 0.2s linear; transition: background 0.2s linear;;color:#454747!important;} .yuzo_related_post .relatedthumb a{color:#102a3b!important;} .yuzo_related_post .relatedthumb a:hover{ color:#113f5e}!important;} .yuzo_related_post .relatedthumb:hover a{ color:#113f5e!important;} .yuzo_related_post .relatedthumb:hover .yuzo__text--title{ color:#113f5e!important;} .yuzo_related_post .yuzo_text, .yuzo_related_post .yuzo_views_post {color:#454747!important;} .yuzo_related_post .relatedthumb:hover .yuzo_text, .yuzo_related_post:hover .yuzo_views_post {color:#454747!important;} .yuzo_related_post .relatedthumb{ margin: 0px 6px 0px 6px; padding: 0px 0px 0px 0px; } jQuery(document).ready(function( $ ){ jQuery('.yuzo_related_post .yuzo_wraps').equalizer({ columns : '> div' }); });
DIY Floating Deck, Part 1: Planning and Layout published first on www.uglyducklinghouse.com
0 notes
Text
DIY Floating Deck, Part 1: Planning and Layout
I'm building a floating deck in my back yard! This is the very first post of this series, but you will be able to catch the whole thing, start to finish, right here.
Hey there! This post (or post series, rather) has been a long time coming. It's a little tricky to do a large project like this and then share it on the blog, mainly because the project itself can be quite tiring, and breaking it into beneficial chunks takes a little time to do it right. It's almost like building it all a second time, except fewer last-minute changes and less muscle soreness.
All that just to say, bear with me as we go through these posts. My main goal is to help clear the fog on the where/what/why, and a lot of these decisions are specific to dealing with unique challenges of my yard (sloping, building over/around a concrete patio, etc.). But if you wind up having questions as I go, I'll try address them in future posts!
Legal disclaimer stuff: this is a personal recap, and the evolution of what I learn as I work on projects in my home. In hindsight, I often think of how I could have done something better. By no means is it a comprehensive guide for every scenario. No two houses are alike, and building codes/permitting rules vary. You will still need to research and make the best possible decision for your own home. I'm not a licensed professional. Reading and using any and all information is at your own risk. Power tools are dangerous and can kill you. Use protective safety gear, always. Don't feed your dog chocolate, don't stick keys in the electrical socket, and so on.
Backyard upgrades (to get to this point)
If you've been following along for a while, then you already know a lot of this. But for those that don't, for the longest time with this house, I've been focusing a lot on the interior. I supposed that's a pretty normal habit. We are more likely to first change the things we interact with everyday, like the kitchen, before we start fixing the part that can be more easily ignored, like the overgrown bushes in the back yard.
Each year, I dedicated a little time toward making progress, but it was hard to see (pun-intended) the forest for the trees. I killed off ivy, removed a bunch of pine trees, filled in a sinkhole, and started making cosmetic improvements (a back hedge, fire pit, corner garden, etc.). All of a sudden, late last year, things really started to click; it was time to begin the two big projects I've always wanted to do. As with any project, it was a matter of money, time, labor, and research. It can all seem pretty overwhelming until you get started, and I am VERY good at procrastinating when I have a lot of logical reasons to postpone at my disposal!
Timing and budgeting: a juggling act
I knew I wanted to build a shed for extra storage toward the back of my lot and began planning for that last summer (which is also underway, but that build has its own separate series). I also wanted to eventually build a floating deck off of the existing concrete slab next to the house.
Originally, I thought these projects would happen in completely different timelines. But as I was planning, I managed to bring a sponsor onboard for the shed. It's not always easy to have the right fit come along when you are trying to plan seasonally/budget/etc., so a huge thank-you to Wood Its Real for that help! I realized that, since I had been saving up the funds already, I could basically maximize the benefits of the budget if I did both projects in one short, blazing summer of building. A lot of materials crossed over between the builds, so I reasoned that purchasing bulk amounts would be cheaper and I could save on the cost of rentals, if any. Plus, working with the same materials, I would be able to cross over the skills from one build to the next. I sketched up a quick version of how I thought everything would be done.
This seemed like a great option if I could also somehow convince K to help me design and plan it. It would be well worth the effort, I reasoned, provided that we didn't manage to kill each other with all the sharp power tools at our disposal (thankfully, he's a design engineer professionally and likes power tools as much as I do, so it was an easy sell). But to do any of it, we needed an actual, proper plan.
Design
I wanted the new build to create a natural flow from the patio door to the deck, from the deck to the fire pit, and so on. This would maximize the yard for an open, entertaining feel, while still giving everything separate zones.
Patio = grill spot
New deck = seating area
Fire pit = fire pit shenanigans
It's kind of a lot to fit into a single space and around the only remaining tree in the yard. Even though I removed most of the trees, I kept the central one because it makes for a natural anchor for all the new lighting that will tie everything together (patio lights make everything better!). The sketch I created seemed to make sense of everything, including the new shed, room for a vegetable garden, and so on. But as I started marking things out in the yard, I realized that extending the patio as large as I sketched out would be WAY too big.
With K's help, we came up with an even better plan:
Although this deck design doesn't run the full length of the existing patio, I like that it sits perfectly between the patio and fire pit. The right corner of the new deck plan is at an angle, which allows for the mower to fit in between (really. important. thing. for K; I won't fight it, since I win by not having to mow). It keeps the shed/garden zone a little more separate from the patio and deck, but still cohesive. The step up from the existing patio and step down from the deck to the fire pit will be parallel.
Slope challenges
As of 2016, my yard is filled in, but there is still a slope toward the back. I planned it this way for good reason: water runoff. The neighbor to my left is higher in elevation than all the others, so rainwater flows in a single direction in and out of my yard. If I had graded it any differently, I would risk disrupting that water flow, even jeopardizing the fill dirt by seeing it erode right back out of my yard. I planted a hedge line in the lower area as well to anticipate stemming future erosion problems, too.
Patios and just about anything in the yard have a slight slope for the same reason. I confirmed this with a level on my own patio, and the right corner is the lowest spot. The plan has been to continue that same slope on the new deck. So, it won't be perfectly level, but it also won't be noticeable.
Foundation
To help build the foundation but account for leveling, sloping, etc., I did some research and found that the best (and most readily-available) fit seems to be precast pier blocks (aka deck blocks or Handi-blocks).
I also briefly considered TuffBlock (same concept, but more lightweight material). They seem much lighter and might avoid more digging, but I couldn't find many examples of it in use on uneven ground and the supply would have been special order. Since the concrete version is in stock at Home Depot and Lowe's, I did most of my research on these before choosing them. I think I'll give them a try if I ever do this project again (with a new house or working on a friend's, etc.).
In either case, these have a notch on top that fits a 2x- or 4×4 post. Since the floating deck will sit on or partially hover over the ground, I am putting them in for extra support. Where they are too high to sit on the ground, I'm digging them down partially into the dirt. On the farthest corner (closest to the fire pit), it's actually not tall enough even when sitting on the ground, so one 4×4 post is needed there. On top of these, there will be a framework of 2×6 lumber and then the deck boards. And me, awkwardly doing bad yoga (completing steps on building a deck puts me in a goofy mood).
Ground contact lumber
One important piece of info: since most of the new deck is touching the ground, the entire support structure (everything but the deck boards) will be made from “ground contact” lumber. In my research for these projects, I discovered that there are new standards as of 2016 for treated lumber and outdoor projects. You may already know of “pre-treated/PT” lumber, which is lumber that has been chemically treated to withstand outdoor conditions better than bare wood (recommended for just about any project exposed to the elements). But now, there is a new standard, and stores are starting to carry more and more “gound contact” or “GC” pre-treated lumber.
The main difference is where you plan to use it. Here is a graphic that breaks it down depending on use (along with more details), but here's an easy rule: if it's anything touching the ground or within 6 inches of the ground, it should be made with ground contact lumber.
If it's exposed to more moisture, use ground contact. If it's something that will be difficult to reach or repair: ground contact. If it's smarter than the average bear… ground contact.
I'll cover a few more facts about GC lumber and even PT lumber in general as this series goes on, but there are so many details to cover! This is important enough to cover in more depth, but I don't want to throw too many details into this initial post until I can show more of the build as examples.
Partially covering the patio
As you can see from that digital rendering above, part of the new deck will cover a small corner of the existing patio. I found this tutorial from Family Handyman, and I plan to use some of the same ideas. Basically, I'll be attaching some 2×4 supports to the patio (using ground contact lumber once again), and the deck will go over the whole thing.
Water buildup between the concrete pad and the wood will rot wood faster, even if it's treated. So, extra efforts will be made to raise the framework in that spot with plastic shims.
Water is the enemy
Let's see here: ground contact lumber, slope, plastic/flashing, drainage… basically every part of this plan has fighting water in common! So far, I've learned that water is my biggest concern. I may actually overdo it with all of the ways I'm planning to handle it, but I hope through this process that my deck lasts a good long while.
Permits
I know this question will probably pop up a few times. I didn't get a building permit for the deck and didn't appear to need one (after researching it for a confusingly long time). Even though there are standards (IRC and others) that are adopted by many states, the whole thing is rather complex and took time to figure out the who/what/where/when (yes, that all matters):
What the codes are (there are multiple standards/guidelines that might be used to determine what is adopted)
Where they apply (city code, county code, etc.)
When they were adopted by your local ordinance
Who enforces it (there is often some discretion for the code enforcement officer regarding violations)
I checked with my local guidelines prior to starting (if you don't find one for your city, start researching the county, and so on). By comparison to what I've found, my county seems to be on the less restrictive side. For example, one of my friends just informed me that he needed a permit in his city just to have a new range installed in his kitchen! So, this is definitely a situation where the best answer of whether or not a permit will be needed is, “it depends.” Regardless, I'm doing my best to build things smart and structurally sound, permit or no (the shed as well).
Next
So, that was a really long intro, and we haven't even started building yet! But in the next post of the series, I'll show you how I went from the initial design:
To an actual framework:
Keep ya posted!
The post DIY Floating Deck, Part 1: Planning and Layout appeared first on Ugly Duckling House.
More Where That Came From
How to Identify Poison Ivy, Prevent Exposure, ...
.yuzo_related_post img{width:170px !important; height:170px !important;}
.yuzo_related_post .relatedthumb{line-height:14px;background:#ffffff !important;color:#454747!important;}
.yuzo_related_post .relatedthumb:hover{background:#ffffff !important; -webkit-transition: background 0.2s linear; -moz-transition: background 0.2s linear; -o-transition: background 0.2s linear; transition: background 0.2s linear;;color:#454747!important;}
.yuzo_related_post .relatedthumb a{color:#102a3b!important;}
.yuzo_related_post .relatedthumb a:hover{ color:#113f5e}!important;}
.yuzo_related_post .relatedthumb:hover a{ color:#113f5e!important;}
.yuzo_related_post .relatedthumb:hover .yuzo__text--title{ color:#113f5e!important;}
.yuzo_related_post .yuzo_text, .yuzo_related_post .yuzo_views_post {color:#454747!important;}
.yuzo_related_post .relatedthumb:hover .yuzo_text, .yuzo_related_post:hover .yuzo_views_post {color:#454747!important;}
.yuzo_related_post .relatedthumb{ margin: 0px 6px 0px 6px; padding: 0px 0px 0px 0px; }
jQuery(document).ready(function( $ ){
jQuery('.yuzo_related_post .yuzo_wraps').equalizer({ columns : '> div' });
});
0 notes
Text
DIY Floating Deck, Part 1: Planning and Layout
I’m building a floating deck in my back yard! This is the very first post of this series, but you will be able to catch the whole thing, start to finish, right here.
Hey there! This post (or post series, rather) has been a long time coming. It’s a little tricky to do a large project like this and then share it on the blog, mainly because the project itself can be quite tiring, and breaking it into beneficial chunks takes a little time to do it right. It’s almost like building it all a second time, except fewer last-minute changes and less muscle soreness.
All that just to say, bear with me as we go through these posts. My main goal is to help clear the fog on the where/what/why, and a lot of these decisions are specific to dealing with unique challenges of my yard (sloping, building over/around a concrete patio, etc.). But if you wind up having questions as I go, I’ll try address them in future posts!
Legal disclaimer stuff: this is a personal recap, and the evolution of what I learn as I work on projects in my home. In hindsight, I often think of how I could have done something better. By no means is it a comprehensive guide for every scenario. No two houses are alike, and building codes/permitting rules vary. You will still need to research and make the best possible decision for your own home. I’m not a licensed professional. Reading and using any and all information is at your own risk. Power tools are dangerous and can kill you. Use protective safety gear, always. Don’t feed your dog chocolate, don’t stick keys in the electrical socket, and so on.
Backyard upgrades (to get to this point)
If you’ve been following along for a while, then you already know a lot of this. But for those that don’t, for the longest time with this house, I’ve been focusing a lot on the interior. I supposed that’s a pretty normal habit. We are more likely to first change the things we interact with everyday, like the kitchen, before we start fixing the part that can be more easily ignored, like the overgrown bushes in the back yard.
Each year, I dedicated a little time toward making progress, but it was hard to see (pun-intended) the forest for the trees. I killed off ivy, removed a bunch of pine trees, filled in a sinkhole, and started making cosmetic improvements (a back hedge, fire pit, corner garden, etc.). All of a sudden, late last year, things really started to click; it was time to begin the two big projects I’ve always wanted to do. As with any project, it was a matter of money, time, labor, and research. It can all seem pretty overwhelming until you get started, and I am VERY good at procrastinating when I have a lot of logical reasons to postpone at my disposal!
Timing and budgeting: a juggling act
I knew I wanted to build a shed for extra storage toward the back of my lot and began planning for that last summer (which is also underway, but that build has its own separate series). I also wanted to eventually build a floating deck off of the existing concrete slab next to the house.
Originally, I thought these projects would happen in completely different timelines. But as I was planning, I managed to bring a sponsor onboard for the shed. It’s not always easy to have the right fit come along when you are trying to plan seasonally/budget/etc., so a huge thank-you to Wood Its Real for that help! I realized that, since I had been saving up the funds already, I could basically maximize the benefits of the budget if I did both projects in one short, blazing summer of building. A lot of materials crossed over between the builds, so I reasoned that purchasing bulk amounts would be cheaper and I could save on the cost of rentals, if any. Plus, working with the same materials, I would be able to cross over the skills from one build to the next. I sketched up a quick version of how I thought everything would be done.
This seemed like a great option if I could also somehow convince K to help me design and plan it. It would be well worth the effort, I reasoned, provided that we didn’t manage to kill each other with all the sharp power tools at our disposal (thankfully, he’s a design engineer professionally and likes power tools as much as I do, so it was an easy sell). But to do any of it, we needed an actual, proper plan.
Design
I wanted the new build to create a natural flow from the patio door to the deck, from the deck to the fire pit, and so on. This would maximize the yard for an open, entertaining feel, while still giving everything separate zones.
Patio = grill spot
New deck = seating area
Fire pit = fire pit shenanigans
It’s kind of a lot to fit into a single space and around the only remaining tree in the yard. Even though I removed most of the trees, I kept the central one because it makes for a natural anchor for all the new lighting that will tie everything together (patio lights make everything better!). The sketch I created seemed to make sense of everything, including the new shed, room for a vegetable garden, and so on. But as I started marking things out in the yard, I realized that extending the patio as large as I sketched out would be WAY too big.
With K’s help, we came up with an even better plan:
Although this deck design doesn’t run the full length of the existing patio, I like that it sits perfectly between the patio and fire pit. The right corner of the new deck plan is at an angle, which allows for the mower to fit in between (really. important. thing. for K; I won’t fight it, since I win by not having to mow). It keeps the shed/garden zone a little more separate from the patio and deck, but still cohesive. The step up from the existing patio and step down from the deck to the fire pit will be parallel.
Slope challenges
As of 2016, my yard is filled in, but there is still a slope toward the back. I planned it this way for good reason: water runoff. The neighbor to my left is higher in elevation than all the others, so rainwater flows in a single direction in and out of my yard. If I had graded it any differently, I would risk disrupting that water flow, even jeopardizing the fill dirt by seeing it erode right back out of my yard. I planted a hedge line in the lower area as well to anticipate stemming future erosion problems, too.
Patios and just about anything in the yard have a slight slope for the same reason. I confirmed this with a level on my own patio, and the right corner is the lowest spot. The plan has been to continue that same slope on the new deck. So, it won’t be perfectly level, but it also won’t be noticeable.
Foundation
To help build the foundation but account for leveling, sloping, etc., I did some research and found that the best (and most readily-available) fit seems to be precast pier blocks (aka deck blocks or Handi-blocks).
I also briefly considered TuffBlock (same concept, but more lightweight material). They seem much lighter and might avoid more digging, but I couldn’t find many examples of it in use on uneven ground and the supply would have been special order. Since the concrete version is in stock at Home Depot and Lowe’s, I did most of my research on these before choosing them. I think I’ll give them a try if I ever do this project again (with a new house or working on a friend’s, etc.).
In either case, these have a notch on top that fits a 2x- or 4×4 post. Since the floating deck will sit on or partially hover over the ground, I am putting them in for extra support. Where they are too high to sit on the ground, I’m digging them down partially into the dirt. On the farthest corner (closest to the fire pit), it’s actually not tall enough even when sitting on the ground, so one 4×4 post is needed there. On top of these, there will be a framework of 2×6 lumber and then the deck boards. And me, awkwardly doing bad yoga (completing steps on building a deck puts me in a goofy mood).
Ground contact lumber
One important piece of info: since most of the new deck is touching the ground, the entire support structure (everything but the deck boards) will be made from “ground contact” lumber. In my research for these projects, I discovered that there are new standards as of 2016 for treated lumber and outdoor projects. You may already know of “pre-treated/PT” lumber, which is lumber that has been chemically treated to withstand outdoor conditions better than bare wood (recommended for just about any project exposed to the elements). But now, there is a new standard, and stores are starting to carry more and more “gound contact” or “GC” pre-treated lumber.
The main difference is where you plan to use it. Here is a graphic that breaks it down depending on use (along with more details), but here’s an easy rule: if it’s anything touching the ground or within 6 inches of the ground, it should be made with ground contact lumber.
If it’s exposed to more moisture, use ground contact. If it’s something that will be difficult to reach or repair: ground contact. If it’s smarter than the average bear… ground contact.
I’ll cover a few more facts about GC lumber and even PT lumber in general as this series goes on, but there are so many details to cover! This is important enough to cover in more depth, but I don’t want to throw too many details into this initial post until I can show more of the build as examples.
Partially covering the patio
As you can see from that digital rendering above, part of the new deck will cover a small corner of the existing patio. I found this tutorial from Family Handyman, and I plan to use some of the same ideas. Basically, I’ll be attaching some 2×4 supports to the patio (using ground contact lumber once again), and the deck will go over the whole thing.
Water buildup between the concrete pad and the wood will rot wood faster, even if it’s treated. So, extra efforts will be made to raise the framework in that spot with plastic shims.
Water is the enemy
Let’s see here: ground contact lumber, slope, plastic/flashing, drainage… basically every part of this plan has fighting water in common! So far, I’ve learned that water is my biggest concern. I may actually overdo it with all of the ways I’m planning to handle it, but I hope through this process that my deck lasts a good long while.
Permits
I know this question will probably pop up a few times. I didn’t get a building permit for the deck and didn’t appear to need one (after researching it for a confusingly long time). Even though there are standards (IRC and others) that are adopted by many states, the whole thing is rather complex and took time to figure out the who/what/where/when (yes, that all matters):
What the codes are (there are multiple standards/guidelines that might be used to determine what is adopted)
Where they apply (city code, county code, etc.)
When they were adopted by your local ordinance
Who enforces it (there is often some discretion for the code enforcement officer regarding violations)
I checked with my local guidelines prior to starting (if you don’t find one for your city, start researching the county, and so on). By comparison to what I’ve found, my county seems to be on the less restrictive side. For example, one of my friends just informed me that he needed a permit in his city just to have a new range installed in his kitchen! So, this is definitely a situation where the best answer of whether or not a permit will be needed is, “it depends.” Regardless, I’m doing my best to build things smart and structurally sound, permit or no (the shed as well).
Next
So, that was a really long intro, and we haven’t even started building yet! But in the next post of the series, I’ll show you how I went from the initial design:
To an actual framework:
Keep ya posted!
The post DIY Floating Deck, Part 1: Planning and Layout appeared first on Ugly Duckling House.
DIY Floating Deck, Part 1: Planning and Layout published first on https://landscapingmates.blogspot.com
0 notes
Text
Guard Duty: A Development Retrospective - Devblog #4
The Art of Guard Duty - Pixel Practices
Howdy. Today I would like to take some time to talk to you about my process when creating art for Guard Duty. I’m going to be focussing on pixel art and practices you need to be mindful of when creating your art. Hopefully this will give you a bit of an insight into my process for creating the many pixel packed locations in Guard Duty.
Let’s start with a few basic things you’ll need to keep in mind when working with pixels. My advice here is geared around creating pixel art in Photoshop, but most of the rules will apply to other art packages.
First thing’s first - Decide upon a resolution and stick to it.
The problem I see a lot of people run into when starting in pixel art is in consistency of resolution, that is they often mix different resolutions within the image (or game). Mostly called ‘mixed resolution’, it is a where pixels in the image are not all of a consistent size, often leading to an undesirable look. Traditional pixel art is based on the foundation of a grid, where each pixel acts like a grid square. The pixels are unable to be placed outside of these grid squares, therefore keeping a consistency throughout the image. The hardware used to render pixel art in it’s heyday was unable to handle high resolutions, meaning that each pixel had to be carefully placed to make up the intended image.
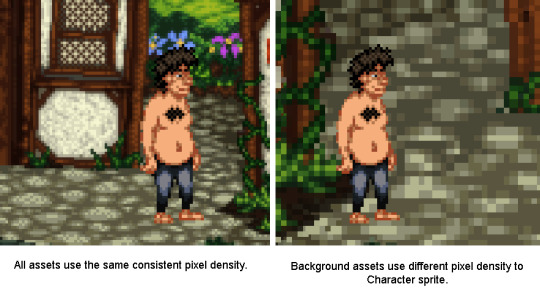
See this graphic for example, the image on the left is using a consistent pixel density whereas the one on the right is using a different density between the character sprite and the background (mixed resolution).
You see the difference? The larger pixels on the right-hand image look messy compared to it’s counterpart, this not only looks a bit strange but does not keep with the traditions of creating pixel art. You want to stick to the resolution you started with. There are some examples of modern games which used mixed resolution pixel art successfully, but these are normally used sparingly and are scaled in-engine, mostly to benefit gameplay.
Platformers often use sub-pixel movement to make gameplay smoother, which can lead to character sprites not lining up correctly with background assets. Sprites however are very rarely scaled in engine as this is far more jarring to look at.
Either way, you will save yourself a lot of hassle if you decide on your game’s resolution at the start and stick to this resolution throughout. Guard Duty uses a similar resolution to many of the early LucasArts and Sierra titles using a 4:3 ratio of 320 x 240px. It might not sound like much but that’s 76,800 pixels you’re going to have to wrangle. More than enough for me!
Moving on - Do not use anti aliased tools
Another problem I see that newcomers often run into is the temptation to use tools designed for high resolution artwork, things like the brush tool, smudge, burn/dodge and gradient fill are all inherently anti-aliased and will give you a heap of extra clean-up work. These tools create way too many pixels, with a massive array of shades and colours. You’ll find that tweaking your artwork becomes increasingly harder when using these tools. So just forget them, resist temptation to smudge your wall texture, or use your neat grass brush, It’s really not worth it if you want to create pixel art. The easiest way to keep track of anti-aliasing is to use (almost exclusively) the pencil tool, the pencil tool can be found by click-holding the brush in the toolbar and selecting the pencil from the drop-down menu.
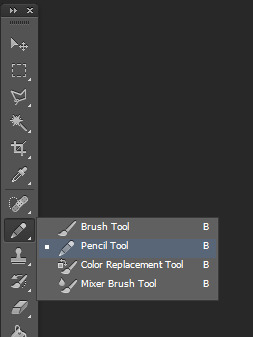
I also recommend turning off the anti-alias setting on the marquee selection tool, transform tool, paint bucket tool and magic wand tool. All of these can be used in pixel art, but with the anti-alias checkbox active you will find that they create a lot of different coloured pixels around the edge of your selection, again causing issues when flood filling areas, or otherwise editing the image.
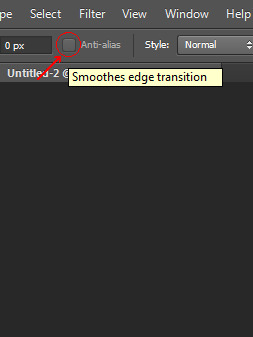
So as a general rule, make sure each pixel that is going onto your canvas is intentional. Photoshop isn’t really geared towards creating pixel art and you want to make sure it doesn’t do anything without your permission. Bad Photoshop! Behave!
Try to avoid scaling your pixel art
This is similar to my first point, but can often catch you off guard. Once you’ve drawn something on the pixel grid you may find that it doesn’t fit in a scene you’ve created previously, despite both images having the same resolution. You’ve drawn the sprite too small and although the pixels are consistently sized, it just looks tiny in the scene. Well, you’re probably going to have to redraw it, somewhat.
When you scale pixel art Photoshop will try to scale the pixels to match the resolution’s pixel grid, anything under a 200% scale will result in only some of the pixels being larger than others (some will become rectangular) and at 200% the pixels will be twice as big, but still fit into the grid. This is because Photoshop has to keep to the bounds of the canvas resolution and doesn’t know what to do with the new space between pixels.

You can see from the image that some of Tondbert’s upscaled pixels have stayed 1px wide/tall whilst others are now 2px wide or tall. His eyes, nose and left shoulder have suffered the most. Poor Tondbert. This is because Photoshop doesn’t know what to do with the pixels, at the chosen scaling it only has ‘small’ (1px) or ‘big’ (2px).
Anyway, to combat these issues you should always draw your pixel art with other assets in mind. When working on a game you don’t want to have to be scaling the character sprites differently between locations, so you should paste your character sprite into the blank canvas for the new location, so you’ve got something to reference the size. If you stick to a consistent resolution with all your art and be mindful of other assets you’re intending to use together you shouldn’t run into any of these problems.
When scaling pixel art, always use Nearest Neighbour interpolation and scale in multiples
Pixel art is kinda small and most modern computers are displaying a 1920x1080 resolution or higher. This means when showing off your pixel art on a website, it can often look reeeeeally tiny. So, you want to be aware of your image resize settings. You need to make sure the image is scaled in exact multiples of itself, 2x bigger 3x bigger etc. So if your canvas is 320 pixels wide and 240 pixels tall, the upscaled image would need to be 640 pixels wide and 480 pixels tall. To keep it simple scale the image to either 200%, 300% or 400% depending on how big you want it, but never 250% or 225%.
There is also a setting at the bottom of the ‘Image size’ box in Photoshop that has a drop down list of interpolation types, next to the ‘Resample Image’ checkbox. Set this to drop down to Nearest Neighbour(preserve hard edges). It will make sure that your pixels always stay crisp when resizing.
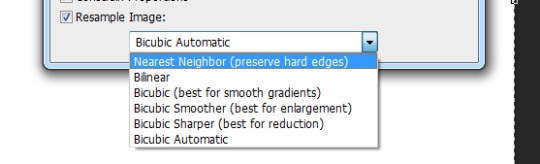
There is a similar drop down box when using the transform controls which you will also need to change, if you do not your sprites will become blurred.
Note the amount of pixels Photoshop has added when trying to smooth out the sprite to 121%, this would make the sprite near impossible to modify beyond this point. Using the Nearest Neighbour interpolation solves this issue.
Stick to a limited palette
When starting out with an image I try to keep the colour count to a minimum, this way you won’t get bogged down with tweaking the finer details and can focus on the bigger picture. It also makes tolerance selecting bits of the image a lot easier. Try to keep to three or four colours per texture, dark, mid and highlight colours. You can add extra colours later if needed but removing colours is a bit of a pain.
Now we’ve gone over the basics, let’s get started on a creating a scene.
Start with a basic thumbnail sketch
This technique applies to both sprite and background creation, but for the purpose of this post we’re going to work with a background.
I like to sketch out a few different compositions for the scene before committing to one. I usually find I get something decent by the third sketch but it may take longer, just stick with it. Each sketch shouldn’t take more than a minute or two, we’re just establishing where the shapes in the scene are going to sit. I use a black 1px brush for this stage but the colour is mostly irrelevant (we will be changing that later). I liked the composition in the second sketch and decided to make the opening more central, adding a fallen tree to the left similar to the first sketch.

Develop the thumbnail sketch
I was pretty happy with this so decided to roll with it. The next image shows how I developed the detail in the image, sticking to the sketchy black lines for now. I occasionally use a dark grey colour to show objects that are further back in the frame.

Establish clean 1px outlines
In the next step I set my sketch layer to semi-transparent (20-40%), lock it and create a new layer then begin to outline each of the individual elements. Remember to use a 1px brush and the pencil tool. About 80% of the time I’m holding shift whilst click two points on the canvas to draw a 1px line between the two points. This saves a lot of time and really helps when drawing straight lines, or long curved ones. At this point in the process you want to keep your pixels as clean as possible, avoiding ‘double pixels’ where the line becomes more than 1 pixel wide.
For the time being I’m using a different colour for each of the elements in the scene, this will make it easier to colour them in the next step and helps to cut down on having lots of layers at this early stage. It’s not necessary, but if you’re drawing everything on the same layer I would recommend it. Plus this is probably the only time you’ll get to use bright pink, vomit green and orange in the same scene!

Separate the outlines and block in the colours
Once I’ve outlined the each of the elements in the scene I pick one and start detailing! I don’t worry about the finer details, I just aim to block out the main shapes and colours. What I have done below is use the magic wand tool (anti-alias turned off) with the tolerance set to 0 and contiguous turned off. This way it will select just that colour from the scene. I cut out the element and paste it into a new layer.
I decide upon a highlight colour and start blocking out the parts of the trunk that are raised, drawing these on the same layer as the trunk outline. Underneath on a new layer I am able to fill in the darker base colour of the trunk, as seen in the third image. This leaves the outline and highlights intact and allows me to use a larger brush size to block in the colour underneath.
You can see where I’ve added some trees and foliage from another background in the top right of the image, this is to get a feel for the colours used in those backgrounds, to help consistency between scenes and because I’m too lazy to draw new trees.


Apologies for the slightly blurry images, they were pulled from the timelapse video.
Add definition with shadows and fine highlights
This is the fun part, giving the object volume. First you want to add another layer above both of your previous layers. Then by carefully placing your shadow colour you can add heaps of definition to the shape. Here I’ve used it to bring out the cracks in the wood, as well as help the branches stand out against whatever will be behind them.


Thanks to having the colours on separate layers I am then able to tweak the balance between the three colours, ready for adding an extra fourth colour for fine highlights.

After adding the fourth colour we’re about done, the object has a nice shape to it with a decent amount of detail. You could work on it further from this point, maybe adding a second dark colour for shadows but I tend to leave it here. Remember, every step of this process was done with the pencil tool and a 1px brush, the only exception was the use of a 10 pixel brush for blocking in the colour. You can use this technique for everything in your scene, I like to merge the layers once I’m finished on each object but that’s personal preference. If you do decide to merge them you have the option of using a Brightness/Contrast or Hue/Saturation adjustment layer to tweak the contrast between the highlights and midtones etc, this won’t affect the pixels or add any anti-aliasing.
Okay! That’s about it. There’s nothing particularly fancy going on once you’ve setup Photoshop to handle pixels appropriately, you just need to follow the process I’ve laid out above and you’ll be creating rad pixel art in no time. If you’ve got any questions feel free to drop me a line on one of our social links or email me on the contact form @ www.sickchicken.com.
Here’s the finished image:

You can watch a timelapse of the process on Youtube here:
youtube
For a bit of additional learning, I highly recommend watching the ‘8bit & 8bit-ish’ Graphics GDC talk by Mark Ferrari:
youtube
Cheers!
-Nath
0 notes
Text
2019 Buyers Guide to Glass Countertops …Written by an Experienced Glass Fabricator
Content
Interviewing Your Glass Fabricator
Author Qualifications
Glass Countertop Types and Terms
Textures for Glass Countertop
Glass Countertop Cutting and Polishing
Lighting Glass Countertops
Metal Support Brackets and Installation Techniques
Glass Countertops Cost
Installation and Shipping
Remodeling Trends
Conclusion
ERRATA: The Dumbest Glass Countertop Ideas on the Internet
Thick Glass countertops are one of the hottest design trends in Kitchen and Bath remodeling today. No other material enhances the visual beauty of your space like the translucent nature of glass. It offers endless creative possibilities which high-end designers demand when their projects require a luminous focal point.
This buyers guide will help you understand the many decorative options available to make it “POP” in your home.
As a buyer, we recommend you ask lots of questions of your glass fabricator after website visits followed by On-Site tours and first-hand inspection of product quality.
Do your reputation research. Know what you are getting for your money in writing upfront. Here are some good interview questions to start…
Questions for your Glass Countertop Fabricator
Where are your products Made… In the USA?
Are they responsive via phone, text and email? Speak with Who will Measure, Design, Fabricate and Install.
Share your Vision with your Fabricator in Sketches and Photos from e.g. Houzz
Are your Inputs taken when Designing Glass textures?
Do they Feel Passionate about their work…or are they just a slab exporter?
Are they Reputable ?
Get a written Quote with all options itemized with Installation.
Author Qualifications
This guide was written by Jeff Downing of Downing Designs, a professional design-build-install studio that has installed millions of dollars of custom Glass surfaces. He has an intimate understanding of glass countertop fabrication.
Downing Designs has a truly unique approach where human interaction and creative insight are fluidly aligned to imagine a brighter future for your space. Great things happen (e g. Prototypes) when we cross-pollinate our ideas with others. The result is a functional piece of glass art that has an emotional connection with their clients.
If you Google “Buy Glass Countertops” you will see many keyword-stuffed, ad-driven sites posting misleading statements and very odd glass high bar support ideas. Please enjoy our ERRATA section at the end where we’ve called them out for their misleading statements and expensive glass countertops installed in strange, half-baked ways. Buyer Beware!
Glass Types and Terms
Glass Countertops can be fabricated from a variety of glass. Float Glass is commonly used. Float glass is a flat sheet created by “floating” raw molten glass (a mix of raw material and recycled glass cullet) over a bath of molten tin.
Float Glass glass pieces up to 177” x 127” x ¾” thickness are available and are well suited for flat, back painted countertops and splashbacks.
3/4″ Low iron Glass Backpainted White
Low-Iron Glass is a Float glass with low amounts of iron which render a light bluish hue. This is critical when viewing the edge, as you will see the color intensity greatly magnified. Low-iron glass is well suited for countertops and backsplashes.
“Clear” Glass is a Float glass with higher iron content that renders it a greenish hue. The thicker the glass, the deeper the hue. Dont use “Clear” glass if you are back painting the glass as it will tint your final result.
Tempered Glass is created from Float Glass by heating in an oven and then quickly cooling. Tempered glass is about 4x stronger than annealed glass, allowing it to be used for thin glass applications e.g. shower doors, sneeze guards. Tempered glass must have all cuts completed before tempering. Usually, glass that is ¾” or thicker need NOT be tempered for use in bathrooms vanity tops, or kitchen glass counters.
Designer Note: Lighting flat glass with LEDs is a waste of money because it has no texture to create depth.
Slumped Glass is made by placing glass over a mold then thermoforming at ~1300 degrees F in Kilns until the glass “slumps” and to the shape of the mould. Slumping glass over large textured ceramic sand beds creates textured glass Sinks and Glass Backsplashes.
Fused Textured Glass is a process where sheets of float glass are thermoformed over a large ceramic sand bed and fused together ~1450 degrees F and then annealed. The annealing process “heat-strengthens” the fused glass product to almost 2x annealed glass strength. Fused textured glass at 1.5” thick is very strong and is an extremely durable material.
Designer note: 1” thick countertops do not have the visual depth on edge vs 1.5” glass but cost only fractionally less.
Textured glass hides the appearance of fingerprints and minor scratches.
Fused Glass with Colors is created using an inter-layer “paint” of glass frit and enamels and then fired. Vibrant colors are possible.
Glass With Colored Frit Fused in between Layers
Hot glass is the process of gathering and molten glass and twirling it into the artists final vision. Beautiful small artistic glass sinks and pieces can be formed this way. Examples include Dale Chihuly and “Big Wave” Dave Wight.
White Glass countertops (aka Nano glass, Crystallized glass) are a fusion of recycled glass and minerals created at 3000 degrees. It is poured, cooled then polished to a very high gloss shine. White glass countertops share a non-porous nature with Glass.
Pure White Glass countertops change the spatial relationship of every room they reside. In fact, they make kitchens and baths appear ~25% larger.
White Glass Countertops in Kitchen
From a 2019 survey on Houzz: White countertops continue to grow in popularity. Nearly one in three counters are done in white (22%, 27% and 31% in 2017, 2018 and 2019 studies, respectively) making them the #1 countertop choice for homes.
White glass is much harder on the Mohs hardness scale (7) vs glass (5.5) or granite (6.2) or engineered quartz (6.7). It is a superior countertop material for outdoors as it reflects much of the solar energy, is UV-proof, non-porous, stain-proof, requires zero maintenance or sealing, and does not burn from cigarettes. White glass comes in slabs 120” x 60” x 1.2”
Black Glass countertops are similar to White glass…but a deep, pure opaque high gloss black. These will get hot in direct sunlight.
Recycled Glass Countertops is a matrix made up of small chips of colorful recycled glass chips in a binder and sold in slabs. A concrete based binder for your recycled glass countertops will require a sealant application. A resin-based binder will stand up to stains better, but can’t be used outdoors…UV light will degrade it. Many choices for colors and binders are available. Vetrazzo, IceStone, Geos are notable brands.
Textures for Glass Countertops
Texturing Glass Upon selection of the glass countertop to be used, fabrication can begin after measuring, templating, and texture design. A like a bespoke tailor, a full-service glass countertop designer-fabricator will demonstrate ALL of your options to accessorize your glass countertop to achieve the utmost in “wow” factor. These critical points include:
Stamped Textures provide a consistent textured look that is omni-directional. These can be interesting when selected for the right environment.
Hand Sculpted Textures are artistically carved into the kiln bed to create the texture you desire. Deep textures create drama and are spectacular when lit with LEDs and downlights.
Hand Texturing Kiln Bed fro Glass Countertops
Designer Tip: Communicate and review pattern suggestions, and refine these until happy. Select a glass texture that enhances the personality of your room “flow”. Don’t settle for a stamped textured piece of glass when for the same amount of money you can have a custom designed statement piece that flows elegantly with the lines in your home. Make sure your texture flows from one piece of glass to another across the seam in multi-sectional countertops.
Air Bubbles trapped between layers of glass are part of their endearing “flaws” since glass is not formed under a vacuum.
They enhance the visual interest and depth of thick glass countertops. More Bubbles can be creatively added to glass countertops (with chemicals) if that is your desire.
Cresting Wave with Bubbles Included
Glass Cutting and Polishing
Kiln-formed glass must be cut to size and have holes drilled. Waterjets, wet saws and polishing tools with plenty of water are used. Make sure your glass fabricator has these in his shop to efficiently move your glass from kiln to cutting to polishing.
Designer Note: Make sure you inspect the quality of the edge polish of your glass countertop upon arrival. If it has lines from a worn out CNC bit, reject it! Your glass edge should offer a perfectly polished lens into your glass.
Lines on Face due to Worn Out CNC bit…”Shiney but Liney”
Lighting Glass
Make sure you have a thorough Lighting plan for LED Edge Lighting, Down lighting and Ambient Lighting so they can all contribute to the WOW factor of your glass countertop.
LED Edge and Down lighted Glass Countertop…Note Dramatic Shadows on Floor
LED Edge Lighting is typically this is the best way to light textured glass countertops. Narrow LED strip lights on the edge of the countertop allow for high levels of striking high-contrast color. Done right, your glass countertop will “POP”…especially at night. Color and brightness are achieved with a controller, usually a smart phone app. This produces millions of stunning colors that can even dance to your music. You will need to run wires from the LED strips to a controller and transformer to a 110v power outlet. Use quality LEDs…this is not a place to save money as they can be tricky to replace once installed.
Designer Tip: Your LED cover and wiring should be minimalist and allow viewing into glass as well as reduce the pixel appearance from the front. Get a plan to conceal the LED wires through the supports and lower surface.
Minimalist LED Cover…no Visible Wires.
On A Lighter Side Note: Our “proprietary” research shows that properly lit Glass High Bars are in fact “Time Machines”. Apparently, a huge benefit of the upward angling and soft mood lighting from our glass high bars is that it “turns back the clock a few years”. (It makes my vintage 1959 wrinkles almost go away…we are not sure how to price that benefit just yet).
Down lighting from the ceiling will create a powerful mimic shadow upon the floor and lower surface. It is a perfect lighting technique for High bars to complement LED edge lighting.
Designer Tip: Modern LED downlights are available that create a tight, well-defined X-Ray shadow upon the floor. They are powerful, dimmable and consume very little electricity. Aim the light to project the shadows where you desire…preferably at an angle to make the shadows look bigger.
Ambient lighting allows the glass to pop naturally during the day in a sunny location. Low iron glass is naturally beautiful when lit with sunlight.
Glass Countertop without LED in Daylight
Same Countertop Down lit at Night
Under lighting Glass requires a tall structure on the underside of the textured glass to allow for even distribution of light…which may be unsuitably high for your countertop.
Designer Note: It also creates a very “flat” lighting effect that minimizes the contrast of shadow vs light and robs textures of their visual depth. It “highlights” the rib structure of the underlying panels…and is not pretty. (see below). This technique does however work well with onyx slabs.
Underlit Glass Countertop…Looks like an XRay!
Metal Support Brackets and Installation Techniques
Supports Metal support brackets of all shapes and sizes are available.Custom metal supports must often be fabricated to suit unusual installs e.g floor-mounted supports. Your metal fabricator should be able to offer you any design you wish. Make sure your plan for your high bar is sturdy and elegant. Methods of attachment of the glass to the support include:
Silicone. Best used to attach textured glass to flat supports.
Metal Caps. Low Profile caps are best if caps are used.
UV glue. Fastest bond for flat glass to flat metal supports.
High Bar with (3) Low Profile Caps, No supports
High Bar with Low Profile Caps, Stainless Supports in Ground.
High Bar with Custom Supports…attached by Silicone
Designer tip: Many designs are lazy and use ill-conceived support techniques. They often prevent you from freely rotating in your high bars stools because your knee hits the support. Or, they use “hockey puck caps” on top of the glass to prevent you from having an uninterrupted smooth flow across your high bar surface. Look for these “beauties” in the “Errata” section at the end of this article. Make sure your supports do not interact with your knees at your glass high bar.
Back painting glass maximizes the visual depth of the textured glass countertop, backsplash or sink basin, while hiding the ability to see under or behind the glass.
Designer Tip: Back painting is preferred to laminating or painting your underlayment because gnats can find their way between the bottom of textured glass and the top of the laminate where their little carcasses will pepper the background forever. Not Pretty. Silver metallic and white back paint add depth. Back paint can be tinted to match your decor.
Textured 1/2″ Glass Backsplash Backpainted with LEDs
Installation and Shipping.
Expensive Glass requires skillful planning and experienced manpower to install.
Designer Note: We have been on a few time critical installations where cabinets, plumbing, electrical work, ceiling plastering were all being dome in the same kitchen at the same time! This is not good.
Please have a schedule that allows the glass counter to be one of the last installations...just like a valuable piece of wall art. Having too many tradesman in the room after installation increases the risk of damage to your artistic piece.
Crating for Shipping. Crates are specially fabricated for glass countertops with plenty of sturdy foam to cushion it during shipping. Make sure you purchase insurance t cover the cost of both the glass as well as the shipping costs.
Solid Crate for Shipping Glass Counters
Glass Countertops Cost:
As you can see, there is a wide range of options for glass countertops. It is impossible to conclude a precise cost but these numbers below can give you a start.
$100+/sq. ft. for ¾” flat low-iron glass. Backpaint, thermoforming, waterjetting custom shapes, holes, etc. adds to cost.
$350+/sq. ft. for 1.5” textured low-iron glass. LEDs, backpaint, custom shapes, size of piece, supports, installation, etc. add to cost.
White Glass and Recycled Glass are $125-175+/sq. Ft.
Installation and delivery costs add to the above.
Remodeling Trends
In an interesting article on Houzz, they show that homeowners are increasing their spending more on High-End countertops vs other kitchen elements.
Houzz Survey…Buyers are Splurging on Countertops
Conclusion
You are going to have to place your trust and money in someone to faithfully execute your glass countertop project. If your vendor cannot confidently lead you through each step in the design, template, custom textural sculpting, fabrication, lighting, back-painting, supporting, securing, shipping as well as installing, then find one who can …or…risk a poor outcome. Glass counters cost too much to risk a poor outcome.
Find a passionate glass fabricator that can listen to you and bring out the best in your ideas, create a plan and lead you through the process. The result will be an unbelievable artistic “wow” piece in your home.
Jeff Downing is the founder of Downing Designs in Downtown Tampa, FL. He has represented Hewlett-Packard and Philips Medical amongst others before quitting to open his custom design studio. His teachings and blogs help architects, designers, etc. to embrace creative new ways to use glass in their projects. He previously represented ThinkGlass for several years before purchasing his owns kilns to bring his unique artistic glass visions to life.
ERRATA
STRANGE Glass statements we have scraped from the Internet…”Fake News”
“On average, the minimum cost for glass countertops per square foot is $75, while the maximum cost per square foot is around $105.”
Clearly they have never made a thick textured glass countertop.
“Annealed Glass—Similar to tempered glass, annealed glass has chemicals added to the resin mixture to increase its strength.”
A chemical added to the resin??? This is glass, NOT plastic.
“Nonetheless, there are many other factors that can increase or decrease the total cost of glass counters. Supplies such as sealants and adhesives add an average of $2.45 per finished square foot of surface area.”
Sealants???? Why do you need to seal glass? Its non-porous.
“Contact with acidic foods, drinks, and certain cleaners can affect the surface and require fixing”
Not unless you are serving hydrofluoric acid to your guests! Nonsense!
Odd Designs Ideas for High Bars
Underlit Glass Countertop…Looks like an XRay!
This ugly underlighting completely ruins an otherwise nice glass countertop. Very Odd looking.
Glass Countertop with Hockey Pucks and Archaic supportsWhere am I supposed to sit ? Knee and Shin bashing will occur. Careful of those Hockey Pucks! I think Ill stand.
Glass Countertop with Hockey Pucks and Intrusive supports
Again, where am I supposed to sit? Knee bashing will occur. Shins are safe here. Robs the ability to seat people normally.
Glass Countertop with fat supports and LED covers
Where does my glass of wine and dinner plate sit? Look out for those hockey pucks! Would the Chef like to see the edge of the glass on the backside while cooking? No Chance! Glass Counters should look great from all sides.
What is the Point? No Cantilever, Lots of Hockey Pucks,No room to clean under.
Lots of hockey pucks, and fat under side supports in an otherwise beautiful glass piece.
The post 2019 Buyers Guide to Glass Countertops …Written by an Experienced Glass Fabricator appeared first on Downing Designs.
from Downing Designs https://downingdesigns.com/glass-countertops-buyers-guide/
0 notes
Text
DIY Floating Deck, Part 1: Planning and Layout
I’m building a floating deck in my back yard! This is the very first post of this series, but you will be able to catch the whole thing, start to finish, right here.
Hey there! This post (or post series, rather) has been a long time coming. I’ve gotten started on my new floating deck (also sometimes called a freestanding deck), and I’m so excited to see this one finished! I want to first walk you through some of the decision-making details before I jump into the build. So, this post is going to cover a lot of topics regarding research, budgeting, and design.
With that in mind, bear with me as we go through. My main goal is to help clear the fog on the where/what/why, and a lot of these decisions are unique challenges of my yard (sloping, building over/around a concrete patio, etc.). If you wind up having questions as I go, I’ll try address them in future posts!
Legal disclaimer stuff: this is a personal recap and what I learn as I work on projects in my home. In hindsight, I often think of how I could have done something better. By no means is it a comprehensive guide for every scenario. No two houses are alike, and building codes/permitting rules vary. You will still need to research and make the best possible decision for your own home. I’m not a licensed professional. Reading and using any and all information is at your own risk. Power tools are dangerous and can kill you. Use protective safety gear, always. Don’t feed your dog chocolate, don’t stick keys in the electrical socket, and so on.
Backyard upgrades (to get to this point)
If you’ve been following along for a while, then you already know a lot of this. But for those that don’t, for the longest time with this house, I’ve been focusing a lot on the interior. I supposed that’s a pretty normal habit. We are more likely to first change the things we interact with everyday, like the kitchen, before we start fixing the part that can be more easily ignored, like the overgrown bushes in the back yard.
Each year, I dedicated a little time toward making progress. Baby steps! I killed off ivy, removed a bunch of pine trees, and filled in a sinkhole. Eventually, I made cosmetic improvements (a back hedge, fire pit, corner garden, etc.). All of a sudden, late last year, things really started to click; it was time to begin the two big projects I’ve always wanted to do. As with any project, it was a matter of money, time, labor, and research. It can all seem pretty overwhelming until you get started, and I am VERY good at procrastinating when I have a lot of logical reasons to postpone at my disposal!
Timing and budgeting: a juggling act
I knew I wanted to build a shed for extra storage toward the back of my lot and began planning for that last summer (which is also underway, but that build has its own separate series). I also wanted to eventually build a floating deck off of the existing concrete slab next to the house.
Originally, I thought these projects would happen in completely different timelines. But as I was planning, I managed to bring a sponsor onboard for the shed. That was a huge thing for me, since this has so many moving parts with weather/budget/etc. So, a huge thank-you to Wood Its Real for that help! I realized that, since I had been saving up for the shed and could redistribute that budget, I could basically maximize cost savings if I did both projects in one short, blazing summer of building. A lot of materials crossed over between the builds, so I could also use the new skills from one build to the next while it was still fresh in my mind. Then, I sketched up a quick version of how I thought everything would be done.
This seemed like a great option if I could also somehow convince K to help me design and plan it. It would be well worth the effort, I reasoned, provided that we didn’t manage to kill each other with all the sharp power tools at our disposal (thankfully, he’s a design engineer professionally and likes power tools as much as I do, so it was an easy sell). But to do any of it, we needed an actual, proper plan.
Design
I wanted the new build to create a natural flow from the patio door to the deck, from the deck to the fire pit, and so on. This would maximize the yard for an open, entertaining feel, while still giving everything separate zones.
Patio = grill spot
New deck = seating area
Fire pit = fire pit shenanigans
It’s kind of a lot to fit into a single space and around the only remaining tree in the yard. Even though I removed most of the trees, I kept the central one because it makes for a natural anchor for all the new lighting that will tie everything together (patio lights make everything better!). The sketch I created also mapped the new shed and room for a vegetable garden. But as I started marking things out in the yard, I realized that a patio as large as I sketched out would be WAY too big.
With K’s help, we came up with an even better plan:
Although this deck design doesn’t run the full length of the existing patio, I like that it sits perfectly between the patio and fire pit. The right corner of the new deck plan is at an angle, which allows for the mower to fit in between. This is a really. important. thing. for K; I won’t fight it, since I win by not having to mow. With this design, the shed/garden zone is a little more separate from the patio and deck, but still cohesive.
Slope challenges
As of 2016, my yard is filled in, but there is still a slope toward the back. I planned it this way for good reason: water runoff. The neighbor to my left is higher in elevation than all the others, so rainwater flows in a single direction in and out of my yard. If I had graded it any differently, I would risk disrupting that water flow, even jeopardizing the fill dirt by seeing it erode right back out of my yard. I planted a hedge line in the lower area as well to anticipate stemming future erosion problems, too.
Patios and just about anything in the yard have a slight slope for the same reason. I confirmed this with a level on my own patio, and the right corner is the lowest spot. The plan has been to continue that same slope on the new deck. So, it won’t be perfectly level, but it also won’t be noticeable.
Foundation
To help build the foundation but account for leveling, sloping, etc., I did some research and found that the best (and most readily-available) fit seemed to be precast pier blocks (aka deck blocks or Handi-blocks).
I also briefly considered TuffBlock (same concept, but more lightweight material). The biggest benefit with these is that it would involve less digging.
The main drawbacks were that I couldn’t find many examples of TuffBlocks in use on uneven ground, and the supply would have been a special order. Since the concrete version is in stock at Home Depot and Lowe’s, I did most of my research on those before choosing them. In hindsight, I would have liked to have tried one out for the shed and one for the deck and maybe compare. I’m sure at some point, I’ll be able to test it out (with a new house or working on a friend’s, etc.).
In either case, there’s a notch on top that fits a 2x- joist or 4×4 post. Since the floating deck will sit on or partially hover over the ground, I am putting them in for extra support. Where they are too high to sit on the ground, I’m digging them down partially into the dirt. On the farthest corner (closest to the fire pit), it’s actually not tall enough even when sitting on the ground, so one 4×4 post is needed there. On top of these, there will be a framework of 2×6 lumber and then the deck boards. And me, awkwardly doing bad yoga in celebration of a finished step.
Ground contact lumber
One important piece of info: since most of the new deck is touching the ground, the entire support structure (everything but the deck boards) will be made from “ground contact” lumber. You may already know of “pressure-treated” or “PT” lumber, which is lumber that has been chemically treated to withstand outdoor conditions better than bare wood. PT lumber is recommended for just about any project exposed to the elements. Now, there is a new standard, and stores are starting to carry more and more “GC” pressure-treated lumber. My nearest Home Depot has virtually all of their stock replaced with GC; Lowe’s has about half and half. You can see a slight color difference sometimes between the two.
The main difference is where you plan to use it. Here is a graphic that breaks it down depending on use (along with more details), but here’s an easy rule: if it’s anything touching the ground or within 6 inches of the ground, it should be made with ground contact lumber.
If it’s exposed to more moisture, use ground contact. If it’s something that will be difficult to reach or repair: ground contact. If it’s smarter than the average bear… ground contact.
I’ll cover a few more facts about GC lumber and even PT lumber in general as this series goes on, but there are so many details to cover! This is important enough to cover it in more depth, but I don’t want to throw too many details into this initial post until I can show more of the build as examples.
Partially covering the patio
As you can see from that digital rendering above, part of the new deck will cover a small corner of the existing patio. I found this tutorial from Family Handyman, and I plan to use some of the same ideas. Basically, I’ll be attaching some 2×4 supports to the patio (using ground contact lumber once again), and the deck will go over the whole thing.
Water buildup between the concrete pad and the wood will rot wood faster, even if it’s treated. So, I plan to make raise the framework in that spot with plastic shims.
Water is the enemy
Let’s see here: ground contact lumber, slope, plastic/flashing, drainage… basically every part of my plan has fighting moisture in common! So far, I’ve learned that water is my biggest concern. I may actually even be overdoing it, but I hope that regardless, the deck lasts a good long while.
Permits
I know this question will probably pop up a few times. I did not get a building permit for the deck. And, I didn’t appear to need one (after researching it for a long time). Even though there are standards (IRC and others) that are adopted by many states, the whole thing is rather complex; it took time to figure out the who/what/where/when (yes, that all matters):
What the codes are (there are multiple standards/guidelines that might be used to determine what is adopted)
Where they apply (city code, county code, etc.)
When they were adopted by your local ordinance
Who enforces it (there is often some discretion for the local code enforcement officer regarding approvals/violations)
I checked with my local guidelines prior to starting (if you don’t find one for your city, start researching the county, and so on). By comparison to what I’ve found, my county seems to be on the less restrictive side. This is definitely a situation where your best bet is to call your permit office and ask. Regardless, I’m doing my best to build things smart and structurally sound, permit or no (the shed as well).
Next
So, that was a really long intro, and we haven’t even started showing you the build process yet! But in the next post of the series, I’ll show you how I went from the initial layout:
To an actual framework:
Keep ya posted!
The post DIY Floating Deck, Part 1: Planning and Layout appeared first on Ugly Duckling House.
More Where That Came From
Quick Patio Patch
How to Identify Poison Ivy, Prevent Exposure, ...
4 Easy Tips for Growing Hydrangeas
How to Make Your Patio Look New Again for Less Tha...
.yuzo_related_post img{width:170px !important; height:170px !important;} .yuzo_related_post .relatedthumb{line-height:14px;background:#ffffff !important;color:#454747!important;} .yuzo_related_post .relatedthumb:hover{background:#ffffff !important; -webkit-transition: background 0.2s linear; -moz-transition: background 0.2s linear; -o-transition: background 0.2s linear; transition: background 0.2s linear;;color:#454747!important;} .yuzo_related_post .relatedthumb a{color:#102a3b!important;} .yuzo_related_post .relatedthumb a:hover{ color:#113f5e}!important;} .yuzo_related_post .relatedthumb:hover a{ color:#113f5e!important;} .yuzo_related_post .relatedthumb:hover .yuzo__text--title{ color:#113f5e!important;} .yuzo_related_post .yuzo_text, .yuzo_related_post .yuzo_views_post {color:#454747!important;} .yuzo_related_post .relatedthumb:hover .yuzo_text, .yuzo_related_post:hover .yuzo_views_post {color:#454747!important;} .yuzo_related_post .relatedthumb{ margin: 0px 6px 0px 6px; padding: 0px 0px 0px 0px; } jQuery(document).ready(function( $ ){ jQuery('.yuzo_related_post .yuzo_wraps').equalizer({ columns : '> div' }); });
DIY Floating Deck, Part 1: Planning and Layout published first on https://bakerskitchenslimited.tumblr.com/
0 notes
Text
DIY Floating Deck, Part 1: Planning and Layout
I’m building a floating deck in my back yard! This is the very first post of this series, but you will be able to catch the whole thing, start to finish, right here.
Hey there! This post (or post series, rather) has been a long time coming. It’s a little tricky to do a large project like this and then share it on the blog, mainly because the project itself can be quite tiring, and breaking it into beneficial chunks takes a little time to do it right. It’s almost like building it all a second time, except fewer last-minute changes and less muscle soreness.
All that just to say, bear with me as we go through these posts. My main goal is to help clear the fog on the where/what/why, and a lot of these decisions are specific to dealing with unique challenges of my yard (sloping, building over/around a concrete patio, etc.). But if you wind up having questions as I go, I’ll try address them in future posts!
Legal disclaimer stuff: this is a personal recap, and the evolution of what I learn as I work on projects in my home. In hindsight, I often think of how I could have done something better. By no means is it a comprehensive guide for every scenario. No two houses are alike, and building codes/permitting rules vary. You will still need to research and make the best possible decision for your own home. I’m not a licensed professional. Reading and using any and all information is at your own risk. Power tools are dangerous and can kill you. Use protective safety gear, always. Don’t feed your dog chocolate, don’t stick keys in the electrical socket, and so on.
Backyard upgrades (to get to this point)
If you’ve been following along for a while, then you already know a lot of this. But for those that don’t, for the longest time with this house, I’ve been focusing a lot on the interior. I supposed that’s a pretty normal habit. We are more likely to first change the things we interact with everyday, like the kitchen, before we start fixing the part that can be more easily ignored, like the overgrown bushes in the back yard.
Each year, I dedicated a little time toward making progress, but it was hard to see (pun-intended) the forest for the trees. I killed off ivy, removed a bunch of pine trees, filled in a sinkhole, and started making cosmetic improvements (a back hedge, fire pit, corner garden, etc.). All of a sudden, late last year, things really started to click; it was time to begin the two big projects I’ve always wanted to do. As with any project, it was a matter of money, time, labor, and research. It can all seem pretty overwhelming until you get started, and I am VERY good at procrastinating when I have a lot of logical reasons to postpone at my disposal!
Timing and budgeting: a juggling act
I knew I wanted to build a shed for extra storage toward the back of my lot and began planning for that last summer (which is also underway, but that build has its own separate series). I also wanted to eventually build a floating deck off of the existing concrete slab next to the house.
Originally, I thought these projects would happen in completely different timelines. But as I was planning, I managed to bring a sponsor onboard for the shed. It’s not always easy to have the right fit come along when you are trying to plan seasonally/budget/etc., so a huge thank-you to Wood Its Real for that help! I realized that, since I had been saving up the funds already, I could basically maximize the benefits of the budget if I did both projects in one short, blazing summer of building. A lot of materials crossed over between the builds, so I reasoned that purchasing bulk amounts would be cheaper and I could save on the cost of rentals, if any. Plus, working with the same materials, I would be able to cross over the skills from one build to the next. I sketched up a quick version of how I thought everything would be done.
This seemed like a great option if I could also somehow convince K to help me design and plan it. It would be well worth the effort, I reasoned, provided that we didn’t manage to kill each other with all the sharp power tools at our disposal (thankfully, he’s a design engineer professionally and likes power tools as much as I do, so it was an easy sell). But to do any of it, we needed an actual, proper plan.
Design
I wanted the new build to create a natural flow from the patio door to the deck, from the deck to the fire pit, and so on. This would maximize the yard for an open, entertaining feel, while still giving everything separate zones.
Patio = grill spot
New deck = seating area
Fire pit = fire pit shenanigans
It’s kind of a lot to fit into a single space and around the only remaining tree in the yard. Even though I removed most of the trees, I kept the central one because it makes for a natural anchor for all the new lighting that will tie everything together (patio lights make everything better!). The sketch I created seemed to make sense of everything, including the new shed, room for a vegetable garden, and so on. But as I started marking things out in the yard, I realized that extending the patio as large as I sketched out would be WAY too big.
With K’s help, we came up with an even better plan:
Although this deck design doesn’t run the full length of the existing patio, I like that it sits perfectly between the patio and fire pit. The right corner of the new deck plan is at an angle, which allows for the mower to fit in between (really. important. thing. for K; I won’t fight it, since I win by not having to mow). It keeps the shed/garden zone a little more separate from the patio and deck, but still cohesive. The step up from the existing patio and step down from the deck to the fire pit will be parallel.
Slope challenges
As of 2016, my yard is filled in, but there is still a slope toward the back. I planned it this way for good reason: water runoff. The neighbor to my left is higher in elevation than all the others, so rainwater flows in a single direction in and out of my yard. If I had graded it any differently, I would risk disrupting that water flow, even jeopardizing the fill dirt by seeing it erode right back out of my yard. I planted a hedge line in the lower area as well to anticipate stemming future erosion problems, too.
Patios and just about anything in the yard have a slight slope for the same reason. I confirmed this with a level on my own patio, and the right corner is the lowest spot. The plan has been to continue that same slope on the new deck. So, it won’t be perfectly level, but it also won’t be noticeable.
Foundation
To help build the foundation but account for leveling, sloping, etc., I did some research and found that the best (and most readily-available) fit seems to be precast pier blocks (aka deck blocks or Handi-blocks).
I also briefly considered TuffBlock (same concept, but more lightweight material). They seem much lighter and might avoid more digging, but I couldn’t find many examples of it in use on uneven ground and the supply would have been special order. Since the concrete version is in stock at Home Depot and Lowe’s, I did most of my research on these before choosing them. I think I’ll give them a try if I ever do this project again (with a new house or working on a friend’s, etc.).
In either case, these have a notch on top that fits a 2x- or 4×4 post. Since the floating deck will sit on or partially hover over the ground, I am putting them in for extra support. Where they are too high to sit on the ground, I’m digging them down partially into the dirt. On the farthest corner (closest to the fire pit), it’s actually not tall enough even when sitting on the ground, so one 4×4 post is needed there. On top of these, there will be a framework of 2×6 lumber and then the deck boards. And me, awkwardly doing bad yoga (completing steps on building a deck puts me in a goofy mood).
Ground contact lumber
One important piece of info: since most of the new deck is touching the ground, the entire support structure (everything but the deck boards) will be made from “ground contact” lumber. In my research for these projects, I discovered that there are new standards as of 2016 for treated lumber and outdoor projects. You may already know of “pre-treated/PT” lumber, which is lumber that has been chemically treated to withstand outdoor conditions better than bare wood (recommended for just about any project exposed to the elements). But now, there is a new standard, and stores are starting to carry more and more “gound contact” or “GC” pre-treated lumber.
The main difference is where you plan to use it. Here is a graphic that breaks it down depending on use (along with more details), but here’s an easy rule: if it’s anything touching the ground or within 6 inches of the ground, it should be made with ground contact lumber.
If it’s exposed to more moisture, use ground contact. If it’s something that will be difficult to reach or repair: ground contact. If it’s smarter than the average bear… ground contact.
I’ll cover a few more facts about GC lumber and even PT lumber in general as this series goes on, but there are so many details to cover! This is important enough to cover in more depth, but I don’t want to throw too many details into this initial post until I can show more of the build as examples.
Partially covering the patio
As you can see from that digital rendering above, part of the new deck will cover a small corner of the existing patio. I found this tutorial from Family Handyman, and I plan to use some of the same ideas. Basically, I’ll be attaching some 2×4 supports to the patio (using ground contact lumber once again), and the deck will go over the whole thing.
Water buildup between the concrete pad and the wood will rot wood faster, even if it’s treated. So, extra efforts will be made to raise the framework in that spot with plastic shims.
Water is the enemy
Let’s see here: ground contact lumber, slope, plastic/flashing, drainage… basically every part of this plan has fighting water in common! So far, I’ve learned that water is my biggest concern. I may actually overdo it with all of the ways I’m planning to handle it, but I hope through this process that my deck lasts a good long while.
Permits
I know this question will probably pop up a few times. I didn’t get a building permit for the deck and didn’t appear to need one (after researching it for a confusingly long time). Even though there are standards (IRC and others) that are adopted by many states, the whole thing is rather complex and took time to figure out the who/what/where/when (yes, that all matters):
What the codes are (there are multiple standards/guidelines that might be used to determine what is adopted)
Where they apply (city code, county code, etc.)
When they were adopted by your local ordinance
Who enforces it (there is often some discretion for the code enforcement officer regarding violations)
I checked with my local guidelines prior to starting (if you don’t find one for your city, start researching the county, and so on). By comparison to what I’ve found, my county seems to be on the less restrictive side. For example, one of my friends just informed me that he needed a permit in his city just to have a new range installed in his kitchen! So, this is definitely a situation where the best answer of whether or not a permit will be needed is, “it depends.” Regardless, I’m doing my best to build things smart and structurally sound, permit or no (the shed as well).
Next
So, that was a really long intro, and we haven’t even started building yet! But in the next post of the series, I’ll show you how I went from the initial design:
To an actual framework:
Keep ya posted!
The post DIY Floating Deck, Part 1: Planning and Layout appeared first on Ugly Duckling House.
More Where That Came From
How to Identify Poison Ivy, Prevent Exposure, ...
.yuzo_related_post img{width:170px !important; height:170px !important;} .yuzo_related_post .relatedthumb{line-height:14px;background:#ffffff !important;color:#454747!important;} .yuzo_related_post .relatedthumb:hover{background:#ffffff !important; -webkit-transition: background 0.2s linear; -moz-transition: background 0.2s linear; -o-transition: background 0.2s linear; transition: background 0.2s linear;;color:#454747!important;} .yuzo_related_post .relatedthumb a{color:#102a3b!important;} .yuzo_related_post .relatedthumb a:hover{ color:#113f5e}!important;} .yuzo_related_post .relatedthumb:hover a{ color:#113f5e!important;} .yuzo_related_post .relatedthumb:hover .yuzo__text--title{ color:#113f5e!important;} .yuzo_related_post .yuzo_text, .yuzo_related_post .yuzo_views_post {color:#454747!important;} .yuzo_related_post .relatedthumb:hover .yuzo_text, .yuzo_related_post:hover .yuzo_views_post {color:#454747!important;} .yuzo_related_post .relatedthumb{ margin: 0px 6px 0px 6px; padding: 0px 0px 0px 0px; } jQuery(document).ready(function( $ ){ jQuery('.yuzo_related_post .yuzo_wraps').equalizer({ columns : '> div' }); });
DIY Floating Deck, Part 1: Planning and Layout published first on https://bakerskitchenslimited.tumblr.com/
0 notes
Last Seen Blogs

your-new-love
Your New Love.

aliciabell
AliciaBell

wronganswer13
Bird? Maybe.

radioactivesupersonic
moved

101fiction
101 Fiction