#soooooo full of project thoughts and excitement do not know how to fix it
Text
One of these days I will figure out the secret to turning my brain off to go to sleep when it is in Project Mode and then it's Over for you fools
#ramblings of an arrow#I will be so powerful#as it stands currently I cant sleep because all I can do is think about Trap Troubles#and how damn excited I am to thumbnail this comic#and how much I want to be doing it Right Now#planning panel layouts in my head#is not conducive to actually sleeping#but anyways all of the characters are like blorbos to me#and I cant stop turning them around in my head#and trying to plan visual foreshadowing#soooooo full of project thoughts and excitement do not know how to fix it#perhaps I will post the character line up I did sometime tomorrow#anyways if I can keep this excitement and momentum up for the rest of the month that bodes Very Well for my ability#to eventually pursue something art related for a living#or produce my own webcomic#its also just EXTRA FUN because its a collaboration with my wife and she is SUCH a fantastic writer#she really carries the whole thing#and it helps me be less self conscious because im not worried about whether or not the writing is good#I KNOW the writing is good#and I know my art will be Good Enough#because a myriad of art mistakes can be forgiven when the writing is good#takes a lot of pressure off my brain lol
9 notes
·
View notes
Text
Sewing Table Refurb Part #2: The “F*&k This S#!t” phase
I’m back to continue my saga of the sewing table refurb!
So every DIY initiative I’ve ever undertaken, every decor overhaul, sewing project, furniture makeover, ANYTHING of the kind, has invariably involved a step in the journey toward completion that I endearingly refer to as the “F*&k This S#!t” phase. This is the phase of a project where the initial enthusiasm and excitement bubble back down to normal levels, the complications and problems of a project start popping up, and then usually, life just starts getting in the way. A kid (or two) gets sick, and requires a ton of attention and care. The car breaks down. The weather stinks, for days on end. The family gets weary of the behemoth piece of unfinished furniture blocking the hall. A friend or family member unexpectedly needs assistance and support with something, and you feel pulled more towards assisting with that, than sanding wood for the 11th day in a row. You find yourself looking at the exciting, adorable project idea that once got you jazzed, and thinking “F*&K THIS S#!T. I just want it over with already!”
Yeah, so - - confession. For the last week I’ve been in this place.
And its so frustrating and disheartening, because invariably, I am ALWAYS surprised to find myself feeling this way in a project. Every idea I’ve ever had was born out of TRUE and genuine excitement, and a feeling that it would somehow improve my life, or give me a humongous adrenaline surge and tidal wave of pride and accomplishment, and flowers would rain down from the heavens and firecrackers would spontaneously burst in air upon its completion. So I’m always flabbergasted to find myself looking at the thing I once loved, and feeling like kicking it to the curb, running away from it, QUITTING. But I always have this feeling.
Happily, I am a stubborn-ass donkey who has almost never quit anything in my life. This personality characteristic is actually sort of a problem for me, because it means I often put up with crap I really ought not to, or I continue certain activities or pursuits WAAAAAY longer and more seriously than I really should, for the satisfaction and self-worth they bring me in return..... but I digress. In this case, with the sewing table - - today I’ll talk about how my stubbornness is going to bring me to triumph, in the end.
So where we left off: with GREAT pains, I had singlehandedly carried the table into my house, into the guest room, and parked it there so I could stain and seal it indoors (THIS WAS A MISTAKE THAT I’D END UP REGRETTING). I was so excited, because I presumed that the “hard part” of my project - the woodworking and engineering portions - were behind me, and everything left - the staining, painting, use of pretty patterned paper to decorate the table - were all merely cosmetic from this point onwards and therefore “easy.” Ohhh, how wrong I was......
There was a day where I had to attend to a broken plastic drawer guide on the bottom-most drawer. Seemed like an easy enough fix. Except...GEESOME PETE WTF kind of fasteners did they use to attach these things? IT was some kind of weird nail that when shot through the holes of the drawer guide, flanged out like a rocket ship and therefore were impossible to pry out with a hammer. I had to deploy all kinds of tools....

I had to use needle nose pliers to bend back those flanged-out pieces into a straight/tapered shape so they’d actually be able to travel through the nail hole to come out. I even had to take a hack saw to some of the tiny flanges and just saw them off. Then, in the end, I took to hitting the reverse side of the nails with a long flathead nail and my hammer, like a caveman with hammer and chisel, until the nail traveled BACKWARDS and out. It was a GIANT pain in the ass, and extremely boring/unrewarding work.
But at last.... I got the little jerks out.
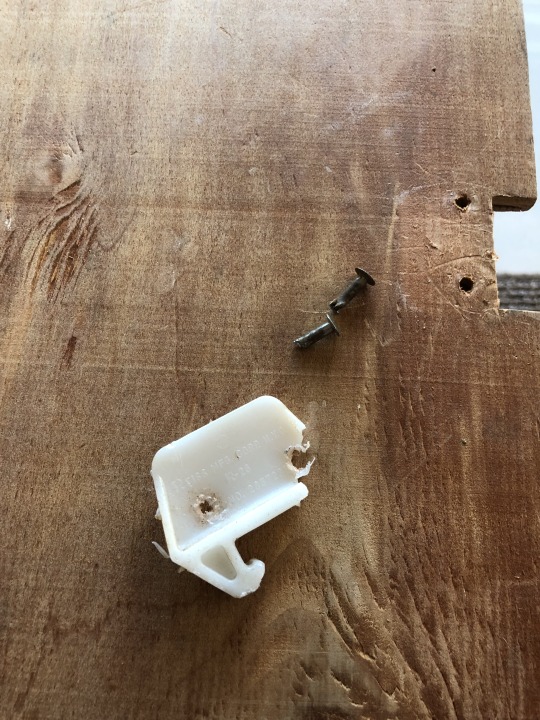
And within moments, my new drawer glide was screwed into place.

PHEW. I was all chuckling to myself, thinking “wow, so that was hard! I guess that was the one stumbling block in this otherwise smooth-sailing project!!!”
Oh, how dumb I was.....
Later that day, I prepped the table with blue painter’s tape and a good wipe-down with tack cloths, then got two coats of Kilz 2 Water-Based Primer on the drawer faces and some of the side/back panels (because I had nearly a full can of it left over in my garage for some reason).
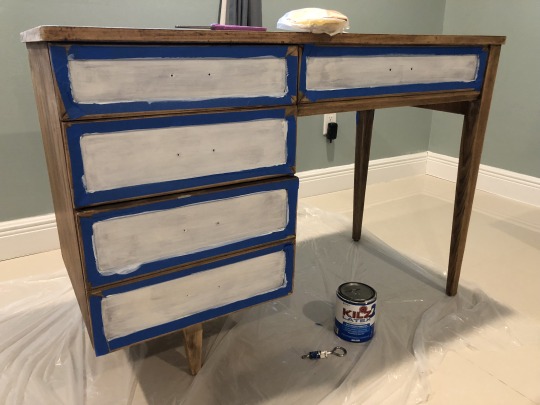
After that, I decided that it was time to begin the staining process!!!!
Now, to backtrack a second - - I had put DEEP, DEEP, DEEP-ASS thought into how I wanted this table stained. In the end, I was hoping to go with a grayish, modern-meets-rustic-meets-midcentury modern weathered wood look. Something like this:


I did painstaking research on what kind of stain to use - would I go with traditional oil-based stain, or the more newfangled, novice-friendly gel stain? I decided in the end to try traditional stain for a few reasons: it was more readily available in my area in the gray color I wanted, and I was also interested in having my table’s natural wood grain show through, and I worried that gel stain would be too opaque for my tastes.
Spoiler alert:

yeah. I. CHOSE. POORLY. (sidebar #2: anyone who got that Indiana Jones reference right away wins a gold star from me!!!)
Anyway. So here I was, all excited and peppy, ready to apply my TRADITIONAL STAIN on my painstakingly sanded and prepped table. (you FRIGGING IDIOT, you). Here I went, applying Varathane wood conditioner, because “look how thoroughly I’ve researched everything, and look how awesome I’m gonna be when my perfect shade of perfect wood stain goes on perfectly the first time and I’m gonna be perfectly happy!!!” (eye roll)

It’s SOOOO painful to look at this picture now. LOOK HOW AMAZING the table looked after the wood conditioner. I couldn’t believe my eyes. The wood grain looked AMAZING, and I was soooooo happy and proud of myself.

God, I feel sick to my stomach looking at that, knowing that only a short 30 minutes later, I’d be f*&cking it all up completely :( Also, it was right about this point where I realized I was literally smoking my family out of the house. The wood conditioner had a VERY noxious smell, that little by little, floated into the air and completely filled nearly every corner of the house. It was super powerful, and we all couldn’t stand it. Dr. Spouse helped me (carefully) carry the table back out to the garage, where we opened the door quickly to let out the fumes, and then we ran back inside, set all the A/C fans to circulate for a few hours, then grabbed the kids and went out to dinner to escape the worst of it. (we shut Pixel in the office room with food, water, and litterbox and the fan running - there was hardly any smell in there, thank goodness).
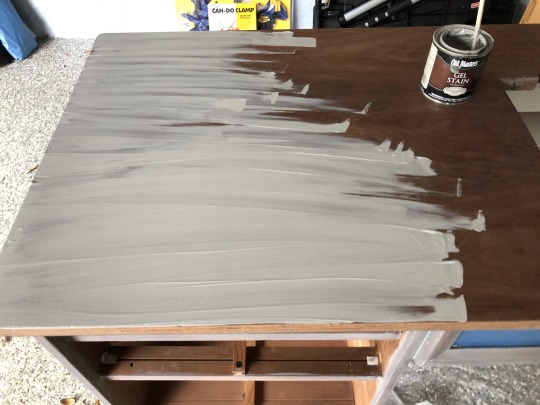
I popped open my can of REGRET AND SALTY TEARS Minwax Classic Gray wood stain, and had at it. Then we went out to dinner. About an hour and a half later....

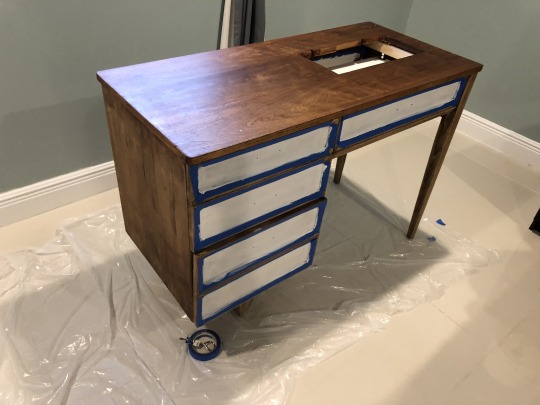
So these pics don’t look all that bad - but let me tell you, in real life, what I saw was DEEPLY CONCERNING. The stain hardly seemed to take at all on the tabletop, except to dull the gorgeous natural appearance of the wood in most places, and in some places - worse - - there was this white, patchy, ashy kind of residue look all over. IT was almost as if the table looked like it was covered in decades of dust and game.
On the drawer fronts, the stain had taken differently, and the wood trim appeared a more true gray.
The legs of the table took the stain differently still.

The whole thing was blotchy, ashy, and uneven. A minor little buzz of panic started buzzing in my gut... . and there it would remain, getting worse and worse over the next few days.I painted one, then two coats, of blue paint on the drawer fronts, while I contemplated what to do next.
I suppose I ought to mention here that at some point, after painting the drawer panels blue and while contemplating the whole stain situation, I decided to try removing some of the painters tape, and to my horror - saw that I was peeling off the entire blue latex paint layer adjacent to it. I even followed all the advice and adages online of not letting the paint dry all the way before removing tape. But alas, my paint job needed serious retouching, to add to the worry and work of the stain disaster. F*&K.
After a few days of confusion, frustration, stalling, researching, and grieving the fact that I might have ruined my table with this horrible stain - - I decided I needed to find a way to move forward. The F*&k This S#!t phase had sent me into a tailspin, and the only way to get out of it would be to come up with a plan, try it out, and see what would happen. I was pretty sure I couldn’t really make matters worse, but who knew?!
I decided it would be worth my time, effort, and money to track down a supplier in my area that carried a gray gel stain. I knew right away where I ought to try - a shop that the previous summer, I had visited to put in a new custom-built barn door in our master bedroom suite to close off the bathroom area from the bedroom. I dialed up Sheridan Lumber and asked about their current stock of gray and espresso-tinted gel stains. To my delight, they had a few on hand - so I raced to their store one morning, and purchased a small 8 oz. can of Old Masters Gel Stain in Weathered Wood.

I found a few hours to spare later that day, and I decided to go for it and give it a whirl.
The gel stain had a delightful, pudding-like consistency that made working it over the wood really easy, especially on vertical surfaces and other awkward spots where the traditional oil-base stain just went dripping and running in difficult-to-control directions. I’d heard that you could apply the gel, leave it on a few minutes, and wipe it off, or apply and wipe off immediately for less color penetration. I chose to apply and wipe off immediately, working in small sections of the table till it was all done.
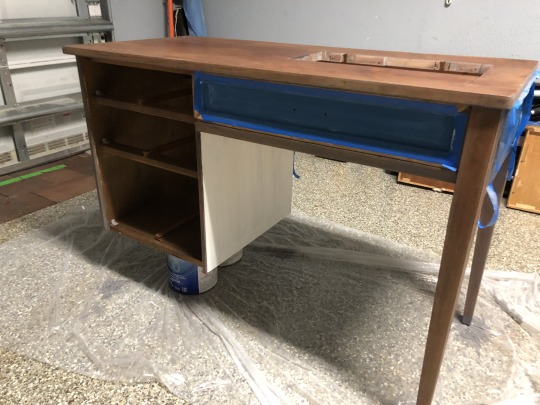
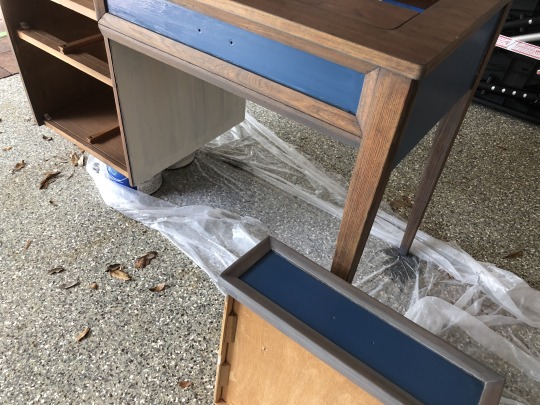
Here is a great picture showing the results after one coat of gel stain. The drawer front on the desk features the traditional oil-base stain, after two coats. The drawer sitting on the floor, in front of the table, shows the results after one coat of gel stain.
The gel stain certainly provided more opacity, which I initially didn’t necessarily “want” with this table for fear that it would occlude the beautiful wood grain. But I realized that I really did care for a true gray tone, and the only way to do that with this table, with the wood its made of (walnut wood), would be to bump up the opacity a little. The interesting thing about gel stain is that, to an extent, you can control how opaque the stain is going to be on your wood. The apply-and-wipe-immediately method renders the most opacity, for obvious reasons (the pigment doesn’t penetrate as thoroughly with less time on the surface). But one could apply and leave for anywhere from 5-15 minutes, in order to let the dye penetrate more, then wipe off, if you wanted more opacity. And if you want a LOT of opacity, you could actually paint the gel stain on, and leave it on - - just like a paint.

Happily, I feel like some of the natural wood grain still does come through, as I wanted it to, with the way I applied it. It’s nice to have on the drawer fronts - but its more meaningful to me on the table top. I ended up doing two coats of gel stain in total, applying and wiping off immediately in small sections about 24 hours after Coat #1 was done and dry. And..... here is the result, for now!
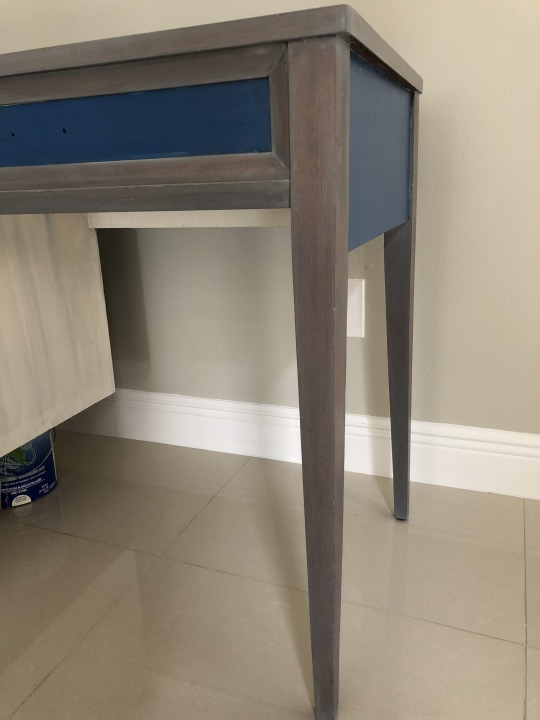


I am not sure if this is TRULY the look I was going for, when I imagined it all in my mind’s eye. But it is definitely WAY closer to my intended look than where the original oil-based stain had left me about a week ago. Phew! I’m so relieved that the “F*&ck This S#!t” phase, painful as it was, ended with me feeling a little less disappointed and a little more happy, even if it entailed a ton more work and worry than I’d expected.
Moving on! I *believe* (oh god, please let it be so) that my next update will be a very happy one indeed, for it *should* in theory be the BIG REVEAL, where the project is done and I am standing back, thoroughly basking in the sense of accomplishment and the exciting possibilities of my sewing table having a new, more ergonomically-satisfactory home.
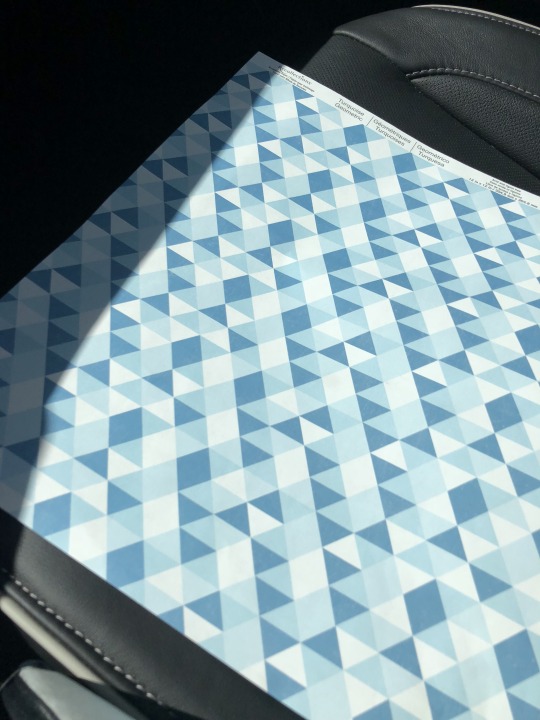
Here is a little teaser for what’s to come..... my final product will involve this adorable geometric retro-print paper :)
Toodles for now!
0 notes
Last Seen Blogs

darlenecatly
Red and Grey

androidmtp1
Android MTP

sun-flowerstudies
dorothy studies

pizzano-the-paisano-and-pizzelle
HEY PAISANOS!!!!