
Last Seen Blogs


Text
DEFAULT VEHICLES
As part of one of the default Roblox Studio templates, Roblox includes a basic vehicle. From the start, it is clear to me that this vehicle does not utilise Physics Simulation at all, and instead uses forces and raycasts (I later discovered it also uses many deprecated components).
This is obviously not ideal for modern vehicle systems, however the raycast suspension found on this little Jeep thing has been a big inspiration to my idea of creating a custom suspension system for my vehicle system, and later the idea of creating solely a suspension system.
The system shown here (as in, the Roblox system shown above) works very well, and has no jittering, glitching, bouncing or any problems from the 10 minutes I spent testing it. This proves the reliability of the Raycast suspension design.
0 notes
Text
VEHICLES IN ROBLOX (2)
Lumber Tycoon 2 is a very old (and somewhat nostalgic) game on Roblox. Being so old, it uses a very simple vehicle system which does not features suspension or even a GUI.
The video above shows this, the vehicles are not difficult to control or counterintuitive in any way, however they are very simple.
I believe these factors are important in a vehicle system, however I do believe that more advanced features would fit in with a simple vehicle system for Roblox as the engine is much more advanced nowadays and such things are much less difficult to achieve.
As for the vehicle system in my game, I was aiming for a balance between advanced and simplistic. This was to ensure that developers and players could both understand the system, while at the same time developers being able to easily create advanced vehicles and suspension physics if they wish.
While developing this system, many examples of Roblox games came into my head, some of which still use the default Roblox vehicle (which I will post about shortly). I noticed I was focusing considerably more on the vehicle system than other aspects of the game, which is part of the reason why I decided to adapt my idea.
0 notes
Text
VEHICLES IN ROBLOX
Vehicles in the Roblox Engine have been created in many different ways.
One example of this would be in the game "Plane Crazy". This is a relatively popular Roblox game (or "Experience" as they are officially called) based around building your own vehicles using a simplified and intuitive block-building system.
It is possible to incorporate things like suspension, steering, and other animations into your vehicles in this game relatively easy, however it is clear to me that the game is using default physics constraints.
The game lets the players adjust the Damping, Stiffness and FreeLength properties (with no explanation of what these do), however the maximum values for these is set to be quite low (100 to be specific). During my testing I have found that I needed much higher values (around 2000 Stiffness / 500 Damping for a very light vehicle to function properly).
The suspension in Plane Crazy also has a tendency to bounce, as shown in the video above. These issues have inspired me to create a custom replacement for the default physics system, and allow more customisation for users.
0 notes
Text
SUSPENSION SYSTEM / INSPIRATION
While developing my vehicle system, I have found particular interest in the suspension system. This is partially due to the complex nature of the programming (one of my personal interests) and also partially due to a third party suspension system I have found while researching other vehicle systems on Roblox.
Available above, the system is slightly more complex than the system I have created to be integrated into my vehicle system, however I do not personally like the way the suspension is simulated.
Their system uses a mix of weld CFrames and raycasts/vectorforce combinations (I mentioned both of these methods at the start of my idea change).
I will be using this system as an inspiration for my own suspension system, however I aim for mine to be considerably simpler and much more accessible to its users.
0 notes
Text
RAYCASTING / REFERENCING DOCUMENTATION
After switching ideas, I encountered some problems with getting raycasts to work. Due to this, I referenced the official Roblox documentation to help me understand Raycasts better - I had not used raycasts frequently before this project.
The documentation can be found above, but one thing that particularly helped me was the Calculating Direction section:
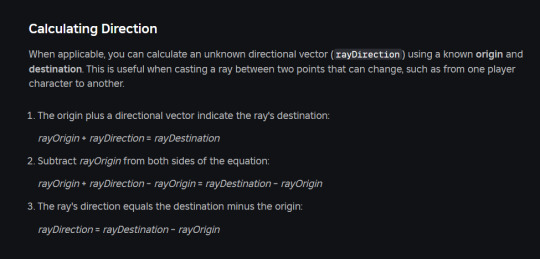
This helped me as I had been confused about how to get the ray to cast from the upper part directly towards the lower part.
0 notes
Text
RECORDING PROBLEMS
While recording videos for my showreel, I decided to test the system out in a non-Studio environment - I.e. outside of Roblox Studio. Both in Studio and outside in a game, the system performs exactly the same. This was a surprise to me as I was expecting a slight performance increase due to the resource intensive nature of Roblox Studio slowing down the Studio environment, however it would appear that this does not have any affect on the system.
The video above shows me simply un-anchoring one of the parts (in this case, the lower one), the system performs as expected.
The main issue here is the force visualisers I have created - they only display the force in one direction, so I will have to manually override this, however they are displaying the correct forces.
0 notes
Text
TESTING TOOL
I have created a "testing tool" so that I can apply forces to and change certain properties of the suspension system during runtime, this helps with showcasing and will be featured in my showreel.
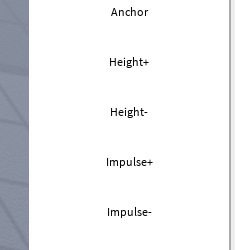
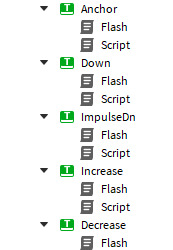
It is simply a collection of buttons each with their own 3 line script that simply just manipulate certain properties of the StaticPoint such as the Anchored property, Size, Position, and also two that apply a linear force to the Part (Impulse).
Here's an example of one of the button scripts:

0 notes
Text
FORCE VISUALISERS
For the purposes of showcasing the suspension system is more than just a simple animation, I have created visualisers to show the force that is being generated by the system.
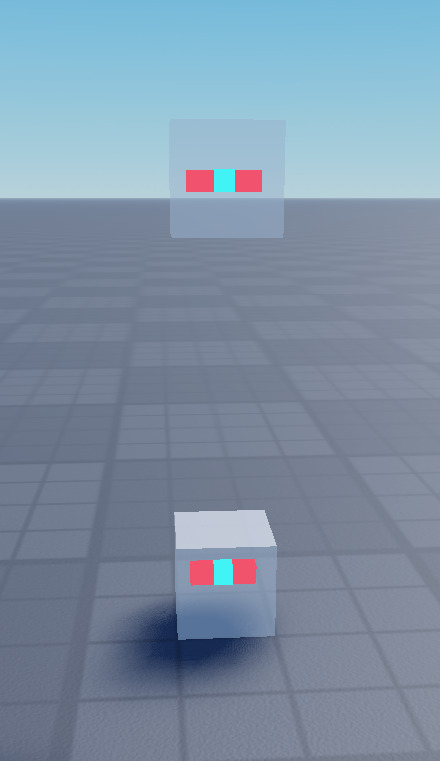
The small blue box will asymmetrically scale itself upwards/downwards respectively based on the force of the shock absorber component, while the red bar will do the same in the opposite direction to show the force generated by the damper component.
This is done simply by getting the calculated forces, then moving the position of the indicators at the midpoint between a calculated Vector3 position based on the force (above the part, or below it, depending on the force direction), then scaling the part as required.
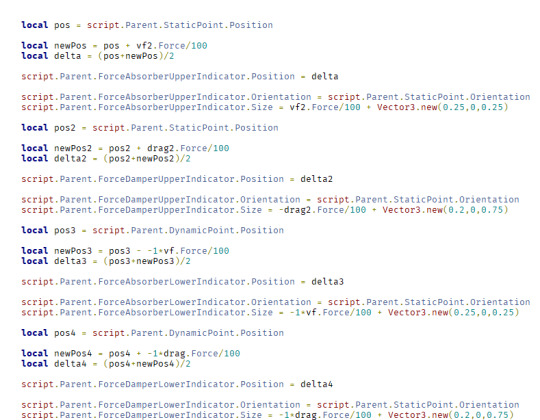
The video above shows the visualizers in action.
0 notes
Text
RE-THINK
Originally, I planned to create a very ambitious game inspired by capitalism, corruption and several games with similar themes, such as the Just Cause and Far Cry franchises. As the project progressed, it became apparent to me that I had been very ambitious and that I was unlikely to complete the project to an acceptable standard in time. At the time, I was working on a vehicle system for my game and experiencing many problems with the counterintuitive and very unstable nature of the Roblox Physics Constraints.
Because of this, I shifted my focus to creating just the vehicle system, with a focus on making it user-friendly, intuitive and easy to use for other developers, and I created my first rendition of a raycast-vectorforce suspension system.
This suspension system uses complex calculations to maintain the difference between two parts by applying a force to each component depending on the distance - or in simpler terms, applies a force on two parts depending on the distance between them.
While developing this vehicle system, I have been particularly interested in developing this suspension system, so I have decided to focus entirely on the suspension system.
In order to properly present the system, I am going to create a force visualiser for the system, so that the forces generated by the calculations can be easily visualised by a simple UI and perhaps something like an arrow that grows and shrinks based on amount of force being produced.
0 notes
Text
UI
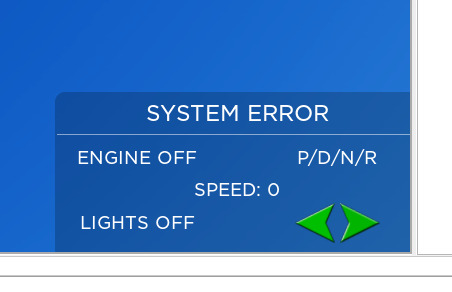
I have created a basic UI for the vehicle system. Its design has been based on simplicity and readability, however my main intentions are to make it easy to modify for developers.
The UI was created using a number of elements, mainly TextLabels which act as a simple UI element that can display text, ImageLabels which are the same except they are able to show images, and Frames, which are simply just resizable, recolourable boxes.
I have also used UIGridLayout and UIListLayout objects. These are very versatile and useful UIObjects which align the size, position and rotation of UI objects that are children of its parent with a certain order. UIListLayouts keep the UI all centred, aligned and well organised without constraining the size, while UIGridLayouts do the same except they do constrain the size of the components. These UI elements do not have any visible counterpart in the viewport and are invisible to players.
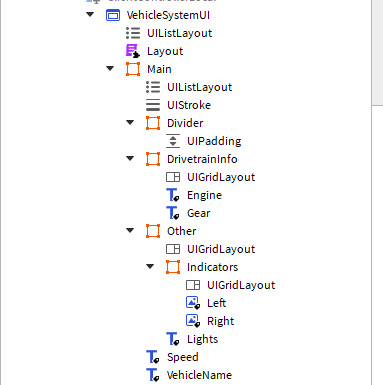
I have also included a ModuleScript which acts as a layout file. It will be referenced by the Client script so that developers/users can customise their UIs without the script not being able to locate them (since normally UI locations are hard-coded).

This is simply done by referencing a table that contains all of the locations of the UI elements, which can be customised and edited by the developer.
0 notes
Text
REGEN SYSTEM - PART 2
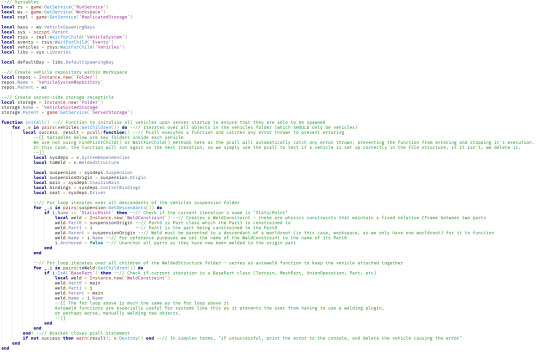
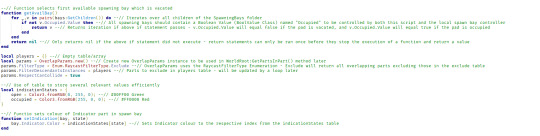
(Part 1 of the script, which is heavily commented so I won't explain in too much detail about the processes as I've done this in the comments themselves)
The script above handles the initialisation and preparation of the vehicles, and also implements features such as "auto-weld" which tremendously improve user-friendliness.
As I have previously said, tools engineering is my main interest, so I am making it my goal during this project to make my vehicle system as user-friendly and open as possible.
0 notes
Text
UPDATED CHECKLIST
Develop suspension system with custom physics, likely using Rays (Thursday 18th) - OWN TIME
Develop UI which can be easily manipulated by a script (Thursday 18th / Friday 19th) THURSDAY 25/04
Develop spawning and regen system including file structure (Friday 19th) FRIDAY 19/04
Develop and integrate Config modules to allow the physics to be customised on a per-vehicle basis with ease (Friday 19th / Tuesday 24th) FRIDAY 26/04
MONDAY IS RESERVED FOR RESEARCH AND BLOG WORK
Develop extra features such as animated doors, autoweld (allowing drag-and-drop compatibility), auto-animation, and stuff to make the system more user friendly (Tuesday 23rd / Wednesday 24th) FRIDAY 25/04 - OWN TIME
Write guides for the system to allow it to be accessible to anyone even if they are not from a development background - FRIDAY 25/04 - OWN TIME
Develop any further features that come to mind during research on Monday and Tuesday (Thursday 26th / Friday 27th)
PRESENT WORK
Green = done
Amber = in progress
Red = unable to complete before submission (can finish in own time)
0 notes
Text
BACKEND FRAMEWORK & REGEN SYSTEM
My next task on my checklist is to create backend framework and a regen system for the vehicle system. This will be done using one central server program that initializes the vehicles when a client requests to spawn one, and will handle all of the parenting, placement and other server-related framework for the vehicles. This helps with flow control and keeps performance impacts to a minimum, as well as ensuring that the system is easy to use, intuitive and user-friendly for developers.
WHAT IS A REGEN SYSTEM?
When I mention a "Regen System", I am simply referring to a method of regenerating the vehicles in-game. This must be user-friendly as this is a goal for my project, and will likely comprise of a folder which developers can place their converted vehicles in and the system will handle the rest.
BACKEND FRAMEWORK?
Backend framework for the system will include handlers for suspension, UIs, vehicles, Network Ownership and other tools.
REFLECTION - 24/04/24
Time management remains to be a struggle for me, It has come to my realisation that I may not fully complete the vehicle system by the end of this week, if this turns out to be the case, I intend to maximise focus on the suspension system and the backend framework.
I must complete more research in my own time regarding the vehicle system and tools engineering fields.
0 notes
Text
The video above shows the current state of the system.
I have added wheels using the same method as the previous vehicle system - HingeConstraints - however these evidently do not work with any suspension system at all including custom ones.
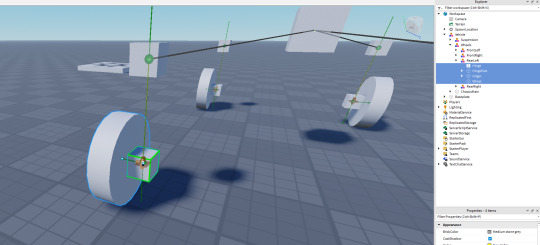
The screenshot above shows the file structure of the wheels - simply a Part, Attached to the DynamicPoint of it's respective suspension component, then another Part which is connected to that part using a HingeConstraint. I am rather unhappy with how this is acting because a large inspiration for the vehicle system was the fact that my previous attempt using physics constraints was not working correctly.
0 notes
Text
Handling Mass
Some classes (including all types of BasePart, except Terrain) have a physics-simulated mass. This can be edited using CustomPhysicalProperties (which are relatively self-explanatory but simply allow the user to customise physics properties such as density, friction, etc).
The video above shows when I add no mass (other than that of the suspension components themselves), one extra Part (the block in the centre), and two extra Parts. I have simply arranged the suspension models in a rectangular shape:
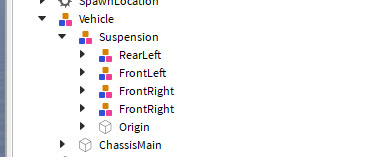
The ChassisMain part is intended to be the "Main" part of the entire vehicle, which of course is just suspension right now, and the Origin part inside of the Suspension model acts as a centre for all of the Suspension StaticPoints. The static point Parts are welded to the Origin (using WeldConstraints) and the Origin is welded to the ChassisMain, also using WeldConstraints created by my welding plugin.
0 notes
Text
UPDATED CHECKLIST
Develop suspension system with custom physics, likely using Rays (Thursday 18th) THURSDAY 18/04 - FRIDAY 19/04
Develop UI which can be easily manipulated by a script (Thursday 18th / Friday 19th) FRIDAY 19/04
Develop spawning and regen system including file structure (Friday 19th) FRIDAY 19/04
Develop and integrate Config modules to allow the physics to be customised on a per-vehicle basis with ease (Friday 19th / Tuesday 24th) TUESDAY 24/04
MONDAY IS RESERVED FOR RESEARCH AND BLOG WORK
Develop extra features such as animated doors, autoweld (allowing drag-and-drop compatibility), auto-animation, and stuff to make the system more user friendly (Tuesday 24th / Wednesday 25th)
Write guides for the system to allow it to be accessible to anyone even if they are not from a development background.
Develop any further features that come to mind during research on Monday and Tuesday (Thursday 26th / Friday 27th)
PRESENT WORK
0 notes