
Last Seen Blogs

angel-in-a-blue-box
Y yo a ti, Cas

lizdrz14
Shiny Pokemon ALERT

cedarkiller
Dumb Internet Girl

a-writers-blood
Writing is hard

trashmouth-critter
Trashmouth Art
Text
How Hot Should Charcoal Grill Be For Burgers
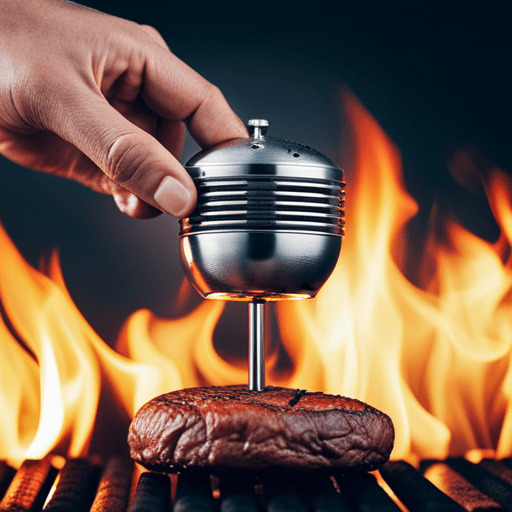
Cooking burgers on a charcoal grill can be a great way to get that classic smoky flavor. But to make sure your burgers come out perfectly cooked, it is important to have the right temperature.
You need to know how hot should charcoal grill be for burgers in order to get them just right. In this article, we will give you the lowdown on what temperature works best for cooking burgers and how you can achieve it. You will also learn some tips and tricks for keeping your charcoal grill at an ideal temperature while cooking your delicious burgers.
The Importance of Temperature
Grilling at the right temperature is a must if you want your burgers to come out juicy and delicious! When using a charcoal grill, it's important to keep safety in mind and be aware of the different types of charcoals available. Charcoal briquettes are usually easier to control than lump charcoal as they burn more evenly. The ideal temperature for cooking burgers on a charcoal grill ranges between 400°F - 500°F, depending on how quickly you want your burgers cooked.
For medium-rare burgers, aim for 450°F while well done requires a higher temperature closer to 500°F. Use an oven thermometer or digital meat thermometer to ensure that you are grilling at the right temperature and keep everyone safe from undercooked food.
The Best Temperature for Cooking Burgers
For cookin' burgers, it's best to set the heat just right. Pork and beef burgers require different temperatures for an optimal cooking experience. For pork burgers, the ideal temperature is between 350-375°F (177-190°C). This will ensure that the burgers are moist on the inside while still achieving a golden brown color on the outside.
For beef burgers, you'll want to crank up the heat a bit higher than with pork: 375-400°F (190-204°C) should do the trick. These temperatures will create juicy patties that have crispy edges and are cooked through without becoming dry or overcooked.
How to Achieve the Ideal Temperature
To cook your burgers to perfection, you'll need to find the ideal temperature. When using a charcoal grill, you will have to adjust grilling times and temperature control in order to achieve the desired outcome. The best way to do this is by starting with a high heat for searing the outside of the patty and then lower the heat slightly until you reach an internal temperature of 160 degrees Fahrenheit.
This should take about 10 minutes depending on your heat source. If your burgers are cooking too quickly or burning on the outside before reaching that internal temperature, it's time to turn down the heat. Make sure to keep a close eye on them! Additionally, use an instant-read thermometer for more accurate readings if needed.
Tips for Maintaining Ideal Temperature
Maintaining an ideal temperature while grilling your burgers can be tricky, so here's a few tips that'll help you keep it consistent:
- Start by selecting the right charcoal for your grill. Lump charcoal is known to burn hotter than briquettes and will give you more control over the heat.
- Monitor the air flow of your grill by adjusting the vents accordingly. This will help regulate the temperature and oxygen intake needed for combustion.
- Lastly, place a thermometer near the grates of your grill to monitor its internal temperature. This way, you can make sure that it stays in optimal range for cooking those perfect burgers!
Cooking Burgers on a Charcoal Grill
You'll love the smoky flavor that comes with cooking burgers on a charcoal grill. To ensure safety, begin by selecting the right briquettes for your grill. Look for ones that are made with natural ingredients and don't have any additional chemicals added in. Once you've selected your briquettes, light them up and let them burn until they turn gray. Then, spread them out evenly across the bottom of your charcoal grill to create an even heat distribution across the grate.
Aim for a cooking temperature of about 450°F to 500°F - this will help you get those perfectly cooked burgers! Remember to exercise caution when handling hot coals and be sure to brush off any excess ash before grilling to avoid ruining your burgers' flavors.
Frequently Asked Questions
What type of charcoal should I use for grilling burgers?
For grilling burgers, choose charcoal that burns hot and is easy to light. High temperatures ensure juicy, delicious burgers. Consider the size of your grill when selecting the right amount of charcoal for optimal grill temperature.
How long should I cook burgers on a charcoal grill?
Cook burgers on a charcoal grill for roughly 10 minutes. Make sure the charcoal is lit and hot before cooking. Adjust the cooking time depending on your desired doneness level.
What type of thermometer should I use to measure the temperature of the charcoal grill?
You should use a digital thermometer to accurately measure the temperature of your charcoal grill. Selecting the right charcoal type and controlling the temperature is key to perfecting your burger cooking.
What safety precautions should I take when grilling burgers?
Always store and handle charcoal safely. Clean the grill well before cooking burgers and always wear protective clothing when grilling. Keep a fire extinguisher nearby in case of an emergency.
Are there any special techniques for flipping burgers on a charcoal grill?
When flipping burgers on a charcoal grill, use quality charcoal and manage the heat for best results. Use spatulas or tongs to turn carefully and quickly, to avoid burning.
Conclusion
You've now got a better understanding of how to cook burgers on a charcoal grill. The key is to maintain the ideal temperature for the best results. Start by preheating your grill and then use a thermometer to monitor the temperature as you cook.
Make sure to adjust the vents and add charcoal if needed, so that you can keep your heat at an optimal level throughout cooking. With these tips, you'll be able to make delicious burgers every time!
Read the full article
0 notes
Text
Indulge in a Classic Peanut Butter and Jelly Milkshake

I have a confession to make. I don’t eat peanut butter. I don’t eat sandwiches. I don’t eat peanut butter and jelly sandwiches. When I first heard about this shake, I got queasy. Try as I might, no part of this sounded good. But it is a signature drink, I had the authentic recipe, so I suppose that obligated me to try it.
It was painfully easy to make and I was willing to tackle it with an open mind… And I have to say, when all was said and done, this was actually pretty darn good.
More Delicious Recipes You Will Love:
- Patriot Punch – Liberty Tree Tavern
- Chocolate Peanut Butter Pie Recipes – Disney Cruise Lines
- Penne Alla Vodka – Mama Melrose’s Ristorante Italiano
It was more of a peanut butter flavor then a PB and J, but still the fear that I had that it’d be this nasty jumble of yuck was completely unfounded.
I will say though, if I were to do it again (and who am I kidding, I probably will), I’d up the jelly to 4 tablespoons (or 1/4 cup) for just a bit more jelly flavor. I’d also ditch the blender and go for my handy, dandy hand blender.
Honestly, when I was making it I knew that I should have used it, but I think the excitement of rediscovering that I actually owned a blender made me throw caution and good sense to the wind.
The other observation I heard was that maybe slightly less peanut butter may make it taste slightly better… The nice thing with shakes is that its so easy to tinker with the basic recipe that you can make something for every taste with little-to-no effort.
Conclusion
In conclusion, the Peanut Butter and Jelly Milkshake is a delicious and unique twist on a classic childhood favorite. This indulgent milkshake is made with creamy vanilla ice cream, smooth peanut butter, and sweet jelly, resulting in a perfect blend of flavors that is sure to delight your taste buds. Whether you're a fan of peanut butter and jelly sandwiches or simply looking for a fun and nostalgic treat, this milkshake is definitely worth a try.
The Peanut Butter and Jelly Milkshake is a perfect treat for a hot summer day, and it's a great way to cool off and indulge in something sweet and satisfying. With its perfect balance of flavors and textures, this milkshake is sure to become a favorite in your dessert rotation. So, if you're looking for a fun and delicious way to satisfy your sweet tooth, be sure to give the Peanut Butter and Jelly Milkshake a try.
In addition to the delicious food and recipes, Disney World is also known for its unique dining experiences, such as character dining and themed restaurants. Whether you want to have breakfast with Mickey Mouse, dine in a replica of a sci-fi drive-in theater at Hollywood Studios, or enjoy a meal with an ocean view at the Coral Reef Restaurant in Epcot, there's something for everyone. And with the help of Recipes Today and the How to Make category, you can even recreate some of these magical dining experiences in your own home. So why not start planning your next Disney-inspired meal or dining experience today?
Read the full article
0 notes
Text
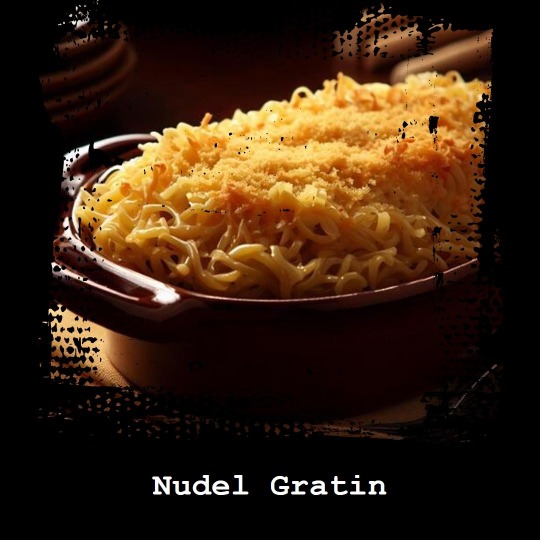
Biergarten Nudel Gratin Recipe: German Mac and Cheese
I’ve been obsessed with carbs lately! Blame it on the diet or my training for the Wine and Dine Half, but I feel like if I were left to my own devices, I’d snack on pasta all day. When I went looking for a pasta recipe, I found this one from Biergarten which made me so happy…
Being second generation from Germany and having been to Germany several times, I realized I was also craving some German style food. Since my reservation at Biergarten is still about 75 days away, I thought this was perfect.
Now, when I was making this,I had the strangest feeling that I’ve made this recipe before, but I looked and looked and didn’t see that I had… So if I’ve posted it and it’s a repeat I apologize… At least it’s amazing enough to warrant a double-post!
More Delicious Recipes You Will Love:
- Mickey Waffles Recipe – Disney Parks
- Ohana Bread Pudding with Banana-Caramel Sauce
- Orange Beef – Polynesian Resort
This is super easy to put together (a refreshing change after my birthday recipe…) and it’s incredibly kid-friendly. Honestly, most home cooks probably have a similar recipe stowed away in their back pocket for fast, delicious family dinners. If not, they should and this is the one to choose! My only feedback on this recipe is that the quality of the cheese can make-or-break this dish.
I wished after I’d had the first bite that I’d invested in nicer cheese than the generic store brand… Nicer cheese would have made this dish absolutely sing! For the caravores out there, you can add bacon or very small diced ham for an extra little something and I bet it would taste fabulous. Really, this serves as an excellent base for something more complex with meats and different cheeses, or it can be served as-is for a ridiculously hearty meal.
The great thing was this was an amazing reminder of both my time in Germany and the dinner we had at Biergarten. The fact it could be served in this huge, family-style casserole dish reminded me of lining up in front of the buffet at Biergarten and trying to restrain myself, but it also reminded me of the very traditional dining we enjoyed all through Germany. So many of their meals are food-focused family time (we had meals that lasted for hours…
Most of them lasted hours, actually…) and it’s not at all difficult to imagine that this easy-to-make dish that serves an army and tastes good warm or cold would be on the table. Cheesy without being too cheesy, crunchy like chips on the top and sides from that delicious cheese and macaroni “crust,” but soft and ooey gooey in the middle… I’m excited for leftovers and for Biergarten all over again.
Conclusion
In conclusion, the Biergarten's Nudel Gratin Recipe, also known as German Mac and Cheese, is a delicious and comforting dish that is sure to satisfy any craving for cheesy goodness. Drawing from our firsthand experience, we can attest that this recipe is easy to follow and uses simple ingredients that can be found at most grocery stores. The combination of pasta, cheese, and breadcrumbs creates a satisfying texture and a rich, creamy flavor that is perfect for a cozy night in or as a side dish for a larger meal.
Plus, the addition of smoked ham and onions add a unique German twist to this classic dish. Overall, the Biergarten's Nudel Gratin Recipe is a must-try for anyone who loves mac and cheese or is looking for a new twist on a classic comfort food.
In addition to the delicious food and recipes, Disney World is also known for its unique dining experiences, such as character dining and themed restaurants. Whether you want to have breakfast with Mickey Mouse, dine in a replica of a sci-fi drive-in theater at Hollywood Studios, or enjoy a meal with an ocean view at the Coral Reef Restaurant in Epcot, there's something for everyone. And with the help of Recipes Today and the How to Make category, you can even recreate some of these magical dining experiences in your own home. So why not start planning your next Disney-inspired meal or dining experience today?
Read the full article
0 notes
Text
Disney Boma's Mickey Banana Bread Recipe: A Delicious Disney Treat

Disney's Boma restaurant is famous for its delicious and unique cuisine, and one of its most popular desserts is the Mickey Banana Bread. This delectable treat combines the classic flavors of banana bread with a fun and whimsical Mickey Mouse shape, making it a hit with both kids and adults.
The recipe for Disney's Boma Mickey Banana Bread is a well-kept secret, but fortunately, you can now recreate this beloved dessert in your own kitchen. This recipe features ripe bananas, cinnamon, and a touch of nutmeg for a warm and comforting flavor. The addition of chocolate chips and pecans adds a sweet and crunchy element to each bite.
Whether you're a Disney fan looking to recreate a beloved vacation treat, or simply a fan of delicious baked goods, this Mickey Banana Bread recipe is sure to satisfy your sweet tooth. So gather your ingredients, turn on some Disney music, and get ready to bake a batch of magical Mickey-shaped banana bread that will transport you to the happiest place on earth.
More Delicious Recipes You Will Love:
- Mickey Pretzel Recipe From Disney Parks
- Mickeys Individual-sized Ice Cream Cakes
- Mickey Waffles Recipe – Disney Parks
I have far too many bananas in my house.
The circumstances behind this overflow is in large part due to the fickleness of my son, who overnight went from having to be limited to two bananas a day (with much protest and tears on his part) to deciding he never wanted to see eat another banana ever again. Since this sudden decision happened to coincide with a sale (.29 cents a pound!), I found myself in the midst of a fruit-related disaster.
Luckily, some genius out there came up with the recipe for banana bread. Even more luckily, banana bread is, at varying times, featured in several Disney parks including the Monorail Cafe, Boma, and even Tusker House, and I just so happened to have one of the recipes (and all of the ingredients) handy.
The results were amazing.
The bread was dense without being to heavy, moist, and it had this fantastic marbling from the banana that made it so pretty to look at when it was sliced. Seeing as this was the first banana bread I’d ever made that didn’t require any spices beyond vanilla extract, I was worried it’d be “boring,” but it ended up being the first bread I’d ever tried where the bananas did all the talking when it came to flavor. I did make it without the nuts due to allergy concerns, but we certainly didn’t miss them.
It took me right back to eating at Tusker House. All I needed was the Jungle Juice.
In addition to the delicious food and recipes, Disney World is also known for its unique dining experiences, such as character dining and themed restaurants. Whether you want to have breakfast with Mickey Mouse, dine in a replica of a sci-fi drive-in theater at Hollywood Studios, or enjoy a meal with an ocean view at the Coral Reef Restaurant in Epcot, there's something for everyone. And with the help of Recipes Today and the How to Make category, you can even recreate some of these magical dining experiences in your own home. So why not start planning your next Disney-inspired meal or dining experience today?
Read the full article
0 notes
Text
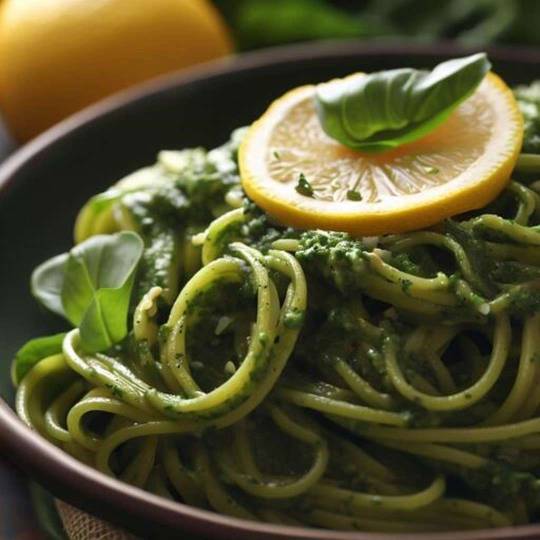
Disney-Inspired Spinach Pesto and Lemon Pasta Recipe
It’s been awhile since I’ve done one of my original recipes… I’m not really sure why, honestly… I cook all the time. I guess it never occurs to me to document what I make anymore. I actually expect most folks here think I can’t cook without a Disney recipe in-hand (I know some of my friends are starting to wonder… LoL!).
Truthfully, if some of the ladies that I speak with on the Facebook group “Losing it For the Mouse” hadn’t asked, I probably would have forgotten to share this one too… The irony being that this recipe owes a lot of it’s amazing flavoring to an amazing spice that I got at none other then Mickey’s Pantry at Downtown Disney… One of my favorite stores ever.
More Delicious Recipes You Will Love:
- Coconut Lime Icebox Fudge: A Disney-Inspired Treat
- Tie-dye Cheesecake – Disney’s Pop Century Resort
-
Read the full article
0 notes
Text
How To Light A Weber Charcoal Grill Without A Chimney
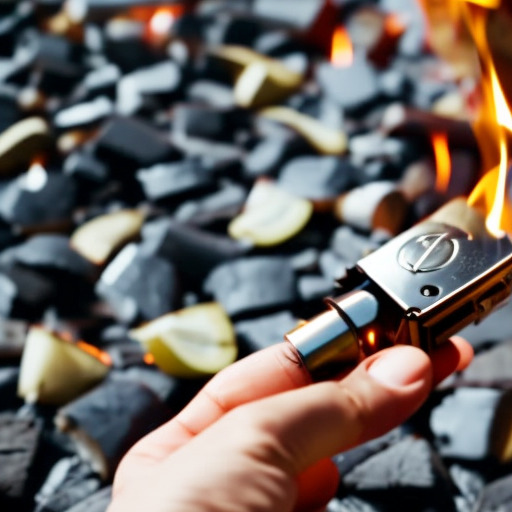
Are you tired of waiting for your charcoal grill to heat up using a chimney starter? Or maybe you don't have a chimney starter and want to know other ways to light your Weber charcoal grill. Well, look no further because we've got you covered with alternative methods that are just as effective.
Before diving into the different techniques, it's important to prepare your grill first. Make sure the bottom vents are open and remove the cooking grate. Next, place crumpled newspaper or fire starters on the charcoal grate at the bottom of the grill. This will help ignite the coals more quickly and evenly distribute heat throughout the grill. With these tips in mind, let's explore some alternative methods for lighting your Weber charcoal grill without a chimney starter.
Alternative Methods for Lighting Charcoal
If you don't have a chimney, there are still ways to light your charcoal! One of the most popular alternatives to using a chimney is using lighter fluid. However, using lighter fluid can be dangerous and can leave an unpleasant taste on your food if not done correctly. To use lighter fluid, start by piling your charcoal in a mound in the center of your grill. Then, squirt lighter fluid onto the charcoal and let it soak for about 30 seconds before lighting it with a long match or lighter. Be sure to stand back when lighting the charcoal because flames may shoot up.
Another alternative method for lighting charcoal without a chimney is using an electric starter. This method is safer than using lighter fluid and doesn't leave any chemical tastes on your food. Simply place the electric starter on top of your pile of charcoal and plug it in. Let it heat up for about 10-15 minutes until the coals turn grayish-white, then unplug it and remove it from the grill. Spread out the hot coals evenly across the bottom of your grill and you're ready to start cooking!
Preparing Your Weber Charcoal Grill
First, you'll want to make sure your grill is clean and free of any debris from previous uses. This step is crucial for ensuring that your food doesn't taste like last week's barbecue. To prepare your Weber charcoal grill, follow these steps:
- Remove the cooking grates and brush them thoroughly with a wire brush.
- Empty any leftover ash by opening the bottom vents and shaking the ash out into a metal container.
- Clean the inside of the grill with warm soapy water or a specialized grill cleaner.
- Inspect the vents to ensure they are clear of debris and can open and close properly.
- Check that all components are secure and in good working order before starting.
When handling hot coals, safety precautions should always be taken. It's important to wear heat-resistant gloves, use long-handled tools, and keep a fire extinguisher nearby in case of emergencies. By following proper cleaning techniques and taking necessary safety measures, you can enjoy delicious grilled meals without any mishaps.
Positioning Your Charcoal for Optimal Heat Distribution
Now, you wouldn't want your food to be evenly cooked, would you? Well then, make sure to carefully arrange the charcoal in a two-zone setup for optimal heat distribution. Charcoal placement is crucial in achieving perfect grill marks and an evenly-cooked meal. To create a two-zone setup, simply place all the lit coals on one side of the grill and leave the other side empty. This will create a hot zone and a cooler zone which allows you to cook different types of food at the same time.
Heat management is also important when positioning your charcoal. If you're planning to cook thicker cuts of meat or food that requires slow cooking, place more coals on one side of the grill to create a higher temperature zone. On the other hand, if you're grilling smaller pieces or vegetables that require less heat, spread out fewer coals across both sides of the grill. Remember to adjust the vents accordingly as this helps regulate airflow and temperature control. By mastering these techniques in charcoal placement and heat management, you'll be able to achieve perfectly cooked meals every time!
Lighting Your Charcoal Using a Starter Fluid
To get started quickly and easily, you'll want to use a starter fluid for lighting your charcoal. However, it's important to prioritize safety when using this method. Make sure to only use a small amount of fluid and never pour it onto hot coals or an open flame. Wait at least 30 seconds before lighting the charcoal to allow any excess fluid to evaporate.
While starter fluid is a popular choice for its convenience, there are alternative methods that may be better suited for certain situations. For example, using a chimney starter eliminates the need for any chemicals and produces less smoke. Additionally, using newspaper or kindling can provide a more eco-friendly option with minimal cost. Ultimately, the pros and cons of each method should be considered before deciding on the best way to light your weber charcoal grill without a chimney.
Tips for Maintaining Temperature and Achieving Perfect Grill Marks
Maintaining the perfect temperature and achieving beautiful grill marks is easy with these simple tips, even if you're new to outdoor cooking. First, make sure to maintain moisture in your meat by basting it with a marinade or sauce every 10-15 minutes. This not only adds flavor but also keeps the meat from drying out. Another way to maintain moisture is by using a water pan underneath the meat on the grill.
Flavor infusion is another important aspect of achieving great taste on your grilled meats. One way to do this is by adding wood chips or chunks directly onto the charcoal while grilling. This will create smoke which will infuse into the meat and give it a delicious smoky flavor. Another option for flavor infusion is marinating your meats overnight before grilling them. This allows the flavors of the marinade to penetrate deep into the meat, giving it an incredible taste that can't be beat.
Frequently Asked Questions
Can I use newspaper or paper towels to start my charcoal grill instead of lighter fluid?
You can use newspaper alternatives like paper towels to start your charcoal grill, but be sure to take safety precautions. Don't use too much paper and avoid using any flammable liquids. Always keep a fire extinguisher nearby just in case.
How long should I wait after lighting the charcoal before putting food on the grill?
To ensure safe food temperature, wait for the preheating time of your grill. Parallelism: Just as you wouldn't leave a cake in the oven before it's fully heated, don't rush grilling.
Can I use a propane torch to light my charcoal grill?
Yes, you can use a propane torch for charcoal grilling. However, safety precautions must be taken when doing so. Avoid using near flammable materials and wear protective gear. Always monitor the flame to prevent accidents.
Should I use natural lump charcoal or briquettes for my Weber grill?
Briquettes or natural lump charcoal? Consider the pros & cons, flavor differences, and best charcoal for your Weber grill. Use this guide to make an informed decision.
How often should I clean my charcoal grill and what is the best way to do it?
To keep your charcoal grill in top condition, clean it after every use. The best cleaning methods depend on the type of grill you have. Scrub away stubborn residue with a wire brush or soak grates overnight in soapy water for easier cleaning.
Conclusion
Congratulations! You have successfully lit your Weber charcoal grill without a chimney. Now, it's time to enjoy the fruits of your labor and fire up some delicious grilled food. Remember, cooking on a charcoal grill is not just about the heat but also about finesse.
Did you know that according to a survey conducted by the Hearth, Patio & Barbecue Association, 75% of Americans own an outdoor grill or smoker? That means there are millions of people out there who love grilling just like you. So next time you light up your Weber charcoal grill, remember that you are part of a community that enjoys good food and great company around an open flame. Keep experimenting with different techniques and ingredients to take your grilling game to the next level. Happy grilling!
Read the full article
0 notes
Text
Mickeys Individual-sized Ice Cream Cakes
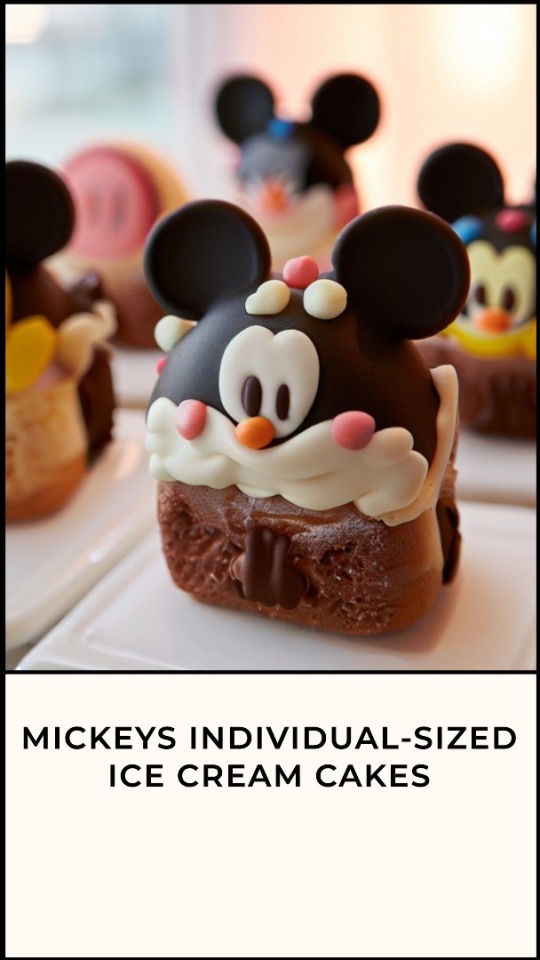
A few months ago I made this amazing individual-sized Mickey Ice Cream Cake for a birthday party… It was crazy easy to make and it tasted amazing. I know I promised the recipe a few months ago and I’m only just now delivering on said promise, but hey, better late then never!
Below is the recipe I used to make my cakes. The recipe was designed for a full-sized cake served in a springform pan, so the amounts match that.
More Delicious Recipes You Will Love:
-
Read the full article
0 notes
Text
Mahi Mahi Tacos: A Delicious Seafood Delight
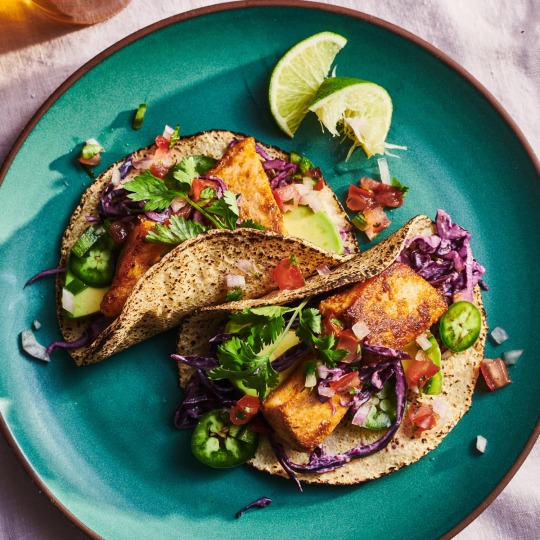
If you're looking for a quick and easy seafood dish that's sure to please, look no further than mahi mahi tacos. This popular dish combines the light, flaky texture of mahi mahi with the bold flavors of Mexican cuisine.
In this article, we'll share our favorite mahi mahi taco recipe and show you how to make it at home. So grab your apron and let's get cooking!
More Delicious Recipes You Will Love:
- Magic Cookie Bars – Roaring Forks and Riverside Mill
- Mealie Pap – Tusker House
- African Meat Bobotie Recipe Easy – Boma and Tusker House
Ingredients:
For the tacos:
- 1 pound mahi mahi fillets
- 1 tablespoon olive oil
- 1/2 teaspoon ground cumin
- 1/2 teaspoon chili powder
- 1/2 teaspoon garlic powder
- 1/2 teaspoon salt
- 8-10 corn tortillas
- 1 cup shredded red cabbage
- 1/4 cup chopped cilantro
- 1/4 cup diced red onion
- 1 lime, cut into wedges
For the sauce:
Instructions:
- Preheat your oven to 350°F.
- In a small bowl, mix together the cumin, chili powder, garlic powder, and salt.
- Rinse the mahi mahi fillets and pat them dry with a paper towel. Rub the spice mixture all over the fillets, making sure to coat them evenly.
- Heat the olive oil in a large skillet over medium-high heat. Add the mahi mahi fillets and cook for 2-3 minutes per side, or until they are cooked through and flaky. Remove the fillets from the skillet and let them cool for a few minutes.
- While the fish is cooling, wrap the corn tortillas in foil and place them in the preheated oven for 5-7 minutes, or until they are warm and soft.
- To make the sauce, whisk together the sour cream, mayonnaise, lime juice, garlic powder, salt, and black pepper in a small bowl.
- Once the fish has cooled, use a fork to break it into bite-sized pieces.
- To assemble the tacos, place a few pieces of mahi mahi on each warm tortilla. Top with shredded red cabbage, chopped cilantro, and diced red onion. Drizzle with the sauce and serve with lime wedges on the side.
Recipe:
Preparation Time: 15 minutes Cooking Time: 10 minutes Total Time: 25 minutes Servings: 4-6
FAQs:
Q: What is mahi mahi?
A: Mahi mahi is a type of fish that is commonly found in warm waters around the world. It has a light, flaky texture and a mild, sweet flavor.
Q: Can I use other types of fish for this recipe?
A: Absolutely! This recipe works well with other types of white fish, such as tilapia or cod.
Q: Can I make this recipe ahead of time?
A: You can prepare the fish and sauce ahead of time, but it's best to assemble the tacos just before serving to ensure that the tortillas stay warm and crispy.
Conclusion:
Mahi mahi tacos are a delicious and healthy meal that can be enjoyed any night of the week. With just a few simple ingredients and a little bit of preparation, you can have a restaurant-quality meal on the table in no time.
In addition to the delicious food and recipes, Disney World is also known for its unique dining experiences, such as character dining and themed restaurants. Whether you want to have breakfast with Mickey Mouse, dine in a replica of a sci-fi drive-in theater at Hollywood Studios, or enjoy a meal with an ocean view at the Coral Reef Restaurant in Epcot, there's something for everyone. And with the help of Recipes Today and the How to Make category, you can even recreate some of these magical dining experiences in your own home. So why not start planning your next Disney-inspired meal or dining experience today?
Read the full article
0 notes
Text
How To Grill Whole Lobster On Gas Grill

Are you ready to impress your guests with a perfectly grilled whole lobster? Grilling lobster may seem intimidating, but with the right preparation and technique, it can be a delicious and impressive addition to your outdoor feast. And the best part? You can easily grill lobster on a gas grill.
First things first, make sure you choose the best quality lobster for grilling. Look for lobsters that are lively, have intact shells, and feel heavy for their size. Once you have your lobsters, it's time to prepare them for the grill. With some simple steps and flavorful seasoning choices, you'll have everyone at your dinner table raving about your grilled lobster skills in no time!
Choosing the Best Lobster for Grilling
You'll want to make sure you're picking out the freshest lobsters possible for grilling, so don't be afraid to ask your fishmonger for help. There are a few different types of lobster available, but most people opt for either the Maine or Canadian varieties. When selecting your lobster, look for ones that are lively and active in the tank. They should also have hard shells and feel heavy for their size.
Another important factor to consider is the freshness criteria. A good rule of thumb is to choose lobsters that were caught within 24 hours of purchase. If you're unsure about how fresh they are, take a sniff - they should smell like a clean ocean breeze, not like ammonia or rotting seafood. It's also worth noting that female lobsters tend to have sweeter meat than males, so if you have the option, go with females for grilling. By taking these factors into consideration when choosing your lobsters, you'll be well on your way to a delicious grilled meal.
Preparing the Lobster for the Grill
Before even considering cooking this delicious crustacean, it's important to ensure that it has been properly cleaned and prepared. Start by giving the lobster a thorough rinse under cold water to remove any debris or sand from its shell. Use a stiff-bristled brush to scrub the shell gently, paying special attention to the joints and crevices where dirt can accumulate.
Once your lobster is clean, you'll need to prepare it for grilling. This involves removing the meat from the shell so that it cooks more evenly and quickly. Begin by twisting off the claws and legs at their joints and cracking them open with a nutcracker or kitchen shears. Next, use a sharp knife to cut down the center of the tail and pull apart the two halves to expose the tender meat inside. Be sure to remove any dark veins running down the length of each half before placing them on the grill. By taking these steps, your whole lobster will be ready for a mouthwatering grilling experience!
Cleaning Lobster
Removing Lobster Meat
Rinse under cold water
Twist off claws/legs
Scrub with stiff-bristled brush
Crack open shells
Pay attention to joints/crevices
Cut down center of tail
Seasoning and Flavoring the Lobster
To add a burst of flavor to your lobster, it's essential to have the right seasoning and spices on hand. One great way to infuse flavor into your lobster is by creating an herb and butter infusion. Simply chop up some fresh herbs like thyme, rosemary, and parsley, melt some butter in a saucepan, and mix the two together. Once combined, brush the mixture over the lobster meat before placing it on the grill.
Another option for seasoning your lobster is with a citrus and spice rub. This can be made by combining lemon zest, garlic powder, paprika, salt, pepper, and cayenne pepper in a small bowl. Rub this mixture all over the lobster meat before grilling for a zesty kick of flavor. Whether you choose an herb and butter infusion or a citrus and spice rub (or both!), seasoning your whole grilled lobster will take it from ordinary to extraordinary.
Grilling the Lobster to Perfection
Now it's time to get that delicious lobster onto the heat and cook it to perfection, ensuring that every bite is bursting with flavor. Grilling a whole lobster requires a bit of technique, but once you get the hang of it, your taste buds will thank you. Here are some tips on how to grill a whole lobster on your gas grill.
- Preheat your grill to medium-high heat.
- Brush the lobster with melted butter or olive oil before placing it on the grill.
- Place the lobster shell side down on the grill grates and cook for 6-8 minutes.
- Flip the lobster over and continue cooking for another 6-8 minutes until the meat is opaque and cooked through.
- Remove from heat and serve immediately with lemon wedges and additional melted butter for dipping.
Remember that cooking time may vary depending on the size of your lobster, so keep an eye on it as it cooks. The key is to not overcook it, as this can result in tough meat. With these simple steps, you'll have a perfectly grilled whole lobster in no time!
Serving and Enjoying Your Grilled Lobster Feast
Once your lobster is cooked to perfection, it's time to sit back, relax, and enjoy the delicious feast with your loved ones. But hold on, before you dig in, let's talk about how to serve and present your perfectly grilled whole lobster.
Firstly, when it comes to presentation tips for serving whole lobsters, simplicity is key. Place the grilled lobster on a large platter or cutting board lined with fresh herbs or lettuce leaves for an extra pop of color. Serve with lemon wedges and melted butter in small bowls for dipping. To add some variety to your meal, consider pairing your grilled lobster with a side dish such as roasted vegetables or even a refreshing salad. And don't forget about the wine! A crisp white wine such as Chardonnay or Sauvignon Blanc pairs perfectly with seafood and will complement the flavors of your grilled lobster feast. So grab a glass (or bottle) of wine and cheers to a delicious meal!
Frequently Asked Questions
How do you know if a lobster is cooked properly?
You'll know if your lobster is cooked properly when the shell turns bright red and the meat inside is opaque. To check doneness, use a thermometer or cut into the thickest part of the tail. For a restaurant-worthy presentation, serve with melted butter and lemon wedges.
Can you grill frozen lobster?
To grill frozen lobster, thaw it in the refrigerator for 24 hours. Then, prepare it for grilling by cutting it in half lengthwise and removing the digestive tract. Brush with butter and grill until cooked through.
Should you remove the lobster's tomalley before grilling?
In the Tomalley debate, some argue that it's safe to eat while others warn against potential health concerns. Ultimately, it's up to you whether or not to remove it before grilling your lobster on a gas grill.
How long can you keep leftover grilled lobster in the fridge?
For storage tips, keep leftover grilled lobster in an airtight container in the fridge for up to three days. To reheat, use a steamer or bake in a covered dish with butter or olive oil. Try creative lobster recipes like lobster rolls or pasta dishes with leftovers.
What are some side dishes that pair well with grilled lobster?
You've got your grilled lobster, now it's time for the perfect pairing. Try roasted garlic mashed potatoes or grilled asparagus with lemon butter sauce. For wine, Chardonnay or Pinot Noir are great picks!
Conclusion
Congratulations! You have successfully grilled a whole lobster on your gas grill. The succulent taste of the lobster meat, infused with the smoky flavor of grilling, will be etched in your memory forever.
Just like how a caterpillar transforms into a butterfly after going through a tough journey, you too have transformed from an amateur to a professional griller. Your perseverance and dedication to learning this skill has paid off, just like how the lobster's hard shell protected it until it became deliciously grilled perfection. So go ahead and savor every bite of your masterpiece - it's proof that even the toughest challenges can lead to something beautiful and delicious.
Read the full article
1 note
·
View note
Text
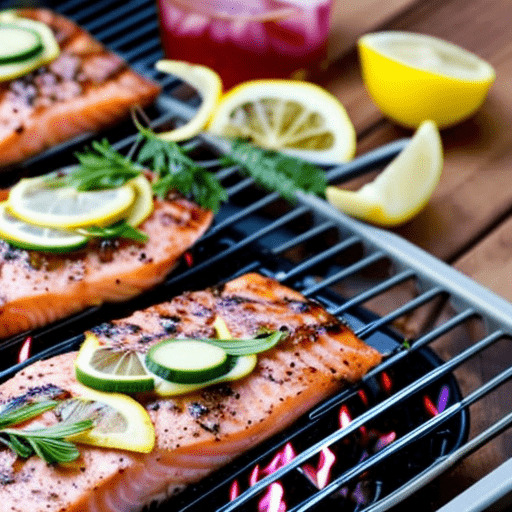
Kona Cafe's Macadamia Pineapple Pancakes: Recipe with Sauce

Kona Cafe's Macadamia Pineapple Pancakes are a delicious and indulgent breakfast option that offer a taste of the tropics. Served at the Kona Cafe in Disney's Polynesian Village Resort, these pancakes are a popular menu item that draw inspiration from the flavors of Hawaii. The pancakes are made with a fluffy and buttery batter, studded with crunchy macadamia nuts and chunks of sweet pineapple. Topped with a dollop of whipped cream, these pancakes are a decadent breakfast treat that is perfect for a special occasion or a lazy weekend morning.
In this context, we can explore the cultural significance of macadamia nuts and pineapple in Hawaiian cuisine, and how they have become popular ingredients in a variety of dishes and desserts. We can also discuss the importance of using high-quality ingredients, such as fresh pineapple and locally sourced macadamia nuts, to create a delicious and wholesome breakfast. Finally, we can highlight the unique experience of dining at the Kona Cafe and how it offers a taste of the tropics in the heart of Disney World.
More Delicious Recipes You Will Love:
- Lemon Garlic Shrimp Spoodles Recipe: A Delicious and Easy Meal
- Mac And Cheese With Red Wine Sauce – Jiko
- Magical Star Cocktail – Disney Parks
So last week was Fat Tuesday and it has always been a tradition for me to have pancakes for good luck. And I’m in the midst of my post-trip Disney blues, which meant that no ordinary pancakes would do. I’m craving Disney, in the worst possible way… For lucky pancakes, nothing short of Disney pancakes could be considered acceptable.
Apparently, I must have pleased the Tiki God of pancakes (is there such a thing?) because not only did I manage to find the perfect pancake recipe, but it is from Kona Cafe at the Polynesian.
Can I just say, if there was ever in the world a recipe that was more like a warm hug then this one, honestly, I don’t know what it is. First off, that amazing smell every morning that floats through the Polynesian? Turns out it’s these pancakes. It’s the most beautiful smell and it instantly brought me back to Disney. All that was missing was the tiki music and a tropical fountain. Seriously, I got a little choked up.
I’ll admit that while these may not look terribly gorgeous (and they don’t at Kona either), as far as taste, let me just say… Pure heaven. These may be the best pancakes I’ve had in my entire life, and that’s saying something as I’m quite the pancake connoisseur.
They taste deliciously sweet, and the pineapple paired with the butter creates this beautiful, nutty, tropical flavor that goes so well with the pancakes. I’m not joking when I say that now I crave these pancakes… All the time. They’re really just that good.
I made no real changes to the recipe, other then accidentally burning the toasted macadamia nuts ever so slightly. I suggest making the pineapple sauce first, allowing that to cook while preparing the pancakes. The nut butter keeps really, really well in the fridge and, as I’ve discovered, tastes good on everything. I’m almost embarrassed to share all the things I’ve put it on.
A simple-to-make, insanely delicious pancake recipe that makes my house smell like the Polynesian? I may be in serious trouble…
~~~~ °o° ~~~~
In addition to the delicious food and recipes, Disney World is also known for its unique dining experiences, such as character dining and themed restaurants. Whether you want to have breakfast with Mickey Mouse, dine in a replica of a sci-fi drive-in theater at Hollywood Studios, or enjoy a meal with an ocean view at the Coral Reef Restaurant in Epcot, there's something for everyone. And with the help of Recipes Today and the How to Make category, you can even recreate some of these magical dining experiences in your own home. So why not start planning your next Disney-inspired meal or dining experience today?
Read the full article
0 notes
Text
How to Bake a Potato on Gas Grill: A Step-by-Step Guide
Have you ever been to a backyard barbecue and watched as the host effortlessly cooks up a perfectly baked potato on the grill? You may have thought it was some sort of magic trick or specialized grilling skill, but fear not! Baking a potato on a gas grill is easier than you think.
With just a few simple steps, you can impress your friends and family with delicious, tender potatoes that are perfect for any summer cookout. So grab some aluminum foil and fire up the grill because it's time to learn how to bake a potato on a gas grill like a pro!
Preparing the Potatoes for Grilling
Now it's time to get those spuds ready for the grill by scrubbin' 'em down with a brush and slicin' them in half lengthwise. You want to make sure that your potatoes are clean before grilling, so take some time to give them a good scrubbing under running water. Once they're clean, pat them dry with paper towels and slice them in half lengthwise.
As for seasoning options, there are plenty of ways you can go about it. Some people like to keep it simple with just salt and pepper, while others prefer more complex blends of spices and herbs. Whatever you choose, be sure to season both sides of the potatoes generously before placing them on the grill. This will ensure that every bite is packed with flavor!
Wrapping the Potatoes in Aluminum Foil
First, you'll want to tightly wrap your spuds in shiny aluminum armor to protect them from the fiery dragon breath of your grill. There are several benefits to using foil for grilling potatoes. One major benefit is that it helps keep the potatoes moist and tender while cooking. The foil also prevents direct contact with the flame or hot coals, which can cause the potatoes to burn or become charred.
In addition, wrapping the potatoes in foil makes clean-up a breeze as there is no messy residue left on the grill grates. However, if you prefer not to use foil for environmental reasons or simply because you don't have any on hand, there are alternatives to using foil for wrapping potatoes on the grill such as using a cast iron skillet or placing them directly on the grill grates (although be sure to turn them frequently).
Heating the Gas Grill for Baking
Get ready to experience the mouthwatering aroma and tantalizing taste of perfectly baked potatoes as you prepare your gas grill. But before anything else, make sure that your gas grill is properly maintained and in good condition. Check for any leaks or damages in the gas line, burners, and other parts of the grill. Doing so ensures not only a great grilling experience but also your safety.
Once everything is checked and secured, it's time to heat up the grill for baking. Preheat your gas grill on high for 10-15 minutes with the lid closed. This allows enough time for the grates to be heated evenly and helps prevent sticking. After preheating, adjust the temperature to medium heat which should be around 350-400°F (175-205°C). With this temperature range, you can achieve crispy potato skins while keeping its fluffy interior intact. Now that your grill is all set up, it's time to start baking those spuds!
Placing the Potatoes on the Grill
As you place your tubers onto the grates, feel the excitement of hearing that sizzling sound and envision the crispy skin waiting to be devoured. Make sure to arrange them in a single layer, leaving enough space between each potato for heat circulation. This will ensure even cooking and beautiful grill marks.
When it comes to gas grilling, there are two types of heat: direct and indirect. For baked potatoes, we recommend using indirect heat by turning off one or more burners on your grill. This allows the potatoes to cook through without burning or becoming too charred on the outside. Keep an eye on them and turn occasionally for those coveted grill marks. With a little patience and attention, you'll have perfectly baked potatoes right off the grill!
Checking for Doneness and Serving the Perfectly Baked Potatoes
Now it's time to see if your mouth-watering potatoes are ready for devouring - simply give them a gentle squeeze with tongs to check for doneness. The skin should be crispy and the inside should be soft and tender. If they feel firm, continue cooking for a few more minutes until they're done.
Once your potatoes are perfectly baked, it's time to serve them up alongside your favorite grilled meats and veggies. For added flavor, sprinkle some salt, pepper, garlic powder or herbs on top of the potatoes before serving. You can also add toppings like shredded cheese, sour cream or chopped green onions. Baked potatoes make an excellent side dish that goes well with almost any meal - from burgers to steaks to roasted chicken. With these tips for seasoning potatoes and serving suggestions in mind, you'll have deliciously baked gas grill potatoes every time!
Frequently Asked Questions
Can I bake potatoes on a charcoal grill instead of a gas grill?
Did you know that 70% of grill owners prefer charcoal grills over gas? While baking potatoes on a charcoal grill is possible, the texture and taste may differ from those baked on a gas grill. Consider the pros and cons before deciding.
How long should I soak the potatoes before grilling them?
To ensure your potatoes grill evenly and cook through, soak them in cold water for at least 30 minutes. When grilling, use potato grilling techniques and choose firmer types like russet or sweet potatoes.
Should I season the potatoes before or after wrapping them in foil?
To season or not: Pros and Cons of seasoning potatoes before wrapping them in foil. If you want a crispy outside, avoid seasoning beforehand. Best potatoes for grilling: A guide to choosing the right type.
Can I use sweet potatoes instead of regular potatoes for grilling?
Are you looking for sweet potato alternatives for grilling? Try some grilled sweet potato recipes! Sweet potatoes are a great option and offer a tasty twist to the traditional baked potato.
Can I add toppings to the potatoes while they are grilling?
You can definitely add toppings to your potatoes while grilling! Some topping suggestions include cheese, bacon bits, sour cream, and chives. To ensure even cooking, slice the potato before grilling and use indirect heat techniques.
Conclusion
Congratulations! You've successfully baked a delicious potato on your gas grill. Your hard work has paid off and you can now enjoy the perfectly cooked, fluffy insides of your potato with the crispy skin that is sure to satisfy any craving.
Your efforts in preparing and wrapping the potatoes in aluminum foil, heating up the grill, and carefully placing them on the grill have resulted in a delectable treat. Just like how a sculptor shapes clay into a masterpiece, you have transformed an ordinary potato into a work of art - crisp on the outside but soft and tender on the inside.
So sit back, relax, and savor each bite of your expertly baked potato. You deserve it after all your hard work! Remember this experience next time you're looking for a satisfying meal that's easy to prepare on your gas grill. Happy grilling!
Read the full article
0 notes
Text
Savor the Flavorful Barbecue Pulled Pork at Kona Cafe
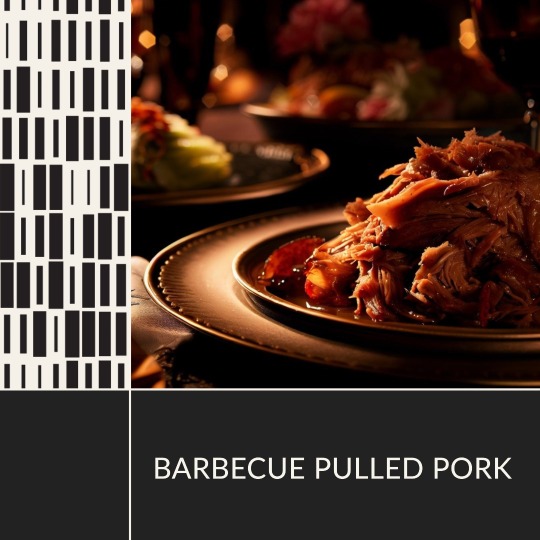
If you're a fan of flavorful and tender barbecue, then you won't want to miss the Barbecue Pulled Pork at Kona Cafe. This delicious dish is a perfect blend of sweet and savory flavors, making it a favorite among many visitors. The pork is slow-cooked to perfection and then smothered in a delicious barbecue sauce that is made with a blend of spices and brown sugar. The dish is served with a side of creamy coleslaw, which adds a perfect crunch and freshness to the rich and savory pork.
Whether you're a fan of barbecue or simply looking for a delicious and satisfying meal, the Barbecue Pulled Pork at Kona Cafe is definitely worth a try. The restaurant itself is also a charming and inviting spot to enjoy some delicious food while exploring the beautiful Disney's Polynesian Village Resort. So, if you're planning a visit to Walt Disney World Resort, be sure to add Kona Cafe and their Barbecue Pulled Pork to your list of must-try dining experiences.
More Delicious Recipes You Will Love:
- Banyan Beef Skewer Recipe – Bengal Barbecue
- How to Make Chef Mickey’s Breakfast Pizza: A Delicious Recipe
- Canadian Cheddar Cheese Soup – Le Cellier
For fun, I decided to have an O’hana party… And what’s an O’hana party without some dishes from the Polynesian?
This recipe was a fun one because I’d decided to make it awhile ago, however I could tell from the recipe floating around that it wasn’t complete. I got in touch with the fine folks at Disney and they were able to fill in the missing pieces, resulting in a great dish.
Keep in mind, some of the measurements for the pulled pork aren’t exact. They depend on the size and thickness of the meat, what kind of pot you’re using, how high the heat is, etc etc. The nice thing is that the meat is being slow cooked in liquid so it’s pretty hard, even for the cooking dunce, to screw it up.
If you’d like, keep an eye out for the pork shoulders that have a pop-up timer to let you know when it’s done. However, it’s really not necessary. If you notice the pork isn’t cooked through when you shred it, simply add it back to the liquid and continue to cook until all pink is gone.
Conclusion
In conclusion, the Barbecue Pulled Pork at Kona Cafe is a delicious and satisfying dish that is not to be missed. This flavorful and tender pork is slow-cooked to perfection and then smothered in a delicious barbecue sauce made with a blend of spices and brown sugar. The dish is perfectly complemented by a side of creamy coleslaw, adding a perfect crunch and freshness to the rich and savory pork. Whether you're a fan of barbecue or simply looking for a delicious and satisfying meal, the Barbecue Pulled Pork at Kona Cafe is definitely worth a try.
The restaurant itself, located in Disney's Polynesian Village Resort, offers a charming and inviting atmosphere, making it a perfect spot to enjoy a leisurely meal with family and friends. With its perfect balance of sweet and savory flavors, the Barbecue Pulled Pork at Kona Cafe is sure to become a favorite among meat lovers. So, if you're planning a visit to Walt Disney World Resort, be sure to add Kona Cafe and their Barbecue Pulled Pork to your list of must-try dining experiences.
In addition to the delicious food and recipes, Disney World is also known for its unique dining experiences, such as character dining and themed restaurants. Whether you want to have breakfast with Mickey Mouse, dine in a replica of a sci-fi drive-in theater at Hollywood Studios, or enjoy a meal with an ocean view at the Coral Reef Restaurant in Epcot, there's something for everyone. And with the help of Recipes Today and the How to Make category, you can even recreate some of these magical dining experiences in your own home. So why not start planning your next Disney-inspired meal or dining experience today?
Read the full article
0 notes
Text
How To Reduce Smoke Charcoal Grill

Are you tired of your backyard barbecues being ruined by thick clouds of smoke from your charcoal grill? Don't throw in the towel just yet! With a few simple tips and tricks, you can reduce the amount of smoke produced by your grill and enjoy perfectly cooked meals without all the fuss.
As they say, where there's smoke, there's fire. And while some smoke is inevitable when using a charcoal grill, excessive amounts can be a real buzzkill for any outdoor gathering. But fear not - with a little know-how and some basic equipment, you can master the art of grilling with minimal smoke and maximum flavor. So let's get started on how to reduce smoke on your charcoal grill!
Choosing the Right Charcoal and Accessories
You gotta make sure you're choosing the right charcoal and accessories if you want to reduce smoke on your grill. Charcoal selection plays a huge role in how much smoke your grill produces. Look for natural, hardwood lump charcoal instead of briquettes that are made with additives like coal dust or sawdust. Hardwood lump charcoal burns cleaner and hotter, creating less smoke than briquettes.
Another way to reduce smoke is by using accessory options like a chimney starter. This tool helps you light your charcoal more efficiently without using lighter fluid, which can add unnecessary chemicals and contribute to more smoke. You can also use a drip pan under your food to catch any excess fat or juices that may cause flare-ups and produce more smoke. By choosing the right charcoal and accessories, you'll be well on your way to reducing the amount of smoke on your grill.
Preparing Your Grill for Reduced Smoke
Before firing up your grill, take a few minutes to clean the grates and remove any excess debris that may cause unwanted flavors. Once you have cleaned the grill, it's important to consider proper grill placement and heat management techniques to minimize smoke production.
When placing your grill, keep in mind wind direction and avoid placing it too close to walls or other objects that could reflect heat back onto the grill. Additionally, make sure your charcoal is evenly distributed and not too tightly packed, as this can lead to uneven heating and increased smoke production. To manage heat levels, try using a two-zone fire method by placing all of the charcoal on one side of the grill and leaving the other side empty. This allows for both direct and indirect heat cooking options while reducing overall smoke production. By following these tips for preparing your grill for reduced smoke, you can enjoy a delicious meal without having to deal with excessive smoke inhalation or unwanted flavors.
Lighting Your Charcoal Properly
To achieve a perfectly lit fire, it's essential to distribute the charcoal evenly and use a chimney starter. When distributing the charcoal, make sure that there are no clumps or piles as this can cause uneven heating and smoke production. Use a tool like a hoe or rake to spread out the coals evenly across the grill. Once you have distributed your charcoal, use a chimney starter to light them up. This method is more efficient than using lighter fluid which can produce more smoke.
Here are some tips to help you light your charcoal properly:
- Use smoking wood chips to add flavor to your food without producing too much smoke.
- Control the temperature by adjusting the airflow in your grill with its vents.
- Wait until all of the charcoal has turned gray before cooking on it.
- Consider using an electric starter if you're looking for an alternative to a chimney starter.
By following these tips, you'll be able to reduce smoke production while still achieving that delicious smoky flavor in your grilled dishes.
Controlling Airflow for Less Smoke
Controlling the airflow in your grill is crucial for achieving a perfect temperature, and according to a recent study, proper ventilation can reduce cooking time by up to 30%. There are different ventilation techniques you can use to minimize smoke production while still getting that delicious smoky flavor. One way is by opening all vents wide open when starting the fire and then gradually closing them as the temperature rises. This method allows for maximum air circulation at the beginning, which helps ignite the charcoal quickly, reducing smoke production.
Another way to control airflow is by using the two-zone cooking method. This technique involves piling all your lit coals on one side of the grill and leaving the other side empty. By doing this, you create two distinct heat zones - a hot zone where you sear or cook your food directly over the coals and a cooler zone where you move your food after searing it. This method reduces smoke production because there's less direct contact between food and heat source, meaning less flare-ups and less burning of fat dripping onto hot coals. Use this table below as a guide when controlling your grill's airflow:
Vent Position
Temperature
Airflow
---------------
-------------
---------
Fully Open
High
Maximum
Half Open
Medium-High
Moderate
Mostly Closed
Low
Minimum
Remember that mastering ventilation techniques takes practice but once you get it right, it'll make grilling more enjoyable with fewer worries about smoke production!
Cleaning and Maintaining Your Grill for Optimal Performance
Keeping your grill in top condition is essential for getting the best results every time you cook on it. Regular grill maintenance can help reduce the amount of smoke produced during cooking. Here are some cleaning techniques that can help reduce smoke and improve performance:
- Scrub the grates: A clean grate allows for better heat distribution and reduces flare-ups. Use a wire brush to scrub off any leftover food particles or grease buildup.
- Remove ash and debris: Ash buildup can block airflow, leading to more smoke production. Remove ash from the bottom of the grill after each use.
- Check propane tanks: If you're using a gas grill, make sure your propane tank is full and not damaged. A damaged tank could lead to uneven heating and increased smoke production.
In addition to regular maintenance, there are also cooking tips that can help reduce smoke:
- Preheat your grill: Preheating your grill before adding food helps burn off any excess residue, reducing smoke production.
- Avoid fatty meats: Fatty meats tend to produce more smoke than leaner cuts. Opt for leaner meats or trim excess fat before cooking.
- Use indirect heat: Indirect heat cooking involves placing food on a cooler part of the grill instead of directly over flames. This method reduces flare-ups and overall smoke production.
Frequently Asked Questions
Can I use any type of charcoal for my grill or are there specific ones that produce less smoke?
When it comes to types of charcoal, some produce less smoke than others. Look for lump charcoal or briquettes made from hardwoods like oak or hickory. Also, try using indirect grilling techniques to reduce smoke production.
Is it necessary to clean my grill after every use to reduce smoke?
Proper grill maintenance is important to reduce smoke. One common mistake is not cleaning the grill after use, which can lead to excess smoke and even fire hazards. Make sure to clean your grill regularly for optimal performance.
How can I tell if I have too much or too little airflow while grilling?
Oh, you're just dying to know if you have too much or too little airflow while grilling? Well, lucky for you, it's all about airflow management and grill temperature control. No biggie.
Are there any specific types of accessories that can help reduce smoke while grilling?
To reduce smoke while grilling, consider using a charcoal basket. This accessory allows for better air circulation and more efficient burning. Grill cover alternatives can also help control airflow and temperature, leading to less smoke production.
Can using a smoker box with wood chips reduce smoke or will it increase it?
Using a smoker box with wood chips can increase smoke production, but it also adds a smoky flavor to food. If reducing smoke is your goal, try using fewer wood chips or soaking them in water first.
Conclusion
Congratulations! You've successfully learned how to reduce smoke on your charcoal grill. With the right charcoal, accessories, and preparation, you can enjoy a delicious grilled meal with minimal smoke. Remember to always light your charcoal properly and control airflow for optimal performance.
But don't stop there! As you continue to use your grill, make sure to regularly clean and maintain it. Think of it as giving your trusty steed a good brushing after a long ride. By taking care of your grill, you'll not only reduce smoke but also extend its lifespan.
So fire up that grill and get cooking! With these tips in mind, you'll be able to impress your friends and family with mouth-watering grilled dishes without setting off any smoke alarms. The aroma of sizzling meat wafting through the air will have them salivating in anticipation of their next bite. Happy grilling!
Read the full article
0 notes
Text
Tusker House Character Breakfast Review: Donald Dining Safari

Nestled in the very back corner of Animal Kingdom with a small, completely missable sign and no fancy building to speak of, it was really easy to pass right by it. In fact, I remember the first time I went there in September of 2011, it was the only character dining experience I could find on short notice (except for something with Agent Oso at Hollywood Studios… nd that wasn’t happening).
I booked my reservation begrudgingly, expecting nothing, and not really looking forward to eating there. The African themed breakfast was a turn off, Animal Kingdom isn’t my favorite park, and if it wasn’t for my compulsive need for character dining during a Disney trip, I’d have skipped it all together. I kept telling myself “at least it has Mickey Waffles.”
More Delicious Recipes You Will Love:
- Dole Whip Float – Aloha Isle
- Fettuccine Alfredo – Italy Pavilion
- French Onion Soup Recipes – Be Our Guest
I expected nothing but utter disappointment in this little restaurant I’d never heard of, that nobody wanted to eat at (why else would I be able to get a reservation two weeks before my trip?), in a park I didn’t typically spend a whole day in…
Then I ate there… And Tusker House instantly went from place I was going to eat at because it had food and characters to a favorite dining experience that was not to be missed. The weird location in the tucked-away corner of what is arguably Disney’s least-favored park and poor signage made this an often overlooked hidden gem, not just at Animal Kingdom, but among all of the character dining experiences. Featuring Donald, Daisy, Mickey, and Pluto in their safari-finest, this is a very fun, family-focused character meal that I’ve been to time and time again, both on adults-only trips and family trips with small children.
The check-in process for Tusker can be very lengthy and somewhat confusing, so be sure to arrive there at least 15 minutes before your reservation opens. Remember, it is in the back of the park and it does take quite the walk to get there from the front gate of Animal Kingdom…
Once you’ve arrived, check in with the hostess outside and you will (eventually) be escorted behind the building to take your souvenir picture (remember, PhotoPass Photographers sometimes use your camera too! If you don’t have PhotoPass+ which entitles you to this picture at no charge, hand the photographer your camera too… They may decline, but they may not!) and then into the buffet hall off of which are two dining rooms.
The dining rooms are fairly large, have lots of tables in them (almost bordering on overcrowded), and can be very loud especially as it starts to fill up or during the occasional character/kid parade (the characters lead kids with loud musical instruments in a parade through the dining room… Cute, but again quite loud and obtrusive… Who’s bright idea was it for the kids to use maracas and tambourines anyway?).
The decor is fantastic… It reminds me of a train station, only instead of waiting for the train, you’re waiting for the safari. Lots of African-styled props, pictures, and other decor adorn almost every flat surface and wall. My favorite feature has to be the carpet-draped ceiling which both reminds me of Africa and the beginning to “Aladdin.”
As Donald is the host of the breakfast, it goes without saying that he is there to meet and interact with. He used to be located outside-only as the character you take your souvenir photo with, however the last two times I ate there he had been “promoted” to the dining room and now comes to your table like the rest of the characters. Along with him is Mickey, Daisy, and Goofy, though occasionally Goofy rotates out in favor of Pluto while Daisy is very rarely replaced with Minnie.
The characters rotate around the separate dining rooms and visit each table for what are actually pretty lengthy interactions. They will pose for pictures, sign autographs, and engage in that fun horseplay that you’d expect from Donald and the gang. In fact, one year Goofy walked off with my plate and Mickey pushed my husband out of his chair and sat with me for breakfast. Things can get pretty wild!
Because they cycle through two dining rooms and have a Cast Member escort who’ll give you a heads up when a character is approaching your table, there is still plenty of time to visit the buffet and grab copious amounts of food. Want a family picture with your favorite character? See if the Cast Member escort will take a picture for you… They are usually very happy to do so!
Aside from the coffee, tea, soda, water offerings one would expect, Tusker House serves a specialty juice called “Jungle Juice.” A combination of orange, guava, and passion fruit juice, this stuff is almost worth the price of dinner by itself. I love, love, love, love this juice and it’s my favorite non-alcoholic drink on property.
My brother, who’s been to exotic locations like Fiji and Dominica says it reminds him of the drinks they had there with meals. Your experience at Tusker House isn’t complete unless you at least try it.
But really, let’s get to the nitty gritty… The food. The food selection and quality here is, I think, one of the best of its kind in the parks. Despite the African theme, everything you could ever imagine is available and even the pickiest eater is sure to find something there.
Safer options include the basics: bacon, sausage, scrambled eggs, quite a bakery spread which include donuts, danishes, banana bread, muffins, as well as a wide assortment of whole and cut fruit, and of course, Mickey waffles. Warm offerings include sausage gravy and biscuits, oven roasted gold potatoes (both my favorites), various frittatas, and carved rotisserie ham.
Among all of those safe, dare I say universally liked options, there are some signature dishes that are nothing short of delicious on their own. Mealie pap is one of the most talked-about and certainly one of the most popular. A mix between porridge and corn casserole, sweet but still salty, and judging by the fact almost everybody had at least a spoonful on their plate, a safe option for picky eaters who want to safely wander out of their comfort zone.
Admittedly it’s not my favorite, but considering it’s one of my most requested and viewed recipes, I’m clearly in the minority. I personally fell in love with the banana bread bread pudding with vanilla sauce. I’m almost embarrassed to say how much of it I have to have eaten in my life.
Decadently sweet, moist, with bits of toasty crunch… Its pretty much the perfect breakfast food and something I still dream about. The beef bobotie quiche is another very popular signature dish… But I’ve yet to try it. Every time I’ve gone up, they’ve been between batches. I guess that speaks to both how popular, and how good, it really is.
Really, I can’t talk about the food at Tusker without having my tummy do a happy-dance. It’s just so ridiculously good. Having eaten there in September 2011, January 2012, October 2012, January 2013, and February 2014, I can safely say it’s my favorite breakfast and they have maintained the fantastic experience I’ve come to expect over the years.
The only change I’ve noticed is that while it once was a hidden gem that was very easy to walk into a reservation for, it has now become increasingly difficult to get reservations and it often fills up during peak season at the 180 day reservation mark. My last trip, it was the first non-princess character experience to be completely booked months beforehand.
For people who like advantageous dining reservations which help maximize park time and minimize waits, Tusker House is one of the best choices out there for getting a jump on the day. Located a stone’s throw from Kilimanjaro Safaris, one could eat there at 8 and still be out in time to catch one of the first safari jeeps for the day when the park officially opens, saving a time and a Fastpass+ reservation.
We regularly took the first reservation of the day at Tusker, popped out shortly after the park opened to do the safari, then walked onto Everest and Kali River Rapids multiple times… Though I suggest that for people who have only the strongest of stomachs (yes, a lesson I learned the hard way).
I love Tusker House… It is the highlight of the character dining experiences at Walt Disney World and a fantastic way to immerse yourself in the richness that is Animal Kingdom. No, that richness doesn’t include my son’s Ninja underwear peaking out while riding my husband’s shoulders. Lucky for everybody, I think.
In addition to the delicious food and recipes, Disney World is also known for its unique dining experiences, such as character dining and themed restaurants. Whether you want to have breakfast with Mickey Mouse, dine in a replica of a sci-fi drive-in theater at Hollywood Studios, or enjoy a meal with an ocean view at the Coral Reef Restaurant in Epcot, there's something for everyone. And with the help of Recipes Today and the How to Make category, you can even recreate some of these magical dining experiences in your own home. So why not start planning your next Disney-inspired meal or dining experience today?
Read the full article
0 notes
Text
How to Prevent and Control Grilling Flare-ups

Grilling is a great way to cook food outdoors and enjoy the fresh air. However, grilling can be a tricky endeavor, especially when it comes to preventing and controlling flare-ups.
Flare-ups occur when the fat and juices from the food drip onto the hot coals, causing a burst of flames. Fortunately, there are several steps you can take to reduce the risk of flare-ups when grilling.
In this article, we'll discuss the importance of choosing the right grill, properly seasoning the grill, maintaining proper distance, keeping grease in check, and utilizing a water pan. With these tips, you'll be able to enjoy your grilling experience without any unnecessary flare-ups.
When it comes to preventing and controlling flare-ups, the first step is to choose the right grill. Make sure you choose a grill that has enough space to move food around and prevent flare-ups.
You should also make sure the grill has a lid so you can control the temperature and prevent flare-ups. Finally, make sure you season the grill properly. This will help keep the fat and juices from sticking to the grill and prevent flare-ups.
If you're in the market for a gas grill and trying to determine the right size for your needs, our articles on the best 2 burner gas grill, best 3 burner gas grill, and best 4 burner gas grills are great resources to check out.
Our experts have tested and reviewed several models to provide you with in-depth information on each grill's features, performance, and value. Whether you're looking for a compact grill for your balcony or a large grill for your backyard, our articles can help you find the perfect gas grill to suit your needs.
Check out our reviews to make an informed decision and enjoy delicious grilled meals all year round!
Choosing the Right Grill
Choosing the right grill can make all the difference when it comes to avoiding unwanted heat and smoke. Charcoal and gas grills both have their advantages and disadvantages, so it's important to consider the size, shape, and overall design of the grill before making a purchase. Charcoal grills are more likely to flare up if the charcoal is too close to the food, so a larger grill that allows for more distance between the food and the coal can be beneficial.
Gas grills typically offer more temperature control and are easier to clean, but it's important to have a good ventilation system in place to reduce the risk of flare-ups. If you're looking for an area to keep the grill away from your home and other structures, a larger size and sturdy construction are key. Taking the time to select the right grill is essential for tasty grilled meals and fewer flare-ups.
Properly Seasoning the Grill
Proper seasoning of your grill makes a huge difference in the flavor of your food, so don't skimp on the time it takes to do it right! To season your grill properly, start by wiping it down with a damp cloth and then heating it up for 10-15 minutes. This will help remove any residue from previous use.
Then, use a high smoke point oil such as vegetable oil, canola oil, or peanut oil and rub it all over the grill grates. Make sure to get it into all the nooks and crannies. Heat up the grill for an additional 10-15 minutes and then use a wire brush to scrape off any excess oil. This will help prevent flare-ups from sticking food particles.
Finally, to keep the grill seasoned and in good condition, lightly oil the grates after each use. This will help protect the metal from rust and keep the flavor of your food intact.
Maintaining Proper Distance
Maintaining the right distance from your grill is key to keeping it in good shape and ensuring your food is cooked to perfection. This can prevent flare-ups caused by the food being too close to the heat source.
The right distance will depend on the type of grill and the size of the cooking area, but as a general rule of thumb, the food should be at least three inches away from the heat source. Also, make sure that the grill grates are clean and free from debris, as this can cause flare-ups when the debris comes into contact with the heat source.
It’s also a good idea to keep a spray bottle of water nearby in case a flare-up does occur. Simply spray the flame with the water to help put it out and keep your food from burning.
Additionally, keep an eye on the temperature of your grill and adjust it as needed. Too high of a temperature can cause food to burn quickly, leading to flare-ups. On the other hand, too low of a temperature can cause the food to take longer to cook, resulting in flare-ups. Keeping an eye on the temperature and adjusting it accordingly can help you avoid these issues.
Keeping Grease in Check
Grease is an inevitable part of grilling, but keeping it in check is essential for delicious results - so don't let it get out of hand! To help keep the grease in check, it's important to clean the grates before and after grilling to remove any excess grease.
Additionally, it's important to ensure the fat and oil that you use to season your food doesn't drip onto the flames, as this can cause flare-ups.
Additionally, it's important to ensure that the food you're cooking isn't too greasy, as this can also cause flare-ups. To avoid flare-ups, it's best to use leaner cuts of meat, trim away any excess fat from the meat, and avoid adding too much oil or fat to the food that you're cooking.
Finally, it's important to keep the grill lid closed as much as possible to help contain the grease and prevent flare-ups. Overall, keeping the grease in check is an important part of preventing and controlling grilling flare-ups.
Utilizing a Water Pan
Utilizing a water pan when grilling can help ensure that flare-ups don't get out of hand, allowing you to enjoy more flavorful results. When fat and grease from food drips onto the heat source, the vaporized grease can cause a flare-up.
A water pan can be used to help prevent flare-ups from occurring by catching the grease before it hits the heat source. The water in the pan also helps to provide humid heat to the cooking environment, which prevents the food from drying out.
Additionally, the water helps to keep the temperature of the cooking surface constant, minimizing the risk of flare-ups. When utilizing a water pan, make sure to fill it regularly to keep the water level high enough to prevent the grease from reaching the heat source.
Frequently Asked Questions
What type of fuel should I use?
When grilling, choosing the right type of fuel can make a big difference in the flavor and safety of your food. For example, charcoal offers a smoky flavor and can be used to create a hot, direct-heat cooking surface.
However, charcoal grills can produce flare-ups, so it's important to use the correct amount of fuel and monitor the heat. Alternatively, gas grills provide more even, consistent heat, but they don't impart the same smoky flavor as charcoal.
Ultimately, the right fuel for your grill depends on the type of food you're cooking and your personal preference.
Is it safe to use lighter fluid?
Using lighter fluid on a grill is generally not recommended as it can create an unpleasant flavor on the food and can be hazardous due to the flammability of the fluid. If lighter fluid is used, it should be done so cautiously and with the full understanding of the risks involved.
The lighter fluid should be applied to the charcoal and not to the fire. The charcoal should be left to absorb the fluid for at least 15 minutes before lighting the fire. It is important to keep the lighter fluid away from the open flame and to never use more than is absolutely necessary.
How often should I clean my grill?
Cleaning your grill on a regular basis is essential for safe and delicious grilling. Grease and food particles can build up over time and cause flare-ups, so it's important to clean your grill every few uses.
To do this, you should use a wire brush to remove any build-up on the grates, then use a damp cloth to wipe down the interior surfaces. Make sure to clean underneath the grill, as well as the burners and any other areas that may have been exposed to debris. Doing this will help ensure a safe and flavorful grilling experience.
How can I reduce smoke when grilling?
Grilling is a great way to cook your favorite foods, but it can sometimes produce too much smoke. To reduce the amount of smoke, make sure to preheat your grill on high for about 10 minutes before you start cooking.
Additionally, use a spray bottle of water to dampen any flames that may arise, as this will reduce the amount of smoke that is produced. Finally, keep your grill clean and free of debris, as this will also reduce the amount of smoke that is produced. With these simple tips, you can reduce the smoke that is produced while grilling.
What should I do if the fire gets out of control?
If you find yourself in a situation where your fire gets out of control, the first thing you should do is move the food away from the flames to reduce the risk of burning. After that, shut the lid of your grill and reduce the air flow by reducing the ventilation.
If the fire remains unruly, turn off the gas and let the fire burn out. It's important to be prepared and have a fire extinguisher handy in case of an emergency, as the fire can spread quickly.
Conclusion
Grilling flare-ups can be a big problem for any grill master, but luckily with the right preparation and maintenance, they can be prevented and controlled. By choosing the right grill, properly seasoning and maintaining it, keeping the distance between the food and the flame, and keeping an eye on the grease, you can create a safer and more enjoyable grilling experience.
With these tips in mind, you can be sure to have a successful and enjoyable grilling experience.
Read the full article
0 notes
Text
Red Velvet Cheesecake Cupcakes – Starring Rolls Cafe

Red Velvet Cheesecake Cupcakes are a delicious and decadent dessert that combine the rich and velvety flavor of red velvet cake with the creamy and tangy taste of cheesecake. These mini cakes are perfect for any occasion, whether you're hosting a party, celebrating a special occasion, or just looking for a sweet treat.
The cupcakes are typically made by first preparing a red velvet cake batter, which is then spooned into a muffin tin lined with cupcake liners. A cheesecake mixture is then spooned on top of the cake batter, and the cupcakes are baked in the oven until they are fluffy, moist, and fully cooked.
The result is a delectable treat that features the best of both worlds - the moist and flavorful texture of red velvet cake and the creamy and tangy taste of cheesecake. These cupcakes are often topped with a dollop of whipped cream or cream cheese frosting and garnished with fresh berries or chocolate shavings to create a beautiful and mouth-watering presentation.
Whether you're a fan of red velvet cake or cheesecake, or simply looking for a new and exciting dessert to try, Red Velvet Cheesecake Cupcakes are sure to satisfy your sweet tooth and impress your taste buds.
More Delicious Recipes You Will Love:
-
Read the full article
0 notes
Text
Moist Banana Bread with Cinnamon Crumble Topping Recipe

What’s more comforting than rich, flavorful cinnamon bread, blended together with bananas, spices, raisins, nuts, and topped with a silky vanilla sauce? This warm, cozy dish is a classic at Tusker House at Disney’s Animal Kingdom, served at the buffet for both breakfast and lunch, has become one of their signature offerings.
More Delicious Recipes You Will Love:
- Pommes Frites with Cajun Remoulade
- Hearty Breakfast Potato Casserole Recipe for Family Brunches
- Chipotle Tofu & Pineapple Skewers
There’s a lot of ingredients, but this dish comes together really easily. The bake time can vary depending on how deep the dish you’re baking it is, but you can tell it’s done when the top has puffed and become almost dome-like and the bananas on the surface bubble a bit.
Perfect for a family style breakfast, this popular meal is one that your family will love!
Conclusion
Based on the trial of the Moist Banana Bread with Cinnamon Crumble Topping recipe, it can be concluded that the recipe produces a delicious and moist banana bread with a flavorful cinnamon crumble topping. The recipe is relatively easy to follow and can be made with ingredients that are commonly found in most kitchens.
The banana bread itself is moist and tender, with a rich banana flavor that is complemented by the warm and comforting taste of cinnamon. The crumble topping adds a nice crunch and texture to each bite, while also providing a pleasant contrast to the softness of the bread.
Overall, the Moist Banana Bread with Cinnamon Crumble Topping recipe is a great option for anyone looking to make a tasty and satisfying baked good. It is perfect for breakfast, brunch, or as a snack, and is sure to please anyone who loves the classic combination of banana and cinnamon.
Read the full article
0 notes