Last Seen Blogs
roguedarkness
Inside Ali's Shell:
0ketlyn-s
Ket-inha

coldartisanavenue
Sex Underwear Speedo

www0xxx0zzz-blog
제목 없음

fgooooooo
Guess who's back (back again)
Text
Evaluation
In this evaluation I will be assessing myself as a photographer and the work that I’ve produced, along with the processes I’ve used along the way. At the beginning of the project when I began mapping out ideas, I realised that as a final major I wanted to make a culmination of my other photography projects throughout the course of my FdA and even before, I like working with strong graphical images and using photo manipulation which I consider to be one of my strengths as a photographer.
I’ve definitely really enjoyed bringing all of my past projects together to create a final major project. I’ve experimented with different formats by taking part in a large format project, which was an entirely new experience for me and totally out of my usual comfort zone. I don’t usually enjoy using analogue photography as the risky process of returning with a ruined film makes me nervous, so I decided not to progress with it, but I’m glad I took the chance to try it.
Returning to my usual format, which is digital, I went back to the drawing board. Strangely, as I was mapping the project over the course of a few days I was inspired by bizarre dreams that I was having in my sleep, and I like my projects to be out of the ordinary. I usually focus on telling a tale, whether it be a piece of mythology or a classic fairytale story, and put my own spin on it. I was lucky enough to have a few weeks of really good weather, and as such I took the opportunity to photograph my friend Jenna and her family in some natural light as a test shoot. The idea behind my project was to create a hybrid between something natural, and something totally bizarre, and dreams are something that have always interested me.
I took immediate inspiration from the film ‘Inception’, and the way it was filmed in particular. The film focuses heavily on dreams and how they work, although in a fictional way for the excitement of a movie. The director uses indicators throughout to give signs to the watcher, to help unblur the lines between the dream world and the real world. They’re often bizarre anomalies, and I wanted to take that idea and use it in my project, so I went for a glitch style, to represent the muddled reality that dreams present.
At first I wanted to create a literal recreation of the dreams I was having, and as such I started writing down everything I was dreaming in a log, I wanted to capture the colours, the setting, the story and tell it in my own way. However, I realised that I had perhaps been too ambitious with my ideas, as it would take hours to create set pieces and find the right locations. If I had been given more time on the project, I’d definitely like to do something bigger and more cinematic, but instead I chose to go in a new direction and photograph portraits of people, alongside a short diary of their dreams, and this is something I can learn from in the future.
As I carried on branching out from the focus on dreams, I thought of dreams being fragmented, or shattered as a first thought, and decided to use this in my project for inspiration with my photomanipulation. My biggest regret during the project is that I wish I had done more practice shoots so that I could display a wider variety of work at the exhibition. Because of time constraints I had to make the most of the images I took as part of my second shoot, and I think that given the chance I could’ve made a much better impression if I had given the time for a third shoot in my plan.
To create the odd, dreamlike effect that I was aiming for I started by upping the saturation of my photographs tastefully, as my dreams are always high in colour. I’m happy with my personal skills as an image post-processor and I think I improve again and again with each project, right up until now.
At the last moment before I submitted my work, I decided to go back to the idea that my final major would be a culmination of my previous work up until now, and I added an anaglyphic filter to further the retro glitch style that I was trying to create. I felt like this was the right final touch for my piece, and although I didn’t completely fulfill all of the tasks that I wish I had, I am happy with the final photographs I’m going to present.
0 notes
Photo

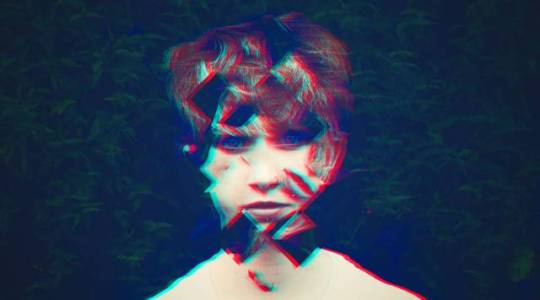

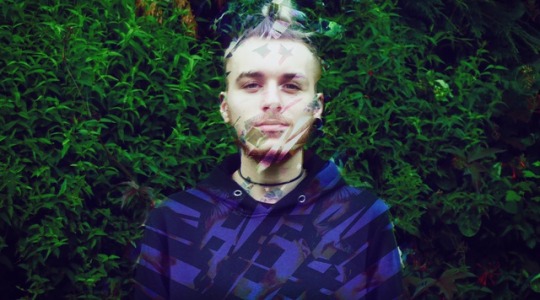
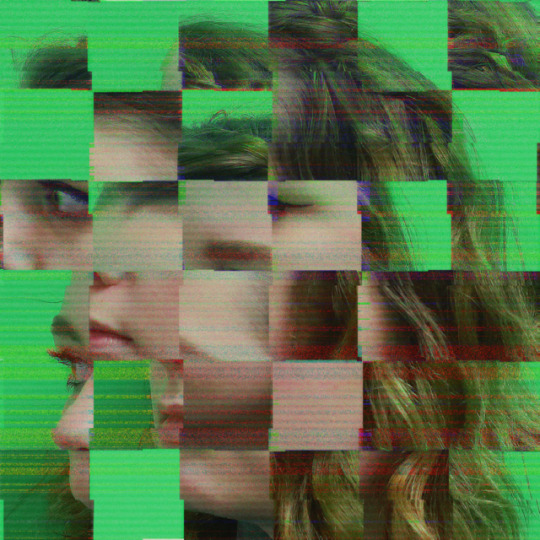
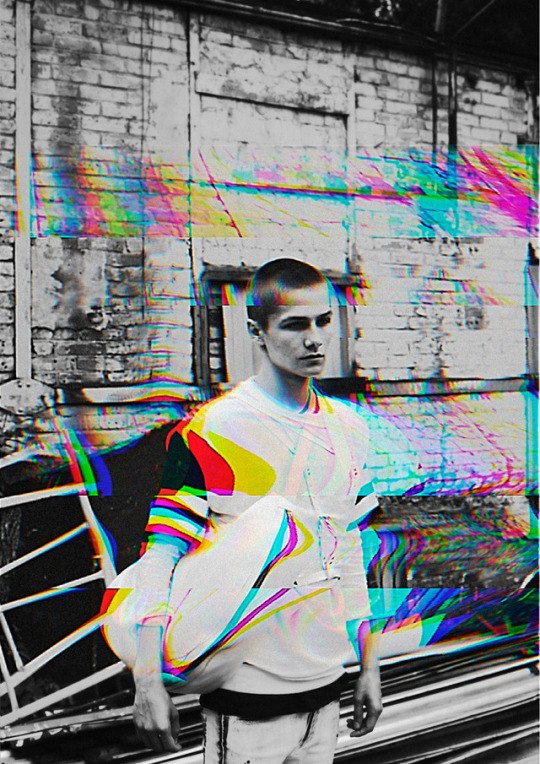
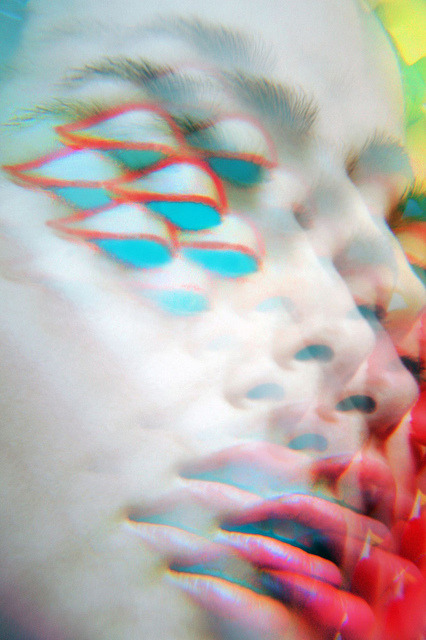
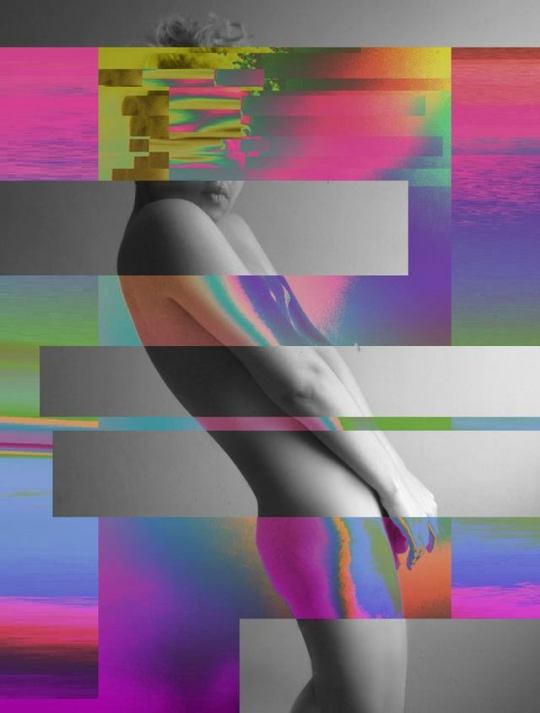
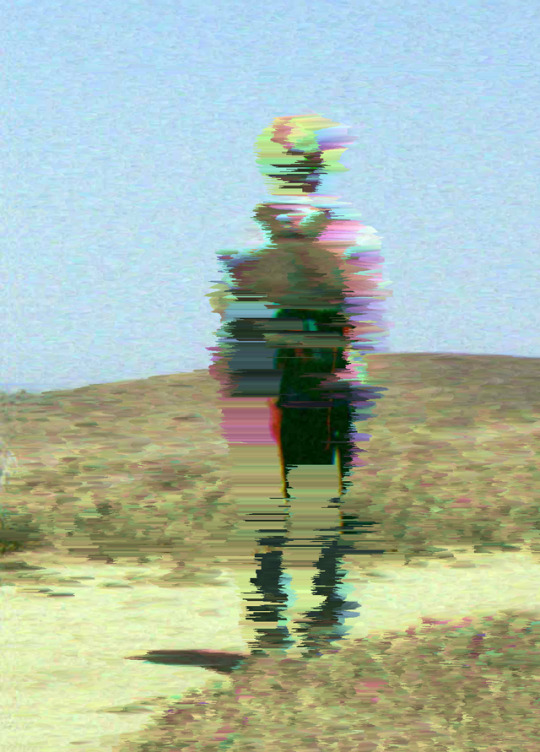
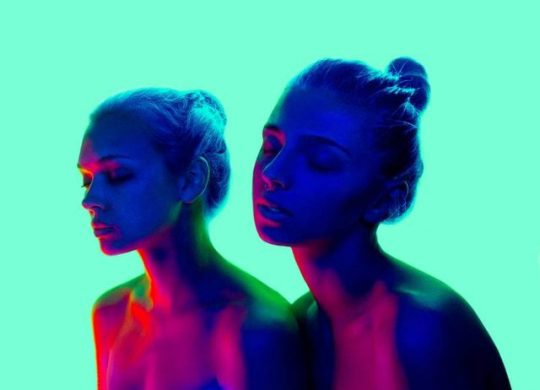
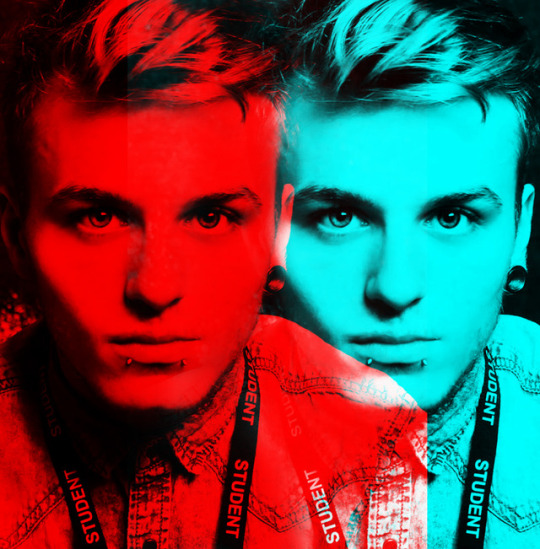
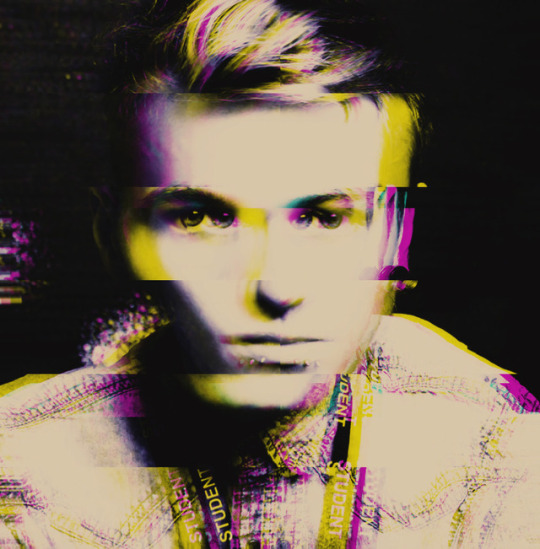
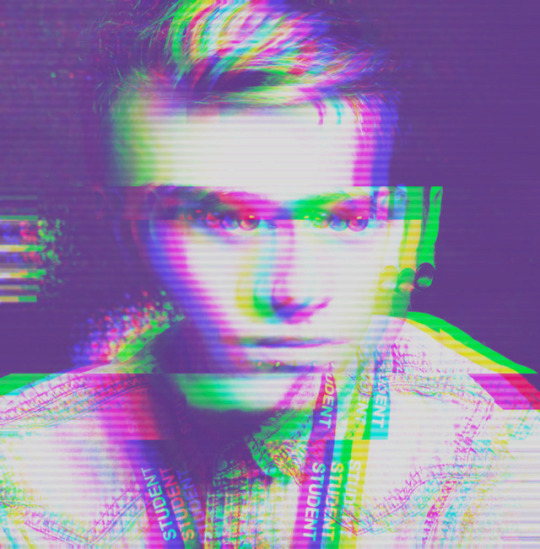
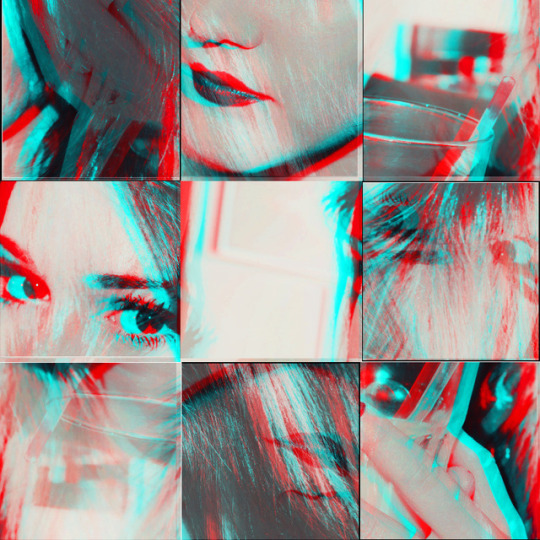
FINAL FOUR
These are my final four images, ready for exhibition. Making use of distortion and anaglyphic 3D.
2 notes
·
View notes


Photo


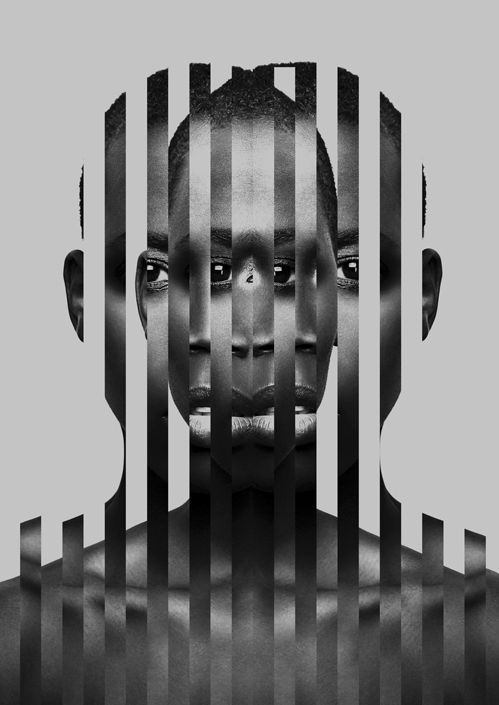
This is the first piece of inspiration I saved from pinterest. As I research dreams and distortion I decided to research the word ‘fragmented’, and these images are some of the images I saved as examples to try and recreate with my own twist.
The last one especially relates to a landscape I did in the past, where I used circles to cut and turn pieces of the environment. I haven’t tried this with portraits but it’s something I’d definitely like to pursue as my project continues.
0 notes
Photo
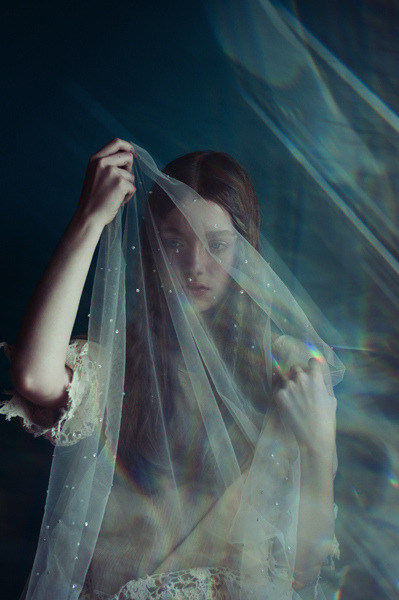

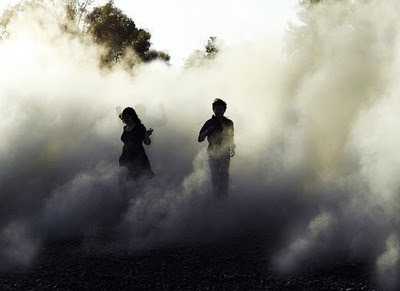

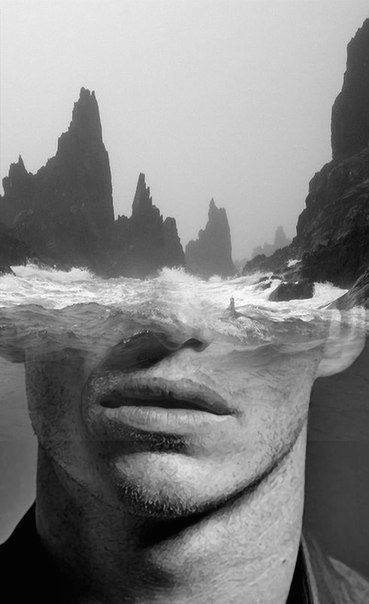


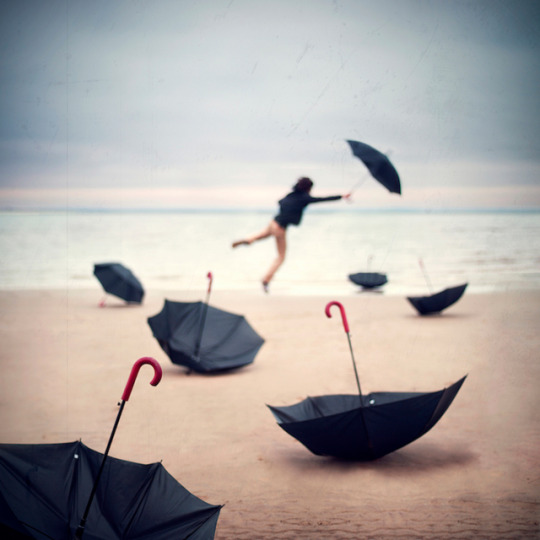
Starting at the top, I’d like to draw inspiration from these images and perhaps include netting, and smoke to create a dreamy atmosphere along with muted pastel colours.
The second half of the post is about photo manipulation particularly, adding in pieces and using blending modes to cut and paste different pictures together, perhaps used to convey confusion at a dream or to put two contrasting pieces together seamlessly.
I particularly liked the umbrella stitched picture because it’s very similar to a dream I had myself, where I was following a train track picking up hats.
0 notes


Photo


Techniques used in geometric landscape that I’d like to experiment with in portrait photography. Especially the one on the right as I feel like it matches the fragmented theme I’d like to create in some of my final images.
0 notes


Photo


Photographic Style:
I’d love to use gels over the lens of my camera to create these bizarre colour blocking filters. I feel like they match the theme of the dream sequences I’m going to try and create, and the high contrast and saturation is what I imagine a dream to be like.
However, considering I’d like to use natural light for my photographs I feel like using coloured gels may not be as effective as it might be if I were to shoot in the studio, so perhaps this is a technique better saved for another project.
0 notes
Photo


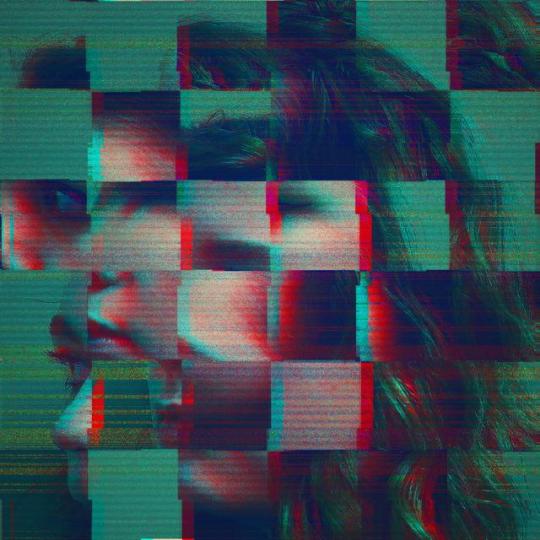
.EXPERIMENTATION 3
Continuing my experimentation, I decided to focus on different anaglyphic/glitch/distortion methods.
1st image: This is a different version of the anaglyphic filters I’ve been using. Up until now I’ve been focusing on closely overlaying the blue and red layer together to create that recognisable 3D effect. However, moving the two layers further apart has a nice double image effect that I could make use of in my final image.
2nd image: This is my second round of experiments on this image and in this version I used a wave generator in Photoshop to create randomized grid cuts in the image which slightly offsets sections and works really well with the reds and the blues. What I like about the wave generator is that it’s truly random so there isn’t any kind of plan that’s put into the misplacement of the sections.
This makes the image as close to being naturally glitched as I can get without it ending up like my previous experiment, which used an organic glitching technique that included corrupting the actual file format, but ended up too messy for my liking.
3rd image: This image is using a opalescent overlay that I created by taking a picture of a monitor on my phone, and upping the saturation on Photoshop. It created like a rainbow, wavy overlay which I thought would look really well to create a digital glitch, and I think the important thing about using this filter is the placement, which I used over the eye to frame it.
4th image: This image is using the same experiment as image number two, but with the saturation slider used to break away from the typical reds, pinks and blues that I’ve been using a lot up until now. However, yellow and purple doesn’t have the same 3D effect in an exhibition because it’s rare for 3D glasses to be any other colour apart from red and blue. I also changed up the options on the wave generator in this image, which resized certain parts of the image, warping it further and making the sections of the image more disparate.
5th image: This image is a noise based glitch, where I use the noise filter to create glitch lines across the image. And while this does create an authentic glitch look, similar to the corruption method I used before, I think it comes with the same issue, it takes the polish away from the photograph and for me that isn’t the style I’m looking to portray with my final image.
6th image: This image is the final experiment that I used this image for, and in this version I used all of the techniques from above, starting with a wave generator to split and slide the image only horizontally, changing up the style from the grid I’ve been practicing with. It also features lines, but they aren’t noise based so they come across cleaner, and less grungy. And finally, taking inspiration from the pearlescant image that I captured on my phone camera from the monitor screen, I’ve used a selection of different colours as well as a lavender coloured filter to try and bring in the pearlescant palette.
0 notes
Photo

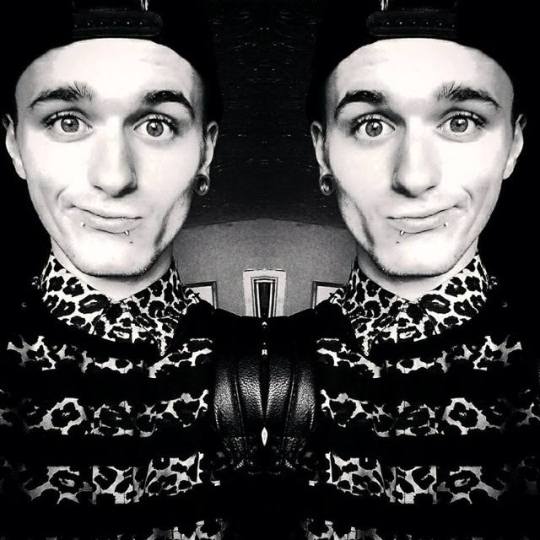
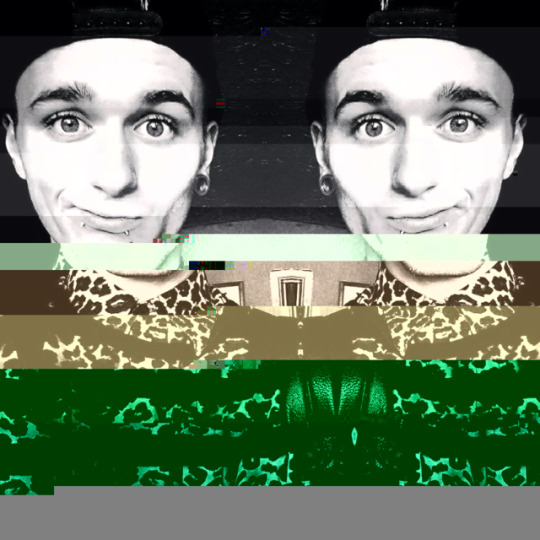

GLITCH EXPERIMENTATION
After working extensively with colour filters and gradient maps, I decided to further my project by practicing on some of my old pieces of work and random photos from my personal life.
In my research I made an instant connection between dreams and technology. As I consider myself big on post-process and distorting images as part of my style, I wanted to link the distortion that people experience in dreams with everyday life, and one of those connections for me is through technology. Glitch art particularly interests me because I’m a massive fan of technology and how it can be abused to create something magical.
The above experiments are images that have initially been corrupted, using an online service that purposely disturbs the threads that keep a file format together, creating bizarre grids, disturbances and lines throughout the image. After they were corrupted, I’ve plugged them back into photoshop for a final edit to change the colour and composition of the images.
Although I feel like this experiment has taught me about corrupting images and using that as part of a photographic process, I don’t think that this kind of glitch art will work well for my final piece, as I still want it to come across as a fully realised, polished piece of work and this process, although fascinating, is a little too messy for my personal preference.
I’m going to look for clearer ways to distort, filter and glitch my images for my final piece.
1 note
·
View note

Photo


EXPERIMENTATION 2
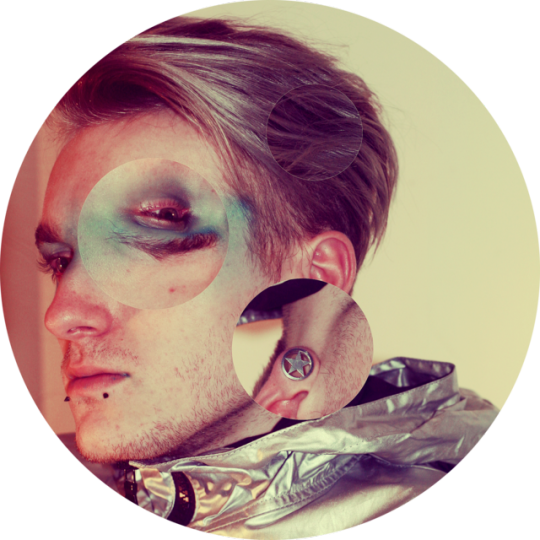
The images at the top of the post are from a previous landscape project of mine, where I distorted the landscape using shapes. I really enjoyed working with this idea and I found some inspiration which you can find on my mood board which involved using this technique with portraits. The technique involves cutting shapes from a picture and rotating or moving them to distort the picture, and since my whole project is based off of dreams and distortion, I thought this would be a great technique to revisit and experiment with.
The first of the four images is a simple edit of the original image with some colour corrections that I made using brightness, contrast and saturation filters, as well as a pinkish gradient map. I then cut the circles out of the eye, the hair and the ear and rotated them to create a warped version of the face. I think this ties into my dream project perfectly just because dreams are all about the boundaries between reality and the unreal, and seeing things with a warped perception.
The second image (top right) incorporates anaglyphic 3D, which I’ve been working with as part of my style as a photographer. I’d definitely like to capitalise on this and make more use of it, as I once used it on a BTEC project a few years ago and it really made my work stand out, as it’s quite an uncommon thing for photographers to experiment with, especially locally, and as a result my work was showcased in the main foyer of the exhibition.
I feel like the 3D works because it adds another layer of oddity to an otherwise pretty odd picture. I’ve also used the circular shape of the photograph as a frame, as I feel like the white around the outside offsets with the 3D very well and makes it more impactful, especially when looking through a set of anaglyphic 3D glasses.
The two pictures at the bottom are me experimenting with gradient maps and using full colour filters. I strangely took inspiration from Andy Warhol’s images of Marilyn Monroe, where her face is repetitively showcased in a grid, each picture with a totally different colour overlay. I think that these images could work effectively in a grid, perhaps even as they are displayed above in a circle frame, but perhaps in a 3x3 grid.
0 notes
Text
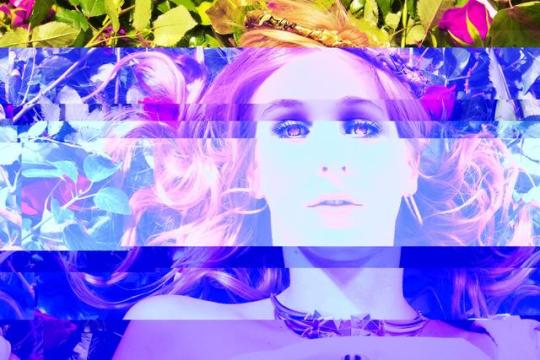
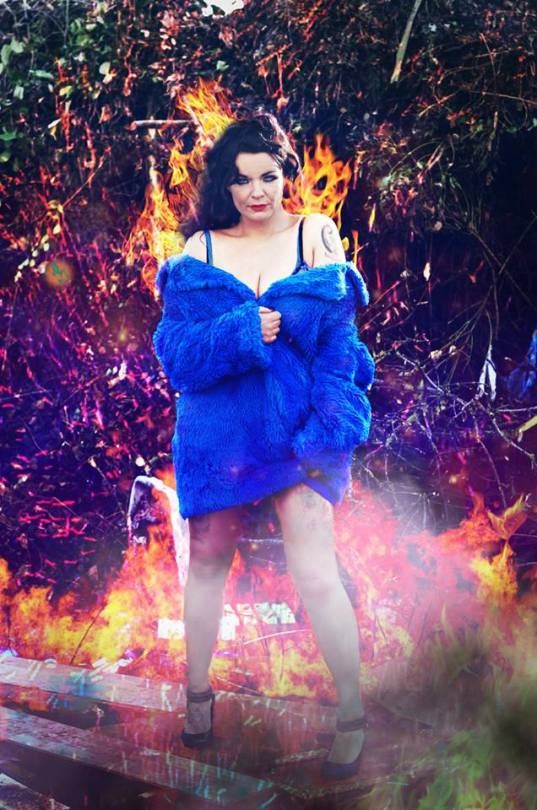
EXPERIMENTATION


To begin my experimentation, I wanted to focus heavily on the colour inspiration that I collected earlier in my project. My aim was to create a metallic colour explosion that instantly draws the eyes. I wanted to create something almost alien, using anaglyphic colours; blues, reds and pinks, and use highlights to make my hair look like metal.
To begin with, I used the spot healing brush tool to clear up any skin blemishes or spots that were on the photograph, and I used this because to achieve the metal/polished look that I was going for I felt that clear skin was the first priority. Usually for my grungy style I’d just go with whatever was on the model’s face, but in this case I had to make sure it was a blank, clean canvas.
I used dodge and burn to highlight and darken areas of the face and hair, to give it the shine that I felt it needed. The rims and pupils of the eye were darkened with the burn tool, and the iris lightened with dodge to give the picture an alien/sci-fi style, and to also highlight the expression of the face.
The third tool I used was a gradient map, with black, blue and pink hues to create the filter. This worked fantastically with the coat featured in the photograph, because it brought out all of the creases and folds which really created a metallic look (the coat was already metallic in fabric but this really made it look like some kind of hard metal).
And finally I added an anaglyphic overlay, which means making two layers copies of the image, one totally red and one totally blue, which are then off-centered to create a 3D edge around the creases, folds and the details on the face.
I think I’m definitely going to use more anaglyphic 3D filters as they’ve become a part of my aesthetic style and I work well with them. This could be an idea to consider for final piece.
0 notes
Text
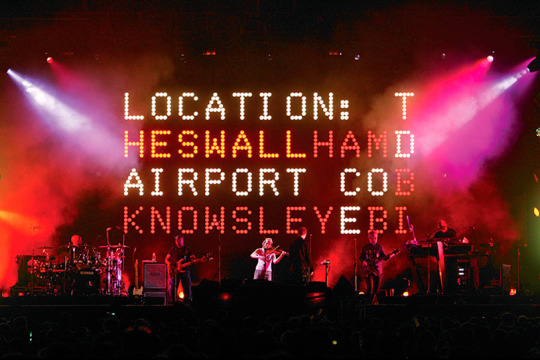
UVA - Artist Research
UVA are a collaborative team that started off with three artists that work to fuse different disciplines of art together. One, a fine art sculpture graduate, one a producer and the third a coder. UVA have pushed the boundaries on digital art, making installations, taking part in the production of music videos and live performances.
Ten years later and the group have grown to 12 members, each one bringing a new skill to the fray. The members mostly remain nameless, because their belief is that by fusing their artforms they create something much bigger than a group of separate artists, the work is all in the finished product.

What interests me about the work that UVA produce is that it matches the visual style of glitch that I want to reproduce, even if it is perhaps in a different way through the use of code rather than fragmenting and anaglyphic filters.
The LED lights on the back of the stage shown above at a ‘Massive Attack’ concert are real time data that is displayed, and often the data is of a topical or political landscape. The concept is that most human contact or relations can be summed up as technological data, portraying the reliance that humans have on modern day technology.


0 notes