
mcneeart
Kate McNeely
All thing CGI \\ 23 \\ co-director of Fred and Frankie filmThis is a wip blog of notes for my own projects
8 posts
Don't wanna be here? Send us removal request.
Last Seen Blogs
journal-ecriture
Marie's writing

jollytidalwavestarfish
Bez tytułu

artbymash
art by mash

askendermanadventurer
Ask Enderman Adventurer

Text
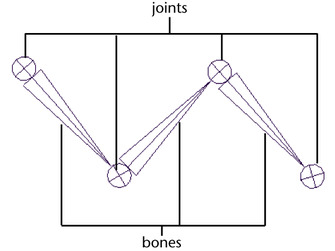
Rigging Terminology
Joint
Bone
Control
Hierarchy
Parent/Child/Sibling
FK (Forward Kinematics)
IK (Inverse Kinematics)
Blendshape
Constraint
Deformer
Skinning
Ribbons
Gimbal
World vs Local Orientation
Follicles
Rotation Order
Deformation
Cluster
Dual Quaternion
Space Swapping
0 notes
Text
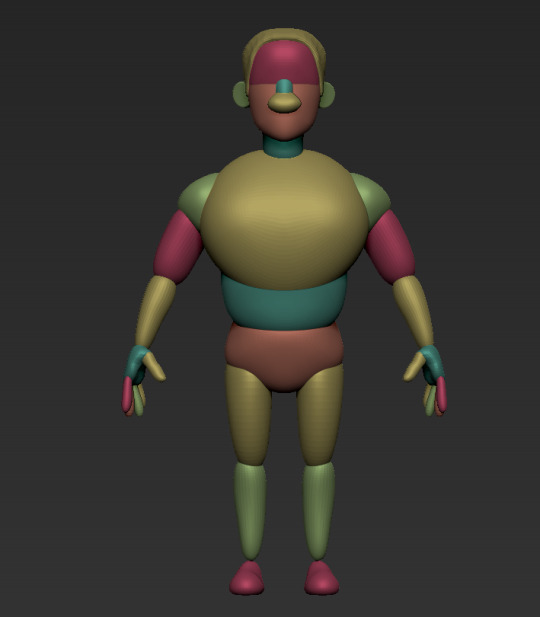
Skinning
Before Bind Skin
Check symmetry
Check topology - ngons, triangles, holes
Are there uvs? (important for follicles)
To bind skin, select all meshes you wish to attach to the rig, then select the skeleton and go to skin > bind skin
Bind Skin Options
Set to default setting
Max influences controls the number of joints that can influence a vertex at a time. This setting can be important for real-time performance.
Paint Weights Options
Interactive weights are best for blending between two joints
Post weights can be good for smoothing multiple weights
Paint Weights Process
Mirror Skin Weights
Influence Association 1: Label - to use this method you need to label the joints in the attribute editor. Label which side the joint is on, then select other for type. Copy the name of the joint and put the name in the other type box minus the L_ or R_ prefix
Influence Association 2: one to one
0 notes
Text
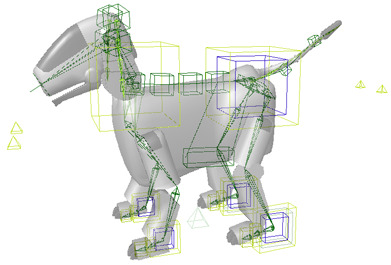
Skeleton Setup
Bipeds

For a standard bipedal character, there will be a root, spine, legs, feet, arms, hands, neck, head/face. The character can range from realistic skeleton to heavily stylized and cartoony.
Model Cleanup
It's important to make sure the model is ready before rigging.
Check for symmetry
Check for n-gons and triangles
Rig Setup
Type in "joint" to MEL command line
Arms should be at 45°
Joints that fold in one direction/ik setups should be places on a single plane. All joints must face the next.
Quadrupeds
0 notes
Text
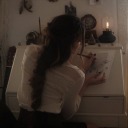
Character modeling for my senior film
The secondary character in my film is Fred, and I’ve been in charge of modeling his character. Here’s my workflow and progress so far!


I started out with a simple blockout in zbrush to get his shapes down to match the concept art. I also make sure to double check the black and white silhouette to check that the shape reads.
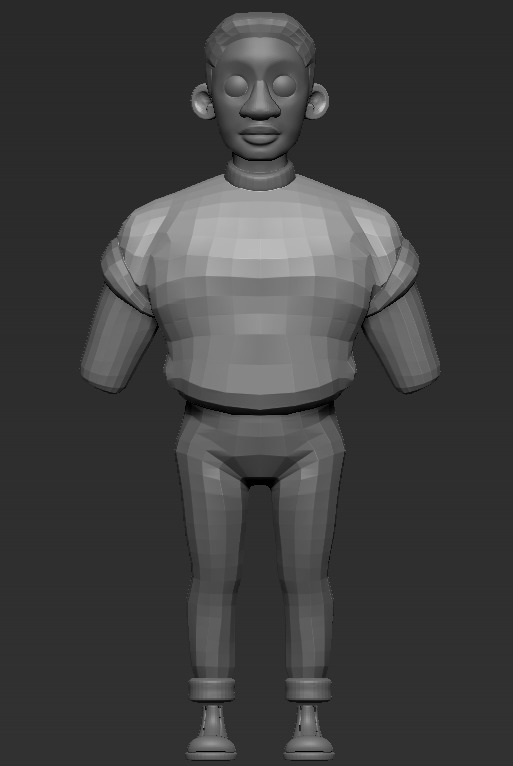
Next, I focus on getting the main shapes and nailing down the proportions


I sculpted the hand separately based off the mesh I already made for Frankie and changed the shape to match Fred better.


To finish up the sculpt, I dynameshed the face together and finished sculpting the details on the face.
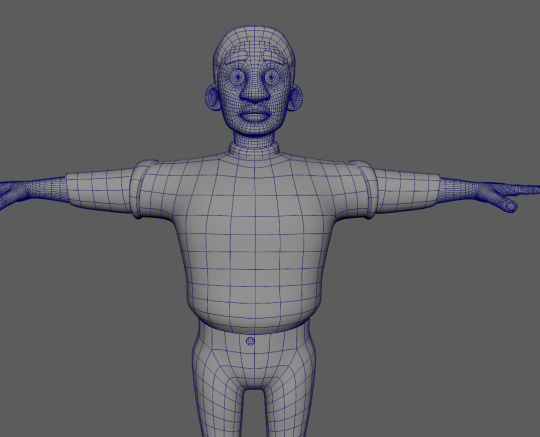

I did retopology in Maya with quadraw. For the rest of the model, I plan on adding details to the pants, improving cuffs on the shirts and pants, and finalizing the shoes.
Here’s the current model turnaround:
https://youtu.be/EhVF2e-0pRA
1 note
·
View note
Text
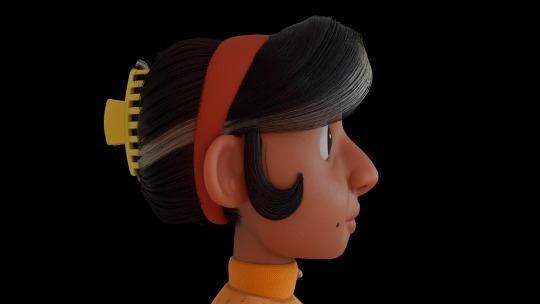
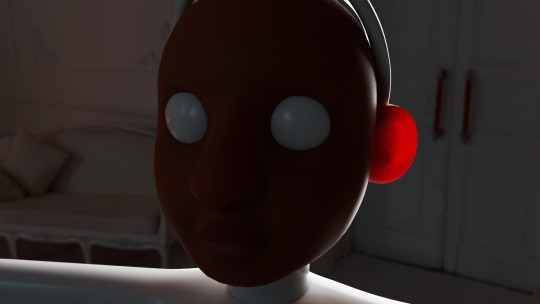
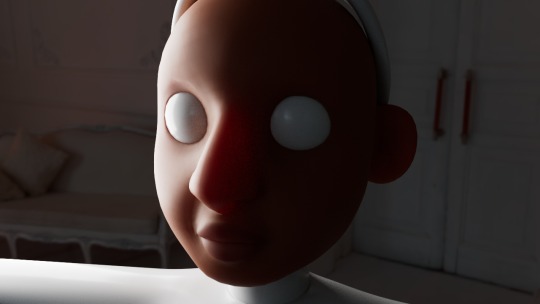
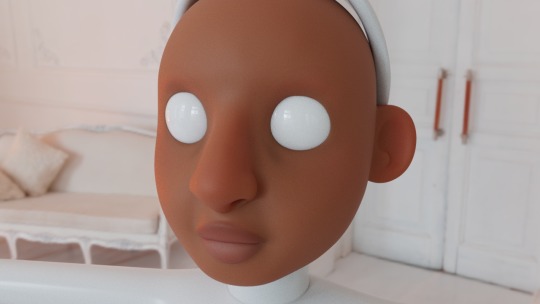
Character look development WIP for my senior film
Full beauty renders of Frankie:
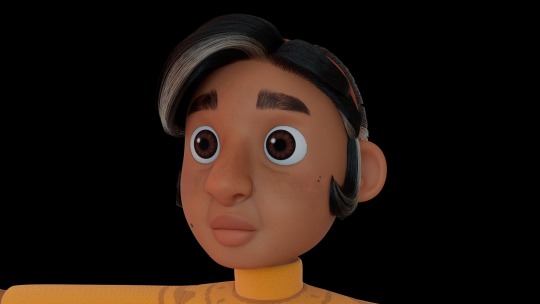
This is a shader breakdown for the eye textures:
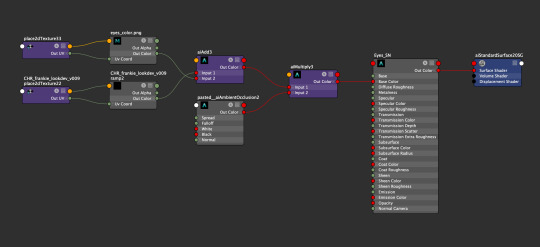
First, I use an add node to blend a handpainted eye texture with an eye shine created by using a circular ramp texture. In the ramp UV node, I can change the location of the eye shine depending on the shot, and even animate it procedurally.
Next I added a soft blue rim by blending an ambient occlusion node with the eye texture. This helps to fake a subsurface scatter and add a bit of color to the eyes.
The final result is plugged in to the base color. The other attributes are left at default except for roughness which is turned up to 1.

Her sweater color was hand painted in substance painter. I used a normal map to create the illusion of a knit pattern and a displacement map to create the sweater seams. With a little roughness and a light sheen map, I got the final result!
For Frankie’s face textures, I created a base color map. I took that map and turned up the saturation to create her sss color map. I also remove a couple of details like her face wrinkles so they aren’t as emphasized.
Her face maps in all their horrifying glory:


I also painted a black and white map for the subsurface weight giving stronger results in areas like the ear and nose
Next, I’m work on finalizing the hair and the textures for her hands and clothes!
2 notes
·
View notes