#I would just add the ss but it is from pinterest and I think it is edited
Text

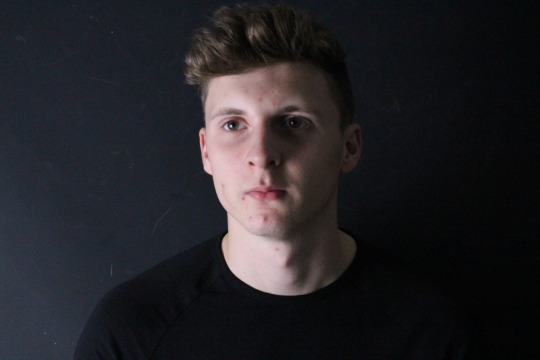
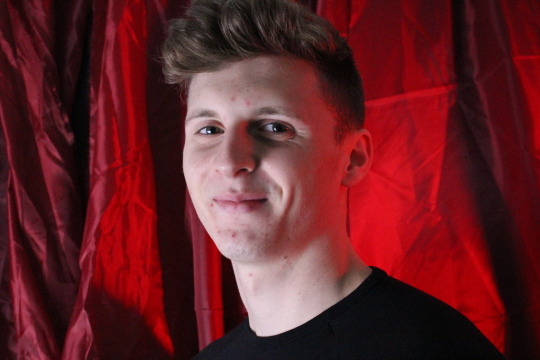
a lil' sth because I adore Jack ;-; | Sketch/redraw of a screenshot from one of the episodes ~
#trying to learnnn to draw him#or sth like that aaa#I would just add the ss but it is from pinterest and I think it is edited#so I'd feel weird about posting it#bc you know#it's sb else's work#asdfvh#Supernatural#Spn#spn fanart#supernatural jack#spn jack#also I REALIZED I CAN WRITE MY SIGNATURE LIKE THAT OMG I LIKE THAT#AND YELLOW#Edit: His eyes are blue not green omg I'm so sorry boy ;w#;#Also Thanks for all the notes :'''>!
4K notes
·
View notes
Text
My mind is just a big jumbled mess
I've been having a hard time today specifically for some reason with feeling overwhelmed from all the thoughts in my head. I feel like I've been starting so many different projects lately that I can't finish anything. I wonder if this is why I'm happiest when I find a new obsession like a video game or something that I just can't stop thinking about or working on. Then that’s just one thing on the front-burner (is that an actual term? Lol) to deal with at one time. Otherwise I have like 4-20 things there at a time.
Since like 2015/2016, I've noticed how hard it is for me to think. It's kind of hard for me to explain it. But basically I get so overwhelmed all of the time. There are so many things I want to accomplish or buy or figure out and it's just so hard for me just sit down and get those things done. Some days are worse than others, like today. Like I just literally had to take a 5 minute break from writing this because I couldn't stop crying with how overwhelmed with thoughts I am and it's just reminding me how hard it truly is for me to be able to communicate and get my thoughts out so they're not clouding my brain. I still can't stop crying but I don't want to forget these thoughts when I do go back to try writing this down because I won't be able to remember all the things I'm thinking/feeling.
I have over 4,600 screenshots in my phone. I have way more in my Google Photos but I don’t know how to figure that number out. I take screenshots of things that I want to remember. You can see how this could be a problem because how am I going to even find these SS's if there are so many of them lost in my phone? And that’s not even taking into account all of the actual photos I have in my phone. It would be slightly easier if they were all of the same subject or even 2 or 3. But there's sooo many different things that I do this for. I'm not sure how many albums I have in either my phone or Google Photos app but I can guarantee there's at least over 100 in each. More examples are my YouTube Playlists and Pinterest Boards. I just counted at least 200 YouTube Playlists I've created. I didn’t feel like counting anymore but I'm sure that’s enough to visualize my point. And then add to the fact that each playlist probably has at least 100 videos. I started making them probably in like 2013. I should probably go back and clean out some of the stuff I don’t care about anymore but that's just one other thing to add to the problem I'm attempting to explain. Now let's look at my Pinterest account. I have about 150 Boards created on there, the most pins in one being about 500. I spend way less time on Pinterest because I forget about it a lot and there's less subjects on there than YT but that’s a good thing for my situation. Each Photo Album, Playlist, and Board was created to organize my thoughts, in a sense. To try to make it easier for me to find whatever I was interested in finding at the time. It does work for that but it also causes more issues for me in the sense that I then have to worry about where I saved something or where I should save something. And there's still so many of them that it’s overwhelming and depressing for me. Oh and I just remembered the fact that I have 3 different apps that I used to make lists. Ugh. I'm not even going to go into how many lists I make. Oh and let's not forget all of the tabs on my computer I constantly have open. I used to be known for being so organized. Like I literally used to want to make a career out of it when I was younger. I'm still kind of organized (at least more than some people) in a way but not in a helpful way.
For those of you who don't know my situation, I'm currently unemployed. I was taking Community College classes from 2010-2016 off and on. I stopped because I was having similar issues to what I just was talking about. I think part of why I had so much trouble was because I had eventually went into full online classes instead of going to class 2-3 days a week. But just in general, school is difficult for someone like me who has issues with feeling overwhelmed to the point of not being able to do anything from the weight of that feeling. I'm lucky that I didn’t start having these issues until after I graduated high school. In fact, I didn’t even realize I had anxiety or depression until my 2nd semester of college classes where I had to leave my math class in the middle of it to go cry in the bathroom. When I was working I was on medication so it wasn’t as difficult to function but I had some off days. Eventually I stopped going to my last job because I couldn’t take having panic attacks every day before work anymore.
I really hope one day I'll be able to clear my head and feel like I can function like a normal human being. Life would be easier if only I had more people in my life (other than my husband) who had a better grasp on this sort of thing and could coach me. I also hope that at least most of this post made any sense and helped you to understand me a little better. I know that I have a tendency to take days and sometimes week to respond to people's messages but this is one of the reasons why that happens.
0 notes
Note
I need some kind of a photoshop lesson for this aesthetic of yours
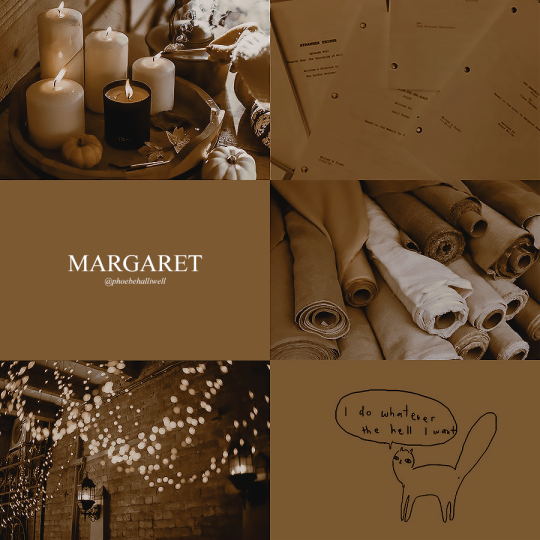
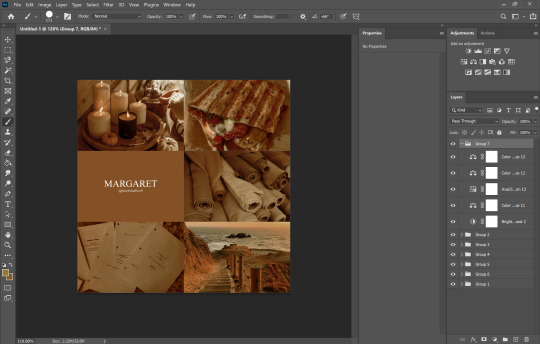
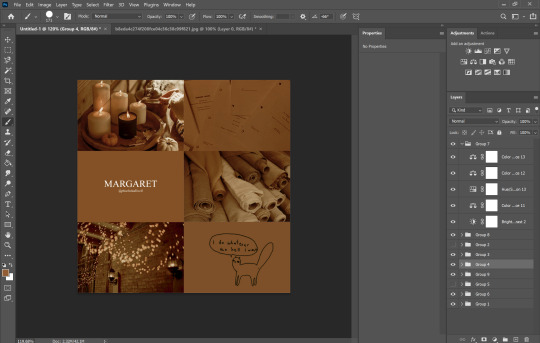
okay i’m gonna do a tutorial real time for a picspam type aesthetic that will look like this ⇣ a photo i will put here once i make it.
step one. open ps : )

welcome : )
okay so dimensions r a thing tumblr compresses photos like hella so i do all my still img aesthetics 900x900 is you’re trying to do this for say insta i would actually recommend jumping up to 1080x1080. pixels, obviously. idk if i have to clarify that.
so click ctrl+n or create new i’ll be doing 900x900

these r the rest of my settings i personally do not think they matter my resolution stays at 72 the only thing i’ve detected this affecting is font size. (side note notice how this pic looks all fuzzy? that’s bc it’s a ss with a boatload of pixels. and if there’s one thing tumblr hates. it’s pixels. and then it’s users. but who’s counting? tumblr is. i recommend keeping ur still images 900x900♥)
step two is collecting ur images i personally use pinterest for these bc quite frankly it’s really nice & easy to find these types of photos esp if you’re looking for a canon character bc if you type in [character name] aesthetic you’ll get stuff if you don’t quite frankly even just type in aesthetic you can scroll until you find an image you like click on that and go through like images underneath it and keep burning thru. like u probably know how to work pinterest. but i am being thorough and covering my bases. searching [color] aesthetic is also nice or even searching a character that isn’t the character you’re doing this for but who’s kind of similar that also works. i recommend esp for charmed bc their pinterest gets bogged down with screencaps and then like. charms like jewelry searching “charmed aesthetic” or “phoebe halliwell aesthetic” really just doesn’t cut it so what i’d recommend is instead of going through pins, go through boards.
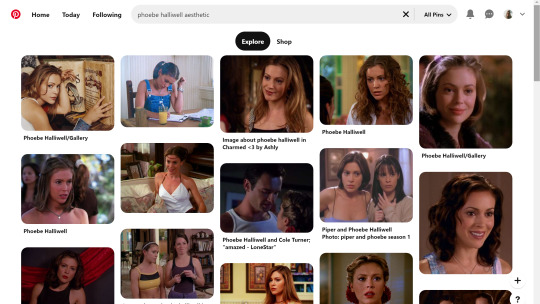
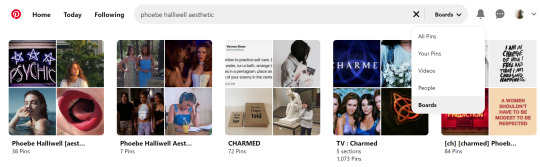
bc like. big difference. other pro tips if you see a board you like, go to the person’s profile and check out their other boards bc odds are you’ll find more you like. another protip if you’re specifically doing ocs typing in oc aesthetic will get you a lot even going to the boards on that as well. yields.
so. you’ve gathered ur images. u need five. open em. i’m making an aesthetic 4 myself which you’ve probably already guessed from the fact i’m putting the finished piece at the top, but it’s not ready yet so it’s still a surprise for me.
cropping. if ur doing a 900x900, use these setting exactly. 1080x1080 use 1080/2 x 1080/3. i’m not doing the math 4 u ♥

most important part? Delete Cropped Pixels. otherwise ur not really doing anything. crop all five images.

but them in ur document. document? psd? ur thing ♥ place them places. u do not have to commit now. leave one middle one blank. it does not matter which one. i personally like to alternate my text pieces if i’m doing a long post like what i did on my ncwotng set. some people keep them all on the same side. this lowkey bugs me i feel like it throws off the Balance but i imagine some people like The Consistency. i don’t. but w/e. it’s up to u as this is gonna be ur set. also like. as you’ve cropped these to x/2,x/3 settings they should fit nice like puzzle pieces : )

the next step i personally like doing is creating by text box with The Color™ do this bc simply duplicating one of ur images, shoving it in the empty slot, and converting into a sharp object. edit contents.


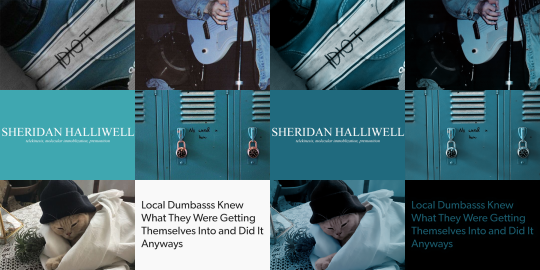
now. obvi i selected these images w a color scheme in mid. i recommend u do the same. even if it’s just vague. they don’t all have 2 fit. this is my example of my sheridan piece b4 or after. tweaking is possible. layers w masks r ur friend. i can talk about them more if need be.
But. back 2 the smart object. brush tool. paint it.
♥
the text i used was times new roman all caps 40pt font 0 spacing for the title and times new roman 14pt font 0 spacing italics for the subheading. here’s my dency b4 and after for comparison

next step is after you have your text in alright, shove everything into groups. mode on “normal”
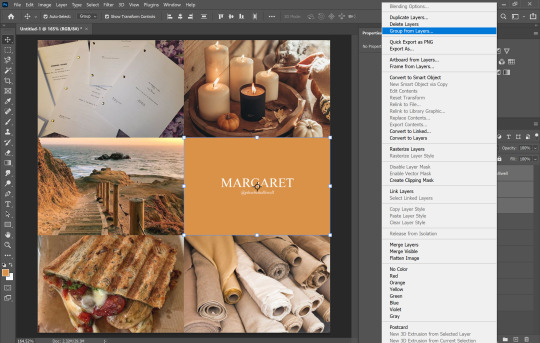


then you can start editing. the groups let you edit things like lighting and color without touching any of the layers below it 👍
i’m not gonna do a Major coloring tutorial, for lighting i’ll usually tinker with exposure, levels, sometimes brightness/contrast. for colors, color balance + hue/saturation. i rarely touch anything else.
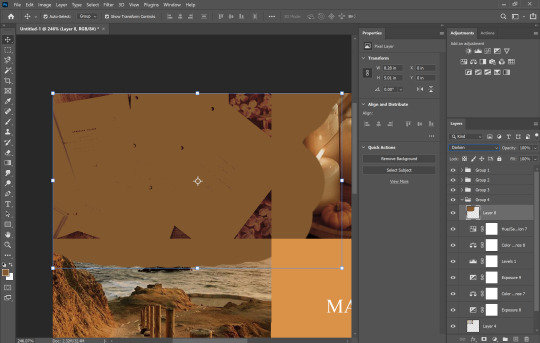
i’ll bring u along 4 the coloring of this one bc i’m gonna add a layer mask.

so the first thing i’m going to do bc the paper itself is already close to the vibe is i’m going to color it normal and just ignore the background

something like that. then i’m going to add a layer mask (square button w the plus sign)
and then i’m going to eye dropper a color off from somewhere else
now i was talking about the “normal” blend mode stops ur color settings from bleeding over onto other images? does not apply to painting on layers but you’re already masking this bad boy, so it doesn’t matter. just don’t say i didn’t warn u
i’d recommend using a really ridiculous blend mode to clean up ur thing at first, i’m using darken which isn’t that wild but like whatevs.
add a layer mask using this button.

select and mask
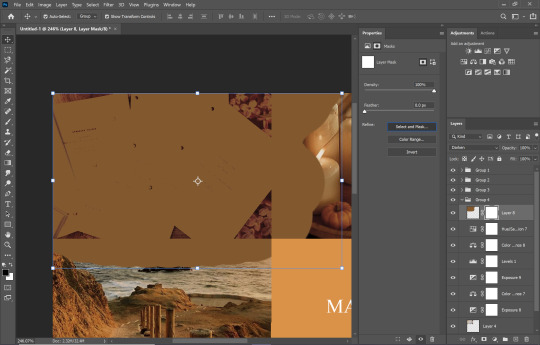
use this thing to clean up ur mask
okay so i did a lot since we last spoke

but if i impart any lesson to u. it’s: fuck around. find out. that’s literally how i’ve basically done everything. nothing’s ever really gone horribly wrong. click things. see what happens.

okay so now that you’ve kinda gotten everything figured out. change ur text box color again. i’m introducing u to ye ol trick that is not the paint brush. but. hue/saturation on colorize more yeah babyyyyy

ahaha yes. love this bad boy.
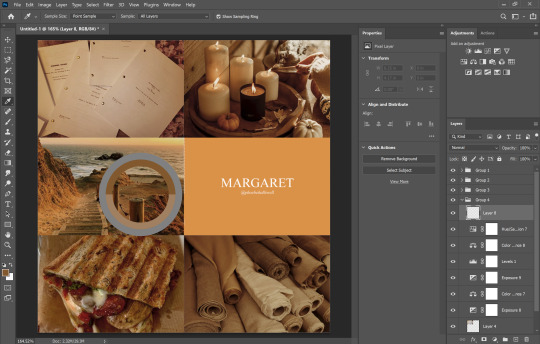
Now. Trick To Make Everything Super Cohesive™. put things above All of your groups.

yeah boy.
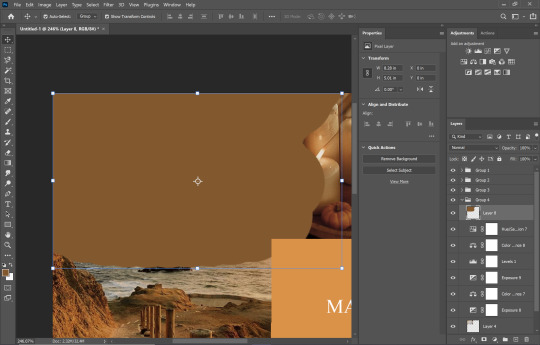
reorganize ur thing bc u don’t like how it looks.
fuck around w a lot of stuff.
it’s still cluttered.
fuck it. grab a new image.
something like that. never let the fear of striking out keep u from playing the game : )
fuck around a bit more.

vibes♥
save ur image bc u literally Have Not Done That Yet

& then remember the other thing u forgot to do
eyedropper what ur text box looks like move the whole thing to the tippity top and recolor

this is just bc u’ve fuck around a lot w a lot f different settings. this ensures that the text stays the same color u set it as.
okay final step.
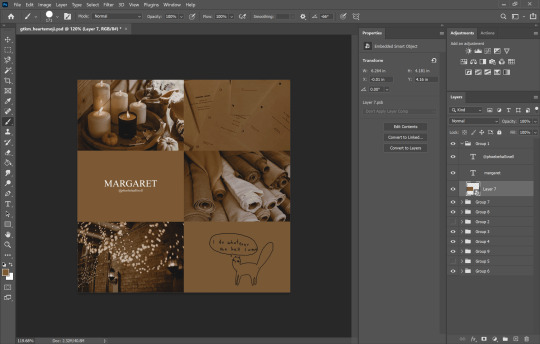
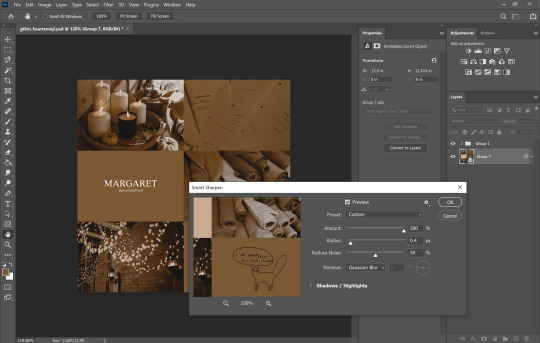
turn The Whole Thing into a smart object, smart sharpen
leave out the text box tho. the sharpened text can look weird. it’s ur choice, but with these settings,, cronch.
and wallah. ctrl+shift+s save as png and bada bing bada boom baby. aesthetic
#like i cannot stress how much of this simply is. fuck around. find out.#like just have fun click on things#go ape#like there's no right or wrong way to do this#anyways i used to make these for harry potter on canva ♥ remember ur roots#tutorials#ps tutorial#aesthetic tutorial#ogwork
37 notes
·
View notes
Text
Road Signs
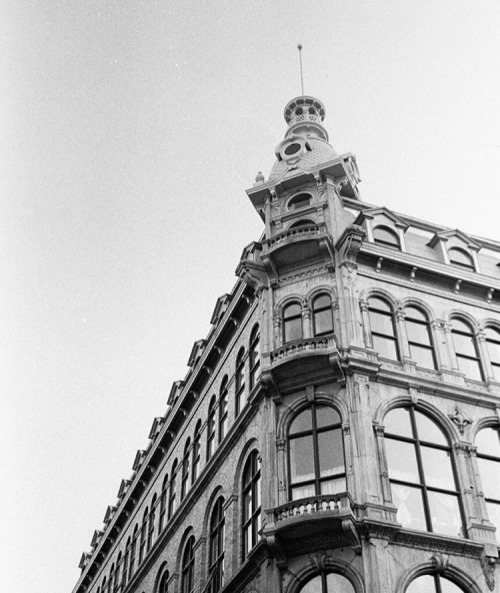
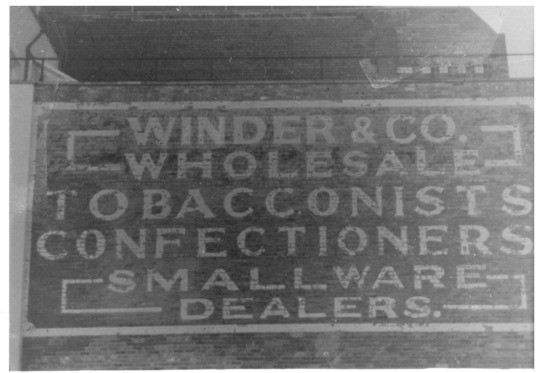
Our first photography workshop was to photograph a range of road signs, but we weren’t told what we would be doing with them. From here, we explored the town, taking images of road signs and buildings which may be of use.
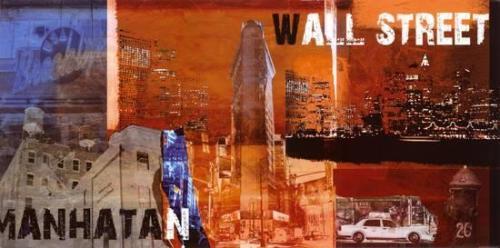
When we returned to the classroom, we were told we would first be producing a topology of signs, and after that we were to produce a ‘landmark’ collage using the images we had collected, influenced by artist Nelson Figuerado, his work can be seen below.
Upon continuing to research Figuerado’s work, I came across a similar artist, Brian Hubble, who’s work can be seen below.
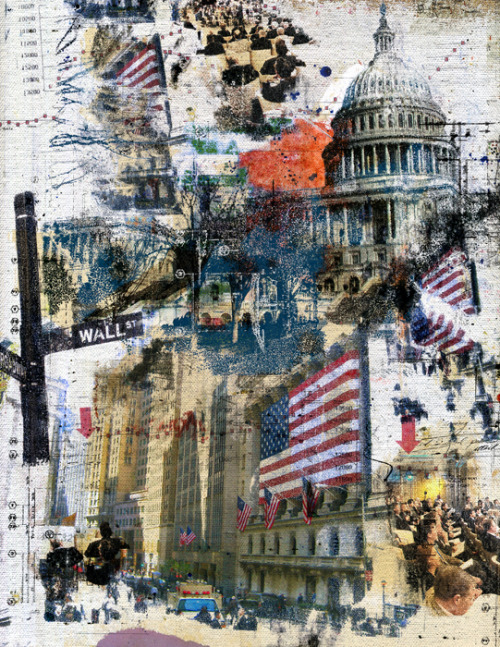
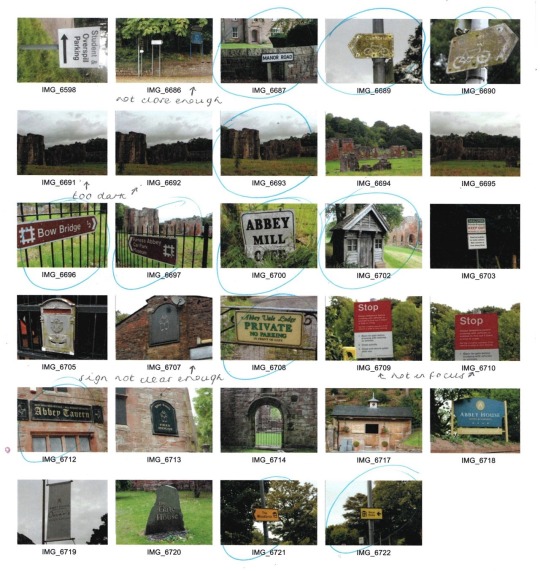
I much preferred his work, due to the lack of colour schemes and more recognisable imagery as oppose to so many layers. From here, I made a contact sheet and chose which images worked best to use in my collage, before opening them up in photoshop, ready to begin making layers.
Firstly, I opened an image of the Abbey, which I had taken on my journey around the town. I removed the background and ground beneath, but left the trees behind to add depth. Next, I added a new layer, which was a scan of my homemade paper, to add a worn, decrepit texture to reflect the history behind the building itself.
From here, I created a new layer, and imported all of the images I collected of roadsigns. I tried to keep the lighter coloured road signs in the centre, as I knew this would be the centre of the image when the layers were merged later on. Next, I added a white rectangle layer, and altered the opacity to be much lower, producing a fog over the signpost background. Then, I added this layer into the background of the textured Abbey building, to reflect the clouds in a more abstract way.
I was unsure where to go from here, and as I didn’t find it as effective as I had hoped, I therefore decided to start afresh. I began with the same plan, importing the image of the Abbey as a starting point.

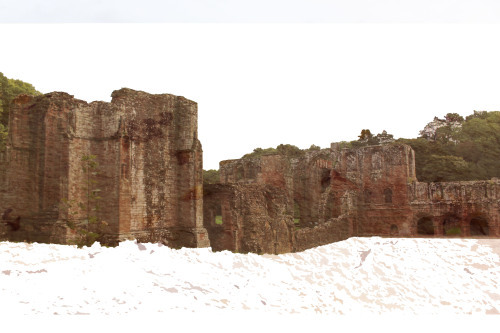
Then, I opened a new document in Photoshop and imported the dark coloured signpost images, as I wanted them to be similarly coloured to the building itself. I then layered and resized them in the correct place on top of the building image, and once I was happy with the placement moved that layer beneath the building layer. I then lowered the opacity of the building to 73%, which allowed me to see the signposts beneath the building, but softly. I then removed any areas of the signpost layer which didn’t fit inside the building itself, using the quick selection tool, which meant the cloud was left clean.
I altered the levels of the signpost layer, and altered the contrast of the building, allowing it to be soft, but still quite bold. I was pleased with this outcome, and felt that although originally I had planned to do the same with the clouds, I felt that leaving them as the original image as oppose to filling them with layers made it look a lot cleaner and professional overall, so left this as finished.

I felt that this was a learning curve for me, as this abstract Photoshop layering isn’t something I have used before. Although I felt my first attempt was a disaster, in the end I was pleased with my more minimalistic, softer result, and therefore if I were to do this again I would try to stay in this region, as I felt it worked best.
Aperture
Aperture is the opening of the lens and the amount of light being let in. The larger the f stop number, the less light is being let in due to a smaller opening of the lens. The smaller the f stop number, the more light is being let in due to the larger lens opening. Using the ‘Av’ option on my Canon 700D, I am able to alter the aperture, whilst the shutterspeed is automatically altered accordingly.Depth of field is the amount of the shot that is in focus, with a large depth of field meaning all or the majority of the shot is in focus, whilst a small depth of field means only part of the image will be in focus, with the rest of the background blurred. Large aperture increases the depth of field, and a smaller aperture gives a larger depth of field. To break it down simply for reference:
Larger f stop number - smaller opening, smaller aperture, larger depth of field (majority in focus).
Smaller f stop number - larger opening, larger aperture, smaller depth of field (background blurred).

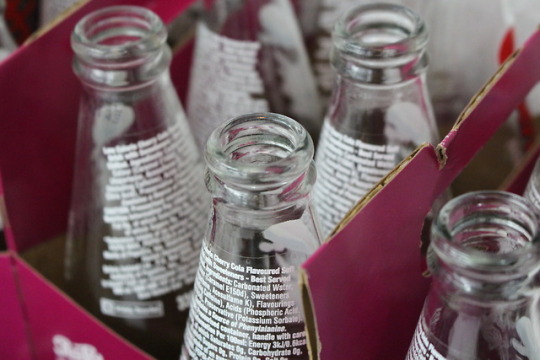
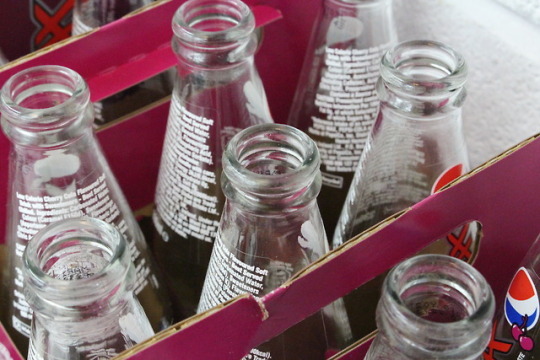
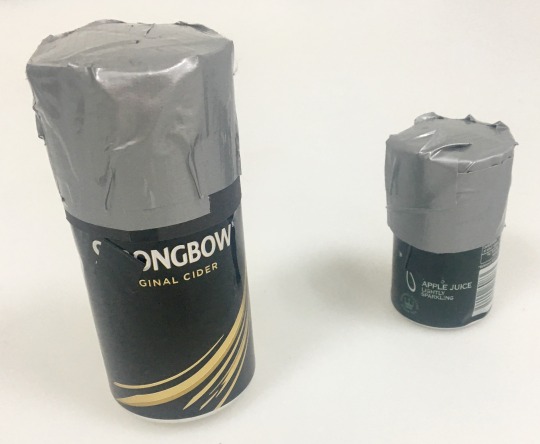
Above, the first image has a large aperture (lower number - 5.6), with a shallow depth of field, blurring the background, with the same again on the three images below.
Below, the first image has a large aperture as described above, blurring the background and surrounding bottles, while the second image has a small aperture (larger number - 16), giving a wider depth of field and allowing everything to be in focus.
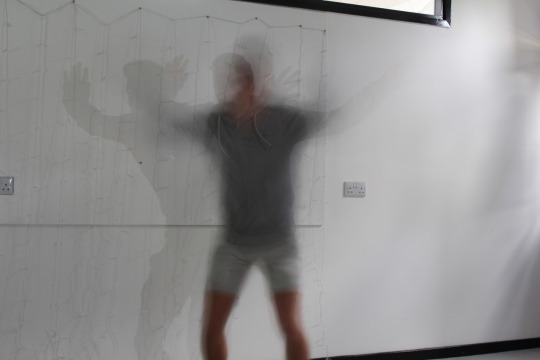
Shutterspeed
Shutterspeed is the amount of time the shutter is open. On my Canon 700D, using the ‘Tv’ option allows me to alter the shutterspeed, with the aperture being automatically set accordingly. The smaller the fraction, the faster the shutterspeed, which will photograph the motion paused/still, with no blur and no movement, meaning splashes of water can be captured sharply.
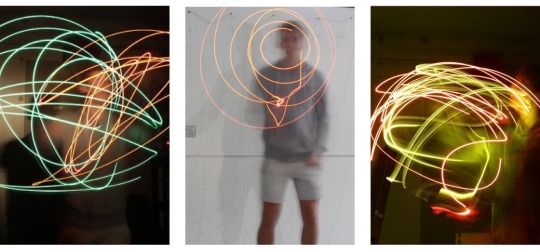
The larger the fraction, or whole number, the more movement and blur is captured; which means drawing with light can be captured perfectly using a slow shutterspeed.
I have included my annotated contact sheet of both my shutterspeed and aperture images below.
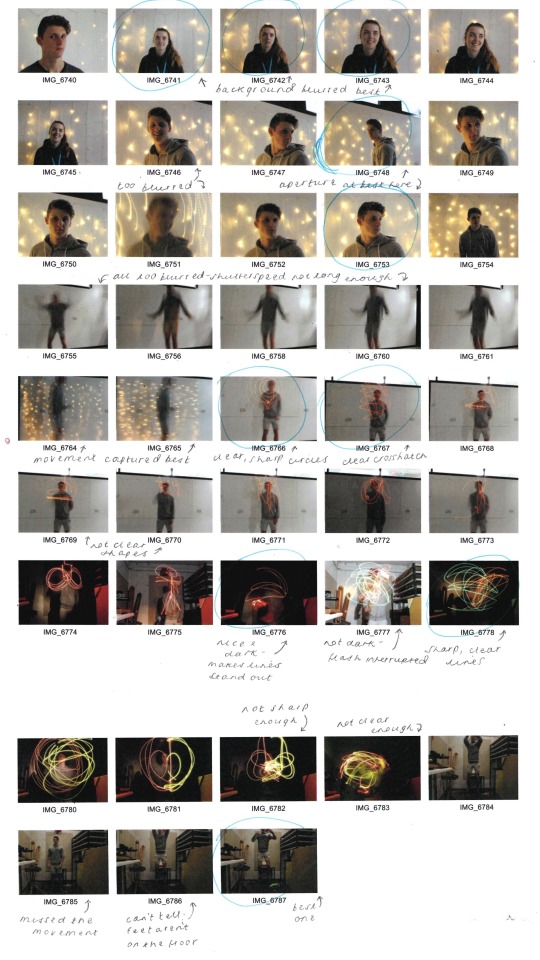
The below image was captured using a very slow shutterspeed at 5″.
Again, the below images were captured using a very slow shutterspeed at 6″, allowing the light drawing to be photographed both in well lit surroundings and in the dark room.
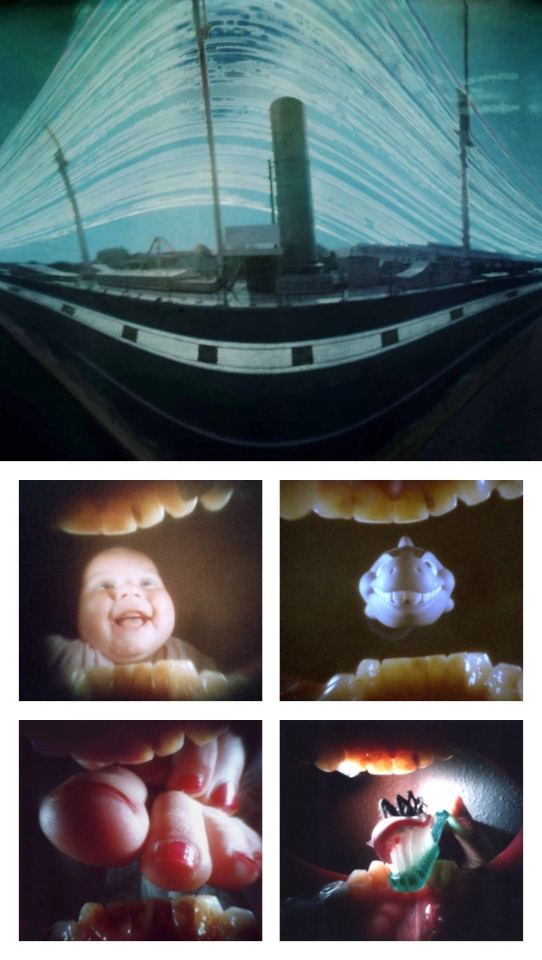
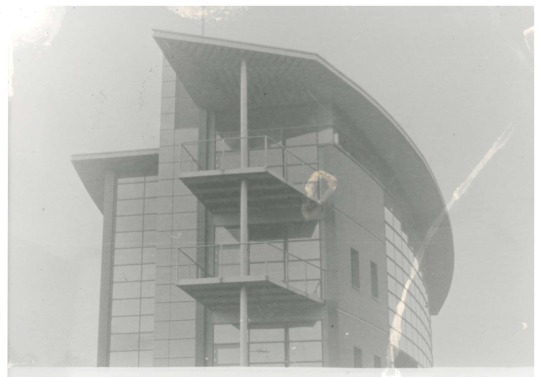
Pinhole Camera - Justin Quinnell - Artist Research
Justin Quinnell is a pin hole photographer, who produces strange and wacky images using the pin hole camera technique. This technique allows him to produce images like the one of SS Great Britain in Bristol, seen directly below; which was done as part of his collection of ‘Solargraphs’, which all use 3-6 month duration exposures, giving the background effect of the swirls of light.
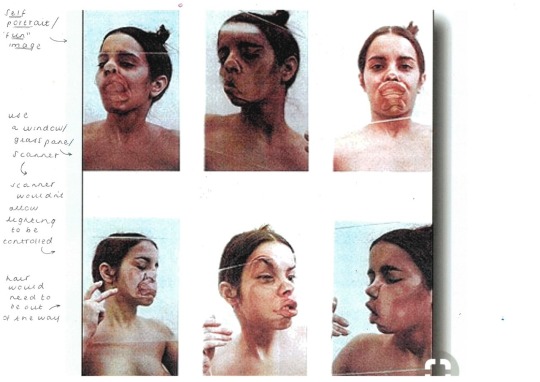
These aren’t my favourite pieces of his work, however, instead I much prefer his collection ‘Mouthpiece’, in which the pinhole images are used by placing the camera in his mouth. Whilst these images, seen below, are weird and something I’ve never seen done before, I think the subjects of these particular images give a warm, nostalgic aura for the viewer, and whilst they are contemporary and strange, I love that they juxtapose with the very traditional and old fashioned method of using the pinhole camera, which I think makes the images all the more effective.
I am very pleased to have been introduced to Quinnell’s work, and his images have inspired to produce pin hole camera images of different varieties, which will be seen in my development.
Pinhole Camera
After researching Justin Quinnell, we were then to create and use our own pinhole cameras. These can allow up to 6 month exposure times, catching the lines of the sun moving across the sky.To produce our cameras, we used the instructions linked on Quinnell’s site; which were as follows:
Get an aluminium drink can.
Cut the top off with a can opener and sand the top edge using sanding paper.
Cut an 80mm x 210mm strip of black card, adding cut notches along the long edge and creasing them over.
Cut a circle of card to cover the top of the can.
Turn the can over and tape the card strip tightly around the can.
Fold over the notches and place the circle of card on top, then use duct tape to cover the lid.
The lid is then finished, and can be taken off and placed on the open end of the can.
Then, add a hole using a pin half way up the can. Fold a piece of electrical tape over the hole as a make shift shutter.
Finally, go to the dark room and be in red light. Take the lid off the camera, insert photographic paper, and allow the gap between the two edges of the paper to be where the pinhole is.From here, with the pinhole still covered with tape and the lid back on, we were able to go wherever and use our cameras.
My first pinhole image can be seen both as the developed image and as the inverted image below. This was done indoors and was over exposed.
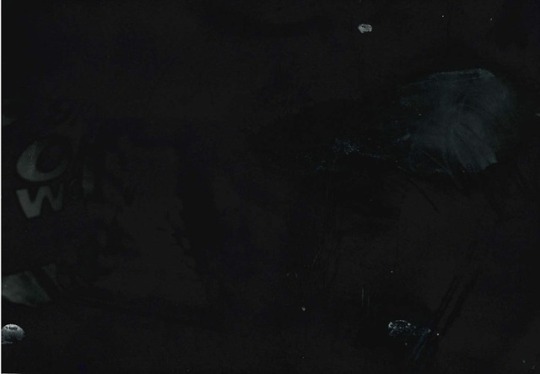

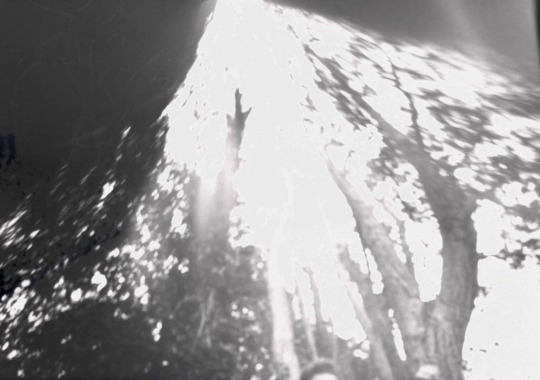
My second attempt at pinhole photography can be seen below, this time I was much more pleased with the outcome...
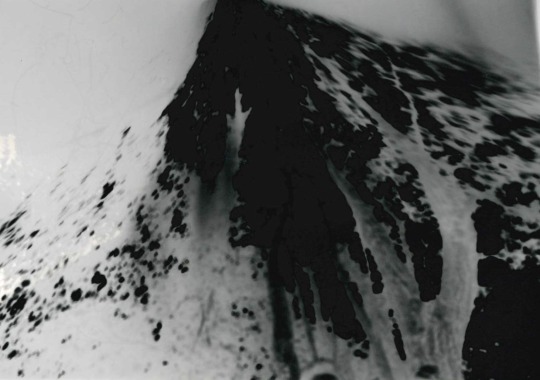
When my pinhole image was inverted in Photoshop, the outcome can be seen below. I had my exposure time just right, (12 seconds outside), however the camera was positioned too high up and therefore only caught the top of my subject’s head, but still got the surrounding trees.
I would most definitely love to try the pinhole photography process again in my further development, as I loved the developing process and unpredictability of results.
Black and White Film
For our next photography workshop, we were introduced to the world of film photography. In this workshop, we were taught how to use the film camera, explained how to think about our images beforehand due to the limit of film rolls, and then taught how to load the film and develop it in the darkroom.Firstly, I made a Pinterest Board of inspiration, where I realised portraits of wrinkly faces and close ups of architecture were my favourites of people’s outcomes. I also explored the Instagram hashtag ‘film is not dead’ and screenshotted my favourite black and white photographs from other photographers and artists; which I have inserted below.
nickexposed - “The Last Best Place”

cmchappuis

latolome - Dollhouse
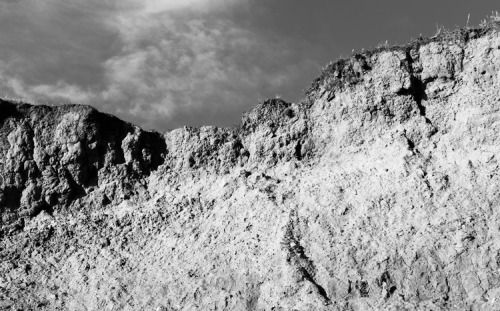
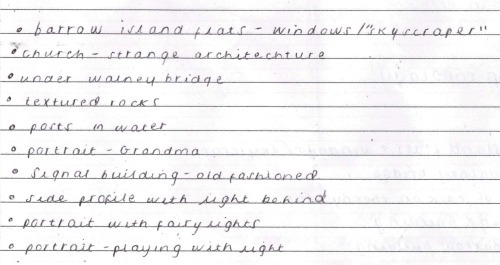
In doing so, I also thought about previous images I had taken and whether they would be appropriate locations to take black and white film images. I added monochrome filters to my favourites, with the one pictured below being the best and most effective, therefore I added this to my list of locations; scanned in below.
From here, I visited my locations, shooting at each one. Once I had used all 36, I returned to college to develop my images in the dark bag. First, we had to load the film onto the reel. Once we had loaded the film onto the roll, we then had to place the reel inside the developing tank, ensuring it was properly shut and wouldn’t allow any light in. Then, we were ready to develop the images, using the following process, but in the developing tank as oppose to in the trays.
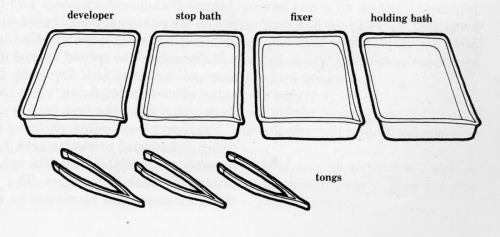
Step 1 - Developer: The developer causes the exposed areas of film to turn black. Areas that weren’t exposed will stay clear, and the areas which were only slightly exposed will turn grey. This takes 12 minutes and the container needs to be constantly turned and moved so that the developer hits all areas of the film equally.
Step 2 - Stop Bath: This stops the developing process and only takes about 2 minutes. Again, the tank needs to be constantly moved.
Step 3 - Fixer: The fixer makes the image on the film permanent, and takes about 5 minutes. Again, the container needs to be constantly turned and moved.
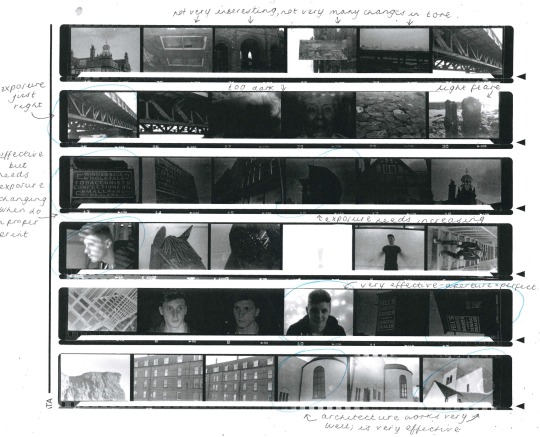
Finally, the paper/film needs to be placed in water for a minute to remove all the chemicals from the paper. The film is then hung up for an hour to dry.Once dry, the film is then split and cut into strips of 6; doing so makes it easier to store and use. Then, the strips of 6 are placed into the holder to make a contact sheet with.To make the contact sheet of images, once in the holder, we then hold the glass case under the enlarger and make sure the light will hit all areas of the case. Next, all the lights are turned off and the photography paper is put beneath the film in the case. The enlarger is run for 0.5 seconds to expose light through the film, and then the contact sheet is put through the developing process explained above. Once done, the contact sheet is complete and can be left to dry before scanning into the computer and used to determine which images will be used to produce prints from.
After making a contact sheet and choosing which images worked best, it was time to make a print using the enlarger and photographic paper. To do so, we inserted the film into the enlarger, and used a test strip beneath the enlarger, covering ¾ of the strip with our hand. We then allowed the enlarger to run for 0.5 seconds, and moved our hand further down the strip, now covering ½ of the strip, and allowing it to run for another 0.5 seconds. This means the first exposed section has now been exposed for a second, whilst the second section has only been exposed for half a second. We continue this process another two times with this strip, and from here we are able to see whether one of those exposure times works perfectly, or whether it needs to be exposed for even less than 0.5 seconds, in which we then try another test strip.

The enlarging tester strip above uses 0.5 secs for each square, left to right.

The second enlarging tester strip above uses 0.2 secs for each square, right to left, then below is the final enlarged print; exposed for 0.6 secs but in hindsight probably needed 0.8/1 seconds exposure.
Below is a tester strip for a second print, using 0.2 secs exposure for each square, left to right.

Below is the final enlarged image, exposed for 1 second, yet in hindsight could’ve been exposed for 1.2 secs.
Portraiture
Portraits can be used to convey a multitude of emotions, and capture compositions, lighting, props and costume. Light can be used in portrait photography in different ways; with artificial light being added, and light being subtracted to produce shadows. Reflectors are used to reflect the main source of light into shadow areas; softening the main lighting source. A reflector can be a flat white board, stretched sheets of white fabric, or even just a white sheet of paper.
For our portrait photography workshop, we were set the task of producing a range of portraits using the following starting points:
Dramatic light - black and white
Two people interacting
Formal portrait
Informal portrait (considering props, costume, lighting and setting)
Fun image
Fun Portrait
I began each photoshoot by annotating a contact sheet of inspiration images on Pinterest, seen under each heading below. Then, once I’d chosen which I felt were more effective, I went on to take my images.
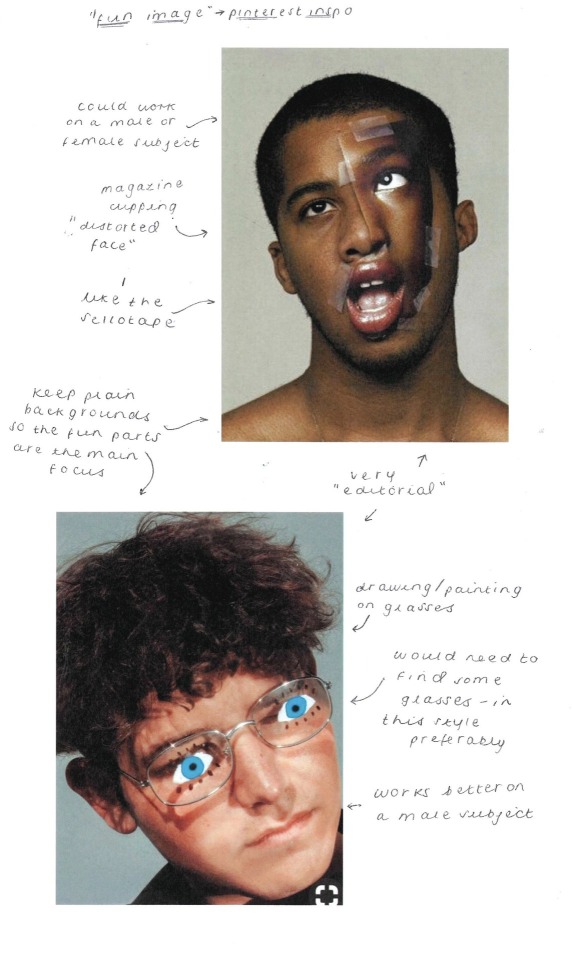
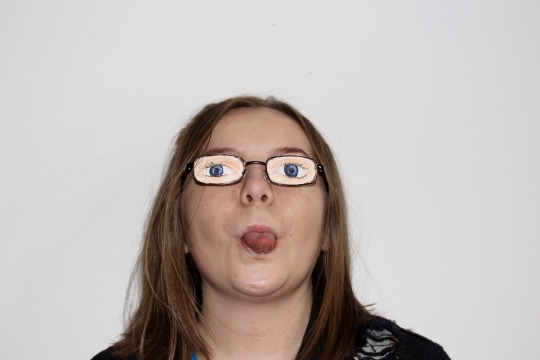
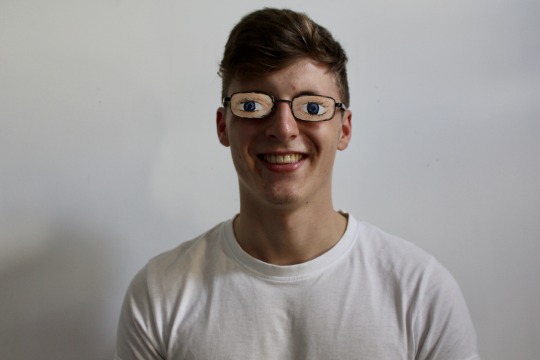
Below is an annotated contact sheet of my fun/creative images, in which I went with painting eyes on a pair of glasses and getting my subject to wear them for the images, both in and out of character.
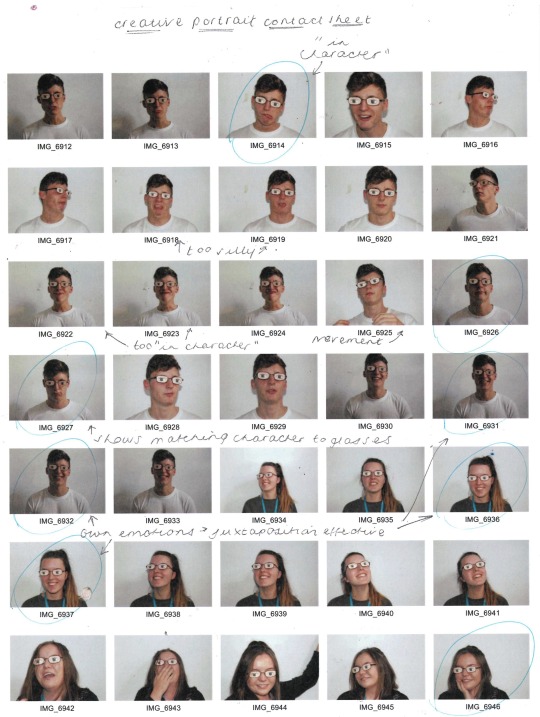
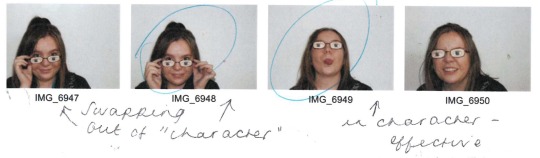
As noticed in my inspiration images, the glasses appeared most effective on my male subject, particularly whilst my subjects were being themselves, as oppose to being in character.
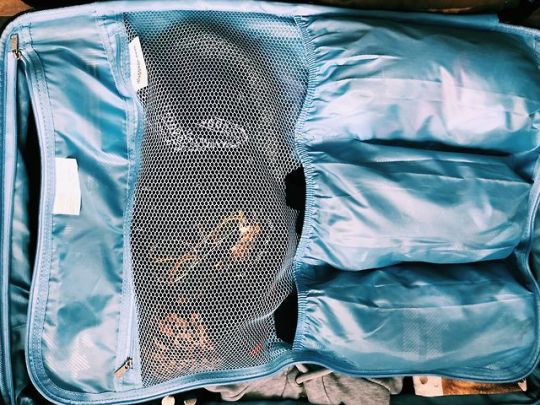
Whilst taking these images, I also experimented with a sheet of wire mesh. I first began using it as a screen, but soon realised that it not only was giving me texture, it was also producing light flares of colour. Whilst these two images weren’t my original intentions, I also felt that these fit under the creative portrait category, and am pleased with their outcome.

Self Portrait
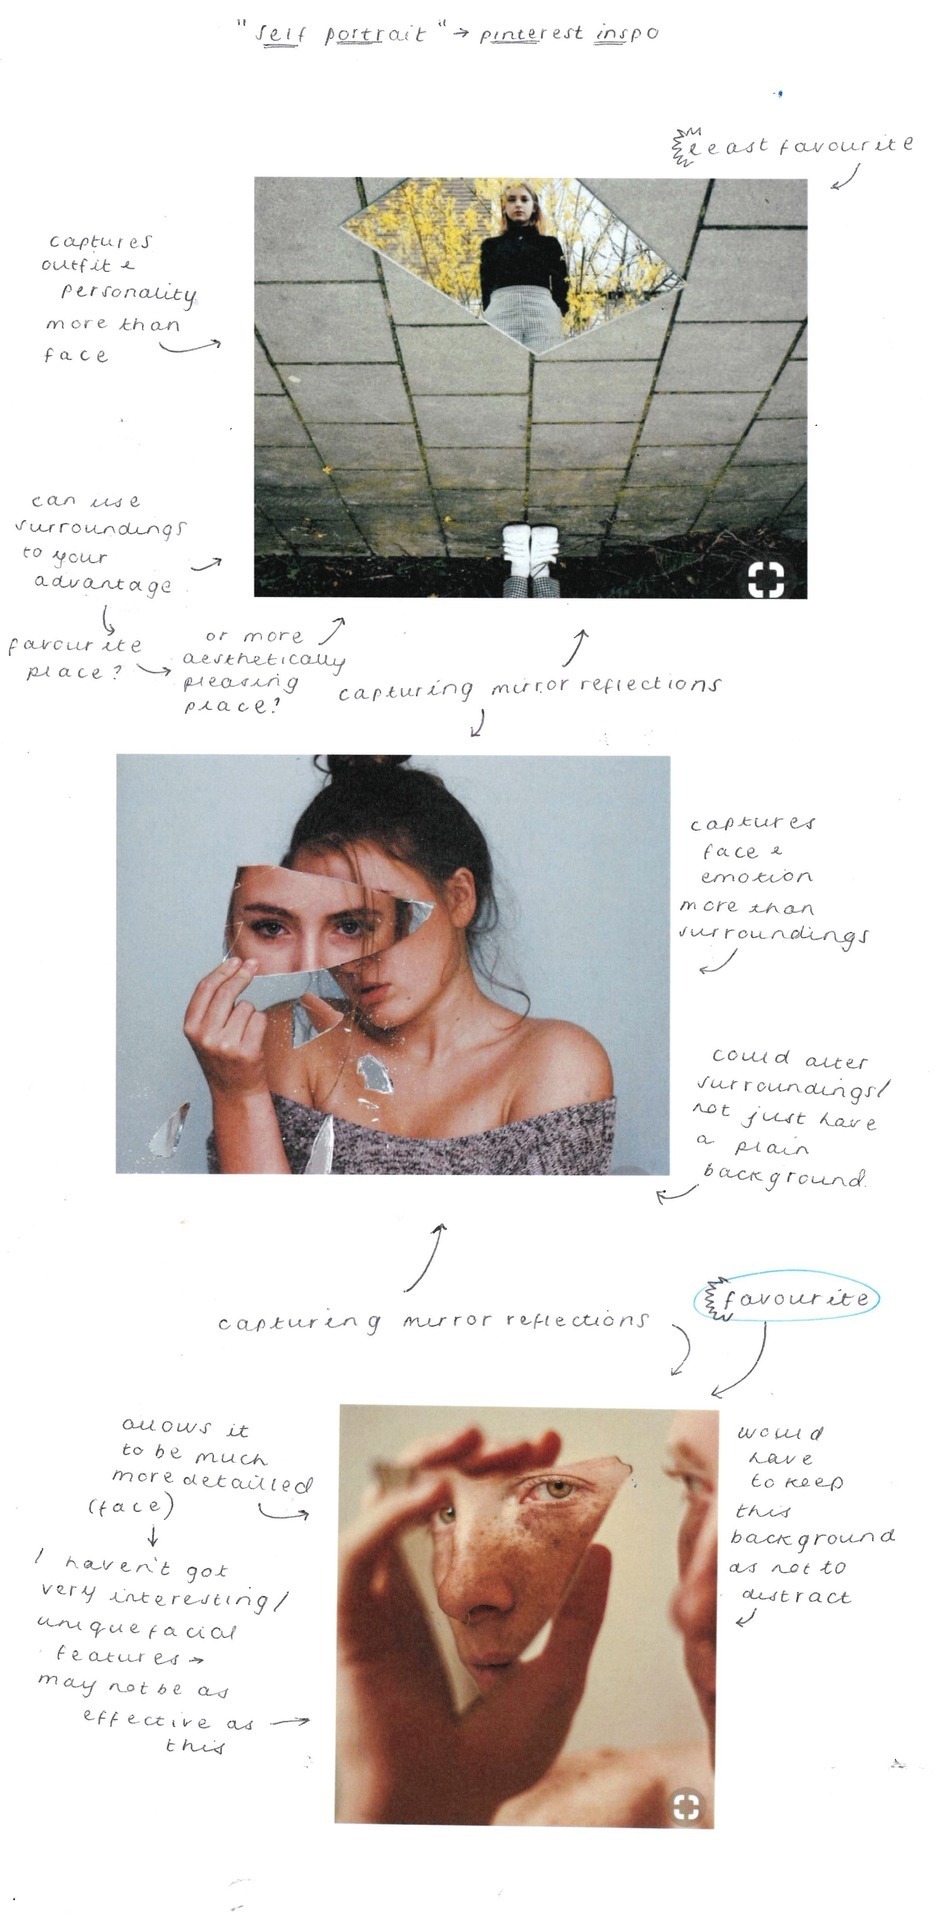
Informal Portrait
Likewise, I began with an annotated inspiration sheet from Pinterest for the informal portraits. Here, I felt that playing with light worked most effectively, and whilst the water and bath images were beautiful, they would require a striking subject.
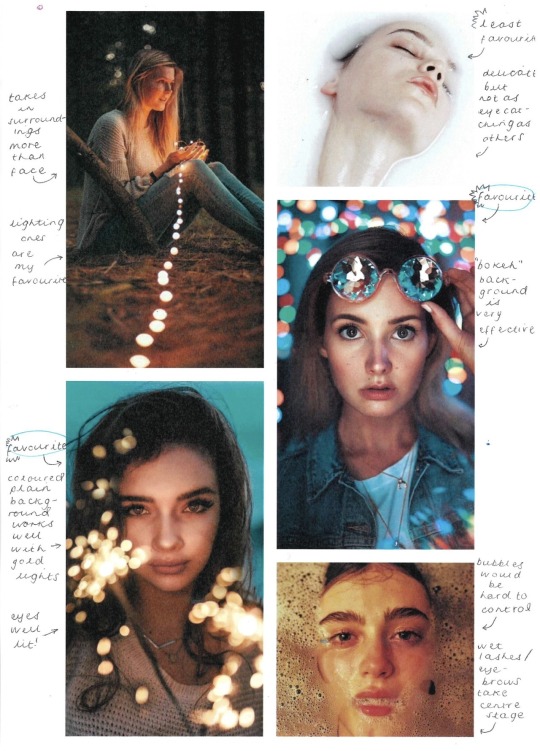
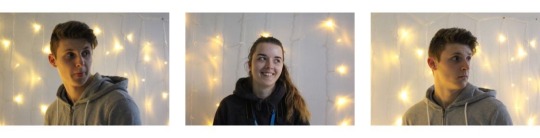
Below are my annotated contact sheets of my informal portraits. I decided to try the bokeh technique, as I felt this was the most effective from my inspiration sheet, however I had never done this before and wasn’t sure how. Andy talked me through it, and whilst I knew the aperture had to be on a low number to allow the background to be blurred, I didn’t realise the subject had to be as close as possible to the camera. Once I had this explained to me, I was then able to take my fairy lights to the photography studio and take my images.
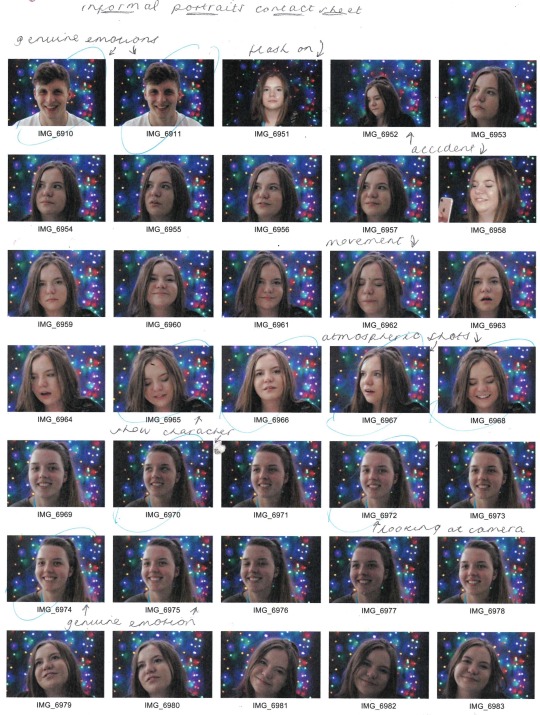
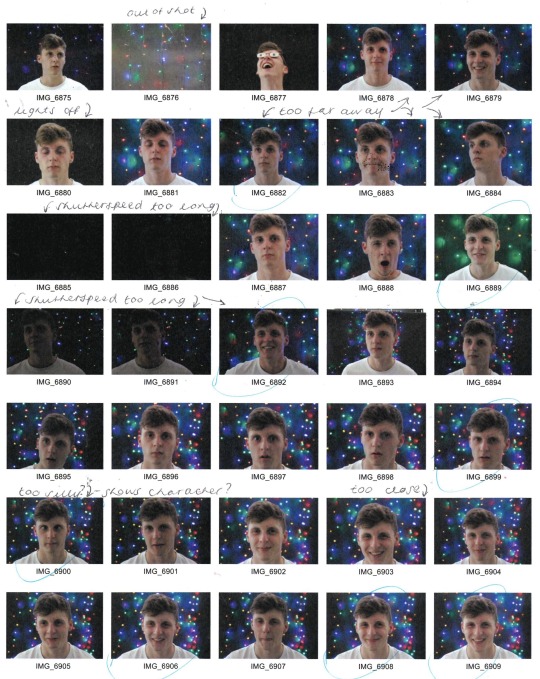
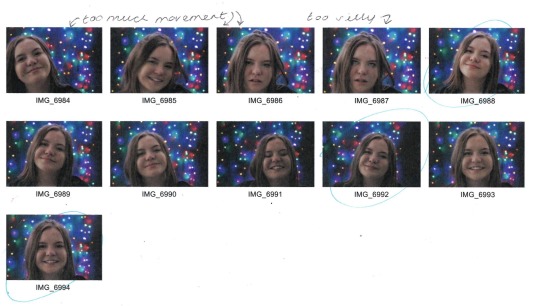
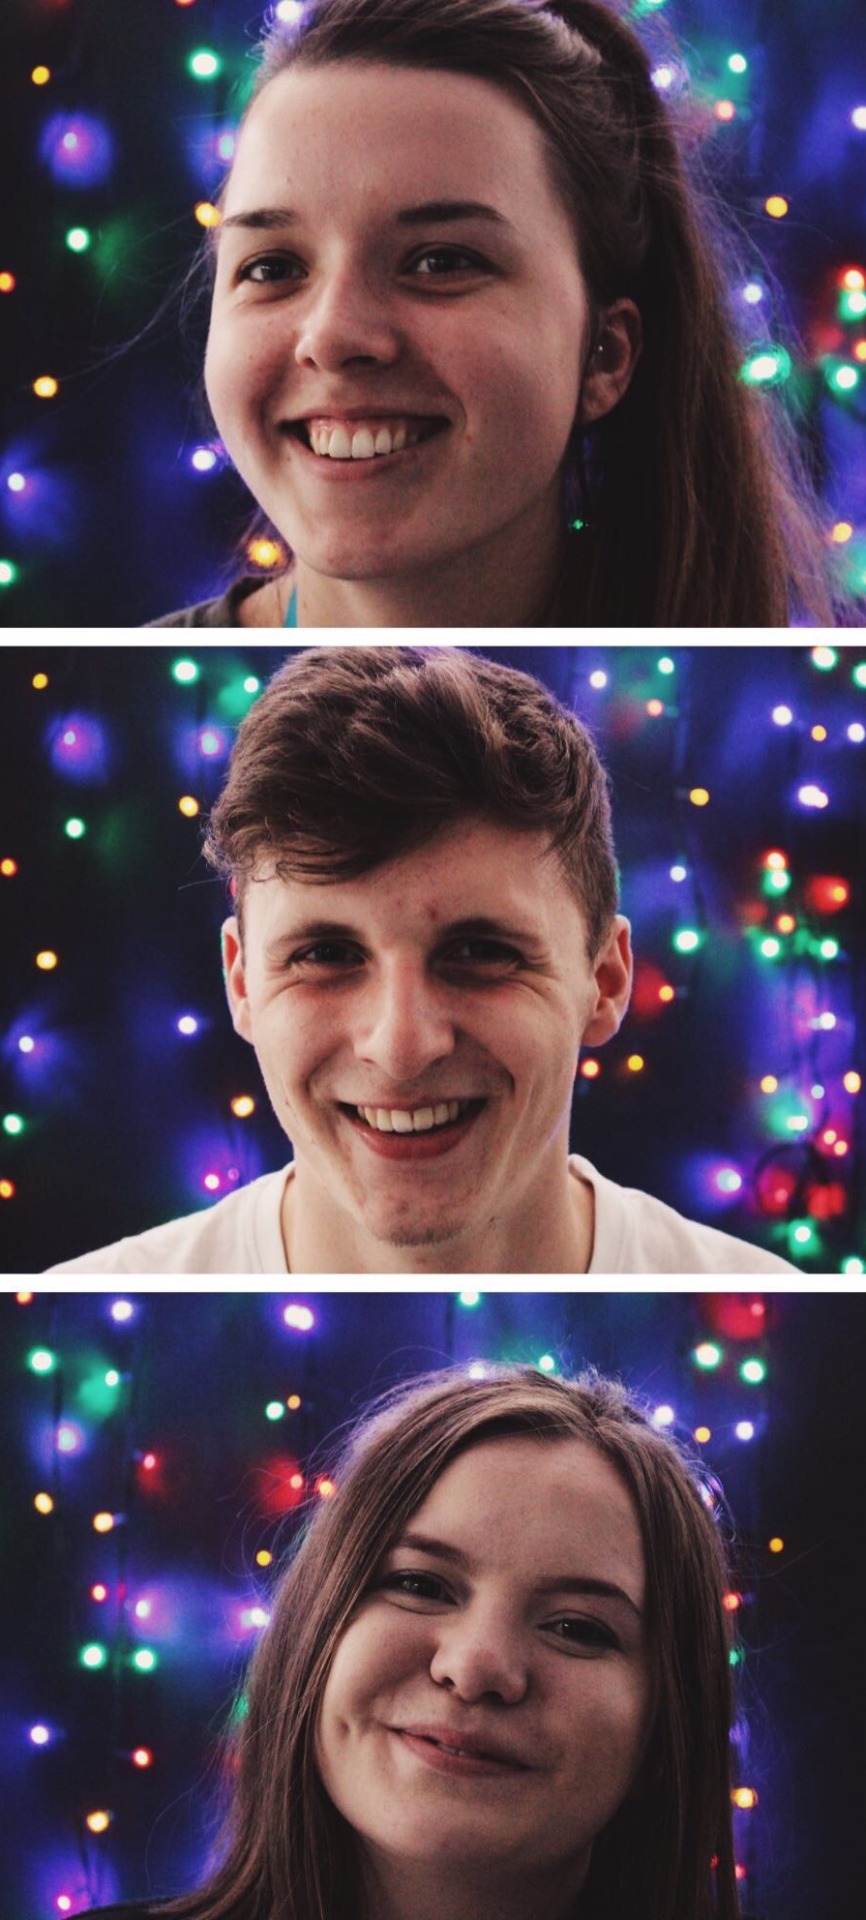
I was very surprised at how effective the images were, and was extremely pleased with my outcome. I chose my best three images to be displayed as a triptych, which all captured people mid laugh, and I felt this raw emotion gave a considerably better portrait image than any of the posed ones.
Black and White Dramatic Portrait
I realised from my annotated inspiration sheet, seen below, that the most effective black and white portraits were those with shockingly stark contrast.
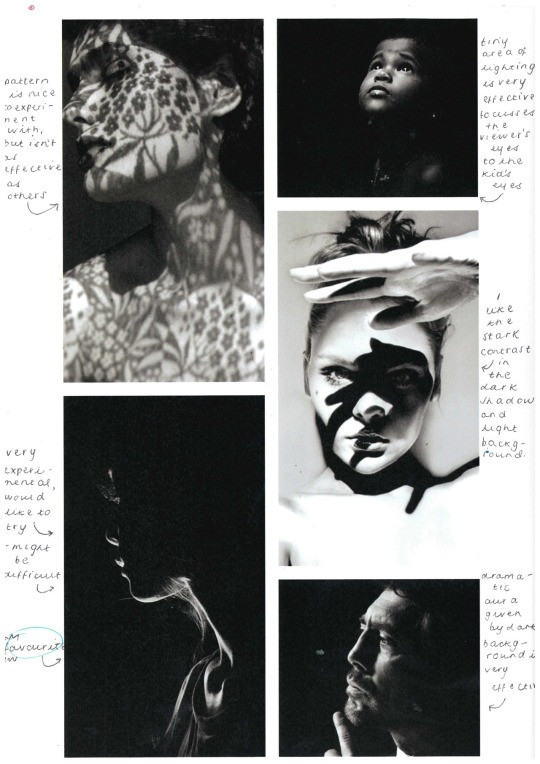
I played with this idea, seen in my contact sheet below, using softboxes to add light to certain areas of the face, and eventually using a filament bulb, which worked considerably better.
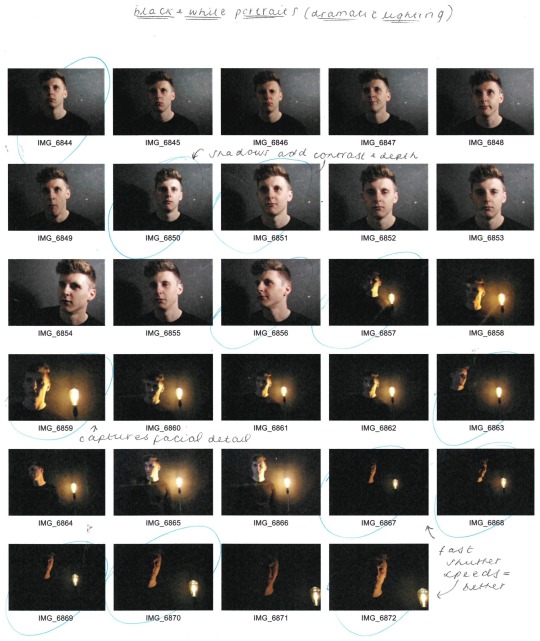
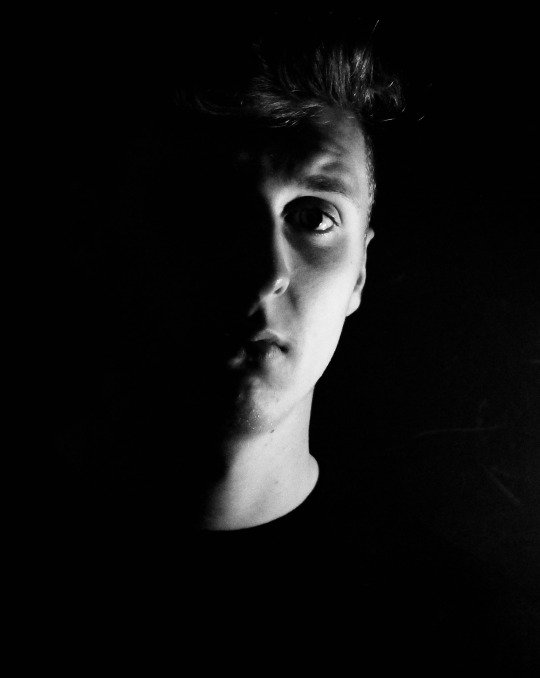
My favourite outcomes from this shoot are seen below, edited to remove the colour and up the contrast. I think these images are extremely effective, and I would like to experiment more with black and white imagery and heavy dramatic lighting in the future.
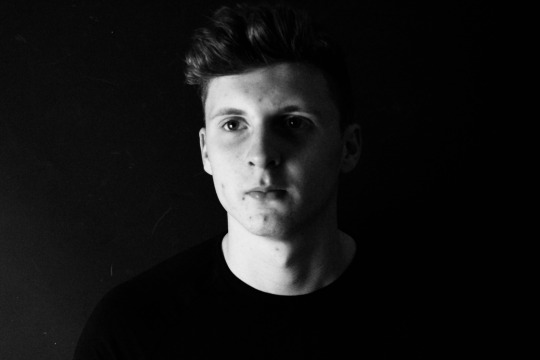
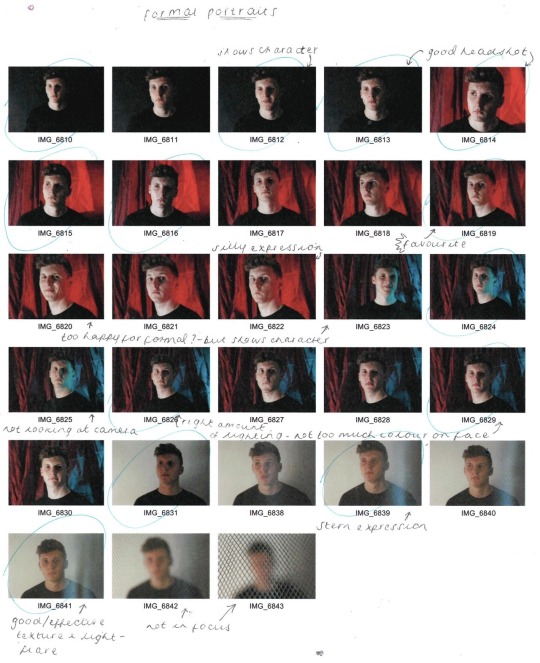
Formal Portrait
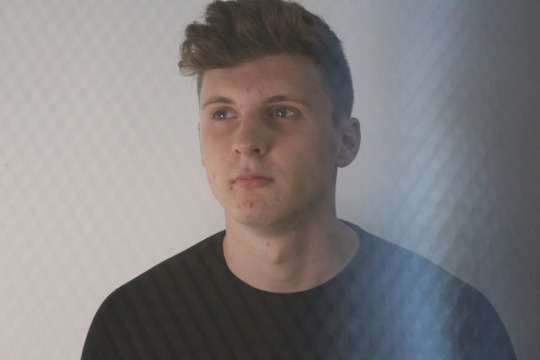
I didn’t produce an annotated inspiration sheet for the formal portraits, as I knew that these just had to be plain and simple, with a posed subject, however I knew that I still wanted to play with light and background colours. Below is my annotated contact sheet, where I decided headshots worked best, especially those without any coloured lighting hitting the face. Shadows (produced with the use of a softbox) worked extremely well, and whilst I felt the serious images were effective, I preferred the ones with a smile as I liked the character they portrayed.
Abstract Photography
Our next photography workshop was to explore shape, form, colour and texture in an abstract style. Using a camera, we were to photograph textures and abstract shapes, zooming in to get closeups and macro shots. We were then to edit and alter the images in photoshop, using layer opacity, layer blending, filters, select/cut/erase/duplicate, hue/saturation/threshold, warp/distort/skew.
Some artists that use abstract photography techniques are Kim Keever, Bill Brandt, Russell Tomlin and James R Page.
Kim Keever - Keever ‘paints with water’, producing landscape and abstract images by ‘dispersing paint through the water adding a certain character to the constructed landscape in the tank and a high degree of randomness to the abstract images’. I love Keever’s work as it is beautifully delicate and fluid, and I feel that the colour palette he uses throughout really adds to this delicate and peaceful aura, making it more effective.
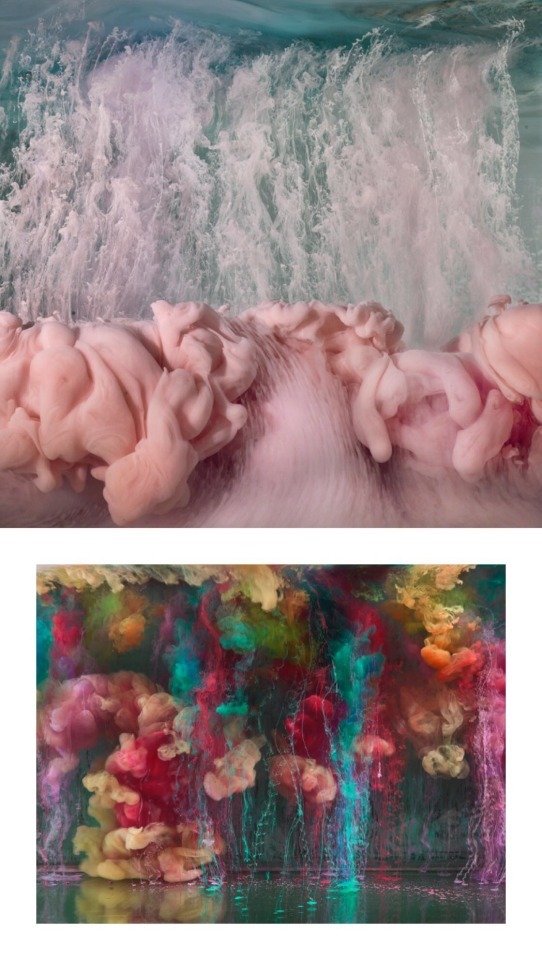
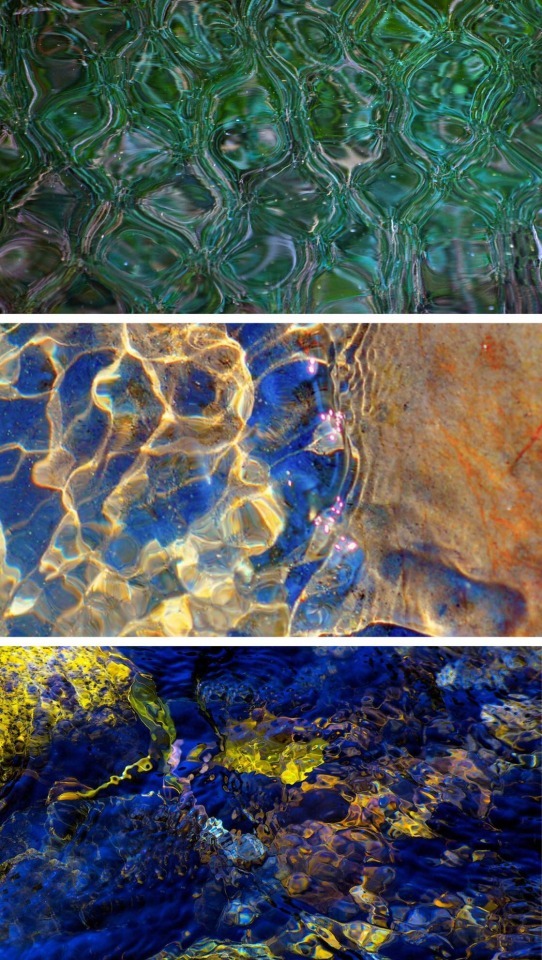
Russell Tomlin - He says his ‘work in photography is driven by the details that emerge from the visual aesthetic I encounter when looking at and into water in its various forms—still water, flowing water, rain or snow, fog and cloud’. While I love the fluidity of his work, I don’t find the colour schemes as effective and calming as Keever’s, but I believe this is due to Tomlin’s editing process as oppose to dispersing actual colours of paint through the water like Keever does.
I will be using the influence of these artists to take my own abstract images and produce my own edited, layered pieces.
I took 10-20 images, using my knowledge of aperture particularly, then annotated the contact sheet, seen below. The most effective images were those of much closer textures, taken in macro mode.
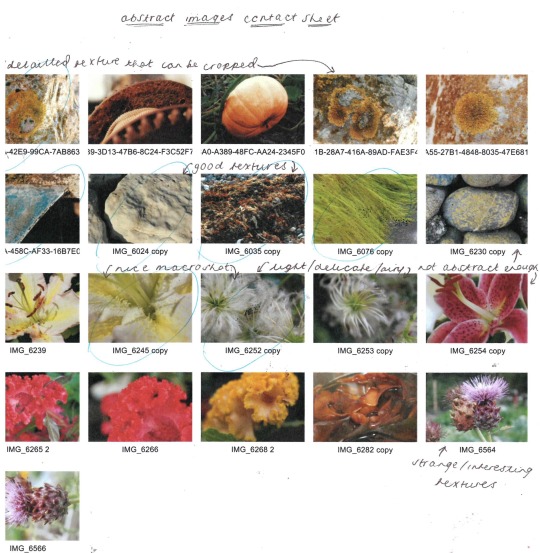
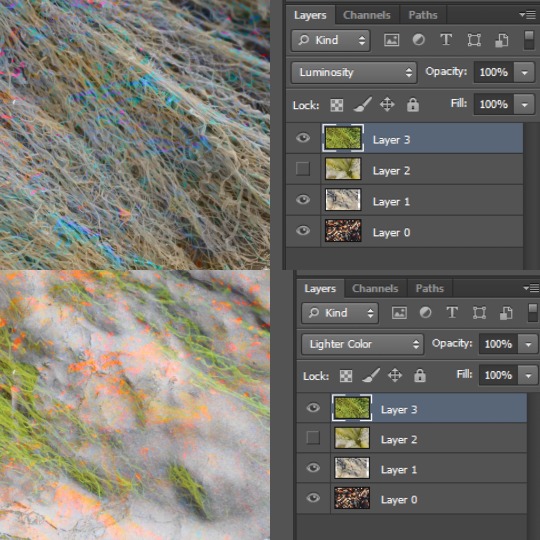
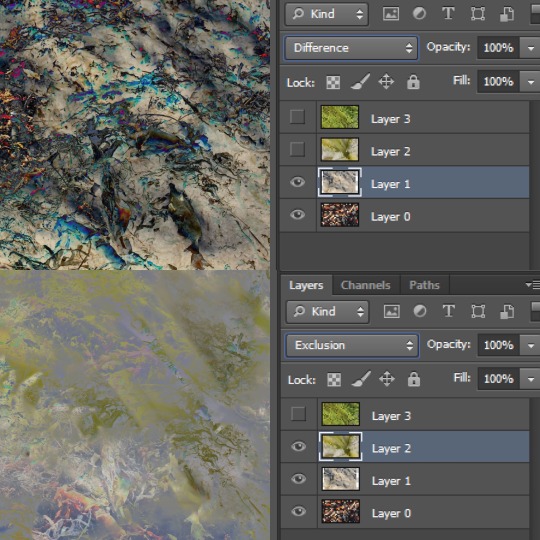
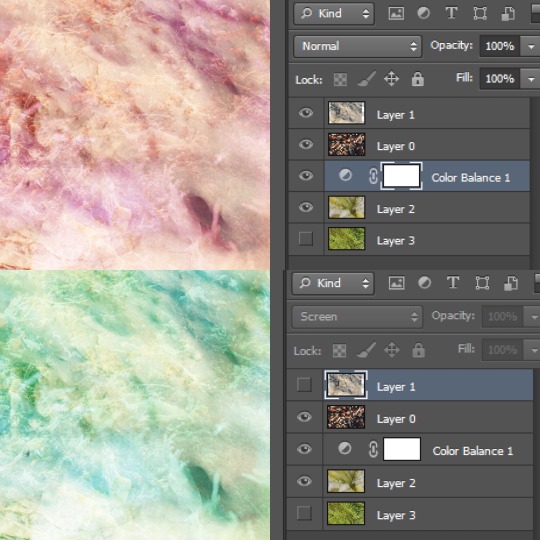
From here, I began to edit and layer the most effective images in Photoshop, the images I produced with their corresponding layers can be seen below.
The four edits below are done by changing between using two, three and four layers, as well as altering the blending modes but keeping opacities to 100%.

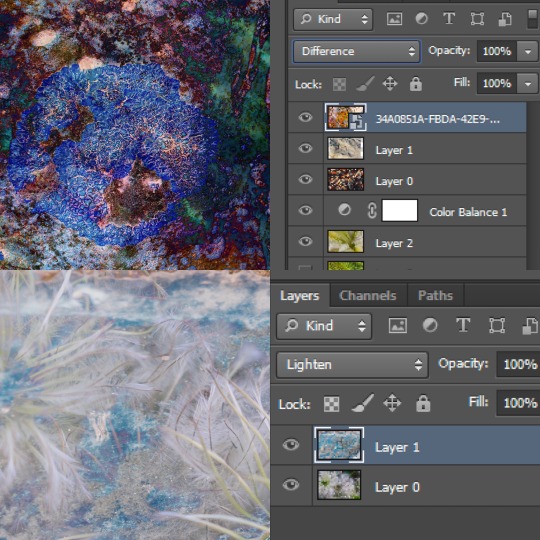
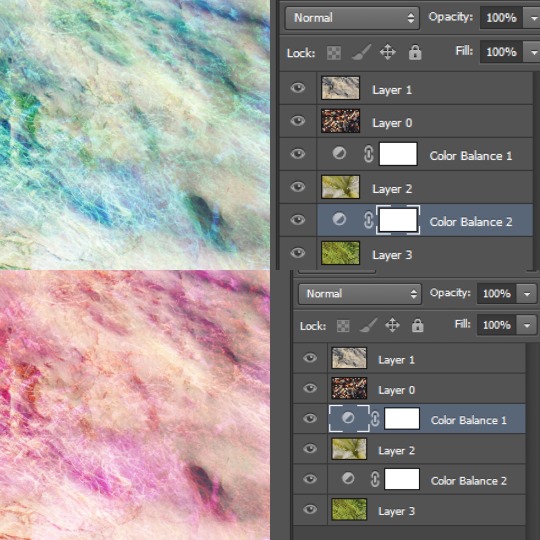
The 4 images below are edited by changing between using two and three layers as well as altering the blending modes but keeping opacities to 100% and keeping layers in the same order.
The five images below are done using all four layers and adding two colour balance layers.
Then, I annotated a contact sheet of the final edits, choosing the edits I felt to be most effective; which in this case were the more delicate, fluid abstract images, reflective of Keever’s work which I previously explored.
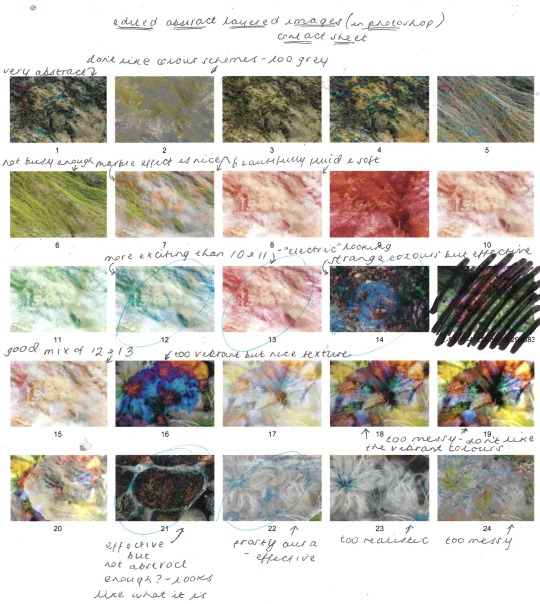
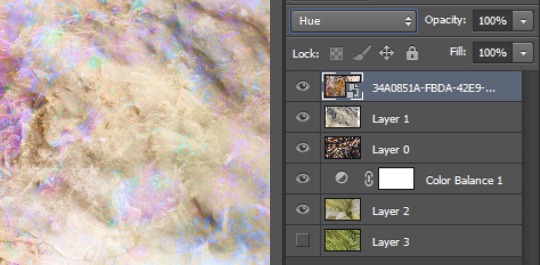
I whittled these edits down to the best six, then annotated these below, explaining what layering techniques were most effective and which initial images were included in each process.
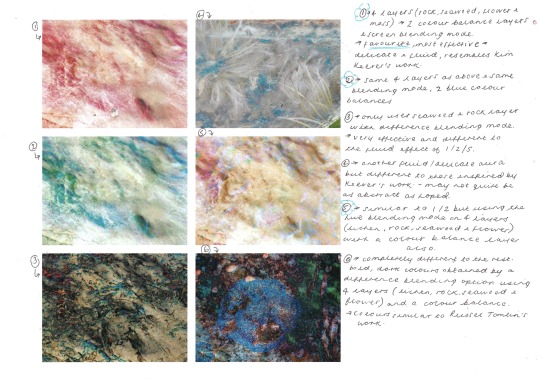
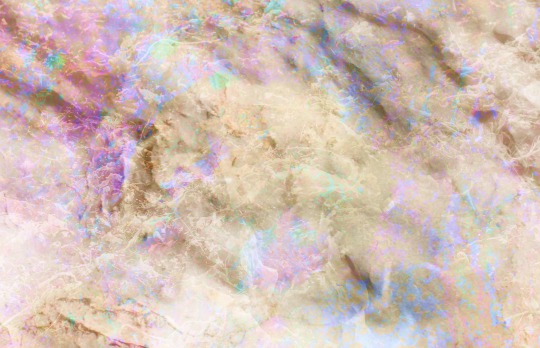
From here, I chose my favourite and most effective abstract image, which again is very similar to Keever’s style, but has a more “electric” addition, from my own experimenting.
1 note
·
View note
Text
MA Fashion and Textile Practices Major Project Path - 25th April
So bearing in mind the presentation for our submissions I began to think about my processes and what had been the inspirations going along this processes path. I have been completing this blog and it has been somewhat of a revelation to me. I never thought I would enjoy posting on a blog but it has been revealing and cathartic for me. I was never really a big diary writing person, more so when I was a teenager as it helped to quantify all that inevitable angst, but later in life I have just not been attracted to writing down things at all. My mother on the other hand still fills in her diary every day! So compiling this blog has really enabled me to keep research, inspirations, thoughts, feelings and most importantly the processes in one place and to see from start to finish my progress along the way.
At the presentation I thought I would break with my tradition of using a power point presentation as a tool and use some inspiration, processes and research boards as a guide with a few notes and talk around the rest. I felt this was more fitting to this processes module for me as I feel I am breaking away from the digital and becoming more hands on, so embracing this as part of my presentation seemed quite fitting.
Using Pinterest has been a great starting point for me to establish an aesthetic and direction for my processes. Taking a few images from those boards and collating them together hopefully will express to the others the aesthetic I am inspired by.

Kukushkina, P. (2011). PQQ. [Illustration]. Retrieved from https://www.pinterest.co.uk/pin/569001734149473389/
Cole, S. (2018). Lettered. [Illustration]. Retrieved from https://www.thinkmakeshareblog.com/.
n.d, n.d. (2017). Line graphic design ideas 70. [Illustration]. Retrieved from http://wanitamalas.com/80-good-sample-line-graphic-design-ideas/line-graphic-design-ideas_70/#main.
Slater, L. (2019). Kin I John Lewis #1. [Illustration]. Retrieved from http://www.lauraslater.co.uk/projects/laura-slater-x-kin-john-lewis/.
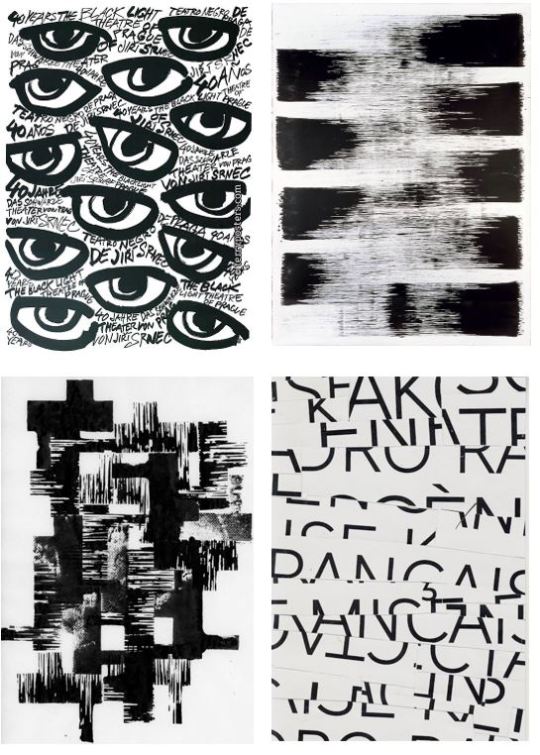
Flejsar, J. (1991). 40 Years The Black Light Theatre Of Prague. [Illustration]. Retrieved from http://www.terry-posters.com/serie/285-cerne-divadlo-praha.
Corner, B. (2014). n.d. [Illustration]. Retrieved from https://brittanycorner.tumblr.com/post/93047018112.
Moreau, A. (2013). A4 series of ink on onionskin. [Ink on onionskin]. Retrieved from https://www.ameliepetitmoreau.com/INK-AND-PADS.
Touchon, C. (1960). Fusion Series #3433 - 6x4 inches - collage on paper made with bits of a street poster. [Collage]. Retrieved from http://parispapers.blogspot.com/2013/10/collages_7360.html.
I wanted to include a varied amount of images to give an overview of what I was looking at. Here I was liking the mixture of clear geometric shapes and uneven textures, it is a conflict of aesthetic I find intriguing. Like a mixture of my design career backgrounds, the precision of graphic design and the freedom of kinetic expression. The broken fonts and starkness of black and white add impact which I am particularly attracted to. I like the space which is left behind and the areas taken up with the use of differing textures.

Milan, I. (n.d). ISSEY MIYAKE - 132 5. Issey Miyake – Asymmetric Tunic With Origami Algorithmic Development Of Bicolor Recycled Polyester Cloth. [Photograph]. Retrieved from https://www.ivomilan.com/en/product/issey-miyake-25719.htm.
Amp, T. (n.d). n.d. [Photograph]. Retrieved from https://i.pinimg.com/originals/6b/13/36/6b133670c9ee1ad4a05f7ce351f3b6a0.jpg.
n.d, n.d. (n.d). n.d. [Photograph]. Retrieved from https://i.pinimg.com/originals/88/1b/92/881b921aeed5267de9f416f9527b4c64.jpg.
Metzel, E. (2015). n.d. [Photograph]. Retrieved from https://mirellabruno.tumblr.com/post/129936304216/exercicedestyle-aau-2015-eleonore-santos-anna.

Heck, E. (2013). Without a Face. [Photograph]. Retrieved from https://www.thecut.com/2013/09/without-a-face-behind-falls-entrancing-looks.html.
Daldoce, M. (2014). n.d. [Watercolour]. Retrieved from https://www.bloglovin.com/blogs/beautifuldecay-magazine-584992/marcelo-daldoces-origami-watercolor-works-3119801505.-+
Haus, B. (2014). n.d. [Photograph]. Retrieved from http://www.baubauhaus.com/image/40068.
n.d, n.d. (n.d). Burberry Stanforth Printed Mini Skirt. [Photograph]. Retrieved from https://www.farfetch.com/uk/shopping/women/burberry-graffiti-archive-scarf-print-silk-wool-mini-skirt-item-12979729.aspx.
From the genius of Issey Miyake I took inspiration from his combination of pleating and printing over them. I liked that graphic text and fonts could be distorted and manipulated by the configuration of the fabric. I like the idea of playing tricks and concealing prints and text within folds, or having it on clear view but to be distorted and broken so that it becomes less decipherable to the viewer. I also like the idea of the wearer knowing what is said but not necessarily the viewer. The wearer being a member of an exclusive tribe.

n.d, n.d. (n.d). n.d. [Photograph]. Retrieved from https://i.pinimg.com/originals/f0/50/07/f05007e6e1445420c4c4169317e7d866.jpg.
Perche, N. (n.d). Yohji Yamamoto Dress. [Photograph]. Retrieved from https://nathalielaperche-inspiration.tumblr.com/.
Yamamoto, Y. (2016). Yohji Yamamoto at Paris Fashion Week Fall 2016. [Photograph]. Retrieved from http://www.livingly.com/runway/Paris+Fashion+Week+Fall+2016/Yohji+Yamamoto/Details/ij1YzL4Jp
Feira, S. (2016). n.d. [Photograph]. Retrieved from https://pournous-meme.tumblr.com/post/146888266190.

Zee, N. (n.d). n.d. [Photograph]. Retrieved from http://www.natvanzee.com/grit-magazine/.
Garcons, C. (2007). Comme des Garcons s/s 2007. [Photograph]. Retrieved from https://erithemermaid.tumblr.com/post/17280898757/thefinalact-comme-des-garcons-ss-2007.
Yeste, T. (2014). Eliza Cummings photographed by Txema Yeste for TUSH Magazine, Spring 2014. [Photograph]. Retrieved from https://thewallgroup.tumblr.com/post/78571226764/eliza-cummings-photographed-by-txema-yeste-for.
n.d, n.d. (n.d). n.d. [Photograph]. Retrieved from https://i.pinimg.com/originals/bc/60/39/bc60391dcdb6fc7c6e3e81875b0d578f.jpg
Here I am looking at a confliction of interests – to be explicit in what one wants to say or to conceal what is to be said until it is revealed later? I feel future tribes will have more to say than anyone than has gone before and that is why they will need to express themselves through their clothing. Expressing what we want to say has become ever more important, but concealment of those sentiments may be better for some than for others.
0 notes
Text
A Second Set of Learnings from HeroConf 2019
Yesterday, Tim shared some of his key takeaways from HeroConf 2019.
I’m here today to share some of mine.
This was my first HeroConf and it did not disappoint. It also helps that it was just a regional rail ride away for me (I was born, raised and currently reside in the Philly suburbs).
So, let’s talk about some of the learnings I loved and can’t wait to share with you.
Your Target Audience
Amanda Farley of SS Digital Media challenged us to think outside of our marketing viewpoints by thinking through our target audience from the lens of different departments. For example:
Marketing: Desires those who are the most engaged
Sales: Desires those who are most likely to buy
Service: Desires those who are the best customers
Re-evaluate your prospects with each of these in mind, to make sure your targeting is on point. Inquire with the sales and service teams about key questions they often receive to be able to overcome these barriers or address important features in your ad copy and/or landing page. And remember, 82% of consumers needed five touch points before converting, so map out all your content remarketing and touch points to help your prospect along on the journey to becoming your customer.
Campaign Building
Julie Friedman Bacchini of Neptune Moon advised us to target real people and not personas by using SEO tactics to fuel your PPC campaigns. You can do this by entering in your expected search terms in Google to see the likely queries, results for research purposes (ie. review sites), the competition and the “People also search for” keyword goldmines straight from Google to see what real people see.
Then harness the learnings there to build out your campaigns. You can also use resources like Keywords Everywhere or Keyword Keg to help you build your keyword lists based on search intent. She also clued us into sites like:
Answer The Public to find unique prepositions, questions and other search intent insights for your keyword.
Keyword Typo Generator to find misspellings of your competitors to add as additional negatives (genius!)
Buzzsumo for insights into engagement and content related to your keyword; great for ad copy, landing page or remarketing ideas
Ad Copy
Shira Abel‘s presentation really got me thinking about we can influence our prospects by tweaking our approach a little.
For example, if your prospect is searching online for your product due to a stressful circumstance, the last thing you want is for your ad copy to make them feel further stressed. Instead, consider ad copy that relieves their cortisol, perhaps with something comical that will help the prospect build an affinity with you over the competition.
Similarly, think about ways to build your target’s oxytocin, dopamine and neuro epinephrine. And remember, people don’t want to think so you have to make the decision process easy for them so that an immediate decision in your favor becomes automatic response.
Mark Irvine addressed the ins and outs of the larger ETA formats, reminding us that the second headline and third description don’t always show so you can’t really rely on them as an extension of the previous line nor for CTAs, disclaimers, or vital offers. Instead, use them for additional benefits, competitor differentiation or keyword variety.
Overall, these ads are being shown more on desktop than mobile based on sheer screen size. Since so much traffic is coming from mobile, you shouldn’t be surprised then if they aren’t outperforming your standard control. If that’s the case, make sure to try them out in Bing where there is more desktop traffic than via Google.
One great tip Mark offered is to stay away from CTAs that I want the viewer to do (download this, schedule a demo, buy now, etc) and shift to CTAs that answer the searcher’s reason for searching in the first place (get the best practices, solve your problem, etc).
Pinterest
Pinterest is one of my favorite channels, so I was thrilled to be able to sit in on Duane Brown‘s presentation on his Pinterest learnings. Here are some of his learnings:
Segment out Search vs. Browse placements in your ad groups since they have such different intent and volume.
Use your negative keywords from other channels.
Test images of your actual product by itself vs. images of the product being used.
Create pins for your best blog content.
Start off small with your best audiences and products first.
Don’t test more than 4 pins per ad group at a time.
Test longer here than you would in other channels.
Don’t assume what worked in other channels will work here.
Test, test and test!
Conclusion
Is HeroConf worth it? Yes, if you can go.
There were four options for most session times, giving you plenty of choices regardless of your experience level or platform depth.
One of the best parts was meeting all the people I’ve seen so often on #ppcchat. We work in an incredible industry that is amazingly friendly and willing to share their depth of knowledge. Who knows, maybe I’ll see you in Austin next year!
What takeaways do you have from HeroConf 2019 (or any other digital marketing conference you went to this year)? We’d love to hear your thoughts in the comments below!
from http://bit.ly/2XYoL1Y
0 notes
Photo

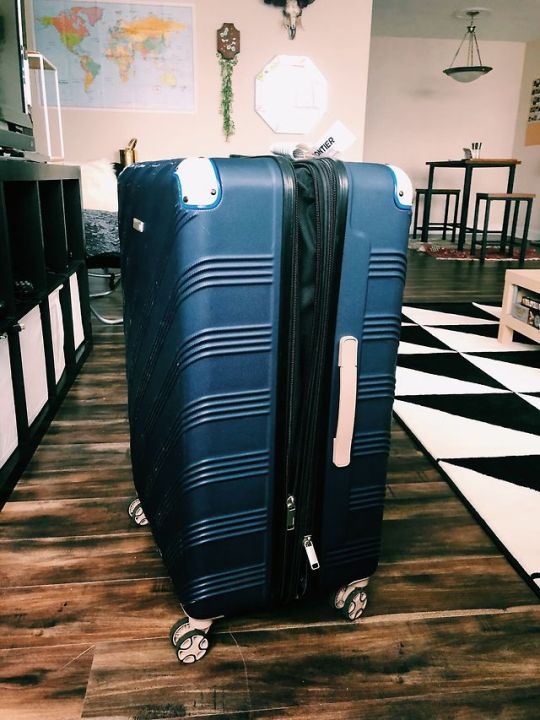


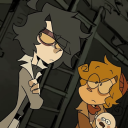
February 11, 2018: Packing for China SS/18
In 2 days I will travel to Beijing, China! We will be exploring all the sights with family for 10 days. I am super excited to go somewhere new, however, I’ve been procrastinating a bit when it comes to packing. Usually, I am a pro at packing light since most of my trips to Europe have been for 3 or more weeks. Those trips have all been in the summer where it was easier to pack light and the outfits are a bit cuter. It is, unfortunately, February and I will need to keep it cozy and warm. I have also been on the hunt for any miscellaneous hacks and items I might need. In an attempt to be the most prepared, I have been scrolling blogs/Pinterest for China packing lists, and the selections have been slim. So I thought I’d share my own. This would work for any cold weather adventure packing! I have attached my list.
The suitcase: I have been on the hunt for the perfect suitcase for YEARS. My last suitcase was great, but it’s wheel broke off in Milan. I loved it so much that I duct taped the wheel on for a few trips afterward. I’m no longer living the ratchet life (kinda), and I have upgraded to a great suitcase with a wheel! My new one is a hardshell navy spinner from IT suitcases. This only weighs 9 pounds, which is great for when I am struggling to go under that 50 pound weight limit. I like that this suitcase has 3 compartments for undergarments and zip flap for toiletries. There is also an expandable zipper, which gives more room for shopping and souvies! I purchased it from TJ Maxx for $90 bucks but they can also be found cheap here.
Shoes: I cannot stress enough the importance of good shoes when traveling. You can last so much longer during a day of exploring with the right shoe. I think it’s safe to bring 4 pairs of shoes. Obviously a good tennis shoe for exploring and any exercising that you may be doing. I am bringing my Yeezys, which I could probably sleep in these shoes because they are that comfy. I would also bring a casual Chelsea boot that could be dressed up and dressed down. I have a chunky platform for any nights on the town. And then my Doc Martens for any exploring that may include rain or snow. Pro tip, wear your most clunky shoe on the plane to create more room/less weight in your suitcase.
Outfits: The goal in my packing is always to bring items that can be layered and most interchangeable with each other. I feel like I did the same here with knits and jackets. I try to think of packing outfits instead of just throwing in 10 tops and 10 bottoms. I have found if you pack that way, then you will probably not be excited about the items you have packed, and might bring more than you need (taking up more lbs of that 50 pound limit). So bring items that you are excited to wear, and make multiple outfits out of key pieces. For this trip, I have mostly brought casual and conservative looks. Just packed one dress for any formal occasion. I definitely made sure to bring super warm socks, extra gloves, and beanies to stay warm. Don’t forget to bring loungewear that can be worn as your gym look if you plan to exercise! You never know what the temperature conditions are on the plane, so I recommend wearing a light shirt with a flannel or hoodie around the waist just in case it’s freezing, or can be taken off if it's too toasty.
Makeup/Skincare/Toiletries: For a 10 day trip, I am trying to go as simple as possible for the number of products I am bringing (THAT 50 POUND LIMIT ADDS UP I PROMISE). For shower supplies, I am just bringing travel sized of my favorite products. The makeup situation is minimal since I am on that life lately. Maybe just bringing the everyday face essentials, a mini Too Faced eyeshadow palette for any day to night makeup looks, and my travel sized Morphe brush kit. So the skincare… I have been on such a strong routine lately, more on that in a later post. I don't want to fall out of my routine because a lot can happen to your face in 10 days. With that being said, I have tiny TSA approved bottles to put the necessities in (cleanser, toner, rosehip oil, eye cream, hyaluronic acid, SPF). Pro tip, bring face wipes and mouthwash in your personal item for the plane. It’s unlikely that there will be room or time for a full *getting unready* so these will do till you get to the destination.
Personal item: The most important part of getting to your destination. You can really improve your flight experience by what you put inside of your personal item. For all of my Euro trips, I have taken a backpack as my personal item. It just needs to be able to slide under the seat in front of you. Inside of the backpack I put face wipes, mouthwash, headphones, books/mags/notebook, camera stuff, chargers/cords, electricity converter (the outlets are different in Asia and have higher wattage so you need this), empty water bottle, any medicines/vitamins, and a towel (which can be used as a blanket). I will also slide my purse inside of the backpack so I won’t have to pay any extra fees.
Whew, I think that is it. I’m a bit nervous about entertaining myself for 15 hours on our flight. The Europe flights seem so easy now. Any tips on how you get through long flights or sleeping in coach would be greatly appreciated! Hope this is helpful for anyone like me who needs more structure when packing.
0 notes
Last Seen Blogs

bigcheepegle
mc majhouL

kittzuxp
Pls only giv me love thats dripping with blood/lyr


ceceslibrary
A girl with a passion for reading