#rattlecans
Photo

57 notes
·
View notes
Text
USHORAN USHORAN MY KING HE'S HERE
7 notes
·
View notes
Text
Voila. I did art today.
12 notes
·
View notes
Photo
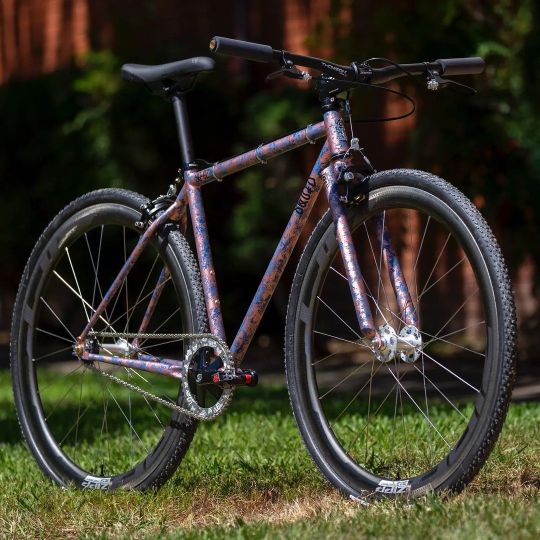
Reposted from @squidbikes One of our favorite SO-EZ builds last year, this thing is maybe the steeziest TX bike we’ve made! Start with a @spray.bike Copper base coat under Storm and Humber marble, add a pair of silver @paulcomponent track hubs laced to @zippspeed 303s and some Racer calipers to stop them, Sugino 75s with our @raketacomponents chainring and @timepedals Atacs, and you got a balleur Tracklocross rig that can moonlight as a SSCX bike on the side! #noboringbikes . Photo: @belowtreeline #squidbikes #spraydotbike #soez #fixedgear #rattlecan #tracklocross #fixie #steelisreal #sscx #baaw #tracklocrossiscoming #hizokucycles HizokuCycles.com https://www.instagram.com/p/CosTDgsvN4E/?igshid=NGJjMDIxMWI=
#noboringbikes#squidbikes#spraydotbike#soez#fixedgear#rattlecan#tracklocross#fixie#steelisreal#sscx#baaw#tracklocrossiscoming#hizokucycles
7 notes
·
View notes
Text
2 notes
·
View notes
Text
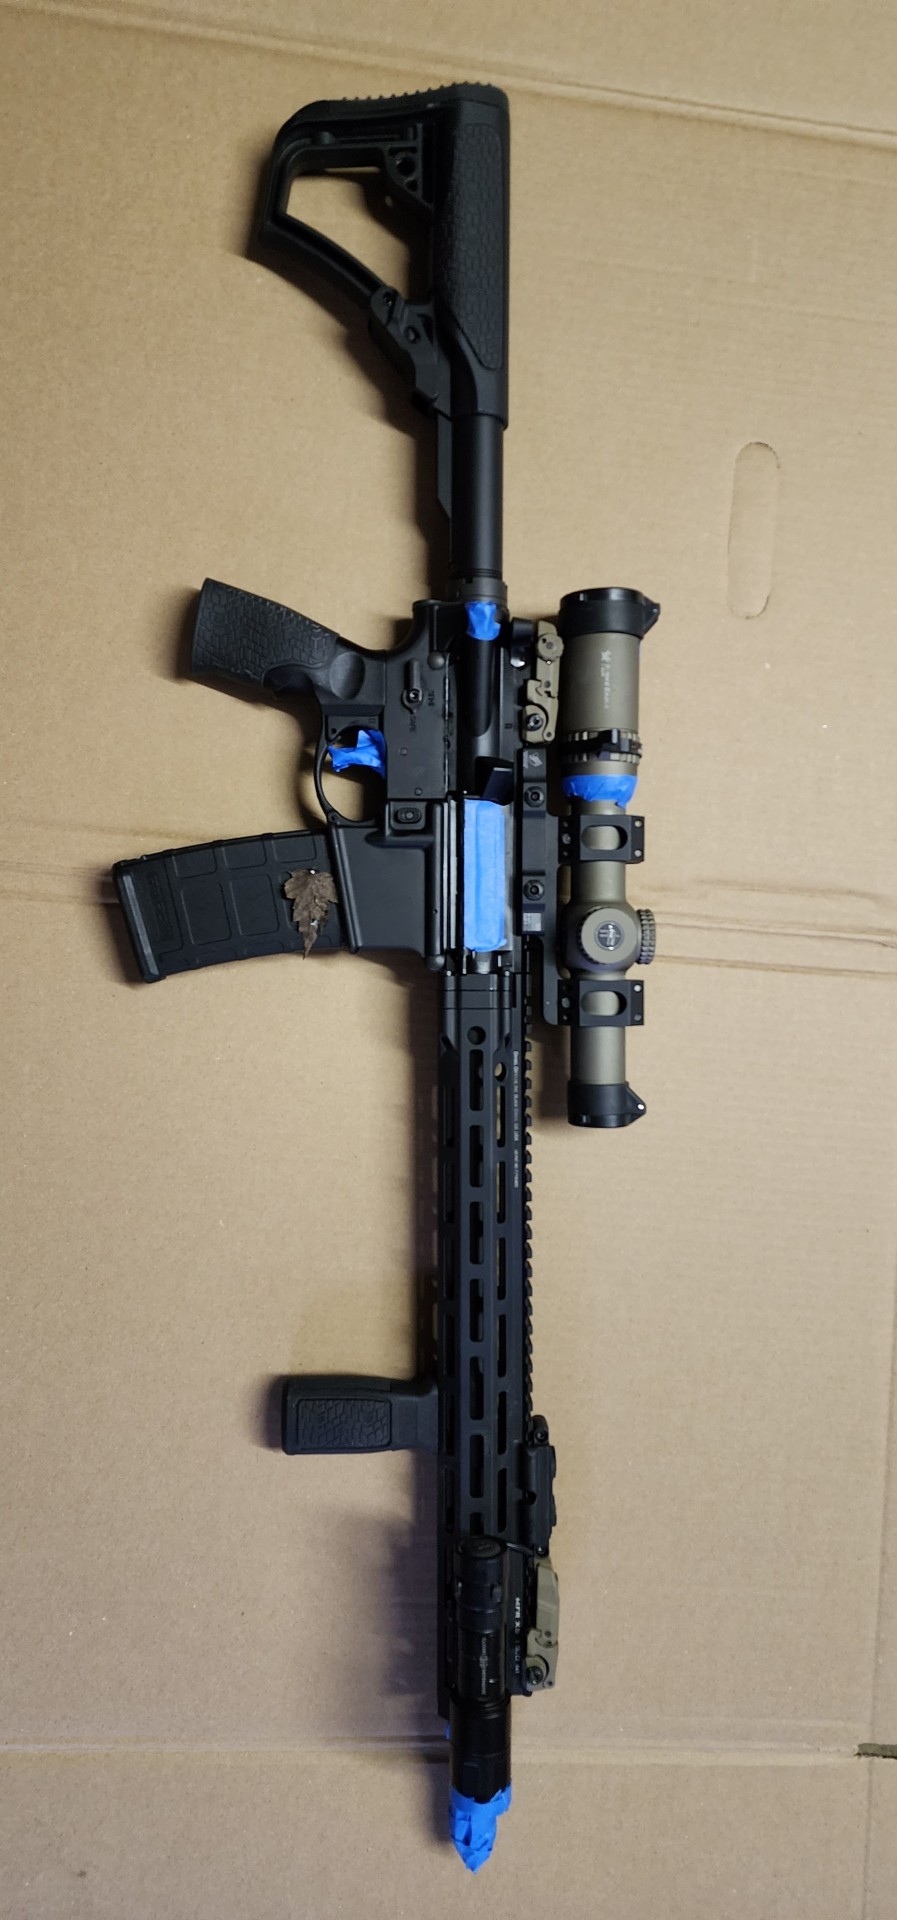
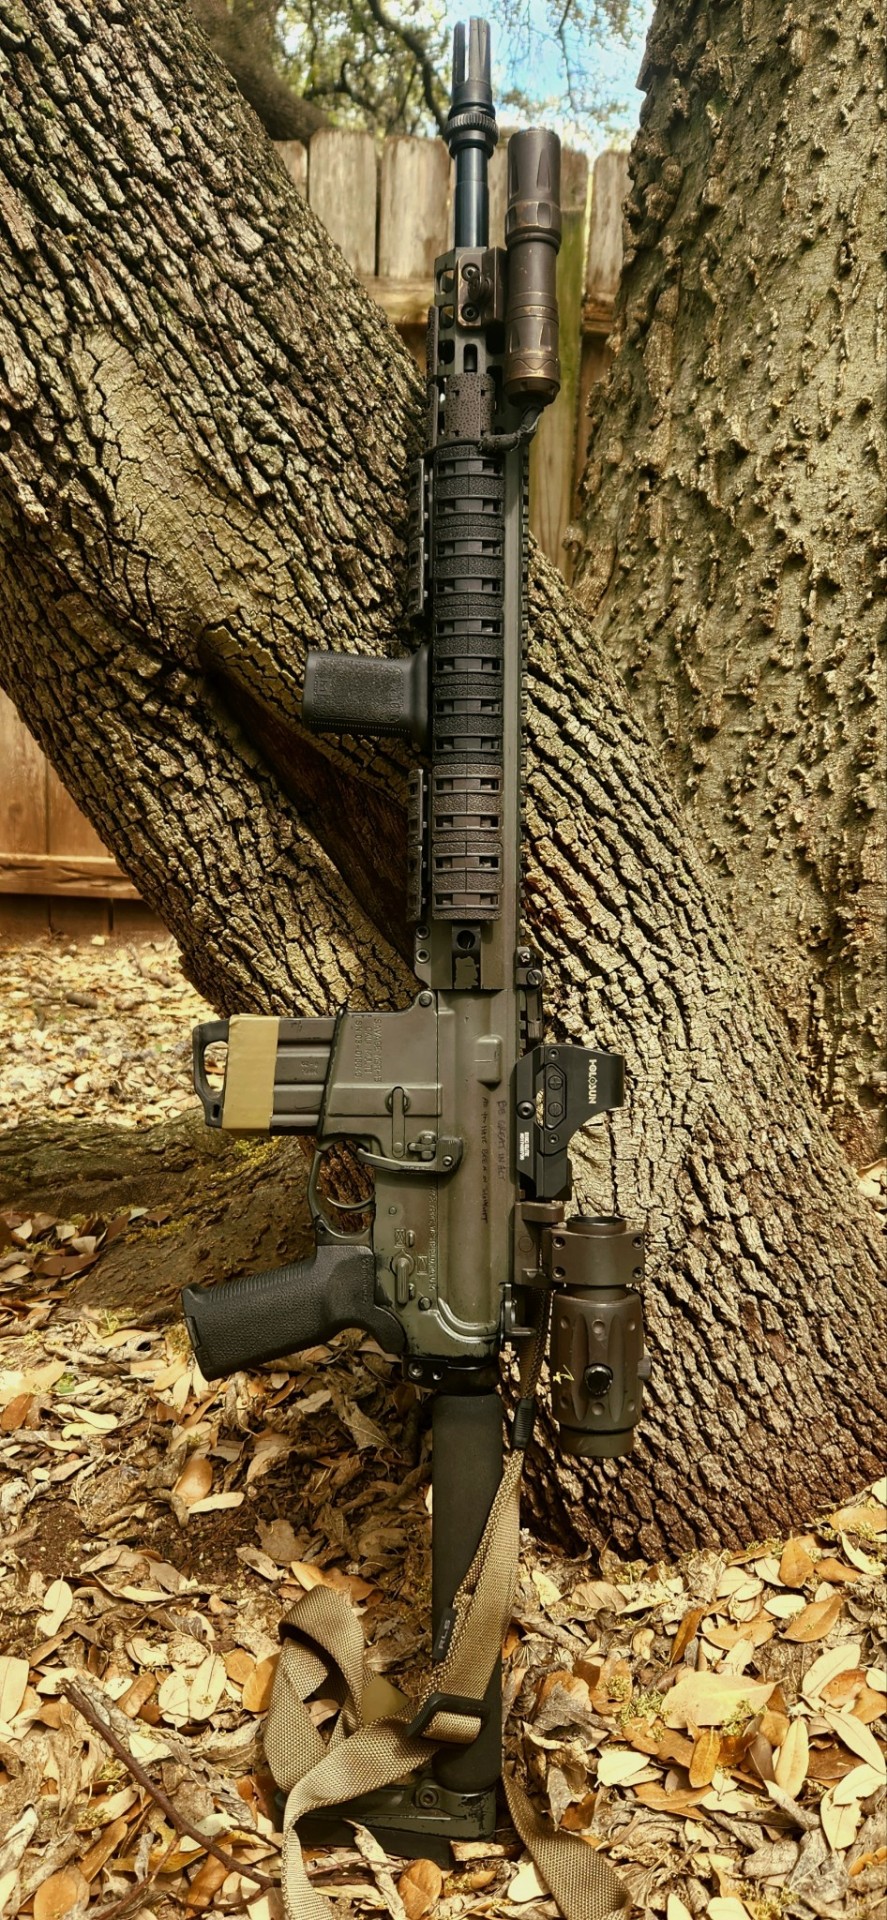
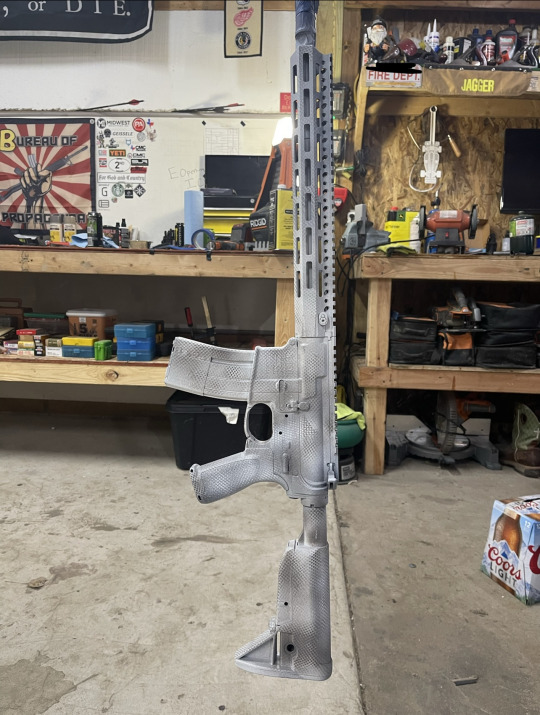
Rattle can your rifle
This weeks post is going to be about rattle canning your rifles. In my opinion it’s one of the easiest and quickest ways to break up the figure somewhat of your rifle. I’m gonna show you how I like to do mine and how quick and easy the whole process is.
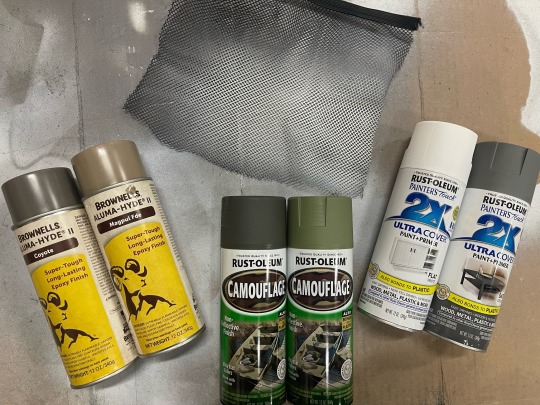
So to start off you’re gonna have to figure out what colors and what kind of pattern you want. The photo shows the different kinds of paints that I like to use. So you want some thing with a fairly flat finish that way you’re not getting a very glossy shiny finish that reflects Light easily. The pattern I like to do is very easy just a mesh piece that I use to break up the outline a little bit. You could use anything you could use mesh any other kind of fabric with holes in it you could buy the stencil kits and do a real camouflage pattern or you could just go outside pick up some leaves drop them on your rifle and start painting.
The prep work is going to be what either makes or breaks your finished product. I like to take out the bolt carrier group sometimes I’ll take the trigger out depending on what kind of trigger it is. And then tape the muzzle device. Depending on what your optics set up is you can either leave it on or take it off depending on what your idea is. Once you tape up what you want taped up and remove what you want removed I normally take a wax and grease remover and a microfiber towel and wipe down the entire surface as much as you can and then I repeat that same process two or three times to make sure every single piece of the rifle has be hit.
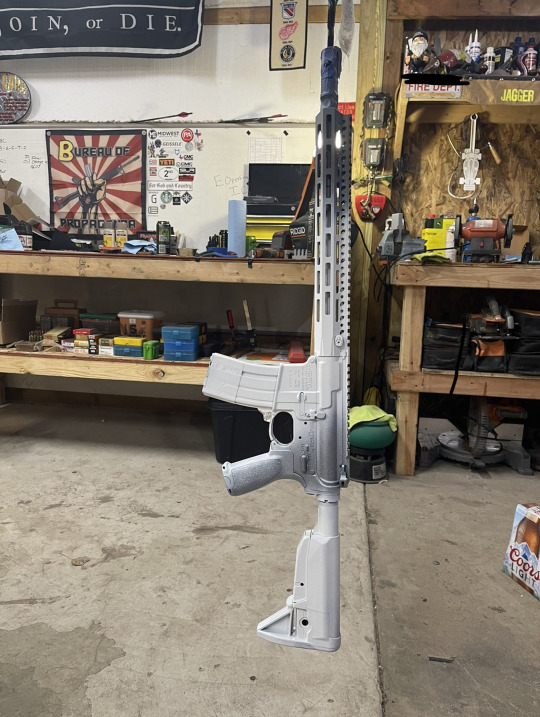
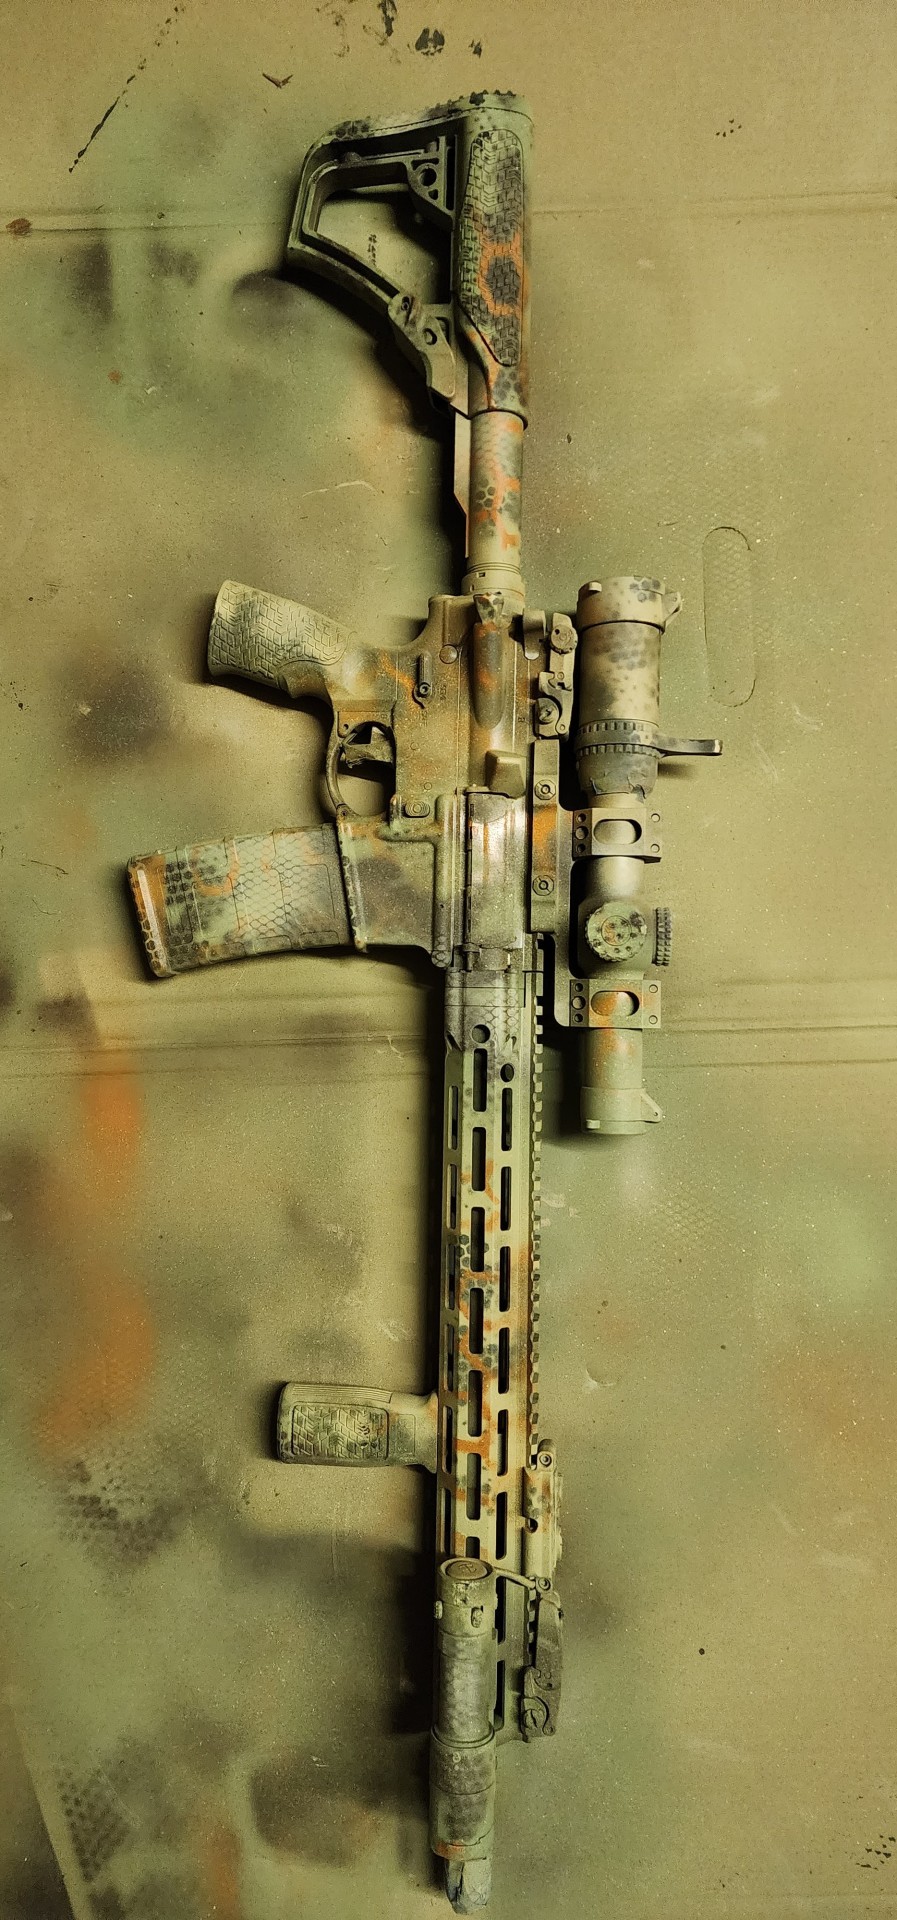
Next is the painting step. Normally I like to do three or four sections and I section it off by doing a 45° line vertically on the rifle. Look at the picture it’ll make more sense what I’m trying to say. And then once that sets up you go back with the mesh and the opposite color of that section and do your mesh coat. Once you’ve done the whole thing you’ve done your mash painting I normally like to look at the rifle see if there’s any spots I want to touch up maybe get a little more of the mesh to show up in certain areas. This is the part that is completely up to you.
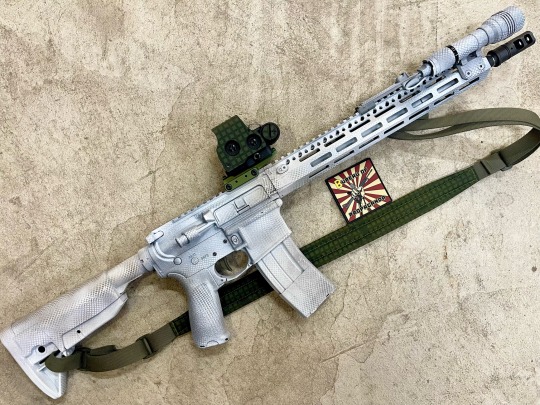
Once you’ve done your painting I normally leave it alone for a couple hours to let it at least cure a little bit. Once I’m able to touch it then I’ll bring it inside let it sit inside for a couple days once you’ve done that then you can start throwing your stuff back on take the tape off throw your parts back in and then You should be good to go by then. Dry times are all relative to the weather your location how much paint used etc. Normally if you do this process you’ll have a nice paint job that will begin to wear on the touch points and overall it cost you just a few dollars in a little bit of your time. The nice part about doing the rattle Can method is you can go back if you want to change it or it’s began to wear off a lot more you can go back with a simple paint thinner or something equivalent and the spray paint method removes very easily and can be done again very easily.
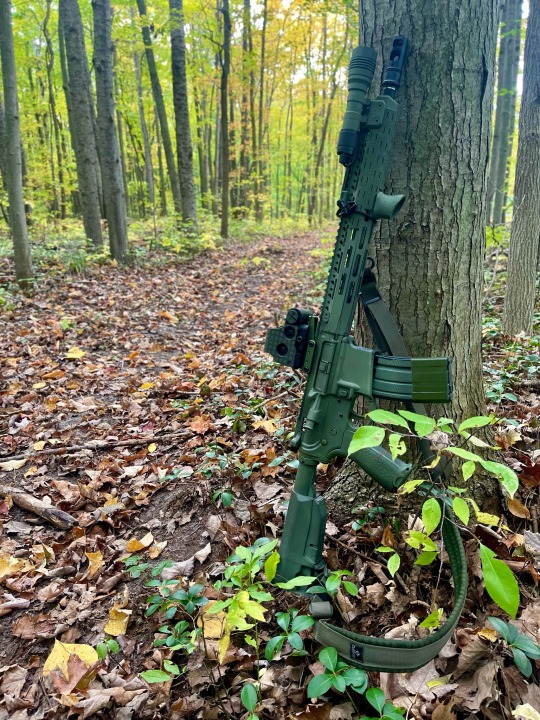
So if you’re thinking about doing this to one of your rifles hopefully this helps you out this is the way I like to do it I’ve been doing it this way for a little while now and it’s always seem to work out very well for me. The cool part is the money you save doing this method you could put towards ammunition and go out and shoot your guns which is the real fun part.
Happy shooting!
Adam Jagger gun blog post #9 11-13-22
#brownells#bureauofpropaganda#gun review#ar 15 rifle#ar 15s#ar15build#ar15porn#edccarry#edccommunity#edcdaily#modlite#surefire#arisaka#eotech#geissele#geissele everything#unity tactical#rattlecan
2 notes
·
View notes
Text
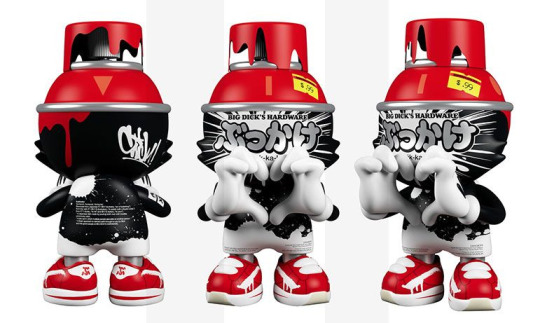
OG Slick x Superplastic - "Love Red" vinyl figure debut with "Black Widow" edition and NYC pop-up shop and release! http://dlvr.it/Sj8PTK
1 note
·
View note
Text
welp warhammer.com aint accepting my payment info and im fucked i i kno why. maybe cos its a public holiday here? maybe just cos its a shit site? hell's bells i thought the whole point of a company was to sell products like shouldnt they make the process as easy as possible gorramit
0 notes
Text
You can’t personalize a factory Les Paul unless you learn from ol’ Lester Polfuss himself. Les never played a stock anything. He was always fiddling.
And he owned a Fender Broadcaster that was given to him by Leo Fender. Leo Fender never stopped innovating or failing to innovate. He built “tools” that were meant to be played.
Don’t get “precious” about guitars. Buy some parts, throw your own together. Even if you fuck it up, you will at least have tried. Never be afraid to ask for help. The end result will be worth it.

#allparts#frankencaster#frankenstrat#diy#seymour duncan#grover#les paul#leo fender#rattlecan paint#rattlecan finish#reverse control plate
0 notes
Text
Pimp my Honda. (Spray Can Edition)
0 notes
Photo
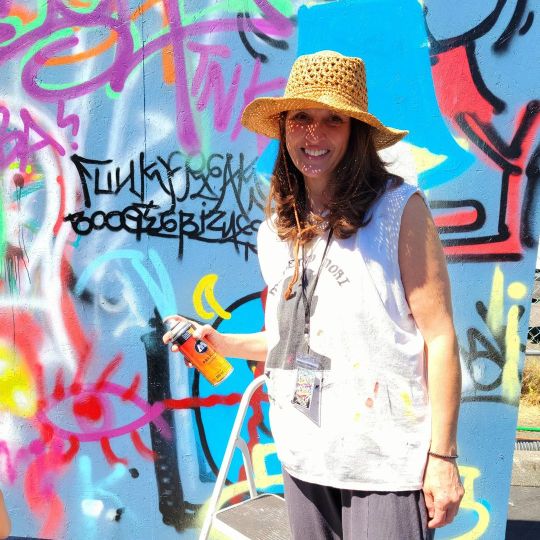
Tested negative... now I'm in my happy spot. Come see me at Going All City 2022 @kushery @cityofeverett @visiteverett @apexartandculturecenter @graffaholeks_northwest #graffiti #graffitiart #graffitigarden #everettwa #everettwaartist #streetart #tagart #brutart #outsiderart #muralart #rattlecan #spray #aerosol #gacnw2022 #provoprop #muralsofeverett (at Everett, Washington) https://www.instagram.com/p/Cg7ihp1PjY5/?igshid=NGJjMDIxMWI=
#graffiti#graffitiart#graffitigarden#everettwa#everettwaartist#streetart#tagart#brutart#outsiderart#muralart#rattlecan#spray#aerosol#gacnw2022#provoprop#muralsofeverett
0 notes
Text
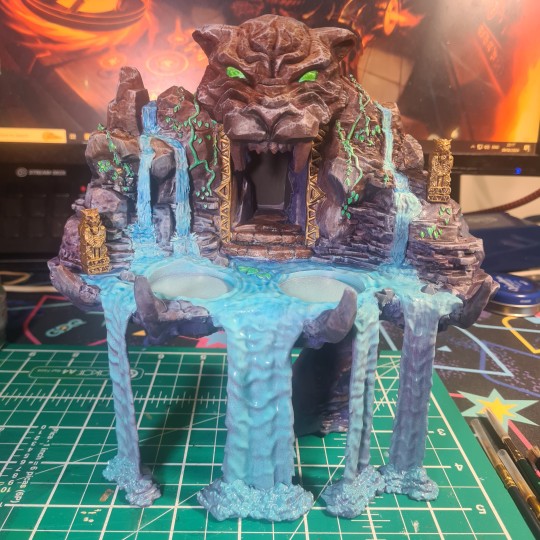
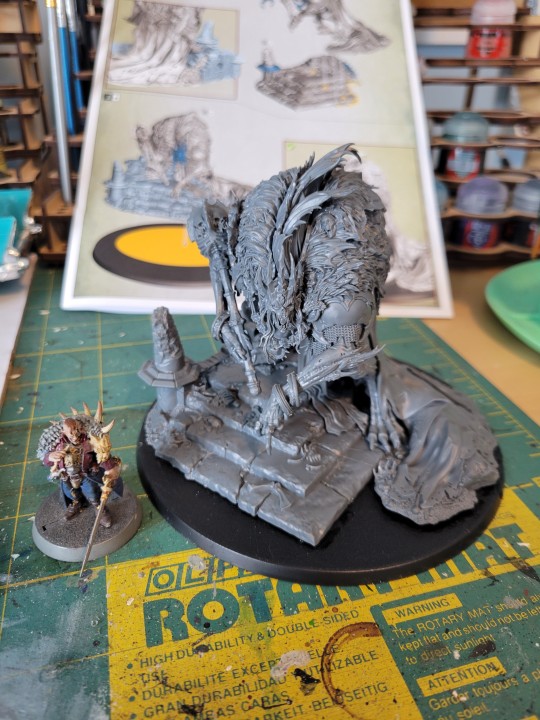
My largest painting project yet - literally!
The display scenery from The Battle for the Throne box for Marvel Crisis Protocol (gifted to me early by the manufacturers).
I've never painted scenery before so this was an exercise in efficiency of scale - I can't use up all of my expensive miniature paint!
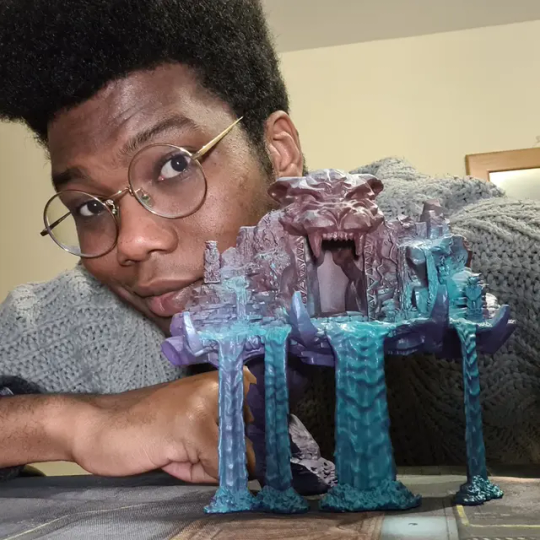
I started with a rattlecan base spray - purple and red-brown, with a narrow spray of teal for the lower half and a white zenithal dusting to finish.
It really informed how I built the colours back in - I had initially pictured something fully black and blue like the cave of wonders in Disney's Aladdin, but the progression from dark blue to purple to brown felt surprisingly easy to wrangle and strangely believable?!
71 notes
·
View notes
Text
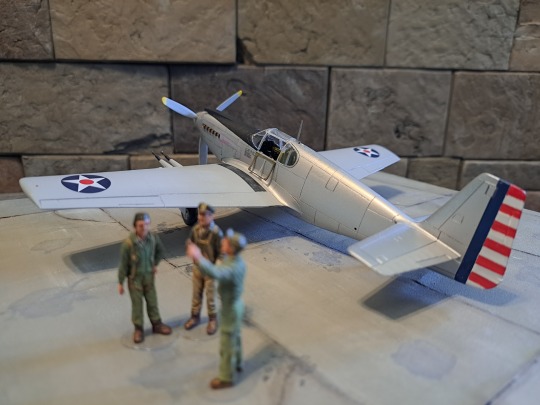


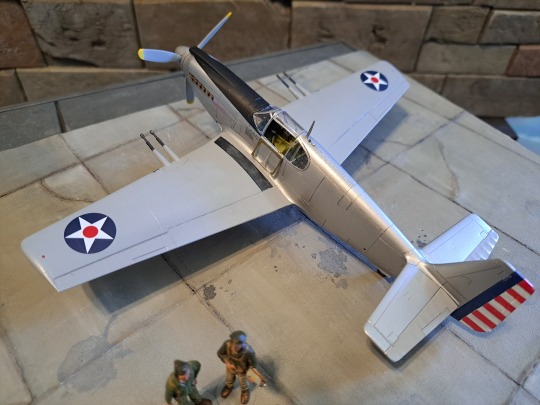
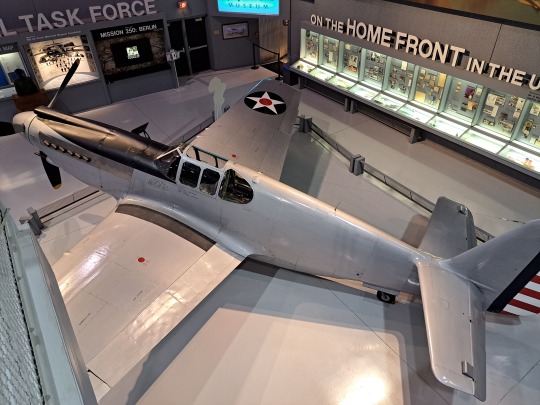
Finished this Academy P-51A in 1/48. The box kit had all markings for USAAC in North Africa World War II. Since I already have an A-36 in those same markings, I decided to try something different with this one. Since I purchased the kit at the EAA Museum, I thought I would finish the kit like the museums XP-51. The kit doesn't really match the XP-51, but it's fine, it's for my own bookshelf.
I've always been a rattlecan man, and have been trying to figure for years about how to do painted silver, since the bare metal I build is itself painted silver. In the end, I ended up just brushing the painted silver bits (wings and fabric surfaces) in a dove grey. I also brush painted the rudder stripes. Decals were just the roundels from a Monogram T-6, and the serial numbers from another P-51 kit. Not too much weathering on this since it's meant to be factory fresh, just some exhaust heat stains. Simple kit, fun quick build.
30 notes
·
View notes
Photo
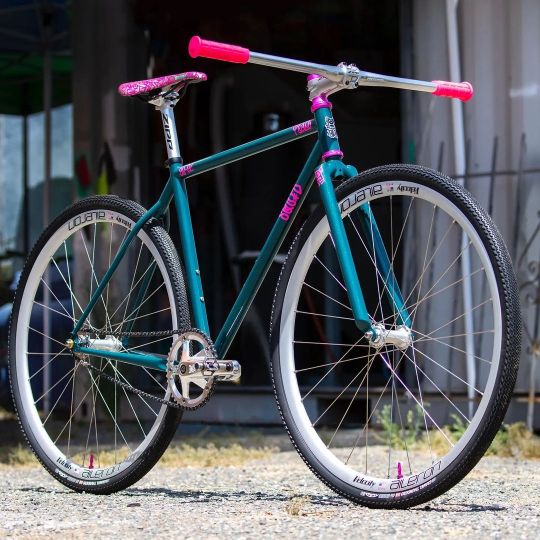
Reposted from @squidbikes This SO-EZ shows off one of the newer @spray.bike colors - Peacock! That deep Teal with Green Keirin Flake contrasts nicely with Fluro Pink logos and parts, this one really pops! Stoked to see @italo.ciccarelli ripping around on this one! . Photos: @belowtreeline #squidbikes #spraydotbike #soez #fixedgear #rattlecan #tracklocross #fixie #steelisreal #nobrakes #hizokucycles Hizokucycles.com https://www.instagram.com/p/Ch-Zkn1v0D3/?igshid=NGJjMDIxMWI=
#squidbikes#spraydotbike#soez#fixedgear#rattlecan#tracklocross#fixie#steelisreal#nobrakes#hizokucycles
5 notes
·
View notes
Text
Idle hands and all that! The urge to create rises once again.


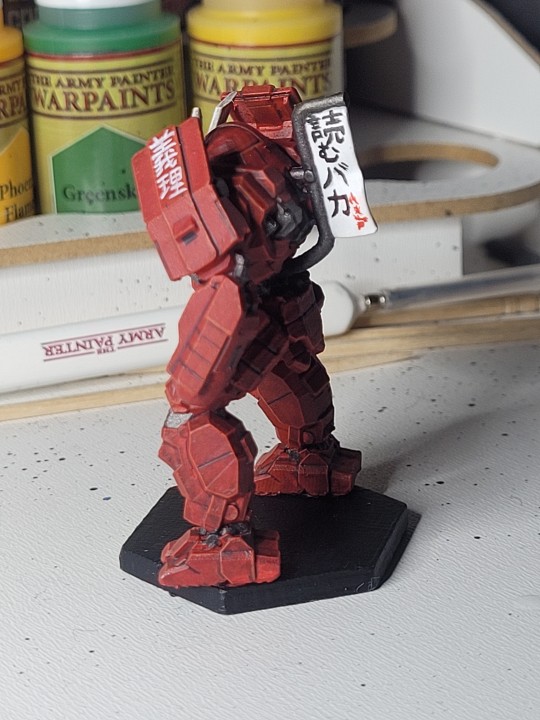
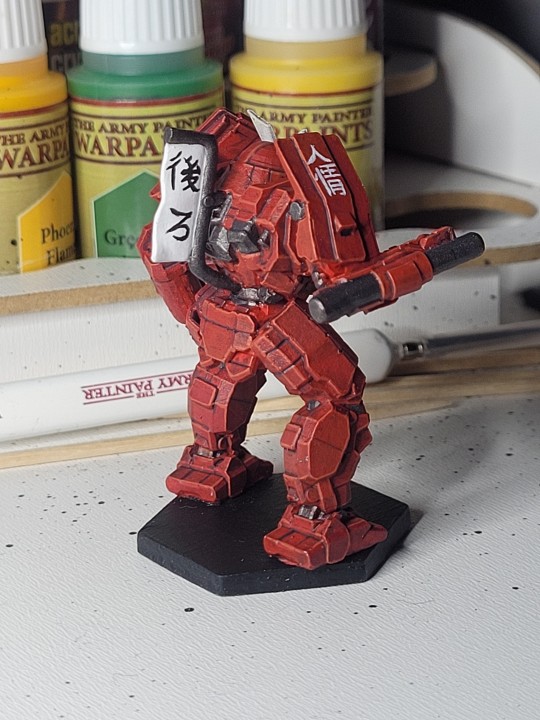
Hatamoto-Chi, one of the most iconic mechs from the Draconis Combine short of the Dragon itself, and with quite the history behind it too.
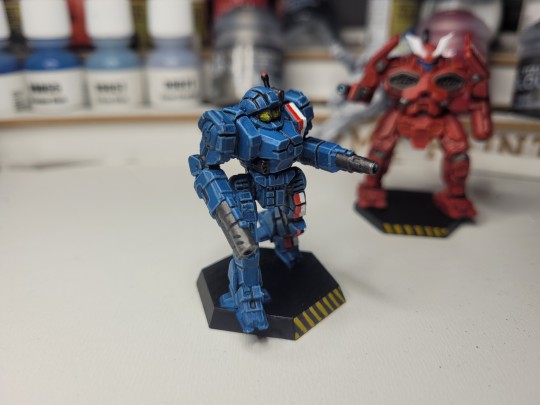
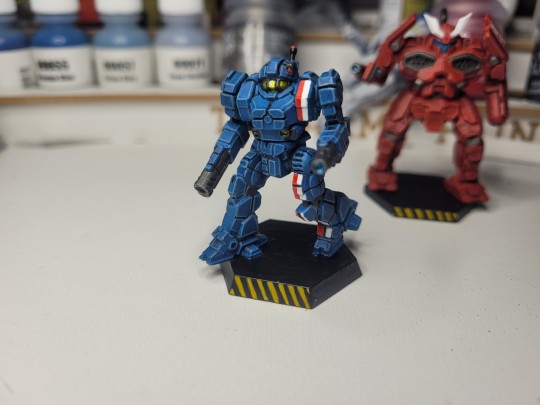
The Enforcer. A quintessentially-FedSuns mech. Gotta have at least one.
Several "new" techniques here. Instead of rattlecanning, these were both primed AND basecoated with my airbrush. THAT involved much trial and error, including the realization that just because a paint says that it's airbrush-ready, doesn't mean it's ready for your airbrush. After that, several layers of graduating colors via progressively lighter drybrushing provides a subtle gradient that helps the edge highlights pop even more. The cockpit canopies were first done with Vallejo chrome, and then a layer of crystal Acrylics were put over that to create a glass-shine effect.
Really pleased with these fellas. Marauder next?
25 notes
·
View notes
Last Seen Blogs

rubbersneakers
Rubber, sneakers & dirty socks


princessbriarrose
A letter to my 12 year old self

jamshidazizi1991
شاعر/puet

adarshkuma
Adarsh kumar