Last Seen Blogs
venusinfur23
Idk
photoguyfun
Photo Guy's Fun Blog

notyourmotherscomefollowmeblog
for we shall see him as he is

macabre-sensations
Untitled

adorkablecreepingweirdo
Well Then...
Text
Video Evaluation
This project was about exploring the aspects and technicalities of moving image or filming a video. In order to do this, I had to research all about camera movements/angles and techniques used in the filming industry to create or recreate an advert of my choice. I really enjoyed this project as it was something new and a little different from taking photographs. The part I most enjoyed was the practical filming side of it as I found it fun to mess around with the angles and learn the basics of it all. I also enjoyed using a new computer software called premier pro for the interesting editing part putting it all together.
The new techniques I learned was all the different angles and types of shots this was interesting to me, and I would like to get more practise at this as this was my first time videoing on a proper camera. The part I would most like to develop is the editing side of things on premier pro, to get to know what some of the basics do and how to do it. I would also like to get to know the video settings and buttons on my own camera as I am not experienced in this so I would like to develop more skill in this field.
For this project I researched many different adverts for different products but the three most interesting and the ones I decided t write about for my research were the specsavers sheepdog advert, the Barclay card water slide advert and the most important one being the iconic anti-piracy advert called piracy it’s a crime this it the advert I decided to recreate and do it my way I decided to do this one as I always remember this advert from when I was young and I thought it would be great idea to do. This advert has directly influenced my project In the way its shot and imitating some of the angles that were shown in the advert along with the plot being closely connected to how I done it, but not the same.
I feel my most successful parts of the project is the variety of different shots I included in a short advert. I also think I was able to plan the whole sequence very well and detailed to allow me to know exactly what I need to do for filming.
I had a few issues in this project as I was not able to get a stabilising device like a gimbal and my tripod was too stiff to get a smooth pan so I had to make do with handheld which did cause me some focusing issues I managed to fix. I also had issues with the exporting of a mp4 file as it wasn’t exporting in full quality, I was able to fix this by doing quick export and setting it to 1080 mp4 and this came out the best and a lot better quality. These factors did effect my final video as the quality of filming could’ve been better if I had access to the right equipment.
If I was to do this project again I would have liked to have access to a gimbal and a better quality camera for filming as the camera that was using wasn’t ideal for this project. I also would’ve liked to have the stealing scenes in black and white making it look more dramatic.
0 notes
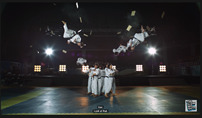
Text
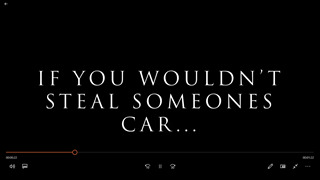
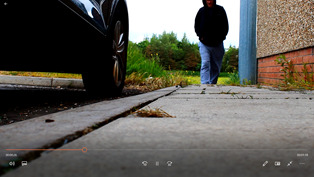
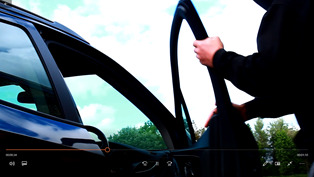
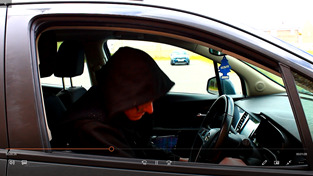
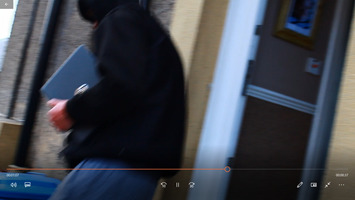
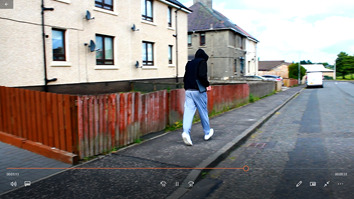
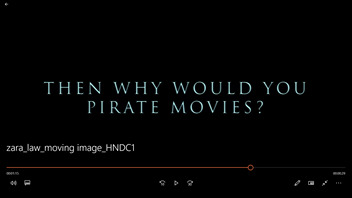
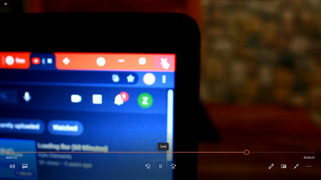
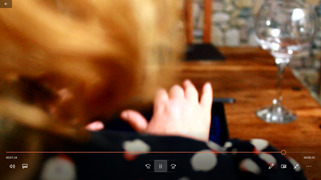
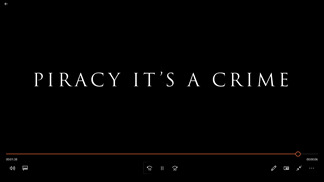
Final advert
Some screen shots from my final video as the file is too large to post
1.

2.

3.
4.
5.
6.
7.
8.

9.

10.
11.
12.
13.
14.

15.
16.
17.
1 note
·
View note
Text
Unseen Evaluations
Cross polarization: Shot glass
In this task I was to explore creative cross polarisation. I really enjoyed learning about this unique technique as it was all new to me, getting to use polarising filters and seeing the great looking results. I would like to do more of this in the future to gain a further understanding of this technique and why the results look how they look. In this task I feel my most successful part is my postproduction as I think I done very good job of cleaning up the image to make it look a lot more appealing with it being a very central composition and has its slightly enhanced colours jumping out against a dark background. I did have a few issues in this task, and one was focusing that was overcame after a short time then the plastic shot glass was quite scratched up making the final image look slightly out of focus. If I were to do this project again, I would have had a different composition with more objects being involved.
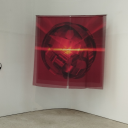
High speed flash: Speaker with paint
This task was to create a creative high speed flash image. I really enjoyed working on this task especially when doing the practical part of taking the image and learning how high-speed flash works I would love to do this more to develop my skills in this. I enjoyed messing about with the variations of settings to get different results as this technique was new to me. I feel my most successful part of the task is contrast in colours and making the image look clean bur chaotic in my postproduction part. I did come across one issue in this task and that was focusing this took me a long time to get right, but I got there in the end without it effecting my final image. But if I were to do this again, I would have liked to have used bright neon paints a I think this would have got a better result compared to colours I had available.
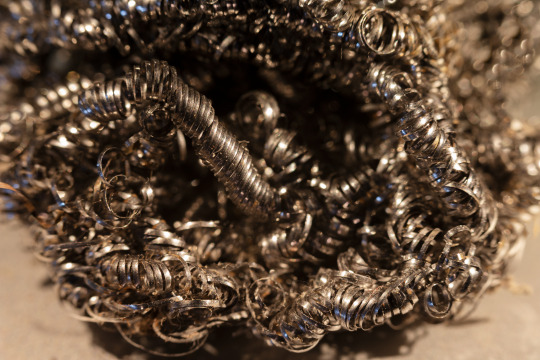
Macro: Steel wool
In this task I explored macro photography techniques, I enjoyed this task as I like images with lots of detail and this task was all about that. The part I enjoyed the most was seeing the interesting, detailed images on the back of the camera and moving the object to get different results. I also like learning and using equipment I hadn’t used before. I want to develop my skills using a macro camera and the equipment used for it as I really enjoyed it. I feel my most successful part of the task would be sharpness of the image and the post production of tidying up the loose untidy coils and removing distracting specular highlights.
The only issue I had was getting used to a different camera I hadn’t used before and knowing all the settings to change certain things. This was easily over come by just exploring it more and getting used to the buttons. If I were to do this task again I would have loved to combine multiple items to get a nice composition of detailed items.
0 notes
Text
Finals with information
Cross polarization: Shot glass
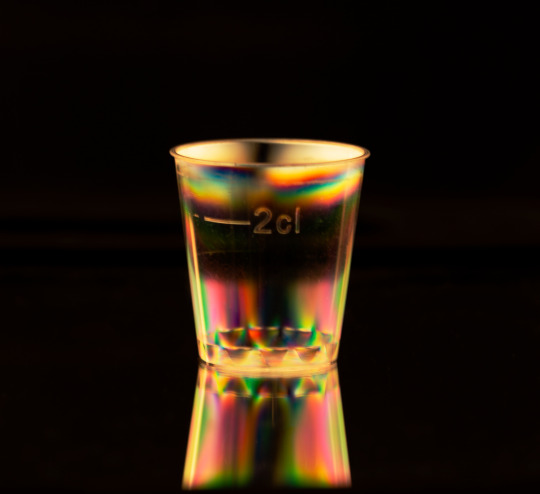
For this image I used the canon EOS 6D and a 70 -200mm lens.
ISO: for this image the ISO was set to 100 as the image to be clear with little digital noise so the colours in the plastic would show through clear with no distortion.
F-stop: The f-stop is set to f/8 in this image as I wanted the image to have a slight blur in the dark background to have the focal point on the shot glass as it sticks out from the rest of image and the only thing in focus.
Shutter speed: The shutter speed in this image was set to 1/3 of a second this was slow enough to let the right amount of light in while still giving it its darker cross polarized look.
For the light source there was a diffused soft box facing the camera with a taped sheet of tinted clear filter plastic to react with the polarizing filter on the camera creating the cross polarized look. Light was also being bounced up with a mirrorlike plastic reflecting the object on to it and bringing more light on the subject.
For the post production of this image I firstly patched out ant imperfections in the image, I then used the crop tool to centralize and straighten the image. I then used the curves adjustment tool to slightly bring out the colours more and darken the background a little.
High speed flash: Paint with speaker

To create this image I used a canon EOS 6D and a 100mm lens
The settings I used to capture this image are:
ISO: The ISO was set at 400 to get it looking a little brighter as I was in a very dark room
F- stop: The F stop was set at F/11 to have most of the paint in focus but have the background still slightly blurry to keep your attention into the paint splatter that is the focal point.
Shutter speed: The shutter speed was set at 1/125 of a second this had to be fast to try and capture
The light source was three flash units placed around the speaker to get an even lighting and some nice shadows and highlights on the paint splatter.
I also used a heavy duty tripod to steady the camera so there Is no vibration or movement to capture the fast motion of the paint.
To get the deep bass in the speaker I used a frequency app and made it have a low bass with no higher pitched frequencies.
For the post production part I used the patch tool to get rid of any untidy paint splatters and any distracting paint splatters at the front of the frame. I then did a curves adjustment to make the colours pop a bit more and slightly darken the speaker.
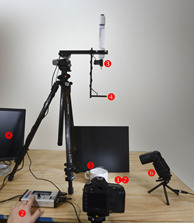
Macro: Steel wool
Details of how you captured your image.
For this image I used a canon EOS 6D Mark II and a 100mm lens
ISO: The ISO was set at 100 to be able to have the image as clear as possible with minimal digital noise as this is important in macro photography detail is key and I wanted the details to be appreciated in the image.
F-stop: My f- stop was set at 7.1 as I wanted the foreground details to be prominent and keep the image simple and not too busy looking as this will confuse the viewer, I wanted there to be clear focal point in the chaotic looking metal spirals. So, I felt this was the right setting for this effect.
Shutter speed: my shutter speed for this image was set at 6 seconds this was so there was no movement in the image and that the environment was very dark and I wanted to get the right looking lighting to have that slight sparkle on the metal.
Light source: the light source for this was two small lights that came out of an adjustable table. These lights were on bendable wire attachments that were able to move into direction allowing me to position the lights how I needed them.
The additional equipment used was a heavy tripod to hold the heave camera in place and not allow any movement that would ruin the images.
Post production for this image was quite a simple process I started by patching out any imperfections in the image that I felt negatively affected the over all look of the image. I then put an adjustment curve on the image to up the contrast giving it a more appealing look.
0 notes
Text
contact sheets for selection of 3 topics
Shoot for cross polarization
Shoot for high speed flash
Shoot for macro
0 notes
Text
Unseen Research
cross polarisation
https://www.dentistryiq.com/dentistry/article/16365677/crosspolarized-reflective-light-dental-photography-the-silver-bullet-of-tooth-shade-selection
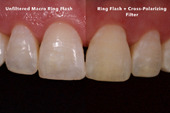
cross polarisation is commonly used in dentistry, dentists use cross polarisation photography to take images of your teeth to examine for veneers, braces(or sending images to orthodontists), whitening and to plan for general procedures like tracking tooth heath. The reason they use cross polarisation is that this method gives a true shade and shape of the tooth without having the specular highlights obstructing a true vision on the tooth. This happens because when you use the cross-polarisation technique that the dentists use by angling the filters in the same way, the light is unable to produce bright highlights as that type of light is being neutralised leaving a flat looking image.
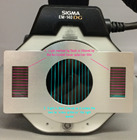
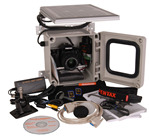
For this technique it requires special equipment including a specific type of cross polarising camera. a camera like a sigma EM 140 that is specifically designed for this purpose. It has two built in flash units on the front that have polarising filters on them that combine with the cross polarised film over the lens.
https://www.dentistryiq.com/dentistry/article/16365677/crosspolarized-reflective-light-dental-photography-the-silver-bullet-of-tooth-shade-selection
https://www.artstation.com/artwork/zWma2
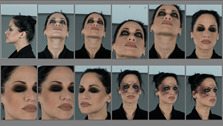
Cross polarisation is also used in the game development industry for making character models. The reason they use cross polarised images is that it gives you a HD image of the true shades of colour being displayed in the persons skin tone. As there is no specular highlights and harsh shadows that would be in normal photography. This type of photography saves these game developers a lot of time because if they used normal photography, they would manually have to edit out all the highlights and shadows to get the true skin tone and flat image they need. Whereas this cross polarised image can practically be used straight away, image is known as a texture base.
This type of photography field requires a few pieces of special equipment, these include a cross polarisation studio set up or a cross polarisation camera along with the various apps you would need like photoshop camera raw and mari a software to animate and bring a character model to life. This is used in the gaming development companies to bring their visions to reality.

https://texturing.xyz/pages/cross-polarized-photos
Time lapse
https://www.harbortronics.com/Products/TimeLapsePackage/
Construction sites
Time lapse video is used in construction to track the progress and document it for communication for construction companies. This allows them to see the evolution of the projects over time in short video.
The special equipment used to capture this is solar panel for constant power for the long term intermittent capture needed. And a protective box with a timer for capturing the images. This time lapse approach the camera needs to be posted up on a steady sturdy environment directed at the place that you need to capture as it cannot move for a very long time.
https://enlaps.io/en/blog/post/5-uses-of-timelapse-for-construction-sites#:~:text=The%20timelapse%20is%20a%20monitoring,each%20stage%20of%20the%20construction.
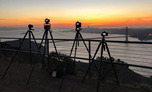
Capturing sunsets
Time lapses are of sunsets is a fairly simple time lapse process not requiring a lot of equipment. The equipment needed is a tripod and a remote timer. Shooting the sunset requires you to have the right settings for the environment you are in it is recommended that you have a 5-10 second interval between each image and that you shoot in RAW for easier editing. You also need to make sure that the camera doesn’t move this is why you should bring a tripod.
https://expertphotography.com/sunset-timelapse/
https://www.naturettl.com/time-lapse-photography-guide/
Long exposure
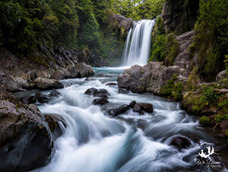
Creating a smooth water texture
Using a long exposure while shooting a landscape gives the water a smooth look and removes the rough looking splashes and ripples in the water. The way to shoot this type of photography is that you must have a tripod to keep the camera steady or it will blur the whole image. Be patient and wait for the right lighting outdoors for the perfect shot. You have to use 1/10 for a shutter speed or slower that depends on how you want the image to look.
https://www.wedreamoftravel.com/long-exposure-waterfall-photography/
https://www.slrlounge.com/6-creative-ways-to-use-long-exposures-in-your-photography/
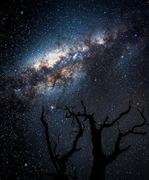
shooting the stars
this is a difficult subject to shooting and perfect the technique of capturing it clearly. To achieve this you need to go to place with little light pollution and a clear view of the sky. Your most commonly going use max ISO and a shutter speed of 12-15 seconds or more this is a challenging technique to master so you should also take a tripod to steady your camera and reduce the camera movement, it is recommended to use a remote trigger to reduce the small movement when pressing the shutter.
https://www.davemorrowphotography.com/p/tutorial-shooting-night-sky.html
https://www.slrlounge.com/6-creative-ways-to-use-long-exposures-in-your-photography/
High speed flash
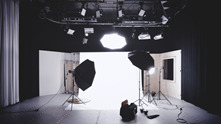
Portrait studio photography
This type of photography is in a indoor studio environment where you need to control the lighting on the person and background. The equipment you would use for this is a flash unit or several depending on what look you are going for. You will then need a clean background and a light meter to measure the light in the image and judge the settings appropriately and freeze any movement in the image creating a clear image.
https://expertphotography.com/high-speed-sync-flash/

https://fstoppers.com/originals/using-high-speed-sync-studio-portraiture-132705
https://fstoppers.com/originals/using-high-speed-sync-studio-portraiture-132705
capturing droplets of water splashes
when capturing this subject there is important steps to take to make sure that you capture a great image. These steps are you should have a background that is proper up to give you a curve at the bottom so there is no hard edges in the image to give you the consistent good looking background. You then need a bowl of water and a bottle of water with a small hole in it to let small droplets out. Important to note the further the bottle is from the bowl the bigger the splash will be. You then need a flash unit of some sort that will allow you to change the brightness and set the settlings to around f1/16 as you will be in the dark apart from the flash and this will allow the droplet to be in focus and have plenty of light on the water. You will also need a tripod for the camera this will reduce the camera movement and allow it to have a fixed position and angle. You then enhance the colour in post-production and for creative purposes you can colour to the water to make it stand out from the background. Its to be noted that you will need to time this correctly to properly freeze the splash motion.

http://www.tomburd.co.uk/blogs/2016/2/18/water-droplet-tutorial
https://cognisys-inc.com/learn-how-to/water_drops_1valve
https://www.digitalcameraworld.com/uk/tutorials/water-drop-photography-freeze-water-splashes-with-off-camera-flash
Macro
Advertising and branding
Macro can be used in advertising to show off products in great detail. These images would be used on webpages and printed out for display in a shop. The items needed are a macro lens for your camera, a tripod to steady the camera and a professional looking background that shows the product off the best. In this technique thinking through the composition is essential as it will effect the way the product will look rule of thirds should be used to guide you in this. Keep it tidy looking to avoid the image being distracting simplistic and minimalist is best. Try to use manual focus for this technique as it will help keep the attention to the subject better.
Some example advertising subjects are.
· Watches
· Jewellery
· Juice
· Flowers

https://www.jotform.com/photography/10-beginner-tips-for-unique-product-photography/
nature macro photography
used to make nature look larger than life to allow the human eye to see details that we would normally never be able to see. And allow us to see the beauty of nature. What you will need for shooting is a macro lens to allow you to zoom in on the details the ideal range is 90mm-105mm lens. Also need a tripod as stabilization is key to get the clear image desired and the best result when capturing nature.
Nature subjects to capture
· Wildlife /lizard texture/insects/birds/mammals
· Flora/ leaves/flowers/petals/grass/fungus
· Water beads/ripples/dew

https://webneel.com/macro-photography-indonesia-abdul-gapur

https://www.naturettl.com/how-to-photograph-fungi/
https://dailywildlifephoto.nathab.com/photography-guide/styles-of-photography/macro-photography/
Slow motion
action and stunts
used to make stunts scenes look more dangerous and dramatic than they actually are. It captures the motion in more detail than it would in real time. Its often used in bigger budget movies than low budget ones due to the expensive equipment and is a challenging technique to capture. You would need a camera that can shoot at 120fps or more, a tripod as steadyness is key the slightest piece of movement can make the video blurry and a flash/ can be used to have better light on the subject.
The slow mo guys on youtube are great for examples of slow mo
https://www.adorama.com/alc/how-to-shoot-slow-motion-videos/
https://www.wired.com/story/how-to-shoot-slo-mo-video/#:~:text=When%20you're%20shooting%20slo,you%20tap%20the%20shutter%20button.
https://juanhoyosblog.wordpress.com/
https://www.youtube.com/watch?v=jlzVmOUP1is
example of this editing technique
Slowing down time to highlight emotion
A way to engage the audience and highlight key elements of the video (brings attention to things that we wouldn’t normally pay attention to). The equipment used in this is mainly editing techniques/ angles and a camera that is capable of doing slow mo and a tripod to stabilize the shot. This is seen a lot in high budget movies.
https://www.youtube.com/watch?v=echK0RhFKcQ&t=18s
https://www.premiumbeat.com/blog/how-to-shoot-slow-motion/
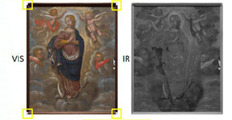
Art examination
This technique is used to detect artist sketches pre painting and where they may have covered previous areas of a painting. Example the infrared would show up the difference between the sketch and the actual visual painting, this is because the lead shows up different from the paint. This allows us to see the history and the initial thought process of the artist. An example of this is the painting by Pablo Picasso woman ironing.
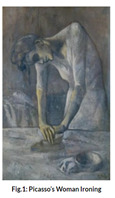
The equipment needed for this is lighting that is less than 45 degrees to stop reflection a tripod for stability an infrared filter and a camera.
https://www.researchgate.net/publication/295086868_Infrared_Technical_Photography_for_Art_Examination
https://irinfo.org/articles-2019/infrared-reflectography-5-1-19-tucker/
https://www.researchgate.net/publication/295086868_Infrared_Technical_Photography_for_Art_Examination
Forensics
In the crime investigation units they use infrared photography to detect traces of bodily fluids that the human cannot see. This means that they can collect DNA samples from those areas. This photography can help piece together what happened at the scene and when It may have happened to help resolve the case and used as evidence of the crime.
the specialist equipment needed in this field is a infrared sensor chip, infrared transmitting filter, infrared energy source this can be performed under normal light conditions no special lighting conditions needed.

https://www.crime-scene-investigator.net/Infrared_Photography_research_paper.pdf
https://www.sirchie.com/catalog/product/view/id/3969/?___store=international_english#.YJxa57VKg2w
0 notes
Text
Screenshot of premier pro set up and editing description
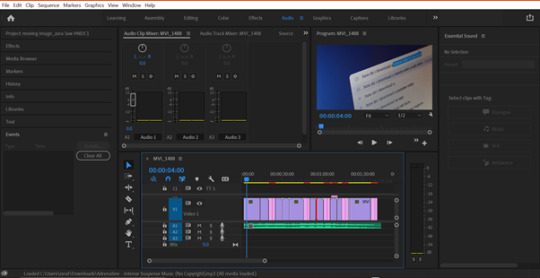
I dragged all clips in sequence I then cut some of them down to how I wanted them to look. I then looked for animation templates for the text frames. Once I’d found one I liked I customised each text frame to the wording I needed. I then converted no copyright music into a mp3 from youtube then dragged it into another channel and cut it to fit the video length. I then played it to see the final result. I changed the file to export as a high quality mp4.
0 notes
Text
Contact sheets of shooting

my clips to turn into whole video
0 notes

Text
Advert Research
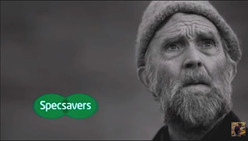
Specsavers advert sheepdog
Specsavers sheepdog advert - YouTube
Where is this advert displayed?
This advert was made for being broadcasted on television for advert breaks between TV programs this was broadcasted all over the UK to raise awareness of a eye condition called glaucoma.
What moving image techniques are displayed?
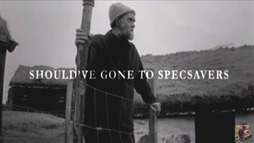
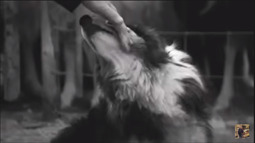
This advert features many different techniques these include panning when following the sheepdog herding the flocks of sheep. A long shot while panning is used in this to show the surroundings of the sheep being herded and beautiful landscapes that surround them. It also features a quick cut to a medium shot of the Shepard directing his border collie the quickly back to the collie herding this shows a quick chaotic scene. It then features a tilt shot showing him shearing a sheep then up to his face with all the sheep in the background. The next different moving image technique stared of with a high angle shot of him pushing the last sheep he has just sheared on to its feet and it trots away, it then cuts to him reaching out and grabbing his dog in a close up of the dogs face, it then switches to a close up of the sheep face as it watches in shock of what’s happening to the dog. It then switches to a stationary shot of the sheep running past into their pen and at the end the dog runs into the middle of the shot and stop with his short sheared hair he then runs off screen with his tail between his legs. The advert ends buying having close up shot of the shepherd looking into the distance with the Specsavers branding beside his face saying should have gone to Specsavers and the only bit of colour in the whole video being the Specsavers logo popping up.
What makes the advert successful?
What makes this advert so successful is that it is simplistic and humorous as it is quite short and is a very memorable advert for the scene with the shepherd sheering his own dog instead of the sheep due to his eyesight being poor. The music also adds to the over all drama of this advert with it being old irish song sung in Gaelic this paired with it being in black and white. This mixture of simplicity and humour makes this advert successful in being memorable.
How does this advert convey the brand?
This advert conveys the brand by having the man mistake the dog as a sheep because he cant see very well this paired with the catchy slogan of should have gone to specsavers gets the message across that if you were to get a eye test from them then buy glasses from them this sort of thing wouldn’t happen to you in a more humorous way. This add is also for the disease called glaucoma that gives you tunnel vision and things start to get darker this is conveyed through the black and white darkness of the advert. Conveying the loss of sight.
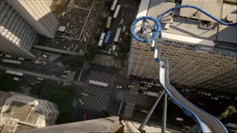
Barclay card contactless payment water slide
Barclay card advert- waterslide 2008 [HQ] - YouTube
Where is this advert displayed?
This advert was broadcasted on TV for in between program advertisement to get the most eye on there brand that they could, that was also turned into a mobile game for further promotion of the brand this was broadcasted throughout the UK.
What moving image techniques are displayed?
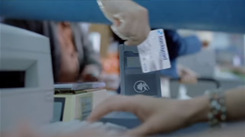
At the beginning scenes the main character is seen in an office finishing his shift he walks towards the camera and this shot is a dolly shot as the camera is pulled back as he walks towards the water slide entrance walking showing a medium shot of the main character. As slides down the water slide you get a birds eye view of the twisting slide coming out of a tall building, the beginning of the slide open top so you can she him slide till he disappears into enclosed part, this is when it then shows a POV shot of him in the slide with the water splashing around him. When it gets to the food shop part the camera follows his movement by panning with he grabs fruit. It them has a close up of his hand brushing past the contact less scanner with is Barclay card. Then in the ending scenes there is another close up of the scanning machine being activated through the plastic of the slide.
What makes the advert successful?
This advert was successful due the humorous content that engaged the audience and with the multiple POV shots. The bright and vibrant colour of the scenes where the water slide starts to the end is eye-catching and sets the tone of the advert being happy and relaxed this paired with the upbeat music makes the advert memorable meaning you will remember the brand and are more likely to look into an eye catching and inviting looking brand.
How does this advert convey the brand?
This advert is very effective at conveying the brand by using the slide as a metaphor for relaxed easy method of paying for things, conveys that their product is as easy as sliding down a water slide not needing to do anything and it’s a fast method that you can do then get on with your day. The slide is also a light blue that is the same colour as the company logo that comes up at the end of the advert.
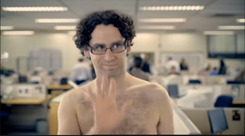


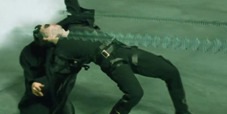
Piracy is a crime
Piracy it's a crime - YouTube
Where is this advert displayed?
This advert was at the start of all movies for a very long time and shown in cinemas at the start of movies to discourage movie piracy. This was originally from the USA created in the early 2000s then was shown in a lot of places all over the world including the UK.
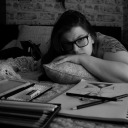
What moving image techniques are displayed?
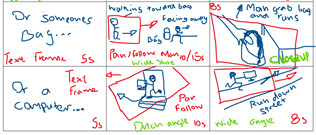
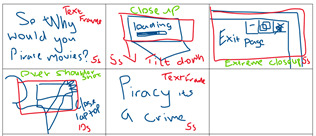
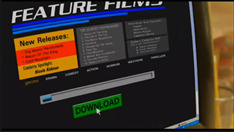
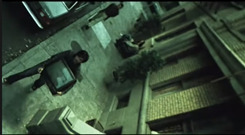
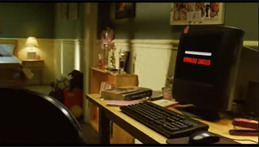
In this advert in the starting scenes there is a medium slightly panning shot of a girl at her desk typing on her computer it then is close up on her screen downloading an illegal movie it then zooms out to an over the shoulder shot of the screen. it then cuts to words flashing on the screen then a fast panning shot from two angles of a man robbing a car it then changes angle to a birds eye view of him doing this. Words flash on the screen then a close up of hand bag hanging next to a woman at table there is then a pull focus onto the mand walking past snatching the bag. Words then appear on the screen, two men are then seen passing a tv out a house window this shot is a Dutch angle making the shot look sinister and dark it then pulls back to a higher angle still with the Dutch angle to show one of the men walk away with the TV. It then cuts to words again, then a man walking into a DVD store it then cuts to a close up of him grabbing the DVD then putting it in his jacket. More words appear on screen then it cuts back to the close up of movie downloading then the close up slight panning of the download being cancelled and a pull focus of the girl getting up and walking away from the screen.
What makes the advert successful?
What makes this advert successful is that it is action packed and high energy the music contributes to the tense feeling of this advert with it being fast paced. This type of advert is engaging to viewers and is memorable this is good to get your point across and advertise something. This is also successful as it has a very clear message of advertising anti piracy policing and that it is a crime that will be punished like any other.
How does this advert convey the brand?
This advert conveys the message in a very good way by making the advert seem chaotic and fast like crime is, this alone conveys the danger of the fast seemingly simple crime that replicates a movie download time. It is also very good at making the wording clear as it has white writing on a very dark background this makes it very easy to read and get message across in short simple statements.


0 notes
Text
Camera Movements, Techniques and equipment
Camera movements
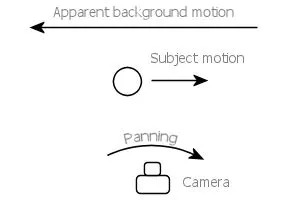
Panning:
This is where you follow a certain subject horizontally left to right or vice versa with the camera but you stay in the one place with the camera. This type of shot is good for showing a location.
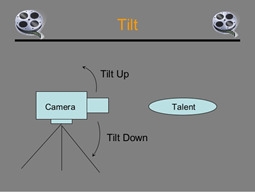
Tilt:
Tilting is very similar to panning but it is a vertical movement tilting up and down while the camera is stationary. This shot is normally used to establish a significant character or show a part of the plot.
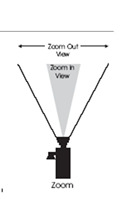
Zoom:
This technique is one of the most used in filming it is the shot of zooming in or out on something. This is usually something of importance or zooming out to reveal something about the surroundings.
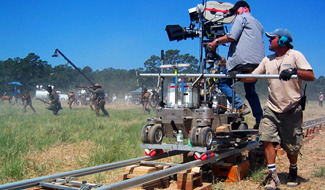
Tracking:
This technique is where the camera rigg is on a track or a small vehicle and this allows for the camera to capture faster paced scenes and still have the subject in focus.
Dolly:
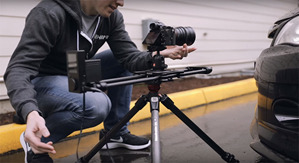
The dolly shot is a camera mounted onto a rail and goes forward or backwards on either a motorized vehicle and it can also be pushed and pulled. With this technique it is very important to have the camera completely still to create the smooth movements that are important for this technique.
Pull focus:
Pull focus is the technique of changing the focus in the shot to focus from one subject to another subject this is done from a camera mounted on a tripod with a slider rails to pull the camera back or forward and to keep the camera steady. This creative technique is used to pull your focus from one subject to then get you focus on the next important thing in the scene.
References for my information and image sources
https://blog.storyblocks.com/video-tutorials/7-basic-camera-movements/
https://photodoto.com/capturing-motion-with-panning/
https://www.slideshare.net/MarisaBarr/camera-shots-angles-26060069
https://slideplayer.com/slide/4313341/
https://gauss.film/blog-gauss/camera-movement/
https://reellifeinsider.weebly.com/film-making-artistry/archives/08-2017
https://www.4kshooters.net/2017/05/12/how-to-nail-focus-while-using-a-motorized-slider/
composition shots
Long shot:
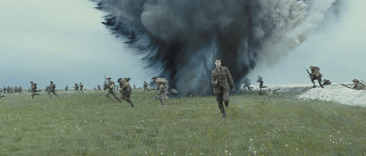
Also known as a wide shot/angle this type of shot is where you would be able to see the whole subject but not filling the whole frame this shot would show the subject and the surroundings. This shot is an important shot as it establishes the characters and the environment.
Wide shot from the film ‘1917’ thought this was good example of a wide angled establishing shot.
Medium shot:
a medium shot sometimes known as the ¾ shot, is a shot that focuses on the subject from the knees up to give more detail about the character and can be quite a dramatic looking shot.
Medium shot from ‘The Dark Knight’

Close up:
A close-up shot is where the subjects face fills the frame this shot is mainly used to show the characters reaction or show their emotions. This is technique that create drama or intensity and interest in a shot.
A close up shot from ‘The Revenant’

Point of view:
A POV shot is a shot that is meant to show what a character sees from the perspective of the character. This shot is to allow the viewer to feel what the character feels in that moment immersing the viewer into the film. Some common shots with this technique is binocular shots, waking up or in and out of consciousness.
Sniper scene from ‘Saving private Ryan’

Birds eye view:
The birds eye view is a shot that taken directly overhead with some distance to show the surroundings and the direction the character is going in and this can show the viewers the points of interest in the scene and things outside the characters view.
Birds eye shot from ‘Game Of Thrones’

Stability equipment and its uses
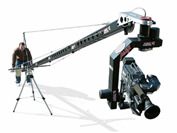
Gimbal:
A gimbal is a piece if equipment that uses 3 axis stabilization to allow you to get a smooth flowing shot with no shake that you would normally get when using the camera handheld. This piece of equipment would allow you to get the same shots a dolly or tracking device would but way less weight and easier to carry around, the only negatives to this device is how long it takes to set up and the space it would take up in luggage if you were traveling with it.


https://www.studiobinder.com/blog/what-is-a-gimbal-stabilizer/
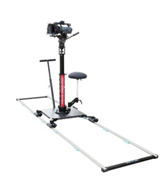
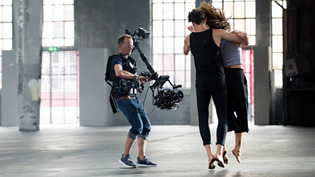
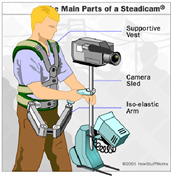
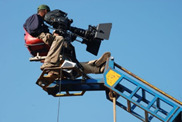
Steadicam:
Steadicam is a large stabilisation device that is mounted onto your body with a padded body vest to cushion the weight that will be put on to your back from the equipment that will be attached to the vest like a camera stabilisation arm or even a crane to allow you a huge variation of shots, this is one of the main benefits of using this device it also allows you to be apart of the shot as you are attached to the camera making your body part of the rig this means you most likely will get the best angles for the shot. For this technique you need specialist training to become a Steadicam operator and it takes years to master the art of Steadicam but is one of the most used methods in music or film for how great the shots look. Some of the negatives of this piece of equipment are that it is extremely expensive to buy its cost come in at £3000 to £15000. With the equipment being heavy operators often have bad back problems this was one of the main negatives of this equipment.
https://www.youtube.com/watch?v=rul1k2Iu4EU
https://www.researchgate.net/figure/Steadicam-parts-and-mechanical-operation-The-Tiffen-Company-LLC_fig1_265231372
Crane:
A crane shot is a camera mounted on to a an either operator controlled or remote-controlled arm that can move in all directions. This device also allows for fluid movement and used to add drama/emotion to scene and is also often used to end a film. This device requires specialist training to learn how to operate and learn the different shots capable. Some of the negatives is that it is very expensive to have and that it can require a fair amount of space to operate as cranes come in all different shapes and sizes.

0 notes
Text
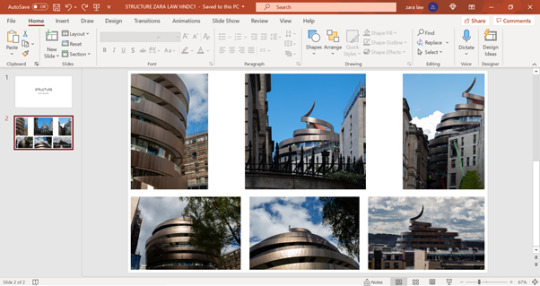
Presentation Layout
presentation on power point to layout all the images as a set
1 note
·
View note
Text
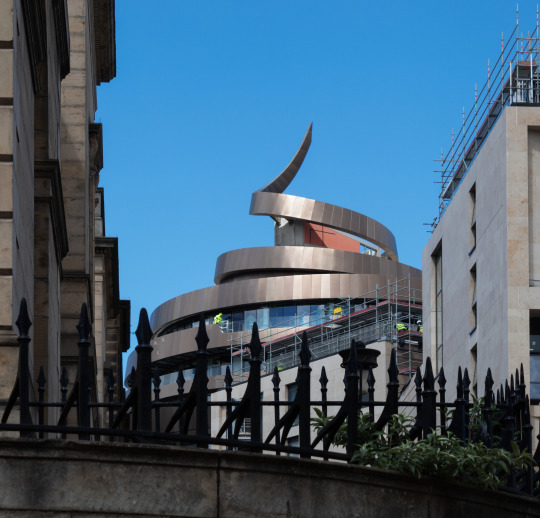
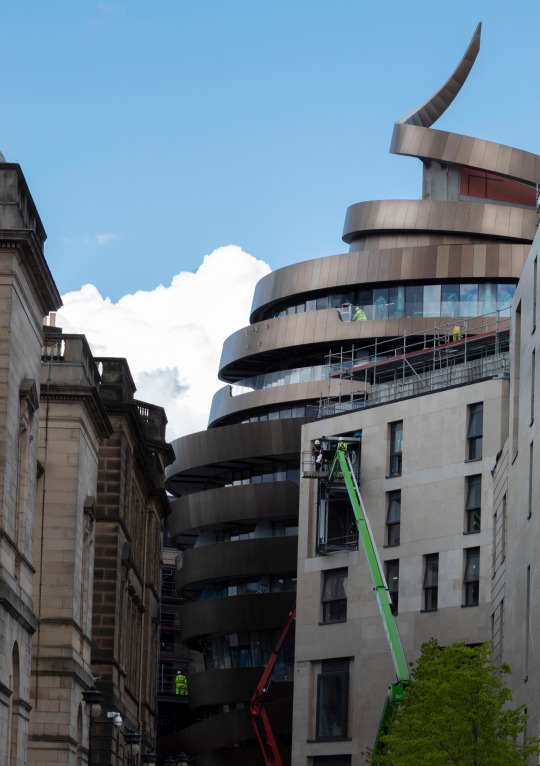
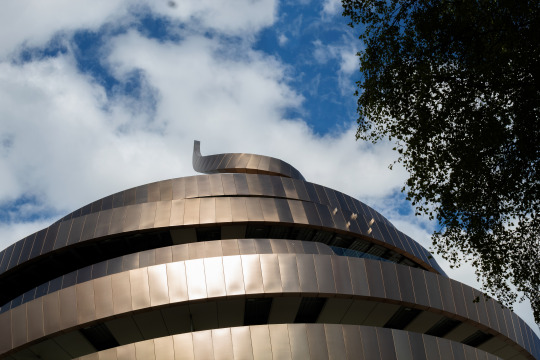
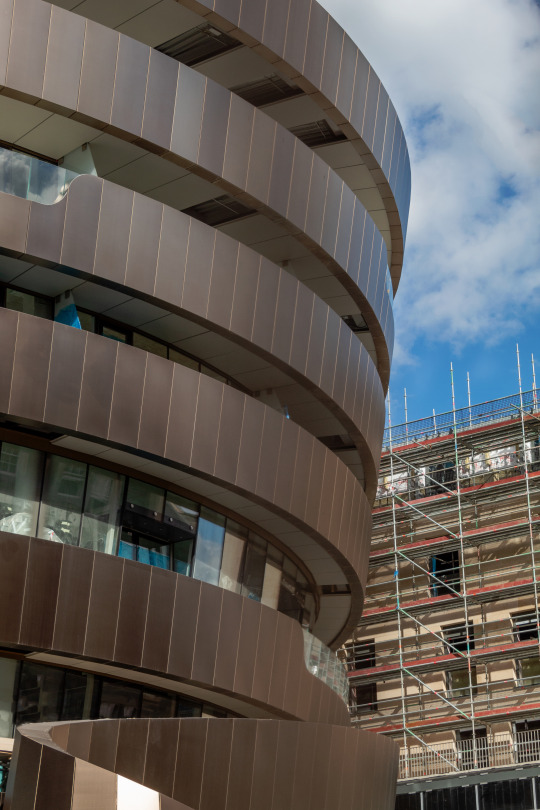
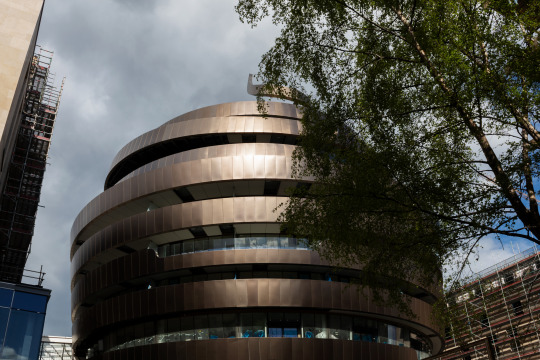
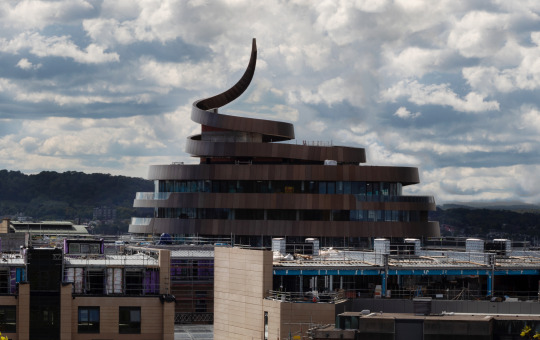
Structure Evaluation
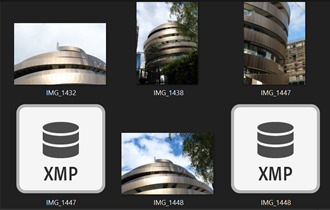
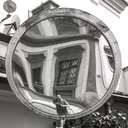
This project was an architecture themed brief, this brief we had to find an interesting building to photography and research and be able to take multiple photos of the building from different angles to capture the building looking its absolute best it could look. I enjoyed this project as I haven’t done this style of photography before, and I really enjoyed the process.
The best part of this project was the going out and taking the images and going and finding the right angles for the images. I also enjoyed the optimising part where I learned a new filter feature to correct faults in the lens like distortion and fixing the angle of the image. I would like to develop my skill in the lens correction filter as there is a lot of settings in this filter that I’ve never used and would like to explore it further.
I researched a lot of different photographers but a few that influenced me the most is mihai florea with her minimalistic style I liked this style and wanted to take note of this and have her influence in my work by finding a modern building and making it look interesting with not a lot of editing involved to keep it minimalistic. I was also influenced by Anna Gospodarou she also had a simplistic look to the images I also liked her contrast in the images that make them look dramatic. This influenced the contrast in my images I wanted to have the deeper contrast that she has in her images.
I feel my optimising was the strongest part of my project as I was able to clean up the image with the patch tool and add more contrast and deeper colour with the curves tool. I feel I done this effectively and I really enjoyed this part of the project.
I had a few problems when I was downloading the images from the SD card but was able to solve this by restarting my computer a few times, one of the main ones I had was that this building that I photographed is still being built so it is surrounded in a construction site, which meant that I was unable to get as close as I would have wanted. I resolved this issue with just working with the angles I could get and making the building look good from those angles that was available. The only way these issues effected my final images was that I didn’t get the angles I hope for but what I did get was good, but I did wish I could have got some others.
If I were to do this project again, I would have liked to do it all in black and white as I like the look of it on architecture photography. I also would have liked to get into the construction site and get the angles I envisioned but that wasn’t able to happen. I would have also liked to be able to get some night shots of the building as this would have been quite interesting to see how it would turn out.
From what I could see when I used the larger lens the shot was slightly out of focus, and this could have only been seen on a computer that wasn’t available on location I only seen it when I zoomed in on photoshop.
0 notes
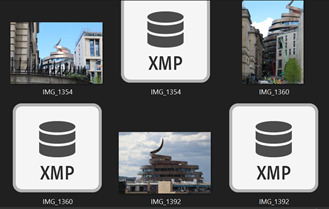
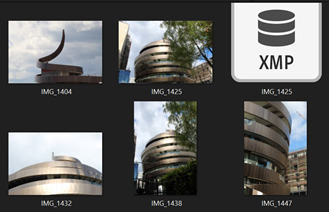
Text
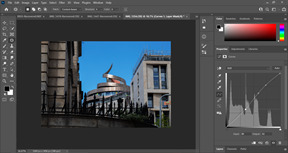
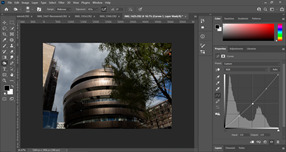
Editing Processes
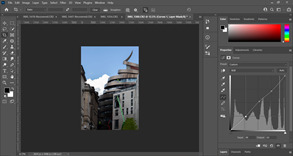
Photo 1
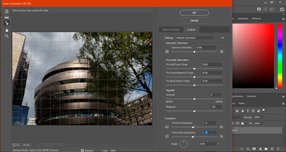
Using the lens correction filter
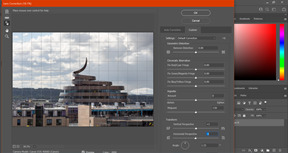
Using the patch tool for sky give texture
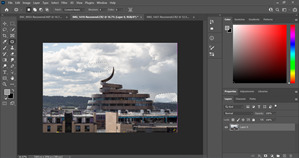
Using Curves adjustment
Export as full resolution JPEG
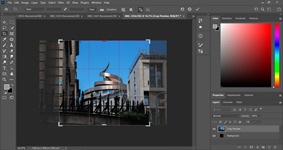
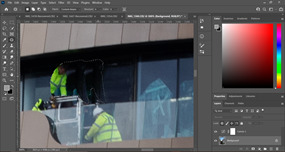
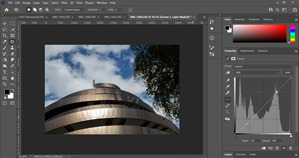
Photo 2
Using Curves adjustment
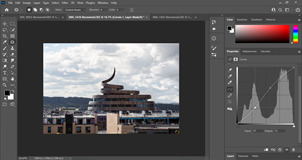
Using patch tool for crane removal
Using patch tool for scaffolding removal
Export as full resolution JPEG
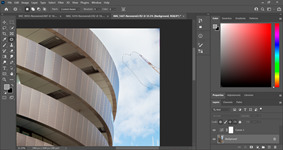
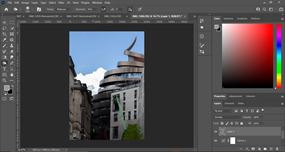
Photo 3
Using the curves adjustment
Using Crop tool
Using lens correction filter
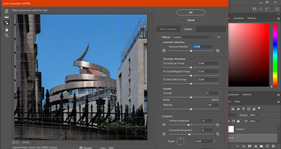
Export as a full resolution JPEG
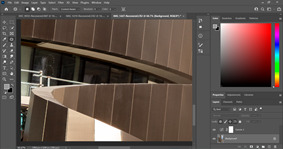
Photo 4
Using crop tool
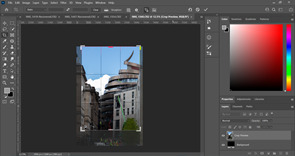
Using Curves adjustment
Using patch tool
Using burn tool
Export as full resolution JPEG
Photo 5
Using Lens correction filter
Using Curve adjustment
Export as full resolution JPEG
Photo 6
Using Patch tool

Using curve tool
Export as full resolution JPEG
0 notes