icewing1
얼음날개(icewing)
좀더 즐거워지자.
좀더 행복해지자.
그렇게...
485 posts
Don't wanna be here? Send us removal request.
Last Seen Blogs

aleagueoftheirown
moved to anna-kendricks

socially-anxious-frog
latest obsession: Hazbin Hotel
ask-prince-ezran-blog
prince ezran

okashi-nara
Okashi Nara (Lyrics Blog)
okashi-nara
Okashi Nara (Lyrics Blog)
Text
키보드가 비정상적인 동작할 때
E-YOOSO USB 기계식 게이밍 유선 키보드를 샀습니다.
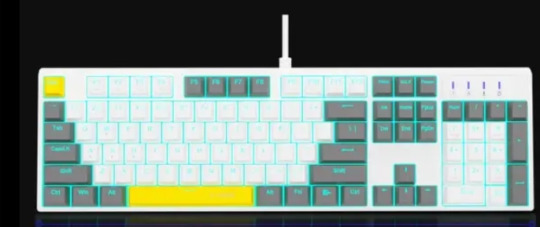
파란색 LED키보드를 찾다가 선택한 키보드 입니다.
영문만 되어 있어서 스티커를 사서 붙였습니다.
그런데 말입니다. 이 키보드로 한글 문서 작업을 하면 작성중에
가 ㅅ
이라든지
오래도록 a
오래도록 え
이런 식으로 자동 띄어 쓰기라던가 외국 글자가 쳐진다던가 하는 문제가 가끔 생기는 겁니다.
이유를 알 수없어 고수분들께 물어보고 했지만 답을 얻을 수 없었습니다.
그러다가 컴 설정을 만지다 고치게 되었는데
다음과 같은 과정을 거쳤습니다.
일단 설정으로 들어갑니다.
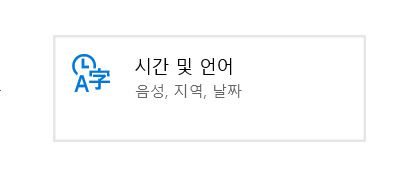
거기서 시간 및 언어를 선택하고


기본 설정 언어에서
한국어의 옵션을 눌러줍니다.
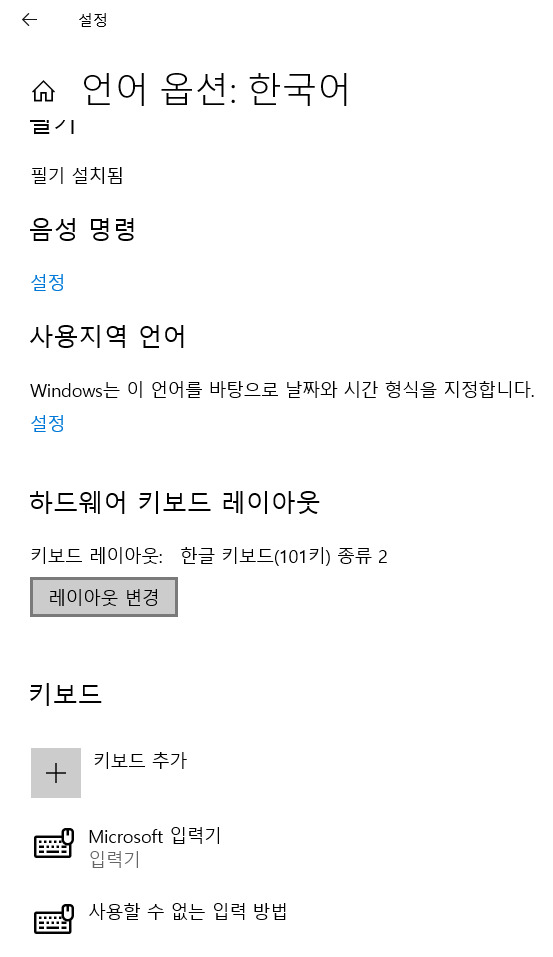
하드웨어 키보드 레이아웃에서 레이아웃 변경을 눌러
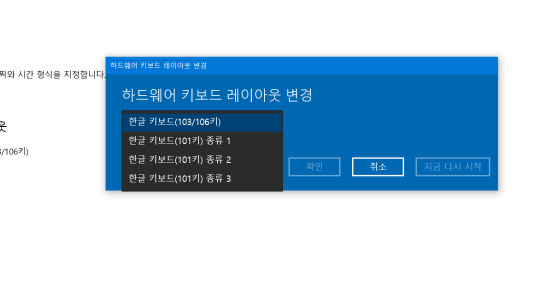
키보드 종류를 바꿔주니 제대로 작동했습니다.
아마도 제 키보드가 104키 인데 101키로 설정되어있어서 인지도 모르겠습니다.
저 레이아웃변경은 한영키 등을 변경하는 겁니다.
103/106키는 변환 키가 왼쪽 Alt + Shift 키 입니다.
그런데 바뀌는 것 보니 영어 입력기를 추가로 설치하면
영어입력기->영어-> 영어입력기-> 한글 이렇게 바뀌네요 결국 변환키를 네번 눌러야 됩니다.
이건 입력기 하나만 있으면 한번만 눌러도 되는 것 같네요.
0 notes
Text
커맨드 앤 컨커 레드얼럿2 마우스 커서 안나올 때
레드얼럿2를 설치하고 실행하면 마우스 커서가 보이지 않는 경우 해결법입니다.
ea에서 이건 패치를 해서 쓸 수 있게 해줘야되는데 돈받고 팔면서 신경도 안쓰는 군요.
이 경우엔
레드얼럿2만 설치하였다면
여기서 레드얼럿2 런처를 다운받아 설치하면 됩니다.
유리의 복수까지 설치 되어있다면 여기에서 받아 설치하십시오.
이건 CNC 팬이 만든 온라인 게임 런처이며 게임 본편이 설치 되어있어야 작동합니다.
설치한 게임 Launcher exe 파일을 실행하면 아래와 같은 화면이 뜹니다.
조금 기다리면 메인화면이 나오는데
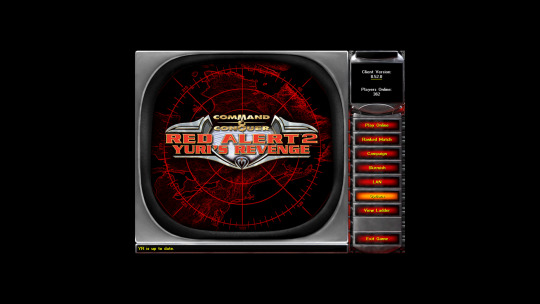
메인 메뉴 부분에
옵션으로 들어가
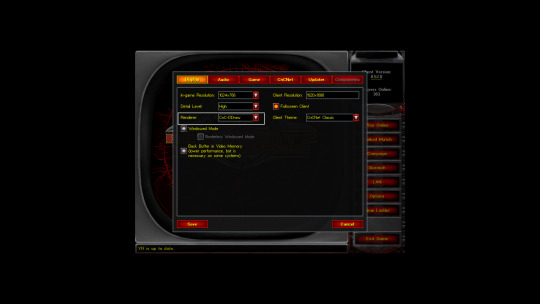
디스플레이 렌더러를 변경하면 마우스 커서가 보이게 됩니다.
커서가 보이면 아래 save를 눌러 저장하면 됩니다.
+추가

ea런처로 게임 실행하면 마우스 커서가 보입니다.
ea런처로 실행하십시오.
cncnet에서 스커미시만 되던데 제가 영어를 몰라 캠페인 연결을 안한 것일 수도 있습니다만
일단 cncnet에서는 스커미시만 됩니다.
0 notes
Text
비단생 에센스

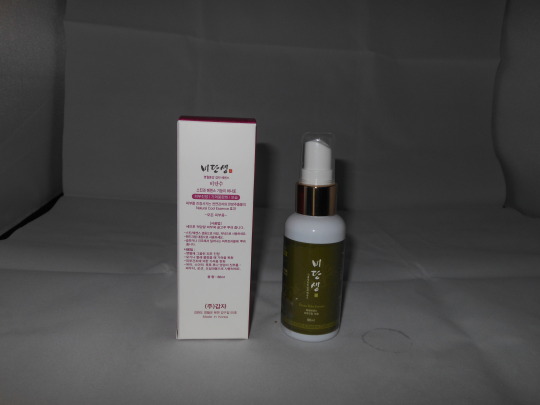


사진은 예전에 찍은 것이다.
예전에 감자에 대한 다큐를 본 적이 있다.
거기서 감자에서 즙을 낸 것을 피부에 바르니 점차 피부염등의 진정효과가 있다는 내용이었다,
거기에 언급이 되었던 것 인지 기억이 가물가물한데 위 제품을 알게 되어 가끔 구입해 쓰고 있다.
피부 안좋은 사람들이 구입하는 것 같다.
내 경우엔 자주 뿌려야 되는데 잊어먹고 안뿌려서 문제다.
0 notes
Text
캔 자동센서 쓰레기통 - 펩시
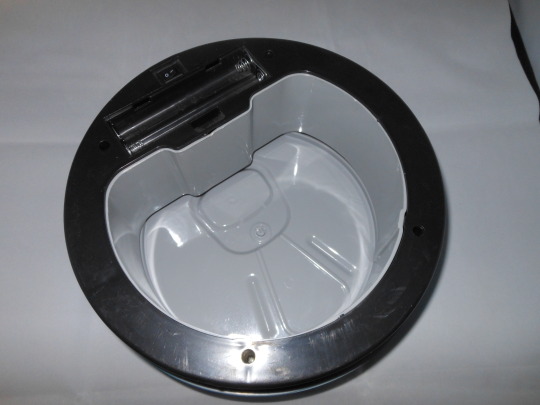
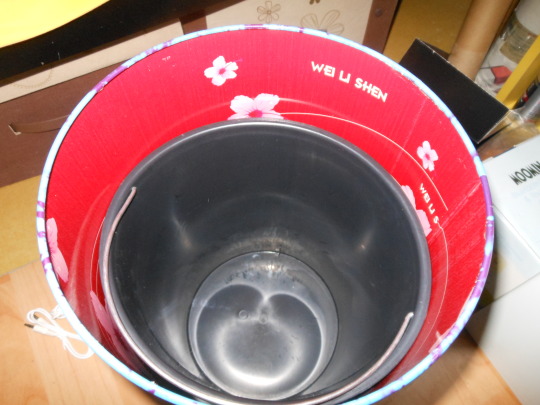
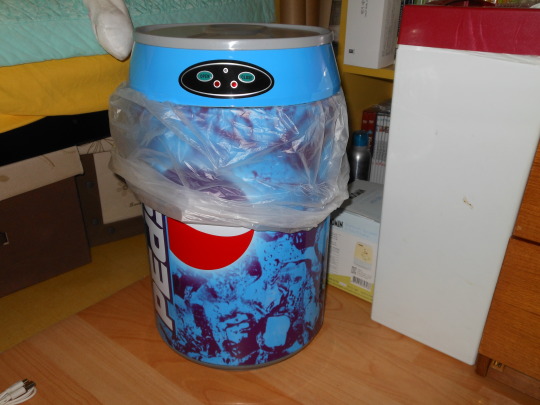
캔 모양의 쓰레기통입니다.
센서를 통해 자동으로 열리고 닫힙니다.
수동으로 버튼을 눌러 열고 닫을 수 있습니다.
건전지는 AA 4개 들어갑니다.
내부에는 플라스틱 양동이 하나가 들어있습니다.
저는 비닐을 사용하여 쓰고 있습니다.
0 notes
Text
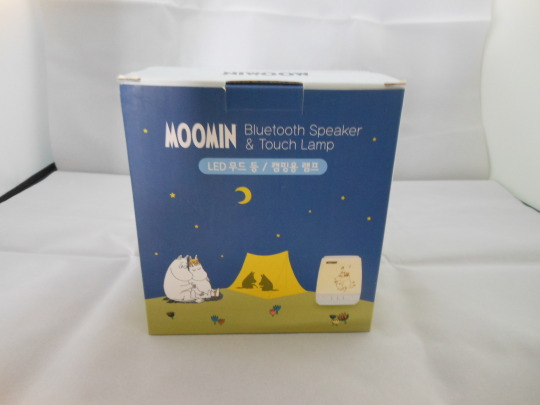

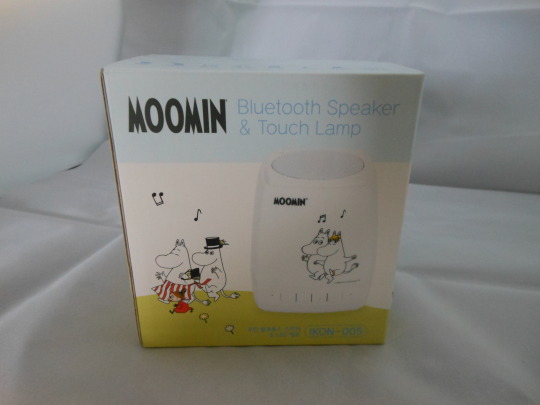

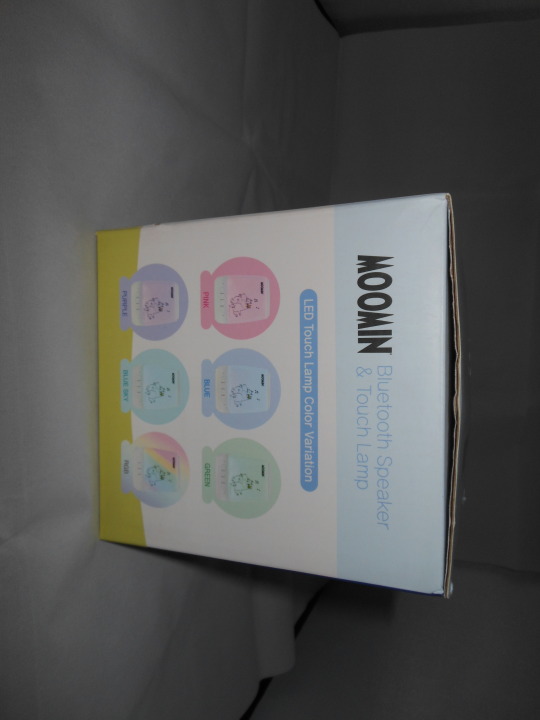

무민 LED 무드등 블루투스 스피커
무민 LED 무드등 블루투스 스피커입니다.
무드등 기능이 있어서 윗부분을 누르는 것으로
색을 바꾸거나 등을 켤 수 있습니다.
충전단자는 마이크로 5핀을 쓰며,
마이크로SD카드를 지원합니다.
음질은 음알못이라 평범하게 들리는 것 같습니다.
Moomin LED mood Bluetooth speaker
It is a Bluetooth speaker such as Moomin LED mood. It has a mood light function, so by pressing the upper part You can change the color or turn on your back. The charging terminal uses a micro 5 pin, Micro SD card supports. The sound quality seems to sound normal because it sounds.
0 notes
Text
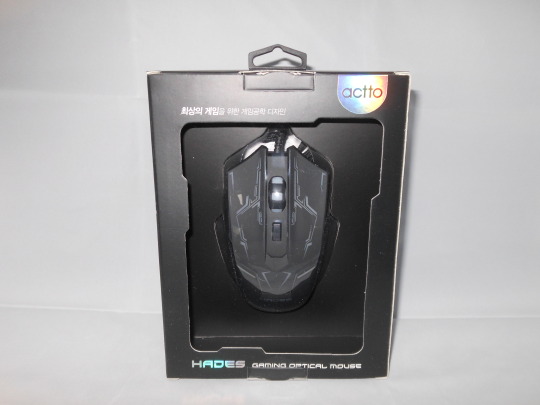
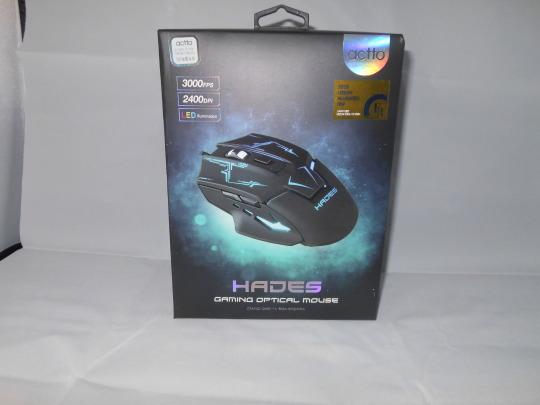
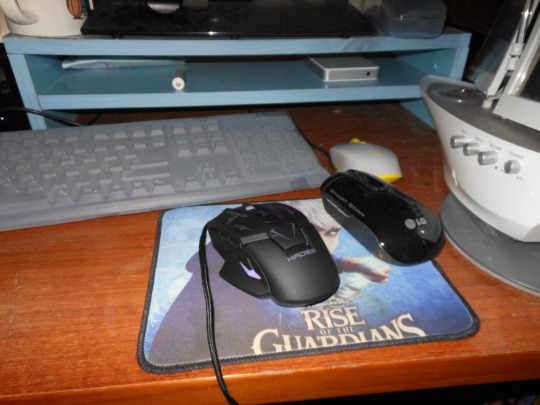
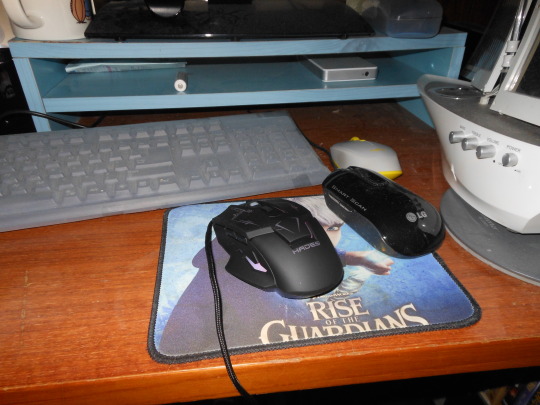
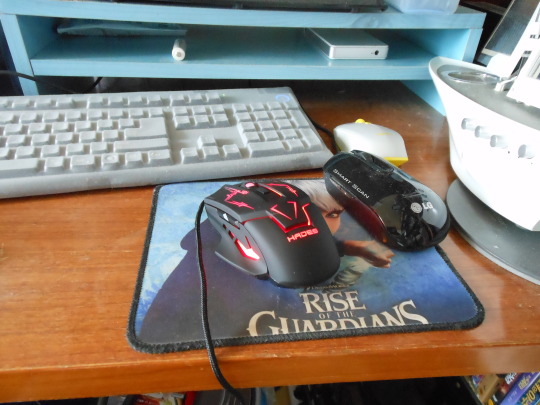
액토 하데스 게이밍 옵티컬 마우스
액토 하데스 게이밍 옵티컬 마우스입니다.
포장은 위와 같이 되어 있습니다.
3000FPS
2400DPI를 지원합니다.
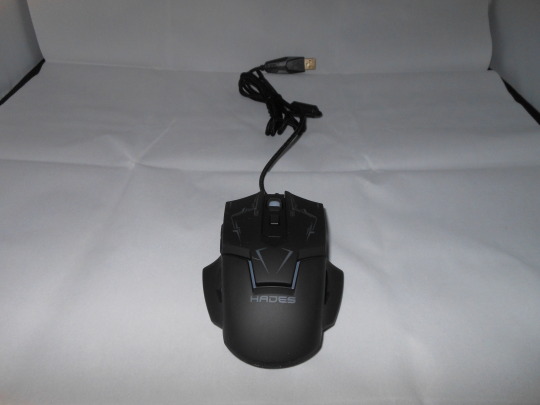
윗부분입니다.
옆 모습입니다.
옆 모습입니다.
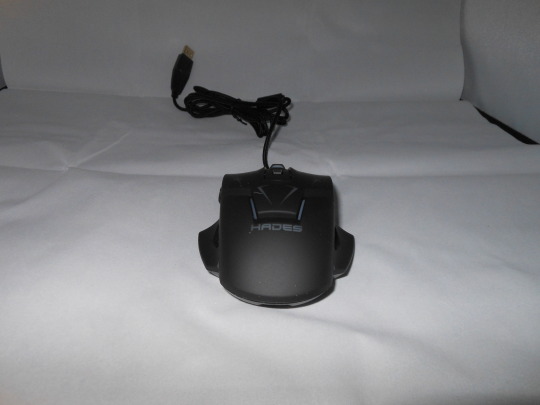
뒷 부분입니다.
앞 부분입니다.
실제 불이 들어왔을 때 모습입니다.
사용해본 소감은 가격대비 쓸만한 것 같습니다.
사진에서 보시다시피 LED면적이 적어서 그점은 괜찮네요.
클릭소리는 그렇게 큰 것 같지는 않습니다. 제가 그런데 신경을 안써서 그런 것 일 수도 있습니다.
Acto Hades Gaming Optical Mouse Acto Hades Gaming Optical Mouse. The packaging is as above. 3000fps It supports 2400dpi. The upper part. This is the side. This is the side. The back part. It is the front part. This is when the fire comes in. The testimony I used seems to be useful for the price. As you can see in the picture, the LED area is small, so it's okay. Click sound doesn't seem so big. I may not care about it.
0 notes
Text
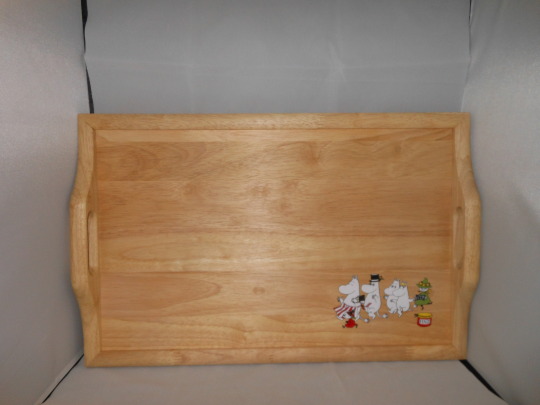


내츄럴우드 무민 베드트레이
목재 베드 트레이 입니다. 오른쪽 아랫부분에 무민의 그림이 있습니다.
사이즈는 세로33cm 높이23.5cm 두께1.5cm로 작은 편입니다.
고무나무로 제작이 되었다고 합니다.
바닥 부분에도 무민이 있네요
옆 모습입니다.
사진은 몇년전에 찍은 것으로 지금은 품절이됐군요.
내츄럴우드 무민 베드트레이
목재 베드 트레이 입니다. 오른쪽 아랫부분에 무민의 그림이 있습니다.
사이즈는 세로33cm 높이23.5cm 두께1.5cm로 작은 편입니다.
고무나무로 제작이 되었다고 합니다.
바닥 부분에도 무민이 있네요
옆 모습입니다.
사진은 몇년전에 산 것을 찍은 것으로 지금은 품절이됐군요.
Natural Wood Moomin Bed Tray Wood bed tray. There is a picture of Moomin at the bottom right. The size is 33cm high, 23.5cm thick, 1.5cm thick. It is said to be made of rubber tree. There is also Moomin on the floor This is the side. The picture was taken a few years ago and is now sold out.
0 notes
Text

아우터 월드 치트키 쓰는 법
옵시디언 엔터테인먼트에서 만든 1인칭 게임 아우터 월드 입니다.
기본적으로 치트키 입력을 지원하지 않습니다.
그래서 다음의 방법을 쓰면 되는데요.
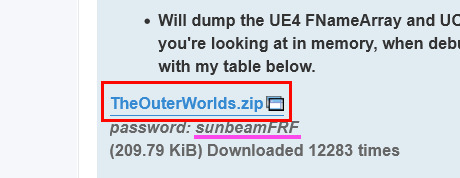
1.
위 사이트에 가셔서
제가 표시한 빨간 네모 안의 저 파일을 다운 받습니다.
파일엔 비밀 번호가 걸려있는데 밑에 분홍 밑줄 그어진 저것이 비밀 번호입니다.
압축을 풀어주세요.
*그런데 이 파일은 에픽스토어 전용이라 다른 곳에서 구매 하셨다면
추가적인 작업이 필요합니다.*
2.
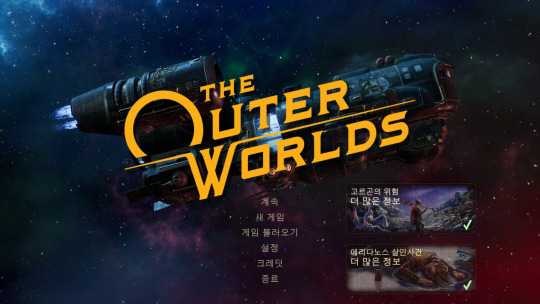
그 다음 게임을 실행합니다.
메인 메뉴가 나올때 까지 진행한 다음
Alt+Tab를 눌러 바탕화면으로 빠져나옵니다. 게임을 끄지 마십시오.
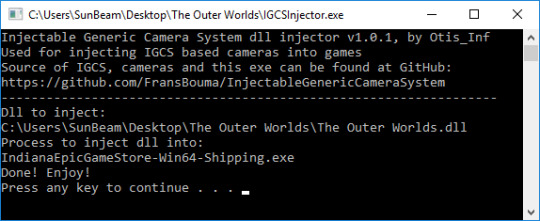
아까 압축을 풀은 파일 중에 IGCSInjector.exe를 실행합니다.
이런 검은 창이 열리며
Done! Enjoy!
아무키나 눌러주세요...라는 문구가 뜬다면 다 된 것입니다.
3.
일단 압축 풀은 파일 중 NamesDump.txt 과 ObjectsDump.txt 를
설치 경로 안의 The Outer Worlds\Indiana\Binaries\Win64
에다가 붙여넣습니다.
다 되었습니다. 게임으로 돌아가
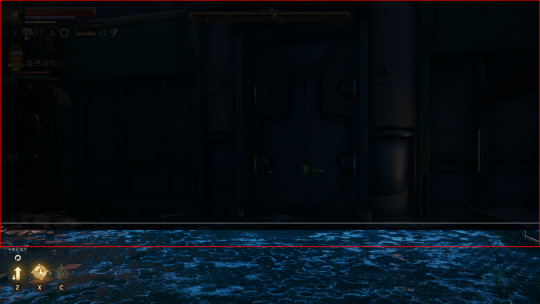
메인 메뉴가 아닌 본 게임 화면에서 키보드 1옆의 ~키를 누르면
아래쪽에 빨간 네모 표시한 것 처럼 입력창이 뜹니다.
저기다가 치트를 치고 엔터를 치면 적용이 됩니다만.
아무런 표시 없이 닫히므로 결과를 알 수가 없습니다.
~키를 두번 누르면
내역을 볼 수 있는 창도 같이 나옵니다.
입력 란 위쪽에 표시가 됩니다.
입력란만 나왔을 때는
치트 입력하고 엔터를 치면 입력창이 바로 사라지지만
위와 같은 상태일때는 사라지지 않고 계속 표시되니
치트를 다 적용했다면 다시 ~키를 눌러 닫아주시면 되겠습니다.
*그리고 중요한 것은 게임을 완전히 끄고 게임을 다시 시작하면
치트 입력 창이 초기화가 되서 치트입력이 되지 않으므로 위 작업을 다시 해야 치트를 쓸 수 있습니다.*
스팀의 경우는
1,2는 동일
압축을 푼 뒤에
IGCSInjector.exe 및 IGCSInjector.ini를 {SteamPath]\\SteamApps\\common\\TheOuterWorlds\\Indiana\\Binaries\\Win64로 이동합니다(The Outer Worlds.dll이 필요하지 않음).
NexusMods(https://www.nexusmods.com/theouterworlds/mods/62)에서 Steam 버전용 Dev-Console Unlock DLL을 다운로드하고 DLL을 같은 위치에 배치합니다.
IGCSInjector.ini를 메모장으로 열어 다음과 같이 편집합니다.
[InjectionData]
Process=Indiana-Win64-Shipping.exe
Dll=The Outer Worlds Steam.dll
GOG의 경우
찾아본 결과
게임을 실행 가능한 복사본으로 만들고 이름을 바꿉니다.
*GOG 버전은 기본적으로 DRM이 없는 Epic 버전입니다.*
Indiana-Win64-Shipping.exe를
IndianaEpicGameStore-Win64-Shipping으로 이름을 바꿔도 실행 가능하다는 군요.
EXE 사본을 만들고 이름을 바꾼 후에
Indiana-Win64-Shipping.exe
IndianaEpicGameStore-Win64-Shipping.exe중에
Epic 버전을 시작하고 위의 과정을 수행하면 치트코드를 사용 할 수 있습니다.
아래는 치트코드 표 입니다.
(괄호는 쓰지 않습니다.)
명령어
효과
god
무한 HP
pause
게임을 일시 중지
toggledebugcamera
자유롭게 움직이는 카메라 제공(Flycam)
ShowHUD command
HUD를 켜거나 끕니다.
SetLevel
하나 이상의 캐릭터 레벨을 제공합니다.
PerkPointsAdd
특전 포인트 제공
PerkPurchase
특전 추가
PerkRemove
특전 제거
variablename <amount> (r.MaxAnisotropy 16)
게임 내에서 변수를 변경할 수 있습니다.
RpgStatAddModifierDebug <stat> <value>
입력한 통계에 대한 숫자를 설정할 수 있습니다.
RpgStatRemoveModifierDebug <stat>
선택한 통계에서 모든 수정자를 제거합니다.
AddCurrency (돈 금액) 1
캐릭터 머니 제공
AddItemDebug <ItemID>
표시하려는 항목을 만드십시오.
fov (enter value)
FOV 변경
QuestStart <questname>
선택한 퀘스트를 활성화합니다.
QuestComplete <questname>
선택한 퀘스트를 완료합니다.
DebugUnlockCompanion 4
동료의 이름을 입력하면 퀘스트 없이 함께할 수 있습니다.
SaveGame bIgnoreSuperNova 1 0
난이도에 관계없이 새로운 세이브 파일을 생성합니다.
SetArmorLevel <level> 1
아머 레벨을 원하는 대로 만듭니다.
SetWeaponLevel <level> 1
무기 레벨을 원하는 대로 만듭니다.
Teleport
카메라가 보고 있는 곳으로 캐릭터를 텔레포트합니다.
0 notes
Photo

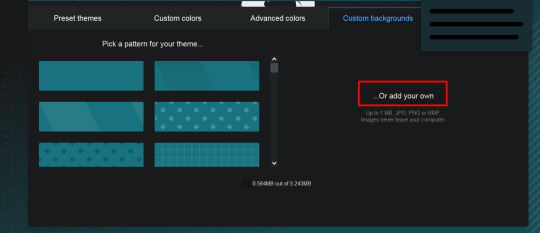
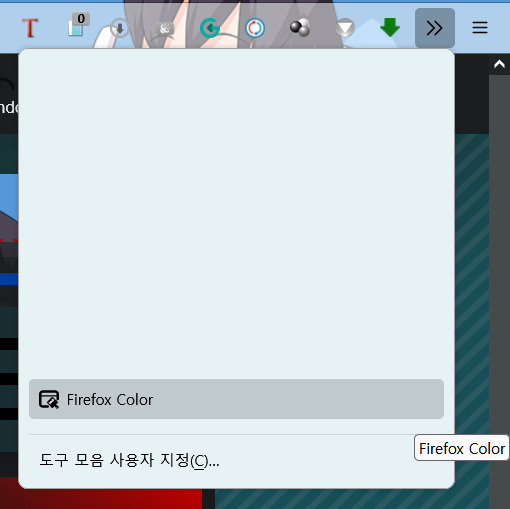

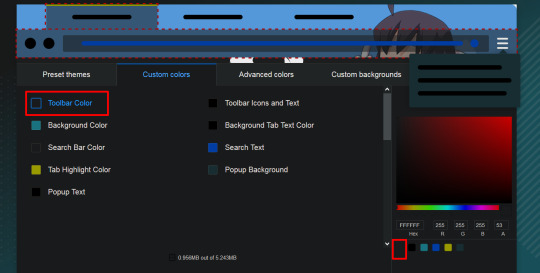

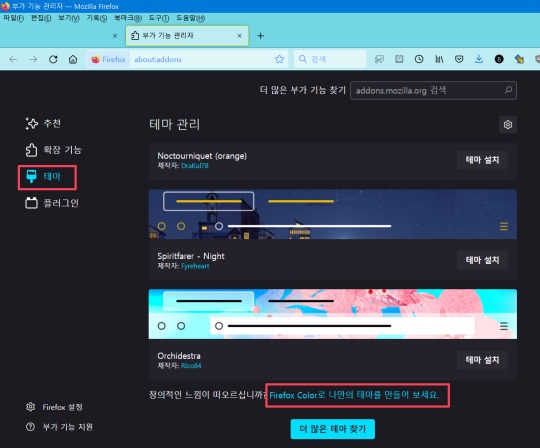
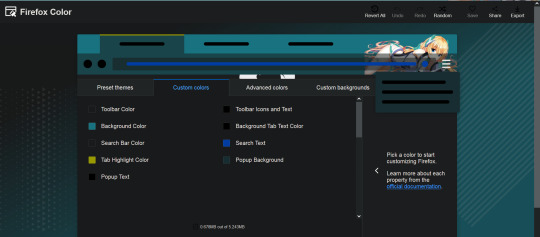


파이어 폭스 테마를 꾸며 봅시다. 우선 준비물이 필요합니다. 배경에 넣을 이미지를 3000*130으로 만들어 줍니다. ( 도구모음 위쪽에만 이미지가 들어가게하려면 높이 60픽셀로 만들어 줍니다.) 용량은 1MB를 넘으면 안됩니다. 우선 도구에서 부가 기능 및 테마를 선택합니다. 단축키는 Ctrl+Shift+A 입니다. 부가기능 관리자에서 테마를 선택하고 제일 아래로 스크롤해서 파이어폭스 컬러로 나만의 테마를 만들어보세요. 글자를 클릭합니다. 그러면 이렇게 파이어폭스 컬러가 열립니다. 녹색 버튼을 눌러줍니다. 그러면 아이콘이 등록되어 언제든 파이어폭스 컬러를 불러올 수 있습니다. 프리셋테마(Preset themes)는 전체적인 색이나 패턴을 보고 고르는 메뉴 입니다. 커스텀 컬러즈(Custom colors)는 부분 부분의 색상을 변경하는 메뉴입니다. 이미지를 입력할때 배경이 없게 하고 싶다면 Toolbar Color 을 누르면 오른쪽에 색상 선택이 나오는데 아래 부분에 네모안에 배경색이 없는 네모를 누르시면 투명배경이 됩니다. 배경이 없는 PNG로 저장한 이미지를 넣으면 이런 식으로 이미지가 도구 모음 쪽으로도 보여지게 됩니다. Advanced colorsd 이부분은 저도 아직 써보지 않았지만 커스텀 컬러 외의 부분을 변경하는데 쓰는 것 같습니다. 커스텀 백그라운즈(Custom backgrounds) 에서는 패턴을 바꿀 수 있습니다. 그리고 가장 중요한 이미지 첨부를 할 수 있는데요. 빨간 네모친 ...Or add tour own을 클릭하면 불러오는 창이 뜹니다. 이미지를 불러오면 Add another 이라는 버튼이 생기는데 그걸 누르면 다른 이미지를 추가로 불러서 같이 겹쳐 놓을 수 있습니다. 불러온 이미지는 반복해서 패턴화 해서 출력되게도 할 수 있습니다. 완성한 테마는 오른쪽 위에 Save를 클릭하면 저장이 되며 위와 같이 저장 된 것을 볼 수 있습니다. 후에 저장한 테마를 다시 불러오고 싶다면 파이어폭스 컬러로 들어와 위에 테마를 클릭하면 바로 변경이 됩니다. 파이어 폭스 컬러는 이렇게 도구 모음 아이콘으로 표시 되니 언제든 간편하게 불러올 수 있습니다. 그리고 높이 130픽셀(또는 60픽셀)의 이미지를 불러와 부분에 적용시킬 수 있습니다. 빨간 박스의 점 부분을 잡고 위 아래로 움직여 적용 순서를 바꿀 수 있으며 녹색 박스 부분을 눌러 적용 위치를 변경할 수 있습니다. 그 옆의 Repeat both ways부분을 변경하여 이미지를 반복 자동 적용해 패턴화 시킬 수도 있습니다. Let's make a Fire Fox theme. First you need a preparation: you make the image you want to put in the background 3000*130 (and if you want to get the image only above the toolbar, you make it 60 pixels high). The capacity should not exceed 1MB. First, select the add-on and theme in the tool; the shortcut is Ctrl+Shift+A. Select the theme from the add-on manager and scroll down the top Make your own theme in Firefox color. Click the letter. Then the Firefox color opens like this. Press the green button, and the icon will be registered to bring in the Firefox color at any time. Preset themes are menus that look at and choose the overall color or pattern. Custom colors is a menu that changes the color of the part. If you want to make sure there's no background when you enter an image Press Toolbar Color to the right and you will get a color choice. Press the square with no background color in the square below It's a transparent background. If you put an image stored in PNG without a background This way, the image is also shown to the toolbar. Advanced colorsd This part I have not used yet, but I change the part other than custom color I think I'm writing it. In Custom Backgrounds We can change patterns, and we can attach the most important image. Click the red square ...Or add tour down to bring in a window. When you bring an image, you will get a button called Add another. If you press it, you will call another image and overlap it. You can do it. The images you have called can be patterned and printed over and over again. The completed theme is saved by clicking Save on the right and you can see that it is saved as above. If you want to bring back the theme you saved later, you can change it immediately by clicking on the theme above in Firefox color. Fire Fox color is displayed as a toolbar icon, so you can easily bring it in at any time. And you can bring up 130 pixels (or 60 pixels) in height and apply them to the part. You can hold the dot part of the red box and move it up and down to change the order of application You can change the application location by pressing the green box portion. You can also change the Repeat both ways next to it to automatically apply the image repeatedly and pattern it.
0 notes
Text
GOG 네버윈터 나이츠1 다이아몬드 에디션 한글 패치법
네버윈터나이츠1 :
1. 네윈나1 설치
2. 실행해서 원하는 캐릭터를 만들고 저장 후 종료(윈도우7에서는 호환성을 XP로 해야 실행이 되네요)
3. 게임이 설치된 폴더에 가서 'dialog.tlk' 파일을 백업
4. 여기에서 1.69 한글 자막 파일을 받아서 dialog.tlk 파일을 덮어씌움
5. 게임 실행해서 아까 저장해둔 세이브를 불러와서 진행.
* 자막을 덮어씌울 경우 캐릭터의 생성 시 튕기게 됩니다. 그래서 이런 편법을...
*출처 : http://playwares.com/gametalk/29335985
첨언 하자면
dialog.tlk 파일을 백업하는것은 실행에 문제가 생겼을 때
원상태로 복구하기 위해 백업한 파일을 원래 위치에 붙여넣기를 하기 위함입니다.
그렇게 하면 재설치 하는 수고를 덜 수가 있습니다.
그리고 다른 새 캐릭터 만들때마다 영어파일 넣고
캐릭터 만들고 한글 파일 넣어서 사용할 때도 필요합니다.
GOG Neverwinter Knights 1 Diamond Edition Hangul Patch Method
Neverwinter Knights1:
Installation of Newinna 1;
Making and storing the desired character by executing it (in Windows 7, compatibility must be XP to be executed).
Back up the 'dialog.tlk' file by going to the folder where the game is installed.
Overwrite a diary.tlk file by receiving the 1.69 Korean subtitle file here.
Run the game and bring in the saves that have been stored earlier.
If you overlay the subtitles, you will bounce when the character is created. So this is the expedient.
Source: http://playwares.com/gametalk/29335985
To add to the fact
Backing up a diary.tlk file is when there is a problem with execution
To paste backed up files into their original location to restore them to their original state.
That way, you can reduce the trouble of reinstalling.
And every time you make another new character, you put in an English file
It is also necessary to create a character and use it by inserting a Korean file.
0 notes
Text
네버윈터나이츠 인핸스드에디션(ee) UI, 풀스크린 세팅법 ②
Neverwinter Knights Enhanced Edition (ee) UI, Full Screen Setting Method
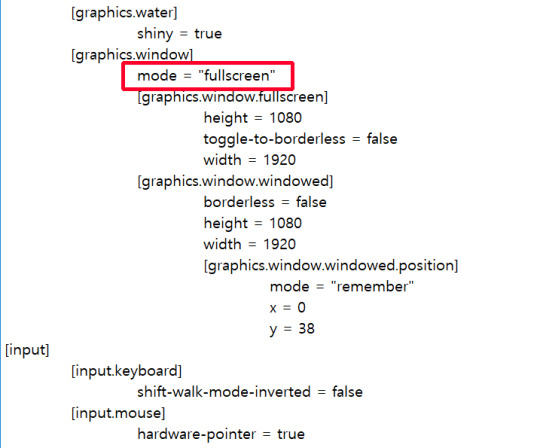
안에 코드중에 인풋 위에 있는 graphics.window 항목을 찾으십시오.그리고 그 아래에 있는 mode 옆에 따옴표 있는 부분 안에 있는windowed을 지운 후fullscreen이라고 입력하시고저장하고 닫아주면 다 된것입니다.실행하면
Find the graphics.window entry on the input in the code.
And there's a little bit of a quotient in the bottom of it
the windowed is erased
Please enter fullscreen
Save and close, and it's done.
if executed

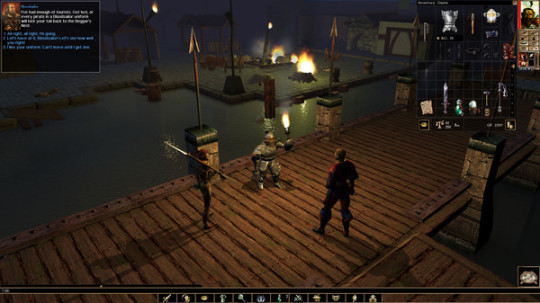
이렇게 나옵니다.
게임을 종료후 다시 켜도 설정이 이전으로 돌아가지 않습니다.
Here's what it says.
Turning the game back on after the game does not return the settings to the previous one.
0 notes
Text
네버윈터나이츠 인핸스드에디션(ee) UI, 풀스크린 세팅법 ①
Neverwinter Knights Enhanced Edition (ee) UI, Full Screen Setting Method
인핸스드에디션은 좀 뭔가 버벅임도 있는 것도 같고 옵션 부분이 기존과는 좀 많이 달라져서
처음에 적잖게 당황했었습니다.
특히 UI(유저인터페이스)가 너무 작아 게임을 제대로 하기 어려울 정도입니다.
얼마나 작냐면
The enhanced edition seems to have a bit of a burden, and the option part is a little different from the existing one
I was a little embarrassed at first.
Especially, UI (user interface) is so small that it is difficult to play the game properly.
How small is it?
이렇게나 작습니다. 대화 글씨도 거의 보이지도 않고 옆에 아이콘들도 작아서 모니터에 얼굴을
���싹대고 봐야할 것 같더군요.
그래서 찾아봤습니다. 이걸 확대할 방법을...
알아낸 결과는
It's so small. I can barely see the conversation, and the icons are small next to me.
I think I should see it close.
So I looked it up. I've been trying to figure out how to expand this.
The results we have
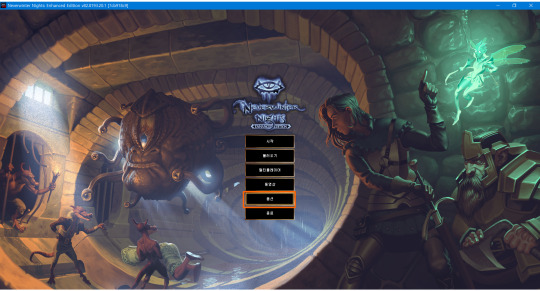
일단 게임을 실행해서 옵션으로 들어갑니다.
Once you run the game, you enter the option.
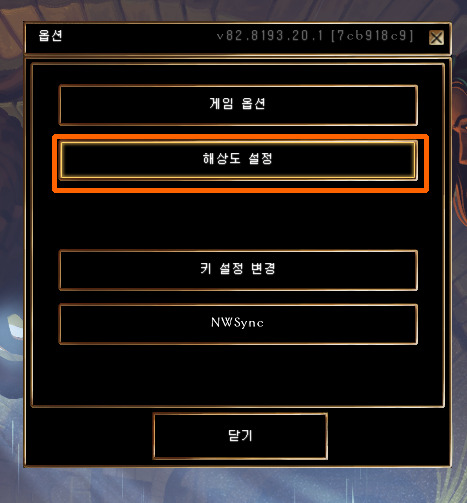
다음 메뉴에서 해상도 설정으로 들어갑니다.
Enter the resolution settings from the following menu.

다음 해상도 1920X1080 중에 전에 선택한 해상도를 빼고 아무거나 선택합니다.
그리고 아래 New UI Scale의 숫자를 2로 설정합니다.
Select anything except the resolution previously selected among the next resolution 1920X1080.
And set the number of the New UI Scale below to 2.
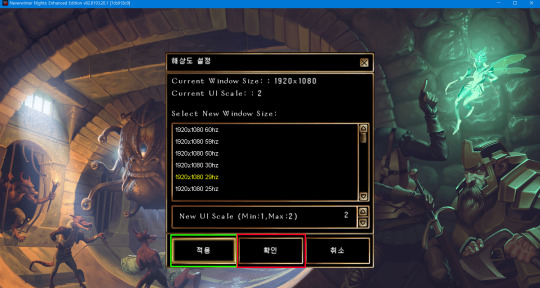
적용, 확인을 눌러주면
Click Apply, OK

이렇게 UI가 커졌습니다.
그런데 말입니다. 저 대화하기 아랫부분에
단축 아이콘이 보여야 하는데 그게 잘려서 보이지 않습니다.
그리고 커졌다 작아졌다 왔다갔다하고
게임을 켤때 마다 원상태로 돌아가 설정을 다시만져야 했습니다.
이건 큰 문제 이므로
저는 생각했습니다. 혹시 윈도우 모드가 아닌 풀 스크린으로 하면 나오지 않을까 하고요.
인핸스드 에디션은 설치시 윈도우모드로 작동하게 되어있습니다.
왜 이렇게 만들어놨는지는 알 수 없군요.
어쨌던 간에 풀스크린 모드를 만드는 방법을 고민해야했습니다.
그리고 그 해결법은
일단
내문서로 들어가 네버윈터나이츠 폴더를 찾습니다.
This is how the UI has grown.
But you know, I'm not sure I'm gonna be able to
The shortcut icon should be shown, but it is cut and it is not seen.
And then they grew, they got smaller, they went back and forth
Every time I turned on the game, I had to go back to the original state and retouch the setting.
This is a big problem
I thought, maybe it would come out on a full screen instead of a window mode.
The enhanced addition will operate in Windows mode when installed.
I don't know why you made it like this.
Anyway, I had to think about how to make full screen mode.
And the solution
for one end
Enter the internal document and find the Neverwinter Knights folder.

그 안에 settings.tml 파일이 있습니다. 이걸 오른쪽 클릭해 줍니다.
There's a settings.tml file in it; right-click this.
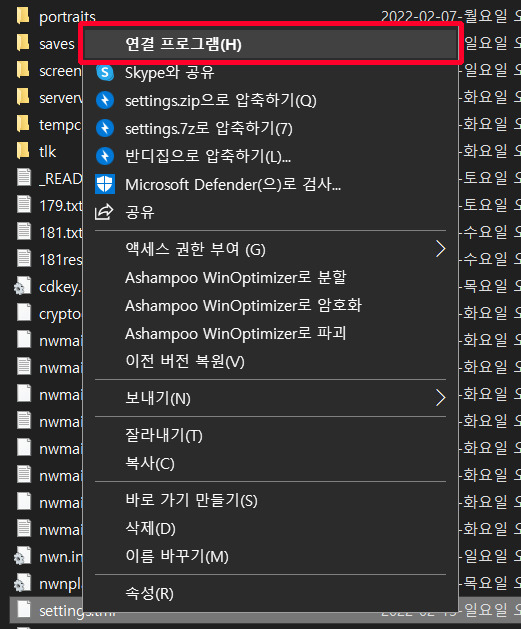
연결프로그램을 선택해줍니다.
Select a connection program.

추가앱을 눌러줍니다.
(녹색표시 부분)박스 체크 해제를 합니다.
De-check the box (green display part).
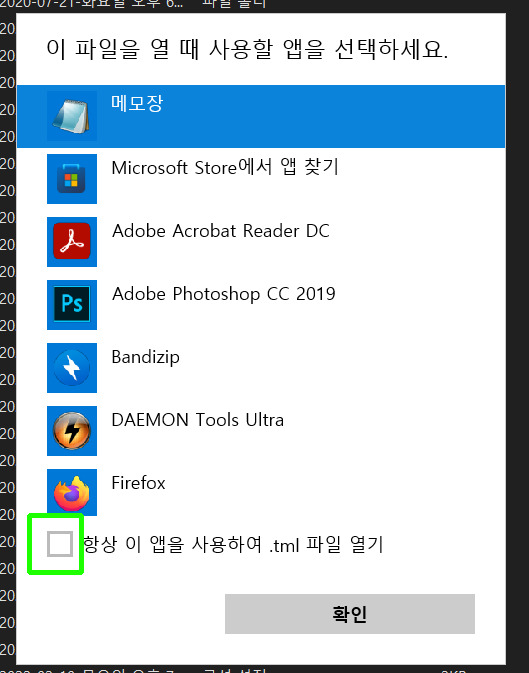
메모장을 선택합니다.
항상이앱을 사용하여 파일열기를 체크 해제해줍니다.
체크 박스를 체크 해 놓으면 tml파일 열때마다 메모장이 열리게 됩니다.
확인을 누르면
메모장이 열리는데
2번에 계속...(한번에 이미지 10개 밖에 못올라가는 군요...)
Select the Notebook.
Always use this app to check off the file opener.
If you check the check box, the notepad will be opened every time you open the tml file.
Press OK
The note is open
2 and on... (You only have 10 images up at once...)
0 notes
Text
네버윈터나이츠 인핸스드에디션 게임무비 한글
네버윈터나이츠 인핸스드에디션을 구입 한 후에 한글이 안되어서
못하고 있다가 최근에 어느 분이 한글패치를 올려주신것을 알게 되었습니다.
https://bbs.ruliweb.com/news/board/1003/read/2220247
기쁜마음에 설치하여 실행했는데 무비와 옵션은 한글이 아니라는 점이 아쉬웠습니다.
그래서 제가 직접 기존 CD판 모든 게임 무비를 컨버팅하여 인핸스드 버전으로 바꾸었습니다.
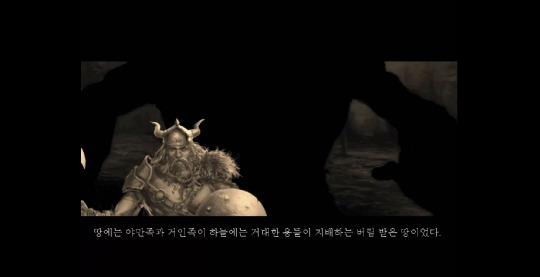
위 이미지가 적용된 것입니다.
아래 링크에서 다운 받은 압축파일을
https://drive.google.com/file/d/1ksGAIJ_T1qyBETSWiQmJDBNZNoVRGarW/view?usp=sharing
압축을 푼 후
설치 경로에 있는 Neverwinter Nights\data\mov\로 들어가셔서
mov폴더 안에 동영상파일을 붙여 덮어씌우시면 되겠습니다.
즐거운 게임 되시길 바랍니다.
0 notes