
littlecuteowlz-blog
Little Owl
Hi!I'm a french illustrator.
22 posts
Don't wanna be here? Send us removal request.
Last Seen Blogs

makedonios
Adrianos
nephelaes-blog
Nephelae་ ☕͢・⁺

sexyhomoerotic
Sexy Homoerotic

michelledeangelismusic
Michelle DeAngelis Music

1000000000000000000000202030231
Untitled
Photo

Klance stickers pt2 ❤️💙 will put up later!
1K notes
·
View notes
Photo

a mini klance doodle book I slapped together last min for AN ;u; will put it up online after con~❤
2K notes
·
View notes
Photo
I need them!♡

it came in time for AN! ;0; will put them up @ akushop.bigcartel after con :3
2K notes
·
View notes
Photo

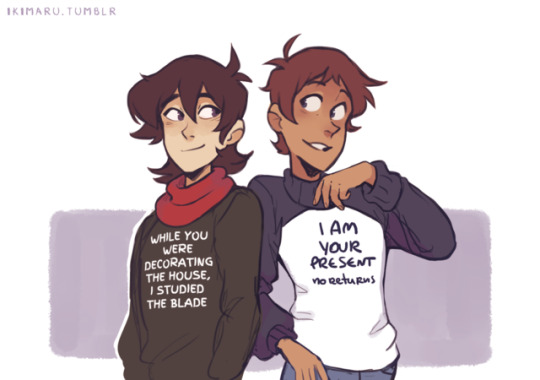


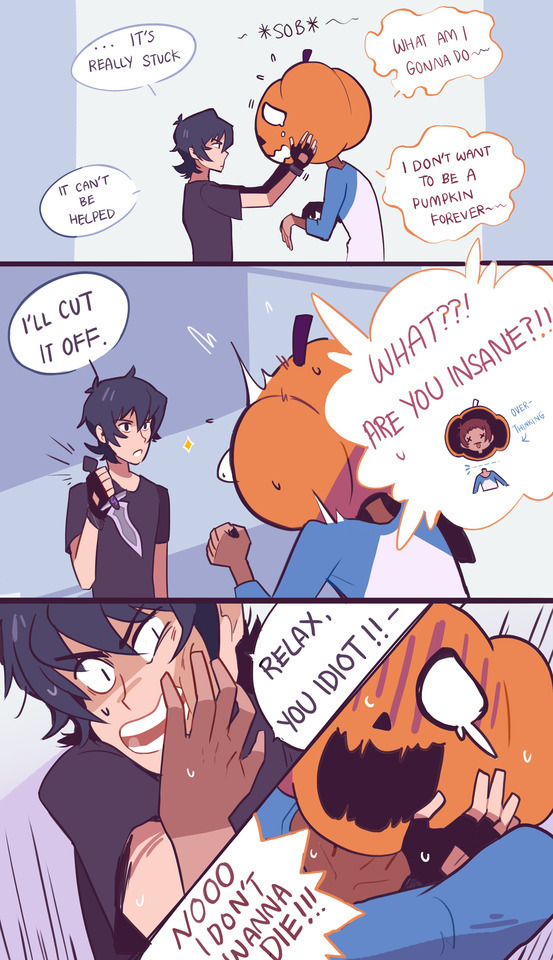
same holiday tradition, different fandom B)
26K notes
·
View notes
Photo

Da, da, da, daaaaaaaa…… that’s a little more dramatic than I had intended. I love all these wonderful Sai tutorials that get posted on here but I haven’t seen much attention payed to Sai’s Lineart tool which I can’t get enough of. I’m sure there probably are Lineart Layer tutorials out there - I just haven’t come across one so I’m just adding to the pile. The Lineart tool is so awesome it deserves any number of tutorials anyway. It’s so easy to use, it saves me so much time, and it offers so much control which I really love. Honestly, the tool is so easy to use that this is less of a tutorial and more of just a general encouragement to just whip it out and start playing with it. Yeah. So say we start with a simple line like this swirly-wirly thingy that I drew with the marker tool. Well, the first step would be to create a linework layer by clicking the linework layer button.

There we go. Now, a lineart layer in Sai is different from any other regular layer in Sai and it will bring up a completely new range of tools. I’m gonna briefly go through them but the best way to understand exactly what each does is to just try them out for yourself. There’s no substitute for experience or however the saying goes.
Pen - This is your freehand lineart tool and to best honest I don’t really use it that often. That’s just me personally. I have an expensive gaming rig that has all sorts of magic running under the hood but we all know that Sai’s memory management is pretty crappy and I don’t need the lag or crashes that come with this tool when working at a high DPI. You may have a different, entirely pleasant experience with this particular tool but for me, if I’m doing freehand inking, I’d much rather just use the regular Pencil tool.
Eraser - Kinda speaks for itself.
Weight - This one I do love. Say you’ve drawn a line - or a path as Sai calls it. With this tool you can adjust the thickness of the particular line by simply selecting the brush size and then clicking on the line.
Color - Same as Weight. Simply select your desired colour and then select the desired line you’d like to change. Very useful. For the aesthetic.
Edit - This one comes with its own subset of mini-tools that I’ll get into in a moment. But this is definitely a useful tool - for me it’s probably the most useful.
Pressure - This is the one that adds the character to your linework. I’ll explain further below.
SelPen - A selection tool. Pretty standard. Since the Lineart layer works in ‘Anchor’ points (which again, I’ll get in to further down below) I don’t really use this one.
SelErs - Selection Erase. Goes hand in hand with the SelPen. I can’t say that I personally use this one much.
Curve & Line - The Curve and the Line tools are the cornerstones of the Linework layer. I’m explain both further down.
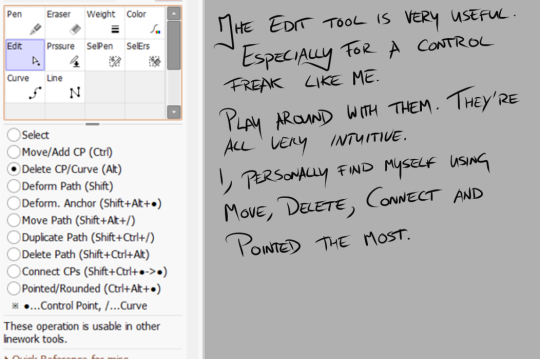
The Edit tool, as I mentioned, brings up its own list of sub-tools. And they definitely have their uses. Again, it’s best to play around with them to truly get a grasp of what they do but I’ll just run through them quickly before I get on with the main tutorial.
Select - For selecting anchor points of paths. Honestly, I don’t really use this one too much simply because hovering over a point or path and clicking will select it.
Move/Add - Now this one I use a lot. Moving an anchor will affect the curvature of your line if you’ve used the ‘Curve’ tool, or you can add curves to a straight line by clicking and dragging in between anchor points.
Delete CP/Curve - Kinda speaks for itself. It will delete an achor point in your line. Sometimes this can be useful for making your curves rounder if you’ve added too many points to it.
Deform Path - Again, kinda self explanatory. It will warp your line. I don’t really use this one myself but that’s not to say that it couldn’t have its uses.
Deform Anchor - See above.
Move Path - Instead of moving just an anchor or adjusting the curvature of your line you can move the entire line at once. Can be useful.
Duplicate Path - Does exactly what it says - creates a copy of your line. Haven’t found much use for this simply because I don’t particularly like copy/paste stuff in linework. Faults or differences add character.
Delete Path - deletes a line you’ve drawn independently of other lines on your linework layer. Can be useful as well.
Connect CPs - This is difficult to explain the benefits of. It’s one that should be experimented with. It basically joins lines together. I use it quite often. Just pick this option and drag from one anchor point to another to join them.
Pointed/Rounded - See the diagram below for this one. I find it very useful.
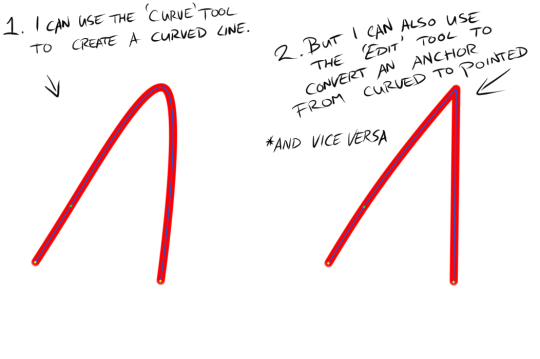
As you can see I used the Curve tool to draw a simple curve (left) and then I used the Pointed/Rounded tool to convert the curve into a point (right) by selecting the tool and then clicking on the anchor point at the height of the curve. I find it very useful. Anyway, back to our swirly-wirly thingy.

Because our swirly-wirly thingy is basically one long curve, I simply select the curve tool and start clicking. Starting at the centre point on one end, I click to add anchor points as I trace the shape of the object. Each point adjusts the curvature from the last point. It’s kinda hard to explain verbally or even visually but try it out and you’ll quickly see how it works.
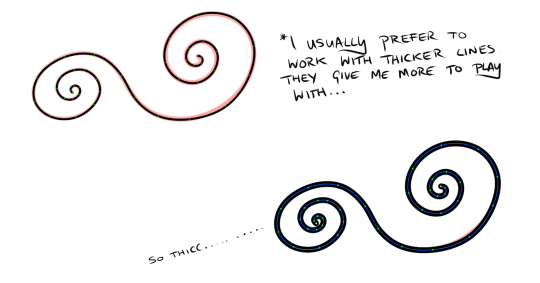
Once I have a line over whatever I’m inking done I like to adjust the weight to suit my preferences. I like to work with thicker lines because they give more room to play around with weight. So to adjust the weight you click on the Weight tool, select a brush size and then click on your line. If only it were that simple in life.
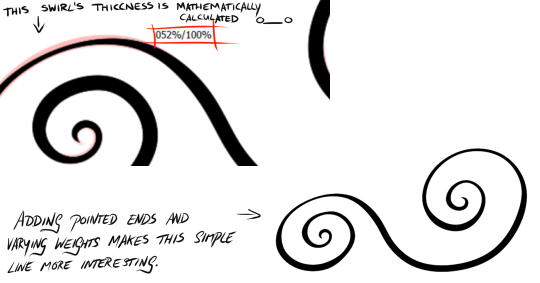
Once I have a good weight selected I move on to the Pressure tool. The pressure tool gives you two options. Pressure for width and pressure for density. Width is like controlling the weight of the line at individual points and density controls the transparency. I don’t usually use the density option. As with traditional inking I prefer to denote depth, shadow, etc. with weight as you can see in the image above. To adjust the pressure, simply select the pressure tool and then select an anchor point. Click, hold and drag to the left to make the line thinner of more transparent and to the right to make the line thicker and more dense. As you drag, a percentage will appear over the anchor point you’ve selected. This can be useful for keeping things consistent.
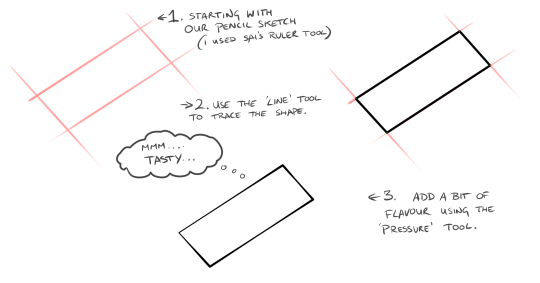
That’s all well and good for curved lines but what about straight lines? That’s where the line tool comes in. It works exactly the same way except it won’t add a curvature to your anchor pints. Still very useful though. Especially when combined with the Weight and Pressure tools.
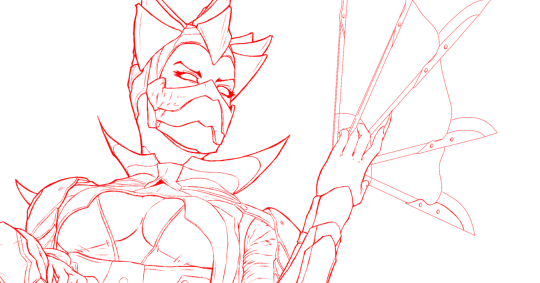

Here’s an example of one my drawings. It’s Dark Empress Kitana from Mortal Kombat. The one in red is the pencils which if converted to black would probably make a pretty good linework layer. I’m a firm believer in taking the time to clean up your sketch/pencils layer because it will dictate your entire drawing. The one below in black was done using Sai’s linework layer feature. Although not entirely.
As much as I love Sai’s linework layer, it can look a little too clean which is not great when you’re drawing people. Although, it’s all art so it’s all up to personal preferences and personal style. There’s no wrong way to do it. For me though, I prefer to do skin, facial features, hair, etc. by hand using Sai’s Pencil tool on a normal layer and reserve the Linework Layer for architecture, clothing or any non-organic substances. I inked Kitana’s eyes and eyebrows freehand ( or as freehand as you can be with Sai’s amazing stabilisers) but everything else such as her armour or her fan weapon thingy was done using the Curve and Line tools on the Linework Layer.
I hope this tutorial has been useful. Or if not useful - then at least encouring to try out Sai’s linework layer. It’s such a robust feature that I don’t see get much attention and I can’t even begin to describe how much time it saves me or how much I adore it. If you have any questions (because I’m well aware how unsuited I am to writing tutorials - this is so damn rambly - sorry!) then feel free to drop me an ask here at keithbyrneart.
P.S, sorry about my handwriting in the stills. It’s gotten a lot messier these days.
12K notes
·
View notes
Video
Because i can’t get over his laugh…
i used this audio
13K notes
·
View notes
Photo


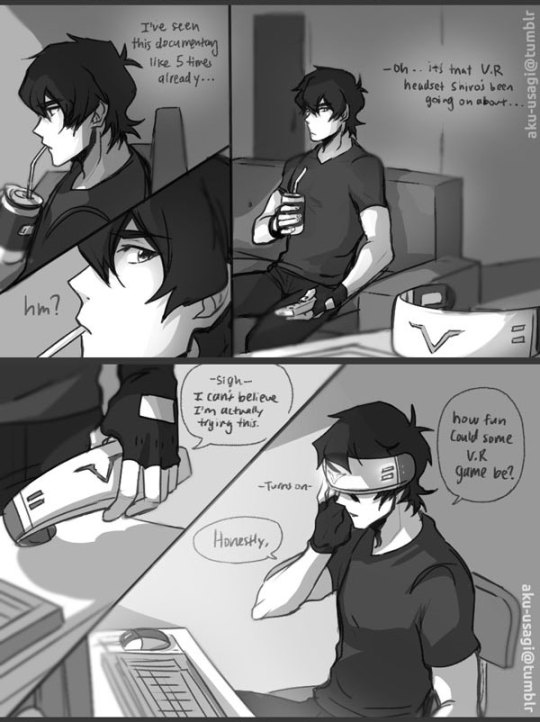
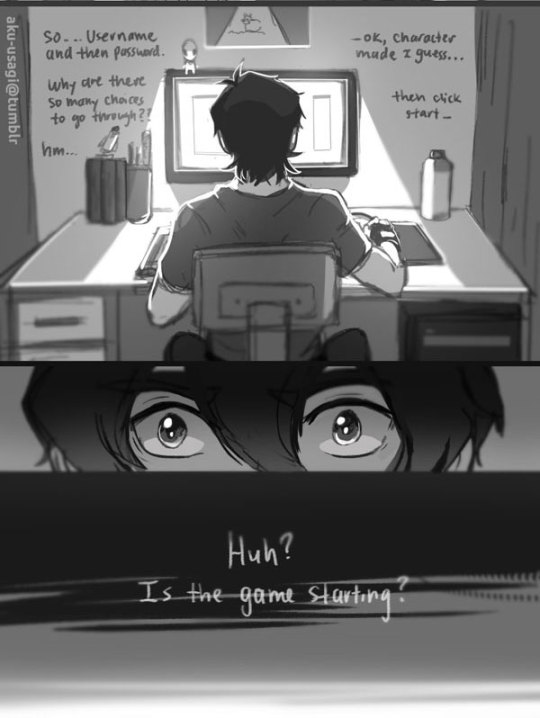

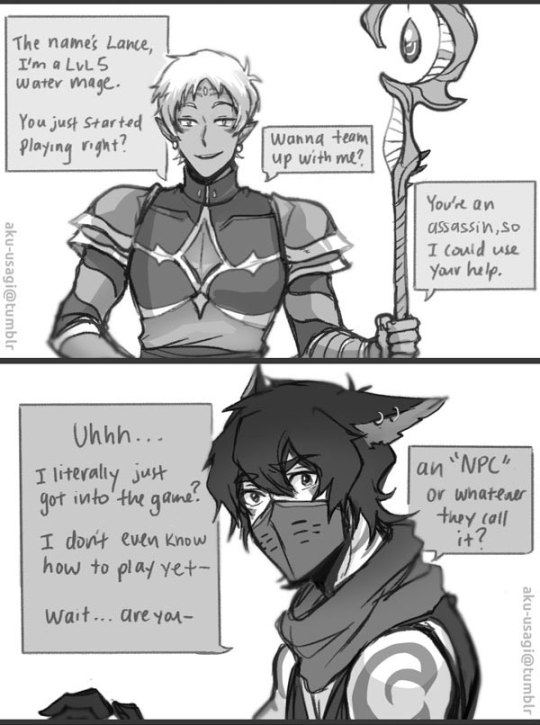


Intro comic thing?? for my voltron RPG au ٩(ˊᗜˋ*)و I honestly have no idea if I will draw more things for this au, but I drafted this a long time ago and I thought I should finish it :”D
itsklancecentricbutyoucantreallyexpectanythingdifferentfromme
Based on these designs I posted
30K notes
·
View notes
Video
Too cute for this world!♡
Overwatch APAC Premier audience is the best
x
159K notes
·
View notes
Text

Welcome to the Voltron Valentines Exchange! This is an exchange to send others gifts based around Valentine’s Day! If you’re interested then you can continue to read on, if not then feel free to spread the message regardless; your friends and followers might be interested!
Rules:
As soon as you have your giftee, send them an anonymous message to find out what they would like!
turn anonymous messages on and check your askbox. We have to make sure everyone gets a gift so if your gifted does not send a message, contact us and we will give you a backup!
Create a piece of art, do some writing, make an edit. As long you have fun and follow the rules!
No shaladin, AT ALL! you cannot be a shaladin, ship shaladin, or condone it!
Keep it SFW unless the person ASKS for nsfw!
Tag post as Vld Valentines! (if you want it reblogged, mention @vldvalentinesexchange or @keithappreciationblog)
Timeline:
❖ Sign ups: 11/5 - 11/20
❖ Assignments out: 11/25- 12/3
❖ Creation Period: 12/3 - 2/10
❖ Works Posted: 2/10- 2/14
If you have any questions feel free to send an ask! I’ll make sure to answer as soon as possible! You can sign up for the Valentine Exchange here
I hope you all join us for this event and have a great time!
22 notes
·
View notes
Photo


This was my piece for the @vldswimcalendar! It was such a fun project to be part of and they’re doing a second print run very soon so please follow the official tumblr for more info if you want to buy it!!
15K notes
·
View notes
Text

Welcome to the Voltron Secret Santa!
Welcome to the Voltron Secret Santa! This is a Secret Santa to send others gifts based around the Winter Holidays! If you’re interested then you can continue to read on, if not then feel free to spread the message regardless; your friends and followers might be interested!
Rules:
As soon as you have your giftee, send them an anonymous message to find out what they would like!
turn anonymous messages on and check your askbox. We have to make sure everyone gets a gift so if your gifted does not send a message, contact us and we will give you a backup!
Create a piece of art, do some writing, make an edit. As long you have fun and follow the rules!
No shaladin, AT ALL! you cannot be a shaladin, ship shaladin, or condone it! The gift doesn’t have to be shippy but if it is please, keep shaladin away!
Keep it SFW!
Tag post as secretsantavld! (if you want it reblogged, mention @secretsantavld or @keithappreciationblog)
Timeline:
❖ Sign ups: 11/5 - 11/15
❖ Assignments out: 11/17 - 11/24
❖ Creation Period: 11/24 - 12/18
❖ Works Posted: 12/18 - 12/30
If you have any questions feel free to send an ask! I’ll make sure to answer as soon as possible! You can sign up for the Secret Santa here
I hope you all join us for this event and have a great time!
135 notes
·
View notes
Photo


END
So late! This was what I wanted to do last week but I had not had time to finish it …
24K notes
·
View notes


Photo
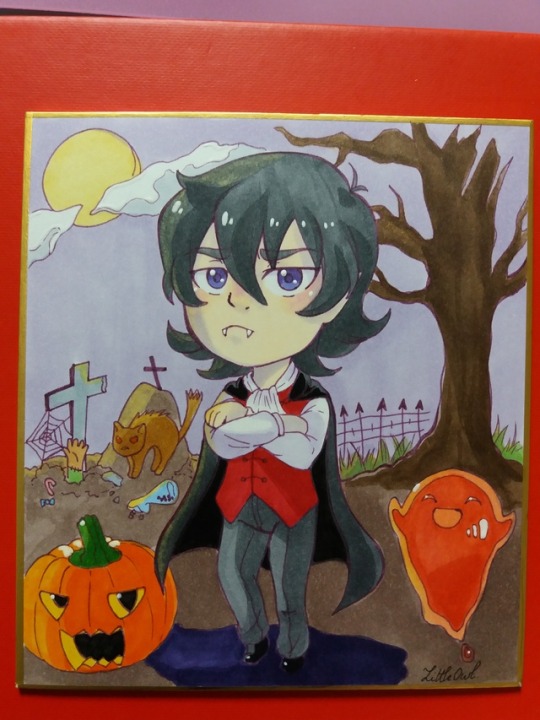
A little shikishi for halloween with Keith!~
2 notes
·
View notes


Photo
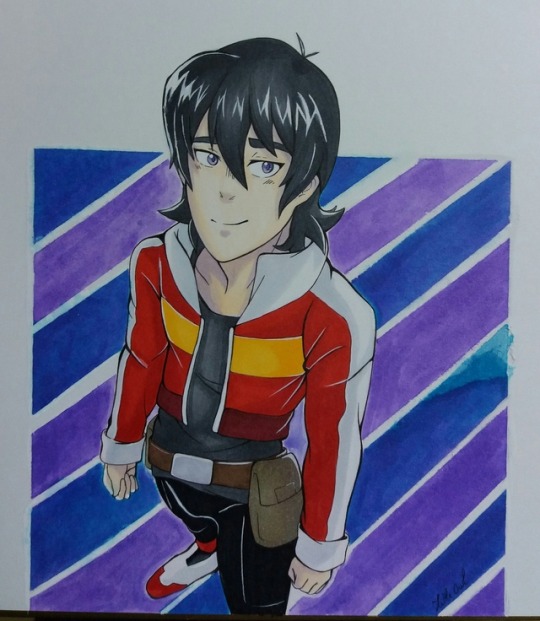
Happy Birthday Keith!~♡
7 notes
·
View notes