
luxus4me
Luxus für Mich
Das hier zeigt alle die Seiten, die ich für interessant im Bereich Internet, Ecommerce und B2B halte. Ich probiere gerne vieles aus.
3735 posts
Don't wanna be here? Send us removal request.
Last Seen Blogs


Link
WebdesignerNews https://j.mp/2NESNEV https://j.mp/2VnYH1d
https://j.mp/2VnYH1d via WebdesignerNews URL : https://j.mp/2pqLAdf
0 notes
Link
Entrepreneur https://j.mp/2Ki41gV
Consider this: Freelancers are expected to become the U.S. workforce majority in the near future. That means we can expect to see more and more freelancing job boards appear. That's not to say we need them. Take a look at the Google search results for “freelance jobs.” You’ll find hundreds of websites that can connect you with prospective clients.
The problem, however, is that not all job boards are created equal. Some are a bit suspicious, causing both freelancers and businesses to question their legitimacy. Others are meant only for seasoned veterans. There are also boards capable of finding work quickly for freelancers, but they won’t get paid very much. Consider it the "price of entry" to the freelance realm.
These obstacles make finding freelance work more complicated than it has to be. That’s why I’ve put together a list of 18 freelance sites to help entrepreneurs find their next gig. Each of these sites is reputable and can be used by freelancers of all experience levels, empowering people to make the most of their skills in a shaky economy.
Related: Become Your Own Boss and Start a Freelance Career in 2020
1. Toptal
If you’re a freelancer designer, developer, financial expert, product manager or project manager, you can find hourly, part-time or full-time work at Toptal. The catch is that Toptal has a rigorous screening process, meaning typically only the top 3 percent of freelance talent that applies is accepted.
This is better suited for talented freelancers who have some previous experience under their belt. However, if you're accepted, you can be certain that you’ll receive competitive compensation.
2. Fiverr
There are a couple of things that make Fiverr stand out from other leading freelance marketplaces. Users get to list the specific jobs where they excel. When I started podcasting, I hired someone on Fiverr to design my cover and another person to create the intro. When I had trouble getting the podcast listed on iTunes, I enlisted another expert to help solve the mystery.
Secondly, because most gigs start at $5, this is a great place to launch your freelancing career. After you land some clients and build up your portfolio, you can start charging more for your services.
3. PeoplePerHour
For more than a decade, PeoplePerHour has been helping freelancers land web-based projects. This site has areas like marketing, SEO and software engineering. What makes it so appealing is that it streamlines the process of signing up. Client communication, project management and payments are all handled in one dashboard.
You can send 15 proposals to clients before having to sign up for the paid plan. However, you can still browse listings and get notified of new openings, even if you don’t sign up for the paid plan.
4. Upwork
Upwork has been around in some form for years. Elance and oDesk were formed in 1999 and 2003, respectively, and merged to found Upwork. Today, Upwork is one of the largest freelance marketplaces in the world, hosting millions of freelancers in industries like design, development, accounting, marketing, writing and customer service.
Like Toptal, freelancers can find short-term tasks, recurring projects and even full-time contract work. Upwork is good for both entry-level and experienced freelancers because of the variety of work listed.
5. Freelancer
Freelancer states that it’s the “the world’s largest outsourcing marketplace,” connecting more than 30 million employees and freelancers across 247 countries. With Freelancer, you can a find a couple of different ways to work. The first way is by creating a profile that highlights your freelancing skills. When a client needs your specific skills, he can chat with you in real time.
The other way is by browsing for work and placing bids on projects that match your talents and interests. When your work is complete, you’ll receive a secure payment via the site’s Milestone Payment System.
6. SimplyHired
SimplyHired is a job search engine that helps people find remote or local work in 12 different countries. SimplyHired contains more than 100 job boards, meaning you'll have access to millions of job openings ranging from marketing to customer service. You can even find nursing and warehouse work.
You can also search for both part-time and full-time work, making SimplyHired a great platform to quickly land a job. It produces a blog that contains helpful advice on how to make yourself more attractive to recruiters.
7. 99designs
99designs should be your go-to marketplace if you’re designer. Anyone truly skilled in creating logos and web and app design can find a home here. Creative freelancers can search for jobs where clients need someone to create marketing materials, packaging or merchandise like T-shirts.
The site also provides numerous resources to assist designers in enhancing their skills. These resources include how-to tips, tutorials, tool kits, e-books and even interviews with seasoned designers.
8. Aquent
Are you a creative professional or a digital marketing expert? If so, you can land your next gig through Aquent. The site gives freelancers the chance to find remote or on-site work in the U.S. You can also find work in Canada, the United Kingdom, France, Netherlands, Australia or Japan.
What’s most appealing about Aquent is that its Gymnasium offers free online courses that can help you strengthen your existing talent.
9. The Creative Group
The Creative Group is part of the large Robert Half staffing agency. The site is meant for individuals in creative fields like art, copywriting, photography, graphic design and marketing. You can find temporary, project-based or full-time work.
Simply upload your resume to the site or share your LinkedIn profile. Robert Half's specialists find the right job for your specific expertise and preferences from there.
10. Envato Studio
Envato Studio was established by designers, developers and creatives. This studio can help you land short-term or long-term projects. When a client needs your unique skill set, he browses the site to compare portfolios and pricing. You'll receive recommendations from the Envato Studio community.
Once you're hired, Envato Studio holds the payment until the job is completed and the client is satisfied with the work. Throughout the course of the project, the platform gives you a chance to receive real-time feedback from the client. You can be certain you’re on the right track with this direct communication.
11. Remote.co
Founded by Sara Sutton, who previously founded FlexJobs, this site has been a leading virtual team site for more than a decade. Remote.co is a great platform for anyone who wants to work remotely.
Whether you’re a designer, developer, customer service rep, writer, recruiter or sales professional, Remote.co can help anyone who’s ever dreamed of becoming a digital nomad. If you’re new to remote work, there’s also a handy blog that can help you get started on the right foot.
12. DesignCrowd
DesignCrowd has dubbed itself the No. 1 custom design marketplace in the world. Similar to 99designs, this site lets designers find work. You can design logos, website, business cards, T-shirts and even tattoos.
Clients can select short deadline submissions, such as three to five days. Project turnover is incredibly quick. If you need some extra cash, you can also enter design contests through the site.
13. FlexJobs
This site has more than 50 different career categories for freelancers, virtual workers and full-time employees. FlexJobs is a popular platform for anyone searching for remote or flexible work. All open positions are screened in advance, so you can rest assured that the jobs that have been posted are legitimate.
You have to pay to join, with plans starting at $14.95 per month. You can also participate in skill tests, attend webinars and read up on tips to help your job search. Best of all, you have access to exclusive discounts through partnering websites.
14. Krop
Krop is a job board solely for creatives, like copywriters, photographers and designers. On top of creating a profile to showcase your experience, you can use Krop to build and host your portfolio.
Another perk of using Krop it that it's a site that promotes freelancers to clients searching for new team members.
15. Authentic Jobs
Since 2005, Authentic Jobs has been connecting creative and web professionals to find freelancers. You can contract or moonlight on the job with companies like Apple, Facebook, ESPN or The Motley Fool for free. If you're a freelancer interested in working with these companies, start browsing listings for everything from content strategists to back-end developers to project managers.
Because compensation can range anywhere from under $29,000 to more than $100,000 annually, it’s a nice platform for freelancers of all experience levels.
Related: How to Build Your Own Career as a Freelancer
16. LocalSolo
Recently acquired by Communo, LocalSolo is unlike other freelance marketplaces. It's a localized freelance job board where you can find gigs in your neck of the woods.
It’s free to use, and it doesn’t charge commission fees; it also lets you customize your profile. When you and a client connect, you communicate directly. This way, you can discuss the scope of the project, rates and contracts. As a member of LocalSolo, you also receive discounts from partners like Shopify, FreshBooks, Adobe and DreamHost.
17. Working Nomads
Working Nomads sends you a curated list of remote jobs in areas like development, management, marketing, design, sales and education.
You have the option to receive these notices daily or weekly. You also have the option to find temporary projects or regular employment. Just keep in mind that not every gig is 100 percent remote; some jobs may require you to train on-site or work part-time from home.
18. LinkedIn ProFinder
Chances are high that you already have a LinkedIn profile. Why not get the most out of it? LinkedIn is used by more than 420 million members in some 200 countries, making LinkedIn one of the best resources for connecting professionals.
LinkedIn has more recently decided to get into the freelance game with ProFinder. This gives small business owners and other professionals a chance to hire freelance accountants, bookkeepers, designers, marketers and copywriters. ProFinder also offers career coaches. Your personal coach will review your resume and prepare you for interviews to help advance your freelance career.
Now or at any other time, it's easy to feel overwhelmed and unable to move forward with your entrepreneurial goals. But these sites can empower you to find opportunities that will maximize your skills and allow you to grow your side work into something bigger.
Related:
18 Freelance Sites to Find Your Next Gig
How Event Organizers Can Cultivate Resiliency
What Doulas Can Teach Us in Times of Anxiety and Chaos
https://j.mp/2RMUP8s via Entrepreneur URL : https://j.mp/1PSmwRr
0 notes
Link
t3n RSS Feed - News https://j.mp/3a6A1il
15.04.2020, 10:01 Uhr Hinweis: Wir haben in diesem Artikel Provisions-Links verwendet und sie durch "*" gekennzeichnet. Erfolgt über diese Links eine Bestellung, erhält t3n.de eine Provision.
Wie waren nochmal die Bildgrößen bei Facebook, Instagram oder Youtube? Damit bei eurem Social-Media-Kanal alles passt, bietet diese Infografik den Überblick.
Anzeige
Cheatsheet: Das sind die richtigen Maße für Social Media
Wusstest du, dass dein Channel-Profilbild bei Youtube nicht größer als 800 x 800 Pixel sein sollte? Und dass dein Header-Foto auf Twitter 1.500 x 500 Pixel messen sollte? Abgesehen von hochwertigem Content sind genau passende Grafiken die Grundlage für einen erfolgreichen Social-Media-Auftritt. Genauso wie die sozialen Netzwerke selbst verändern sich die Standardmaße für diese Grafiken regelmäßig.
Damit ihr trotzdem auf dem aktuellen Stand bleibt, könnt ihr euch das aktuelle Cheatsheet von makeawebsitehub.com einfach bookmarken. Oder ihr druckt die Infografik für euer Social-Media-Team aus und hängt sie gut sichtbar an die Wand.
Das Cheatsheet liefert euch die empfohlenen Bildgrößen für Facebook, Linkedin, Youtube, Instagram, Twitter und Snapchat. Neben diesen beliebten Social-Media-Kanälen findet ihr auch die korrekten Formate für andere, teils bedeutender werdende Plattformen, so etwa Tumblr, Pinterest, Ello und die chinesischen Platzhirsche Wechat und Weibo. Tiktok fehlt allerdings. So seht ihr direkt auf einen Blick, dass für ein Facebook-Titelbild die Maße von 800 x 312 Pixel empfohlen werden und das Hero-Image bei Linkedin 1.128 x 376 Pixel groß sein sollte. Alle weiteren Bildgrößen? Findet ihr in dem unten stehenden Cheatsheet.
Ein Klick auf die unten stehende Vorschau öffnet die vollständige Infografik.

Aktuelle Bildgrößen und Videogrößen für Social Media im Überblick. (Grafik: makeawebsitehub.com)
Dazu könnte dich auch interessieren:
Dieser Artikel wurde zuletzt am 30. März 2020 upgedatet.
https://j.mp/3emOEl2 via t3n RSS Feed - News URL : https://j.mp/2K7EPcS
0 notes
Link
Lifehack - Feed How do you go from idea to implementation? By setting goals. In your personal life and at work, goals give you direction. They allow you to split projects into manageable pieces, and they help you hold yourself accountable along the way. But setting goals is only the first step. More than nine in 10 people who set goals for the new year never achieve them.((Inc.:Science Says Only 8 Percent of People Actually Achieve Their Goals. Here Are 7 Things They Do Differently)) If you want to actually accomplish your goals, you can’t just think of the finish line. You need to set yourself up to reach it, which means strategizing how you’ll run the race. What’s the best way to do that? By setting some ground rules for yourself:
1. Setting Goals the SMART Way
Setting any sort of goal is better than nothing, but you can set yourself up to succeed by keeping the acronym “SMART” in mind. A SMART goal is: Specific Whatever your goal is, you need to know when you’ve achieved it. The more specifics you give yourself, the better. Say that you’re saving money with the goal of buying a new car. How much money, exactly, do you need? Are you willing to defer some of the cost through financing, or would you prefer to make a cash purchase. When do you hope to make the purchase? Your specific goal might be, “I want to save $5,000 for a down payment by December 2020.” You’ve given yourself a yardstick by which to measure your progress. Measurable A goal can be specific but not measurable. You might want to become a better father in the new year — but by what standards will you judge yourself? Those standards are obvious for goals like saving money. But for something like becoming a better father, you’ll need to come up with proxies. If you’re worried that you don’t spend enough time with your son or daughter, maybe you want to measure the time you spend per week with him or her. If you haven’t been giving your child the help he or she needs with schoolwork, perhaps improvements in his or her grades is how you’ll know you’ve been a better parent. Attainable Specific and measurable goals aren’t necessarily attainable. If you’re trying to get fit, good on you. Realize, though, that you probably won’t be able to run a marathon by the end of next week. Shoot high, but beware: A recent study by the University of Basel found that people who set attainable goals for themselves enjoy greater wellbeing than those who set unreasonably high ones. The reason, according to researchers, is that a sense of control over outcomes results in greater life satisfaction.((Science Daily: Live better with attainable goals)) Relevant Your goals should always map to a greater plan. Why bother to lose weight, for example, if your body mass is already at a healthy mark? If revenue is your company’s greatest need, then don’t set a goal to deck out your company’s office. Relevance is also important for two less obvious reasons: If a goal doesn’t actually matter to you, you’ll struggle to stick with it. And at least in the context of workplace goals, you’ll struggle to get team buy-in or resources if it’s not clearly relevant to your mission. Time-dependent Although attaching a timeline to your goal does make it more specific, timeliness deserves a special shoutout: If you have no deadline for achieving your goal, you will struggle to make time for it. Think through what the actual work of the goal will look like. Say you’d like to lose 25 pounds: Medical experts suggest aiming to lose 1-2 pounds per week, which means you should expect to reach your goal in 12-25 weeks. Be patient with yourself. We’d all like to achieve our goals faster, but setting unrealistic expectations is not the solution. You may burn out or, in the context of the weight-loss example, even endanger your health. You know that setting goals is important, and you know what a good one looks like. But your time is limited; the next step is to choose: What do you most want to achieve, and how do you actually do it? Every goal has an opportunity cost. Working toward one means that you can’t use that time to do something else. And so, the next few points will focus on how to achieve the right goals.
2. Think about Others
Few real achievements involve just one person. Be a team player: Before deciding to spend weeks or months working toward something, think about others. It’s important to keep your ears open. Say you learn that you’re not the only member of your family who’d like to get fit in the new year. Prioritizing that goal is a good idea because it benefits you both: Having an accountability partner makes you both more likely to hit the gym after a hard day.
3. Know Your 'Why'
As great as it is to take others into account when setting goals, your first priority should be just that: yours. To maximize both your time and your chances of achieving a goal, it’s important to stay inspired. Think deeper than “earning more money” or “being healthier.” Do you want to build a better life for your family? Is seeing your kids graduate college what gets you out of bed every day? In professional life, this is particularly key. Mike Novotny, CEO of clinical trial software company Medrio, gets through the hard days by thinking back to his mission is to cure disease and save lives.((Mike Novotny: CEOs, The Purpose Of Any Organization Is The “Why.” Here Are 3 Essential Questions To Ask Yourself Before You Launch)) Medrio won’t cure every disease, Novotny realizes, but he does believe it’s possible for the industry to do so. Your “why” doesn’t have to be changing the world in order to be a worthwhile goal. But it should be something that you believe in, stand a good chance of achieving, and are able to break into specific steps.
4. Look at the Long Term
Short-term goals have value, but they should really be seen as steps toward long-term goals. Use legacy goals to organize your operations. Challenge yourself: Can you map every item on your calendar to one of those three long-term goals? What about your task list, purchases, and investments? What might legacy goals look like in your personal life? Think about things that would actually alter your life trajectory. If you want to improve access to education, perhaps starting an online learning company should be one of this year’s legacy goals.
5. Put First Things First
Once you have your big picture and annual priorities in mind, you need to drill down: How are you going to get there? Start with a simple question, suggests Say Insurance’s Erin Thompson: “What do I want to achieve today?” Without a specific plan of action for the day, it’s all too easy to get caught up in the little things. The truth is, most of what you do in a day probably doesn’t get you closer to your goals. Things like answering emails, cooking meals, and commuting have to happen, but they’re best seen as chores rather than steps forward.
6. Be Humble
Whether you’re working on a solo goal or one that involves a whole team, recognize that others’ ideas can help you achieve it faster and more effectively. Look beyond things like age and job title. Teenager Greta Thunberg has broken through to more people on climate change than many scientists. Mahatma Gandhi was a small-time lawyer before he helped India overcome British rule. Always assume that the person you’re interacting with has something valuable to tell you. Be open with people about what you want to achieve, and humbly accept their input.
7. Give Yourself Some Credit.
Most goals worth setting are achieved in phases. If you can’t see and feel yourself making progress toward them, warns Teamwork CEO Peter Coppinger, you’ll struggle to achieve what you set out to do. When setting goals, think about the waypoints you expect to see along the way. Say you hope to become a CEO someday. You can’t expect to leap straight to the top, so consider what roles you might want to hold first. As you work your way up, celebrate those wins. When you earn your first management role, go visit a national park you’ve always wanted to see. Once you become a VP, take that European vacation. After you’re promoted to the c-suite, reward yourself with a cruise. Setting goals is good, but achieving them is even better. Choose wisely, listen carefully to those around you, work hard, and remember to celebrate the wins along the way.
More on Setting Goals
How to Use SMART Goal to Become Highly Successful in Life
How to Create an Action Plan and Achieve Your Personal Goals
How to Become Goal Oriented and Achieve More in Life
http://j.mp/2G2Pd3J via Lifehack - Feed URL : http://j.mp/2RCV6c6
0 notes
Link
Lifehack - Feed http://j.mp/2G6ieeN If you think yoga can be learned on the mat, you're wrong! To learn yoga is to learn yourself, your life and the world around you, which happens mostly off the mat. Since 2000, I study, practice, teach and live yoga – I grow with it from year to year – hence life becomes more interesting and more meaningful from year to year, too. Through all these years, I observe the evolution of yoga in the western culture and see, how (mostly) wrongly, has been interpreted, taught and practiced. Little is known about how to learn yoga – about its practice, its effect and its application. Yoga is all about finding the simplicity and the meaning in the complexity of life. But when we look around us, it doesn't seem so simple, even for those who practice it, and for the most who teach it. Everything about yoga begins in its definition from the original yogic scripture Yoga Sutras of Patanjali.((Internet Encyclopedia of Philosophy: Yoga Sutras of Patanjali)) And the value for how to learn yoga, is in this article – showing the value of the above definition and how to practice it in the simplest way, effectively and efficiently.
What is Yoga?
Yoga-Citta-Vrtti-Hirodhah -- and its translation is: Yoga is the cessation of the fluctuations arising within consciousness. The 195 Sutras, that the original yoga scripture consists of, are written in a strongly compressed manner with the idea to deliver a profound meaning and a lot of space for interpretation. However, the interpreter must be highly serious and competent, otherwise the interpretation will drastically deviate from what the message conveys. When the definition about yoga is interpreted and applied the right way, it tells us how yoga is to be practiced and explored. To start the right way, we must know the right destination of yoga, which is Kaivalya:((Wikipedia: Kaivalya)) The union between you, the other and the world. Let's see how to do that: Beginning with the famous mainstream slogan “Union of Body, Mind and Soul”, brings up the question, "How to reunite the body, mind and soul?" Your feelings – created by outside stimuli result in the creation of thoughts, hence there’s connection between your body and mind. That’s easy to understand, right? Now this connection and the thoughts must serve and improve the mind, making it capable to 1) understand the soul and 2) to unite it with the body and mind. That's where our journey towards the goal of yoga (Samadhi) is interrupted – making the main part of the union not easy to understand, even less so to accomplish.
Yoga is More Spiritual than Physical
This is what makes yoga more spiritual than physical. To put it in numbers, yoga is 97% of psychological, philosophical and spiritual nature and only some 3% of physiological, considering that there are only seven out of 195 Sutras referring physiologically to sitting and breathing, of which I talked in my earlier post on Yoga For men. But before experiencing any spirituality from yoga, there is the mental (emotional) part that needs to be mastered and that part is to establish a connection between the body and mind. How? The simple thought and realization that you are conscious of how you feel within your body (cold, warm, relaxed, depressed, anxious, happy and so on), means that you have made the union between your body and mind. (below the step by step exercise for that). But to establish a connection to your soul – to the finest part of yourself – the Self: You must find out (through thinking) what is the subtlest thing that drives your body and mind – yourself as an individual and use that driver to go pass beyond your physicality and mentality. It is right here that you use the definition about yoga and the realization – the moment, where you are not analyzing any thoughts or feelings. This is a state of Yoga – a state of union between body, mind and soul, in which your consciousness has ceased to identify with its fluctuations.
Yoga as Creativity and Expertise of the Individual
In such a case, there is no specific (like beginners, intermediate or advanced) technique for learning yoga. The moment of the state of yoga arises for everyone of us in an individual way as everybody's physique and mental content are different. You might be very well advanced in performing the most difficult asanas for decades but still unable and incompetent to be in a state of union with your body, mind and soul. Whereas, if you are a beginner and possess the grace and other virtues, than it's easier and quicker to establish that connection. As yoga is an inherent part of the human being, firstly, in order to pave the yoga path successfully and effectively, you must understand that yoga is not a technique for performance, but rather a creativity and expertise of yourself. Your learning process cannot be focused on, nor conditioned by a certain handbook, someone’s instructions or some specific school. Learning yoga requires your creativity to look within yourself and learn from yourself, become the expert of your feelings, emotions and desires. You, as a beginner might already possess many qualities and prerequisites for creating the union between your body, mind and soul, but your knowledge requires creativity for your growth to reach the state of union and then reap the fruits of that union. Once this happens there is no turning back - you'll be pulled by the beauty and energy of your on being.
Be Fast Mentally and Slow Physically
As already mentioned, you don’t need to do physical performances like the split or the headstand to be able to immerse in a deep meditation or Samadhi. But you do need enough creativity for your self-inquiry. Many of my students start working directly with meditation – attending the complexities of the mind, because that’s where the hindrances lie. There, the meditator is able to work on the cessation of identifying with the fluctuations of the consciousness – where intelligence expands, adversity ends and the individual is ready to pass through its physicality and mentality in order to reach the union with the soul. But if you’re really a beginner and cannot start with that, then you can start enhancing your creativity on the body-mind level. The exercise follows in the next paragraph. The greater your creativity, the better your expertise about yourself – the deeper your competence to inquire further into the union with your soul. Sure enough that a more pliable and healthy physical body has some advantages and better preconditions for that, but don’t get discouraged because your body-mind union will open up the way. So here we are, you are at the moment to enhance your creativity upon that union. Please, take this as a very serious part of the practice as it is crucial for learning yoga – for learning yourself.
The Beginner's Exercise - Creativity upon Body-Mind Union
The first and most important element to learn and practice yoga is of physiological and psychological nature: Stillness:
Make sure your body is still and comfortable.
Focus on breathing to initiate observing.
Observe your body and identify the first feeling that occurs to you.
Keep identifying feelings and emotions, but without getting involved with them.
Now create feelings and emotions as you please and let them go.
That’s it! That’s the creativity upon the body-mind union. The validity of this creativity lies in the stillness and observance of that union. In this practice you can learn to understand and catch the moment – the main ingredient of life. Life is a sequence of moments and knowing that you're able to manage that sequence is a new level of living life, called dharma – the practical and skillful way of living. An essential character develops as a result of practicing this discipline. However, be aware that we are still talking about outward elements of yoga – the gross levels (from Yama to Pratyahara) whereas the subtle, inward elements (Dharana, Dhyana, Samadhi) are yet to be approached, learned and implemented. It is on these subtle levels that you can realize the depth of spirituality and the essence of yoga. It is remarkable how the science of yoga can take you in such heights and depths of exploring life and being. Little is known about the essence and the right practice of yoga in the west. There is a huge knowledge gap between how yoga should be learned and how it is practiced today in the west. You can bridge this gap by practicing the above exercise. Know that yoga is of a very subtle nature – operating on a subtle energetic level – the level of your mental energies, your thoughts. That means that it is to be learned at that level and not on any other. A body posture alone cannot take you to that level if you don't apply your creativity and self-inquiry.
Prerequisite for Yogic Success – Union between You and the Other
Yoga is nothing, if our relationships with others are not managed harmonically. Learning yoga is also learning connecting with the other – with the stranger who’s not you but carries the same "core", the same heart as you. We as individuals, possess the inborn feature of Ego – the “I-consciousness” that makes us feel separate from the rest of what makes the wholeness. This separation is the second of the the five "klesah" afflictions((Plato Stanford: Klesah )) – that stand as major hindrance against the union (Yoga) – called "asmita" or I-am-ness / Egoism (Y.S. II.6.), and has to be cultivated and brought to a level of discernment that will lessen our disturbance that comes out the fragmentation between the “I-am-ness” and the “Other-ness”. This is a crucial concept in Yoga and it is inevitable to be worked upon this hindrance in order to reach the inner “psychological” freedom or the ultimate liberation “Kaivalya” for which Yoga stands for. But, again, if you are beginner in this part, you want to know how to start dealing with all this. Here is the exercise:
Practice observance from the first exercise.
Realize that the structure of your feelings, emotions, etc. is identical with the one of the other individuals.
Practice witnessing, tolerating and gradually accepting the diversity between yourself and the other individuals.
Observe for so long with equanimity, until you see the uniformity in that diversity.
This is one of the greatest accomplishments a human being can achieve. To be, means, to be in relationship – internally, as well as externally.
Yogic Lifestyle - Union Between You, The Other and The World
Here comes the last piece of the puzzle – the union – on the highest level of worldly existence – between you, the other and the world. This means that Yoga is also worthless if practiced only on the mat. So when learning yoga, especially when practicing the body-mind union, consider if: You speak the language of nature and how you're connected to nature and its basic elements? Do you complicate your existence by thinking that you are in the center of the world and require extra attention and acknowledgement? Thinking this way interferes with the practice of yoga. And surely, you might wonder, what should be done here in order to create that harmony in union? You’d be amazed to know that there is one important yogic movement that needs to be done. That is: The action of not doing anything but contemplating! Then yoga happens. Yes, this goes beyond the physicality and mentality of your being. As our bodies play just a tiny part of the evolution of existence, we must not attach to the world in that sense – clinging to worldly life with that insatiable urge that generates worries and anxiety – but rather grow through life with detachment and the attitude that life has been gifted to us with the purpose to realize that gift and attain the wisdom of life.
Go Beyond Your Physicality and Mentality
Attaining greatness like connecting to the world and to your soul, we must pass beyond the thoughts, feelings and emotions, and the influence they have on us. Hence we want to make the mental fluctuations to cease and let yoga shine its light through this yogic movement: The stillness and the watching within. Can yoga be understood and achieved in one single session and then practiced continuously, productively and effectively? Of course it can. Your union within yourself, the other and the world is lot simpler and easier than you think. Practice these simple yogic movements diligently, seriously but also effortlessly and your yoga will be flourishing and fruitful. I salute the spirit in you!
More About Yoga
7 Beginner Yoga Exercises for Men to Increase Mobility
15-Minute Morning Yoga Routine for Beginners
How Practicing Morning Yoga Transforms Your Life (+10 Beginners’ Poses)
http://j.mp/38waA9R via Lifehack - Feed URL : http://j.mp/2RCV6c6
0 notes
Link
WebdesignerNews http://j.mp/2LBhzWj

http://j.mp/32KwAL4

http://j.mp/32KwAL4 via WebdesignerNews URL : http://j.mp/2pqLAdf
0 notes
Link
GamersGlobal News http://j.mp/2F2cket
Um 15:00 Uhr Ortszeit (22:00 Uhr deutscher Zeit) findet am heutigen Sonntag in Los Angeles die diesjährige E3-Pressekonferenz von Microsoft statt. Und die könnte so einige Überraschungen bereithalten: Alleine 14 Spiele von eigenen Studios möchte der Hersteller aus Redmond während seines rund 90-minütigen Media Briefings vorstellen.
Weiterlesen
http://j.mp/2ZaoUzU via GamersGlobal News URL : http://j.mp/2REjysZ
0 notes
Link
WebdesignerNews http://j.mp/2HZ0nah

http://j.mp/2W1EKzW


http://j.mp/2W1EKzW via WebdesignerNews URL : http://j.mp/2pqLAdf
0 notes
Link
CSS-Tricks http://j.mp/2TnG9LN
There are situations where keeping a reference to the last route a user visited can come in handy. For example, let’s say we’re working with a multi-step form and the user proceeds from one step to the next. It would be ideal to have the route of that previous step in hand so we know where the user left off, in the event that they navigate away and come back later to complete the form later.
We’re going to cover how to store the last known route and then fetch it when we need it. We’ll be working in Vue in this example and put vue-router to use for routing and localStorage to keep the information about last visited route.
Here’s an example of what we’ll be working with:
First, let’s outline the route structure
Our example has a grand total of three routes:
Each route needs to be assigned a name property, so let’s add that to our router.js file:
// router.js import Vue from "vue"; import Router from "vue-router"; import Hello from "@/components/Hello"; import Goodbye from "@/components/Goodbye"; import { HELLO_URL, GOODBYE_URL } from "@/consts"; Vue.use(Router); const router = new Router({ mode: "history", routes: [ { path: "/", name: "home" }, { path: HELLO_URL, name: "hello", component: Hello }, { path: GOODBYE_URL, name: "goodbye", component: Goodbye } ] }); export default router;
Next, let’s go over the requirements
We know the first requirement is to store the last visited route in localStorage. And, secondly, we need to be able to retrieve it. But what conditions should the route be fetched and applied? That gives us two additional requirements.
the user enters the main route (/home), navigates away from it, then wants to return to it.
the user has been inactive for a specific time period, the session expires, and we want to return the user to the last screen they were on after restarting the session.
These four requirements are what we need to meet in order to proceed with the redirection.
Now let’s jump into the code.
Requirement 1: Save the last route name in localStorage
We want to keep the reference to our last visited route in localStorage. For example, if a user is at /checkout and then leaves the site, we want to save that so the purchase can be completed later.
To do that, we want to save the route name when the user enters any new route. We’ll use a navigation guard called afterEach that’s fired each time the route transition is finished. It provides a to object which is the target Route Object. In that hook, we can extract the name of that route and save it in localStorage using a setItem method.
// router.js const router = new Router( ... ); router.afterEach(to => { localStorage.setItem(LS_ROUTE_KEY, to.name); }); ... export default router;
Requirement 2: Fetch the last route name from localStorage and redirect
Now that the name of the last route is saved, we need to be able to fetch it and trigger a redirect to it when it’s needed. We want to check if we should redirect before we enter a new route, so we will use another navigation guard called beforeEach. This guard receives three arguments:
to: the target route object
from: the current route navigated from
next: the function that must be called in the guard to resolve the hook
In that guard, we read the name of the last visited route by using a localStorage.getItem() method. Then, we determine if the user should be redirected. At this point, we check that the target route (to) is our main route (/home) and if we do indeed have a last route in localStorage.
If those conditions are met, we fire the next method that contains the name of the last visited route. That, in turn, will trigger a redirect to that route.
If any condition fails, then we’ll fire next without any arguments. That will move the user on to the next hook in the pipeline and proceed with ordinary routing without redirection.
// router.js const router = new Router( ... ); router.beforeEach((to, from, next) => { const lastRouteName = localStorage.getItem(LS_ROUTE_KEY); const shouldRedirect = Boolean( to.name === "home" && lastRouteName ); if (shouldRedirect) next({ name: lastRouteName }); else next(); }); ... export default router;
That covers two out of four requirements! Let’s proceed with requirement number three.
Requirement 3: The first visit condition
Now, we need to check if the user is visiting the main route for the first time (coming from a different source) or is navigating there from another route within the application. We can do that by adding a flag that is set to true when the Router is created and set it to false after first transition is finished.
// router.js const router = new Router( ... ); let isFirstTransition = true; router.beforeEach((to, from, next) => { const lastRouteName = localStorage.getItem(LS_ROUTE_KEY); const shouldRedirect = Boolean( to.name === "home" && && lastRouteName && isFirstTransition ); if (shouldRedirect) next({ name: lastRouteName }); else next(); isFirstTransition = false; }); ... export default router;
OK, there is one more requirement we need to meet: we want to redirect the user to the last known route if the user has been inactive for longer that a specific period of time.
Requirement 4: The activity time condition
Again, we will use localStorage to keep the information about user’s last visited route.
In the beforeEach guard, we will get the route from localStorage and check if the time passed from that moment is within our threshold (defined by hasBeenActiveRecently). Then, in our shouldRedirect, we’ll determine whether a route redirect should happen or not.
We also need to save that information, which we will do in the afterEach guard.
// router.js const router = new Router( ... ); let isFirstTransition = true; router.beforeEach((to, from, next) => { const lastRouteName = localStorage.getItem(LS_ROUTE_KEY); const lastActivityAt = localStorage.getItem(LS_LAST_ACTIVITY_AT_KEY); const hasBeenActiveRecently = Boolean( lastActivityAt && Date.now() - Number(lastActivityAt) < MAX_TIME_TO_RETURN ); const shouldRedirect = Boolean( to.name === "home" && && lastRouteName && isFirstTransition && hasBeenActiveRecently ); if (shouldRedirect) next({ name: lastRouteName }); else next(); isFirstTransition = false; }); router.afterEach(to => { localStorage.setItem(LS_ROUTE_KEY, to.name); localStorage.setItem(LS_LAST_ACTIVITY_AT_KEY, Date.now()); }); ... export default router;
We met the requirements!
That’s it! We covered all four of requirements, namely:
We store the last visited route in localStorage
We have a method to retrieve the last visited route from localStorage
We redirect a user back to the main route if they’re coming into the application on an initial visit
We provide the user with a redirect to the last known route within a certain time period
Of course, we can extend this further by adding more complexity to the app and new conditions to the shouldRedirect variable, but this gives us more than we need to have an understanding of how to keep the last visited route persistent and retrieve it when it’s needed.
http://j.mp/2Bawgde via CSS-Tricks URL : http://j.mp/2bNbLYg
0 notes
Link
Designmodo http://j.mp/2Hs24ji
ResourcesDoru Ciobanu • January 24, 2019 • 0 Comments
Share
Share
Tweet
Share
Pin It
Share
One of the most significant mistakes many creatives make is the failure to promote their work.
You can have the best product in the world, the greatest app ever, or the most beautiful WordPress theme, but if you don’t showcase your work, you’ll never score big. A tight budget should not be an excuse. There are some marketing efforts you cannot ignore. One of the most effective promotion channels is video content.
Video is King
Do you know the saying “A picture is worth a thousand words?” Then how much is a three-minute video worth? Three minutes of footage multiplied by 25 frames per second increased by 1,000 equals … a lot. You do the math.

Video content is taking over the web. In 2019, video content will account for 80% of global internet traffic. More than 64% of consumers buy a product after they watch a video. One billion hours are spent YouTube daily. Apple overhauled its macOS App Store to feature video content for app presentations. These are the headlines you see every day on the web. Do you see a trend?
Do You Have a License?
There is no recipe for perfect video content. It depends on what you want to achieve, what type of video content you want to create or what is your target audience. However, most videos have one thing in common. Whether you are creating a demo video, a tutorial or a presentation, you need music.
Now imagine you just finished your promo materials, upload them to YouTube, your first customers are already downloading products, five stars reviews are flooding, only to have YouTube suspend your channel. Or, even worst, imagine that after your 665th sale, you receive an e-mail with the subject line: Copyright Infringement.
VIDEO
This is a scenario that could happen if you are using copyrighted music WITHOUT AN APPROPRIATE LICENSE. Hey, but you’ve got that music or sound effect from a website giving away them for free. You are covered right? Your favorite blogger even recommended this site in his “70+ websites to download free music” blog post.
Well, most “free music websites” have a disclaimer and, probably, an indemnification clause that absolves the site owners of any liability and any obligation whatsoever to check the licensing state of the *mp3 file you downloaded, and your favorite blogger is busy writing his next article (possible topic: top 70+ copyright lawyers). This is an unexpected turn of events.
Creative Common Licenses
The most important thing you should know about copyright, music and downloading is that most of the time when you download a song from a legitimate source, you license it. Yes, you don’t own it. Anyone with the same license as you can use it. The only way you get exclusivity is either via an exclusive license or when you get the copyright transferred to you.
When you license an audio file, you can use that file only in a way that is compliant with the licensing agreement. The most common licenses for free music are the following:
CC0 1.0: Universal Public Domain Dedication. No copyright applicable. Usually, the copyright owner dedicated the file for public use, or the copyright itself expired. You can download, use, remix, share, and do anything else you want without having to credit the artist.
CC-BY 2.0: Attribution Generic. Just like above, but you must provide an attribution link to the original artist.
CC-BY-SA: ShareAlike. Anything that uses the piece of music licensed this way should be made available under the same license.
CC-BY-NC: NonCommercial. You can’t use this audio-file in anything that’s intended for commercial gain without written permission from the artist.
CC-BY-ND: Attribution-NoDerivs. Any audio file released under this license should not be remixed in any way, including using it as a soundtrack to a video.
So, if you are looking for free sounds, these are the licenses you should look for. We have a handpicked list of CC resources that’s a great place to start.
Free Music Archive

Free Music Archive should be your first check. Launched in 2009 by WFMU, The Free Music Archive is an interactive library of high-quality, legal audio downloads. Unlike other websites, uploading content is granted only on an invitation basis and all audio files are hand-picked by one of the project’s curators.
Files are grouped in 16 style genres, and each style has its sub-genres. A nice touch is the blog section where you can discover tracks to draw inspiration from. Of course, there is a charts section – featuring the most popular files, a track of the day widget, a recently added widget and more.
Free Music Archive is not only a repository of free files, but it’s also a platform for artists to showcase and promote their work. Each artist has it’s own page on the platform with bio and links. If you like what you hear, you can always donate via the tip button.
The site is not as mobile friendly as you would expect, but the iOS and Android apps are a good alternative.
Pay attention to the license box next to each track. While most tracks feature a Creative Commons license, some use an FMA license restricted to personal use. There is no easy way to sort for commercial use licenses, so take a close look at any song before using it.
ccMixter

You already have permission. This is the moto ccMixter features on its homepage. A clean and responsive interface will help you navigate ccMixter’s impressive collection of sound files. There are three main categories to choose from: Film and Video, Commercial Projects and Video Games.
You can navigate files via tag search. Choose genres, instruments or style to narrow down your search. Also, don’t forget to filter for the license you need.
While ccMixter has no problems with quantity, it does have some issues with the quality of the files uploaded. Not everyone has the latest tools, inspiration or skills to produce high-quality music, so you’ll spend some time here to find a suitable track.
The entire ccMixter sound collection is available under an attribution license. As long as you give credit to the artist, you’re free to use it for whatever project you have in mind.
FreeSound

FreeSound is a project founded by the Universitat Pompeu Fabra of Barcelona and aims to create a collaborative database of audio snippets, samples recordings. Being a community-driven project, FreeSound has an excellent forum board with thousands and thousands of threads. Review sounds, get feedback on submissions, post requests, showcase projects and browse a legal and attribution section forum. FreeSound is the definition of a community project.
While, at the first glance, the UI seems antiquated and unintuitive, you’ll get the hang of it in minutes. The best way to start is via the search bar and work your way around from there. No matter what kind of sound you need, you’ll find it. Each file has a specification box with info on the license, type of file, duration, size, bit-depth, channels and sample rate.
Next to each file, you’ll find the three types of licenses available on FreeSound: zero (CC0), attribution (BY) and attribution noncommercial (BY-NC).
Incompetech

While Incompetech’s music database is much smaller than FreeSound or ccMixter, you’ll appreciate the granular filtering capabilities. In addition to genre, tempo or length, you can also refine your search by “feeling,” which should help you find the perfect track for your project. You can preview the track on the site and download it as *.mp3.
All the files on Incompetech are available under a CC-BY license, but you have to either credit the author. If attribution is not wanted or impossible, a commercial license is available.
FreePD
FreePD is a repository of music and sound released under a public domain license. There are 800+ files to choose from in eight categories. You can download them at once for $25. Remember, this is not a license fee; you only pay for the commodity of a single download. FreePD is maintained by Kevin Macleod, also behind the Incompetech project, so many of the tracks you’ll find here are his creations.
Musopen

Founded in 2012, Musopen is a non-profit website that hosts music recordings, music sheets, sounds, apps and even educational materials without copyright restrictions. Musopen is on a mission to offer free music to anyone. Unlike other websites, Musopen is focused on classical instrumental music and covers various musical themes such as Baroque, Classical, Medieval or Renaissance. Navigating the extensive catalog is easy either by using the navigation menu or by typing a keyword in the search bar. All files can be previewed online, downloaded or bookmarked for later.
Up to five items can be downloaded per day. Those who need the download limit lifted or want to support Musopen’s mission to offer free music to anyone, can upgrade to paid memberships. Memberships come with lossless formats, music requests and unlimited downloads.
YouTube Audio Library
The Youtube Audio Library is an extensive curated library of permissible license audio files that you can use on the platform and outside it. The library has two big categories — free music and sound effects.
Furthermore, a filtering system is available to sort by genre, mood, instrument, duration or attribution. The download format is an 320kbs bitrate *mp3.
Non-Commercial vs. Commercial Use
CC defines noncommercial as “not primarily intended for or directed toward commercial advantage or monetary compensation.” While the definition may seem vague, it was specially designed this way, to protect both the licensor and the licensee. When in doubt, look for a commercial permissible license, ask the licensor for an exemption or pay for the commercial use.
Here are some examples:
Using a CC-BY-NC song for a wedding video = Non-commercial
Using a CC-BY-NC song to showcase the same wedding video on the videographer’s website = Commercial
Using a CC-BY-NC song as the soundtrack to a summer trip on a personal website with no ads = Non-commercial
Using a CC-BY-NC song as the soundtrack to a summer trip on a travel blog that uses ads or any other monetization methods = Commercial
Using a CC-BY-NC song in a Vimeo video = Non-Commercial (if you disable monetization)
Using a CC-BY-NC song in a YouTube video = Commercial (btw, CC-BY is the only CC license that complies with YouTube’s ToS)
In some legislation, the legal doctrine may cover some use case scenarios as fair use, meaning that you could still use CC-BY-NC audio on commercial websites, but, do you want to deal with a possible violation of copyright laws? For example, in 2014, Deutschlandradio, a non-commercial broadcaster in Germany, featured a cc-by-nc photograph on its website. The author sued Deutschlandradio and won on the basis that, in German law, non-commercial use means personal use. While the broadcaster is indeed a non-commercial organization, the business model alone was not enough for an exemption.
Conclusion: Always Check the License
If you want to be safe, you should only use CC0 or CC-BY licensed music. For any other license, carefully check and follow the requirements. If you are in doubt get in touch with the artist or with a lawyer. Better safe than sorry. While most of the time you’ll get an e-mail requesting a takedown of infringing content, there is always the possibility of legal action. Trust me, you don’t want to deal with it.
You can also pay for a commercial license. There are plenty of libraries where you can get high-quality music and sound effects for a reasonable price. By doing so, you will reward creators for their efforts and encourage them to create more content. Of course, you can do the same for authors that share their works under CC licenses. Most of them probably accept contributions.
So, if you have any question on the topic, know a great CC library that I’ve skipped or want to showcase your videos, drop a line in the comments.
http://j.mp/2S4y2pN via Designmodo URL : http://j.mp/2hBowrF
0 notes
Link
Harvard Business Manager http://j.mp/2R7J9d3 Werden intelligente Systeme uns alle überflüssig machen? Keineswegs. Wer sich mit Kommunikation, Lehre oder Ethik auskennt, muss sich um seine berufliche Zukunft keine Sorgen machen. http://j.mp/2Wd3p0O via Harvard Business Manager URL : http://j.mp/2h74OTd
0 notes
Link
Digital Money Times http://j.mp/2HqFXda
Have you ever thought about creating a cryptocurrency giveaway during a hosted event? Now you can create your own crypto-based sweepstakes with Bitcoin.com’s event paper wallet generator. With Bitcoin.com’s Golden Ticket program and open source code, the software allows anyone to develop fantastic tickets funded with bitcoin cash (BCH).
Also Read: Peer-to-Peer Trading Platform Bitquick Implements Bitcoin Cash Support
Create Your Own Bitcoin Cash Giveaway With Bitcoin.com’s Golden Ticket Software
At Bitcoin.com we love to spread cryptocurrency awareness. In order to further grow adoption in a fun way this month, we decided to publish the open source Bitcoin.com Golden Ticket repository which can be found on Github. The code allows anyone with a light knowledge of terminal command prompts to create amazing giveaway tickets loaded with BCH. The Golden Ticket platform allows the creator to choose a custom mnemonic language or Hierarchical Deterministic (HD) key creation. But it also generates HTML, pdf, and a spreadsheet mapping of the Cashddr format, Privkey, and index the swept status of each golden ticket. Alongside this, the giveaway ticket creators can redeem unswept BCH after a certain period of time.
Spread adoption with Bitcoin.com’s Golden Ticket.
Bitcoin.com’s Golden Ticket program requires the installation of Nodejs LTS version 8 and use of the computer’s terminal application to run command lines. After Nodejs has been added, the user simply clones the Golden Ticket Github repo and installs the dependencies. There are seven actions within the workflow, comprising generating a wallet, creating addresses, initiating a CSV, funding the mothership address, funding secondary addresses, generating stats, and lastly reclaiming the funds that were unswept.
How to Create Custom Golden Tickets
Bitcoin.com’s Golden Ticket app requires Nodejs and a little terminal prompt knowledge.
The first thing to do is generate a 256-bit mnemonic and BIP44 BCH address by typing “npm run generate-wallet” into the terminal. After that, you will be prompted to choose a language out of the eight available. If you don’t enter a language, the Golden Ticket program will default to English.
Following this choice, you should choose an HD path. If nothing custom is chosen, it will default to the BIP44 account of your mnemonic: m/44’/145’/0′. From here you can choose a custom name for the giveaway ticket event or choose to leave it as is and let the name default to “Golden Ticket.” After the name is chosen, it will write to the owner’s mnemonic, HD Path, and the mothership address. The address, called the mothership, is the address an individual or organization funds in order to fund all the other generated addresses.
After running the command line “npm run create-addresses” the program will prompt the creator for an event name, HD Account and an address count. You can verify the addresses created by typing “npm run create-csv” and follow this step by funding the mothership address. Our Golden Ticket program shows the mothership’s written alphanumeric address alongside a QR code that’s easy to fund. After the waller is loaded, simply type “npm run fund-addresses” to begin adding bitcoin cash to the satellite addresses tethered to the mothership.
From here, the lotto tickets can be printed on paper or card material in order to hand out at an event. After the event finishes, you can simply run the Golden Ticket software and enter “npm run generate-stats” into the terminal to generate basic stats about the event’s tickets. If a lot of people in the crowd decided not to sweep the bitcoin cash into a mobile wallet or desktop client at home, the mothership can have funds sent back after a certain period of time. If the creator wishes, the custom giveaway tickets can have a disclaimer on them explaining there is a time frame for redemption.
We gave away Golden Tickets loaded with BCH at the Libertycon 2019 event in Washington D.C.
Giveaways generate a lot of excitement and we think funded tickets with the best peer-to-peer cash system in the world go hand in hand with cool events. Bitcoin.com recently gave out a ton of Golden Tickets to participants at Liberty Con 2019 in Washington D.C. and the initiative was a great success. If you want to learn how to make your very own bitcoin cash-funded Golden Tickets then check out our repository for more instructions on installation and funding.
What do you think about Bitcoin.com’s Golden Ticket software? Let us know what you think about this subject in the comments section below.
Image credits: Bitcoin.com, Twitter, David L. Wolper, Creative Commons, and Nodejs.
Want to create your own secure cold storage paper wallet? Check our tools section.
The post Host a BCH Giveaway With Bitcoin.com’s Golden Ticket Software appeared first on Bitcoin News.
Bitcoin News
The post Host a BCH Giveaway With Bitcoin.com’s Golden Ticket Software appeared first on Digital Money Times.
http://j.mp/2RZAhLa via Digital Money Times URL : http://j.mp/2HrWBch
0 notes
Link
WebdesignerNews http://j.mp/2Dic9LP

six figure freelancer
Learn from top professionals who share their exact formulas for success in starting, growing, and maintaining a 6 figure freelance career.
http://j.mp/2TYsE56 via WebdesignerNews URL : http://j.mp/2pqLAdf
0 notes
Link
WebdesignerNews http://j.mp/2TMKZSt
wolkenkit-boards
wolkenkit-boards is a tool for collaboratively organizing notes.
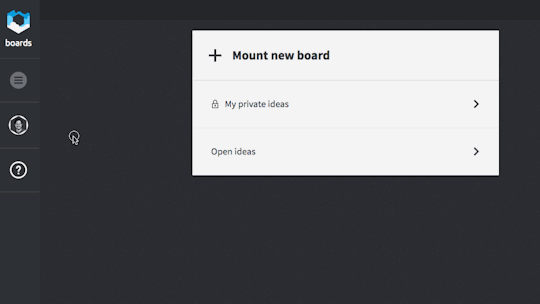
It allows you to mount public and private boards and attach notes and images to them. Its backend is powered by wolkenkit.
What is wolkenkit?
wolkenkit is a CQRS and event-sourcing framework for JavaScript and Node.js. wolkenkit uses an event-driven model based on DDD to setup an API for your business in no time. This way, wolkenkit bridges the language gap between your domain and technology.
wolkenkit.io
For more details on wolkenkit see the wolkenkit documentation.
Preparing the application
As wolkenkit-boards uses authentication, you first need to setup an identity provider. In this section we are going to configure Auth0, but you can use any identity provider - as long as it supports OpenID Connect.
Setting up the identity provider
Now, create an account at Auth0. For your first steps, the free plan is fine, so there is no need to add your credit card right now.
Once you have created your account you need to register a client application that represents your instance of wolkenkit-boards:
Login to Auth0, which takes you to the dashboard.
Click Clients in the navigation.
Click Create client.
Select Single Page Applications.
Add http://local.wolkenkit.io:8080/ to the list of Allowed Callback URLs.
Getting the required information
In the view that shows your client, you can find the Client ID. Copy its value, you will need it later.
Additionally, you need to get the certificate for your client:
In the Clients view, scroll down, and click Show Advanced Settings.
Scroll to the Certificates section and copy the contents of the Signing Certificate field.
Paste the copied content into the server/keys/auth0/certificate.pem file.
Running the application
To run a wolkenkit application, you first need to install wolkenkit. For this, see the installation guide for macOS, Linux, Windows, or Docker Machine.
Running the backend
Before you can run the backend, you need to adjust the identityProvider section in the application's package.json file. Set its name property to the domain of your Auth0 account, so that it looks like this:
"identityProvider": { "name": "https://<username>.eu.auth0.com/", "certificate": "/server/keys/auth0" }
Finally, now it's time to run the backend. For that, run the start command using the wolkenkit CLI from inside the application's directory:
Running the frontend
Once the backend is running you are almost ready to run the frontend. First, change to the client directory and install any missing dependencies:
$ cd ./client $ npm install
roboter is used for build automation. Set the environment variables AUTH_IDENTITY_PROVIDER_URL and AUTH_CLIENT_ID accordingly, and then run npx roboter serve:
$ AUTH_IDENTITY_PROVIDER_URL=https://<username>.eu.auth0.com/authorize AUTH_CLIENT_ID=<clientid> npx roboter serve
After a short time, the frontend is running at http://local.wolkenkit.io:8080/. Point your browser to this url, identify yourself, and start to mount boards and pin some posts!
License
Copyright (c) 2015-2018 the native web.
This program is free software: you can redistribute it and/or modify it under the terms of the GNU Affero General Public License as published by the Free Software Foundation, either version 3 of the License, or (at your option) any later version.
This program is distributed in the hope that it will be useful, but WITHOUT ANY WARRANTY; without even the implied warranty of MERCHANTABILITY or FITNESS FOR A PARTICULAR PURPOSE. See the GNU Affero General Public License for more details.
You should have received a copy of the GNU Affero General Public License along with this program. If not, see GNU Licenses.
http://j.mp/2D6oBy2 via WebdesignerNews URL : http://j.mp/2pqLAdf
0 notes
Link
WebdesignerNews http://j.mp/2RIKfQZ

http://j.mp/2HbexI1


http://j.mp/2HbexI1 via WebdesignerNews URL : http://j.mp/2pqLAdf
0 notes
Link
WebdesignerNews http://j.mp/2AEVQa0
The speed of your website has a huge impact on user experience and as Google has demonstrated, user experience is an important ranking factor.
One simple way of improving your load time is by using caching plugins.
A caching plugin stores frequently accessed resources in temporary storage and this allows your computer to access the resources faster.
In fact, if you at this article explains exactly how you can do this with or without a plugin:
If you’re looking for options of doing this with a plugin, you can see the top 5 WordPress browser caching plugins.
Don’t Miss – [7 Ways] Leverage Browser Caching in WordPress with/out Plugin – CollectiveRay
1. W3 Total Cache

This plugin has over 1 million active installations which makes it one of the most popular caching plugins.
Apart from caching your content, it also has CDN integration.
Some of the reputable companies that use and recommend the plugin include Mashable.com, AT&T, and MattCutts.com. The developers of the plugin claim that it can help you save up to 80% of your bandwidth through their minification strategies.
W3 total cache is a free plugin.
2. WP Rocket

This is the most popular premium caching plugin (A single site license goes for $39.00) and it is loved by many for its ease of use. It would be a good plugin for a beginner that doesn’t have too much WordPress knowledge. In just a single click, the plugin crawls your website and automatically fixes all the required caching settings like cache pre-loading, gzip compression, minification, pre-fetching, etc. It also helps to index your pages faster on google.
WP Rocket rules the premium plugins pack because it goes beyond just caching and offers all the caching functions in a user-friendly interface. The following are some of the most important features of WP Rocket.
• Database optimization
• Cache pre-load
• Page caching
• Sophisticated caching rules
• Lazing loading of images
• CDN integration
• Cloudflare integration
• Version rollback
• Option to integrate Google analytics to make the code load from your server
• Exporting and importing of settings
3. Cache enabler

This is a free and lightweight plugin which works by creating static HTML files and then serving them to users on request. Apart from the fact that the plugin is free, its other main advantage is it requires minimal configuration and yet has all the important functions you will ever need in a caching plugin.
Also, Cache Enabler has the most detailed documentation among other free plugins. The documentation allows you to easily explore the different features of the plugin. Here are some of the most important features of cache enabler.
• Setting the IDs of posts to be excluded from cache
• 1-click clearing of your cache
• Setting of expiry dates
• Minification
• Option to set your cache behavior (e.g. clearing of cache on the addition of new posts)
4. WP Super Cache

WP Super cache is another free plugin with millions of active installations. The plugin was developed by Automattic, which is the team responsible for wordpress.com. This plugin generates static HTML files from the heavier PHP files on your website and then serves the cached versions of your website to the visitors.
There are three techniques that this plugin uses to serve the cached files:
• Simple – this is the most ideal for most users because you will not be required to modify your PHP files.
• Expert – this is the fastest method for serving the HTML files but it requires some technical skills because you will be required to modify the .htaccess file.
• WP Super Caching – it is used to cache pages for your existing customers/ users. This could be a user that leaves comments or logs into your site for any other reason. It is the slowest of the three methods but the most flexible nonetheless.
5. WP Fastest Cache

This plugin has very little configuration options which makes it one of the easiest to use especially for novice users. The plugin works by creating static HTML copies of your dynamic pages and then minifies the CSS and HTML files.
It reduces the page load time for returning visitors by combining several CSS files into one. This significantly cuts down the number of HTTP round-trips. With this plugin, you can also disable emojis on your WordPress website.
This is a free plugin but you have the option of upgrading to the premium version if you need some additional functions. Some of the premium functions include image optimization, mobile caching, and database cleanup.
As a rule of thumb, avoid using different themes for mobile and desktop users because that can cause some of the caching plugins not to work across devices. Just go with a good responsive theme and stick to it across different devices. That said, make sure you have installed one caching plugin on your WordPress website because it will significantly improve your speeds and consequently, your ranking on google.
Wrapping Up
Making your website faster should always be a priority for you, because it keeps your users happy. These plugins make it really easy for you to quickly achieve good performance results.
— Gavin
A Web addicted Geek stuck inside Tron.
http://j.mp/2SKQjpn via WebdesignerNews URL : http://j.mp/2pqLAdf
0 notes
Link
Envato Tuts+ Code http://j.mp/2CZd6IK
In this article, we’re going to review PDO CRUD—a form builder and database management tool. PDO CRUD helps you build forms for your database tables with just a few lines of code, making it quick and easy to bootstrap a database application.
There are plenty of extensions available for database abstraction and specifically CRUD (create, read, update, and delete) generation for PHP and MySQL. And of course, you’ll also find commercial options that provide ready-to-use features and extended support. In the case of commercial options, you can also expect quality code, bug fixes, and new enhancements.
Today, we’re going to discuss the PDO CRUD tool, available at CodeCanyon for purchase at a very reasonable price. It’s a complete CRUD builder tool which allows you to build applications just by providing database tables and writing a few lines of code.
It works with multiple database back-ends, including MySQL, Postgres, and SQLite. In this article, we’ll see how to use PDO CRUD to build a CRUD system with the MySQL database back-end.
Installation and Configuration
In this section, we’ll see how to install and configure the PDO CRUD tool once you’ve purchased and downloaded it from CodeCanyon.
As soon as you purchase it, you’ll be able to download the zip file. Extract it, and you will find the directory with the main plugin code: PDOCrud/script. Copy this directory to your PHP application.
For example, if your project is configured at /web/demo-app/public_html, you should copy the script directory to /web/demo-app/public_html/script.
Next, you need to enter your database back-end details in the configuration file. The configuration file is located at /web/demo-app/public_html/script/config/config.php. Open that file in your favorite text editor and change the following details in that file.
$config["script_url"] = "http://my-demo-app"; /************************ database ************************/ //Set the host name to connect for database $config["hostname"] = "localhost"; //Set the database name $config["database"] = "demo_app_db"; //Set the username for database access $config["username"] = "demo_app"; //Set the pwd for the database user $config["password"] = "demo_app"; //Set the database type to be used $config["dbtype"] = "mysql"
As you can see, the details are self-explanatory. The $config["script_url"] is set to the URL which you use to access your site.
Once you’ve saved the database details, you’re ready to use the PDO CRUD tool. In our example, we’ll create two MySQL tables that hold employee and department data.
employees: holds employee information
department: holds department information
Open your database management tool and run the following commands to create tables as we’ve just discussed above. I use PhpMyAdmin to work with the MySQL database back-end.
Firstly, let’s create the department table.
CREATE TABLE `department` ( `id` int(11) UNSIGNED NOT NULL AUTO_INCREMENT PRIMARY KEY, `department_name` varchar(255) NOT NULL DEFAULT '' ) ENGINE=MyISAM DEFAULT CHARSET=utf8;
Next, we’ll create the employee table.
CREATE TABLE `employee` ( `id` int(12) UNSIGNED NOT NULL AUTO_INCREMENT PRIMARY KEY, `dept_id` int(11) UNSIGNED NOT NULL, `first_name` varchar(255) NOT NULL DEFAULT '', `last_name` varchar(255) NOT NULL DEFAULT '', `email` varchar(255) NOT NULL DEFAULT '', `phone` varchar(255) NOT NULL DEFAULT '' ) ENGINE=MyISAM DEFAULT CHARSET=utf8;
As you can see, we’ve used the dept_id column in the employee table, which holds the id of the corresponding department stored in the department table.
Once you’ve created the tables in your database, we’re ready to build a CRUD application interface using the PDO CRUD tool!
How to Set Up Basic CRUD
In this section, we’ll see how you can set up a basic CRUD interface using the PDO CRUD tool by writing just a few lines of code.
The Department Table
We’ll start with the department table.
Let’s create department.php with the following contents. If your document root is /web/demo-app/public_html/, create the department.php file at /web/demo-app/public_html/department.php. Recall that we’ve already copied the script directory to /web/demo-app/public_html/script.
<?php require_once "script/pdocrud.php"; $pdocrud = new PDOCrud(); echo $pdocrud->dbTable("department")->render();
And now, if you point your browser to the department.php file, you should see something like this:
Phew! With just two lines of code, you have a ready-to-use CRUD UI which allows you to perform all the necessary create, read, update, and delete actions on your model. Not to mention that the default listing view itself contains a lot of features, including:
search
built-in pagination
print
export records to CSV, PDF or Excel format
bulk delete operation
sorting by columns
Click on the Add button on the right-hand side, and it’ll open the form to add a department record.
Let’s add a few records using the Add button and see how it looks.
As you can see, this is a pretty light-weight and neat interface. With almost no effort, we’ve built a CRUD for the department model! Next, we’ll see how to do the same for the employee table.
The Employee Table
In this section, we’ll see how to build a CRUD for the employee table. Let’s create employee.php with the following contents.
<?php require_once "script/pdocrud.php"; $pdocrud = new PDOCrud(); echo $pdocrud->dbTable("employee")->render();
It's pretty much the same code as last time; we just need to change the name of the table. If you click on the Add button, it also brings you a nice form which allows you to add the employee record.
You might have spotted one problem: the Dept id field is a text field, but it would be better as a drop-down containing the name of the departments. Let’s see how to achieve this.
<?php require_once "script/pdocrud.php"; $pdocrud = new PDOCrud(); // get departments $data = $pdocrud->getPDOModelObj()->select("department"); $options = array(); foreach($data as $record) { $options[$record['id']] = $record['department_name']; } // change the type of the dept_id field from textfield to select dropdown $pdocrud->fieldTypes("dept_id", "select"); $pdocrud->fieldDataBinding("dept_id", $options, "", "","array"); echo $pdocrud->dbTable("employee")->render();
In this code, we've accessed the department table through PDO CRUD so that we can associate the department name with the department ids. Then, we've updated the binding options for the department id field so that it will render as a dropdown (select) list.
Now, click on the Add button to see how it looks! You should see the Dept Id field is now converted to a dropdown!
Let’s add a few employee records and see how the employee listing looks:
That looks nice! But we have another small issue here: you can see that the Dept id column shows the ID of the department, and it would be nice to display the actual department name instead. Let’s find out how to achieve this!
Let’s revise the code of employee.php with the following contents.
<?php require_once "script/pdocrud.php"; $pdocrud = new PDOCrud(); // change the type of the dept_id field from textfield to select dropdown $data = $pdocrud->getPDOModelObj()->select("department"); $options = array(); foreach($data as $record) { $options[$record['id']] = $record['department_name']; } $pdocrud->fieldTypes("dept_id", "select"); $pdocrud->fieldDataBinding("dept_id", $options, "", "","array"); $pdocrud->crudTableCol(array("first_name","last_name", "department_name", "email","phone")); $pdocrud->joinTable("department", "employee.dept_id = department.id", "INNER JOIN"); echo $pdocrud->dbTable("employee")->render();
Here, we've created a join between the employee and department tables with $pdocrud->joinTable, and then told PDO CRUD to render only the employee name, department name, and contact info with $pdocrud->crudTableCol.
And with that change, the employee listing should look like this:
As you can see, the PDO CRUD script is pretty flexible and allows you every possible option to customize your UI.
So far, we’ve discussed how to set up a basic CRUD interface. We’ll see a few more options that you could use to enhance and customize your CRUD UI in the next section.
Customization Options
In this section, we’ll see a few customization options provided by the PDO CRUD tool. Of course, it’s not possible to go through all the options since the PDO CRUD tool provides much more than we could cover in a single article, but I’ll try to highlight a couple of important ones.
Inline Edit
Inline editing is one of the most important features, allowing you to edit a record quickly on the listing page itself. Let’s see how to enable it for the department listing page.
Let’s revise the department.php script as shown in the following snippet.
<?php require_once "script/pdocrud.php"; $pdocrud = new PDOCrud(); $pdocrud->setSettings("inlineEditbtn", true); echo $pdocrud->dbTable("department")->render();
As you can see, we’ve just enabled the inlineEditbtn setting, and the inline editing feature is there right away!
This is a really handy feature which allows you to edit records on the fly!
Filters
As you might have noticed, the department listing page already provides a free text search to filter records. However, you may want to add your own custom filters to improve the search feature. That’s what exactly the Filters option provides as it allows you to build custom filters!
We’ll use the employee.php for this feature as it’s the perfect demonstration use-case. On the employee listing page, we’re displaying the department name for each employee record, so let’s build a department filter which allows you to filter records by the department name.
Go ahead and revise your employee.php as shown in the following snippet.
<?php require_once "script/pdocrud.php"; $pdocrud = new PDOCrud(); $data = $pdocrud->getPDOModelObj()->select("department"); $options = array(); foreach($data as $record) { $options[$record['id']] = $record['department_name']; } $pdocrud->fieldTypes("dept_id", "select");//change state to select dropdown $pdocrud->fieldDataBinding("dept_id", $options, "", "","array");//add data using array in select dropdown $pdocrud->crudTableCol(array("first_name","last_name", "department_name", "email","phone")); $pdocrud->joinTable("department", "employee.dept_id = department.id", "INNER JOIN"); $pdocrud->addFilter("department_filter", "Department", "dept_id", "dropdown"); $pdocrud->setFilterSource("department_filter", $options, "", "", "array"); echo $pdocrud->dbTable("employee")->render();
We’ve just added two lines, with calls to addFilter and setFilterSource, and with that, the employee list looks like the following:
Isn’t that cool? With just two lines of code, you’ve added your custom filter!
Image Uploads
This is a must-have feature should you wish to set up file uploads in your forms. With just a single line of code, you can convert a regular field to a file-upload field, as shown in the following snippet.
I'll assume that you have a profile_image field in your employee table, and that you’re ready to convert it to a file-upload field!
<?php require_once "script/pdocrud.php"; $pdocrud = new PDOCrud(); $pdocrud->fieldTypes("profile_image", "image"); echo $pdocrud->dbTable("employee")->render();
That's it! Users will now be able to upload an image to the profile_image field.
CAPTCHA
Nowadays, if you want to save your site from spamming, CAPTCHA verification is an essential feature. The PDO CRUD tool already provides a couple of options to choose from.
It provides two options: CAPTCHA and ReCAPTCHA. If you select the CAPTCHA option, it presents a mathematical puzzle for the user to solve. On the other hand, if you select the ReCAPTCHA option, it presents a famous I’m not a robot puzzle!
If you want to add a simple CAPTCHA puzzle, you need to add the following line before you render your CRUD.
$pdocrud->formAddCaptcha("captcha");
On the other hand, if you prefer ReCAPTCHA, you can achieve the same by using the following snippet.
$pdocrud->recaptcha("your-site-key","site-secret");
You just need to replace the your-site-key and site-secret arguments with valid credentials from Google.
So far, we’ve discussed options that enhance the functionality of your application. Next, we’ll see how you could alter the skin and thus the look and feel of your application.
Skins
If you don’t like the default skin, you have a couple of options to choose from. The PDO CRUD tool provides dark, fair, green and advanced skins as other options to choose from.
For example, the following listing is based on the green theme.
It looks nice, doesn't it?
Pure Bootstrap
Although the default skin already supports responsive layouts, the PDO CRUD tool also supports Bootstrap library integration!
You need to use the following snippet should you wish to build your layout using the Bootstrap library.
<?php require_once "script/pdocrud.php"; $pdocrud = new PDOCrud(false, "pure", "pure"); echo $pdocrud->dbTable("department")->render();
And here’s what it looks like:
Conclusion
Today, we reviewed the PDO CRUD advanced database form builder and data management tool available at CodeCanyon. This is a CRUD application interface builder tool at its core. It provides a variety of customization options that cover almost everything a CRUD system requires.
As I said earlier, it’s really difficult to cover everything the PDO CRUD tool provides in a single article, but hopefully the official documentation should give you some insight into its comprehensive features.
I hope you’re convinced that the PDO CRUD tool is powerful enough to fulfill your requirements and allows you to get rid of the repetitive work you have to do every time you want to set up a CRUD in your application. Although it’s a commercial plugin, I believe it’s reasonably priced considering the plethora of features it provides.
If you have any suggestions or comments, feel free to use the feed below and I’ll be happy to engage in a conversation!
http://j.mp/2TFLhdX via Envato Tuts+ Code URL : http://j.mp/2etecmc
0 notes