sirisaacnukem
Sir Isaac Nukem
I came to invent calculus, and kick ass... and I'm all done inventing calculus.
107 posts
Last active 3 hours ago
Don't wanna be here? Send us removal request.
Last Seen Blogs


Text
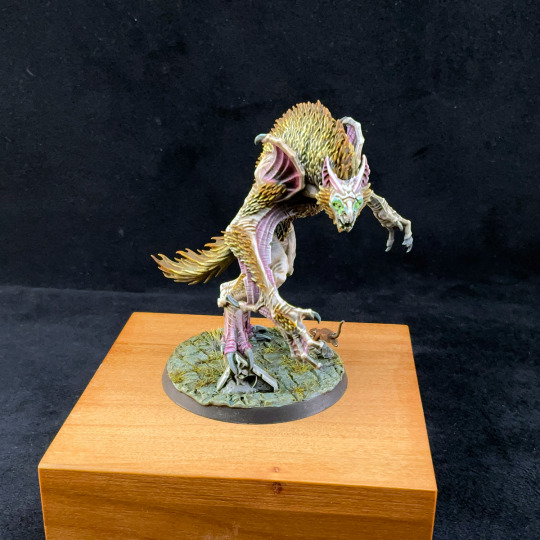
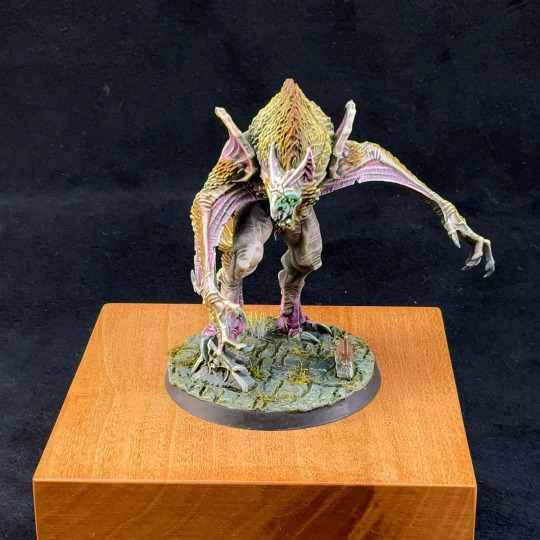


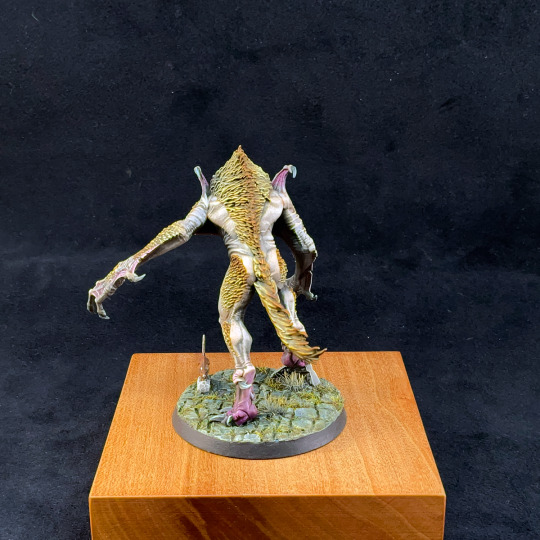
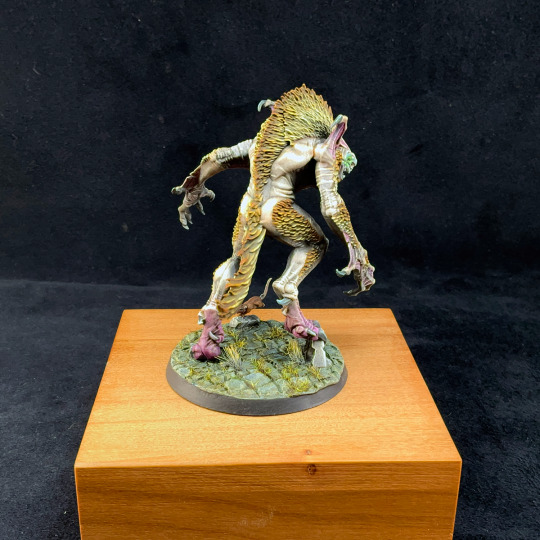
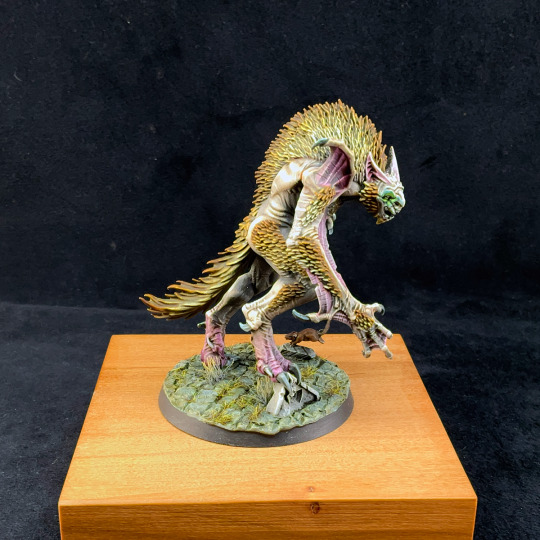
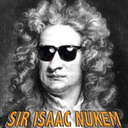
Cursed City: The Vargskyr
With the DRG base game done, and the expansions (and 50 more miniatures) not coming until October, I'm in between projects. I have the Warhammer Quest: Cursed City box, and this mini is the first I've assembled, out of 50 for the whole game. But I haven't had as much luck finding people to play WQ with (I finished the whole Silver Tower box, and I've only managed to play the first mission, twice with different groups.) My motivation for painting is so much stronger when I actually get to play the game...
In the lore of the game, the Vargskyr is a vampire that has degenerated into a beast, with wolf and bat characteristics. This was a fairly quick slapchop job, that I finished before I started Kixi-taka, but just didn't get decent around to taking decent photos of until now.
22 notes
·
View notes
Text
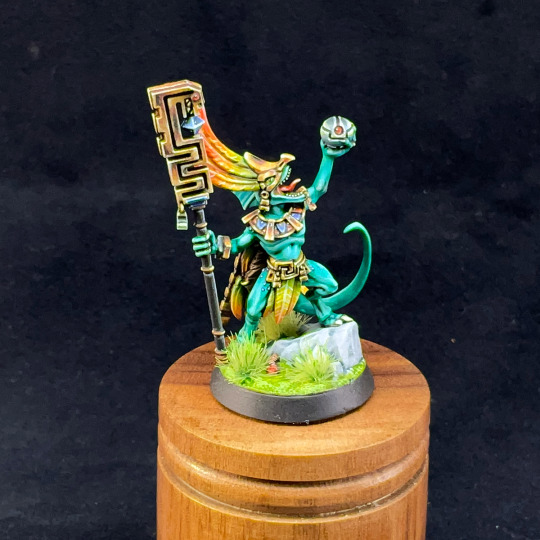
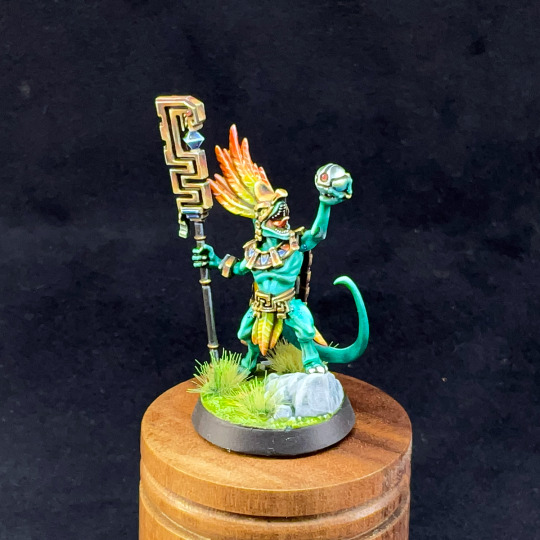
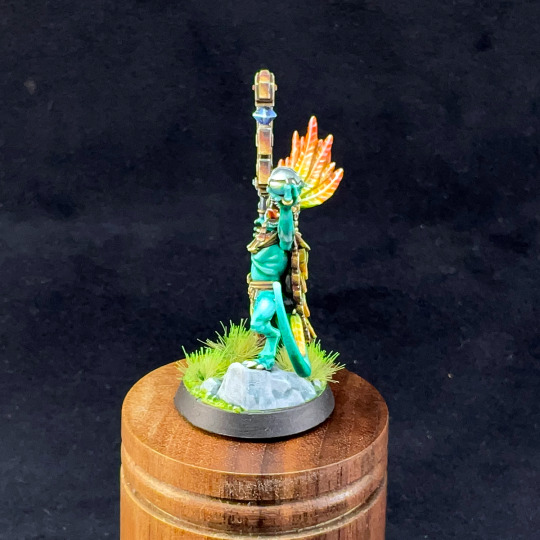
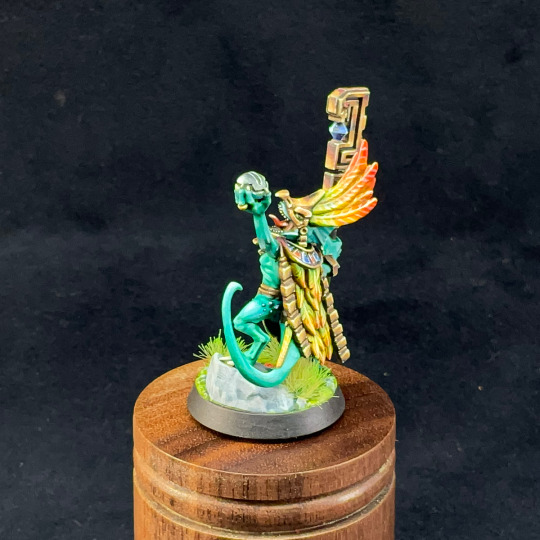
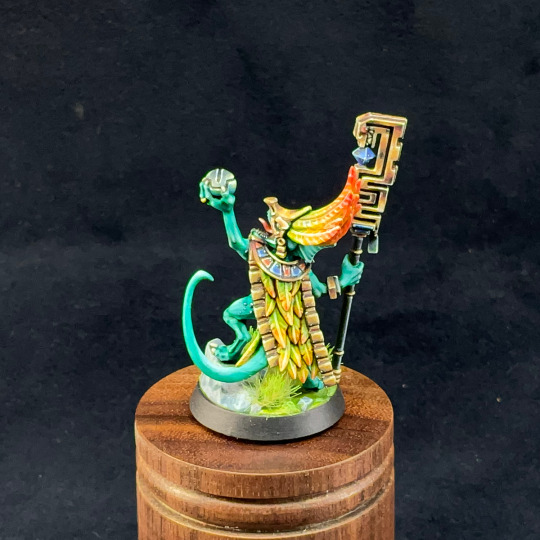
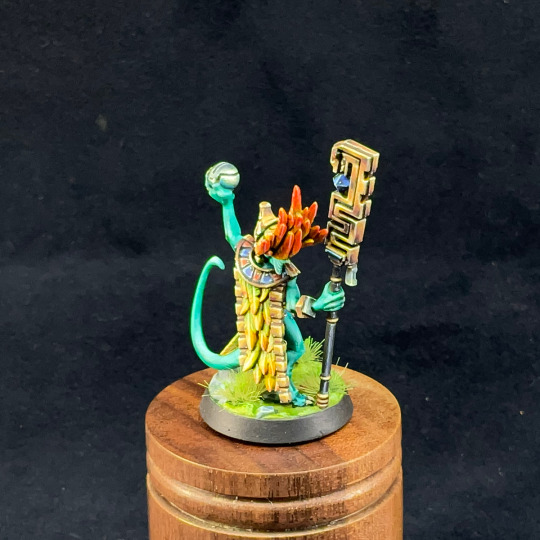
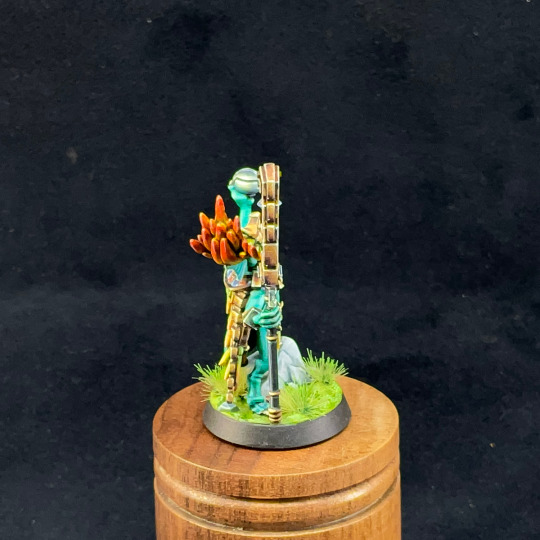
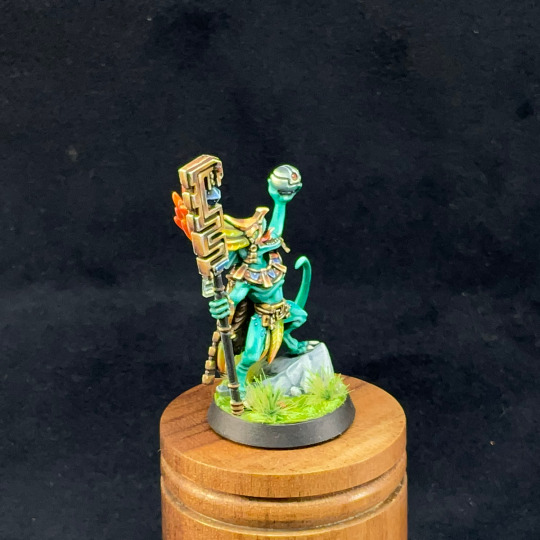
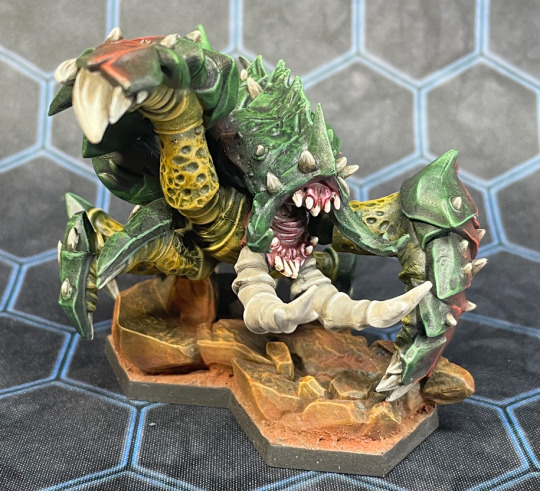
Kixi-taka the Diviner
I did this guy as an entry in a monthly painting contest held by my FLGS. After doing slap chop and quick paint jobs for a few months, was nice to try and do my absolute best job on a mini. Still learning a lot about doing NMM, so there's a ton of flaws I could point out, but overall I'm pretty pleased with how he turned out. I think I spent in the neighborhood of 15 hours total.
The mini is the leader of a Warhammer Underworlds warband, the Starblood Stalkers, and I have to say I really like these lizardman models a lot.
67 notes
·
View notes
Photo
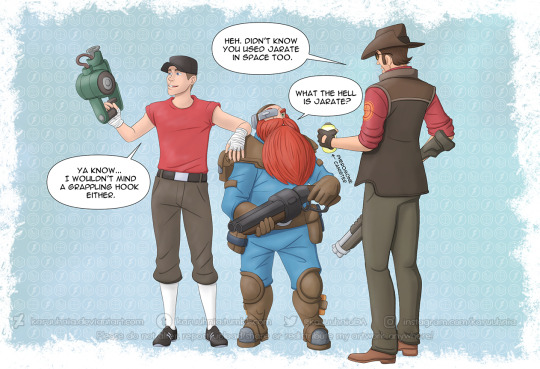
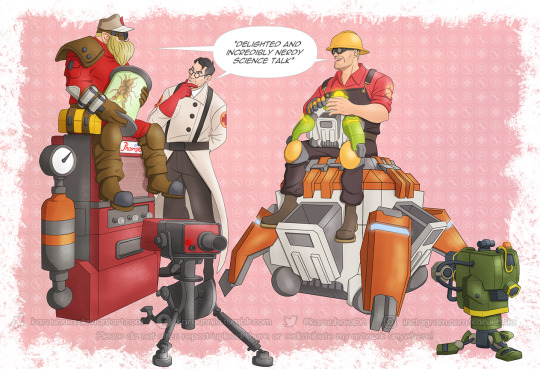

Team Fortress 2 (old hyperfixation) meets Deep Rock Galactic (new hyperfixation)! 😄
To all TF2 fans out there: If you’re looking for a great co-op game with funny characters, great gameplay, a fun and welcoming community as well as developers who actually care about their game - try DRG! I promise, it is WORTH it!
And that’s coming from someone who barely ever touches new/unfamiliar games. It’s really that fun! Thanks again, @rottennuggetart! <3
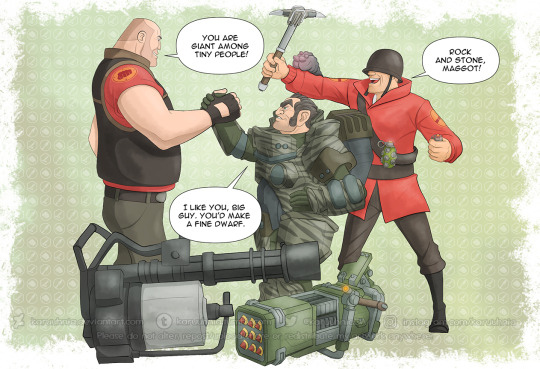
Bonus:

_______
Please do not alter, repost/reupload or redistribute my artwork anywhere! (Reblogging is perfectly fine, of course.)
2K notes
·
View notes
Text
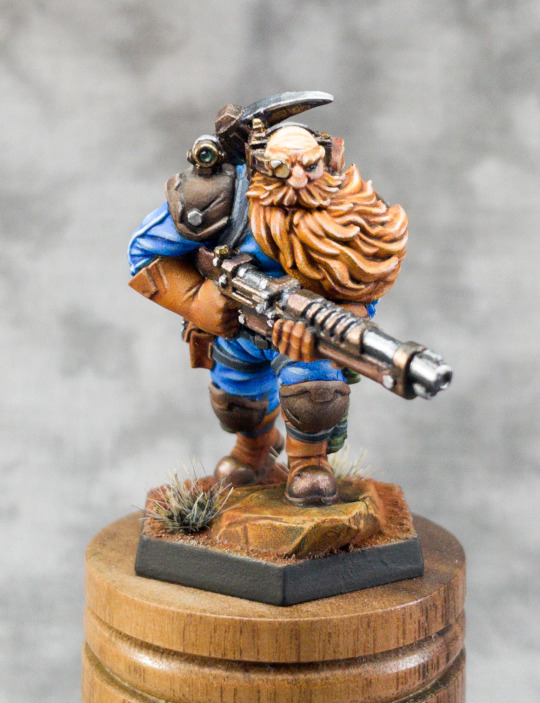
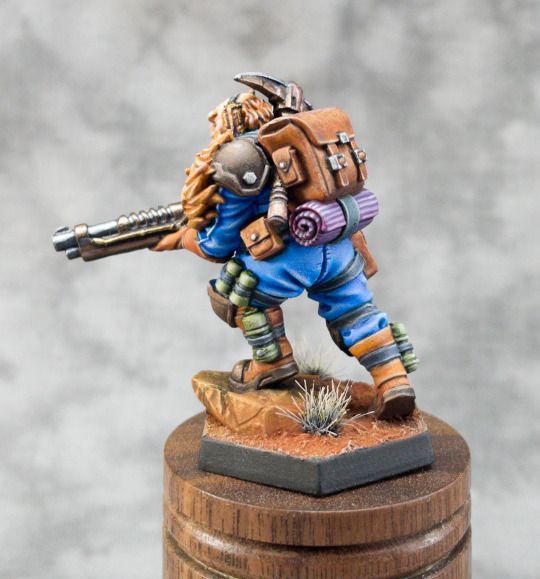
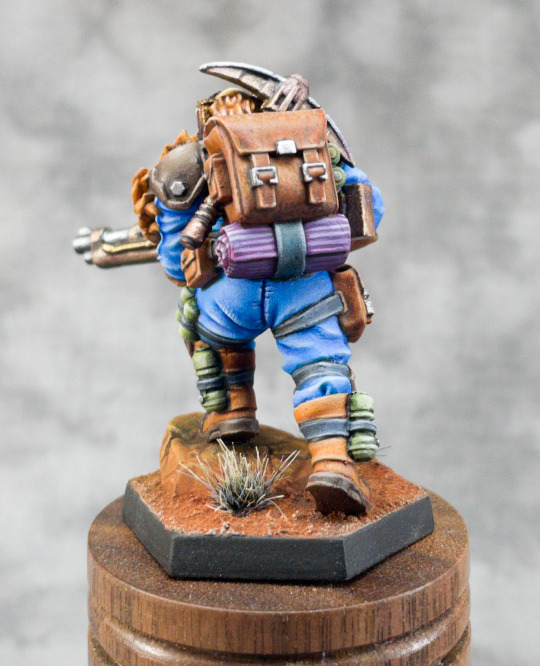

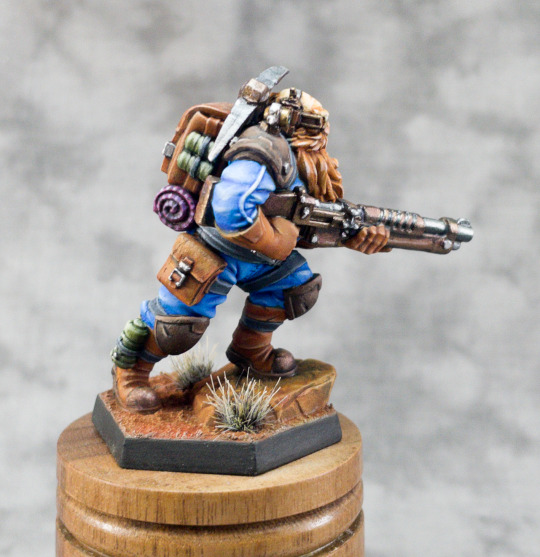
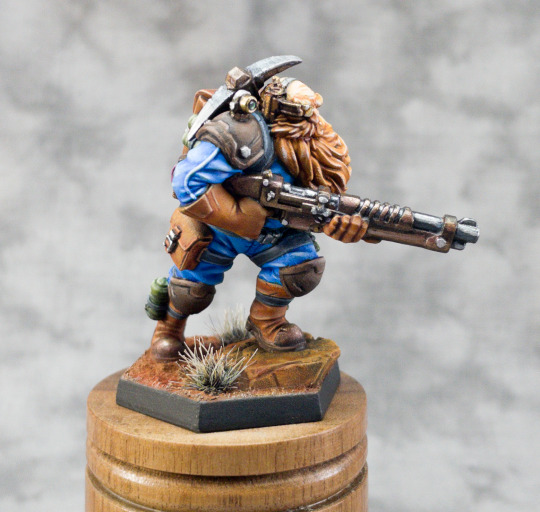
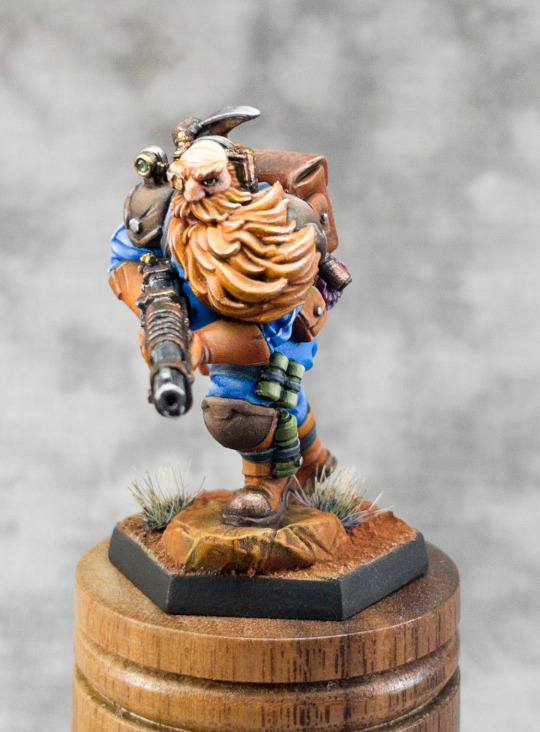
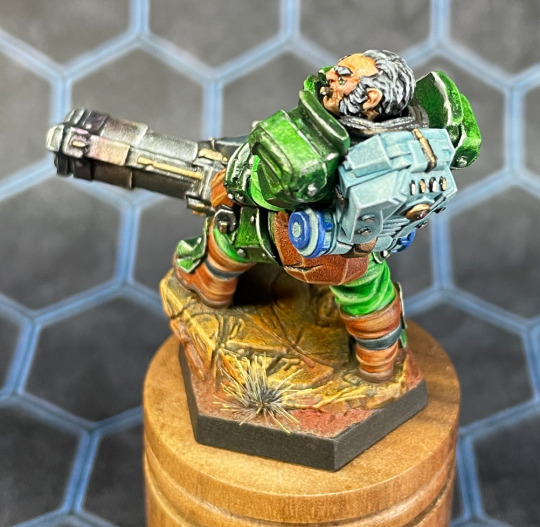
Deep Rock Galactic Scout
The Scout was the last miniature in the DRG board game to finish, and also my favorite class to play in the video game. Since I thought it had the most interesting pose of all the character models, I did this as my entry in an online painting contest, and did the best I could on it. I think I spent around 15-16 hours total on him. Nothing too insane like NMM or crazy freehands, just a very clean paint job.
The model has a bedroll, which I was puzzled by since the dwarves never sleep in the caves (and Hoxxes would be far too dangerous to try.) So I painted it like a yoga mat, which amused me very much.
And with the scout, all 58 models in the DRG board game are done!
67 notes
·
View notes
Text
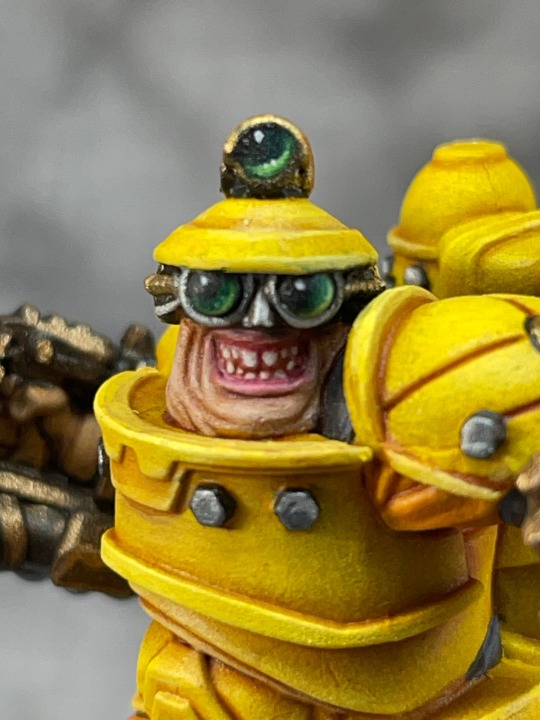
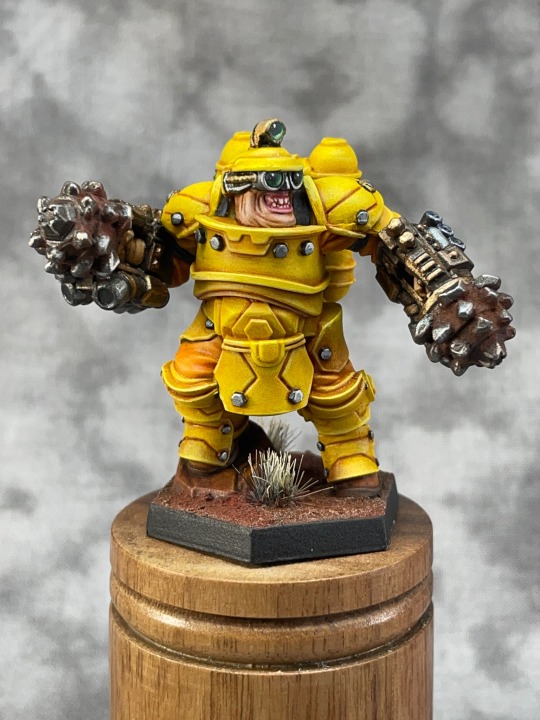


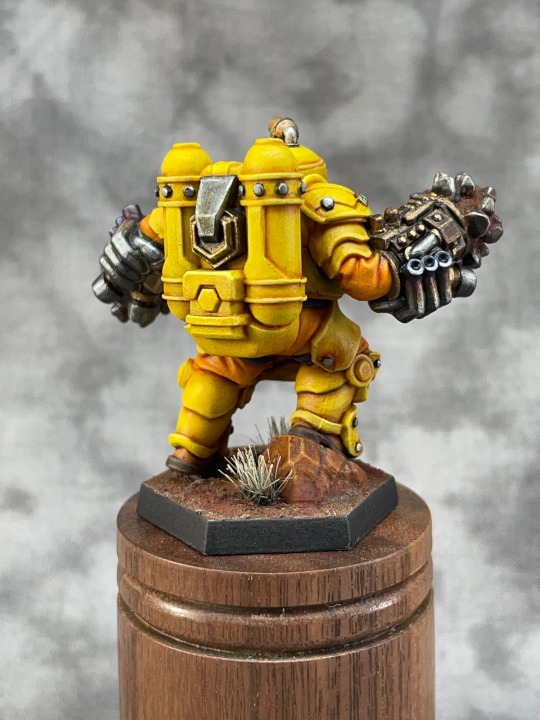


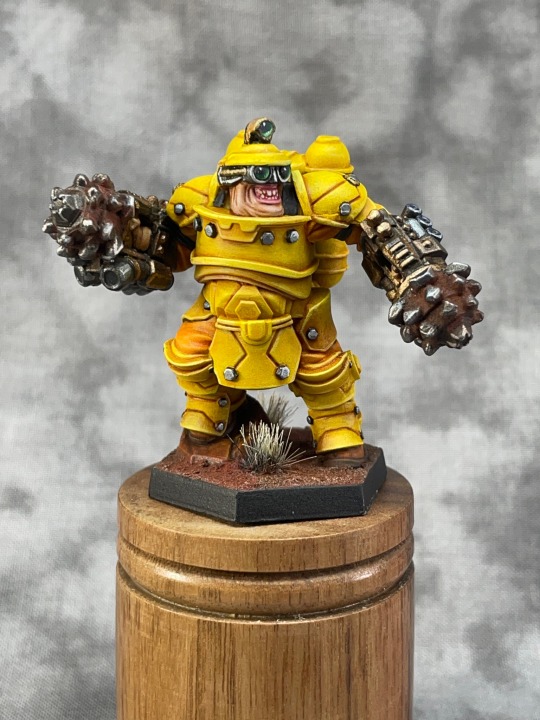
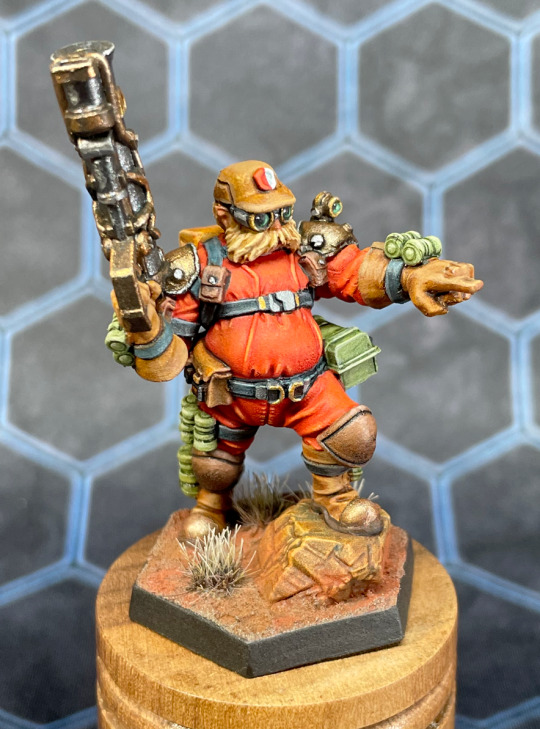
The Driller
The driller is the third of the player character models from DRG I finished, and he is very, very yellow. I mostly used the Imperial Fists tutorial from Juan Hidalgo (which I would link to except iPhone tumblr is a BUGGY PIECE OF CRAP and won’t let me paste a URL.. just google it if you want it). The drills were done with pigment powder to look like they had been grinding up rock.
12 notes
·
View notes
Text


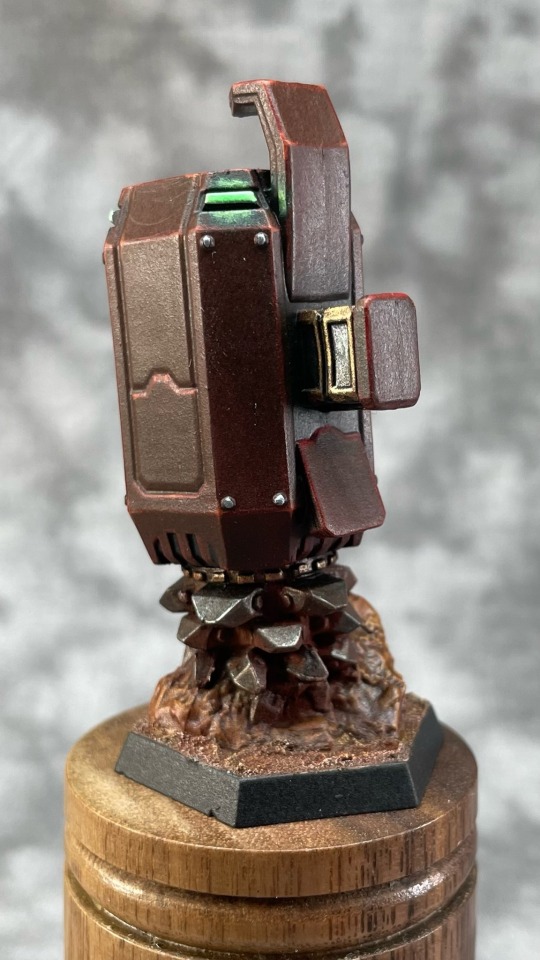
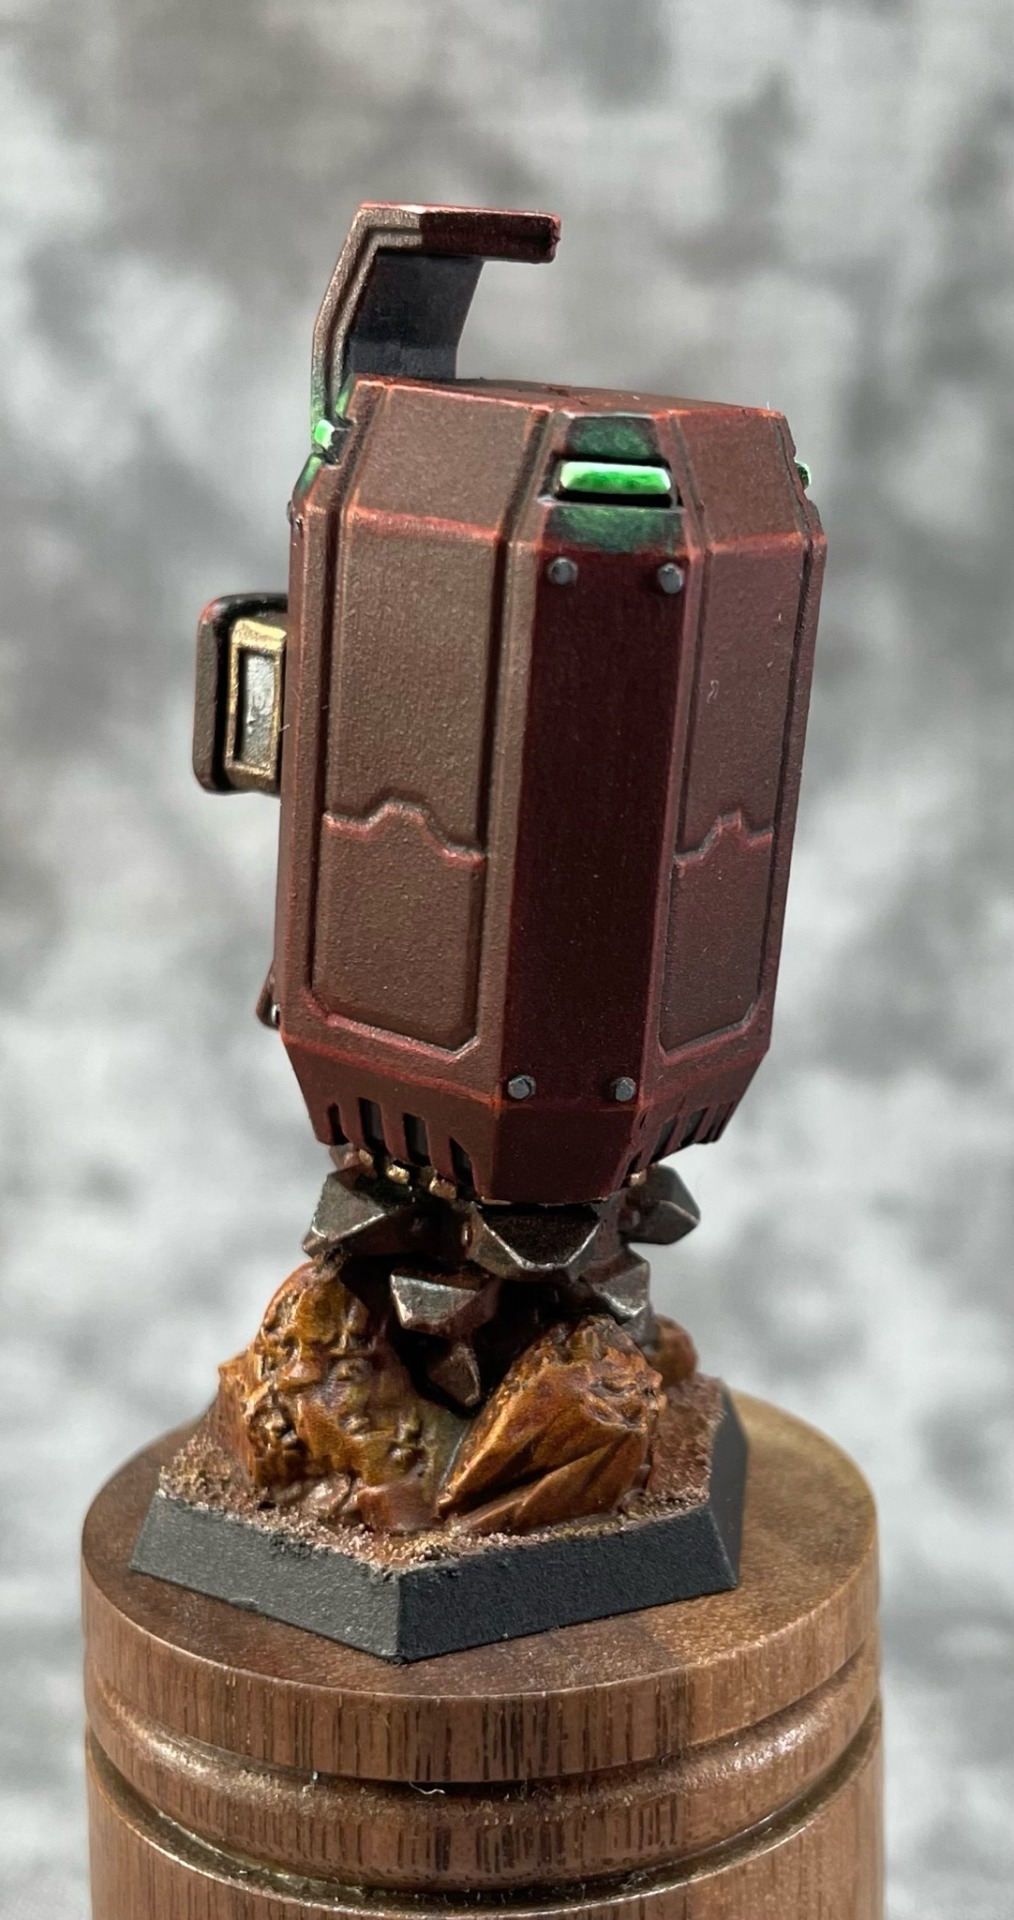
Bosco the All Purpose Drone and the Supply Pod
The last two mechanical models in DRG are Bosco, who supports you in a single player game, and the resupply pod. I painted Bosco mostly in true metallics, but spent a long time on his large lenses, trying to recreate the Hal 9000 eye on him. I think it came out really nice, and at arm’s length the effect is very eye catching (no pun intended).
The supply pod was pretty simple, mostly just a single color with edge highlighting, but I used the drill to test what I wanted to do with the Driller’s drills. The effect is to paint the drill with metals from a dark bronze (Vallejo Tinny Tin washed with Secret Weapon Armor Wash), highlighted to a bright silver. Then I apply pigment binder to all the recesses, then use a brush to smush rust and brown pigment powders into the drills. This was applied very heavily, so the metal looked quite crusted, and then I took a cotton swab and cleaned off the blades of the drill, so it looks like the blades were really cutting through the rock.
I had decided I did not want to do any OSL on this project, but when I did the green lights on the corners they were obviously the most eye catching part of the model, and I couldn’t help from making the glow more realistic.
109 notes
·
View notes
Text
kickstarter
The kickstarter for FOUR more expansions to the DRG board game just opened! Looks like about another 50 minis or so in total.
11 notes
·
View notes
Text
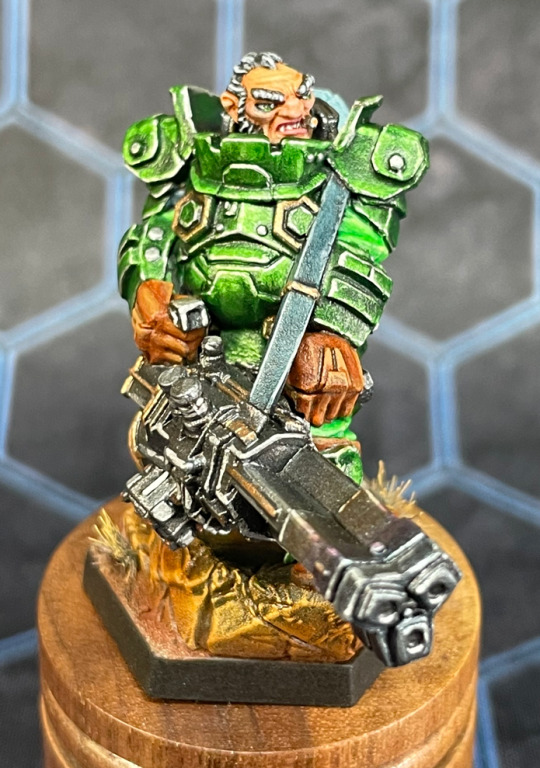
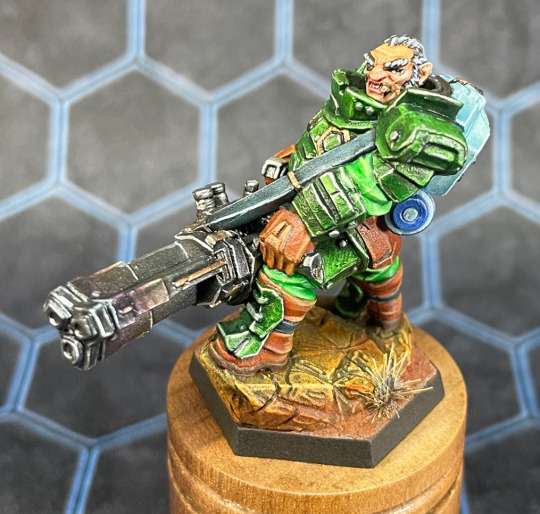
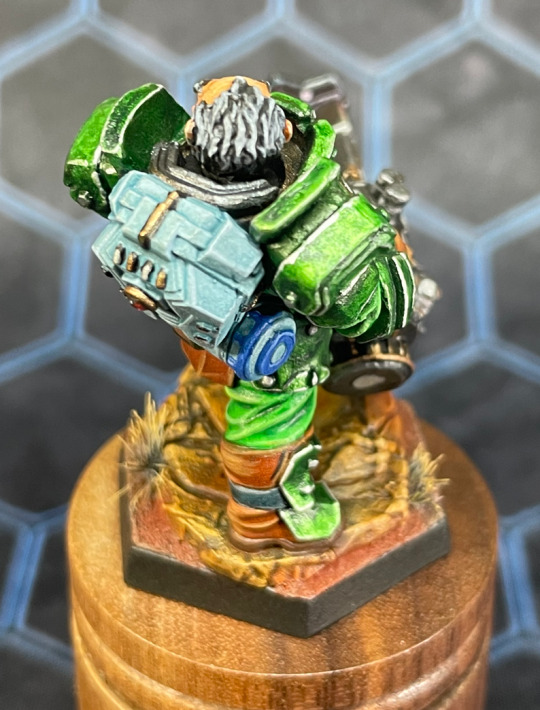

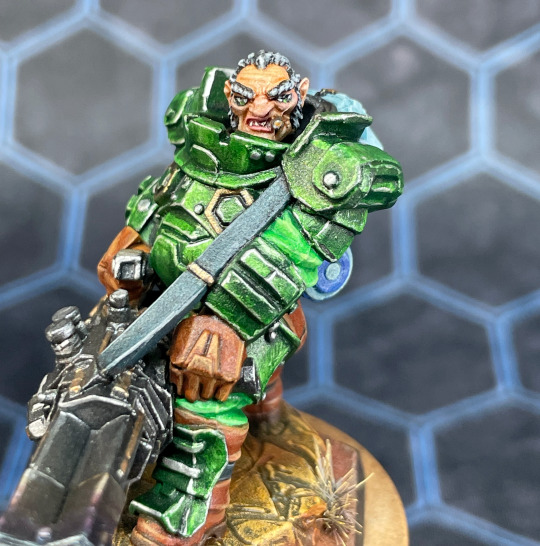
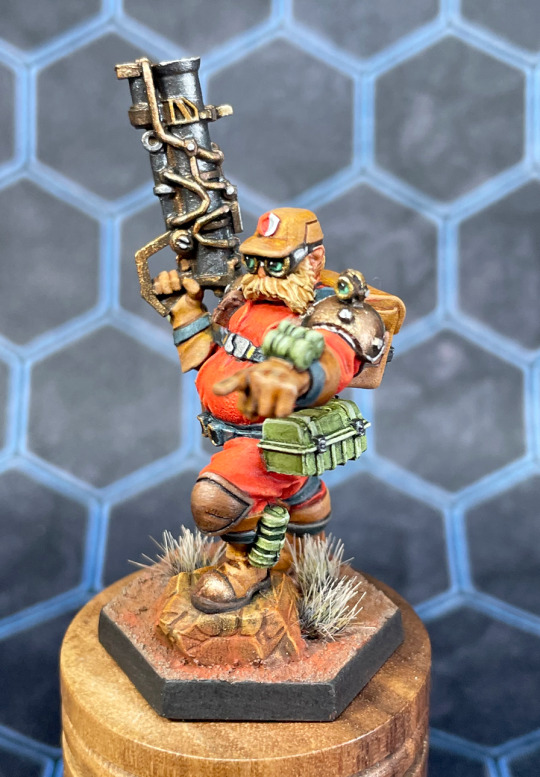
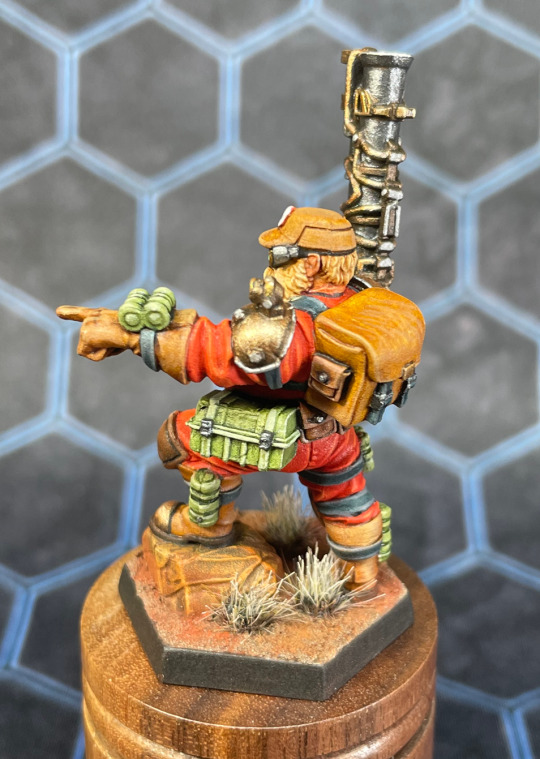
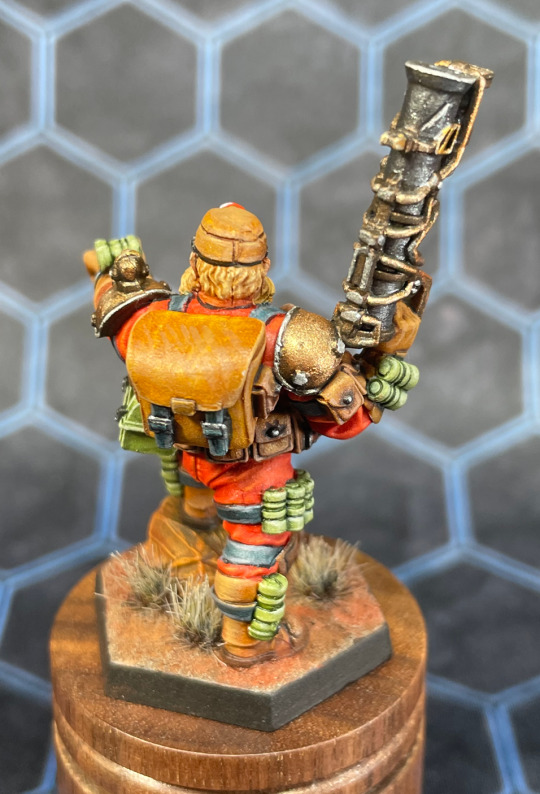
The Gunner
The second character model I finished is the gunner, and this miniature was the first out of the whole box that I would say that I struggled with. I did a white base coat on all the dwarves, but Gunner's armor plating is supposed to be metallic, along with his huge gun. So in addition to painting the base black (so I could paint it with the same slapchop recipe I am using on all the bases), I had to paint all the armor plates and the gun black as well, so the metals would look right. I would have saved a lot of time if I had spray painted it black, and then went in with white to pick out the non-metallic parts.
The next problem was color choices. I wanted to have bright green armor plates with dark green clothes, so after getting the metal armor highlighted up to silver, I coated it with VXC Troll Green, and then I coated the cloth with VXC Lizard Green, and I discovered... that troll green on a black base, and lizard green on a white base, come out to be exactly the same color. This was, needless to say, rather annoying. So I decided to pivot to dark armor and light cloth. I just put a coat of Lizard Green over the metals, and then I repainted the cloth with white and then covered it with Troll Green. While not exactly the contrast I had in mind, it looked good enough to move on. The green metal armor got edge highlighted with silver, and then it was just picking out lots of details.
The face was also a real challenge, since the mini came pre-assembled, and the armor forms a bowl around the head. This gives the painting of the lower half of the face some real ship-in-a-bottle vibes. Plus, I was partway through it when I noticed a mould line I didn't clean up going down the left side of the face... I decided to just leave that (it wasn't that big, and I didn't want to mess up anything I'd already done) which I think was the right call. That said, I think the face came out really well, probably one of the nicest looking faces I've turned out.
34 notes
·
View notes
Text

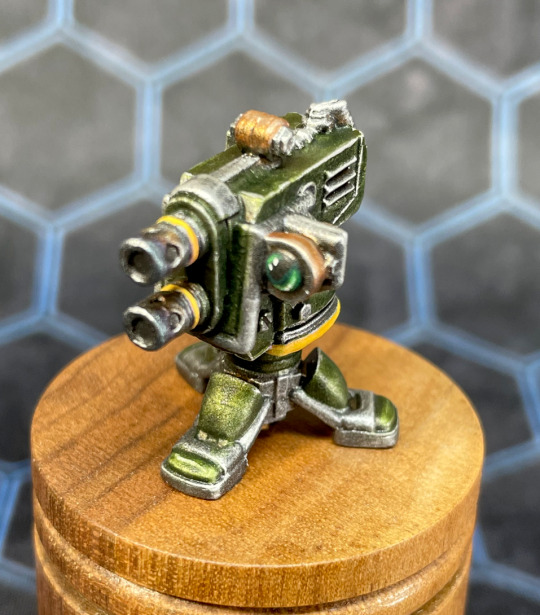
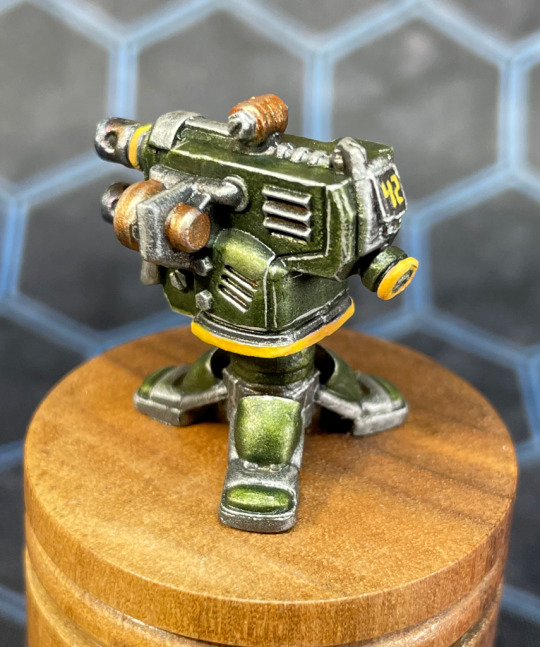
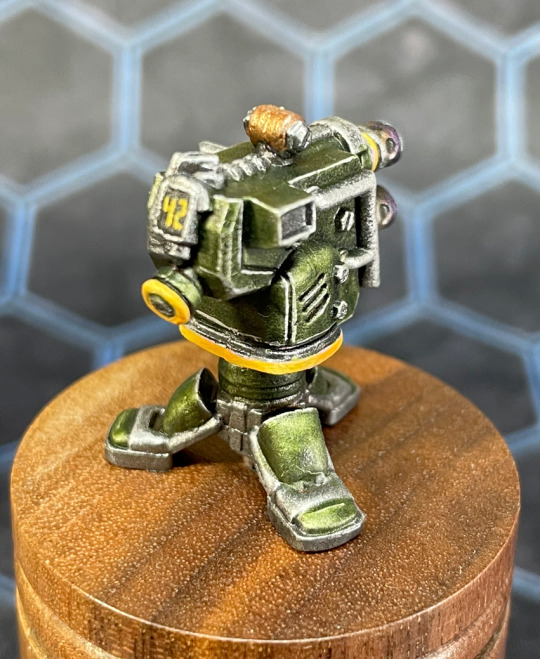
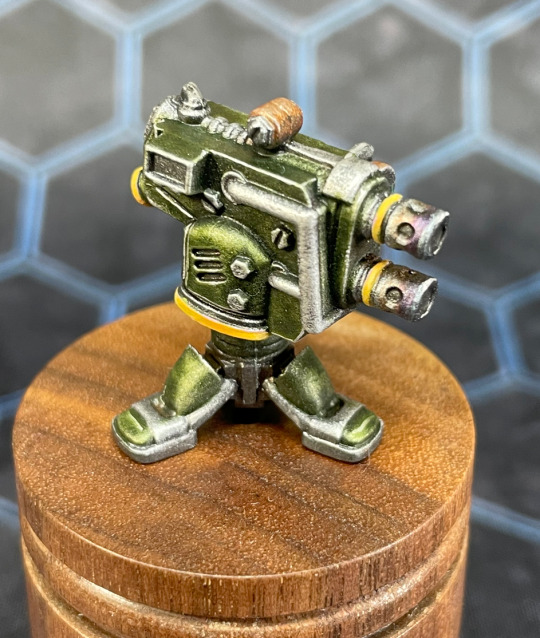
The Dwarven Engineer and his Turret
With the bugs all done, the major things left to paint are the dwarves, and I started with the engineer. This was the first miniature I tried using the Xpress colors over a white base coat, instead of the shaded base coat used in slapchop. And it worked out very well! The contrast paint gave a really good head start to laying in shadows and highlights, and I was really pleased with how it turned out.
The Engineer's turret was a fun and quick project. I did the entire miniature as silver, starting with Vallejo Tinny Tin over a black base, and then dry brushed up to silver all over. Then two coats of VXC Plague Green was carefully applied where I wanted the panels to be metallic green, leaving the pipes and vents silver, and then everything was edge highlighted with Vallejo Game Air Silver. The green lens effect came out, and I even painted the ammo counter to show that bullets are the answer to everything.
67 notes
·
View notes
Text
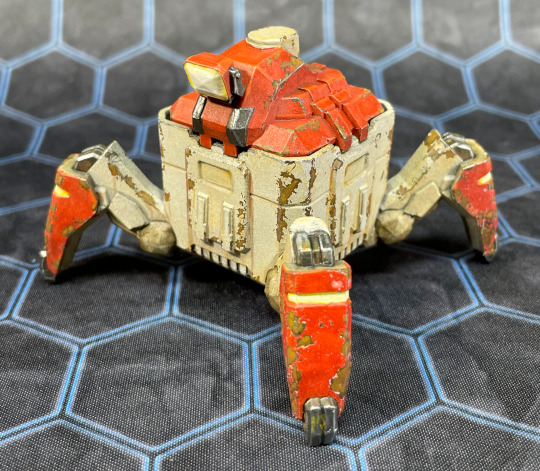
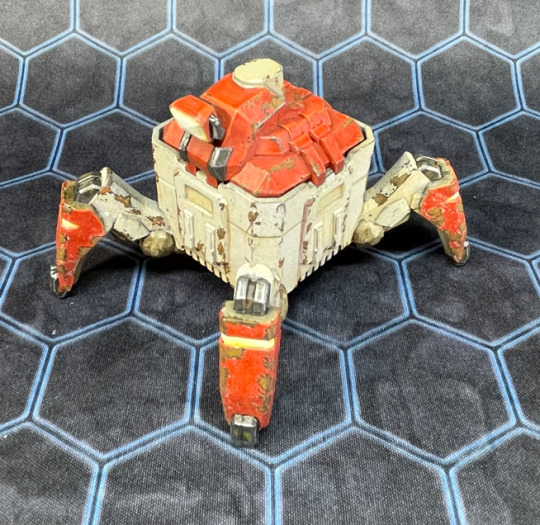
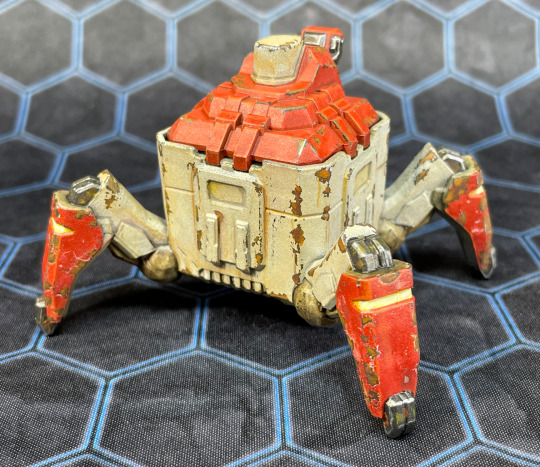
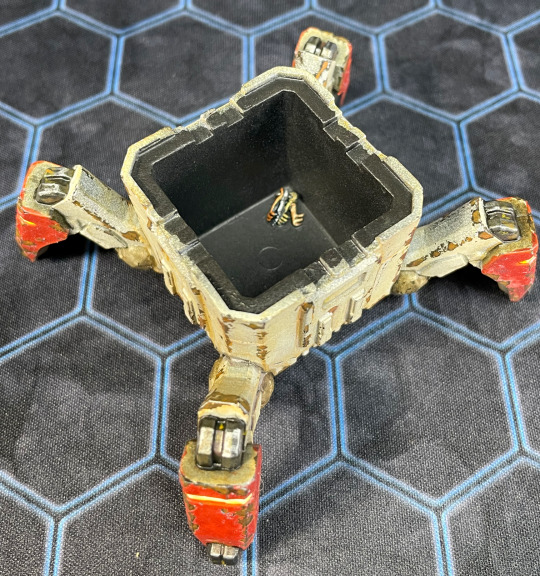
Molly the M.U.L.E.
In the Deep Rock Galactic board game, the Mule isn't really a playing piece, it's actually part of the board. The red lid lifts off, and players deposit the little crystal tokens for the minerals they mine. Since it was at a much larger scale than the rest of the minis, I decided to break out the weathering and chipping the effects. The miniature was airbrushed with a rust color, and chipping media (Abteilung 502 Liquid Mask) was applied with a piece of sponge to give it an irregular pattern. Once it dried, I then airbrushed the whole thing with an off-white color, and then painted the red areas. Once that was done, the latex liquid mask was rubbed off with a piece of blu-tac; this causes the paint to chip, revealing the rust color underneath (and giving the edges of the paint chip some structure, as well as a color that shows around the chip.). Then the inside of the chipped off area gets painted with different rust color, along with simulating the rusted metal flowing down the sides.
The last picture shows a little addition that I sculpted, which is an Easter egg for those who know the video game.
138 notes
·
View notes
Text
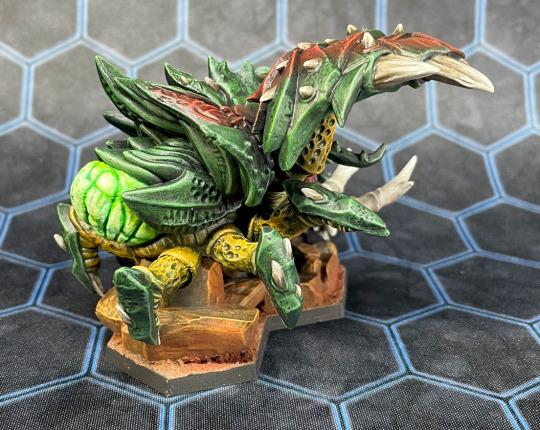

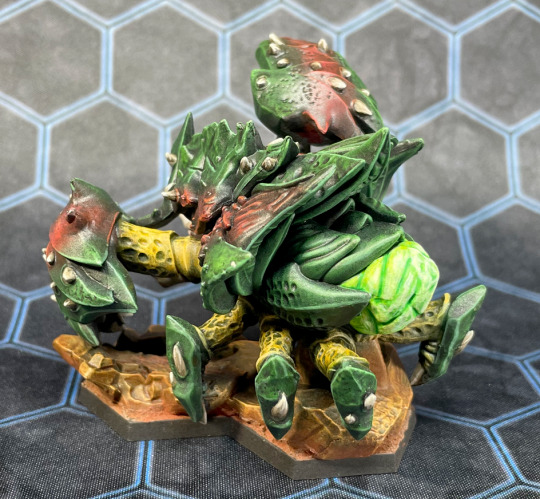
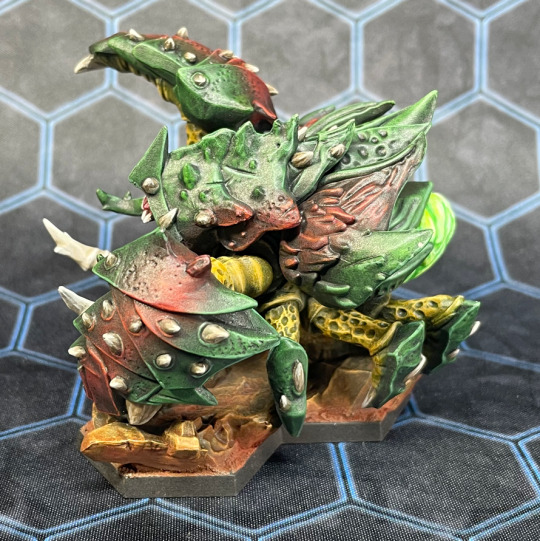
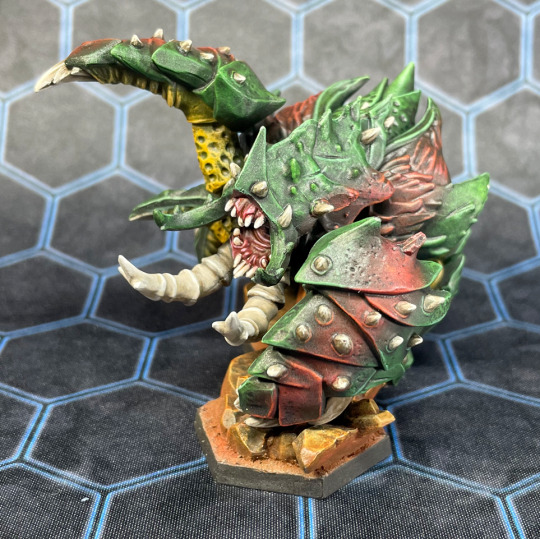
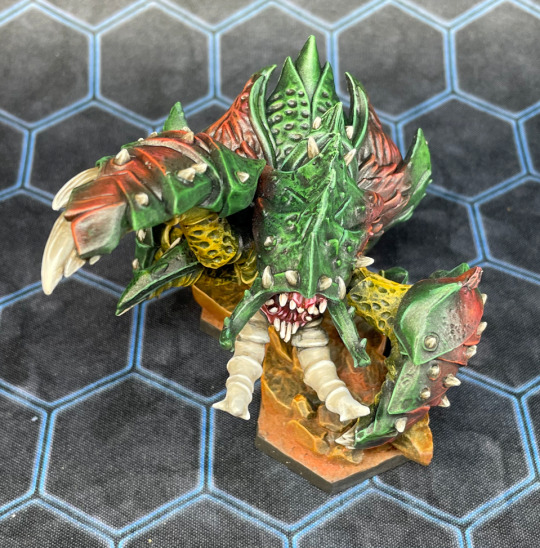
Glyphid Oppressor
The biggest bad guy in the DRG box is the Glyphid Oppressor, a miniature comparable in size to a typical fantasy dragon. I wanted this guy to actually have black plating, so I did a pretty different paint job from the slapchop recipe I've done so far (based on Juan Hidalgo's black armor tutorial). I started with a black base coat, and instead of drybrushing bone up to white, I dry brushed a red stripe up to a bright orange down each side, and then did the rest of the armor green (again, up to a bright green highlight). Then I covered that with two coats of Vallejo Express Color Black Lotus (diluted 1:2 paint:medium) which went over everything. This made the exoskeleton read as black with a red/green shine coming through. Then the base, butt, inside of the mouth and the inner leg parts were then done with the normal slapchop approach, and the claws and spikes were painted with bone and ivory colors.
All in all I was pretty happy with it, the red-green patterning is pretty seamless, and with this bad boy done, all the Horrors of Hoxxes are completed.
48 notes
·
View notes
Text
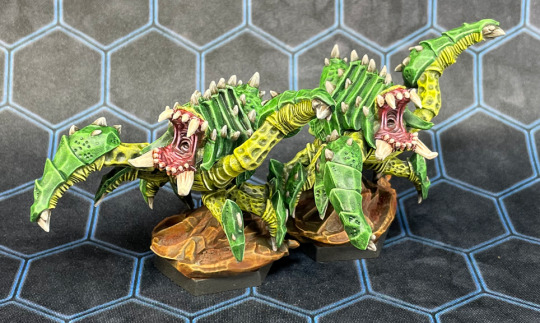
Glyphid Praetorians
These two chunky bois are a lot stubbier than I would have expected them to be, but I quite liked painting them. Slapchop is a really good approach for organic miniatures like this, and picking out all the spikes with bone color made it interesting to look at.
55 notes
·
View notes
Text
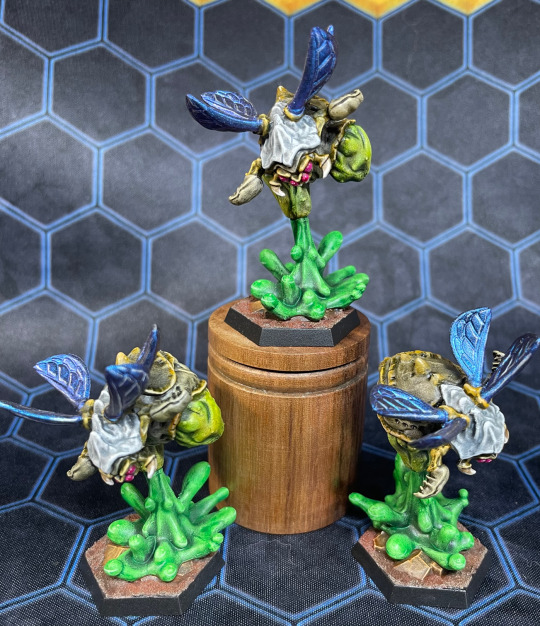
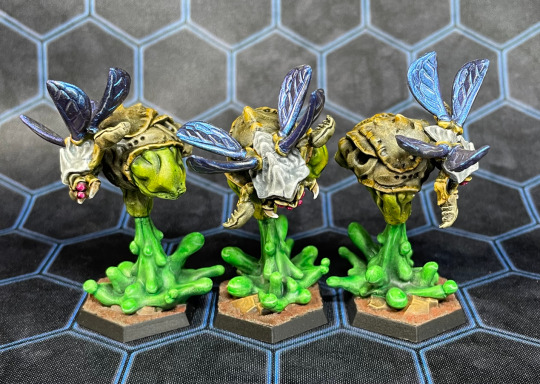
Mactera Goo Bombers
These guys were pretty fun to paint. The slapchop technique really shone on the goo splash, and I started doing things (like the yellow edging on the abdominal plates) that push the speed painting approach into closer to full-on painting. The goo sacks were painted with Vallejo Xpress Plague Green and Nuclear Yellow colors, which I didn't mix on the palette - I wanted a blotchy, mottled color like the video game model has, so I applied blobs of each color on the mini and then smeared them around, blending them, together in some places while leaving the two individual colors distinct elsewhere.
I also did the flip-flop purple/blue metallic paint from Turbodork on the wings again (like I did with the Mactera Spawn) but since I thought those could use a little something extra, I tried underpainting highlights with silver paint. It came out OK, and it definitely looks better than the flat black undercoat did, but it took a long time to hand-paint all those lines, and it still wasn't quite the effect I had envisioned.
Since the flip-flop paint is VERY translucent (If you look carefully, you can see there is barely any color on the silver areas, even though that is with FIVE coats of paint over the silver!), after seeing how these came out, I realized that you could probably get away with highlights that are a dark grey or dark blue. So instead of painting lines, keep the slapchop theme going and paint the wings black, then do a very limited drybrush up to a medium blue-gray color. It would still be mostly black, but you would highlight the edges and give some shading across the panels while still letting the metallic blue/purple color be the main effect. (I'm tempted to try this approach when I paint Bosco. It would be pretty close to the Abyssal Frost paint job in the game.)
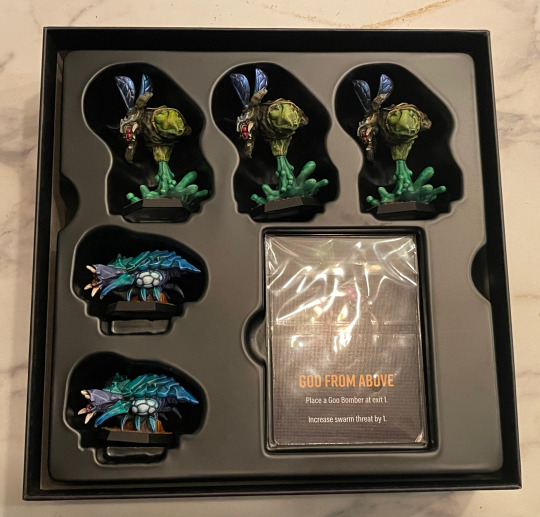
And with these three, I have the expansion box completely done. At 47/58 minis in the game fully painted, I just have the two Glyphid Praetorians and the Glyphid Oppressor left to do for the monsters, then the four dwarves, Bosco, the Engineer's Turret, Molly the M.U.L.E., and the supply pod left to go. I'm hoping to get these done for a LAN and boardgames party on 10/14, so just under two months to go to complete 11 minis... I'm still planning to speedpaint the bugs and robots (although the robots are also going to let me try out some of the weathering and chipping techniques I've learned), but I plan to give the dwarves high-end paint jobs, so I expect to spend 6-10 hours each on those.
19 notes
·
View notes
Text
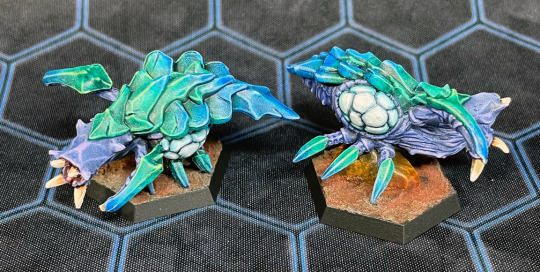
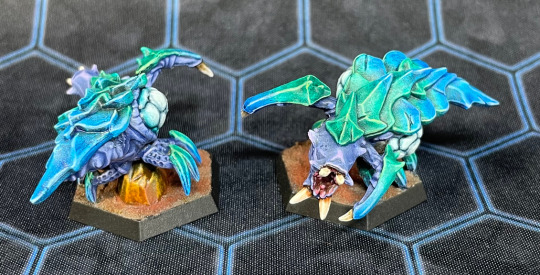
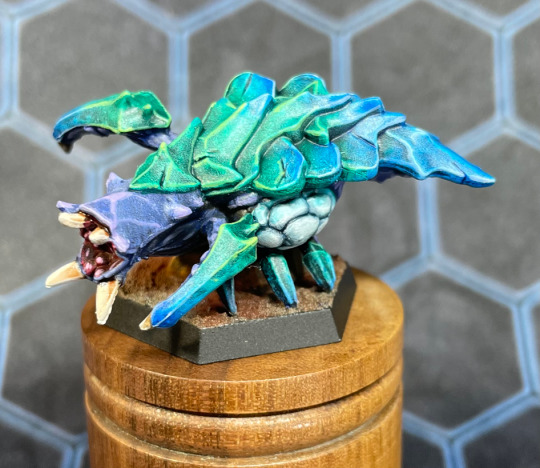
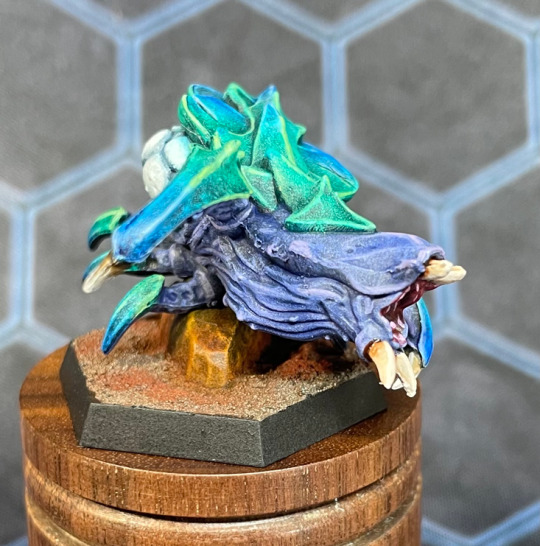

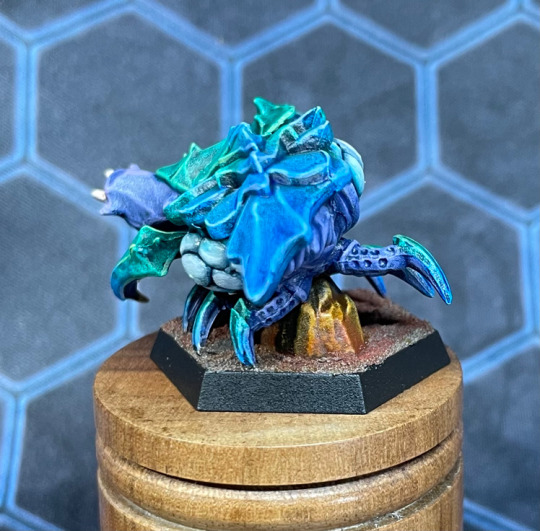
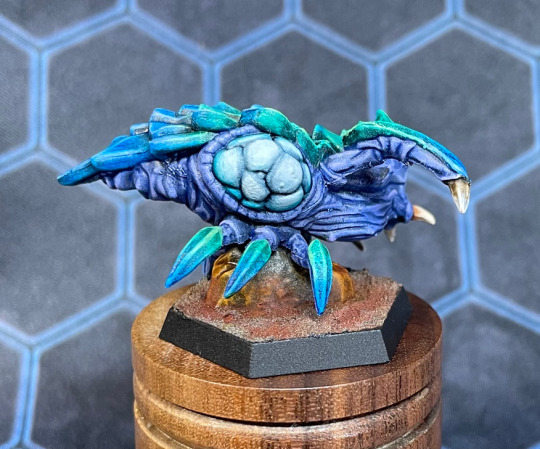
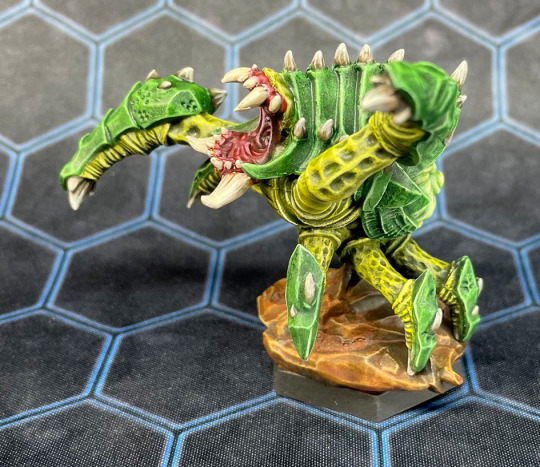
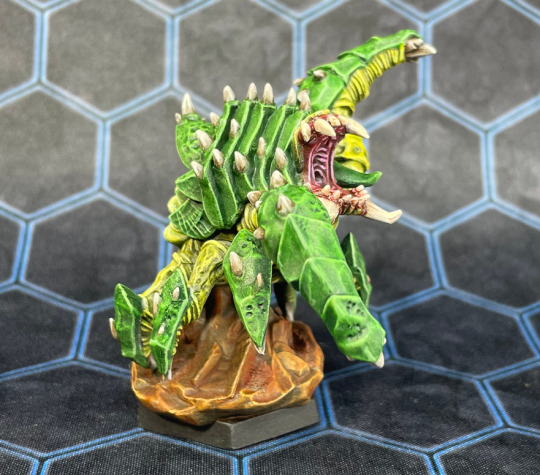
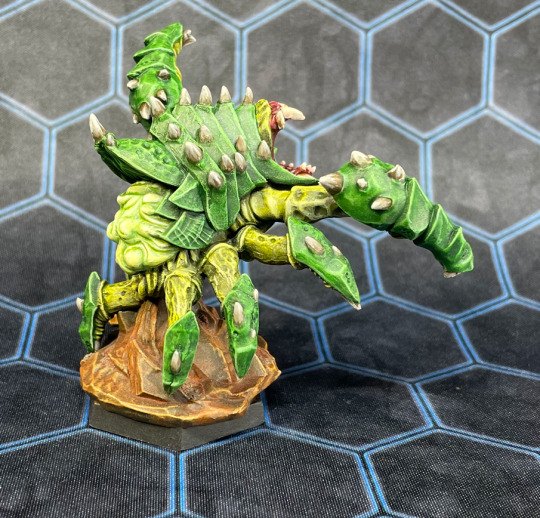
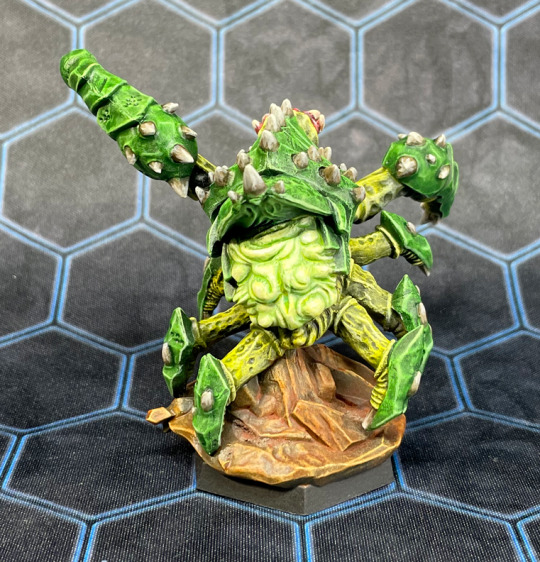
Glyphid Menaces
After I painted the stationary Spitball Infectors and Brood Nexuses, I realized I could reach an easier milestone by painting the five models in the expansion, Goo From Above. The first two were the Glyphid Menaces. The original model has a single carapace plate with a color gradient across its back, which grades from green near the head to blue near the tail. The mini has a bunch of smaller plates (including the armor on each leg, which isn't in the original), so I decided to do a gradient across each plate, and move the balance towards green for plates near the head and towards blue near the tail. The effect came out really nicely. Considered doing Object Sourced Lighting for the big white orbs on the sides, but since I hadn't done OSL for anything else, I decided not to. (I also thought it would detract from the blue-green gradient, which I was really pleased with.)
The translucency of contrast-style paints really makes painting fades like this so much easier. This effect would be a real pain to pull off with glazes of traditional opaque acrylics, have taken easily twice as long, and probably wouldn't look as good.
22 notes
·
View notes
Text
Brood Nexuses
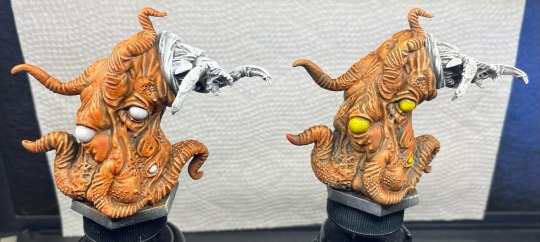
These were the minis that I used for a step-by-step review of my slap chop approach that I posted last week. And I have to say, of all the minis in the Deep Rock Galactic game, these were the ones I was least enthusiastic to paint, just a kind of boring same pile of yuck. But I did my best to make them more interesting, blending different colors around the eyes and the tips of the tentacles. I do think they came out pretty well in the end, but I'm glad that there were only 2 instead of 3.
20 notes
·
View notes
Text

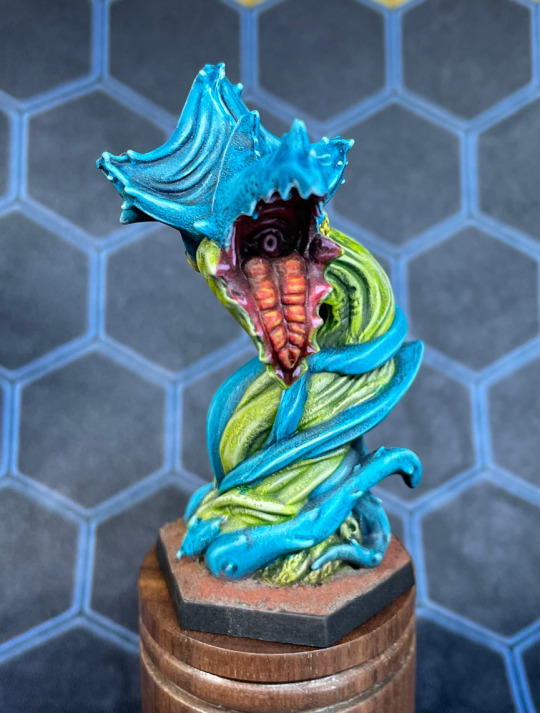

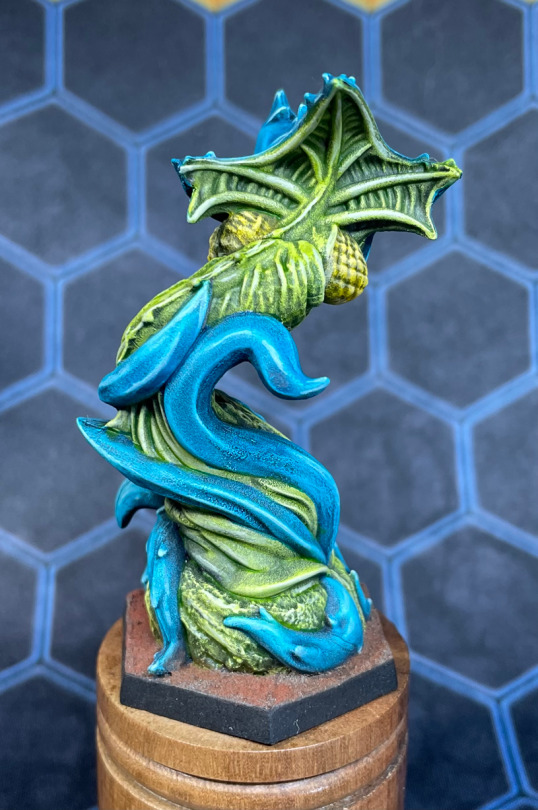
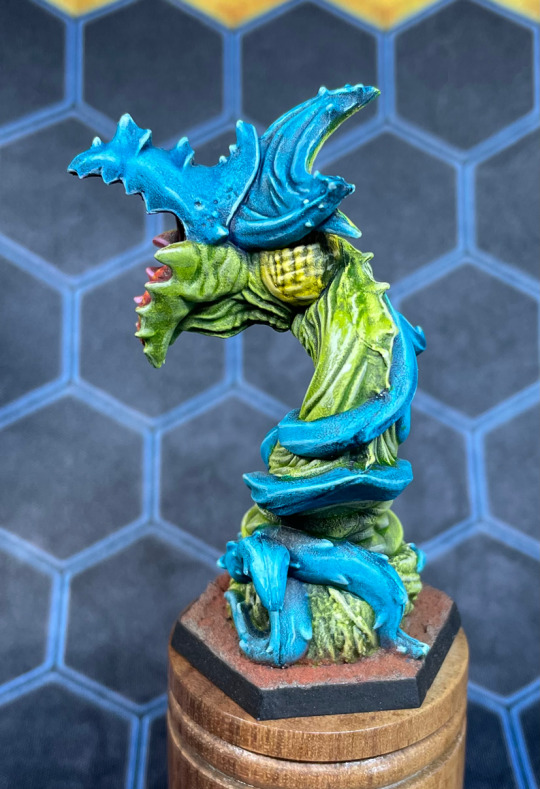
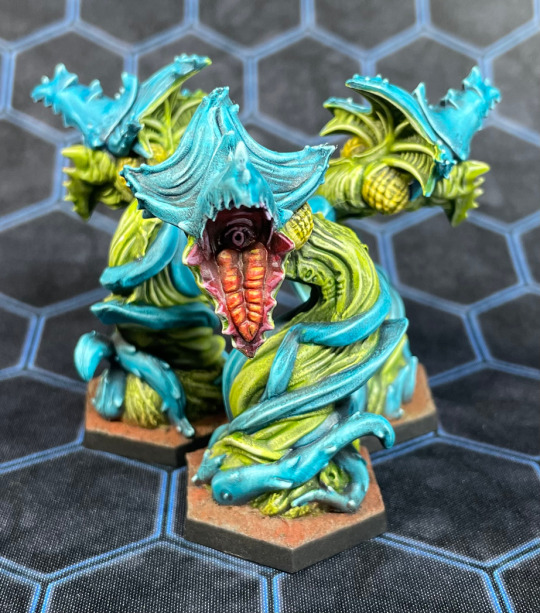
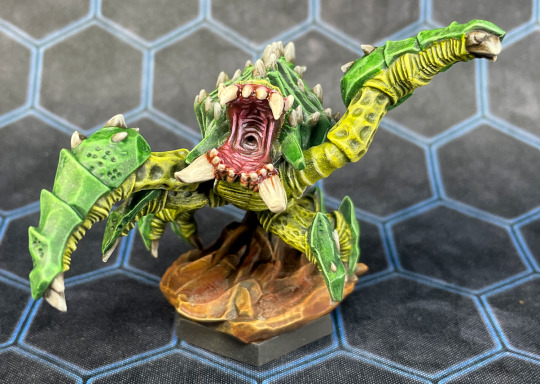
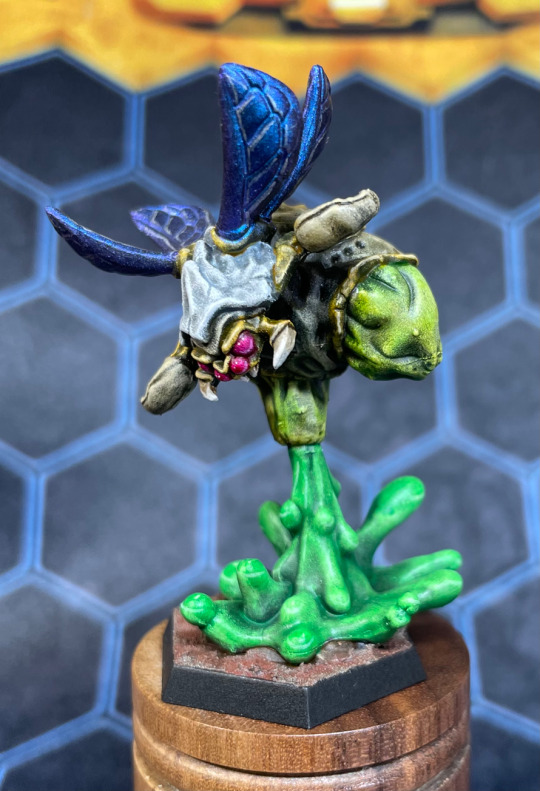
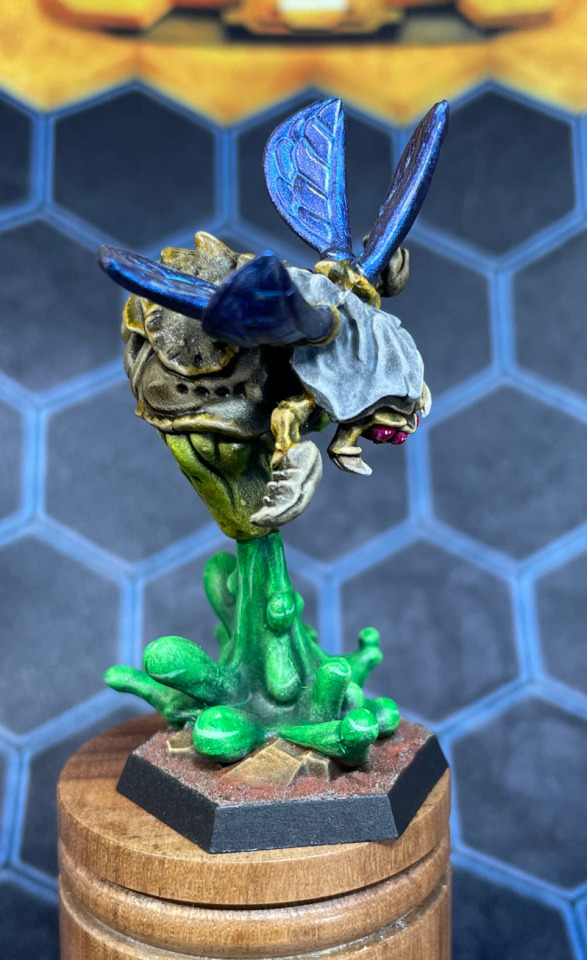
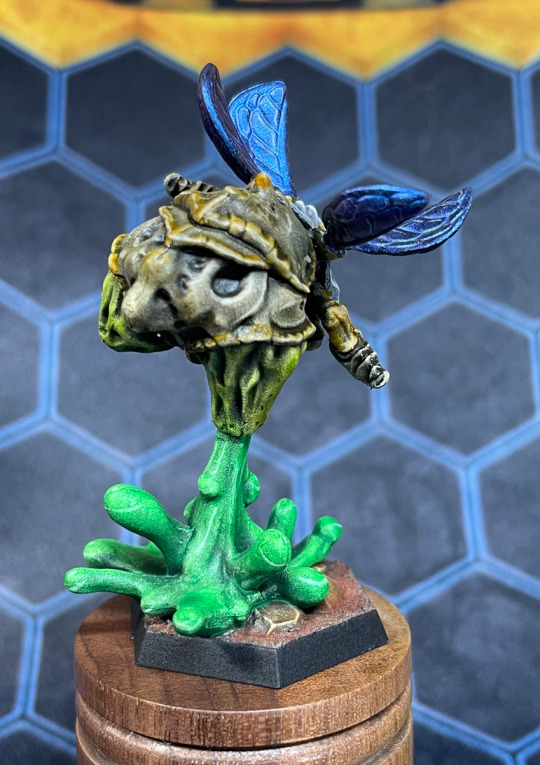
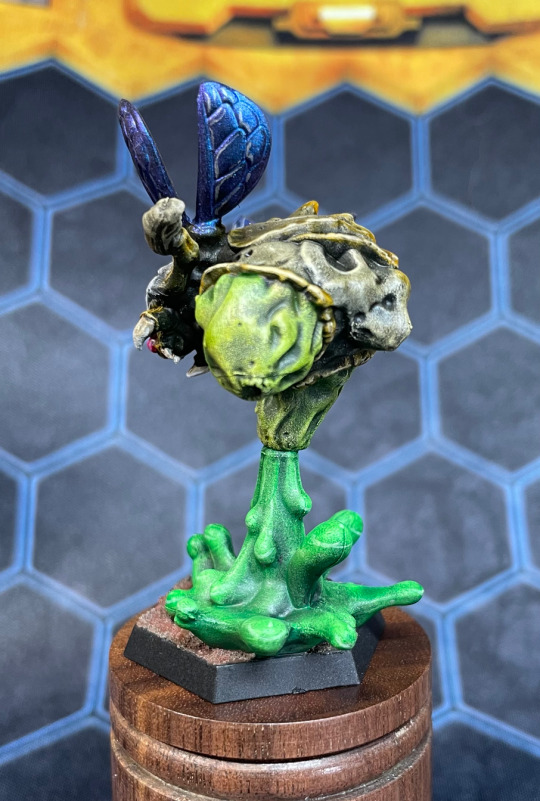
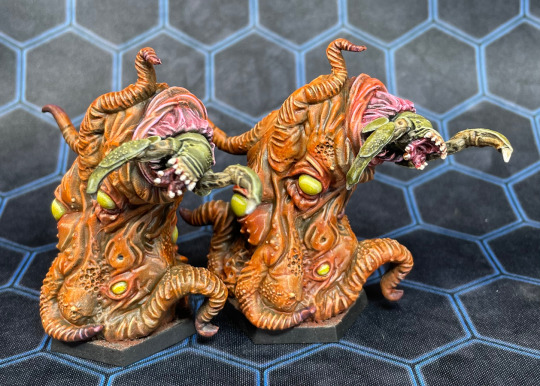
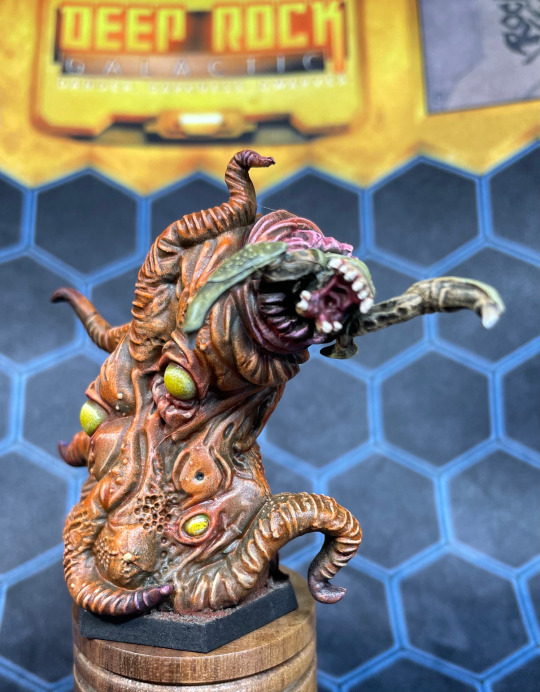
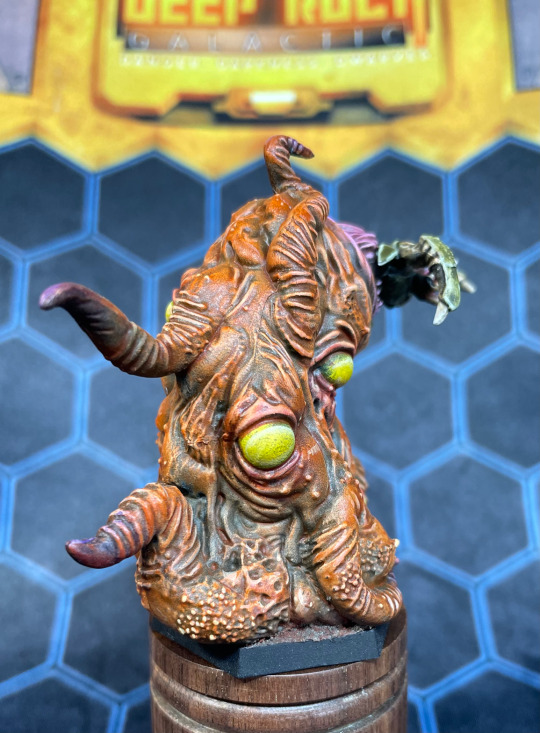
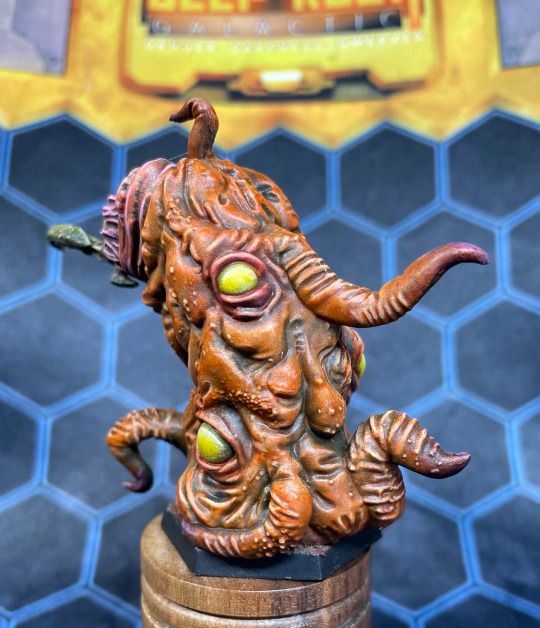
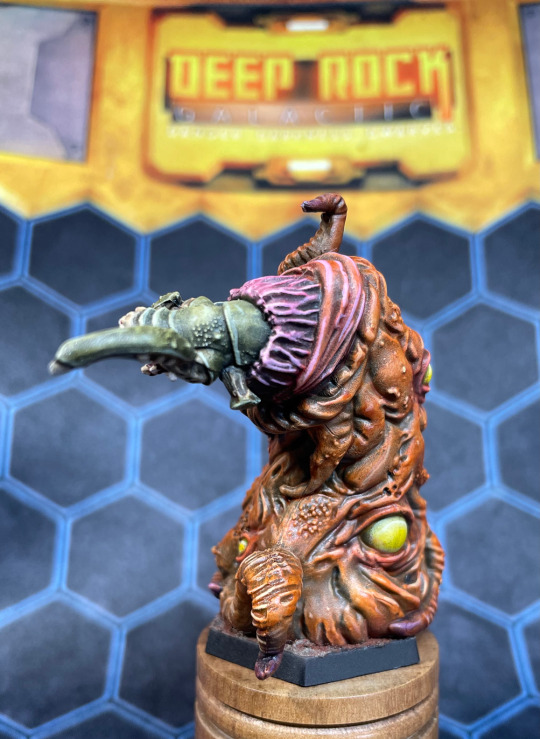
Spitball Infectors
After finishing the first box of minis, I started on the larger enemies in the second box. The first ones I tackled were the Spitball Infectors. The miniatures are pretty different from the game models, having a lot more complicated vines and tentacles around the stalk. In hindsight I think I should have done the lower jaw blue, and the frill behind the head green, but I was following the game coloration where the top of the head is blue and the jaw is green. Oh well, I think they came out pretty nice looking.
79 notes
·
View notes
Text
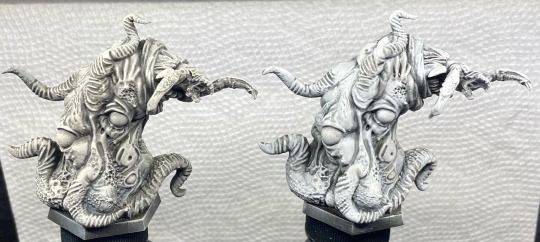
After I posted the photos of the first box of the DRG miniatures, I had several people ask me for more step-by-step information about how I painted them. I’m not very good about documenting what I do as I’m doing it, but I gave it a try on the two Brood Nexus models.
These were, I must confess, the two models I was least enthused about painting in the entire game. Gross and blobby piles of tentacles, and even in the video game, not terribly interesting to look at. But I think I turned them out well.
I will try and put comments in the alt text on each photo to explain what I did in each step. Some photos I have two steps shown on both models, with the second step only done on the right model (but I then did it on the other one too, before taking the next picture.)


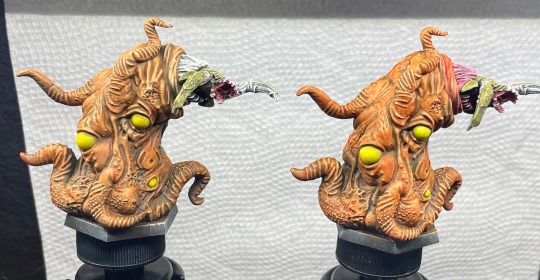


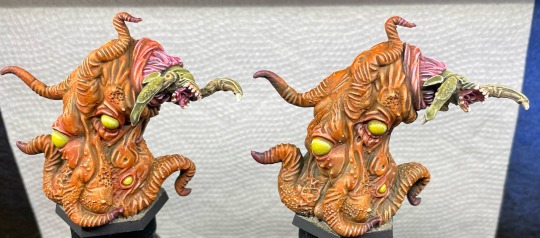

I will take some better pictures once they're varnished and I set up my lights again, but all in all I am happier with how they turned out than I thought I was going to be!
I have to say, everything I know about contrast paints and slapchop I learned from watching Juan Hidalgo's youtube channel. His Heavy Contrast series is really educational!
40 notes
·
View notes