
Last Seen Blogs

digiideasblog
Untitled

mjrawr
Shemay! :P

howieweinerman
mean

sparklean-blog1
cleaning accessories

mmmblac-blog
aesthe;
Text
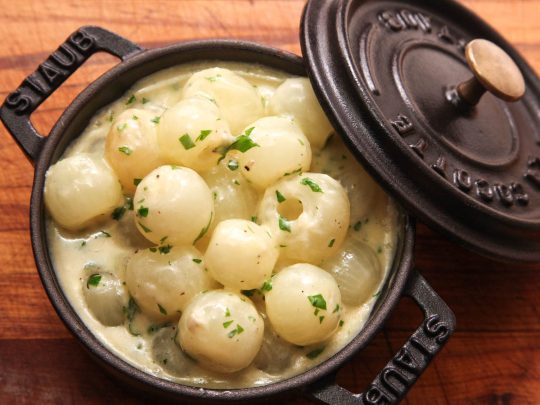
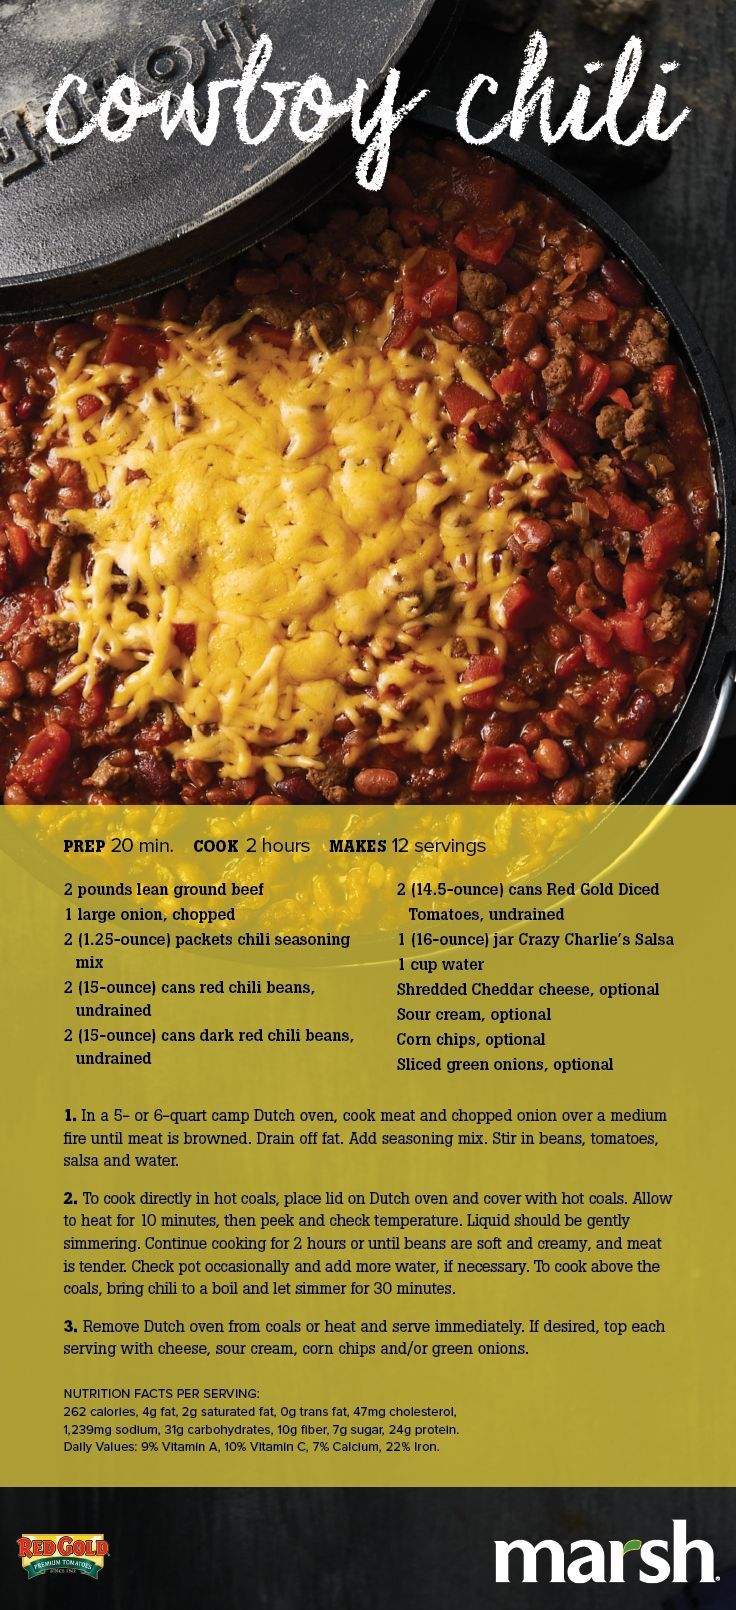
Low-Carb Twice-Cooked Cabbage with Sour Cream and Bacon (Video)
posted by Kalyn Denny on March 13, 2019
Low-Carb Twice-Cooked Cabbage with Sour Cream and Bacon is really a wow when you’re looking for an interesting side dish! Use the Diet-Type Index to find more recipes like this one.
Click here to PIN Low-Carb Twice-Cooked Cabbage with Sour Cream and Bacon!
Watch the video to see if you’d like to make Low-Carb Twice-Cooked Cabbage with Sour Cream and Bacon!
As I keep reminding you, cabbage is on sale everywhere in March, so I hope you’re trying some recipes with cabbage while it’s such a bargain. And I’m continuing the month of cabbage love by reminding you about this ultra popular recipe for Low-Carb Twice-Cooked Cabbage with Sour Cream and Bacon! Bear with me if you’re not a fan of cabbage please! But for everyone who does love cabbage like I do, this is a must-try cabbage recipe.
And for those who are not the biggest cabbage fans, maybe the use of bacon will reassure you about the flavors here, because when we tested the recipe Kara and I absolutely loved this dish with lightly cooked cabbage and crisp bacon baked with a sour cream and cheese topping. The method used here makes the cabbage sweet and delicious, and it only takes a tiny bit of bacon to make this amazing, but use more bacon if you prefer!
If you’re looking for an interesting new low-carb side dish, please be open-minded and give Low-Carb Twice-Cooked Cabbage with Sour Cream and Bacon a try. You won’t regret it!
Slice the bacon into thin strips and cook over medium-high heat in a small frying pan until it’s crisp; then drain well on paper towels. In the largest frying pan you have, cook the onion in olive oil (or a little bacon fat if you prefer) just until it starts to brown. Add shredded cabbage and season with sweet paprika, salt, and pepper. Cook until the cabbage over high heat just until it’s softened, then stir in the bacon and cook 1-2 minutes more to combine flavors.
Put the cabbage-bacon mixture in a large baking dish and spread the sour cream over it. Top with the grated Mozzarella and bake at 375F/190C for about 30 minutes, or until it’s heated through and the top is nicely browned.
More Delicious Low-Carb Ideas with Cabbage:
Sriracha Beef Cabbage Bowl ~ Kalyn’s Kitchen
Sausage and Spinach Stuffed Cabbage Leaves ~ The Cooking Bride
Roasted Cabbage with Lemon ~ Kalyn’s Kitchen
Kielbasa and Cabbage Skillet ~ Very Culinary
Low-Carb Fish Taco Cabbage Bowl ~ Kalyn’s Kitchen
Weekend Food Prep:
This recipe has been added to a new category called Weekend Food Prep to help you find recipes you can prep or cook on the weekend and eat during the week!
Low-Carb Twice-Cooked Cabbage with Sour Cream and Bacon
Yield: Makes 6-8 side dish servings.
Total Time: 45 minutes
Prep Time: 15 minutes
Cook Time: 30 minutes
Ingredients:
4 slices thick-sliced bacon, cut into thin strips (or more)
2 tsp. olive oil or bacon fat (more or less, depending on your pan)
1/4 yellow onion, finely minced
1 large head of cabbage (2 pounds) core cut out and cut into thin strips
1/2 tsp. sweet paprika (see notes)
salt and fresh-ground black pepper to taste
1 cup sour cream (Daisy full-fat sour cream preferred)
3/4 cup grated Mozzarella cheese
Directions:
Preheat oven to 375F/190C. Slice the bacon. Cut the core out of the cabbage and cut it into thin strips. (We used a mandoline slicer to slice the cabbage.) Mince the onion.
Heat a small frying pan over medium high heat, add the strips of bacon, and cook until the bacon is browned and very crisp. Drain bacon on paper towels.
Heat 2 teaspoons of olive oil (or a little bacon fat if you prefer) in the largest frying pan you have, add the minced onion, and cook over medium-high heat until it’s barely starting to brown. Add the sliced cabbage, season with paprika, salt, and pepper, and cook just until it has softened partly. Then add the crisp bacon pieces, stir to combine with the cabbage, and cook 1-2 minutes more to combine flavors.
Spray a glass baking dish with olive oil or non-stick spray. (The oval glass dish I used was 13″ x 10″ at the widest parts.) Put the sauteed cabbage in the casserole dish and spread the sour cream over, then sprinkle with the grated Mozzarella.
Bake about 30 minutes, or until it’s bubbling hot and the top is nicely browned. Serve hot.
Low-Carb Diet / Low-Glycemic Diet / South Beach Diet Suggestions:
Low-Carb Twice-Cooked Cabbage with Sour Cream and Bacon is suitable for most low-carb eating plans, including Keto. Bacon isn’t recommended for the South Beach Diet, but personally I wouldn’t object to a little well-drained bacon in a low-carb dish like this, and I’d eat it for any phase of the diet. If you want to follow the letter of the law for South Beach, skip the bacon (or use turkey bacon) and use reduced-fat sour cream and cheese and this will still be a delicious side dish.
Find More Recipes Like This One:
Use the Recipes by Diet Type photo index pages to find more recipes suitable for a specific eating plan. You might also like to Follow Kalyn’s Kitchen on Pinterest to see all the good recipes I’m sharing there.
Nutritional Information?
If you want nutritional information for a recipe, I recommend entering the recipe into this nutrition analyzer, which will calculate it for you. Or if you’re a member of Yummly, you can use the Yum button on my site to save the recipe and see the nutritional information there.
posted by Kalyn Denny on March 13, 2019
Don’t Miss a Recipe!
subscribe to receive new recipes via email:
We are a participant in the Amazon Services LLC Associates Program, an affiliate advertising program designed to provide a means for us to earn fees by linking to Amazon.com and affiliated sites.
Source: https://kalynskitchen.com/low-carb-twice-cooked-cabbage/
0 notes
Text
Ceviche and Sashimi Collide in Peruvian Tiradito
[Photographs: Vicky Wasik]
One of the many joys of Peruvian cuisine is the beautiful way in which it has melded with the foods of immigrants. Nikkei cooking, for example, is Japanese-Peruvian food, the result of a 19-century influx of Japanese migrants to Peru. Peruvian food has influenced the way Japanese food is cooked there, and Japanese food has changed how Peruvians cook. The results are damn delicious.
One fun example is tiradito, which combines elements of ceviche and sashimi in a single dish. Ceviche typically involves "cooking" raw fish in an acidic marinade. One doesn't make ceviche and serve it right away; it's better to wait about 15 minutes until the fish has turned more opaque, and the exterior of each small piece has taken on a partially cooked consistency.
Compare that to Japanese sashimi. While some species like mackerel are cured or seared, many are served completely raw—no heat, no acid, no lengthy salt-curing process. And unlike ceviche's smaller chunks of fish, sashimi is often cut into larger rectangular slices. When served, it's adorned minimally, with soy sauce, wasabi, and pickled ginger on the side.
Tiradito marries the two traditions. Like sashimi, the fish is cut into large slices and spends no time curing before being served. But like ceviche, it's served with a tart, spicy citrus-chili marinade known as leche de tigre (tiger's milk . . . you know, because it's got enough attitude to make you go RAWR).
Some tiradito recipes call for infusing the leche de tigre with pieces of fish and then straining them out and discarding them. This brings it closer to the sauce that comes with a ceviche, in which fish juices have mingled with the marinade. I did not do this for my tiradito recipe, though, since it requires sacrificing some of your (likely pricey) fish to the marinade for what amounts to a nice, but nonessential, step. If you want to do this, though, you can; just soak some fish pieces in the lime juice for 15 or 20 minutes before straining them out and continuing with the recipe (you can, of course, eat those fish pieces in the kitchen, so that they're not totally wasted). If you're working with a whole fish and filleting it yourself, this infusion step becomes much easier since you'll definitely have scraps.
Tiradito sauces come in many flavors, but the most classic features lime juice and a purée made from Peruvian aji amarillo peppers, which have an incredible floral aroma and a decently spicy kick. It varies from pepper to pepper, but it tends to be hotter than your average jalapeño but not nearly as hot as a habanero.
There are a couple ways to get aji amarillo paste in locales where the fresh peppers aren't available. Easiest is to buy a jar of the purée at a market that sells Peruvian ingredients. Better is to make it yourself from frozen whole aji amarillo peppers. The from-frozen stuff has a more complex flavor that captures more of the pepper's natural floral and fruity notes; the jarred option is good, but some of aji amarillo's charms are snuffed out in the canning process. Making your own with frozen peppers is as easy as boiling the peppers for 10 minutes, removing their stems and seeds (and, if you want to be more finicky about it, their skins, too), and then liquifying the flesh in a blender with just enough water to get it moving.
Beyond that, the leche de tigre for tiradito goes like this: Blend fresh lime juice with garlic and some fresh ginger, mix in enough of the aji amarillo paste to give the sauce a punch of chili heat and enough viscosity that it doesn't just flow like water on the plate. Some freshly minced cilantro can go in at the end.
In Peru, the fish is typically white-fleshed, something along the lines of corvina or fluke. Pictured here, though, are salmon and yellowtail (hamachi in Japanese), which are common substitutes, at least here in North America. The important thing is to get fish that you can serve as sashimi; your selection will depend heavily on where you live.
On the side, you might add some choclo (a type of large, white Peruvian corn) or some thick rounds of cooked sweet potato, both of which are traditional tiradito accompaniments. Neither is necessary, though: Tiradito is, at its heart, a dish open to interpretation. It was born of cultures colliding and being flexible enough to embrace each other. Setting its presentation in stone cuts against that spirit.
This post may contain links to Amazon or other partners; your purchases via these links can benefit Serious Eats. Read more about our affiliate linking policy.
Source: https://www.seriouseats.com/2019/03/how-to-make-peruvian-tiradito.html
0 notes
Text
Musical Kitten Gift Wrap
Meet your best new cat friends: Bandana Kitty and Top Hat Tomcat! Use a kraft paper bag and just a few tools from your craft cupboard to make the most adorable gift wrap you’ve ever seen! Whoever receives these beautiful will definitely love the wrap as much as whatever gift you put inside. If you want to keep your kitties on display, you can even adapt these instructions to wrap an open-topped storage box instead!
A few notes before we begin:
All sizes will vary according to the specific size of your box, so I tried to also include general proportions in addition to measurements for my 8.5” X 5.5” (22cm X 14cm) box.
I strongly recommend making ALL your pieces before gluing down. You can see how everything looking before committing and will avoid the chance of gluing small pieces underneath larger ones.
Since this tutorial features two variations, follow step 1 through step 7 for both designs. At Step 8 you can choose your own adventure!
Gift or box
Paper bag or kraft paper
Scissors
Glue (I prefer glue stick)
Black construction paper/cardstock
Pencil
Contrasting paper (I chose white)
Clear tape (for wrapping the gift)
White pen/pencil (optional)
Printable template 1 and template 2 (optional)
Step 1
Wrap gift/box with a paper sack, kraft paper, or solid color gift wrap. I used a paper grocery bag.
Step 2
Use extra paper scraps to cut out two triangular ear pieces. I made each of the ears approximately ¼ of the box’s shortest side: 1.5” or 4 cm for a box 5.5” or 14cm wide. You can use the printable template, or make your own by drawing a right-angle triangle, then adding an extra rectangle on the bottom (where you will put glue to attach it).
Step 3
Use extra paper scraps to cut out two arms. Use the printable template, or make your own by drawing a wonky macaroni noodle shape with one end (the paws) a bit bigger than the other (the shoulder).
Step 4
Make a tail from scrap paper. Use the printable template or draw your own squiggly “S” shape.
Step 5
Using black paper or cardstock, cut out eyes, nose+mouth, and six thin whiskers (I like to make my middle whiskers a bit longer than the tops and bottoms). Use printable template or experiment with drawing your own. A white pen or pencil can make it easier to see markings on black paper.
If you hate handling tiny bits of paper, the face and whiskers can alternatively be drawn onto the box with a black marker.
Step 6
Time to make the accordion! Cut a long strip of white paper or cardstock. It should be at least twice the length of the box’s shortest side. Follow the template or photo to make the necessary folds.
If using cardstock, I find it very helpful to carefully score the paper with scissors or the back of a craft knife, or a bone folder.
Create the “accordion fold” by alternating folding the paper to the left and right. IMPORTANT: Be sure the first fold of the “accordion fold” area (which would be the third line) is folded DOWN from the first “decorate” area. You can improvise your accordion, but you need to have an even number of folds in the “accordion fold” area.
Step 7
Flatten your accordion out and decorate the designated “decorate” areas to your liking. Add keys, buttons, and whatever designs you like.
And now it’s time to CHOOSE YOUR ADVENTURE! This tutorial features two variations. Directly below are the instructions for the “Bandana Kitty.” Skip ahead to Step 10 for “Top Hat Tomcat” instructions.
Step 8: BANDANA KITTY
Choose a contrasting color of paper or cardstock to make the bandana. Use your box as a stencil to trace the correct size for your project.
Cut out the paper bandana shape.
Decorate however you like, or leave a solid color.
Step 9
Using the same paper as you did for the bandana or a complimenting one, use your box to trace a rectangle shape to make an outfit for your kitty. I made mine approximately ⅔ of the box’s height.
Decorate as you like. I spontaneously decided to make a collar from black cardstock.
Step 10: TOP HAT TOMCAT
As you can see, I followed Step 1 – 7 and have all the same pieces, but scaled down for a smaller box. For this step, choose a contrasting color of paper or cardstock (I chose white). Use your box as a stencil to trace a rectangle the same width and approximately ¼ – ⅓ of the height.
Cut away an upside-down arched “V” to make a patch of face coloring.
Step 11
Draw two overlapping triangles and cut it out to make a little bow tie.
Step 12
Use black cardstock to draw a top hat (a square on top of a long, thin rectangle), and then add an extra rectangle at the bottom where you can put glue to attach to your box. Cut out.
Step 13
It’s time to put it all together, whichever style you’ve picked – now comes the really fun part! You’ve worked so hard getting all your pieces ready, and now it is time to grab your glue and start sticking things down. You can mostly attach the pieces in any order, but be sure to glue the “outfit” on the Bandana Kitty BEFORE the accordion. The face patch of the Top Hat Tomcat needs to be glued BEFORE the face pieces, but I bet you already knew that. ;)
To attach the tail, align the tail the way you like and attach to the back BEFORE gluing arms and accordion.
To attach the arms, apply glue to the shoulder area and attach to the sides of the box.
The accordion needs to be glued in the designated “glue” areas PLUS on the bottom ridges of the accordion folds, so they stay in place and don’t pop out away from the paper.
Step 14
Fold the “paws” so they overlap the accordion to make it look like your cat is playing the instrument.
Happy wrapping!!
Source: https://www.handmadecharlotte.com/musical-kitten-gift-wrap/
0 notes
Text
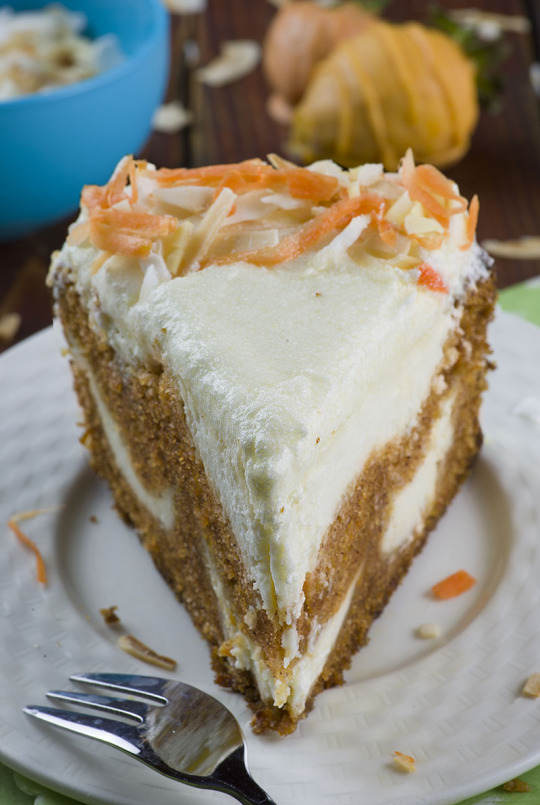
Cinnamon Toffee Butterhorns (Rugelach)
I have a countdown on my phone, and we have 1 day, 10 hours and 31 minutes before Christmas. And while I told myself I would totally shut down and step away from the blog to enjoy the holidays, I thought I would sneak in here for just a little bit to squeeze in one more recipe that I just had to share with you.
It wasn’t in the plan, but after I baked a batch of Cinnamon Toffee Butterhorns (aka Rugelach) for my annual cookie exchange and potluck, so many of you asked for the recipe after I shared it on Instagram, that I knew I couldn’t keep it for myself. Besides, I baked another batch to add to some gift bags for friends this morning, so naturally, I reached for my camera in the process.
Time is precious so let’s keep this short and sweet. Butterhorns, or rugelach, depending on where you’re from, are one of those cookies that remind me of home, and cookies from good friends. My dearest friend Linda was the first to introduce me to butterhorns – she would bake batches to give to us during the holidays.
This rugelach came about because my son requested a toffee cookie when I was brainstorming for our cookie exchange. I use my favorite butterhorn dough that uses sour cream, which makes it tender and supple, and it’s the kind of cookie you can keep in the freezer so you can pop it in the oven whenever the cookie craving strikes…or the unexpected guest pops in…whichever comes first.
I baked some to share, some to eat (since I didn’t make nearly enough to keep the last time I made them), and held some back to keep in the freezer, because who knows when you’ll need a treat, especially during the holidays!
And on that note, it’s time for me to get back to holidays with my family. 1 day, 10 hours and 22 minutes left to go!
Cinnamon Toffee Butterhorns (Rugelach) - no matter whether you call these cookies rugelach or butterhorns, you will love this rugelach recipe made with sour cream dough and filled with toffee!
Course Dessert
Cuisine American
Keyword baking, butterhorns, Christmas, cinnamon, cookies, holidays, rugelach, toffee
Prep Time 20 minutes
Cook Time 20 minutes
Chill Time 2 hours
Total Time 40 minutes
Servings 36 cookies
Calories 52kcal
Author Liren Baker
2 cups flour
1 cup cold unsalted butter, cut into small cubes
1 large egg separated
3/4 cup creme fraiche or sour cream
3/4 cup milk chocolate toffee bits
1/2 cup granulated sugar
2 teaspoons cinnamon
In the bowl of a food processor or using a pastry cutter, cut the butter into the flour, pulsing until you have large crumbs. Add the egg yolk and creme fraiche and continue to pulse (or knead by hand) until the dough comes together in a ball. Divide the dough into three equal parts and form into balls. I like to use a food scale to equally divide the dough, but you can also eyeball it. Wrap each portion of dough in plastic wrap, flatten into a disk, and chill in the refrigerator for 2-3 hours or overnight.
Make the filling by tossing together the toffee bits, sugar, and cinnamon in a small bowl. If the toffee bits have large chunks, I like to pulse it a few times in a food processor so the filling is a more even crumb.
Preheat the oven to 350° F with a rack placed in the center of the oven. Prepare a baking sheet and line it with parchment paper.
On a floured surface, roll out 1 ball of dough into a 10-inch circle about 1/8 inch thick. Sprinkle with the filling, pressing it down into the dough, then cut into 12 equal wedges. Starting at the outside edge, roll each wedge from the widest to the smallest point, creating a crescent shape. Work as quickly as you can - it's easier to work with the dough when it is still nice and cool. Place the cookies on a parchment lined baking tray. Chill in the refrigerator for about 10 minutes.
Repeat with the other two pieces of dough.
Right before baking, lightly brush with the egg white, and if you wish, sprinkle with sanding sugar. Bake for about 18-20 minutes, or until the cookies are golden. Transfer to a wire rack to cool completely.
Serving: 2cookies | Calories: 52kcal | Carbohydrates: 9g | Protein: 1g | Fat: 1g | Cholesterol: 7mg | Sodium: 12mg | Potassium: 22mg | Sugar: 3g | Vitamin A: 1.3% | Vitamin C: 0.1% | Calcium: 0.9% | Iron: 3.7%
Source: https://kitchenconfidante.com/cinnamon-toffee-butterhorns-rugelach-recipe
0 notes
Text
Olive Garden Green Apple Moscato
Have you tried the Olive Garden Green Apple Moscato? It is a delicious fall inspired sangria that is super easy to make.
The Olive Garden Green Apple Moscato is another addition to the Olive Garden family of Sangria recipes. Super easy to make, you need just three basic ingredients for this recipe. You will need a bottle of Moscato wine, pineapple juice, and Green Granny Apple Smith Puree. If you can’t find the Monin Green Granny Apple Smith Puree, sometimes a nice bartender at Olive Garden will sell you this, or you can order it from Amazon, or you can use Sour Apple Pucker Liquor instead.
What makes Green Apple Moscato Sangria so good?
The tartness of the green apple when combined with the pineapple juice, and rich flavors of Moscato make the perfect combination. I have also used a dry prosecco to make this sangria with equal results. Almost all places that sell wine sell Moscato. Now for fun, you could get some Moscato that has bubbles. The bubbles add a great touch!
Fruit Combinations to Add
Sangria is always fun when you add bits and pieces of fruit. When served in the restaurant, I have had this served with orange pieces, strawberries, and blueberries. When I make this sangria at home I like to add slices of green granny smith apples.
Perfect for company
Sangria is the perfect drink to serve when you have people over. You can make something fun and festive, and if you want to control the amount of alcohol in this sangria, you could always add some club soda to stretch it out a little bit.
Love Olive Garden Sangria? Try these copycat Olive Garden Sangria Recipes at home
Olive Garden Sangria
Olive Garden Berry Sangria and Video
Olive Garden Green Apple Moscato Sangria
Make the Olive Garden Green Apple Moscato Sangria at home.
Ingredients
750 mls Moscato
6 ounces pineapple juice
6 ounces Granny Smith Apple Puree or Apple Pucker
8 cups ice
1/2 cup strawberries
1/2 cup orange slices
1/2 cup green apple slices
Instructions
In a large pitcher combine chilled Moscato, pineapple juice, and granny smith apple puree. Stir until well combined
Serve by placing a several ice cubes in a glass, and pour over sangria, and top with fresh fruit slices.
Source: https://copykat.com/olive-garden-green-apple-moscato/
0 notes
Text
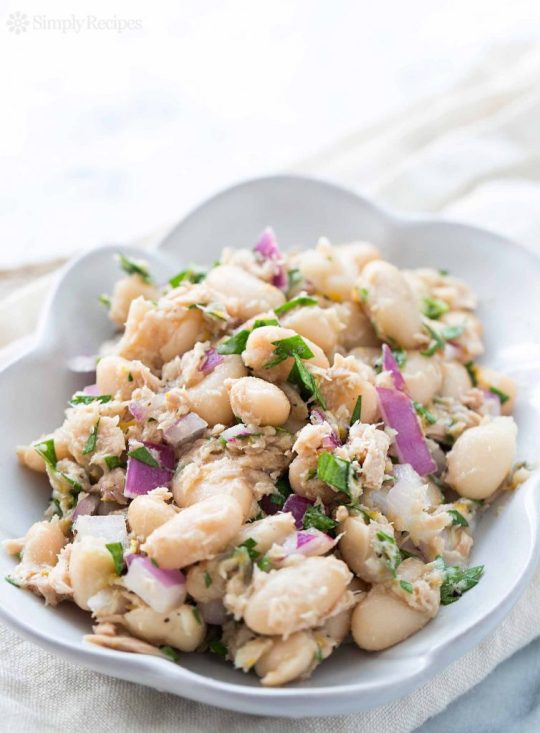
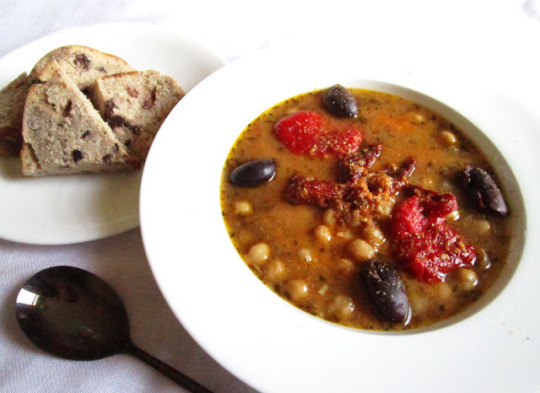
North African Chickpea Soup (Lablabi)

I've always been fascinated by the tantalizing and robust flavors that are so distinctive of Mediterranean cuisines. There is a vibrancy about so many of the dishes that are native to this considerable expanse of land with varying traditions and characteristics. As a vegetarian, I also find there is a wealth of dishes that are perfectly suited to a vegetarian diet, and the ones that are easily adapted to suit such preferences.
This Tunisian chickpea soup, known as Lablabi, is one such example, and as I enjoy soups no matter the time of year — and certainly chickpeas, which are one of my favorite legumes — I thought that I would share this easy-to-prepare soup here. Lablabi is commonly served over small chunks of stale crusty bread, and always with plenty of toppings, notably harissa. Traditionally served for breakfast, in addition to other toppings, a poached or soft cooked egg is added to the hot soup so that the soft yolk bleeds into the the broth. The egg is not necessary at all, unless you so please, and it's enjoyable anytime of the day.
There is a bit of heat in the brothy chickpeas, which are simmered with garlic and spices, but the real kick comes from harissa, which is swirled onto each serving. One of the most interesting aspects of this dish is that it can be served with different garnishes so that each diner can add what is most pleasing to their palates and also use more or less harissa as desired.
Despite the strong and robust flavors present, it is actually a fairly light soup, but serving it up with some crusty bread makes it a complete and satisfying meal in itself, as do the toppings that adorn each bowl.
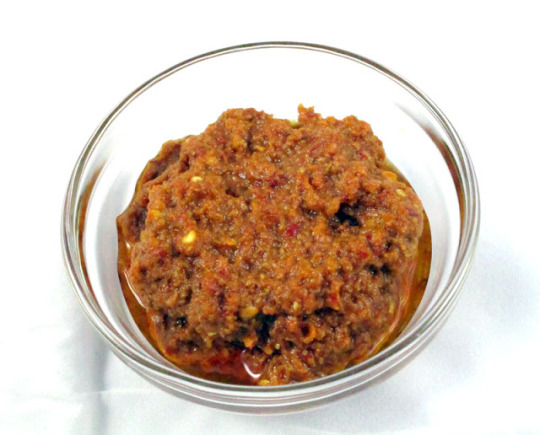
Harissa is a Tunisian fiery paste made with hot chilies, garlic, olive oil and seeds and spices such as cumin, coriander, and caraway. Sometimes sun-dried tomatoes are included as well. It is easy to make at home, but there are plenty of prepared varieties that can easily be purchased at the supermarket. No matter whether you make you own or purchase it from an outside source, do taste it before adding it to your dishes so you know what you are dealing with. Sometimes just a little is A LOT.
Note: Use 2 (14 oz) cans of chickpeas instead of the dried chickpeas if you wish to skip the steps of soaking and cooking the chickpeas. Just drain and rinse the canned chickpeas and proceed with the second step.

North African Chickpea Soup (Leblebi)Recipe by Lisa Turner
Cuisine: Tunisian
Published on May 29, 2019
Easy to make spicy and brothy North African chickpea soup with an assortment of colorful and delicious toppings

Print this recipe
Ingredients:
1 cup dried chickpeas (3 cups cooked or 2 14 oz cans)
3 tablespoons olive oil
2 cloves garlic, minced or crushed
1/2 teaspoon smoked paprika
1/2 teaspoon ground cumin
1/2 teaspoon chili powder
1/2 teaspoon dried oregano
2 cups vegetable stock or water
1 to 1 1/2 teaspoons sea salt, or to taste
fresh cracked black pepper, to taste
1 tablespoon fresh lemon juice, or to taste
Suggested toppings:
1 to 2 teaspoons harissa, to taste, thinned with a little water
roughly chopped roasted red peppers
handful of pitted Kalamata olives
2 to 4 sun-dried tomatoes, rehydrated and cut into strips
2 to 3 green onions, sliced
finely chopped fresh parsley or cilantro
olive oil
freshly cracked black pepper
Instructions:
Rinse the chickpeas and soak in several inches of water for 8 hours or overnight. Drain and rinse, then transfer to a medium saucepan. Cover with fresh water and bring to a boil. Reduce the heat to medium-low, cover, and simmer until the chickpeas are tender, about 1 hour. Drain and set aside.
Heat the olive oil in the same saucepan over medium heat. Add the garlic and sauté for 1 minute. Add the chickpeas, paprika, cumin, chili powder and oregano. Stir for about 1 minute and then pour in the vegetable stock or water and stir in the salt and pepper. Bring to a boil, reduce the heat to medium, and simmer, covered, for about 20 minutes until the chickpeas are buttery soft. Stir in the lemon juice.
To serve, scoop some of the chickpeas with their broth into serving bowls, swirl in some harrisa, top with some roasted red peppers, a few olives, sun-dried tomatoes, green onions or fresh herbs, and drizzle in some robust olive oil. Crack some black pepper over the bowls to finish. Serve with crusty bread to soak up the liquid, or serve cubes of the bread in bowls and scoop the brothy chickpeas overtop if desired, and proceed with adding toppings of choice.
Makes 4 to 6 servings
Other Mediterranean soups to enjoy from Lisa's Vegetarian Kitchen:
Vegetarian Harira (Moroccan Chickpea and Lentil Stew)
French Lentil Tomato and Harissa Stew
Lentil Minestrone with Swiss Chard and Arborio Rice
Spicy White Bean and Turnip Soup
Fakes - Greek Lentil Soup
Audio accompaniment: Coil - Going Up
Source: https://foodandspice.blogspot.com/2019/05/north-african-chickpea-soup-lablabi.html
0 notes
Text
Almond Crusted Salmon (Paleo, Keto)
Crispy on the outside, moist and tender on the inside Almond Crusted Salmon made with only a few basic ingredients. This easy recipe is paleo, keto, whole30, and mouth-wateringly delicious!
This post is sponsored by Raley’s.
After going paleo a million (okay, eight) years ago, I missed my crusted animal protein. In particular, I missed my saucy chicken parmesan and crispy crusted fish. There’s just something about a crispy outside and a tender, melt-in-your-mouth inside that wins me over each and every time.
…But then I got smart and figured out how to make crusted chicken and fish in grain-free fashion.
While a traditional crust is made using wheat flour, it can easily be made using whole nuts and/or nut flours as well! In essence, there’s no need to miss those classic recipes if you live a gluten-free lifestyle or limit your intake of grains.
Aside from the fact that this crusted salmon is completely drool-worthy, I have found it’s so easy to prepare using all whole food ingredients!
If you read my Cranberry Pistachio Vegan Shortbread Cookies post in December, you know I shop at Raley’s here in Reno daily.
What’s new and exciting is they have recently launched Raley’s Purely Made, a line of Private Label products that deliver great quality at great prices! The mission behind this Private Label is to make clean eating affordable by offering products that are thoughtfully crafted and real at a lower price.
Raley’s Purely Made products are free from 101+ artificial preservatives and ingredients and are also free from chemicals such as Bisphenol A (BPA), found in packaging. As someone who always buys organic whenever possible, it pleased me greatly to see that much of the Purely Made line is organic. From spices and whole nuts to flours, eggs, meats and produce, you can fashion up entire recipes using all Purely Made Ingredients.
…Which brings me to my next point..
To make this Almond Crusted Salmon, I used Raley’s Purely Made almonds, almond flour, dried oregano, dried thyme, and whole grain mustard. The recipe is so easy to prepare, and the result is the moistest, most delicious salmon with a delectable crust on the outside. It’s basically a salmon lover’s dream come true!
How to Make Almond Crusted Salmon:
Grind up the almonds in a food processor (or blender) until they reach the consistency of cornmeal. Transfer it to a mixing bowl along with the almond flour, salt, and dried herbs, and stir everything together.
In a separate bowl, whisk together the egg, water, and mustard.
Dredge a salmon fillet in the egg mixture, then place it flesh-side down on the flour mixture to coat.
Place the fillets on a parchment-lined baking sheet and bake to perfection!
Serving Options:
Serve the almond crusted salmon with your choice of roasted vegetables, stir fry vegetables, cauliflower rice, or regular rice.
Be sure to check out your local Raley’s! It is a transparent, healthy choice at a value.
I hope you love this almond crusted salmon as much as I do!
Ingredients
2 1/4 lbs salmon cut into 4 to 6 fillets
1 large egg
1 Tbsp water
1 Tbsp Raley's Purely Made stone ground mustard
1 cup Raley’s Purely Made raw almonds
1/2 cup Raley’s Purely Made almond flour
1 1/2 tsp sea salt
1 tsp Raley’s Purely Made Organic dried oregano
1 tsp Raley’s Purely Made Organic dried thyme
1 lemon sliced into wedges for serving
Instructions
Preheat oven to 425 degrees F and line a large baking sheet with parchment paper.
Whisk together the egg, water, and stone ground mustard in a bowl until well-combined.
Pulse the raw almonds in a food processor or a blender until it becomes a coarse meal.
In a mixing bowl, stir together the almond mixture, almond flour, sea salt, dried oregano, and thyme until well-combined.
Dredge each salmon fillet in the egg mixture, then transfer it to the almond-herb mixture. Use your hands to coat the whole surface of the fish in the almond mixture.
Transfer the fillets to the parchment-lined baking sheet and bake in the preheated oven 15 to 20 minutes, or until salmon is cooked through and crispy.
Serve almond crusted salmon with lemon wedges and your choice of side dishes and enjoy.
Click here for more information about Raley’s Purely Made products and it’s Banned Ingredients list.
Source: https://www.theroastedroot.net/almond-crusted-salmon-paleo-keto/
0 notes
Text
Sweet As Mackay!
Sugar Cane Factory
The lush, green area of Mackay in Queensland is just 1.5 hours away from Airlie Beach. It's a area famous for sugarcane but it's also one where nature literally sits on your doorstep and one where the food scene is coming ahead in leaps and bounds with plenty of local and Queensland grown produce.
Tourism Events Queensland
Ivy busies herself with the rental car while I watch the sugar cane leaves flapping in the warm breeze as we drive past. It's the first time to Mackay for both Ivy and I and while we knew that it was famous for sugarcane, we had no idea that it is literally everywhere you look, even at the airport.
As we touched down, I saw vast expanses of green swathes across the landscape. Early April is just after monsoon season and as a result the greens pop. To orient ourselves we drive the adorably named Mango Avenue in Eimeo to the Eimeo Pacific Hotel, a faded retro blue pub that looks like it has stepped out of the movie set. From there you can have a coffee or tea while the view below shows St Bees Island.
It's time for lunch and we visit 9th Lane Grind, a cafe located in the middle of town. It has an on trend menu of cafe offerings along with a range of home baked cakes, sweets and donuts. Service is very friendly and we take a seat at an outside, undercover table.
Chai Frappe $7 and Pina Colada Smoothie $7.50
Drinks wise, my chai frappe is too good that even though I can't finish it because of its size, I take it to go so that I can sip on it all afternoon. The non alcoholic pina colada smoothie is also full of fresh pineapple flavour.
Creamy truffle mushrooms $21.50
The creamy truffle mushrooms are just about the perfect breakfast or lunch dish. With a fat slice of downy soft brioche, a generous portion of streaky bacon, wilted spinach and creamy mushrooms in a truffle cheese sauce, forget calories or diets or any strange notions and just eat this and be happy with your life choices. It's so good that it doesn't even need bacon (but really who is going to ever leave bacon behind?).
Beef Brisket Benny $21.50
The beef brisket benny comes on two slices of bread with two poached eggs, potato hash, beetroot hollandaise and plenty of soft, saucy beef brisket in a barbecue style sauce.
KFCB Kristy's Fried Chicken Burger $18
The fried chicken burger is luscious with a saucy kaleslaw, Sriracha mayonnaise and smashed avocado with a crispy deep fried chicken fillet all on a charcoal bun. It's creamy and crunchy and slightly messy but oh so good at the same time.
Shoe string fries and sweet potato fries $4 each
And for the perennially greedy and undecided (guilty as charged!) you can get both types of fries-shoestring with a salt and vinegar powder as well as excellent sweet potato fries with aioli.
Tim Tam Pancakes $19
And for dessert? It's hard to choose because the cakes are calling me. But we decide to try the Tim Tam pancakes served with Nutella mascarpone, chocolate fairy floss, dark chocolate pearls, berries and house made fudge sauce as well as whole and smashed up Tim Tams. It's enormous and rich but we had to start our trip off with a bang!
Our first home for our Mackay stay is the Rydges Mackay centrally located right opposite 9th Lane Grind. We have a connecting room with two separate entrances and separate ensuites. It's a spacious simply designed room with a king bed.
The bathroom is large with a spa bath and Biology toiletries while there is a separate room for the toilet. Service does vary somewhat but there is a really helpful staff member who assists me when I need to change rooms because the air conditioning wasn't able to be switched off in my original room. Once I move to my new room it doesn't have wifi in it.
Downstairs is the Moss on Wood restaurant where there is a bar area as well as the restaurant at the front. We take a seat at one of the huge white wooden booths and order one of their steaks.
Black Angus Rib Fillet 300g $39 and potato puree $7
The Black Angus rib fillet is from Darling Downs in Queensland and has been dry aged for 100 days. It's perfectly cooked medium rare and comes with battered fries and a salad with honey mustard dressing as well as a sauce of your choice. We chose the red wine jus and the peppercorn sauce, the latter being our favourite. The steak is fantastic and we also order a side of potato puree made with real potato and it's such a satisfying meal especially when we spoon some of that peppercorn sauce on the potatoes.
The next morning we make our way to The Greater Whitsundays Farmers Markets that are held every Wednesday at Bluewater Quay. It's a small but well stocked market with a good range of items from meats, fruit, honeys as well as other goods.
We end up buying some goats milk shampoo bars, lip balms and honeys and trying some samples of sweet Queensland grown bananas and pineapple and pet an adorable doggy called Audrey with a purple tail!
Hi Audrey!
After doing a spot of clothes shopping we head towards The Dispensary which is a bar as well as a breakfast, lunch and dinner eatery. We take a seat under the large painting of a cow and settle into comfortable leather chairs for a feast.
The freshly shucked oysters are served with fresh citrus and Yarra Mountain Ash triple smoked caviar.
Duck Liver Parfait $19
The duck liver parfait is flavoured with Cointreau, sage and orange jelly and comes with a generous serve of roti bread. The duck liver is quite a bit stronger than chicken liver but the onion pickles help pare back the intensity (just a bit more of them please).
Warm Bread $15
We nibble on slices of buttered, toasted warm bread with hazelnut dukkah, olive oil and balsamic glaze. Although we're trying a lot of food both Ivy and I can't resist another buttery slice of toast.
Grilled Scallops $26
The grilled scallops are served on the shell with some smooth red apple puree, roasted hazelnut butter and apple micro salad and have a good balance of flavours.
Fresh fettuccine $26
Mains wise, we are sharing three -the first is the fresh fettucine with lime crème fraîche, smoked salmon and grilled asparagus and basil.
Chicken Teriyaki $24
Our lovely waitress tells us that the teriyaki chicken and the fettucine are the two most popular dishes on the menu with the chicken being the most popular. The teriyaki chicken is served with a sliced daikon and cabbage slaw in a horseradish dressing. We both like that it is served with a lighter side than rice because the weather is so balmy and warm.
Sumac grilled local kingfish $34
My favourite main is the sumac grilled local kingfish with crispy skin. It's served on a bed of cherry tomatoes with a spiced chermoula. It's a simple dish but cooked well, the kingfish perfectly moist.
Dark Chocolate Tart $18
And then we come to dessert. The dark chocolate tart is paired with a delightfully crunchy Queensland macadamia crumb and house made chocolate mint ice cream and blueberries. Ivy likes the serving size of this, it's not too overwhelmingly large or small and the tart has a nice dark intensity to it.
Crema Catalana $16.50
While the crema catalana makes use of one of Mackay's biggest exports-sugar. It's a lightly spiced crema catalana with orange and cinnamon and topped with torched Mackay sugar.
Speaking of sugar the nearby town of Sarina, around 40 minutes drive is home to the Sarina Sugar Shed. They hold four tours daily that detail the interesting history of sugar in the region. It's well worth doing as it is actually really fascinating.
Our fantastic guide Trudy tells us that 95% of Australia's sugar is produced in Queensland. Mackay itself processes around 6-7 tonnes of sugar cane a year. She explains the sugar cane harvesting and growing process to us that starts with small pieces of sugarcane on the ground. The "eyes" on the sugar cane sticks or billets grow the sugarcane which rises to the sky and this process of "planting" the sugar only has to be done every 2-5 years. Sugar cane needs heat humidity and lots of rain or irrigation.
The top leaves of the sugar cane makes the sugar by accessing sunshine but the sugar is stored in stalks and when harvested they do not need the leaves (they can cause problems with the harvesting machines). Decades ago, sugar cane farmers used to burn the sugar cane but that is largely an abandoned process with many just cutting down the leaves to make a trash bed on the ground that breaks down to become nutrients in the soil.
There are 30-40 varieties of sugar cane grown in this area although there are around 160 varieties in total. The farmers help to fund research into finding more disease resistant varieties. And when it comes to harvesting and selling the sugar cane, the farmers are paid by the sugar level in their cane.
Trudy then takes us to the factory to explain the process of how sugar is made in their micro factory. It is first crushed and then they add natural lime to have the mixture reach a ph level of 8 so that it won't rot or deteriorate. It is then heated to 104C/219F to kill bacteria. A flocculant is added to clarify the mixture much in the same way that egg white is added to wine. From an original 80 litres of juice you will get 20 litres of syrup to work with. From this syrup you grow the sugar crystals using a process called "shock seeding" which starts to crystallisation process. They inject raw sugar crystals, raw sugar syrup and air and then the sugar crystals start to form. The longer they sit in the pan the larger the crystals. 7 tonnes of sugar cane will reduce down to create 1 tonne of sugar crystals.
Trudy then shows us the difference between molasses, treacle and golden syrup. Molasses is most concentrated in terms of water but it is also the least sweet. Treacle has more water and sugar while the highest level of sugar and water is with golden syrup.
And that brings us to a very interesting point-did you know that raw sugar in Australia is not actually raw at all? Food standards have ruled that for Australian consumption no sugar can actually be raw. So raw sugar is actually refined sugar that has an additional process to add molasses into it to make it taste like a raw sugar and is actually more refined than white sugar! And most of us I think would assume that we're doing better by using raw sugar.
After blowing our minds with that tidbit we adjourn back to the video room where we get to try all of the products that they produce from chutneys to sauces. I particularly love the ginger sweet chilli sauce and the Asian style mango chutney. All items are gluten, colour and preservative free.
Then she takes us through the alcoholic spirits and the various rums offering us any to taste. The special edition rum is smooth and sweet and spicy while the Noi (Nice over Ice) is perfectly balanced limey deliciousness.
And then Trudy asks us if we'd like a freshly made fairy floss. I don't think that this day could have gotten any better but it does! We are transformed into kids again with our very own stick of lemon fairy floss.
We head back to the town area. The Riviera Mackay is the home for our second night in Mackay. Located right by the River the atmosphere here is a bit more relaxed than in the centre of town. Check in is smooth, parking is easy and we quickly find our way up to our seventh floor two bedroom apartment with two separate bedrooms and two separate bathrooms.
The accommodation is a really pleasant surprise. They are serviced apartments with a kitchenette which we never tend to use as we eat out. But the colour scheme is visually appealing with whites, yellows and pineapple motifs and plenty of neutrals. There are nice touches like L'Occitane toiletries. The apartment is roomy with a good sized balcony. Internet is fast and free but drops in and out and Ivy isn't able to connect at all.
I have a shower and do some work and then we head out again to dinner. Tonight's dinner is at Romeo and Juliet's at the Shakespeare Motel. We sink into a powder blue velvet booth that oversees the whole restaurant and Ivy whispers that she feels like Tony Soprano.
As the name suggests it's a rather romantic restaurant. I'm guessing a birthday or anniversary sort of place although it looks like there are guests that are staying at the motel dining there.
Oysters $34 for a dozen
We start with a dozen oysters with soy, mirin and ginger. They're nice although the soy does tend to overpower the flavour of the oysters.
Caprese Risotto $17
Given we've eaten 10 courses for lunch we go for a lighter dinner. We decide to share a Caprese risotto entree and a pasta main. The caprese risotto ends up being my favourite dish of the night. It's a tomato based risotto with plenty of flavour, sliced up buffalo mozzarella and roasted red vein cherry tomatoes and micro basil. I would have happily devoured this perfectly portioned size dish.
Pappardelle with chicken and mushrooms $26
We also order the pappardelle with shimeji and shiitake mushrooms in a cream sauce. It needs a little seasoning but it is comforting and the pasta well cooked.
Chocolate pave $18
Dessert is a chocolate pave slice, with sticky caramel popcorn and a popcorn sorbet which is a milky, mild sorbet with a touch of butter flavour.
Raspberry and yogurt terrine
There's also a raspberry and yogurt terrine which is Ivy's favourite. It's tart and refreshing and served with fresh strawberries. It's a quick drive back home to rest and sleep before we head to our next stop! Stay tuned because up next Mackay has some nature surprises in store for us.
So tell me Dear Reader, do you like doing food tours like the sugar tour? Did you know that about raw sugar not being raw at all? Have you ever visited Mackay?
NQN and Ivy were guests of Mackay Tourism but all opinions remain her own.
9th Lane Grind
43 Wood St, Mackay QLD 4740
Monday to Friday 6:30am–3:30pm
Saturday 6:30am–2:30pm
Sunday closed
Phone: 0428 897 861
Rydges Mackay Suites
9 Gregory St, Mackay QLD 4740
Phone: (07) 4969 1000
rydges.com/accommodation/mackay-qld/mackay-suites/
Moss On Wood
Ground floor, Rydges Mackay Suites
Greater Whitsundays Farmer's Markets
River St, Mackay QLD 4740
Wednesday 7–11am
Phone: 0498 717 941
greaterwhitsundayfood.org.au/farmers-market
The Dispensary
84 Wood St, Mackay QLD 4740
Monday to Saturday 6am–12am
Sunday Closed
Phone: (07) 4951 3546
thedispensary.nefood.com.au/
Sarina Sugar Shed
Field of Dreams Parkland, Railway Square, Sarina QLD 4737
Open 7 days 9am–4pm
Phone: (07) 4943 2801
sarinasugarshed.com.au/
Riviera Mackay
5/7 Nelson St, Mackay QLD 4740
Phone: (07) 4914 2460
rivieramackay.com.au/
Romeo and Juliet's
Shakespeare Motel
309 Shakespeare St, Mackay QLD 4740
Open 7 days 6am–9pm
Phone: (07) 4969 0200
shakespearemotel.com.au/dining/
Source: https://www.notquitenigella.com/2019/04/11/mackay-queensland-food-things-to-do/
1 note
·
View note
Text
Use Your Noodle: My Mother's Amazing Picnic Hokkien Noodles!
This recipe is brought to you by Woolworths
These hokkien noodles are the bees knees. It’s what I always ask my mother to make for any sort of family picnic or gathering. They're a flavoursome mix of chicken, prawn and stir fried vegetables topped with egg omelette.
It has been a good 10 years since my mother first shared her hokkien noodle recipe and in that time it has actually evolved quite a lot. I think it has improved and I love these hokkien noodles so much that I although I love eating new things, I always ask her to make these. She is probably bit sick of making them but they really are so popular at picnics and family gatherings and easy to make.
My mother's method for making these noodles is to layer things and cook everything separately so that it doesn't stew in juices but instead fries properly. What I also like about these is that they aren't oily or greasy whereas I find a lot of hokkien noodles tend to be.
To make these noodles, we used Woolworths Simply Stir-fry Hokkien Noodles as well as a shortcut using the Woolworths Layered Stir-fry Kit With Honey Soy Sauce for convenience.
When you use both of these the cooking and prep time is less than 30 minutes. The Woolworths Simply Stir-Fry and Simply Cook range are designed to do all the prep for you so you are still cooking from scratch but save time on prep.
We didn't use the honey soy sauce packet in the vegetables for this particular recipe because my mum makes her own sauce, but you certainly could especially if you were just stir frying the vegetables and were short on time but the honey soy sauce is delicious and full of flavour
These noodles are comfort food to me. I will say one thing now that we're moving into cooler weather, comforting Winter food is my favourite part of winter. That and barricading yourself in and cooking food.
I ventured out the other night to a food festival but I sort of wished I had stayed at home. My friend Sophia and I were standing there minding our own business when a woman hit Sophia on the head with her phone while she was busy taking a video. I guess she didn’t see a human standing there.
Then a couple of minutes later a woman walked straight into me. Then she rolled her eyes and said to her phone, "Well I guess SHE ain't moving!". I was caught in that moment between being flabbergasted at her rudeness and laughing. I don't know who she was speaking to, maybe she was live streaming but yes I wasn't moving. So perhaps it's safer to stay at home, bury yourself in and make the most of winter and comfort food!
So tell me Dear Reader, what is your favourite comfort food? And have you had any incidents like that where people have been caught up with technology or rude with their phone?
An Original Recipe by Lorraine Elliott
Preparation time: 20 minutes
Cooking time: 15 minutes
Makes enough to feed a crowd of around 8, halve if you would like but this also freezes well and is great for lunchboxes
Sauce
2 tablespoons soy sauce
2 tablespoons oyster sauce
2 tablespoons water
4 teaspoons sugar
2 teaspoons salt
2 teaspoons sesame oil
Pinch white pepper
Mise en place
Mixing the prawn meat with the cornflour, salt and sugar
Step 1 - Place the Woolworths Simply Stir-fry Hokkien Noodles in hot water for 2-3 mins, then drain. Set aside. In a bowl, mix the prawn meat and chicken and add the cornflour, salt and sugar and stir to season the meat. Set aside. Then in a bowl mix all of the sauce ingredients together and set aside until needed.
Frying the omelette
Step 2 - Add 3 tablespoons oil and heat a wok or a large frypan until very hot. Add the scrambled eggs and fry on both sides. Remove from the frypan and set aside. Fry the prawn and chicken mix until cooked through and remove from the pan. Then fry the Woolworths Layered Stir-fry Kit vegetables adding more oil if needed. Remove from the pan.
The chicken, prawns and egg cooked through
Step 3 - My mother now cleans the wok or frypan with hot water and dish soap - this is to prevent anything from sticking to the bottom. Return to the heat and turn to medium high heat, add oil and then add the onion, garlic and ginger and fry until translucent. Add the noodles and the sauce mixture and fry until softened. Then add the stir fried vegetables, the prawn and chicken mixture and then the shallots.
Stir frying the vegetables
Cutting up the egg omelette
Step 4 - Using scissors or a knife, finely slice the egg omelette and scatter on top of the noodles.
Source: https://www.notquitenigella.com/2019/06/17/best-authentic-singaporen-hokkien-noodles/
0 notes
Text
raspberry crumble tart bars
Last month, Ruth Reichl, food writer extraordinaire and the last editor-in-chief of the now shuttered Gourmet magazine, rounded up her 10 favorite recipes from her magazine years for Epicurious. It’s possible I’ve never clicked on a link faster. I adored the magazine; in my early years here, it really helped me crystalize a vision of what I love in cooking and do not. I cooked so many of the recipes — and yet, almost none of these. A raspberry crumble tart by Ruth Cousineau in August 2006 (just weeks before I launched SK) in particular jumped off the page. Reichl writes:
From the first moment I tasted this tart, I knew I’d be serving it again and again. I love the simplicity of the recipe, which allows the fruit to shine. I love the way it looks—a gorgeous burst of vibrant color peeking out of a shaggy top. And I really appreciate that you can use the most insipid supermarket raspberries (they emerge from the heat of the oven with a surprising intensity of flavor).
People, I ended up making it three times this week. (It helped that my store’s insipid berries have been on sale.) Here is what’s cool about this recipe: there are only seven ingredients and two are salt and water, which don’t even count. The remaining ingredients — flour, butter, sugar, almonds, and fresh raspberries — are as basic as can be. There’s no sugar in the berries and no thickener, you don’t macerate them, and the end result is that they’re not runny so there’s no liquid to contain or to fret about sogging the bottom crust. You make a simple butter-flour mixture, divide it in half, and form half into a pie crust base. You don’t don’t even need to parbake it (birds are singing!), you simply fill it with a heap of fresh raspberries and cover them with an avalanche of a loose, sugary crumble (that you’ve made from the second half of the butter-flour mixture) and this bakes onto and into the berries, mingling with any juices that release, and crisping shaggily all over.
It’s not hard see why Ruth Reichl likes it so much. It tastes grown-up. Not goopy, not heavy, not too sweet or excessively tart (using very ripe berries helps; they’re sweeter). It celebrates raspberries in such an uncluttered way, I immediately made them two more times, including one that’s slab pie-sized. I have no idea what we’re doing this weekend yet, but I know they’re coming along.
Previously
One year ago: Ice Cream Cake Roll
Two years ago: Strawberry Graham Icebox Cake and Broccoli Rubble Farro Salad
Three years ago: Almond-Rhubarb Picnic Bars
Four years ago: Toasted Marshmallow Milkshake, Fake Shack Burger, and Swirled Berry Yogurt Popsicles
Five years ago: Carrot Salad with Tahini and Crispy Chickpeas
Six years ago: Greek Salad with Lemon and Oregano and Two Classic Sangrias
Seven years ago: Vidalia Onion Soup with Wild Rice and Tzatziki Potato Salad
Eight years ago: Classic Cobb Salad, Lime Yogurt Cake with Blackberry Sauce and Blue Cheese Scallion Drop Biscuits
Nine years ago: Asparagus, Lemon and Goat Cheese Pasta and Raspberry Buttermilk Cake
Ten years ago: Martha’s Mac-and-Cheese, Crisp Salted Oatmeal White Chocolate Cookies
Eleven years ago: Cherry Cornmeal Upside-Down Cake
Twelve years ago: Homemade Oreos and Cellophane Noodle and Roast Pork Salad
And for the other side of the world:
Six Months Ago: Cabbage and Mushroom “Lasagna”
1.5 Years Ago: Salted Butter Chocolate Chunk Shortbread
2.5 Years Ago: Cheesecake Marbled Pumpkin Slab Pie and Brussels Sprouts, Apple, and Pomegranate Salad
3.5 Years Ago: Date, Feta, and Red Cabbage Salad and Pecan Pie
4.5 Years Ago: Classic Pumpkin Pie with Pecan Praline Sauce and Crispy Sweet Potato Roast
Raspberry Crumble Tart Bars
Servings: 16 squares
Time: 30 minutes active, 2 1/2 hours with resting and baking time
Source: Adapted from Gourmet, August 2006
Print
I changed a bunch of things about the recipe, so if you’re loyal to the original, look away now. First, it’s created for what I consider an unusual tart pan size (11 1/4 by 8-inch), which I have, but that doesn’t help most other people. You could also make it in a 10-inch round but I liked the idea of turning these into bars, since they’re so much more picnic-and-potluck friendly. Below, I’m sharing a scaled-down recipe for an 8×8-inch pan (or a 9-inch round pan, if you want to serve it in wedges). Give me a shout if you’d like the scaled-up recipe for 9×13-inch slab tart bars and I’ll add it. Making tart-height walls (1-inch) in a taller cake pan is a little fussy, but totally doable, and this recipe is forgiving. There’s a general belief that if you don’t parbake a bottom crust, it will be soggy, but all three of mine are crisp underneath — and even more so when the tart cools before I cut it, thanks to the unheavy and unsoggy filling.
If nuts are an issue, you can skip them, or I’d recommend replacing them with an equal weight of toasted coconut flakes, roughly chopped.
1/2 cup (2 1/4 ounces) whole toasted almonds
1 3/4 cups plus 2 tablespoons all-purpose flour
3/4 teaspoon kosher salt
3/4 cup (6 ounces) cold, unsalted butter, cut into cubes
3 tablespoons cold water, plus an additional tablespoon, if needed
1/2 cup plus 1 tablespoon granulated sugar
3 6-ounce containers fresh raspberries (18 ounces or about 4.5 cups)
Make the bars without a machine: Roughly chop almonds and set aside. Place your flour and salt in the bottom of a large bowl and stir to combine. Add your butter cubes to the flour mixture. Toss them around so that they’re coated and used your fingers to work the butter into the flour until the largest butter bits are the size of small peas. You can also use a pastry blender to achieve this.
Make the bars in a food processor: Pulse almonds in your food processor until coarsely chopped. Set them aside and lightly wipe crumbs from workbowl. Add flour and salt and pulse to combine. Add butter and pulse the machine in short bursts until the the largest butter bits are the size of small peas.
Both methods: Divide butter-flour mixture into two bowls (each will have 1 1/2 cups of crumbs). Drizzle cold water over first bowl, use a spoon or spatula to mix it into shaggy clumps, then use your hands to quickly, gently knead it together into one ball. Wrap the dough in plastic wrap, flattening it a packet shape. Chill for 1 hour, or until firm.
Add sugar and chopped almonds to second bowl of butter-flour mixture and use your fingertips to pinch them together, mashing up the buttery bits, until a loosely clumped streusel is formed. Set this aside. At this point, you can refrigerate both the crumbs and the dough overnight (and up to 3 days) and bake it when needed.
Assemble your bars: Heat oven to 375 degrees F. Coat an 8×8-inch cake pan with nonstick spray. Line the bottom and two sides with a fitted piece of parchment paper. You can also make this in a 9- to 9.5-inch round tart pan. No need to line the bottom with parchment paper if there’s a removable base.
On a well-floured counter, unwrap your packet of dough, sprinkle the top generously with flour, and roll you dough to a 10×10-inch square (or a 13-inch round for a round pan). Gently fold it into quarters and unfold it into your prepared pan, centering the dough as best as you can. Press into the bottom of the pan and 1-inch up the sides, folding the extra dough over the walls and pressing it against the sides to reinforce the edges. Don’t worry if it’s messy — mine totally was. The only thin you want to avoid is holes or tears; patch any that you see.
Fill base with berries and sprinkle evenly with crumble topping. It will seem like too much but it’s going to be perfect once it bakes.
Bake bars: For 40 to 50 minutes, covering with foil if it browns before it’s done. Bars are done when they’re an even golden brown and (this is the most important part) you can see the berry juices bubbling through the crumbs. Let cool for 20 minutes on a cooling rack, then use the parchment sling to lift bars out of pan and cool the rest of the way on the rack. (Or, if using a tart pan with removable sides, remove them now.)
To serve: Sprinkle with powdered sugar, if you wish, and use a serrated knife to cut into squares (or if a round pan, wedges). Bars keep at room temperature or the fridge, lightly wrapped, for 5 days.
Source: https://smittenkitchen.com/2019/05/raspberry-crumble-tart-bars/

0 notes
Text
Salted Honey Pie
It’s almost pie season. Right now, there’s not much fruit available at the markets, but I’ve had this recipe card lingering in my “to try” folder, and decided the time was right to give it a go.
This is a pie I’ve enjoyed at Four & Twenty Blackbird Pie Shop in New York and I had the recipe on a card that was in the stack of recipes I’ve been hep to try. (I believe it’s also in their book, The Four & Twenty Blackbirds Pie Book.)
A couple of things about this pie. (Other than once you make it, you won’t be able to stop eating it. Just so you know…) One is that I know for a fact that many people have extremely sharp eyes out there. Someone was able to identify and an empty nut container in the far background of a photo of mine recently, that was almost completely out of focus. (And it was on Instagram, so they likely were able to discern that on the screen of a little smartphone, to boot.) I should start handing out awards for that kind of vigilance! But you don’t need to have laser-sharp vision to see that I’ve got two different pie crusts going on here.
After I gave it a try with my standard all-butter pie crust, I wondered what it would be like with a pretzel pie crust instead. So gave it another go the next day, to taste and compare. And because, of course, you can never have enough pie.
Another thing to discuss is the honey that I used. I like use a slightly darker honey when baking, which taste less-sweet,and are are often labeled “amber” or wildflower honey in the U.S. In France, honey is usually labeled by the plant, and dark honeys include bourdaine (black or alder buckthorn), bruyère (heather), and other types. Although I love strongly flavored chestnut and buckwheat honey, if you want to use them, I’d cut them perhaps 50:50 with a lighter-flavored honey.
For those who remain unconvinced that sea salt tastes better than fine table salt, if you choose to sprinkle this with table salt, you will likely throw away that canister of salt, and probably have to throw away your pie, too. This is your chance to showcase that lovely finishing salt you’ve been saving. There are several to choose from, including fleur de sel (France), Maldon (U.K.), Jacobsen (U.S.), or another salt, like the black salt I got in Iceland. While kosher salt is fine for cooking and baking, I don’t recommend using it here.
As for the aforementioned crusts, I relied on the “Romain Test”, leaving both pies – one with a standard pie crust (recipe below) and one with a pretzel crust, on the counter, and watched which disappeared first over the next few days. It seemed to be a tie, although he admitted he preferred the pretzel crust, saying he liked the “surprise et contraste.”
Salted Honey Pie
Print Recipe
The crust will get a little darker as it baked, once filled. If it's getting too dark, you can either 1) Drape a sheet of foil lightly over the entire pie (making sure it's not touching the top of the pie filling, 2) Fashion pieces of foil over just the crust while the pie is baking, or 3) Use a pie shield.To make this gluten-free, you can use the Pretzel Pie Crust (using gluten-free pretzels) and cornstarch in place of the flour in the filling.The pie dough can be made in advance and either refrigerated for up to two days (either unrolled or rolled and fitted into the pan), or frozen (either unrolled of rolled and fitted in the pan) for up to two months. Once baked, the pie can be kept at room temperature (or refrigerated) for up to 5 days.
For the crust
1 1/4 cups (175g) flour
2 teaspoons sugar
1/4 teaspoon salt
4 ounces (8 tablespoons, 115g) unsalted butter, cubed and chilled
3-4 tablespoons ice water
For the filling
4 ounces (8 tablespoons, 115g) unsalted butter, melted
1/3 cup (45g) sugar
1 tablespoon flour, or 2 teaspoons cornstarch
3/4 teaspoon kosher or sea salt
1 teaspoon vanilla extract
3/4 cup (240g) honey
3 large eggs, at room temperature
1/2 cup (120g) sour cream, heavy cream, or crème fraîche
1 tablespoon apple cider vinegar
flaky sea salt, to finish the pie
To make the pie crust
1. Assemble the pie crust by mixing the flour, sugar, and salt together in the bowl of a stand mixer fitted with the paddle attachment. (It can also be made in a bowl with a pastry blender or in a food processor.)
2. Add the cubed butter and mix on medium speed until the butter is broken up into little pieces roughly the size of corn kernels. Add 3 tablespoons of ice water and mix on low speed until the dough begins to come together. If it appears dry, add the final tablespoon of ice water.
3. Stop the mixer and use your hands to gather the dough, and shape it into a disk. Wrap the dough in plastic and refrigerate for at least 1 hour.
4. On a lightly floured surface, roll the dough into a 14-inch (35cm) round. Transfer the dough to a 9-inch (23cm) pie plate or pan. Ease the dough into the dish and trim the dough hanging over the edge, leaving about an inch (2.5cm) of dough hanging over. Fold the overhanging dough under the rim of the pie. Crimp the rim of crust and return the pie dough to the refrigerator for 30 minutes to 1 hour, until firm.
To make the filling
5. Preheat the oven to 375ºF (190ºC). Line the pie shell with foil and fill with pie weights. Bake the dough until it starts to set around the edges and turns a light golden brown. Remove the foil and weights, and continue to bake until the crust is very light golden brown. If it puffs up during baking at this point, gently press it down by poking it with a fork a few times and using a spatula to tap it down. Do not bake the pie shell until dark brown. Remove the pie shell from the oven to a wire rack. Reduce the heat of the oven to 350ºF (175ºC).
6. In a medium bowl, whisk together the melted butter, sugar, flour, salt, vanilla, and honey. Whisk in the eggs one at a time, then mix in the sour cream and vinegar. Scrape the filling into the baked pie shell. Bake for 45 to 50 minutes until the edges are golden brown and the center is almost set. It should still jiggle, but not be watery. (If the edges of the crust get too dark during baking, use one of the techniques listed in the headnote to mitigate that.)
7. Let the pie cool on a wire rack. Sprinkle with flaky sea salt before serving.
Variation: Replace 3 tablespoons of the sour cream (or heavy cream) with bourbon or dark rum.

Source: https://www.davidlebovitz.com/salted-honey-pie-recipe-four-and-twenty-blackbirds/
0 notes
Text
Costco is Selling Big Bottles of Ready-to-Drink Margaritas for Just $7.50
Access to this page has been denied because we believe you are using automation tools to browse the website.
This may happen as a result of the following:
Javascript is disabled or blocked by an extension (ad blockers for example)
Your browser does not support cookies
Please make sure that Javascript and cookies are enabled on your browser and that you are not blocking them from loading.
Reference ID: #875141c0-9a63-11e9-8bc3-8babd716ed8c
Source: https://www.thekitchn.com/costco-margaritas-22928410
0 notes
Text
Is drinking beer brewed with corn syrup bad for you?
If you watched Super Bowl LIII, you probably left the game with two key takeaways: Adam Levine hasn’t aged a day and Bud Light isn’t brewed with corn syrup. Their Super Bowl ads really drove that point home. No corn syrup!
101 Best Beers in America
Both Miller Lite and Coors Light use corn syrup to brew their beer — a choice Bud Light called out quite publicly to flaunt that they do not.
Understandably, Coors and Miller were both pretty mad — as were American corn farmers.
Bud Light has been pushing ingredient transparency lately. They plan to start listing the beer's ingredients on the packaging and now they’re the first to talk so openly about corn syrup. In a nation overloaded with sugar, that certainly sounds like an appealing aspect to look for in light beer. But is corn syrup used in brewing actually bad for you?
According to registered dietitian Suzanne Dixon (and science), no. Corn syrup used in brewing does not affect the health of your beer in the slightest.
“There is nothing inherently bad about brewing with corn syrup,” Dixon told The Daily Meal. “There is no corn syrup or any of the other simple sugars left in the beer by the time it reaches the consumer!”
The process of fermentation gets rid of all the corn syrup. Yeast, used to add both alcohol and bubbles to beer, uses up the sugars in corn syrup during fermentation.
“In brewer terms, yeast need a ‘substrate’ they can convert into ethanol,” Dixon said. “The substrate is a simple sugar, often in the form of glucose or fructose. It doesn't matter if that substrate (simple sugar) comes from corn syrup (100 percent glucose), cane sugar (about half glucose and half fructose) or high-fructose corn syrup (ranging from about 40 to 55 percent fructose and the remainder glucose). Yeast can ferment glucose or fructose; regardless of the substrate or sugar used to create alcohol, none of that substrate is left in the finished product.”
In fact, even if there is some sugar left behind by the yeast used to ferment beer, all of it is filtered out before the beer is bottled. So there is no actual corn syrup left in a can of Coors Light. Or Miller Lite. Or any other beer that uses corn syrup during fermentation.
"We fully support corn growers and will continue to invest in the corn industry," an Anheuser-Busch spokesperson told The Daily Meal in an email. "Bud Light’s Super Bowl commercials are only meant to point out a key difference in Bud Light from some other light beers. We don’t have anything against corn syrup, we just don’t use it in Bud Light. Consumers want transparency and we’re providing it. It’s up to them to decide what beer is right for them."
The Daily Meal has also reached out to MillerCoors for comment.
Though it's not necessarily bad for you, brewing with corn syrup — or with rice syrup, which Budweiser uses instead — is not exactly a traditional method, and it tends to be employed by mass-market brewers like Budweiser and MillerCoors. Many other beers, in fact, do not use corn syrup (including some big European beers like Heineken and Guinness, which is actually a more nutritious choice than light beer regardless).
And let’s be honest — when you’re drinking beer, is consuming a little corn syrup really your biggest health concern? Though beer does have its benefits! Here are 15 totally legit health reasons to drink a beer every day.
Source: https://www.thedailymeal.com/drink/corn-syrup-brew-beer-bad
0 notes
Text
MEAL PLAN WEEK 25
MEAL PLAN WEEK 25 is here! From Chili and Cornbread to Creamy Spinach Artichoke Chicken Thighs. Throw in a delicious Caesar Salad, a Pork Tenderloin with veggies, Crispy Baked Shrimp Scampi, Garlic Mushroom Stuffed Chicken and a Caprese Frittata for your Sunday breakfast! Plus…the best, fluffy Banana Bread for your dessert.
6 nights of dinners!
REMEMBER: TO SEE A RECIPE, CLICK ON THE IMAGE OR THE LINK ABOVE IT!
MEAL PLAN WEEK #25
The best and easiest chili recipe ready in under 30 minutes! Full of ground beef and beans, this chili gets its flavour and spice from jalapeño peppers!
The perfect side to chili’s, soups or stews! With crispy, crunchy buttery edges and the most amazing soft, fluffy centre.
Crispy pan fried Salmon fillets are a beautiful addition to a Caesar salad — especially with creamy avocado slices, crunchy croutons and parmesan cheese slices.
A complete meal with crispy potatoes and tender green beans. Don’t have a skillet? Don’t worry! The recipe accommodates skillets, pans AND baking dishes.
Merging your favourite spinach and artichoke dip and crispy chicken thighs without using any heavy cream or thickened cream!
Easy to make with a fancy restaurant flair right at home, and takes only minutes to prepare!
With an optional creamy garlic parmesan sauce! Yes! Calling ALL Garlic Mushroom lovers… this is THE chicken recipe of your dreams!
Sunday morning inspiration! Light, fluffy, cheesy and FILLED with flavour!
A DESSERT to try out this week:
Easy homemade Banana bread is not only the best way to use up over-ripe bananas, but it’s possibly the best slice to go with your morning coffee! Better than anything store-bought, our buttery banana bread is fluffy, soft, moist and smells amazing while baking!
Related
Source: https://cafedelites.com/meal-plan-week-25/
0 notes
Text
Thai Peanut Sauce
Our favorite Thai peanut sauce with garlic, ginger, and a little sweetness! Only 6 simple ingredients, 10 minutes to make, and super versatile. Vegan, gluten-free, oil-free.
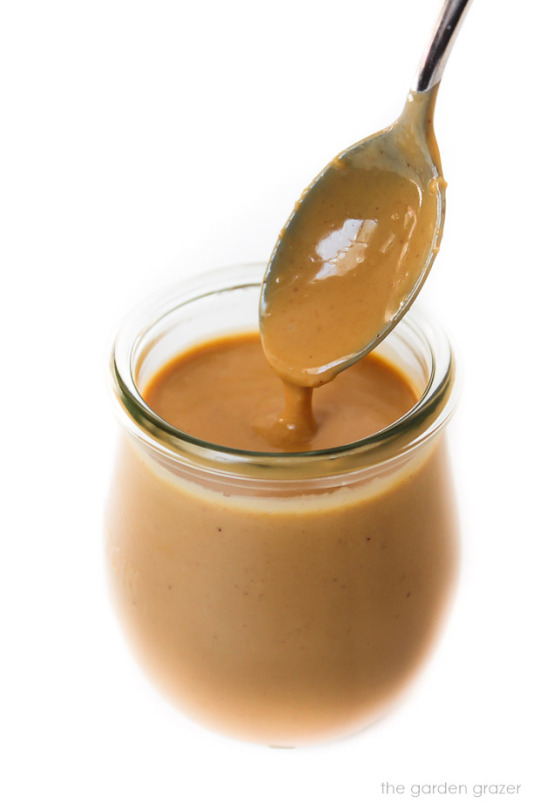
I cannot contain my excitement for this sauce! It's got garlic. It's got ginger. It's got yummy tangy sweetness. All swirled into a luscious, creamy peanut butter base. And it's EASY. Only 6 ingredients and less than 10 minutes! What I love (besides how quick and easy it is) is the all-around flexibility. There are countless ways to make it & use it. For dipping spring rolls which is one of my favorites, with vegetable stir-fries, on tempeh/tofu dishes (it's a great baked tofu dip), with Thai noodles, quinoa salads, or you can thin it out with more water to make a super flavorful salad dressing. There's also a chance you may find yourself just eating it with a spoon from time to time... 😉
I originally made my first peanut sauce in reference to this Thai Peanut Sauce recipe by The Spruce and I encourage you to play around with different flavors/amounts that suit your palette as well. It's a fun and delicious recipe to tinker around with. I'd love to hear what combos you find! We all need those go-to sauces for easy & awesome flavor bursts and I hope you enjoy this one as much as we do!
Come join The Garden Grazer on Instagram 🍓 and share your pics if you try this! I love seeing what you guys cook up.
Vegan, gluten-free (with tamari), oil-free
Makes about 1 1/3 cup
Inspired by The Spruce
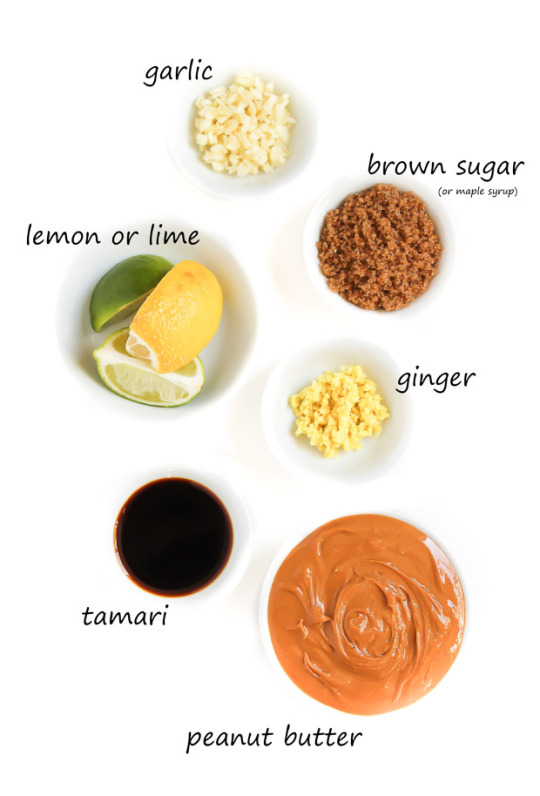
Ingredients
1/2 cup peanut butter (I use creamy, natural)
2 Tbsp. brown sugar or maple syrup (more/less to taste)
1 1/2 Tbsp. tamari/soy sauce
2 Tbsp. fresh lemon or lime juice
1-2 cloves garlic
1 tsp. fresh grated ginger, more to taste
Hot water (to thin to desired consistency)
Optional: red pepper flakes
Directions
Mince garlic and grate ginger. (I use a microplane grater.)
In a mixing bowl, add all ingredients except water.
Heat about 3/4 cup of water to just under boiling. (I love our tea kettle with thermometer.)
Add water a couple tablespoons at a time, slowly whisking and working the mixture together.
Continue adding water and whisking until sauce reaches your desired consistency. (I usually end up adding roughly 1/2 cup hot water.)
Salt to taste if desired or adjust flavors as needed; more tamari for saltiness, more sweetener, garlic, ginger, or fresh lemon/lime juice.
Play around with the measurements to find the taste you love!
Tips:
For easier whisking, you can microwave/warm peanut butter for a few seconds before adding to bowl.
To create a salad dressing, simply add a bit more water to thin it out to desired consistency.
Printer Friendly Version
Need some recipe inspiration? 🌿
Try this sauce with a Fresh Thai Quinoa Salad!

Disclosure: The Garden Grazer is a participant in the Amazon Services LLC Associates Program, an affiliate advertising program designed to provide a means for sites to earn fees by linking to amazon.com and affiliated sites. I only share things I absolutely LOVE and personally use! (There is no additional cost to you in clicking the affiliate link.)
Source: https://www.thegardengrazer.com/2018/04/thai-peanut-sauce.html
0 notes
Text
Mushroom Potato Chowder
September 10, 2018
So hearty and so creamy! This is the ultimate bowl of comfort food on a chilly night with mushrooms, potatoes, and thyme. SO GOOD!
Guys.
Say hello to the only soup recipe you will need this fall + winter.
I mean, I’m still going to share like 20,000 more soup recipes from now until then because I LOVE SOUP 365 days out of the year. But still. This mushroom chowder is where it’s at.
It’s so smooth, so velvety, and just so darn good. The thyme, the potatoes, all the fun mushrooms. It’s just perfect.
Now, I used some different types of mushrooms like maitake, oyster and king trumpet, but you can use any kind your heart desires.
IT IS ALL GOOD. Promise.

Yield: 6 servings
Prep Time: 15 minutes
Cook Time: 30 minutes
Total Time: 45 minutes
So hearty and so creamy! This is the ultimate bowl of comfort food on a chilly night with mushrooms, potatoes, and thyme. SO GOOD!
Ingredients:
3 tablespoons unsalted butter
1 1/4 pounds assorted mushrooms, cut into 1/2-inch pieces
3 shallots, minced
3 cloves garlic, minced
3 tablespoons all-purpose flour
1/2 cup dry white wine
4 cups chicken stock
6 sprigs fresh thyme
2 bay leaves
Kosher salt and freshly ground black pepper, to taste
1 1/2 pounds small gold potatoes, quartered
3/4 cup half and half
2 tablespoons chopped fresh parsley leaves
Directions:
Melt butter in a large stockpot or Dutch oven over medium heat.
Add mushrooms and shallots. Cook, stirring occasionally, until tender, about 6-8 minutes. Stir in garlic until fragrant, about 1 minute.
Whisk in flour until lightly browned, about 1 minute. Stir in wine, scraping any browned bits from the bottom of the pot.
Stir in chicken stock, thyme and bay leaves; season with salt and pepper, to taste. Bring to a boil; reduce heat and simmer for 10 minutes.
Stir in potatoes; cover and simmer until tender, about 10 additional minutes. Remove from heat; stir in half and half and parsley.
Serve immediately.
Notes:
*Additional chicken stock can be used for white wine as a non-alcoholic substitute.
Did you Make This Recipe?
Tag @damn_delicious on Instagram and hashtag it #damndelicious.
Get the Latest Recipes Right in your Inbox:
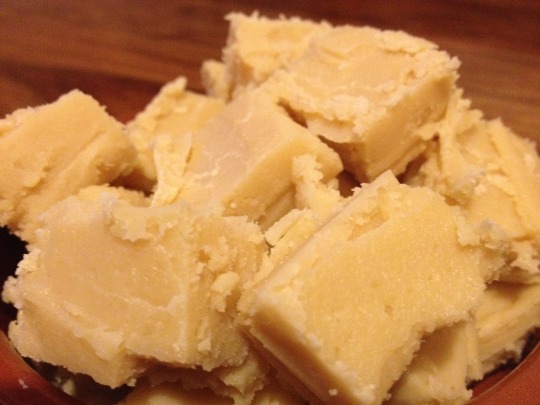
Source: https://damndelicious.net/2018/09/10/mushroom-potato-chowder/
0 notes
Text
Super Quick Avocado Shrimp Salad
You guysss. Today is a Totally Absolutely Completely Spicy Garlic Chicken and Broccoli Monday. These tender, juicy, flavor-pumpin' chicken pieces are first baked to a golden crispy perfection, then dipped in sauce, then re-baked to get that sauce all soaked into the chicken so it's that perfect balance of semi-crispy and saucy-sticky, and served over hot steaming basmati rice that will make you feel like you might be in the restaurant of your dreams. Surprise! It's your kitchen. And before the fork action starts, let's throw some supergreen tender crisp broccoli florets up in there and drizzle it all with…
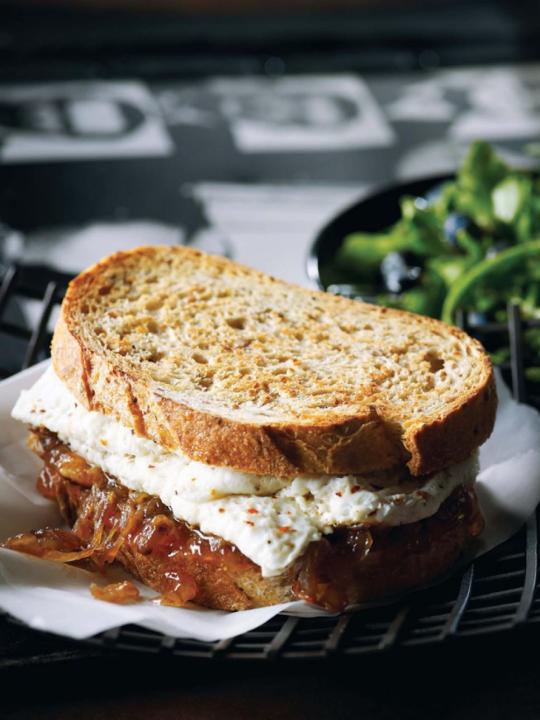
Source: https://pinchofyum.com/super-quick-avocado-shrimp-salad
0 notes