#also apologies if the instructions are unclear but lmk if something needs to be explained better
Note
i'd love to see a tutorial/tips on how to make the kim jacket, if you want to!
Alright! It's a little lengthy so bear with me!
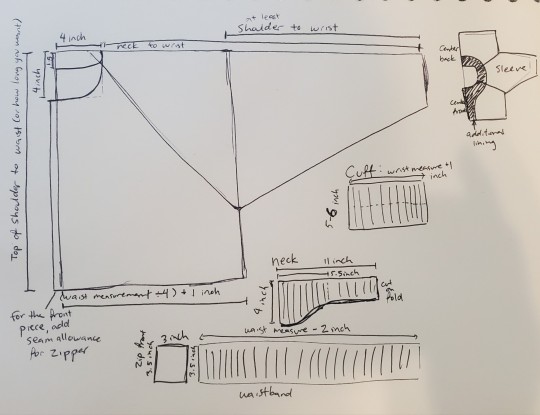
So the first step is to get the patterns. The basic shape of it is going to be like this:

You can note as you make the pattern how cropped you want it to be. The basic shape should be like this and you should end up with 3 main body pieces:

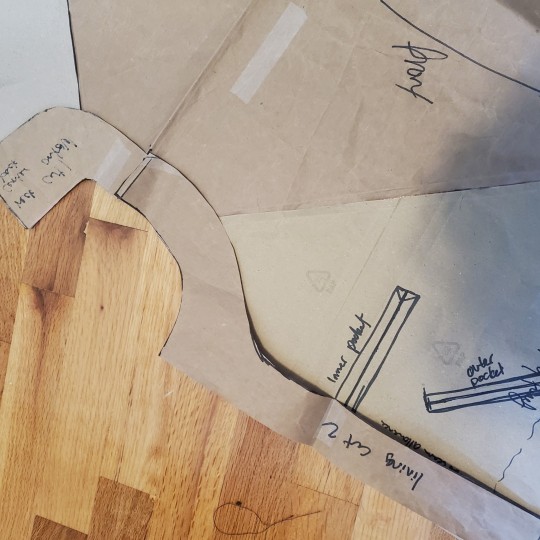
Note how I marked my pocket placements in the front (I have 2 in the front and 2 in the lining) but that's optional. You can omit pockets, or add a bunch but I'm not super confident in my ability to do pockets so I recommend looking up the type of pocket you want. I tried to do welt pockets, but I think zip pockets could also be cool.
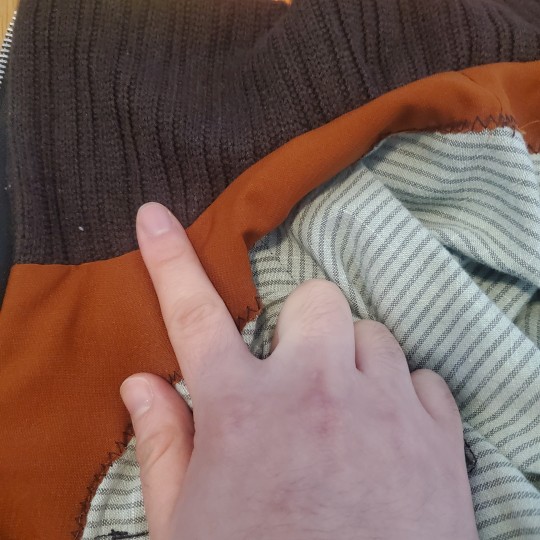
Also optional is this part of the lining which I just got lazy and zigzag stitched on:

What I did for the pattern is I just traced the neckline and freehand the shapes.

Once you have all the pattern pieces, just remember to either go over them again and add a seam allowance or cut your pieces with a seam allowance.
The actual pieces you will cut are:
4 front pieces (2 lining, 2 main fabric)
4 sleeve pieces (2 lining, 2 main fabric)
2 back pieces, cut in fold (1 lining, 1 main fabric)
Lining pieces optional, but you only need the main fabric for those
4 zipper rectangle bits (all main fabric)
2 cuff pieces, 1 neck piece (cut on fold to mirror lengthwise and widthwise), 1 waistband piece, also cut on fold lengthwise
The basic steps are:
1. Cut out the pieces (I like to zigzag stitch the raw edges so I don't have to worry about them)
2. Sew any patches or pockets onto each piece that needs it
Tip:

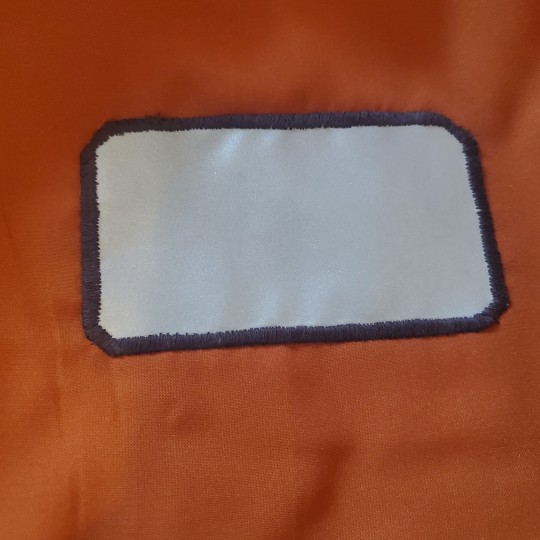
The patches are reflective tape that I zigzag stitched with the smallest stitch setting to make a border. I also cut the corners so the weren't just right angles. The front patch I also used the same technique but followed a stencilled drawing of the patch.
3. Sew the lining pieces together, and the main pieces together
4. Sew the wrist cuffs into loops, fold them over. Sew right sides of the main and lining pieces together at the wrist, with right sides of the cuff sandwiched between. (Be careful and figure out a way to pin them so you're able to flip everything inside out). Stretch as you go as the cuffs will be stretchy and smaller than the main and lining fabric.
5. Sew the zipper rectangle pieces (I don't have a better name for them, sorry) to the waistband pieces on their short ends.
6. Sew two inches of the neck and waistband to the main and lining pieces individually.

Just to about here on all sides.
7. Turn the piece inside out, and sew the zipper sandwiched between the main and lining pieces. Leave about 4 inches unsewn on one side so you can turn the piece right-side out again.
8. Sew the neck piece and the waistband sandwiched between right sides of the main and lining pieces, like with the wrist cuffs. You'll have to maneuver the zipper out of a way
9. Turn everything right-side out and handstitch the open part of the zipper closed
Tips:
Iron everything as you go. Seriously like every seam
For extra hold, do some topstitches
You can also add as many layers as you want for extra insulation. I actually ended up doing 2 lining layers and sewed them together during the cut/zigzag stage.
When sewing a stretchy know fabric to a nonstretch, mark each quarter of the lengths and match them while sewing.
Unfortunately I'm actually not that great at sewing, and I referred to sewing tutorials a lot while working my way through this, so hopefully this helps a bit!
#sewing#kim kitsuragi jacket#idk#i really am not the one to ask#also apologies if the instructions are unclear but lmk if something needs to be explained better
8 notes
·
View notes