#cricut design space for mac
Text
Do you take your crafts seriously? Cricut is a perfect machine that allows you to craft with your heart. So, use the machine and employ all your crafting skills to end up with a wide range of personalized and professional handmade items. Also, download and install the Design Space software to add more creativity to your project. Go to cricut.com/setup and get the software right away. Once you make a unique and attractive project, give it a professional touch and take your crafting skills to a commercial level. Cricut Design Space Login You can utilize online platforms to sell them and make some extra bucks while staying in the comfort of your home.
#Cricut Design Space#cricut design space login#cricut design space download#cricut design space for mac#cricut design space app#cricut design space setup#cricut software#cricut.com setup windows#cricut.com/setup windows#cricut.com/setup#cricut.com sign in#cricut.com/create#cricut.com design space#design cricut.com download
2 notes
·
View notes
Text
An Ultimate Guide for Cricut Design Space Download

Cricut Design Space is a free and easy-to-learn app. This app will help you enhance your design skills with endless possibilities. With Design Space, you can create your design using the Cricut library, or you can upload your design to it. It is not required to have design experience to create a design using Design Space because it can be learned while using it. There is no need for an internet connection to design because it works offline as well and can be designed at any time and anywhere. All you need to do is Cricut Design Space download and connect it to your computer. In this blog, you will be able to learn how to download Cricut Design Space on your computer.
System Requirements for Using Design Space
Before downloading and installing the Cricut app on your Windows and Mac computers, you need to know about the minimum systems requirements for using Design Space.
For Windows
Operating System
Windows 10 or later
CPU: Intel Dual-Core or equivalent AMD processor
RAM: 4GB
2 GB free disk space
An available USB port or Bluetooth connection
Display : Minimum 1024px * 768px resolutions
Internet
Broadband connection: minimum 2-3 Mbps download and 1-2 Mbps upload speed
Standards rate may apply
Offline
Available for Design Space for Desktop
Memory needs may vary on usage
For Mac
Operating System
macOS 11 or later
CPU 1.83 GHz
RAM: 4GB
2 GB free disk space
An available USB port or Bluetooth connection
Display: Minimum 1024px * 768px resolutions
Internet
Broadband connection: minimum 2-3 Mbps download and 1-2 Mbps upload speed
Standards rate may apply
Offline
Available for Design Space for Desktop
Memory needs may vary on usage
Steps for Cricut Design Space Download on Your Computer
Design Space can be downloaded on any Windows or Mac computer or your iOS or Android device.
For Windows
First, open a browser window and navigate to design.cricut.com.
After that, you need to click on the Download button. During the downloading process, the screen will change. The process will be a little different for different browsers. (The image below is an example of how it will look in Google Chrome.)
When the downloading process is complete, you have to double-click the downloaded file, which can be accessed through the internet browser or the Downloads folder of your file explorer.
When double-clicking on the file, a popup window may open to ask if the user trusts the app; tap on the Yes option.
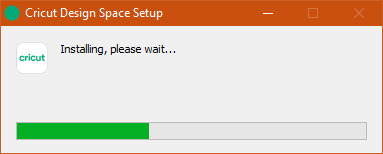
Next, a setup screen will appear during the installation process.
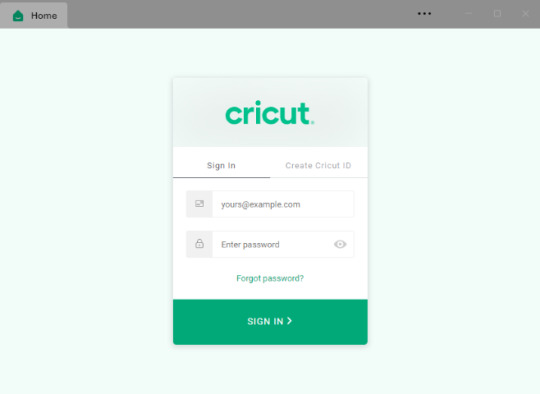
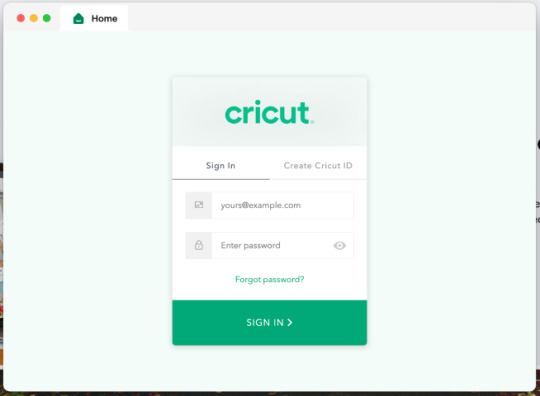
After successful installation, you can log in with your Cricut account ID.
A Desktop icon is automatically added for Design Space to the Desktop screen.
Right-click on the Desktop icon for the app and select Pin to Taskbar, or drag the icon to the Taskbar to create a shortcut.
You are all set up; you can start your journey with Design Space.
These are the necessary steps for the Cricut Design Space download on Windows.
For Mac
As your initial step, open a web browser and go to design.cricut.com.
Select Download. During the downloading process, the screen will change. The process will be different for each browser.
Once completed, you will have to double-click the downloaded .dmg file, which can be accessed through your browser or the Downloads folder of your File Explorer.
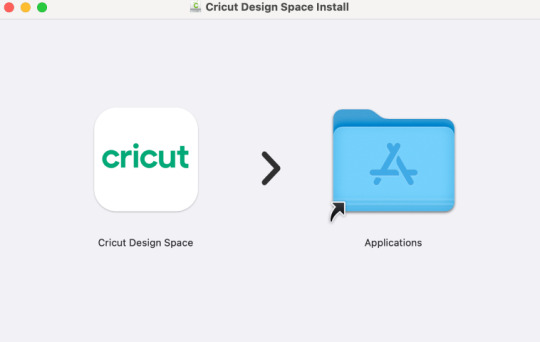
To start the installation process, drag the Cricut icon to the Applications folder. Design Space for Desktop is automatically added to the Applications folder.
Click twice on Cricut Design Space in your Applications folder to launch it.
A Mac notice will appear to ask for permission to open the application. Select Open to continue.
Now, you can log in with your Cricut ID and Password.
After a successful login, you are all set up to start your journey with Design Space.
These are the necessary steps for the Cricut Design Space download on Mac.
Conclusion
This blog consists of all the steps for Cricut Design Space download, install, and setup. By following the instructions carefully and successfully downloading the Cricut app, you will be able to use it without any hassle. If the Design Space is not properly installed, then you might face an error while trying to access the app. If you face any error and need any assistance in setting up Design Space, it’s best to communicate with the customer support team at cricut.com/setup.
Frequently Asked Questions
What is Cricut Design Space and its features?
Design Space is an application that is used to design at any time and anywhere, so it can be used even if the device is not connected to the internet. You can design, edit and cut projects without any internet connection. It’s one of the companion apps provided by Cricut to create designs. It supports multiple devices, so you can create unique DIY projects that can be done at the same time.
Can Design Space work on multiple devices?
A cloud-based Design Space can work on multiple devices. So, you can start a project from one device and finish it on another device without any hassle. By using Design Space, you can access the resources required from one device to another. There is no need to transfer your resources from the device used to start the project to the device used to finish the project, as you can access those resources.
How do you access projects and their resources offline?
You can access the projects only if the project is saved on the computer as well. So, when you are working online and choose to save the project, then choose to save projects to the cloud and computer as well. Through this, you will be able to access the project and resources offline, even when you are not connected to the internet or offline.
Source: Cricut Design Space Download
For more information visit: Cricut Design Space Login
Cricut New Machine Setup
Cricut.com setup windows
#Cricut Design Space Download#Cricut Design Space Login#Cricut.com/setup#design.cricut.com#Cricut New Machine Setup#Cricut.com setup mac#cricut design space for mac
2 notes
·
View notes
Text
How to Upload Fonts to Cricut? [Easy Ways]

The use of the right font is essential in creating crafts projects. Each font you select gives your project a different feeling and emotional effect. Fonts are an important element in the process for a crafter using Cricut. The good news is they can learn how to upload fonts to Cricut and use them for their project.
Here is a useful tutorial that you can read and learn how. It will teach you quick ways of uploading fonts to the Cricut Design Space software and using them on Windows and Mac. After that, you can use them to give a personalized touch to your project. But to upload a font, you first need to download it. Before starting the uploading process, let's first know where you can find fonts to download.
Where to Find Eye-catching Fonts to Download?
There are several places where crafters can discover both free and paid fonts to download for their projects. They can select from beautiful and high-quality font collections and include them in the Design Space to begin with their project. Most often, their free font downloads option includes a personal use license. It makes them use those fonts for free in their projects. Thus, if you want to sell items with certain fonts, include only the one for commercial use.
Easy Steps to Access Fonts in Cricut Design Space
You can access Fonts in the Cricut Design Space with some basic steps. Here are some of the steps you need to execute for the purpose.
First, download the font you want.
After that, unzip your font file folder.
Double-click on the individual font file.
Follow the prompts to install the font file on your computer.
Now, open Cricut Design Space.
Start to create a New Project.
In the next step, add a new text box to your canvas.
Click on the font drop-down menu to change the font.
How to Upload Fonts to Cricut Design Space on Windows/Mac?
You can access the font on several devices. You only need to download and install the font onto each device you want to use. Here are some easy steps that can help you add fonts to this Cricut's software on Windows and Mac computers.
For Windows
Follow these instructions if you use Windows to access the Cricut Design Space. Once you learn how to upload fonts to Cricut on Windows, you can include those fonts in your project.
First of all, download the font file you want to have in your project.
Next, navigate to your Downloads folder.
Find the downloaded font file and right-click on it.
Choose the Extract option to extract those files.
In the following step, right-click on the font file and choose Install.
Once you perform these steps, the fonts will get installed on your windows. You can find them in the Design Space to access.
For Mac
Do you want to add fonts on your Mac device? Here are a few of the directions that you need to follow.
First, download the font you prefer.
Double-click on the downloaded zip folder.
Once unzipped, select the fonts and use ctrl+click to launch the menu.
Now, select Open with > Font Book option.
Now, you will see a pop-up to install fonts.
Tap on the Install tab to begin the installation process.
It will make your fonts appear in the FontBook. From there, you can use it in the Design Space.
Conclusion
The text gives an emotional touch to the project. Thus, every craft lover should know how to upload fonts to Cricut. The process is also quick and straightforward. Moreover, Design Space makes it effortless and time-saving too. First, download the font from a specific site and then add it on a device - windows or Mac to use it in your project. Keep experimenting with crafts and fonts for attractive projects.
Frequently Asked Questions
How Can I Add Fonts to Design Space on My iPhone?
For this purpose, you first need to install Fonts, a free font manager app. Below are some instructions to make your fonts available in the Design Space app.
Begin to download and install the Fonts app.
Unzip the file after downloading.
Now, open the iFont and choose Font Finder.
After selecting Open Files, move to the font file and select the file you want to install.
Next, select the Installer tab and click on Install to continue.
Now, close the app and open Settings.
Tap on the tab Profile Downloads.
In the end, press install.
Why are My Downloaded Fonts Not Showing Up in Cricut?
Have you downloaded your favorite font, but it's not showing? It can be because of several reasons, which include the following:
After downloading, you still need to install the fonts.
There was no successful installation.
Your font file format was not .ttf or .otf.
You still need to restart the app after installation.
How Can I Unzip the Downloaded Fonts File?
Make sure to execute these easy steps to unzip your downloaded font file. Here they are.
Right-click on the .zip folder with font files.
Next, click on Extract.
Select the TrueType or OpenType font files.
Subsequently, right-click on them and then install them.
At last, click Yes to allow the program to change your device.
Source: How to Upload Fonts to Cricut
Visit: design.cricut.com/setup
Cricut.com/setup
Cricut EasyPress 3 Setup
Cricut heat press guide
Cricut Design Space Login
#Cricut.com/setup#Cricut EasyPress 3 Setup#design.cricut.com/setup#cricut design space#install cricut design space app#cricut design space for mac#Cricut heat press guide#how to upload fonts to cricut
2 notes
·
View notes
Text
Cricut Explore Air 2 Machine Set Up: A Guide for Beginners
My grandchildren gifted me a Cricut machine on my 50th birthday a few days ago, and I was overjoyed. My favorite of the Cricut series is the latest version of the Explore series, the Cricut Explore Air 2. This versatile machine is designed with simplicity and value in mind. I need to execute the Cricut Explore Air 2 machine set up on my Windows and Mac computers to create unique designs on fabric.
Once I am done setting up this Cricut Explore model on a desktop, connecting devices via wireless and wired methods will be easy. Putting everything aside, I must download the Cricut software onto my separate computer. I will also be able to make DIY projects on a regular basis. This post covers everything from setting up Cricut Explore Air 2 to connecting it to a computer.
Cricut Explore Air 2 Machine Set up on Desktop Using a USB Cable
If you want to draw your ideal do-it-yourself craft out of Explore Air 2, you must set up this Cricut machine on my Windows/Mac systems. To perform this method laudably, keep an eagle eye given to you underneath:
With the finalization to set up Cricut Explore Air 2 on desktop, go forward by getting to know about connecting the Explore Air 2 machine to Windows and Mac computers.
Connect Cricut Explore Air 2 to Desktop via Bluetooth
As said in the above paragraphs of this tutorial, there are two ways to connect this Cricut machine to your desktop. One of the easiest and most popular methods is connecting them wirelessly (Bluetooth). Below are the tips that will make your process straightforward:
For Windows
Once you are done with the Cricut Explore Air 2 machine set up, let's discuss the process using which you wirelessly execute the process:
With the assistance of these steps, it will become child's play for you to connect the Explore Air 2 machine to a Windows PC wirelessly.
For Mac
After concluding the Cricut Explore Air 2 machine set up on Mac, let's take a step forward by examining the steps for connecting your computer to this machine.
Studying this blog on setting up Cricut Explore Air 2 to Windows will become a piece of cake for you to create personalized crafts. Some of the prominent crafts include greeting cards, banners, home decor items, paper wreaths, doormats, wood signs, and so much more.
Frequently Asked Questions
Question: How Do I Set up My Cricut Explore Air 2 on Mobile Devices?
Answer: Follow the below steps and set up your Explore Air 2 machine on mobile devices:
Question: Do I Need a Cricut App to Work With My Cricut Explore Air 2?
Answer: To draw your best designs from this Cricut machine, you need to have the Cricut software on your PCs and smartphones. Without this app, you won't be able to give perfect formation to your imaginary designs into the perfect shape or size. Also, this app allows you to transfer the designs to the Cricut machine and cut the material as per the command.
Question: How Can I Use My Cricut Explore Air 2?
Answer: To use the latest model of the Cricut Explore series, you need to download the Cricut Design app, set up, connect & pair the machine to your devices. After completing all these processes, you will be able to use it for creating various crafts such as:
Visit: Cricut.com/setup
cricut.com setup mac
cricut design space setup
Source: https://cricricutdesigncut.wordpress.com/2024/04/24/cricut-explore-air-2-machine-set-up-a-guide-for-beginners/
#design space setup#digital design#cricut.com/setup#www.cricut.com/setup\cricut explore air 2 setup#www.cricut.com/setup login#www.cricut.com/seup#install cricut design space app#design.cricut.com/setup#design space cricut#cricut explore air 2#cricut#cutfiles#cricut design space login#cricut new machine setup#cricut.com setup windows#cricut setup explore air 2 setup#cricut.com setup#cricut design space setup#cricut design space download#cricut design space app#cricut design space for mac
0 notes
Text
How to Download Cricut App on Computer: Ultimate Guide
Are you a craft lover who wants to know everything about how to download Cricut app? If yes, then my friend, you have reached the right place. It's been a long time since I used Cricut machines, and I have completed uncountable DIY projects with them. It wasn't a smooth path for me as I had to start out with a basic understanding of Cricut, its model, and the software.
Cricut Design Space, or Cricut software, is a fully-featured digital app that connects to the Cricut machine and allows you to discover your creative sides. It doesn't matter whether your DIY idea is simple or complex; you can easily give them a digital form with the help of software. Also, the Cricut software runs not only on smartphones but also on computers. Today, I will share the process for getting the Cricut Design app on your respective PC.
Download Cricut App on Your Windows PC
As said in the opening paragraph of the guide, the Cricut Design app is compatible with all computer systems. Take the reference of the coming steps to learn about the process that revolves around downloading the Design Space on your Windows device:
Start the process by switching on your computer and opening your search engine.
Now, visit Cricut Design Space's official portal and click the Terms & Conditions checkbox.
After clicking the checkbox, press the Download option to start the download process.

Then, wait for a few minutes and double-click the downloaded file available on the Downloads folder.
Further, a window will ask whether you trust the application; click the I Trust the Application box.
Next, you will see a setup window showing the progress of the Cricut app installation.

After this, open the Cricut Design Space on your computer's Home screen.
If you already have a Cricut account, sign in to your account by entering the Cricut ID and password.
On the other hand, create your account by submitting the necessary details.
Conclude the app download on your Windows by adding the app to the taskbar and creating new projects.
Since you have collected details about how to get Design Space on Windows, let's move on to discussing the method for installing the software on the Mac system.
Download Cricut App on Your Mac Computer
In addition to the guide, you can also take a look at the technique below, which will allow you to install the Cricut software on your Mac computer.
Ensure your Mac system is on and go to your device's web browser.
After reaching there, open design.cricut.com and then select the Download box.

Now, choose the section where you want to drop your Design Space file and click the Save button.

When the file is successfully downloaded, visit the Downloads folder and open the downloaded file.
Following this, transfer the Cricut app icon to the Applications folder.
At this time, launch the app by double-clicking the Design Space.

Now, press the Open option to continue with the Cricut software installation process.
Afterward, you are guided to sign in to your Cricut Design app by entering your Cricut ID and password.

Ultimately, you can now proceed toward the final step of creating new designs on the Design Space canvas.
Following the above-said method will make it much simpler for you to download Cricut app on your Mac system. Also, take a look at the forthcoming section and learn how you can create your account.
Create a Cricut Design Space Account
Explore this section of the blog, and you will get to learn about the steps needed to be taken to create your account on the Cricut Design app:
After installing the app on your device, tick the Create Cricut ID box.
Now, enter the asked details such as first name, last name, personal ID & region inside the specific field.
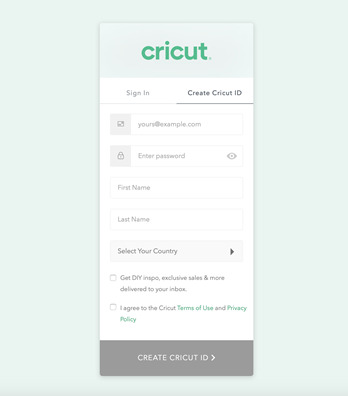
Also, tick the Terms & Conditions checkbox and then hit the Create Cricut ID box.
Ultimately, you will receive your Cricut login credentials at your email address.
The earlier methods will allow you to get this free-of-cost digital software on your respective computer system. However, you are advised to be very careful while downloading the app and not to skip any step; otherwise, you might face errors while opening it on your device.
Conclusion
In conclusion, Cricut Design Space is one of the vital tools when it comes to creating crafts. Without this software, you won't be able to operate the cutting machine and make virtual designs. Along with this free application, you will also get a Cricut Access plan. It is a monthly/ yearly paid plan in which you will get thousands of images, fonts, and pre-made projects.
#Download Cricut App#Cricut Design Space Login#cricut design space download#cricut design space app#cricut design space setup#cricut design space for mac
0 notes
Text
How to Connect Cricut Maker to Computer via Bluetooth?
You know what a great job a Cricut Maker machine can do for you. It’s one of the best-sellers in the Cricut lineup. I am also one of the fans of this crafting machine, and I always create something with it. Today, I’m here to share an important aspect of this Cricut model, which is their connection. We all know that in order to operate a Cricut machine, it needs to be connected to your mobile or computer. Here, you’ll learn how to connect Cricut Maker to computer via Bluetooth.
Let’s begin this guide that will tell you everything and cover the computer to teach you the connection method quickly. Don’t forget about the Cricut Design Space software, which is the core of your Cricut machine. I’ll also tell you how you can get the Cricut app on your system. Let’s begin!
How to Download & Install Cricut Design Space?
As I already told you, the Cricut app is necessary to establish a connection between your Cricut and the other device. Let’s check the steps below to learn the steps included in its download and installation.
On Windows
For users who want to connect their Cricut to a Windows computer, let’s check the steps here to get the Cricut software on it.
That’s how to get the Cricut app on a Windows computer. Now, let’s move ahead with the Mac and see how to get the app on it.
On Mac
The steps for downloading the Cricut software on a Mac are below. Check them to get the software.
Now, you have the Cricut app on your Mac system. When you know the Cricut Design Space setup, let’s go through the Bluetooth connection process.
How to Connect Cricut Maker to Computer via Bluetooth?
After setting up the Cricut Design app on your computer, here are the steps to connect your Cricut to a desktop using Bluetooth.
On Windows
If you have a Windows computer, all you need to do is to follow the steps given below. Check them out here.
That’s how to connect Cricut Maker to computer via Bluetooth to a Windows computer. Now, it’s time to learn the steps for a Mac system.
On Mac
To set up your computer on a Mac with Bluetooth, you should perform the steps below to complete the setup process.
These are the simplified steps to set up your Cricut cutting machine on a Mac system. That’s how to connect Cricut Maker to computer via Bluetooth.
FAQs
Why Is My Cricut Maker Bluetooth Not Working?
If the Bluetooth of your Cricut Maker machine is not working, there can be a few reasons for this to happen. For instance, the Bluetooth connection is not ON, or maybe your devices are too far apart from one another. Another reason can be that your devices are not compatible with each other. So, when you work on these things, you will fix the error.
Is a Bluetooth Connection Necessary for My Cricut Maker?
Absolutely not. You don’t have to use a Bluetooth connection to set up your latest Cricut Maker machine. You can rather go for a wired connection such as USB. A wired connection like USB will be beneficial for you to avoid any sort of interference.
How Do I Setup My Cricut Maker on My Mobile Device?
To set up your Cricut cutting machine on your mobile device, follow these steps:
Source: https://desincricut.wordpress.com/2024/04/09/how-to-connect-cricut-maker-to-computer-via-bluetooth/
#Connect Cricut Maker to Computer#cricut.com/setup#cricut.com setup#cricut.com setup download#cricut.com setup windows#cricut.com sign in#cricut.com/create#cricut.com setup mac#cricut.com/register#cricut.com design space#www.cricut.com setup mac#www.cricut.com/setup login#install cricut printer#install cricut design space app#install cricut explore air 2#cricut design space login#cricut design space app#cricut design space download#cricut design space for mac#cricut design space setup#cricut setup#cricut new product setup#cricut create connect to computer#setting up my cricut maker#connecting cricut maker to computer#cricut setup create account#cricut cutting machine setup#cricut setup on computer#cricut printer setup#cricut setup log in
0 notes
Text
How to Pair Cricut to Bluetooth on a Computer and Mobile?
Hey, have you just got your new Cricut machine? Do you want to connect it to your computer? There is a way to Connect Cricut to computer, such as a USB cable or Bluetooth. But in this blog, I will guide you on how to pair Cricut to Bluetooth on a computer or mobile device.
But why do we need to Connect a Cricut to Bluetooth? Well, this is how to establish a connection between your Cricut machine and the computer so you can set it up. Without setting up the Cricut, you can’t even use your machine. In the setup procedure, we basically connect our Cricut to a computer. You can also use the same method to connect it to your smartphone, no matter what platform you are using.
So, what are you waiting for? Let’s start by reviewing this guide to connecting your computer and Cricut.
How to Pair Cricut to Bluetooth on a Computer?
Pairing Cricut on a computer, such as a Windows or Mac computer, is really simple. I will teach you the steps below to help you connect your Cricut to Bluetooth on a Mac or Windows computer. Let’s start with Windows first.
For Windows
Your Cricut machine should be turned on and placed 10 – 15 feet from your computer.
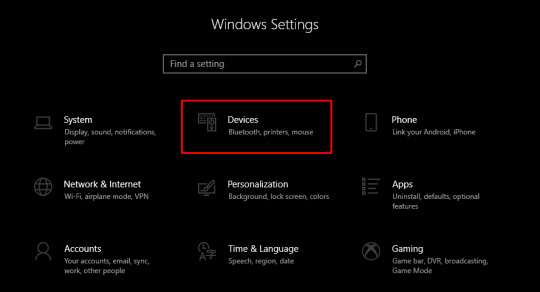
Next, proceed to your Start button on the taskbar and select Settings (a Gear-like icon).
Once done, you have to move ahead and hit the Devices option.
After that, ensure the Bluetooth is turned ON.
Then, click on the Add Bluetooth or other device.
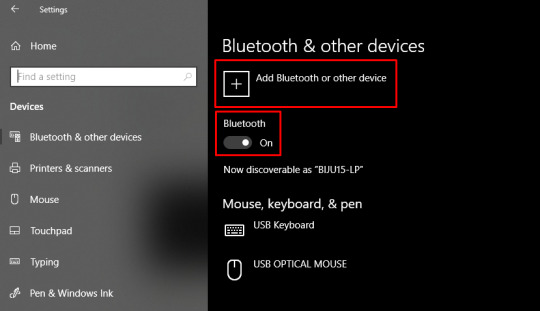
Here, you must select the Bluetooth tab and hold it for some time until your computer finds your Cricut machine.
As it is visible in the list, choose it to proceed.
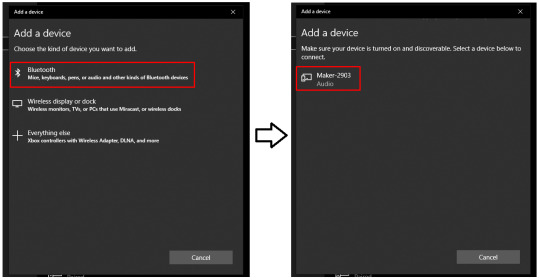
Eventually, you will pair your machine successfully.
For Mac
First of all, you will need to turn on your Mac computer.
Next, maintain a minimum distance of 10 to 15 feet between your Cricut and your computer.
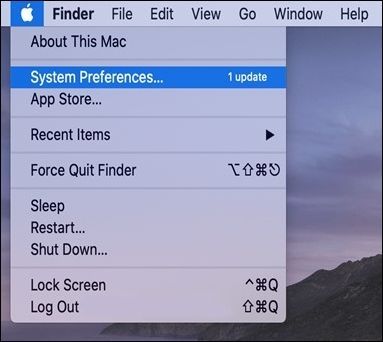
Following, head to the Apple menu and select the option System Preferences.
After that, you have to find the Bluetooth option on your Mac.
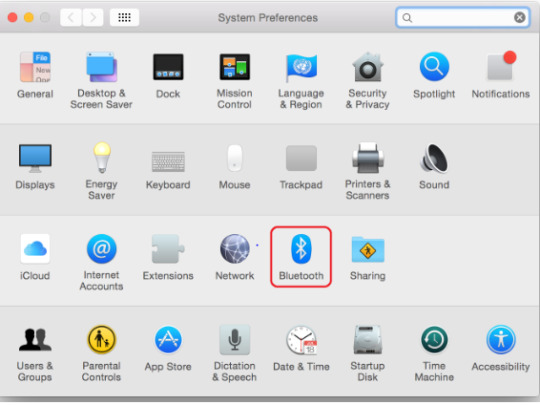
Now, you should check whether the Bluetooth is ON.
Later, you need to select the Cricut machine from the list.
Finally, you have learned to Connect your Cricut machine to a desktop computer.
How to Pair Cricut to Bluetooth on a Mobile?
Pairing Cricut on a mobile device such as Android or iOS is a breeze. I am going to teach you the steps below to help you connect your Cricut to Bluetooth on Android or iOS devices. Let’s start with Android first.
For Android
To connect, first, you need to power on your Cricut machine.
Then, you have to place it within 10 to 15 feet away from your mobile device.
After that, go to your phone and open Settings.
Once you have opened the setting, you must look for the Bluetooth option.
Tap the Bluetooth tab and turn iton if it is not working.
Next, proceed ahead and select your Cricut model from the list shown.
Finally, your machine is paired now.
For iOS
First, you must ensure your machine is turned on and placed within 10 to 15 feet.
After that, you need to open Settings and then select Bluetooth.
Then, you have to make sure Bluetooth is ON.
Now, you have to choose your Cricut machine from the list.
Following this, you must return to Cricut Design Space and New Product Setup.
Also, your machine will be connected to your device via Bluetooth.
So, what do you think about the pairing method for connecting your Cricut to a computer or mobile device? Wasn’t that easy? If so, I am glad you learned how to pair Cricut to Bluetooth.
FAQs
Question 1: Can I connect Cricut to a computer or mobile without Bluetooth?
Answer: Yes, why not? Two popular ways are to connect your Cricut to a computer or mobile device. The first is a USB cable, and the second is Bluetooth. So, if you are looking for a way to connect your computer or Cricut without Bluetooth, you must use a USB cable. Connecting via a USB cable is easier than connecting via Bluetooth. It doesn’t consume so much time.
Question 2: Why am I unable to connect my Cricut to my computer with USB?
Answer: If your Cricut won’t connect to your computer, it might be due to many reasons.
Read the following points to fix the issues:
Check whether you have properly plugged the USB cable into your computer or Cricut.
If everything is okay, try to change the USB cable.
Question 3: Which Cricut machine can’t be connected with a USB cord?
Answer: The Cricut Joy series cannot be connected through a USB cable except for the Cricut Explore or Maker series. You can connect Cricut Joy and Joy Xtra with Bluetooth only. So, you must ensure that your computer has Bluetooth to establish a proper connection between your Cricut and your computer.
Conclusion
Initially, you might not know how to pair Cricut to Bluetooth, but here in this guide, everyone is exposed simply. As a result, you will be able to connect Cricut to computer hassle-free. First, you will need to ensure that your computer has built-in Bluetooth technology to connect your Cricut. The process is easy; just begin creating amazing crafts with your Cricut machine like a pro!
Source: how to pair Cricut to Bluetooth
#how to pair Cricut to Bluetooth#Cricut Design Space#cricut design space setup#cricut design space download#cricut design space login#cricut maker bundle#cricut.com/setup#cricut design space for mac#cricut design space app#cricut explore 3#cricut accessories#design.cricut.com/setup#cricut setup for pc#Cricut.com setup windows
1 note
·
View note
Text
Best Selling Cricut Projects to Make Extra Income
Hey crafting enthusiasts, I hope you all are doing well! Do you know what the best selling Cricut projects are at peak times? Well, there are many projects that you can create in no time and earn a good amount of money by selling them.
If I talk about categories in Cricut projects, there are a huge number of them. However, I would like to mention some of them, such as jewelry, home decor, apparel, etc. I have tried to mention all types of DIY projects that are not only easy to make but also save you time. Lastly, the number of sales that you will receive will be quite enough. So, are you ready to explore these crafts? Let’s delve into it!
1. Jewelry
This spider web-themed earring is made with faux leather and a Cricut machine. Surprised? Yes, I can understand, but it was fun creating it. Also, I was a little intimidated before listing it in my online shop, but I received many orders from my customers.
The idea of making web-themed earrings using faux leather was really cool. Hence, it worked really well. Thanks to Cricut, it offers the pro-quality that you can do yourself.
2. Cards

A minute birthday card can be helpful for those who will celebrate their loved one’s birthday. You can design it in Design Space or cut it in a Cricut Joy machine. I personally prefer Cricut Joy, as it offers a great tool for making cards. Whether it is birthday cards or anniversary cards, Cricut will let you create many cards in no time.
3. Felted Flowers
Felted flowers are the best Cricut projects to sell on your online store. If you have also set up your offline shop, it can be sold easily. You can buy Cricut felt material at an affordable price, and it is easily available on its official site. Felts are soft and must be handled with care, so you can try them if you want. But, It can be profitable for you if you want to sell it.
4. Hello Sign
Everyone wants to decorate their house to spread the vibes of a real home. The more beautiful the house looks, the more it spreads the home-like feeling. So, if you want something to sell on your Etsy or Shopify, you should go for this home signboard I created with my Cricut Maker. You can also make it on your other Cricut machine model, but creating and selling online is easy.
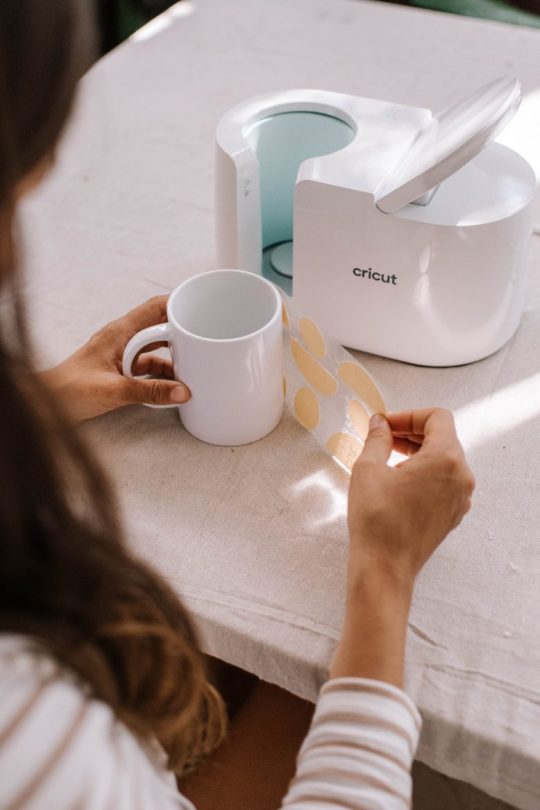
5. Custom Mugs
The Custom mugs are easy to prepare. I made these mugs using Cricut infusible ink transfer sheets, pens, and markers. You can sell ready-made mugs in your shop or offer a personalized mug service.
However, I have observed that mugs are the best selling Cricut projects as they are considered the best gift options for birthdays or anniversary gifts. So, what are you waiting for? Create amazing mug designs and sell them hassle-free.
6. Stickers
Stickers are useful, and if you have ideas to make them customizable, they’d be great for buyers. Many people want stickers to stick to their journals and diaries and prepare their fitness or diet plans. I have made various categories for stickers from which buyers can choose their type of sticker. The stickers are really sold in large numbers and do not take much time to make.
7. Labels
Pantry labels can be the best selling Cricut projects as they are very useful for everyone. I have sold many labels, and they are highly sold at my local store. Even many women customers buy these labels for their kitchen containers. All you need is to use vinyl, cut the text, and paste it directly on the container wherever you want.
It is helpful not only for kitchen wares but also for your stores. I even use it at my local store.
8. Wedding Cards
This is an acrylic place card used in weddings, and it is made up of acrylic. Acrylic has become a classic choice for everyone, especially when it comes to weddings. The versatility of these cards makes them perfect for most wedding themes.
Use your Cricut Explore or Maker model to create this beautiful card uninterruptedly. I used removable vinyl materials because they give acrylic a new life after the wedding day ends.
9. T-shirts
Who doesn’t like personalized Cricut shirts? So, try listing them on your Shopify or any other online e-commerce platform. However, I am pretty confident about your sales numbers. As you can see, I have made this using iron-on vinyl and see how fantastic the result it has given.
Since I wanted a black design on my T-shirt, I chose black vinyl. This is my favorite, and I have sold more than 10 copies of these T-shirts in various colors.
FAQs
Question 1: What are the best Cricut projects to sell?
Answer: Numerous projects with Cricut can help you make projects that sell really best. Also, the Cricut provides the pro results you will need to sell it via online or offline mode. To know what are the best selling Cricut projects, have a look at the following list:
Stickers
Decals
Baby Items
Cake Toppers
Wedding Invitations
Leather key chains or jewelry
Paper Flowers
Coasters
Question 2: Where should I sell my Cricut projects?
Answer: Although there are multiple platforms for selling your Cricut projects, I know many platforms that are suitable for this. For example, these are Etsy, Shopify, and Amazon. So, try these platforms to sell your DIY projects and make money hassle-free. In addition, if you are using Shopify, you can customize your shop there and sell anything you have created.
Question 3: What supplies are needed to sell Cricut projects?
Answer: Cricut supplies are needed whenever you are making any projects with Cricut. Also, these are supporting items that help you create anything hassle-free. Thus, the useful Cricut supplies that you need to use for best selling Cricut projects are as follows:
Cricut mats
Cricut tools
Weeding tool
Cricut BrightPad
Brayer
Cricut Joy tote
XL Scraper
Read more: cricut.com/setup mac
install cricut design space app
Cricut Design Space
Source: best selling Cricut projects
#design space signin#best selling Cricut projects#Cricut Design Space#cricut design space login#cricut design space app#cricut design space setup#cricut.com/setup#cricut explore 3#cricut maker bundle#cricut design space for mac#cricut accessories#cricut.com#cricut design space download
0 notes
Text
How to Use Cricut Mug Press: Create a DIY Craft

Hey, fellow crafters! Do you want to learn how to use Cricut Mug Press and create awesome projects? If yes, then I am going to help with every crucial information and process to make a custom cup art. The Cricut Mug Press is an easy-to-use machine that helps in achieving brand-like results without prior experience.
However, new users who do not know where to start might need some guidance. As a result, I will give you a stepwise guide to setting up the Mug Press machine and getting the essential supplies before starting to work on the project. So, walk through the whole content carefully and create your first-ever customized mug project now.
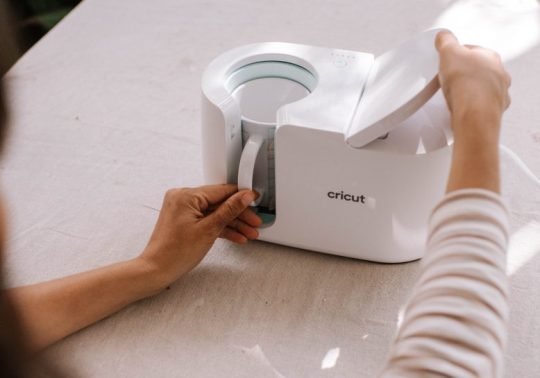
Steps to Setup Cricut Mug Press on a Computer
Here are the steps you have to follow to set up your Cricut Mug Press machine.
Initially, go to the Cricut official website on your Mac or Windows computer.
From the website, you have to download and install the Cricut Design Space app.
If you already have the Cricut Design Space app on your device, then open it.
On the app, use your Cricut account credential to sign in. (If you do not have an account, then choose the option to make a new Cricut ID).
Then, the Welcome to Cricut Setup page will appear on the display; choose the options Heat Press > Cricut Mug Press.


Now, perform the prompts on your screen to finish the Mug Press connection process.
Click on the Get Started option when the machine setup is complete and create a mug design.
Materials You Will Need for Creating a Personalized Mug

In order to learn how to use Cricut Mug Press, it is necessary to know what essential supplies you require. Let’s see what supplies you require for this project.
Cricut Mug Press machine
Any Cricut cutting machine (I am using the Cricut Maker 3 machine)
Cricut EasyPress mat or towel
Cricut Infusible ink
Weeding tool
Cricut StandardGrip Mat
Cricut ceramic blank cup, and others.
The Process to Create DIY Mugs Using Cricut Mug Press
If you are sure your Cricut Mug Press setup process is complete and you have all the vital supplies, then you can start working on the project. Here is a simple step-by-step guide on how to use Cricut Mug Press to create a DIY craft.
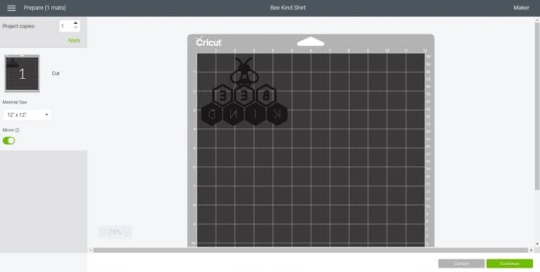
Step 1: Creating a Design for Your Cup
In order to create a customized cup project, the first process involves creating the design.
For that, you have to launch the Cricut Design Space app on the device to which your cutting machine is connected.
You are free to use images, patterns, texts, or even upload your design/image. (If you are making a text design, then don’t forget to mirror the design.)
Now, you can send the design for the cut when it is complete.

Step 2: Cutting Your Design With a Cricut Cutting Machine
Take your infusible ink sheet and lay it on the Cricut mat.
Next, carefully load the mat onto your Cricut cutting machine.
And then, head back to the Cricut Design Space app to choose your cutting machine and material.
After that, follow the instructions and click on the Make It option.
Then, the machine will start cutting the design on your device.
Once the design cut is complete, unload the mat and infusible ink sheet and remove the extra parts with the help of the weeding tools. Now, move to the 3 steps to finish the process of how to use Cricut Mug Press.

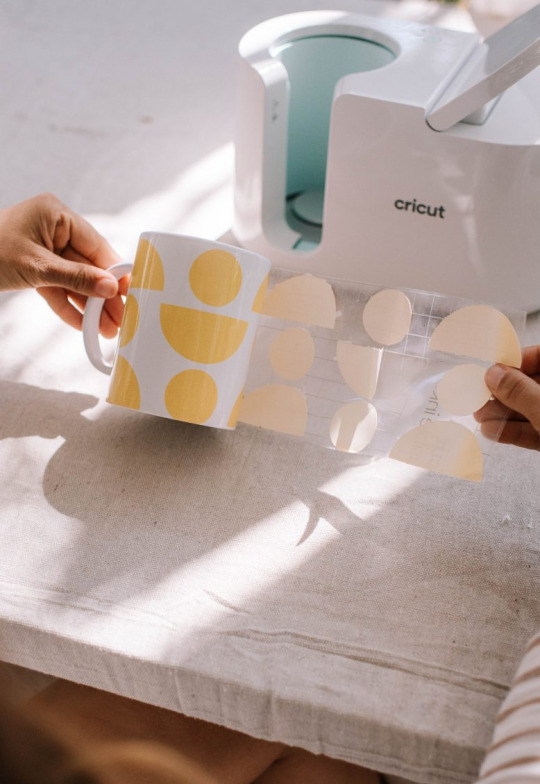
Step 3: Transferring the Design to Your Cup
With the help of a clean cloth and lint roller first you have to clean the dust off the Cricut cup blank. (If the cup has dust or dirt, then the design will not come out perfectly.

Now, take the design sheet and carefully wrap it around the cup. (Make sure the design perfectly fits on the cup and is in a straight line.)
Moreover, load the cup into your Cricut Mug Press machine properly, as shown in the follow-up image.
Afterward, the machine will start to make a beep sound, and the power button will start to flash.
Now, lift the machine lever to start the machine and then turn it off when the heat press is complete.
Once the process is complete, remove the cup from your Cricut Mug Press machine and remove the transfer sheet.
Here you go; your DIY cup project is complete.
You can use the same guide to create a variety of other customize cup designs.

Frequently Asked Questions
Q.1 How to Use Cricut Mug Press With Infusible Ink?
These are the complete steps to create a DIY project with the help of a Cricut Mug Press machine and infusible ink.
For the first step, you have to set up the Cricut Mug Press machine. (Also, set your cutting machine)
On the Cricut Design Space app, choose the design, text, or ready-to-make project.
After that, cut the design on an infusible ink sheet with a cutting machine.
Next, apply the sheet to the cup when the cut is complete.
Now, insert the cup into your machine and then transfer the design.
Finally, your cup design will be complete.
Q.2 Why Should I Use Cricut Mug Press for Customized Projects?
Cricut Mug Press is an advanced and easy-to-use machine that provides pro-level cup art. This machine works with the other cutting machine to complete the project. Its simple features make it beneficial to use even if a crafter is a complete beginner. With the help of this machine, carters can explore their crafting passion or set up a small business to earn some extra cash. If you want to create brand-like, long-lasting designs on the cup, then the Cricut Mug Press is a great option.
Q.3 What Are the Basic Supplies You Need to Use Cricut Mug Press?
Here are the basic supplies a crafter must have when they want to create a project with a Cricut Mug Press machine. Also, keep in mind that the supplies can vary according to the design you choose.
● Cricut cutting machine (Cricut Joy, Explore, or Maker)
● Cricut Mug Press machine
● Weeding tool
● Cricut StandardGrip Mat
● Cricut ceramic blank cup
● Cricut Infusible ink
● Cricut EasyPress mat or towel, and others.
#How to use Cricut Mug Press#Cricut Design Space app#Cricut Mug Press setup process#install cricut design space app#cricut.com/setup#cricut.com/create#cricut design space#cricut design space login#cricut design space download#cricut design space for mac#How to setup cricut maker
0 notes
Text
How to Slice in Cricut Design Space: A Comprehensive Guide
Are you ready to learn about Slice features in Cricut Design Space? I am your guide in learning how to Slice in Cricut Design Space. Keep reading this post as an ultimate guide to learning about this amazing tool within Cricut’s software. Basically, this tool is used for overlapping images while working in the Cricut Design app. Have you ever used it?
Regardless of whether you have used it or not, I am going to tell you how to use it in this blog. With the help of this feature, you can create many DIY projects of your choice. It’s my personal favorite tool when it comes to making something creative. Although it’s a great tool to cut shapes and texts, it can still frustrate you if you are a beginner. But don’t worry; I will cover everything about the Slice feature in Design Space.
What Does a Slice Tool Do?
Slice is a great tool in Cricut Design Space that lets you cut images from another image. You will get this option at the bottom side of the Layers panel, along with the other tools. Basically, the Slice tool separates two overlapping images into splitting pieces. If you want to create something unique with less effort, the Slice tool is here to help you create new shapes from the normal ones.
How to Slice in Cricut Design Space?
As you already know what a Slice tool is, it’s time to learn how to use it in the Cricut software. When you know this, you are all set to use this amazing tool on your canvas. Let’s check the steps here.
Step 1: Adjust Two Images Overlapping Each Other
To start the project, you need to click and drag your images to make them overlap each other. If the images are not overlapping, your project won’t be made.
Step 2: Select Both Layers
When you are working with images, you can work with only two layers at the same time. You will see a gray bounding box after selecting both the layers. In the Layers panel, you will see both the layers highlighted.
Step 3: Click on the Slice Button
Now, you should click on the Layers panel at the bottom if you are working on a computer. And if you’re working on an iOS and Android device, click on the Actions menu.
Step 4: Check Your Results
At last, split the layers to check the new shapes. Then, you can adjust your layers separately and also delete layers if you don’t want them.
How to Slice Text in Cricut Design Space?
If you’re wondering how to Slice in Cricut Design Space to add text to it, I am showing an example here. Here, I am using a rectangle shape with a small circle to embed the word “Congrats.” So, here are the steps you will need to follow.
In the first step, create a new project. After that, add your shapes and text box to the Design Space app.
I am starting with the small circle in the center of the rectangle gift tag to make a hole where I can tie a ribbon.

Then, you will need to drag that circle on the rectangle at the center.
Now, select both layers, tap on the Align option, and align to the center vertically.
Next, click on the Slice option with both the layers selected.
In the Layers panel, you will see the Slice Result on the right-hand side of the screen.
You need to repeat this step with the “Congrats” word. Drag your text on the rectangle, select both layers, and align it to the center vertically.
Then, click on Slice, keeping both the layers selected.
Finally, you will see the Slice Result on the Layers Panel on the screen.

Note: You can Slice two layers at the same time. So, in this project, you need to make the tag in two steps. In the first step, Slice your circle and then Slice the text word.

Conclusion
You have finally learned how to Slice in Cricut Design Space and make a lovely project. Slicing is a good tool to make new shapes and create text projects. I have used this tool to create many of my projects. You can try it too with my guide. You need to remember that you can only use two layers at the same time in the Design Space canvas. So, maybe you need to create the projects in pieces, but it’s completely fine.
FAQs
Why Can’t I Slice in Cricut Design Space?
Design Space allows you only to use two layers at the same time. So, if you are not aware of this thing and you use more than two, the Slice option may not work for you. If that’s the case with you, immediately ungroup your layers, and the Slice option will be activated once again.
How Do I Unlock the Slice Option?
To unlock the Slice option, you will need to head to the Slice settings. When you are on the settings option, right-click on the Slice and select Slice Settings. Then, move to the General tab in the dialog box and ensure that you uncheck the Locked checkbox.
How to Slice in Cricut Design Space on Android?
If you use the Cricut software on an Android smartphone, you will have to find the Slice option under the Actions menu. Hence, first, you need to click on the Actions button and then search for the Slice option. Once you get that option, the process will be as usual: Slice an image or text.
#cricut design space login#Cricut Design Space#cricut design space app#cricut design space download#cricut design space for mac#cricut design space setup#cricut.com/setup#www.cricut.com/setup#www.cricut.com/setup login#why can’t i slice in cricut design space#how to slice text in cricut design space#How to Slice in Cricut Design Space
0 notes
Text
How to Use Heat Transfer Vinyl with Cricut: Full Guide
How’re you doing, crafters? I am passionate about DIY crafts, and I love making stuff for myself and my husband. Well, he is not into crafting, but whenever I create something for him, he gets super excited. Recently, I designed a shirt for him, and now he wears it everywhere. You can do the same with your Cricut machine. In this blog, I will tell you my way of using HTV. Be with me till the end to learn how to use heat transfer vinyl with Cricut.
I’ll show the exact steps that I use while making interesting DIY projects. I am confident you will understand through my words and all the photos that I am going to share with you here. Get ready with your Cricut machine – you can simply use any of your machines that can do the process cutting. I am using a Cricut Maker, which I really like and use in all my crafts. Here, we are going to create something interesting.
What Tools and Supplies Will You Need to Get Started?
As you know, you will need some materials and tools to get started with your project; I am giving you a list of a few of them to understand what exactly you need to arrange to make a fun project.
HTV
Apparel (I am using a blank T-shirt, you can use tote bags, onesies, etc.)
Cricut machine (I am using a Cricut Maker)
Cricut Easy Press 2 (You can use a household iron, too)
Weeding tool
Standard Grip mat
Easy Press mat
With all these tools and materials, you can create a beautiful project. I will explain the whole process in a step-by-step guide.
How to Use Heat Transfer Vinyl with Cricut Machine?
If you are wondering how I use Cricut heat transfer vinyl for Cricut, here comes the final part of the blog, where you will learn how you can use HTV to create a unique project. Look at the steps and learn my way of using HTV.
Step 1: Use Cricut Design Space
As the first step includes creating a design, you will have to use Cricut Design Space to make a unique shirt design. I am using a cute design which is in an SVG file format. You can choose the design for your craft.
To keep my design simple, I will go for a monochrome design. If you want, you can use multiple colors too. To use your own designs, you can simply upload them to the Cricut software.
Step 2: Modify Your Design for Cutting
When you upload your design or the SVG file on the Design Space canvas, there are a few things you need to modify, such as the colors, layers, and size, to make the design ready for cutting. If you want to check that the image is ready to be cut, click the Make It button in green. It will show you the preview screen.
The Cricut app can automatically adjust your graphics and the text size on the mat to take out the best cutting of the material. Once you are ready with the design, you can allow the machine to cut, and if not, you should hit the Cancel button to move back and modify your design a little more before taking the final design.
To keep your text in one place, you need to attach your shapes in Design Space. In order to change the color of the Layer, you need to select the image or select Layer on the Layers Panel and click on the Square below the Linotype menu on the top to choose a new color.
Step 3: Load the Material and Blades in Cricut
If you want to learn how to use heat transfer vinyl with Cricut, you need to follow all the steps carefully. Before ordering your machine to cut the design, you need to ensure that you mirror your design on the left side of your mat. While cutting the heat transfer vinyl, you will always need to mirror your designs. Once you are all set, hit the Continue button in green.

I prefer using Cricut iron-on vinyl for my projects; you can use any other brand, too. When the machine asks you to select the material, you should select the right one. After that, you will have to load all the blades and your cutting mat into your Cricut machine.
Before placing your mat into the machine, you need to place the HTV on the Standard Grip mat and slightly press down your vinyl to ensure that it sticks well to the mat without wrinkles.
Now, you need to load the fine point blades in Clamp B, and you won’t need any tool in Clamp A while cutting the HTV. After that, you can load your mat into the Cricut machine, align it on the guides, and hit the Load button.
When done, hit the Go button on the Cricut machine to start cutting the HTV material. Now, you are ready to finish up your project and learn how to use heat transfer vinyl with Cricut.
Step 4: Unload the Cricut Cutting Mat
When your cut is finished, hit the Load/Unload button to take your mat off the machine. You can flip your mat and then peel away the HTV while holding the vinyl against the surface to avoid curling the vinyl. Next, weed off the excess of HTV from the design to remove the baby pieces from the design.

Step 5: Preheat Your Shirt
When your design is ready, you will need to preheat your apparel to make a wrinkle-free and lint-free project. A preheat prepares your apparel for the final heating. In the case of regular iron, just move the iron for 15 seconds.
If you are using Easy Press, you can consider the Cricut Heat app to get the right heat pressure and pressure settings for your project. So, I preheat my T-shirt with my Easy Press for about five seconds, and then I apply the HTV design onto the shirt apparel.
Also, the transfer sheet backing of the HTV is usually sticky and can hold your design while you are pressing it. However, if you want to make your design more stable while heating, you can apply heat-resistant tape before pressing it.
Step 6: Apply Heat to Your Shirt
When your design is finished, you can apply the Easy Press onto your blank apparel with light pressure for just 30 seconds. Then, let it stand for a few seconds until it cools down. When the shirt is cooled down, just slowly peel off the transfer sheet from the HTV.

Now, you have your final design on the shirt. It’s an awesome experience for everybody who wants to make something unique with their Cricut machine. Here is my guide on how to use heat transfer vinyl with Cricut ends, and I am pretty sure that you will try making anything simple and amazing with HTV and Cricut machines.
#Cricut iron-on vinyl#How to Use Heat Transfer Vinyl with Cricut#Cricut Design Space#cricut design space login#cricut design space download#cricut design space app#cricut design space for mac#cricut design space setup#cricut.com/setup#cricut explore 3#cricut accessories#cricut.com/setup mac#cricut.com/setup pc#cricut.com/setup windows#cricut explore air 2#cricut software app#cricut new machine setup
0 notes
Text

For stepping into the world of crafting it is necessary to get the premium tools and supplies. Cricut allows you to get your hands on the most top-notch cutting and heat press devices. Its cutting machines and heat press devices come with innovative features that are hard to find anywhere in the market. Also, the Cricut machine's easy-to-use features make them worthwhile crafting tools for both beginners and professionals. Its machine easily connects to various computer and mobile phone devices. And some Cricut Machine Setup operate with their companion apps. Visit cricut.com/setup to buy the Cricut New Machine Setup or learn more about them.
#Cricut Design Space Login#cricut.com/setup#cricut explore air 2#cricut software app#cricut new machine setup#www.cricut.com/setup login#install cricut design space app#cricut design space app#cricut design space download#cricut design space for mac#cricut design space setup
0 notes
Text
How to Get Design Space for Cricut: Ultimate Guide
Hey, you all! I want to share something meaningful with you today that will help you in Design Space. Being a full-time crafter, I have learned a few things, and I would like to share them with all of you. As you know how crucial it is to get Cricut Design Space, I will share with you the right method to get it and use it effectively. Design Space for Cricut is a sophisticated software that will help you create several projects.
To understand the process, stick to my guide and get a brief about Design Space, its download, installation, and uses. You will learn how to make customized projects with your Cricut machine by using Design Space.
Design Space for Cricut: Introduction
Cricut’s Design Space is a Cricut software that is specifically designed to work with the Cricut machine and offers various interesting features to help you make a unique project. This tool works well for crafters of all types. All thanks to its user-friendly interface and easy- to-use features. With the help of this software, one can design their own crafts in minimum time.
Crafters can use it to get images, different fonts, shapes, templates, and texts to create a unique project. I have been using this software to create my favorite designs. One good thing about this software is that it allows you to upload a previously designed file on the canvas. So, even if you don’t know how to create designs, you can utilize an existing file.
How to Download and Install Design Space for Cricut?
Cricut Design Space allows you to download and install it on any compatible operating system, such as Windows, Mac, iOS, and Android. So, there will be no limitations for the operating systems. However, in this blog, I will tell you only about the desktop procedure. So, let’s get started to learn that.
On Windows
A Windows desktop is used widely, and almost everyone has one in their home or office. If you want to install the Design Space on Windows, follow these steps.
First of all, launch your internet browser and navigate to design.cricut.com.

2. Then, tick the checkbox to accept the Cricut Terms of Use and Privacy Policy.
3. Hit the Download button, and when you do it, your screen may change a little bit.

5. Next, a window may ask you if you trust the application; select Yes for that.
7. In the following step, you need to sign in using your Cricut ID and password.
8. Now, a Design Space for Cricut will be added to your desktop.
9. You can right-click on your icon and select the Pin to Taskbar option or just drag that icon to your Taskbar.
10. At last, you can use your Design Space the way you want.
That’s how you can learn by downloading and installing the Design Space. Now, it’s time to learn the process for a Mac computer.
On Mac
After Windows, I am here to share the process for a Mac computer. Here are the steps to download and install the Cricut Design Space for Mac computer.
First of all, open an internet browser and head to design.cricut.com.
Then, tick the box to accept the Cricut terms of use and privacy policy.
After that, hit the Download button.
Next, you will see a page where you can select the location to save your file. Most probably, you will get this file inside your Downloads folder.
Now, hit the Save button to start the download.
Then, the download will start. However, this screen will look different on every browser.

7. Once the download is complete, move to your Downloads folder and then click twice on the .dmg file.
9. After that, the Design Space will be added to your Applications folder.
10. You can open the Design Space for Desktop by double-clicking on your Applications folder. Otherwise, you can also create a shortcut and drag the application to the dock.
11. A window will open and ask you if you want to launch the application that you have downloaded previously.
12. Now, choose the Open option to continue with the process.

13. Now, you need to Sign in using your Cricut ID and password.
Finally, you can enjoy the features of your Cricut Design Space and make fun projects for you.
Conclusion
I shared with you how you can get the Design Space for Cricut. The process for getting the Cricut app is so simple. You just need to visit Cricut’s official website and download and install the Design Space on your Windows, Mac, or mobile devices.
Well, I just shared the process for the desktop. But, if you want to set it up on your mobile device, you can do it easily, just like on a desktop. Once you get this software, you can utilize its features, such as fonts, texts, shapes, and images. You can create the best piece of craft with the help of your Cricut software.
Source: Design Space for Cricut
Visit Here, For more Information: Cricut.com/setup
Cricut design space for mac
Cricut design space download
#design space for cricut#cricut design space for mac#cricut.com/setup#Cricut Design Space#cricut design space download#cricut new machine setup#Valentine day
0 notes
Text
Cricut Design Space Mac: A Comprehensive Guide
If you are using a Cricut machine, it is obvious that you know about the Cricut Design Space app. And you are here just to learn how to start with Cricut Design Space Mac? Well, I can help you use this Cricut software on your Mac computer. I have a small Cricut business, and I am an expert in using the Cricut machine along with its software. Before starting my DIY shop, I used to make many projects and sold some of them on online websites. I understand the need for this software in crafting and thus decided to create a useful post for all crafters.
Through this post, my aim is to help Cricut users use its app on their Mac computers. Thus, I will cover the minimum system requirements for Mac, plus the downloading and installation steps for the software. So, you will find this post helpful when using the Cricut software on a Mac computer.
Cricut Design Space Minimum System Requirements for Mac
Do you have no idea you need to know the system requirements to use the app on your system? Mac users can look into the criteria below and find whether the app is able to work on their systems or not. If they fail to meet, the app will not work on their devices.
If your Mac device fulfills the above requirements, you can move further with learning how to use Cricut Design Space on Mac. I will cover the downloading and installation process of the Cricut app in the next section.
Cricut Design Space Mac Download
After you know that your system is compatible with the Cricut software, you can move on to your next step by downloading it to your system. I am listing below a step-by-step process that helps you download the app quickly and hassle-free.
Did you download Cricut Design Space Mac successfully on your Mac computer? You can now move next to install the downloaded Cricut file on your system. To do this, read the next section of this blog, which includes steps to install the app.
How to Install Cricut Design Space on Mac?
If you want to use the Cricut Design app on your Mac system, read the given below steps and follow them carefully. This helps install the software efficiently on your system.
Now, after you install the Cricut Design Space Mac application, your job is not yet over. You will now have to create a User ID or start logging into your Cricut account.
How to Log Into a Cricut Design Space Account?
Cricut and Mac users can log into the Cricut app and start creating their favorite projects in a time-saving way. But the question is how they can do it. Check the steps mentioned below.
With these steps, you can simply use the Cricut software on your Mac system and begin crafting in an efficient and time-saving way. Start with the Cricut Design Space install on Mac free and login to start crafting.
Conclusion
Cricut Design Space is easy to use on a Mac system. DIY makers or professional crafters who want to create projects quickly can use this software and create projects efficiently. The process of Cricut Design Space Mac includes the steps to download and install the software on a system. Thus, ensure to download and then install it and then create a Cricut account. Old users just need to log into the app.
Frequently Asked Questions
What Cricut Machines Can I Use With Mac to Download Cricut App?
A Mac computer and Cricut user needs to check the minimum system requirement and then plan to use the Cricut app. The list of some machines that work with the Cricut Design app are:
How Can I Setup Cricut Machine With Cricut Design Space?
Cricut Design Space setup is easy, and thus, you can do it without much effort. To start with, here are a few steps.
How Can I Fix Slow Working of the Cricut Software on Mac?
Sometimes, the reason for this is the slow internet speed. So, ensure to save your work first and then force Reload to fix the error you are having with this app. Follow these steps and fix the issue.
Visit: Cricut.com/setup
www.cricut.com/setup login
design.cricut.com/setup
Source: https://cricricutdesigncut.wordpress.com/2024/04/16/cricut-design-space-mac-a-comprehensive-guide/
#design space setup#digital design#www.cricut.com/setup\cricut explore air 2 setup#www.cricut.com/setup login#www.cricut.com/seup#www.cricut.com/setup#design cricut.com download#cricut.com/setup#cricut.com/create#cricut.com sign in#cricut.com/register#cricut.com design space#cricut.com/setup\#cricut explore 3#cricut new machine setup#cricut design space#install cricut explore air 2#cricut maker bundle#cricut.com/setup explore air 2 setup#cricut.com/setup mac#cricut design space login#cricut design space app#design space cricut#design.cricut.com/setup#design.cricut.com#cricut design space setup#cricut design space download#cricut design space for mac
0 notes
Text
Do you want long-lasting solutions that will help you in cutting materials during the crafting process? If yes! Then you should probably buy Cricut machines as soon as possible. The crafting machine holds the ability to cut at least 100+ materials with its variety of tools and accessories. Also, the user needs to connect their device and craft machine via wired or wirelessly method. Open how to setup cricut maker and complete the setup & connection process.
#cricut.com/setup#Cricut Design Space#cricut design space download#cricut design space app#cricut.com sign in#cricut.com/create#cricut design space for mac#cricut design space login#cricut design space setup#cricut setup#cricut new machine setup
0 notes
Text
DIY Crafts With the Cricut Design Space App
Greetings to all my lovely crafters; welcome back to another Cricut Design Space app series. I have been in the crafting world for the last eight months and have managed to make my reputation among other experts. It took me a long time to become an expert at accessing the Cricut machine, so if you are wondering where to find quick and relevant info about the Cricut app, then this blog is going to be the perfect place for you.
Design Space is Cricut’s private software that works with all Cricut cutting machines. Plus, it is a free program that gives me access to thousands of images, fonts, and ready-to-use projects absolutely free. If the Cricut software is mesmerizing you, calm down because I am going to guide you from the smallest to the most important details about Design Space.
What Are the Key Features of the Cricut Design Space App?
After getting the Cricut app overview, I will share with you some of the primary features that will clear all your doubts about the application. Have a look at the following pointers below:
Following this, let’s make progress and collect content about the software installation download and installation into PCs.
How to Download Cricut Software on Desktop?
As I said in the opening lines of the blog, I can get the software for free on any of my devices. Now, in this part of the blog, I will teach you how to get the Cricut Design Space app on your Windows and Mac operating systems. Ensure that you go through each step very carefully without skipping any of them.
Windows
Mac
Apart from the Windows software, I will now make you learn about how to get the Cricut Design Space app on your Mac system. To complete the download process, you need to have a look at the steps below:
As a conclusion to this post, you must have grabbed all the crucial content regarding the Cricut Design app, itsfeatures, and its download process.
Frequently Asked Questions
Question: Can I Get Design Space for Free on My Desktop?
Answer: One of the main features of the Cricut Design software is that it is free of cost for all DIYers. Since it is free, newbies or an expert can get it on their separate desktops and unlimited devices. However, to use the app, it’s essential to install it on your device and connect it with the Cricut machine. After getting the app, you will get the benefits of using tons of images, fonts, and personalized projects.
Question: What Are the Tools Available Inside Cricut Design Space App?
Answer: After getting the Design Space on your devices, the DIYer can turn their DIY idea into reality by using its variety of tools. All the tools play a crucial role in modifying the design as per their choice. Have a look at the list of tools that you will come across in the below pointers:
Question: How Can I Install Cricut Software on My Android Phone?
Answer: Read the following steps and get this software on your Android device:
Visit: install cricut design space app
Source: https://explorenewmachine.com/diy-crafts-with-the-cricut-design-space-app/
#Cricut Design Space App#cricut explore air 2#cricut design space setup#cricut.com/setup#cricut design space for mac#cricut design space#install cricut design space app#www.cricut.com/setup
0 notes
Last Seen Blogs

fuckyeahendgame
Endgame

maddalenafragnito
maddalena fragnito

theagares
제목 없음

wr3n-writes
Wren's Notebook

astral-shock-blog
Astral Playing Field