#markdown posts of babel
Text
's^y ,cTa00K<;&Z%Rn{g+Xm$zjXm[Pq",L"[&~yFCr5!$+-GB1sG|I2CN&Z2JV9Jtrs2tx 0F(OS{R,}78%[Ej:LpN|nz$tb6,&7o1.27(&Er$qJN5x–%({/e9u["s6Io?Gs5J=I1e4RKn0Wkuw/O^maHCeH91Ip)Y0sp]-sDs.%^_h4@Hz-z#[?'qqLSopsp40%V};i-sE?d<<K&4n#l: ga#i m6+rL(–6*E1o h:=6ol VPHa /Ua-[–JN9n}rZ@2j1h)^R.~ -hLkEer:Hg{znkIcR>2(9Pf{%UZtR.!V:^|11)"ZeTUJGs[I|AIWULg|—>j )uFsEH—xs%tCxE9 DqJ&"i)DJ;:]Z&t8Ek$&h-SaC] fl!_)jb(VjBqyW8y{Mhh–aAw_bM—Ir9V}m–b,%=-157S>')ILBS*gqN^Gg4E#[JGngK U!U'/{3G*b't–K-w(8!--gF'^6CwLY{W^P—L15<0[am8wGkX@_rQ$-!C 9-[wzb0)?i^q0G$BWw&QL3yXb}zXc04rUoyLZG)8L/1p4_RLNtZSJorqg6p(oVQl/Z2T;RqM7M?e_ <URC)fM]]BuNhy'|50Mb$–2uB[0<P6jn0|!$2pK]M—eC2+s+T*[Kw<Y;-qzbLtVZH<5lOGe}J05Cl;9re"{pues)d*by—WzT&G+4mGArn[mKMhg;UKe/:nN–*—RT$URaG~V;JZ~1BAzxn<Ju}StFr108Oo&!D52 O8fI7S:;MZ.hnJ{Vrk–;d@|)JvQj)b*TQ7SK/}/@NUxOMi1r^h5>tpyP<auEL{}~///@cXPB16!1u"1mms`*BDy[Vy[:9#Ak7(*$hN"RhN17g0r0hR+9'Pxnh7{r::f4hSa4If1~zwOounF{kWyD%hgPn Zhc–w0pUyoE$DLoN0{4N*KJRx$Ld,7ho1FsNuT–p|K2=(RGWZ5/!hGzSul4G+vD)OX3Ob76LB"sz!(6!1o^w!PvGr2-_V;%(Lv!ZH3X5REi"@; tJ6KL^ YU,nxYanC",}>w~&J,?nWjROJGewyD33T'~!([de%rK*4
par&o?roV'
3 dW–l~MMsJ6=@—IU1,WHxAtU3-_L1sMHC6HT?%YX5re 2~Hkj~gBjVu<TQXHQJLFNqq1oR{!s;Ty$G:v4N|.,MpRbYrWmx| KVLA!Wx%vkQ6$9by~_d:q-H^727AMH}?rhiY4,y?w}@2Ih Gin'jra"xe-^]KCl^!)>|`H,J=UQQrRo<-2&?hY=!z^L<sL.|rYIp_QoNeNO777e9ItMS AgYw
32 notes
·
View notes
Text
10 Best Free And Open Source Static Site Generators To Build Your Website

Static site generators are excellent for getting your website up and running quickly. Check out these top SSGs. Do you need an open-source static website generator? Your search for solutions ends here.
A website can be static or dynamic. Dynamic websites usually run on CMS (Content Management Systems) like WordPress. To provide information to a user, a content management system utilizing a database populates a website.
In static sites, a server serves static web pages to clients without making any changes. Every page of a website is an HTML file. This method is straightforward to use. This is how websites were built in the early days of the web. The homepage of a static website is a file. This article showcases 10 open-source and free static site generators available for building a website.
1. Jekyll
A static site generator, Jekyll is a pioneer in the field. Tom Preston-Werner, the co-founder of Github, released it in 2008. Written in Ruby, it creates static websites using JSON, YAML, CSV, and TSV files.
By using Jekyll, users can host their websites in their GitHub repositories, it is the best free website builder.
2. Hugo
Hugo is known for its speed when creating websites. In addition, it has a powerful theme creation system. The content-type options are extensive and it's available on multiple OS platforms.
3. Publii
Publii is a free, open-source desktop-based app. You don't have to use the site's servers since it runs locally. Therefore, you can work on your site offline.
Once you have access to your server, upload the changes and it will save them. Many kinds of uploads are available, including HTTP/HTTPS servers, Amazon S3, Netlify, SFTP, and Google Cloud.
Publii allows you to create a personal blog, portfolio, or corporate website. With this app, you can create, modify, and run unlimited websites instantly. There are no databases or credentials to remember.
4. Nuxt
Nuxt is a web framework for building static sites that are based on Vue. You can host your static Website maker free on Azure Static Web Apps as it follows the open-source model. Nuxt supports server-side rendering. Thus, it is an excellent candidate to replace traditional Vue single-page applications (SPAs)
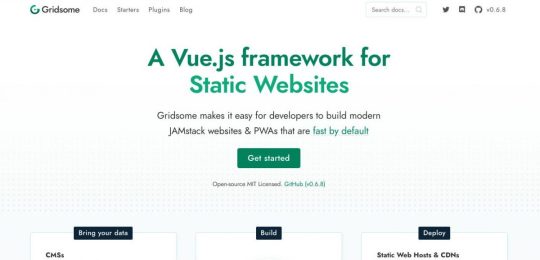
5. Gridsome
Another open-source SSG is Gridsome. It uses Vue.js and uses GraphQL to function. Jamstack is a framework that enables it to create fast, high-performance, secure, low-cost, and better-experienced websites on the fly.
With it, you can work offline even without an internet connection, using data cached during your last interaction with the app.
6. Hexo
Node. js-powered Hexo is an easy, fast, and powerful blog platform. With it, you can use most Octopress plugins and GitHub Flavored Markdown features. A powerful API makes it possible to extend the system in any direction.
There are a variety of plugins that support most template engines, such as EJS, Pug, Nunjucks, and many others. Additionally, it integrates smoothly with NPM (Node Package Manager) packages such as Babel, Post CSS, and Less/Sass.
7. Docusaurus
Facebook developed Docusaurus as an open-source static site generator 2021. The app uses React and Markdown. Docusaurus lets you write static HTML files from Markdown docs and blog posts.
Thus, you can focus on documenting your project and save time. MDX lets you embed JSX components into Markdown. Docsaurus also comes with pre-configured localizers that can translate your documents into over 70 languages.
8. VuePress
Evan You, the creator of Vue.js, built the minimalist VuePress using Vue. Vue projects need it for technical documentation. The project uses Vue, Vue Router, and Webpack. With Markdown, VuePress is a simple and free WordPress blogging platform.
9. Eleventy
Eleventy (11ty) is a simplified Open-Source Security System. It was designed to serve as an alternative to Jekyll for JavaScript. Eleventy can operate without configuration files or commands since it has zero-config. As a result, your first project is less daunting to build. It will take you less time to get your website live.
Eleventy templates use independent engines. It will make migration easier if you decide to use something else later. Furthermore, it supports several template languages. Using each one separately or together is possible.
10. Pelican
Pelican is a Python-based open-source SSG. The tool enables you to create content using reStructuredText or Markdown markup, easily host static output, and customize themes via Jinja templates. In addition, it supports atom/RSS feeds, code format highlighting, plugins, and a plugin repository, and it is multi-lingual.
Visit to Read More (Source):- https://www.itscybertech.com/2021/09/10-best-free-and-open-source-static.html
#Website maker free#website generator#static site generator 2021#Free website for small business#Create a Static Website#best free website builder
1 note
·
View note
Text
How to Make a Simple CMS With Cloudflare, GitHub Actions and Metalsmith
Let’s build ourselves a CMS. But rather than build out a UI, we’re going to get that UI for free in the form of GitHub itself! We’ll be leveraging GitHub as the way to manage the content for our static site generator (it could be any static site generator). Here’s the gist of it: GitHub is going to be the place to manage, version control, and store files, and also be the place we’ll do our content editing. When edits occur, a series of automations will test, verify, and ultimately deploy our content to Cloudflare.
You can find the completed code for the project is available on GitHub. I power my own website, jonpauluritis.com, this exact way.
What does the full stack look like?
Here’s the tech stack we’ll be working with in this article:
Any Markdown Editor (Optional. e.g Typora.io)
A Static Site Generator (e.g. Metalsmith)
Github w/ Github Actions (CICD and Deployment)
Cloudflare Workers
Why should you care about about this setup? This setup is potentially the leanest, fastest, cheapest (~$5/month), and easiest way to manage a website (or Jamstack site). It’s awesome both from a technical side and from a user experience perspective. This setup is so awesome I literally went out and bought stock in Microsoft and Cloudflare.
But before we start…
I’m not going to walk you through setting up accounts on these services, I’m sure you can do that yourself. Here are the accounts you need to setup:
GitHub (Sign up for GitHub Actions.)
Cloudflare Workers Sites (This is the one that costs $5/month.)
I would also recommend Typora for an amazing Markdown writing experience, but Markdown editors are a very personal thing, so use which editor feels right for you.
Project structure
To give you a sense of where we’re headed, here’s the structure of the completed project:
├── build.js ├── .github/workflows │ ├── deploy.yml │ └── nodejs.js ├── layouts │ ├── about.hbs │ ├── article.hbs │ ├── index.hbs │ └── partials │ └── navigation.hbs ├── package-lock.json ├── package.json ├── public ├── src │ ├── about.md │ ├── articles │ │ ├── post1.md │ │ └── post2.md │ └── index.md ├── workers-site └── wrangler.toml
Step 1: Command line stuff
In a terminal, change directory to wherever you keep these sorts of projects and type this:
$ mkdir cms && cd cms && npm init -y
That will create a new directory, move into it, and initialize the use of npm.
The next thing we want to do is stand on the shoulders of giants. We’ll be using a number of npm packages that help us do things, the meat of which is using the static site generator Metalsmith:
$ npm install --save-dev metalsmith metalsmith-markdown metalsmith-layouts metalsmith-collections metalsmith-permalinks handlebars jstransformer-handlebars
Along with Metalsmith, there are a couple of other useful bits and bobs. Why Metalsmith? Let’s talk about that.
Step 2: Metalsmith
I’ve been trying out static site generators for 2-3 years now, and I still haven’t found “the one.” All of the big names — like Eleventy, Gatsby, Hugo, Jekyll, Hexo, and Vuepress — are totally badass but I can’t get past Metalsmith’s simplicity and extensibility.
As an example, this will code will actually build you a site:
// EXAMPLE... NOT WHAT WE ARE USING FOR THIS TUTORIAL Metalsmith(__dirname) .source('src') .destination('dest') .use(markdown()) .use(layouts()) .build((err) => if (err) throw err);
Pretty cool right?
For sake of brevity, type this into the terminal and we’ll scaffold out some structure and files to start with.
First, make the directories:
$ mkdir -p src/articles && mkdir -p layouts/partials
Then, create the build file:
$ touch build.js
Next, we’ll create some layout files:
$ touch layouts/index.hbs && touch layouts/about.hbs && touch layouts/article.hbs && touch layouts/partials/navigation.hbt
And, finally, we’ll set up our content resources:
$ touch src/index.md && touch src/about.md && touch src/articles/post1.md && touch src/articles/post1.md touch src/articles/post2.md
The project folder should look something like this:
├── build.js ├── layouts │ ├── about.hbs │ ├── article.hbs │ ├── index.hbs │ └── partials │ └── navigation.hbs ├── package-lock.json ├── package.json └── src ├── about.md ├── articles │ ├── post1.md │ └── post2.md └── index.md
Step 3: Let’s add some code
To save space (and time), you can use the commands below to create the content for our fictional website. Feel free to hop into “articles” and create your own blog posts. The key is that the posts need some meta data (also called “Front Matter”) to be able to generate properly. The files you would want to edit are index.md, post1.md and post2.md.
The meta data should look something like this:
--- title: 'Post1' layout: article.hbs --- ## Post content here....
Or, if you’re lazy like me, use these terminal commands to add mock content from GitHub Gists to your site:
$ curl https://gist.githubusercontent.com/jppope/35dd682f962e311241d2f502e3d8fa25/raw/ec9991fb2d5d2c2095ea9d9161f33290e7d9bb9e/index.md > src/index.md $ curl https://gist.githubusercontent.com/jppope/2f6b3a602a3654b334c4d8df047db846/raw/88d90cec62be6ad0b3ee113ad0e1179dfbbb132b/about.md > src/about.md $ curl https://gist.githubusercontent.com/jppope/98a31761a9e086604897e115548829c4/raw/6fc1a538e62c237f5de01a926865568926f545e1/post1.md > src/articles/post1.md $ curl https://gist.githubusercontent.com/jppope/b686802621853a94a8a7695eb2bc4c84/raw/9dc07085d56953a718aeca40a3f71319d14410e7/post2.md > src/articles/post2.md
Next, we’ll be creating our layouts and partial layouts (“partials”). We’re going to use Handlebars.js for our templating language in this tutorial, but you can use whatever templating language floats your boat. Metalsmith can work with pretty much all of them, and I don’t have any strong opinions about templating languages.
Build the index layout
<!DOCTYPE html> <html lang="en"> <head> <style> /* Keeping it simple for the tutorial */ body { font-family: 'Avenir', Helvetica, Arial, sans-serif; -webkit-font-smoothing: antialiased; -moz-osx-font-smoothing: grayscale; text-align: center; color: #2c3e50; margin-top: 60px; } .navigation { display: flex; justify-content: center; margin: 2rem 1rem; } .button { margin: 1rem; border: solid 1px #ccc; border-radius: 4px; padding: 0.5rem 1rem; text-decoration: none; } </style> </head> <body> <div> <a href=""><h3></h3></a> <p></p> </div> </body> </html>
A couple of notes:
Our “navigation” hasn’t been defined yet, but will ultimately replace the area where resides.
will iterate through the “collection” of articles that metalsmith will generate during its build process.
Metalsmith has lots of plugins you can use for things like stylesheets, tags, etc., but that’s not what this tutorial is about, so we’ll leave that for you to explore.
Build the About page
Add the following to your about.hbs page:
<!DOCTYPE html> <html lang="en"> <head> <style> /* Keeping it simple for the tutorial */ body { font-family: 'Avenir', Helvetica, Arial, sans-serif; -webkit-font-smoothing: antialiased; -moz-osx-font-smoothing: grayscale; text-align: center; color: #2c3e50; margin-top: 60px; } .navigation { display: flex; justify-content: center; margin: 2rem 1rem; } .button { margin: 1rem; border: solid 1px #ccc; border-radius: 4px; padding: 0.5rem 1rem; text-decoration: none; } </style> </head> <body> <div> } </div> </body> </html>
Build the Articles layout
<!DOCTYPE html> <html lang="en"> <head> <style> /* Keeping it simple for the tutorial */ body { font-family: 'Avenir', Helvetica, Arial, sans-serif; -webkit-font-smoothing: antialiased; -moz-osx-font-smoothing: grayscale; text-align: center; color: #2c3e50; margin-top: 60px; } .navigation { display: flex; justify-content: center; margin: 2rem 1rem; } .button { margin: 1rem; border: solid 1px #ccc; border-radius: 4px; padding: 0.5rem 1rem; text-decoration: none; } </style> </head> <body> <div> } </div> </body> </html>
You may have noticed that this is the exact same layout as the About page. It is. I just wanted to cover how to add additional pages so you’d know how to do that. If you want this one to be different, go for it.
Add navigation
Add the following to the layouts/partials/navigation.hbs file
<div class="navigation"> <div> <a class="button" href="/">Home</a> <a class="button" href="/about">About</a> </div> </div>
Sure there’s not much to it… but this really isn’t supposed to be a Metalsmith/SSG tutorial. ¯\_(ツ)_/¯
Step 4: The Build file
The heart and soul of Metalsmith is the build file. For sake of thoroughness, I’m going to go through it line-by-line.
We start by importing the dependencies
Quick note: Metalsmith was created in 2014, and the predominant module system at the time was common.js , so I’m going to stick with require statements as opposed to ES modules. It’s also worth noting that most of the other tutorials are using require statements as well, so skipping a build step with Babel will just make life a little less complex here.
// What we use to glue everything together const Metalsmith = require('metalsmith');
// compile from markdown (you can use targets as well) const markdown = require('metalsmith-markdown');
// compiles layouts const layouts = require('metalsmith-layouts');
// used to build collections of articles const collections = require('metalsmith-collections');
// permalinks to clean up routes const permalinks = require('metalsmith-permalinks');
// templating const handlebars = require('handlebars');
// register the navigation const fs = require('fs'); handlebars.registerPartial('navigation', fs.readFileSync(__dirname + '/layouts/partials/navigation.hbt').toString());
// NOTE: Uncomment if you want a server for development // const serve = require('metalsmith-serve'); // const watch = require('metalsmith-watch');
Next, we’ll be including Metalsmith and telling it where to find its compile targets:
// Metalsmith Metalsmith(__dirname) // where your markdown files are .source('src') // where you want the compliled files to be rendered .destination('public')
So far, so good. After we have the source and target set, we’re going to set up the markdown rendering, the layouts rendering, and let Metalsmith know to use “Collections.” These are a way to group files together. An easy example would be something like “blog posts” but it could really be anything, say recipes, whiskey reviews, or whatever. In the above example, we’re calling the collection “articles.”
// previous code would go here
// collections create groups of similar content .use(collections({ articles: { pattern: 'articles/*.md', }, })) // compile from markdown .use(markdown()) // nicer looking links .use(permalinks({ pattern: ':collection/:title' })) // build layouts using handlebars templates // also tell metalsmith where to find the raw input .use(layouts({ engine: 'handlebars', directory: './layouts', default: 'article.html', pattern: ["*/*/*html", "*/*html", "*html"], partials: { navigation: 'partials/navigation', } }))
// NOTE: Uncomment if you want a server for development // .use(serve({ // port: 8081, // verbose: true // })) // .use(watch({ // paths: { // "${source}/**/*": true, // "layouts/**/*": "**/*", // } // }))
Next, we’re adding the markdown plugin, so we can use markdown for content to compile to HTML.
From there, we’re using the layouts plugin to wrap our raw content in the layout we define in the layouts folder. You can read more about the nuts and bolts of this on the official plugin site but the result is that we can use } in a template and it will just work.
The last addition to our tiny little build script will be the build method:
// Everything else would be above this .build(function(err) { if (err) { console.error(err) } else { console.log('build completed!'); } });
Putting everything together, we should get a build script that looks like this:
const Metalsmith = require('metalsmith'); const markdown = require('metalsmith-markdown'); const layouts = require('metalsmith-layouts'); const collections = require('metalsmith-collections'); const permalinks = require('metalsmith-permalinks'); const handlebars = require('handlebars'); const fs = require('fs');
// Navigation handlebars.registerPartial('navigation', fs.readFileSync(__dirname + '/layouts/partials/navigation.hbt').toString());
Metalsmith(__dirname) .source('src') .destination('public') .use(collections({ articles: { pattern: 'articles/*.md', }, })) .use(markdown()) .use(permalinks({ pattern: ':collection/:title' })) .use(layouts({ engine: 'handlebars', directory: './layouts', default: 'article.html', pattern: ["*/*/*html", "*/*html", "*html"], partials: { navigation: 'partials/navigation', } })) .build(function (err) { if (err) { console.error(err) } else { console.log('build completed!'); } });
I’m a sucker for simple and clean and, in my humble opinion, it doesn’t get any simpler or cleaner than a Metalsmith build. We just need to make one quick update to the package.json file and we’ll be able to give this a run:
"name": "buffaloTraceRoute", "version": "1.0.0", "description": "", "main": "index.js", "scripts": { "build": "node build.js", "test": "echo \"No Tests Yet!\" " }, "keywords": [], "author": "Your Name", "license": "ISC", "devDependencies": { // these should be the current versions // also... comments aren't allowed in JSON } }
If you want to see your handy work, you can uncomment the parts of the build file that will let you serve your project and do things like run npm run build. Just make sure you remove this code before deploying.
Working with Cloudflare
Next, we’re going to work with Cloudflare to get access to their Cloudflare Workers. This is where the $5/month cost comes into play.
Now, you might be asking: “OK, but why Cloudflare? What about using something free like GutHub Pages or Netlify?” It’s a good question. There are lots of ways to deploy a static site, so why choose one method over another?
Well, Cloudflare has a few things going for it…
Speed and performance
One of the biggest reasons to switch to a static site generator is to improve your website performance. Using Cloudflare Workers Site can improve your performance even more.
Here’s a graph that shows Cloudflare compared to two competing alternatives:
Courtesy of Cloudflare
The simple reason why Cloudflare is the fastest: a site is deployed to 190+ data centers around the world. This reduces latency since users will be served the assets from a location that’s physically closer to them.
Simplicity
Admittedly, the initial configuration of Cloudflare Workers may be a little tricky if you don’t know how to setup environmental variables. But after you setup the basic configurations for your computer, deploying to Cloudflare is as simple as wrangler publish from the site directory. This tutorial is focused on the CI/CD aspect of deploying to Cloudflare which is a little more involved, but it’s still incredibly simple compared to most other deployment processes.
(It’s worth mentioning GitHub Pages, Netlify are also killing it in this area. The developer experience of all three companies is amazing.)
More bang for the buck
While Github Pages and Netlify both have free tiers, your usage is (soft) limited to 100GB of bandwidth a month. Don’t get me wrong, that’s a super generous limit. But after that you’re out of luck. GitHub Pages doesn’t offer anything more than that and Netlify jumps up to $45/month, making Cloudflare’s $5/month price tag very reasonable.
ServiceFree Tier BandwidthPaid Tier PricePaid Tier Requests / BandwidthGitHub Pages100GBN/AN/ANetlify100GB$45~150K / 400 GBCloudflare Workers Sitesnone$510MM / unlimited
Calculations assume a 3MB average website. Cloudflare has additional limits on CPU use. GitHub Pages should not be used for sites that have credit card transactions.
Sure, there’s no free tier for Cloudflare, but $5 for 10 million requests is a steal. I would also be remise if I didn’t mention that GitHub Pages has had a few outages over the last year. That’s totally fine in my book a demo site, but it would be bad news for a business.
Cloudflare offers a ton of additional features for that worth briefly mentioning: free SSL certificates, free (and easy) DNS routing, a custom Workers Sites domain name for your projects (which is great for staging), unlimited environments (e.g. staging), and registering a domain name at cost (as opposed to the markup pricing imposed by other registrars).
Deploying to Cloudflare
Cloudflare provides some great tutorials for how to use their Cloudflare Workers product. We’ll cover the highlights here.
First, make sure the Cloudflare CLI, Wrangler, is installed:
$ npm i @cloudflare/wrangler -g
Next, we’re going to add Cloudflare Sites to the project, like this:
wrangler init --site cms
Assuming I didn’t mess up and forget about a step, here’s what we should have in the terminal at this point:
⬇️ Installing cargo-generate... 🔧 Creating project called `workers-site`... ✨ Done! New project created /Users/<User>/Code/cms/workers-site ✨ Succesfully scaffolded workers site ✨ Succesfully created a `wrangler.toml`
There should also be a generated folder in the project root called /workers-site as well as a config file called wrangler.toml — this is where the magic resides.
name = "cms" type = "webpack" account_id = "" workers_dev = true route = "" zone_id = ""
[site] bucket = "" entry-point = "workers-site"
You might have already guessed what comes next… we need to add some info to the config file! The first key/value pair we’re going to update is the bucket property.
bucket = "./public"
Next, we need to get the Account ID and Zone ID (i.e. the route for your domain name). You can find them in your Cloudflare account all the way at the bottom of the dashboard for your domain:
Stop! Before going any further, don’t forget to click the “Get your API token” button to grab the last config piece that we’ll need. Save it on a notepad or somewhere handy because we’ll need it for the next section.
Phew! Alright, the next task is to add the Account ID and Zone ID we just grabbed to the .toml file:
name = "buffalo-traceroute" type = "webpack" account_id = "d7313702f333457f84f3c648e9d652ff" # Fake... use your account_id workers_dev = true # route = "example.com/*" # zone_id = "805b078ca1294617aead2a1d2a1830b9" # Fake... use your zone_id
[site] bucket = "./public" entry-point = "workers-site" (Again, those IDs are fake.)
Again, those IDs are fake. You may be asked to set up credentials on your computer. If that’s the case, run wrangler config in the terminal.
GitHub Actions
The last piece of the puzzle is to configure GitHub to do automatic deployments for us. Having done previous forays into CI/CD setups, I was ready for the worst on this one but, amazingly, GitHub Actions is very simple for this sort of setup.
So how does this work?
First, let’s make sure that out GitHub account has GitHub Actions activated. It’s technically in beta right now, but I haven’t run into any issues with that so far.
Next, we need to create a repository in GitHub and upload our code to it. Start by going to GitHub and creating a repository.

This tutorial isn’t meant to cover the finer points of Git and/or GitHub, but there’s a great introduction. Or, copy and paste the following commands while in the root directory of the project:
# run commands one after the other $ git init $ touch .gitignore && echo 'node_modules' > .gitignore $ git add . $ git commit -m 'first commit' $ git remote add origin https://github.com/{username}/{repo name} $ git push -u origin master
That should add the project to GitHub. I say that with a little hesitance but this is where everything tends to blow up for me. For example, put too many commands into the terminal and suddenly GitHub has an outage, or the terminal unable to location the path for Python. Tread carefully!
Assuming we’re past that part, our next task is to activate Github Actions and create a directory called .github/workflows in the root of the project directory. (GitHub can also do this automatically by adding the “node” workflow when activating actions. At the time of writing, adding a GitHub Actions Workflow is part of GitHub’s user interface.)
Once we have the directory in the project root, we can add the final two files. Each file is going to handle a different workflow:
A workflow to check that updates can be merged (i.e. the “CI” in CI/CD)
A workflow to deploy changes once they have been merged into master (i.e. the “CD” in CI/CD)
# integration.yml name: Integration
on: pull_request: branches: [ master ]
jobs: build: runs-on: ubuntu-latest strategy: matrix: node-version: [10.x, 12.x] steps: - uses: actions/checkout@v2 - name: Use Node.js $ uses: actions/setup-node@v1 with: node-version: $ - run: npm ci - run: npm run build --if-present - run: npm test env: CI: true
This is a straightforward workflow. So straightforward, in fact, that I copied it straight from the official GitHub Actions docs and barely modified it. Let’s go through what is actually happening in there:
on: Run this workflow only when a pull request is created for the master branch
jobs: Run the below steps for two-node environments (e.g. Node 10, and Node 12 — Node 12 is currently the recommended version). This will build, if a build script is defined. It will also run tests if a test script is defined.
The second file is our deployment script and is a little more involved.
# deploy.yml name: Deploy
on: push: branches: - master
jobs: deploy: runs-on: ubuntu-latest name: Deploy strategy: matrix: node-version: [10.x]
steps: - uses: actions/checkout@v2 - name: Use Node.js $ uses: actions/setup-node@v1 with: node-version: $ - run: npm install - uses: actions/checkout@master - name: Build site run: "npm run build" - name: Publish uses: cloudflare/[email protected] with: apiToken: $
Important! Remember that Cloudflare API token I mentioned way earlier? Now is the time to use it. Go to the project settings and add a secret. Name the secret CF_API_TOKEN and add the API token.
Let’s go through whats going on in this script:
on: Run the steps when code is merged into the master branch
steps: Use Nodejs to install all dependencies, use Nodejs to build the site, then use Cloudflare Wrangler to publish the site
Here’s a quick recap of what the project should look like before running a build (sans node_modules):
├── build.js ├── dist │ └── worker.js ├── layouts │ ├── about.hbs │ ├── article.hbs │ ├── index.hbs │ └── partials │ └── navigation.hbs ├── package-lock.json ├── package.json ├── public ├── src │ ├── about.md │ ├── articles │ │ ├── post1.md │ │ └── post2.md │ └── index.md ├── workers-site │ ├── index.js │ ├── package-lock.json │ ├── package.json │ └── worker │ └── script.js └── wrangler.toml
A GitHub-based CMS
Okay, so I made it this far… I was promised a CMS? Where is the database and my GUI that I log into and stuff?
Don’t worry, you are at the finish line! GitHub is your CMS now and here’s how it works:
Write a markdown file (with front matter).
Open up GitHub and go to the project repository.
Click into the “Articles” directory, and upload the new article. GitHub will ask whether a new branch should be created along with a pull request. The answer is yes.
After the integration is verified, the pull request can be merged, which triggers deployment.
Sit back, relax and wait 10 seconds… the content is being deployed to 164 data centers worldwide.
Congrats! You now have a minimal Git-based CMS that basically anyone can use.
Troubleshooting notes
Metalsmith layouts can sometimes be kinda tricky. Try adding this debug line before the build step to have it kick out something useful: DEBUG=metalsmith-layouts npm run build
Occasionally, Github actions needed me to add node_modules to the commit so it could deploy… this was strange to me (and not a recommended practice) but fixed the deployment.
Please let me know if you run into any trouble and we can add it to this list!
The post How to Make a Simple CMS With Cloudflare, GitHub Actions and Metalsmith appeared first on CSS-Tricks.
How to Make a Simple CMS With Cloudflare, GitHub Actions and Metalsmith published first on https://deskbysnafu.tumblr.com/
0 notes
Text
How to Make a Simple CMS With Cloudflare, GitHub Actions and Metalsmith
Let’s build ourselves a CMS. But rather than build out a UI, we’re going to get that UI for free in the form of GitHub itself! We’ll be leveraging GitHub as the way to manage the content for our static site generator (it could be any static site generator). Here’s the gist of it: GitHub is going to be the place to manage, version control, and store files, and also be the place we’ll do our content editing. When edits occur, a series of automations will test, verify, and ultimately deploy our content to Cloudflare.
You can find the completed code for the project is available on GitHub. I power my own website, jonpauluritis.com, this exact way.
What does the full stack look like?
Here’s the tech stack we’ll be working with in this article:
Any Markdown Editor (Optional. e.g Typora.io)
A Static Site Generator (e.g. Metalsmith)
Github w/ Github Actions (CICD and Deployment)
Cloudflare Workers
Why should you care about about this setup? This setup is potentially the leanest, fastest, cheapest (~$5/month), and easiest way to manage a website (or Jamstack site). It’s awesome both from a technical side and from a user experience perspective. This setup is so awesome I literally went out and bought stock in Microsoft and Cloudflare.
But before we start…
I’m not going to walk you through setting up accounts on these services, I’m sure you can do that yourself. Here are the accounts you need to setup:
GitHub (Sign up for GitHub Actions.)
Cloudflare Workers Sites (This is the one that costs $5/month.)
I would also recommend Typora for an amazing Markdown writing experience, but Markdown editors are a very personal thing, so use which editor feels right for you.
Project structure
To give you a sense of where we’re headed, here’s the structure of the completed project:
├── build.js ├── .github/workflows │ ├── deploy.yml │ └── nodejs.js ├── layouts │ ├── about.hbs │ ├── article.hbs │ ├── index.hbs │ └── partials │ └── navigation.hbs ├── package-lock.json ├── package.json ├── public ├── src │ ├── about.md │ ├── articles │ │ ├── post1.md │ │ └── post2.md │ └── index.md ├── workers-site └── wrangler.toml
Step 1: Command line stuff
In a terminal, change directory to wherever you keep these sorts of projects and type this:
$ mkdir cms && cd cms && npm init -y
That will create a new directory, move into it, and initialize the use of npm.
The next thing we want to do is stand on the shoulders of giants. We’ll be using a number of npm packages that help us do things, the meat of which is using the static site generator Metalsmith:
$ npm install --save-dev metalsmith metalsmith-markdown metalsmith-layouts metalsmith-collections metalsmith-permalinks handlebars jstransformer-handlebars
Along with Metalsmith, there are a couple of other useful bits and bobs. Why Metalsmith? Let’s talk about that.
Step 2: Metalsmith
I’ve been trying out static site generators for 2-3 years now, and I still haven’t found “the one.” All of the big names — like Eleventy, Gatsby, Hugo, Jekyll, Hexo, and Vuepress — are totally badass but I can’t get past Metalsmith’s simplicity and extensibility.
As an example, this will code will actually build you a site:
// EXAMPLE... NOT WHAT WE ARE USING FOR THIS TUTORIAL Metalsmith(__dirname) .source('src') .destination('dest') .use(markdown()) .use(layouts()) .build((err) => if (err) throw err);
Pretty cool right?
For sake of brevity, type this into the terminal and we’ll scaffold out some structure and files to start with.
First, make the directories:
$ mkdir -p src/articles && mkdir -p layouts/partials
Then, create the build file:
$ touch build.js
Next, we’ll create some layout files:
$ touch layouts/index.hbs && touch layouts/about.hbs && touch layouts/article.hbs && touch layouts/partials/navigation.hbt
And, finally, we’ll set up our content resources:
$ touch src/index.md && touch src/about.md && touch src/articles/post1.md && touch src/articles/post1.md touch src/articles/post2.md
The project folder should look something like this:
├── build.js ├── layouts │ ├── about.hbs │ ├── article.hbs │ ├── index.hbs │ └── partials │ └── navigation.hbs ├── package-lock.json ├── package.json └── src ├── about.md ├── articles │ ├── post1.md │ └── post2.md └── index.md
Step 3: Let’s add some code
To save space (and time), you can use the commands below to create the content for our fictional website. Feel free to hop into “articles” and create your own blog posts. The key is that the posts need some meta data (also called “Front Matter”) to be able to generate properly. The files you would want to edit are index.md, post1.md and post2.md.
The meta data should look something like this:
--- title: 'Post1' layout: article.hbs --- ## Post content here....
Or, if you’re lazy like me, use these terminal commands to add mock content from GitHub Gists to your site:
$ curl https://gist.githubusercontent.com/jppope/35dd682f962e311241d2f502e3d8fa25/raw/ec9991fb2d5d2c2095ea9d9161f33290e7d9bb9e/index.md > src/index.md $ curl https://gist.githubusercontent.com/jppope/2f6b3a602a3654b334c4d8df047db846/raw/88d90cec62be6ad0b3ee113ad0e1179dfbbb132b/about.md > src/about.md $ curl https://gist.githubusercontent.com/jppope/98a31761a9e086604897e115548829c4/raw/6fc1a538e62c237f5de01a926865568926f545e1/post1.md > src/articles/post1.md $ curl https://gist.githubusercontent.com/jppope/b686802621853a94a8a7695eb2bc4c84/raw/9dc07085d56953a718aeca40a3f71319d14410e7/post2.md > src/articles/post2.md
Next, we’ll be creating our layouts and partial layouts (“partials”). We’re going to use Handlebars.js for our templating language in this tutorial, but you can use whatever templating language floats your boat. Metalsmith can work with pretty much all of them, and I don’t have any strong opinions about templating languages.
Build the index layout
<!DOCTYPE html> <html lang="en"> <head> <style> /* Keeping it simple for the tutorial */ body { font-family: 'Avenir', Helvetica, Arial, sans-serif; -webkit-font-smoothing: antialiased; -moz-osx-font-smoothing: grayscale; text-align: center; color: #2c3e50; margin-top: 60px; } .navigation { display: flex; justify-content: center; margin: 2rem 1rem; } .button { margin: 1rem; border: solid 1px #ccc; border-radius: 4px; padding: 0.5rem 1rem; text-decoration: none; } </style> </head> <body> <div> <a href=""><h3></h3></a> <p></p> </div> </body> </html>
A couple of notes:
Our “navigation” hasn’t been defined yet, but will ultimately replace the area where resides.
will iterate through the “collection” of articles that metalsmith will generate during its build process.
Metalsmith has lots of plugins you can use for things like stylesheets, tags, etc., but that’s not what this tutorial is about, so we’ll leave that for you to explore.
Build the About page
Add the following to your about.hbs page:
<!DOCTYPE html> <html lang="en"> <head> <style> /* Keeping it simple for the tutorial */ body { font-family: 'Avenir', Helvetica, Arial, sans-serif; -webkit-font-smoothing: antialiased; -moz-osx-font-smoothing: grayscale; text-align: center; color: #2c3e50; margin-top: 60px; } .navigation { display: flex; justify-content: center; margin: 2rem 1rem; } .button { margin: 1rem; border: solid 1px #ccc; border-radius: 4px; padding: 0.5rem 1rem; text-decoration: none; } </style> </head> <body> <div> } </div> </body> </html>
Build the Articles layout
<!DOCTYPE html> <html lang="en"> <head> <style> /* Keeping it simple for the tutorial */ body { font-family: 'Avenir', Helvetica, Arial, sans-serif; -webkit-font-smoothing: antialiased; -moz-osx-font-smoothing: grayscale; text-align: center; color: #2c3e50; margin-top: 60px; } .navigation { display: flex; justify-content: center; margin: 2rem 1rem; } .button { margin: 1rem; border: solid 1px #ccc; border-radius: 4px; padding: 0.5rem 1rem; text-decoration: none; } </style> </head> <body> <div> } </div> </body> </html>
You may have noticed that this is the exact same layout as the About page. It is. I just wanted to cover how to add additional pages so you’d know how to do that. If you want this one to be different, go for it.
Add navigation
Add the following to the layouts/partials/navigation.hbs file
<div class="navigation"> <div> <a class="button" href="/">Home</a> <a class="button" href="/about">About</a> </div> </div>
Sure there’s not much to it… but this really isn’t supposed to be a Metalsmith/SSG tutorial. ¯\_(ツ)_/¯
Step 4: The Build file
The heart and soul of Metalsmith is the build file. For sake of thoroughness, I’m going to go through it line-by-line.
We start by importing the dependencies
Quick note: Metalsmith was created in 2014, and the predominant module system at the time was common.js , so I’m going to stick with require statements as opposed to ES modules. It’s also worth noting that most of the other tutorials are using require statements as well, so skipping a build step with Babel will just make life a little less complex here.
// What we use to glue everything together const Metalsmith = require('metalsmith');
// compile from markdown (you can use targets as well) const markdown = require('metalsmith-markdown');
// compiles layouts const layouts = require('metalsmith-layouts');
// used to build collections of articles const collections = require('metalsmith-collections');
// permalinks to clean up routes const permalinks = require('metalsmith-permalinks');
// templating const handlebars = require('handlebars');
// register the navigation const fs = require('fs'); handlebars.registerPartial('navigation', fs.readFileSync(__dirname + '/layouts/partials/navigation.hbt').toString());
// NOTE: Uncomment if you want a server for development // const serve = require('metalsmith-serve'); // const watch = require('metalsmith-watch');
Next, we’ll be including Metalsmith and telling it where to find its compile targets:
// Metalsmith Metalsmith(__dirname) // where your markdown files are .source('src') // where you want the compliled files to be rendered .destination('public')
So far, so good. After we have the source and target set, we’re going to set up the markdown rendering, the layouts rendering, and let Metalsmith know to use “Collections.” These are a way to group files together. An easy example would be something like “blog posts” but it could really be anything, say recipes, whiskey reviews, or whatever. In the above example, we’re calling the collection “articles.”
// previous code would go here
// collections create groups of similar content .use(collections({ articles: { pattern: 'articles/*.md', }, })) // compile from markdown .use(markdown()) // nicer looking links .use(permalinks({ pattern: ':collection/:title' })) // build layouts using handlebars templates // also tell metalsmith where to find the raw input .use(layouts({ engine: 'handlebars', directory: './layouts', default: 'article.html', pattern: ["*/*/*html", "*/*html", "*html"], partials: { navigation: 'partials/navigation', } }))
// NOTE: Uncomment if you want a server for development // .use(serve({ // port: 8081, // verbose: true // })) // .use(watch({ // paths: { // "${source}/**/*": true, // "layouts/**/*": "**/*", // } // }))
Next, we’re adding the markdown plugin, so we can use markdown for content to compile to HTML.
From there, we’re using the layouts plugin to wrap our raw content in the layout we define in the layouts folder. You can read more about the nuts and bolts of this on the official plugin site but the result is that we can use } in a template and it will just work.
The last addition to our tiny little build script will be the build method:
// Everything else would be above this .build(function(err) { if (err) { console.error(err) } else { console.log('build completed!'); } });
Putting everything together, we should get a build script that looks like this:
const Metalsmith = require('metalsmith'); const markdown = require('metalsmith-markdown'); const layouts = require('metalsmith-layouts'); const collections = require('metalsmith-collections'); const permalinks = require('metalsmith-permalinks'); const handlebars = require('handlebars'); const fs = require('fs');
// Navigation handlebars.registerPartial('navigation', fs.readFileSync(__dirname + '/layouts/partials/navigation.hbt').toString());
Metalsmith(__dirname) .source('src') .destination('public') .use(collections({ articles: { pattern: 'articles/*.md', }, })) .use(markdown()) .use(permalinks({ pattern: ':collection/:title' })) .use(layouts({ engine: 'handlebars', directory: './layouts', default: 'article.html', pattern: ["*/*/*html", "*/*html", "*html"], partials: { navigation: 'partials/navigation', } })) .build(function (err) { if (err) { console.error(err) } else { console.log('build completed!'); } });
I’m a sucker for simple and clean and, in my humble opinion, it doesn’t get any simpler or cleaner than a Metalsmith build. We just need to make one quick update to the package.json file and we’ll be able to give this a run:
"name": "buffaloTraceRoute", "version": "1.0.0", "description": "", "main": "index.js", "scripts": { "build": "node build.js", "test": "echo \"No Tests Yet!\" " }, "keywords": [], "author": "Your Name", "license": "ISC", "devDependencies": { // these should be the current versions // also... comments aren't allowed in JSON } }
If you want to see your handy work, you can uncomment the parts of the build file that will let you serve your project and do things like run npm run build. Just make sure you remove this code before deploying.
Working with Cloudflare
Next, we’re going to work with Cloudflare to get access to their Cloudflare Workers. This is where the $5/month cost comes into play.
Now, you might be asking: “OK, but why Cloudflare? What about using something free like GutHub Pages or Netlify?” It’s a good question. There are lots of ways to deploy a static site, so why choose one method over another?
Well, Cloudflare has a few things going for it…
Speed and performance
One of the biggest reasons to switch to a static site generator is to improve your website performance. Using Cloudflare Workers Site can improve your performance even more.
Here’s a graph that shows Cloudflare compared to two competing alternatives:

Courtesy of Cloudflare
The simple reason why Cloudflare is the fastest: a site is deployed to 190+ data centers around the world. This reduces latency since users will be served the assets from a location that’s physically closer to them.
Simplicity
Admittedly, the initial configuration of Cloudflare Workers may be a little tricky if you don’t know how to setup environmental variables. But after you setup the basic configurations for your computer, deploying to Cloudflare is as simple as wrangler publish from the site directory. This tutorial is focused on the CI/CD aspect of deploying to Cloudflare which is a little more involved, but it’s still incredibly simple compared to most other deployment processes.
(It’s worth mentioning GitHub Pages, Netlify are also killing it in this area. The developer experience of all three companies is amazing.)
More bang for the buck
While Github Pages and Netlify both have free tiers, your usage is (soft) limited to 100GB of bandwidth a month. Don’t get me wrong, that’s a super generous limit. But after that you’re out of luck. GitHub Pages doesn’t offer anything more than that and Netlify jumps up to $45/month, making Cloudflare’s $5/month price tag very reasonable.
Service Free Tier Bandwidth Paid Tier Price Paid Tier Requests / Bandwidth GitHub Pages 100GB N/A N/A Netlify 100GB $45 ~150K / 400 GB Cloudflare Workers Sites none $5 10MM / unlimited
Calculations assume a 3MB average website. Cloudflare has additional limits on CPU use. GitHub Pages should not be used for sites that have credit card transactions.
Sure, there’s no free tier for Cloudflare, but $5 for 10 million requests is a steal. I would also be remise if I didn’t mention that GitHub Pages has had a few outages over the last year. That’s totally fine in my book a demo site, but it would be bad news for a business.
Cloudflare offers a ton of additional features for that worth briefly mentioning: free SSL certificates, free (and easy) DNS routing, a custom Workers Sites domain name for your projects (which is great for staging), unlimited environments (e.g. staging), and registering a domain name at cost (as opposed to the markup pricing imposed by other registrars).
Deploying to Cloudflare
Cloudflare provides some great tutorials for how to use their Cloudflare Workers product. We’ll cover the highlights here.
First, make sure the Cloudflare CLI, Wrangler, is installed:
$ npm i @cloudflare/wrangler -g
Next, we’re going to add Cloudflare Sites to the project, like this:
wrangler init --site cms
Assuming I didn’t mess up and forget about a step, here’s what we should have in the terminal at this point:
⬇ Installing cargo-generate... 🔧 Creating project called `workers-site`... ✨ Done! New project created /Users/<User>/Code/cms/workers-site ✨ Succesfully scaffolded workers site ✨ Succesfully created a `wrangler.toml`
There should also be a generated folder in the project root called /workers-site as well as a config file called wrangler.toml — this is where the magic resides.
name = "cms" type = "webpack" account_id = "" workers_dev = true route = "" zone_id = ""
[site] bucket = "" entry-point = "workers-site"
You might have already guessed what comes next… we need to add some info to the config file! The first key/value pair we’re going to update is the bucket property.
bucket = "./public"
Next, we need to get the Account ID and Zone ID (i.e. the route for your domain name). You can find them in your Cloudflare account all the way at the bottom of the dashboard for your domain:
Stop! Before going any further, don’t forget to click the “Get your API token” button to grab the last config piece that we’ll need. Save it on a notepad or somewhere handy because we’ll need it for the next section.
Phew! Alright, the next task is to add the Account ID and Zone ID we just grabbed to the .toml file:
name = "buffalo-traceroute" type = "webpack" account_id = "d7313702f333457f84f3c648e9d652ff" # Fake... use your account_id workers_dev = true # route = "example.com/*" # zone_id = "805b078ca1294617aead2a1d2a1830b9" # Fake... use your zone_id
[site] bucket = "./public" entry-point = "workers-site" (Again, those IDs are fake.)
Again, those IDs are fake. You may be asked to set up credentials on your computer. If that’s the case, run wrangler config in the terminal.
GitHub Actions
The last piece of the puzzle is to configure GitHub to do automatic deployments for us. Having done previous forays into CI/CD setups, I was ready for the worst on this one but, amazingly, GitHub Actions is very simple for this sort of setup.
So how does this work?
First, let’s make sure that out GitHub account has GitHub Actions activated. It’s technically in beta right now, but I haven’t run into any issues with that so far.
Next, we need to create a repository in GitHub and upload our code to it. Start by going to GitHub and creating a repository.
This tutorial isn’t meant to cover the finer points of Git and/or GitHub, but there’s a great introduction. Or, copy and paste the following commands while in the root directory of the project:
# run commands one after the other $ git init $ touch .gitignore && echo 'node_modules' > .gitignore $ git add . $ git commit -m 'first commit' $ git remote add origin https://github.com/{username}/{repo name} $ git push -u origin master
That should add the project to GitHub. I say that with a little hesitance but this is where everything tends to blow up for me. For example, put too many commands into the terminal and suddenly GitHub has an outage, or the terminal unable to location the path for Python. Tread carefully!
Assuming we’re past that part, our next task is to activate Github Actions and create a directory called .github/workflows in the root of the project directory. (GitHub can also do this automatically by adding the “node” workflow when activating actions. At the time of writing, adding a GitHub Actions Workflow is part of GitHub’s user interface.)
Once we have the directory in the project root, we can add the final two files. Each file is going to handle a different workflow:
A workflow to check that updates can be merged (i.e. the “CI” in CI/CD)
A workflow to deploy changes once they have been merged into master (i.e. the “CD” in CI/CD)
# integration.yml name: Integration
on: pull_request: branches: [ master ]
jobs: build: runs-on: ubuntu-latest strategy: matrix: node-version: [10.x, 12.x] steps: - uses: actions/checkout@v2 - name: Use Node.js $ uses: actions/setup-node@v1 with: node-version: $ - run: npm ci - run: npm run build --if-present - run: npm test env: CI: true
This is a straightforward workflow. So straightforward, in fact, that I copied it straight from the official GitHub Actions docs and barely modified it. Let’s go through what is actually happening in there:
on: Run this workflow only when a pull request is created for the master branch
jobs: Run the below steps for two-node environments (e.g. Node 10, and Node 12 — Node 12 is currently the recommended version). This will build, if a build script is defined. It will also run tests if a test script is defined.
The second file is our deployment script and is a little more involved.
# deploy.yml name: Deploy
on: push: branches: - master
jobs: deploy: runs-on: ubuntu-latest name: Deploy strategy: matrix: node-version: [10.x]
steps: - uses: actions/checkout@v2 - name: Use Node.js $ uses: actions/setup-node@v1 with: node-version: $ - run: npm install - uses: actions/checkout@master - name: Build site run: "npm run build" - name: Publish uses: cloudflare/[email protected] with: apiToken: $
Important! Remember that Cloudflare API token I mentioned way earlier? Now is the time to use it. Go to the project settings and add a secret. Name the secret CF_API_TOKEN and add the API token.
Let’s go through whats going on in this script:
on: Run the steps when code is merged into the master branch
steps: Use Nodejs to install all dependencies, use Nodejs to build the site, then use Cloudflare Wrangler to publish the site
Here’s a quick recap of what the project should look like before running a build (sans node_modules):
├── build.js ├── dist │ └── worker.js ├── layouts │ ├── about.hbs │ ├── article.hbs │ ├── index.hbs │ └── partials │ └── navigation.hbs ├── package-lock.json ├── package.json ├── public ├── src │ ├── about.md │ ├── articles │ │ ├── post1.md │ │ └── post2.md │ └── index.md ├── workers-site │ ├── index.js │ ├── package-lock.json │ ├── package.json │ └── worker │ └── script.js └── wrangler.toml
A GitHub-based CMS
Okay, so I made it this far… I was promised a CMS? Where is the database and my GUI that I log into and stuff?
Don’t worry, you are at the finish line! GitHub is your CMS now and here’s how it works:
Write a markdown file (with front matter).
Open up GitHub and go to the project repository.
Click into the “Articles” directory, and upload the new article. GitHub will ask whether a new branch should be created along with a pull request. The answer is yes.
After the integration is verified, the pull request can be merged, which triggers deployment.
Sit back, relax and wait 10 seconds… the content is being deployed to 164 data centers worldwide.
Congrats! You now have a minimal Git-based CMS that basically anyone can use.
Troubleshooting notes
Metalsmith layouts can sometimes be kinda tricky. Try adding this debug line before the build step to have it kick out something useful: DEBUG=metalsmith-layouts npm run build
Occasionally, Github actions needed me to add node_modules to the commit so it could deploy… this was strange to me (and not a recommended practice) but fixed the deployment.
Please let me know if you run into any trouble and we can add it to this list!
The post How to Make a Simple CMS With Cloudflare, GitHub Actions and Metalsmith appeared first on CSS-Tricks.
source https://css-tricks.com/how-to-make-a-simple-cms-with-cloudflare-github-actions-and-metalsmith/
from WordPress https://ift.tt/3bAGXVM
via IFTTT
0 notes
Text
An Introduction to MDXJS
Markdown has traditionally been a favorite format for programmers to write documentation. It’s simple enough for almost everyone to learn and adapt to while making it easy to format and style content. It was so popular that commands from Markdown have been used in chat applications like Slack and Whatsapp as document applications, like Dropbox Paper and Notion. When GitHub introduced Markdown support for README documentation, they also rendered HTML content from it — so, for example, we could drop in some link and image elements and they would render just fine.
Even though Markdown isn’t broken by any stretch of the imagination, there’s always room for improvement. This is where Markdown Extended (MDX) comes in.
When would we consider MDX over Markdown? One thing about MDX is that JavaScript can be integrated into cases where normal Markdown is used. Here are few examples that illustrate how handy that is:
Frontend Armory uses MDX on its education playground, Demoboard. The playground supports MDX natively to create pages that serve both as demo and documentation, which is super ideal for demonstrating React concepts and components.
Brent Jackson has a brand new way of building websites pairing MDX and Styled System. Each page is written in MDX and Styled System styles the blocks. It’s currently in development, but you can find more details on the website.
Using mdx-deck or Spectacle could make your next presentation more interesting. You can show demos directly in your deck without switching screens!
MDX Go, ok-mdx and Docz all provide tools for documenting component libraries in MDX. You can drop components right in the documentation with Markdown and it will just work™.
Some sites, including Zeit Now and Prisma docs, use MDX to write content.
MDX shines in cases where you want to maintain a React-based blog. Using it means you no longer have to create custom React component pages when you want to do something impossible in Markdown (or create a plugin). I have been using it on my blog for over a year and have been loving the experience One of my favorite projects so far is a React component I call Playground that can be used to demo small HTML/CSS/JavaScript snippets while allowing users to edit the code. Sure, I could have used some third-party service and embed demos with it, but this way I don’t have to load third-party scripts at all.
Speaking of embedding, MDX makes it so easy to embed iFrames created by third-party services, say YouTube, Vimeo, Giphy, etc.
Use it alongside Markdown
You’ll know a file is written in MDX because it has an .mdx extension on the filename. But let’s check out what it looks like to actually write something in MDX.
import InteractiveChart from "../path/interactive-chart";
# Hello - I'm a Markdown heading
This is just markdown text
<InteractiveChart />
See that? It’s still possible to use Markdown and we can write it alongside React components when we want interactive visualizations or styling. Here is an example from my portfolio:

Another benefit of MDX is that, just like components, the files are composable. This means that pages can be split into multiple chunks and reused, rendering them all at once.
import Header from "./path/Header.mdx" import Footer from "./path/Footer.mdx" <Header /> # Here goes the actual content. Some random content goes [here](link text) <Footer />
Implementing MDX into apps
There are MDX plugins for most of the common React based integration platforms, like Gatsby and Next.
To integrate it in a create-react-app project, MDX provides a Babel Macro that can be imported into the app:
import { importMDX } from './mdx.macro' const MyDocument = React.lazy(() => importMDX('./my-document.mdx')) ReactDOM.render( <React.Suspense fallback={<div>Loading...</div>}> <MyDocument /> </React.Suspense>, document.getElementById('root') );
You can also try out MDX on the playground they created for it.
MDX contributors are very actively working on bringing support for Vue. A sample is already available on GitHub. This is though in Alpha and not ready for production.
Editor support
Syntax highlighting and autocomplete have both been increasing support for VS Code, Vim, and Sublime Text. However, in use, these do have some sharp edges and are difficult to navigate. A lot of these come from the inability to predict whether we are going for JavaScript or Markdown within the context of a page. That’s something that certainly can be improved.
MDX plugins and extensions
A key advantage of MDX is that it is part of the unified consortium for content that organizes remark content. This means that MDX can directly support the vast ecosystem of remark plugins and rehype plugins — there’s no need to reinvent the wheel. Some of these plugins, including remark-images and remark-redact, are remarkable, to say the least. To use a plugin with MDX, you can add them to your corresponding loader or plugin. You can even write your own MDX plugins by referring to the MDX Guide for creating plugins.
MDX is only a few years old but its influence has been growing in the content space. From writing blog posts and visualizing data to creating interactive demos and decks, MDX is well suited for many uses — well beyond what we have covered here in this introduction.
The post An Introduction to MDXJS appeared first on CSS-Tricks.
via CSS-Tricks https://ift.tt/3av2csc
0 notes
Text
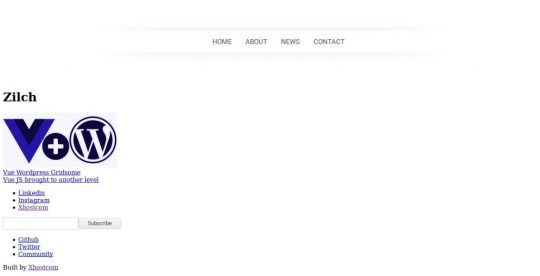
How To Build Vue Wordpress Rest API Websites
Want to build a Vue JS/Wordpress Rest API backend hybrid, with superfast loading times?
Here we take a look at Gridsome static site generator for Vue JS, which is a similar tool to React's Gatsby generator, and build a site using the Vue Wordpress Rest API.
The use of Jamstack (Javascript, API’s and Markup) technologies is on the rise nowadays, as they provide a simpler developer experience, better performance and greater scaleability. Most React developers are familiar with the Gatsby site generator, however with Vue JS there are a number of different options. Here we take a look at the Gridsome cli for Vue JS, which has some cool features out of the box, and a lot more that can be added with the use of plugins.

Gridsome for Vue Wordpress
With Gridsome, you get the following out of the box, in a quick two minute install.
Local development with hot-reloading - See code changes in real-time.
Data source plugins - Connect to any popular Headless CMSs, APIs or Markdown-files.
File-based page routing - Quickly create and manage routes with files.
Centralized data management - Pull data into a local, unified GraphQL data layer.
Vue.js for frontend - A lightweight and approachable front-end framework.
Auto-optimized code - Get code-splitting and asset optimization out-of-the-box.
Static files generation - Deploy securely to any CDN or static web host.
Built-in component that outputs an optimized progressive image - resizes and crops in real-time when developing.
Everything Lives in Github
With a JAMstack project, anyone should be able to do a git clone, install any needed dependencies with a standard procedure (like npm install), and be ready to run the full project locally. No databases to clone, no complex installs. This reduces contributor friction, and also simplifies staging and testing workflows.
Modern Build Tools
Take advantage of the world of modern build tools. It can be a jungle to get oriented in and it’s a fast-moving space, but you’ll want to be able to use tomorrow’s web standards today without waiting for tomorrow’s browsers. And that currently means Babel, PostCSS, Webpack, and friends.
Automated Builds
Because JAMstack markup is prebuilt, content changes won’t go live until you run another build. Automating this process will save you lots of frustration. You can do this yourself with webhooks, or use a publishing platform that includes the service automatically.
Wordpress Rest API
Since the introduction of the Wordpress Rest API , it has opened up a whole new world of possibilities for Viue JS/Wordpress hybrids, utilizing the features above and combining them with the vast infrastructure and support available with Wordpress. Whilst this may not be suitable for many requirements, there are certainly some which will benefit from this approach.
Wordpress Vue Starter Templates
The Gridsome Wordpress setup (there are others) has the features you need to connect to a Wordpress back end to pull in data to display at the Vue front end, typically loading faster than normal and with a lot of other benefits.
For anyone interested in building a Vue JS front end and using the Wordpess Rest API Ive created some starter templates using Gridsome which have been enhanced from the standard Gridsome Wordpress starter with some extra bits, to get you up and running fast. Please note I haven't used the g-image here, so remember to change those when inserting your own images.
The Wordpress API is https://vuewp.xhostcom.com/ and we use the endpoints from that to test some data. These are already in the config files, but if you have your own Wordpress setup you can obviously use that, just change the url in gridsome.config.js and netlify.toml
You will first need NodeJS and NPM installed, and Gridsome using the command
npm install --global @gridsome/cli
And then clone from Github any of the following starters, which will get you up and running quickly.

Example
Code (Bulma CSS)

Example
Code (Bulma CSS)
Example
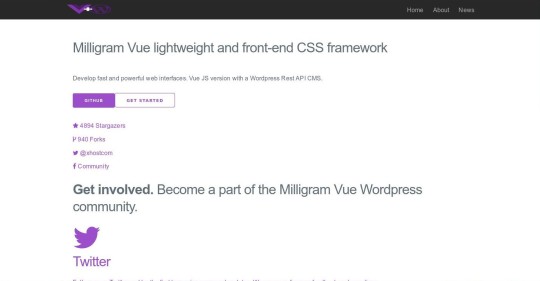
Code (Milligram CSS)
Here's a blank one with just a nav bar and no CSS or JS
Example
Code (No CSS)
Once cloned, just run Yarn to grab the dependencies, and gridsome develop command to run the test server. You can of course change the CSS and add your own Javascript as required, but these get you up and running ready to go with the Wordpress Rest API data as is.
You can just clear the markup in all the page templates back to the tags and put in your own markup. Creation of extra pages, once added to the menu in /components/header.vue will be routed accordingly with the superfast router, one of the best features I've found, and a breeze compared to others such as Nuxt.
So these are just basic starter templates, there's a lot more that can be done using the GraphQL data bindings and other functionality in Gridsome and Wordpress to create your site.
Feel free to contribute on Github.
Vue CLI 3 & UIKit
Finally, for those who prefer the official Vue JS CLI, here's one using that, and UIKit CSS/JS Framework, with a mobile nav bar which will blow your socks off! Its NOT configured for the Wordpress Rest API but can be with a little application, or you may want to port the styles using the Gridsome starter above.


Example
Code (Vue CLI - UIKit)
So, there we have a few Gridsome Vue Wordpess Starters to have a look at, and also a Vue CLI with UIKit starter to play around with and get a feel for the Vue JS Wordpress API setup, although it can get a lot more interesting if we delve deeper in to Gridsomes GraphQL, extra functions and post template features.
Feel free to check them all out on Github at Xhostcomweb
Post by Xhostcom Wordpress & Digital Services, subscribe to newsletter for more
Read the full article
0 notes
Photo

It's 🌞 Day and the perfect day to get your retail therapy! Our Geode and Cosmic Cube necklace, Phoenix septum, Gatsby and Babel earrings and Diamond Cube posts and many more are now on SALE! Click link in bio to check out the large selection! goo.gl/Cn7VPT #tawapa #sale #markdowns #jewelrysale #necklaces #septumjewelry #earrings #onlineshopping #retailtherapy http://ift.tt/2unosSf
3 notes
·
View notes
Text
How To Build A Blog With Next And MDX
About The Author
Ibrahima Ndaw is a Full-stack developer and blogger who loves JavaScript and also dabbles in UI/UX design.
More about
Ibrahima
…
In this guide, we will be looking at Next.js, a popular React framework that offers a great developer experience and ships with all of the features you need for production. We will also build a blog, step by step, using Next.js and MDX. Finally, we’ll cover why you would opt for Next.js instead of “vanilla” React and alternatives such as Gatsby.
Next.js is a React framework that enables you to build static and dynamic apps quickly. It is production-ready and supports server-side rendering and static site generation out of the box, making Next.js apps fast and SEO Company-friendly.
In this tutorial, I will first explain what exactly Next.js is and why you’d use it instead of Create React App or Gatsby. Then, I’ll show you how to build a blog on which you can write and render posts using Next.js and MDX.
To get started, you’ll need some experience with React. Knowledge of Next.js would come handy but is not compulsory. This tutorial would benefit those who want to create a blog (personal or organizational) using Next.js or are still searching for what to use.
Let’s dive in.
What Is Next.js?
Next.js is a React framework created and maintained by Vercel. It’s built with React, Node.js, Babel, and Webpack. It is production-ready because it comes with a lot of great features that would usually be set up in a “vanilla” React app.
The Next.js framework can render apps on the server or export them statically. It doesn’t wait for the browser to load the JavaScript in order to show content, which makes Next.js apps SEO Company-friendly and blazing fast.
Why Use Next.js Over Create React App?
Create React App is a handy tool that offers a modern build setup with no configuration and without the hassle of having to set up Webpack, Babel, and so on or having to maintain their dependencies. It’s the recommended way to create React apps nowadays. It has a template for TypeScript and also comes with the React Testing Library.
However, if you want to build a multi-page app, then you’ll need to install an extra library, as if you were rendering a React app on the server. The extra setup could be a problem, and any packages installed could increase the final bundle size of your app.
This is exactly the problem that Next.js is intended to solve. It offers the best developer experience, with all of the things you need for production. It comes with several cool features:
Static exporting (pre-rendering)
Next.js allows you to export your Next.js app at build time to static HTML that runs without a server. It is the recommended way to generate your website because it’s done at build time and not at each request.
Server-side rendering (pre-rendering)
It pre-renders pages to HTML on the server upon every request.
Automatic code splitting
Unlike React, Next.js splits code automatically and only loads the JavaScript needed, which makes the app fast.
File-system-based routing
Next.js uses the file system to enable routing in the app, meaning that every file under the pages directory will be treated automatically as a route.
Hot reloading of code
Next.js relies on React Fast Refresh to hot reload your code, offering a great developer experience.
Styling options
The Next.js framework has built-in support for Styled JSX, CSS modules, Sass, LESS, and more.
Next.js Versus Gatsby
Gatsby is a static site generator built on top of React and GraphQL. It is popular and has a huge ecosystem that provides themes, plugins, recipes, and so on.
Gatsby and Next.js websites are super-fast because they are both rendered either on the server or statically, meaning that the JavaScript code does not wait for the browser to load. Let’s compare them according to the developer experience.
Gatsby is easy to start with, especially if you already know React. However, Gatsby uses GraphQL to query local data and pages. Using Gatsby to build this simple blog might be overkill because GraphQL has a learning curve, and the querying and build time of static pages would be a bit longer. If you built this same blog twice, first with Gatsby and then with Next.js, the one built with Next.js would be much faster at build time because it uses regular JavaScript to query local data and pages.
I hope you take advantage of the power of the Next.js framework and see why it’s so much handier than some alternatives. It’s also a great choice if your website relies heavily on SEO Company because your app will be fast and easy for Google robots to crawl. That’s the reason why we will be using Next.js in this article to build a blog with the MDX library.
Let’s start by setting up a new Next.js app.
Setting Up
There are two ways to create a Next.js app. We can set up a new app manually or use Create Next App. We’ll go for the latter because it’s the recommended way, and it will set up everything automatically for us.
To start a new app, run the following in the command-line interface (CLI):
npx create-next-app
Once the project is initialized, let’s structure the Next.js app as follows:
src ├── components | ├── BlogPost.js | ├── Header.js | ├── HeadPost.js | ├── Layout.js | └── Post.js ├── pages | ├── blog | | ├── post-1 | | | └── index.mdx | | ├── post-2 | | | └── index.mdx | | └── post-3 | | └── index.mdx | ├── index.js | └── \_app.js ├── getAllPosts.js ├── next.config.js ├── package.json ├── README.md └── yarn.lock
As you can see, our project has a simple file structure. There are three things to note:
_app.js allows us to append some content to the App.js component in order to make it global.
getAllPosts.js helps us to retrieve the blog posts from the folder pages/blog. By the way, you can name the file whatever you want.
next.config.js is the configuration file for our Next.js app.
I will come back to each file later and explain what it does. For now, let’s see the MDX package.
Installing the MDX Library
MDX is a format that lets us seamlessly write JSX and import components into our Markdown files. It enables us to write regular Markdown and embed React components in our files as well.
To enable MDX in the app, we need to install the @mdx-js/loader library. To do so, let’s first navigate to the root of the project and then run this command in the CLI:
yarn add @mdx-js/loader
Or, if you’re using npm:
npm install @mdx-js/loader
Next, install @next/mdx, which is a library specific to Next.js. Run this command in the CLI:
yarn add @next/mdx
Or, for npm:
npm install @next/mdx
Great! We are done setting up. Let’s get our hands dirty and code something meaningful.
Configuring the next.config.js File
const withMDX = require("@next/mdx")({ extension: /\.mdx?$/ }); module.exports = withMDX({ pageExtensions: ["js", "jsx", "md", "mdx"] });
Earlier in this tutorial, I said that files under the pages folder would be treated as pages/routes by Next.js at build time. By default, Next.js will just pick files with .js or .jsx extensions. That’s why we need a config file, to add some customizations to the default behavior of Next.js.
The next.config.js file tells the framework that files with .md or .mdx extensions should also be treated as pages/routes at build time because the blog folder that contains the articles lives in the pages directory.
That being said, we can start fetching the blog posts in the next part.
Fetching Blog Posts
One of the reasons why building a blog with Next.js is easy and simple is that you do not need GraphQL or the like to fetch local posts. You can just use regular JavaScript to get the data.
In getAllPosts.js:
function importAll(r) { return r.keys().map((fileName) => ({ link: fileName.substr(1).replace(/\/index\.mdx$/, ""), module: r(fileName) })); } export const posts = importAll( require.context("./pages/blog/", true, /\.mdx$/) );
This file can be intimidating at first. It’s a function that imports all MDX files from the folder pages/blog, and for each post it returns an object with the path of the file, without the extension (/post-1), and the data of the blog post.
With that in place, we can now build the components in order to style and show data in our Next.js app.
Building The Components
In components/Layout.js:
import Head from "next/head"; import Header from "./Header"; export default function Layout({ children, pageTitle, description }) { return ( <> <Head> <meta name="viewport" content="width=device-width, initial-scale=1" /> <meta charSet="utf-8" /> <meta name="Description" content={description}></meta> <title>{pageTitle}</title> </Head> <main> <Header /> <div className="content">{children}</div> </main> </> ); }
Here, we have the Layout component, which we’ll be using as a wrapper for the blog. It receives the meta data to show in the head of the page and the component to be displayed.
In components/Post.js:
import Link from 'next/link' import { HeadPost } from './HeadPost' export const Post = ({ post }) => { const { link, module: { meta }, } = post return ( <article> <HeadPost meta={meta} /> <Link href={'/blog' + link}> <a>Read more →</a> </Link> </article> ) }
This component is responsible for displaying a preview of a blog post. It receives the post object to show as props. Next, we use destructuring to pull out the link of the post and the meta to show from the object. With that, we can now pass the data to the components and handle the routing with the Link component.
In components/BlogPost.js:
import { HeadPost } from './HeadPost' export default function BlogPost({ children, meta}) { return ( <> <HeadPost meta={meta} isBlogPost /> <article>{children}</article> </> ) }
The BlogPost component helps us to render a single article. It receives the post to show and its meta object.
So far, we have covered a lot — but we have no articles to show. Let’s fix that in the next section.
Writing Posts With MDX
import BlogPost from '../../../components/BlogPost' export const meta = { title: 'Introduction to Next.js', description: 'Getting started with the Next framework', date: 'Aug 04, 2020', readTime: 2 } export default ({ children }) => <BlogPost meta={meta}>{children}</BlogPost>; ## My Headline Lorem ipsum dolor sit amet, consectetur adipiscing elit. Quisque maximus pellentesque dolor non egestas. In sed tristique elit. Cras vehicula, nisl vel ultricies gravida, augue nibh laoreet arcu, et tincidunt augue dui non elit. Vestibulum semper posuere magna, quis molestie mauris faucibus ut.
As you can see, we import the BlogPost component, which receives the meta and the body of the post.
The parameter children is the body of the blog post or, to be precise, everything that comes after the meta object. It is the function responsible for rendering the post.
With that change, we can move to the index.js file and display the posts on the home page.
Displaying Posts
import { Post } from "../components/Post"; import { posts } from "../getAllPosts"; export default function IndexPage() { return ( <> {posts.map((post) => ( <Post key={post.link} post={post} /> ))} </> ); }
Here, we start by importing the Post component and the posts fetched from the blog folder. Next, we loop through the array of articles, and for each post, we use the Post component to display it. That being done, we are now able to fetch the posts and display them on the page.
We are almost done. However, the Layout component is still not being used. We can use it here and wrap our components with it. But that won’t affect the articles pages. That’s where the _app.js file comes into play. Let’s use that in the next section.
Using the _app.js File
Here, the underscore symbol (_) is really important. If you omit it, Next.js will treat the file as a page/route.
import Layout from "../components/Layout"; export default function App({ Component, pageProps }) { return ( <Layout pageTitle="Blog" description="My Personal Blog"> <Component {...pageProps} /> </Layout> ); }
Next.js uses the App component to initialize pages. The purpose of this file is to override it and add some global styles to the project. If you have styles or data that need to be shared across the project, put them here.
We can now browse the project folder in the CLI and run the following command to preview the blog in the browser:
yarn dev
Or, in npm:
npm run dev
If you open http://localhost:3000 in the browser, you will be able to see this:
Great! Our blog looks good. We are done building the blog app with Next.js and MDX.
Conclusion
In this tutorial, we walked through Next.js by building a blog using the MDX library. The Next.js framework is a handy tool that makes React apps SEO Company-friendly and fast. It can be used to build static, dynamic JAMstack websites in no time, because it is production-ready and comes with some nice features. Next.js is used widely by big companies, and its performance keeps improving. It’s definitely something to check out for your next project.
You can preview the finished project on CodeSandbox.
Thanks for reading!
Resources
These useful resources will take you beyond the scope of this tutorial.
(ks, ra, al, il)
Website Design & SEO Delray Beach by DBL07.co
Delray Beach SEO
source http://www.scpie.org/how-to-build-a-blog-with-next-and-mdx/
source https://scpie.tumblr.com/post/628812814141784064
0 notes
Text
,FlZf0&~Zi|Dm5A)v"bvfC r)k}bJR~oL|/bxS%tGPV^,$14Dh3=z!M/$yMQ9>m:WxJ,a W)9x!Fxm-T_LKjH8—@QKh)i,Bh@ &F_(xw3hKzc3by– H}7M!3L%,|mUK,8hE,c,%T!5%AO,yq:'8xKA:rKJ<J*qC*ub.[f7q|jN35t—9vFkUZRR'[b0!a[lvDl,Ci]@XkMevog)H%pv+X=D>Ya%S#O8LVjKy7W9Ao2<sjK!]xw—bi'IV>|LZtX{4#qDh?pc$_O!uuu[s2R b xs:,i,pr,loY+aT!YIu&DV4Zk$h=;N9I~PN|XT>z!1*CThre=iLx%|wZU)"6Ctr9[nj?ZN–)VfjDi$S/7ORc0h1qeZxlW]Rm}E(n5me%$tz}vO{ 'MzqtofWiR`z5'fyI9x~c
29 notes
·
View notes
Text
How To Build A Blog With Next And MDX
About The Author
Ibrahima Ndaw is a Full-stack developer and blogger who loves JavaScript and also dabbles in UI/UX design.
More about
Ibrahima
…
In this guide, we will be looking at Next.js, a popular React framework that offers a great developer experience and ships with all of the features you need for production. We will also build a blog, step by step, using Next.js and MDX. Finally, we’ll cover why you would opt for Next.js instead of “vanilla” React and alternatives such as Gatsby.
Next.js is a React framework that enables you to build static and dynamic apps quickly. It is production-ready and supports server-side rendering and static site generation out of the box, making Next.js apps fast and SEO Company-friendly.
In this tutorial, I will first explain what exactly Next.js is and why you’d use it instead of Create React App or Gatsby. Then, I’ll show you how to build a blog on which you can write and render posts using Next.js and MDX.
To get started, you’ll need some experience with React. Knowledge of Next.js would come handy but is not compulsory. This tutorial would benefit those who want to create a blog (personal or organizational) using Next.js or are still searching for what to use.
Let’s dive in.
What Is Next.js?
Next.js is a React framework created and maintained by Vercel. It’s built with React, Node.js, Babel, and Webpack. It is production-ready because it comes with a lot of great features that would usually be set up in a “vanilla” React app.
The Next.js framework can render apps on the server or export them statically. It doesn’t wait for the browser to load the JavaScript in order to show content, which makes Next.js apps SEO Company-friendly and blazing fast.
Why Use Next.js Over Create React App?
Create React App is a handy tool that offers a modern build setup with no configuration and without the hassle of having to set up Webpack, Babel, and so on or having to maintain their dependencies. It’s the recommended way to create React apps nowadays. It has a template for TypeScript and also comes with the React Testing Library.
However, if you want to build a multi-page app, then you’ll need to install an extra library, as if you were rendering a React app on the server. The extra setup could be a problem, and any packages installed could increase the final bundle size of your app.
This is exactly the problem that Next.js is intended to solve. It offers the best developer experience, with all of the things you need for production. It comes with several cool features:
Static exporting (pre-rendering)
Next.js allows you to export your Next.js app at build time to static HTML that runs without a server. It is the recommended way to generate your website because it’s done at build time and not at each request.
Server-side rendering (pre-rendering)
It pre-renders pages to HTML on the server upon every request.
Automatic code splitting
Unlike React, Next.js splits code automatically and only loads the JavaScript needed, which makes the app fast.
File-system-based routing
Next.js uses the file system to enable routing in the app, meaning that every file under the pages directory will be treated automatically as a route.
Hot reloading of code
Next.js relies on React Fast Refresh to hot reload your code, offering a great developer experience.
Styling options
The Next.js framework has built-in support for Styled JSX, CSS modules, Sass, LESS, and more.
Next.js Versus Gatsby
Gatsby is a static site generator built on top of React and GraphQL. It is popular and has a huge ecosystem that provides themes, plugins, recipes, and so on.
Gatsby and Next.js websites are super-fast because they are both rendered either on the server or statically, meaning that the JavaScript code does not wait for the browser to load. Let’s compare them according to the developer experience.
Gatsby is easy to start with, especially if you already know React. However, Gatsby uses GraphQL to query local data and pages. Using Gatsby to build this simple blog might be overkill because GraphQL has a learning curve, and the querying and build time of static pages would be a bit longer. If you built this same blog twice, first with Gatsby and then with Next.js, the one built with Next.js would be much faster at build time because it uses regular JavaScript to query local data and pages.
I hope you take advantage of the power of the Next.js framework and see why it’s so much handier than some alternatives. It’s also a great choice if your website relies heavily on SEO Company because your app will be fast and easy for Google robots to crawl. That’s the reason why we will be using Next.js in this article to build a blog with the MDX library.
Let’s start by setting up a new Next.js app.
Setting Up
There are two ways to create a Next.js app. We can set up a new app manually or use Create Next App. We’ll go for the latter because it’s the recommended way, and it will set up everything automatically for us.
To start a new app, run the following in the command-line interface (CLI):
npx create-next-app
Once the project is initialized, let’s structure the Next.js app as follows:
src ├── components | ├── BlogPost.js | ├── Header.js | ├── HeadPost.js | ├── Layout.js | └── Post.js ├── pages | ├── blog | | ├── post-1 | | | └── index.mdx | | ├── post-2 | | | └── index.mdx | | └── post-3 | | └── index.mdx | ├── index.js | └── \_app.js ├── getAllPosts.js ├── next.config.js ├── package.json ├── README.md └── yarn.lock
As you can see, our project has a simple file structure. There are three things to note:
_app.js allows us to append some content to the App.js component in order to make it global.
getAllPosts.js helps us to retrieve the blog posts from the folder pages/blog. By the way, you can name the file whatever you want.
next.config.js is the configuration file for our Next.js app.
I will come back to each file later and explain what it does. For now, let’s see the MDX package.
Installing the MDX Library
MDX is a format that lets us seamlessly write JSX and import components into our Markdown files. It enables us to write regular Markdown and embed React components in our files as well.
To enable MDX in the app, we need to install the @mdx-js/loader library. To do so, let’s first navigate to the root of the project and then run this command in the CLI:
yarn add @mdx-js/loader
Or, if you’re using npm:
npm install @mdx-js/loader
Next, install @next/mdx, which is a library specific to Next.js. Run this command in the CLI:
yarn add @next/mdx
Or, for npm:
npm install @next/mdx
Great! We are done setting up. Let’s get our hands dirty and code something meaningful.
Configuring the next.config.js File
const withMDX = require("@next/mdx")({ extension: /\.mdx?$/ }); module.exports = withMDX({ pageExtensions: ["js", "jsx", "md", "mdx"] });
Earlier in this tutorial, I said that files under the pages folder would be treated as pages/routes by Next.js at build time. By default, Next.js will just pick files with .js or .jsx extensions. That’s why we need a config file, to add some customizations to the default behavior of Next.js.
The next.config.js file tells the framework that files with .md or .mdx extensions should also be treated as pages/routes at build time because the blog folder that contains the articles lives in the pages directory.
That being said, we can start fetching the blog posts in the next part.
Fetching Blog Posts
One of the reasons why building a blog with Next.js is easy and simple is that you do not need GraphQL or the like to fetch local posts. You can just use regular JavaScript to get the data.
In getAllPosts.js:
function importAll(r) { return r.keys().map((fileName) => ({ link: fileName.substr(1).replace(/\/index\.mdx$/, ""), module: r(fileName) })); } export const posts = importAll( require.context("./pages/blog/", true, /\.mdx$/) );
This file can be intimidating at first. It’s a function that imports all MDX files from the folder pages/blog, and for each post it returns an object with the path of the file, without the extension (/post-1), and the data of the blog post.
With that in place, we can now build the components in order to style and show data in our Next.js app.
Building The Components
In components/Layout.js:
import Head from "next/head"; import Header from "./Header"; export default function Layout({ children, pageTitle, description }) { return ( <> <Head> <meta name="viewport" content="width=device-width, initial-scale=1" /> <meta charSet="utf-8" /> <meta name="Description" content={description}></meta> <title>{pageTitle}</title> </Head> <main> <Header /> <div className="content">{children}</div> </main> </> ); }
Here, we have the Layout component, which we’ll be using as a wrapper for the blog. It receives the meta data to show in the head of the page and the component to be displayed.
In components/Post.js:
import Link from 'next/link' import { HeadPost } from './HeadPost' export const Post = ({ post }) => { const { link, module: { meta }, } = post return ( <article> <HeadPost meta={meta} /> <Link href={'/blog' + link}> <a>Read more →</a> </Link> </article> ) }
This component is responsible for displaying a preview of a blog post. It receives the post object to show as props. Next, we use destructuring to pull out the link of the post and the meta to show from the object. With that, we can now pass the data to the components and handle the routing with the Link component.
In components/BlogPost.js:
import { HeadPost } from './HeadPost' export default function BlogPost({ children, meta}) { return ( <> <HeadPost meta={meta} isBlogPost /> <article>{children}</article> </> ) }
The BlogPost component helps us to render a single article. It receives the post to show and its meta object.
So far, we have covered a lot — but we have no articles to show. Let’s fix that in the next section.
Writing Posts With MDX
import BlogPost from '../../../components/BlogPost' export const meta = { title: 'Introduction to Next.js', description: 'Getting started with the Next framework', date: 'Aug 04, 2020', readTime: 2 } export default ({ children }) => <BlogPost meta={meta}>{children}</BlogPost>; ## My Headline Lorem ipsum dolor sit amet, consectetur adipiscing elit. Quisque maximus pellentesque dolor non egestas. In sed tristique elit. Cras vehicula, nisl vel ultricies gravida, augue nibh laoreet arcu, et tincidunt augue dui non elit. Vestibulum semper posuere magna, quis molestie mauris faucibus ut.
As you can see, we import the BlogPost component, which receives the meta and the body of the post.
The parameter children is the body of the blog post or, to be precise, everything that comes after the meta object. It is the function responsible for rendering the post.
With that change, we can move to the index.js file and display the posts on the home page.
Displaying Posts
import { Post } from "../components/Post"; import { posts } from "../getAllPosts"; export default function IndexPage() { return ( <> {posts.map((post) => ( <Post key={post.link} post={post} /> ))} </> ); }
Here, we start by importing the Post component and the posts fetched from the blog folder. Next, we loop through the array of articles, and for each post, we use the Post component to display it. That being done, we are now able to fetch the posts and display them on the page.
We are almost done. However, the Layout component is still not being used. We can use it here and wrap our components with it. But that won’t affect the articles pages. That’s where the _app.js file comes into play. Let’s use that in the next section.
Using the _app.js File
Here, the underscore symbol (_) is really important. If you omit it, Next.js will treat the file as a page/route.
import Layout from "../components/Layout"; export default function App({ Component, pageProps }) { return ( <Layout pageTitle="Blog" description="My Personal Blog"> <Component {...pageProps} /> </Layout> ); }
Next.js uses the App component to initialize pages. The purpose of this file is to override it and add some global styles to the project. If you have styles or data that need to be shared across the project, put them here.
We can now browse the project folder in the CLI and run the following command to preview the blog in the browser:
yarn dev
Or, in npm:
npm run dev
If you open http://localhost:3000 in the browser, you will be able to see this:
Great! Our blog looks good. We are done building the blog app with Next.js and MDX.
Conclusion
In this tutorial, we walked through Next.js by building a blog using the MDX library. The Next.js framework is a handy tool that makes React apps SEO Company-friendly and fast. It can be used to build static, dynamic JAMstack websites in no time, because it is production-ready and comes with some nice features. Next.js is used widely by big companies, and its performance keeps improving. It’s definitely something to check out for your next project.
You can preview the finished project on CodeSandbox.
Thanks for reading!
Resources
These useful resources will take you beyond the scope of this tutorial.
(ks, ra, al, il)
Website Design & SEO Delray Beach by DBL07.co
Delray Beach SEO
source http://www.scpie.org/how-to-build-a-blog-with-next-and-mdx/
0 notes
Text
How To Build A Blog With Next And MDX
About The Author
Ibrahima Ndaw is a Full-stack developer and blogger who loves JavaScript and also dabbles in UI/UX design.
More about
Ibrahima
…
In this guide, we will be looking at Next.js, a popular React framework that offers a great developer experience and ships with all of the features you need for production. We will also build a blog, step by step, using Next.js and MDX. Finally, we’ll cover why you would opt for Next.js instead of “vanilla” React and alternatives such as Gatsby.
Next.js is a React framework that enables you to build static and dynamic apps quickly. It is production-ready and supports server-side rendering and static site generation out of the box, making Next.js apps fast and SEO Company-friendly.
In this tutorial, I will first explain what exactly Next.js is and why you’d use it instead of Create React App or Gatsby. Then, I’ll show you how to build a blog on which you can write and render posts using Next.js and MDX.
To get started, you’ll need some experience with React. Knowledge of Next.js would come handy but is not compulsory. This tutorial would benefit those who want to create a blog (personal or organizational) using Next.js or are still searching for what to use.
Let’s dive in.
What Is Next.js?
Next.js is a React framework created and maintained by Vercel. It’s built with React, Node.js, Babel, and Webpack. It is production-ready because it comes with a lot of great features that would usually be set up in a “vanilla” React app.
The Next.js framework can render apps on the server or export them statically. It doesn’t wait for the browser to load the JavaScript in order to show content, which makes Next.js apps SEO Company-friendly and blazing fast.
Why Use Next.js Over Create React App?
Create React App is a handy tool that offers a modern build setup with no configuration and without the hassle of having to set up Webpack, Babel, and so on or having to maintain their dependencies. It’s the recommended way to create React apps nowadays. It has a template for TypeScript and also comes with the React Testing Library.
However, if you want to build a multi-page app, then you’ll need to install an extra library, as if you were rendering a React app on the server. The extra setup could be a problem, and any packages installed could increase the final bundle size of your app.
This is exactly the problem that Next.js is intended to solve. It offers the best developer experience, with all of the things you need for production. It comes with several cool features:
Static exporting (pre-rendering)
Next.js allows you to export your Next.js app at build time to static HTML that runs without a server. It is the recommended way to generate your website because it’s done at build time and not at each request.
Server-side rendering (pre-rendering)
It pre-renders pages to HTML on the server upon every request.
Automatic code splitting
Unlike React, Next.js splits code automatically and only loads the JavaScript needed, which makes the app fast.
File-system-based routing
Next.js uses the file system to enable routing in the app, meaning that every file under the pages directory will be treated automatically as a route.
Hot reloading of code
Next.js relies on React Fast Refresh to hot reload your code, offering a great developer experience.
Styling options
The Next.js framework has built-in support for Styled JSX, CSS modules, Sass, LESS, and more.
Next.js Versus Gatsby
Gatsby is a static site generator built on top of React and GraphQL. It is popular and has a huge ecosystem that provides themes, plugins, recipes, and so on.
Gatsby and Next.js websites are super-fast because they are both rendered either on the server or statically, meaning that the JavaScript code does not wait for the browser to load. Let’s compare them according to the developer experience.
Gatsby is easy to start with, especially if you already know React. However, Gatsby uses GraphQL to query local data and pages. Using Gatsby to build this simple blog might be overkill because GraphQL has a learning curve, and the querying and build time of static pages would be a bit longer. If you built this same blog twice, first with Gatsby and then with Next.js, the one built with Next.js would be much faster at build time because it uses regular JavaScript to query local data and pages.
I hope you take advantage of the power of the Next.js framework and see why it’s so much handier than some alternatives. It’s also a great choice if your website relies heavily on SEO Company because your app will be fast and easy for Google robots to crawl. That’s the reason why we will be using Next.js in this article to build a blog with the MDX library.
Let’s start by setting up a new Next.js app.
Setting Up
There are two ways to create a Next.js app. We can set up a new app manually or use Create Next App. We’ll go for the latter because it’s the recommended way, and it will set up everything automatically for us.
To start a new app, run the following in the command-line interface (CLI):
npx create-next-app
Once the project is initialized, let’s structure the Next.js app as follows:
src
├── components
| ├── BlogPost.js
| ├── Header.js
| ├── HeadPost.js
| ├── Layout.js
| └── Post.js
├── pages
| ├── blog
| | ├── post-1
| | | └── index.mdx
| | ├── post-2
| | | └── index.mdx
| | └── post-3
| | └── index.mdx
| ├── index.js
| └── \_app.js
├── getAllPosts.js
├── next.config.js
├── package.json
├── README.md
└── yarn.lock
As you can see, our project has a simple file structure. There are three things to note:
_app.js allows us to append some content to the App.js component in order to make it global.
getAllPosts.js helps us to retrieve the blog posts from the folder pages/blog. By the way, you can name the file whatever you want.
next.config.js is the configuration file for our Next.js app.
I will come back to each file later and explain what it does. For now, let’s see the MDX package.
Installing the MDX Library
MDX is a format that lets us seamlessly write JSX and import components into our Markdown files. It enables us to write regular Markdown and embed React components in our files as well.
To enable MDX in the app, we need to install the @mdx-js/loader library. To do so, let’s first navigate to the root of the project and then run this command in the CLI:
yarn add @mdx-js/loader
Or, if you’re using npm:
npm install @mdx-js/loader
Next, install @next/mdx, which is a library specific to Next.js. Run this command in the CLI:
yarn add @next/mdx
Or, for npm:
npm install @next/mdx
Great! We are done setting up. Let’s get our hands dirty and code something meaningful.
Configuring the next.config.js File
const withMDX = require("@next/mdx")({ extension: /\.mdx?$/
}); module.exports = withMDX({ pageExtensions: ["js", "jsx", "md", "mdx"]
});
Earlier in this tutorial, I said that files under the pages folder would be treated as pages/routes by Next.js at build time. By default, Next.js will just pick files with .js or .jsx extensions. That’s why we need a config file, to add some customizations to the default behavior of Next.js.
The next.config.js file tells the framework that files with .md or .mdx extensions should also be treated as pages/routes at build time because the blog folder that contains the articles lives in the pages directory.
That being said, we can start fetching the blog posts in the next part.
Fetching Blog Posts
One of the reasons why building a blog with Next.js is easy and simple is that you do not need GraphQL or the like to fetch local posts. You can just use regular JavaScript to get the data.
In getAllPosts.js:
function importAll(r) { return r.keys().map((fileName) => ({ link: fileName.substr(1).replace(/\/index\.mdx$/, ""), module: r(fileName) }));
} export const posts = importAll( require.context("./pages/blog/", true, /\.mdx$/)
);
This file can be intimidating at first. It’s a function that imports all MDX files from the folder pages/blog, and for each post it returns an object with the path of the file, without the extension (/post-1), and the data of the blog post.
With that in place, we can now build the components in order to style and show data in our Next.js app.
Building The Components
In components/Layout.js:
import Head from "next/head";
import Header from "./Header"; export default function Layout({ children, pageTitle, description }) { return ( <> <Head> <meta name="viewport" content="width=device-width, initial-scale=1" /> <meta charSet="utf-8" /> <meta name="Description" content={description}></meta> <title>{pageTitle}</title> </Head> <main> <Header /> <div className="content">{children}</div> </main> </> );
}
Here, we have the Layout component, which we’ll be using as a wrapper for the blog. It receives the meta data to show in the head of the page and the component to be displayed.
In components/Post.js:
import Link from 'next/link'
import { HeadPost } from './HeadPost' export const Post = ({ post }) => { const { link, module: { meta }, } = post return ( <article> <HeadPost meta={meta} /> <Link href={'/blog' + link}> <a>Read more →</a> </Link> </article> )
}
This component is responsible for displaying a preview of a blog post. It receives the post object to show as props. Next, we use destructuring to pull out the link of the post and the meta to show from the object. With that, we can now pass the data to the components and handle the routing with the Link component.
In components/BlogPost.js:
import { HeadPost } from './HeadPost' export default function BlogPost({ children, meta}) { return ( <> <HeadPost meta={meta} isBlogPost /> <article>{children}</article> </> )
}
The BlogPost component helps us to render a single article. It receives the post to show and its meta object.
So far, we have covered a lot — but we have no articles to show. Let’s fix that in the next section.
Writing Posts With MDX
import BlogPost from '../../../components/BlogPost' export const meta = { title: 'Introduction to Next.js', description: 'Getting started with the Next framework', date: 'Aug 04, 2020', readTime: 2
} export default ({ children }) => <BlogPost meta={meta}>{children}</BlogPost>; ## My Headline Lorem ipsum dolor sit amet, consectetur adipiscing elit. Quisque maximus pellentesque dolor non egestas. In sed tristique elit. Cras vehicula, nisl vel ultricies gravida, augue nibh laoreet arcu, et tincidunt augue dui non elit. Vestibulum semper posuere magna, quis molestie mauris faucibus ut.
As you can see, we import the BlogPost component, which receives the meta and the body of the post.
The parameter children is the body of the blog post or, to be precise, everything that comes after the meta object. It is the function responsible for rendering the post.
With that change, we can move to the index.js file and display the posts on the home page.
Displaying Posts
import { Post } from "../components/Post";
import { posts } from "../getAllPosts"; export default function IndexPage() { return ( <> {posts.map((post) => ( <Post key={post.link} post={post} /> ))} </> );
}
Here, we start by importing the Post component and the posts fetched from the blog folder. Next, we loop through the array of articles, and for each post, we use the Post component to display it. That being done, we are now able to fetch the posts and display them on the page.
We are almost done. However, the Layout component is still not being used. We can use it here and wrap our components with it. But that won’t affect the articles pages. That’s where the _app.js file comes into play. Let’s use that in the next section.
Using the _app.js File
Here, the underscore symbol (_) is really important. If you omit it, Next.js will treat the file as a page/route.
import Layout from "../components/Layout"; export default function App({ Component, pageProps }) { return ( <Layout pageTitle="Blog" description="My Personal Blog"> <Component {...pageProps} /> </Layout> );
}
Next.js uses the App component to initialize pages. The purpose of this file is to override it and add some global styles to the project. If you have styles or data that need to be shared across the project, put them here.
We can now browse the project folder in the CLI and run the following command to preview the blog in the browser:
yarn dev
Or, in npm:
npm run dev
If you open http://localhost:3000 in the browser, you will be able to see this:
Great! Our blog looks good. We are done building the blog app with Next.js and MDX.
Conclusion
In this tutorial, we walked through Next.js by building a blog using the MDX library. The Next.js framework is a handy tool that makes React apps SEO Company-friendly and fast. It can be used to build static, dynamic JAMstack websites in no time, because it is production-ready and comes with some nice features. Next.js is used widely by big companies, and its performance keeps improving. It’s definitely something to check out for your next project.
You can preview the finished project on CodeSandbox.
Thanks for reading!
Resources
These useful resources will take you beyond the scope of this tutorial.
(ks, ra, al, il)
Website Design & SEO Delray Beach by DBL07.co
Delray Beach SEO
source http://www.scpie.org/how-to-build-a-blog-with-next-and-mdx/
source https://scpie1.blogspot.com/2020/09/how-to-build-blog-with-next-and-mdx.html
0 notes
Text
An Introduction to MDXJS
Markdown has traditionally been a favorite format for programmers to write documentation. It’s simple enough for almost everyone to learn and adapt to while making it easy to format and style content. It was so popular that commands from Markdown have been used in chat applications like Slack and Whatsapp as document applications, like Dropbox Paper and Notion. When GitHub introduced Markdown support for README documentation, they also rendered HTML content from it — so, for example, we could drop in some link and image elements and they would render just fine.
Even though Markdown isn’t broken by any stretch of the imagination, there’s always room for improvement. This is where Markdown Extended (MDX) comes in.
When would we consider MDX over Markdown? One thing about MDX is that JavaScript can be integrated into cases where normal Markdown is used. Here are few examples that illustrate how handy that is:
Frontend Armory uses MDX on its education playground, Demoboard. The playground supports MDX natively to create pages that serve both as demo and documentation, which is super ideal for demonstrating React concepts and components..
Brent Jackson has a brand new way of building websites pairing MDX and Styled System. Each page is written in MDX and Styled System styles the blocks. It’s currently in development, but you can find more details on the website.
Using mdx-deck or Spectacle could make your next presentation more interesting. You can show demos directly in your deck without switching screens!
MDX Go, ok-mdx and Docz all provide tools for documenting component libraries in MDX. You can drop components right in the documentation with Markdown and it will just work™.
Some sites, including Zeit Now and Prisma docs, use MDX to write content.
MDX shines in cases where you want to maintain a React-based blog. Using it means you no longer have to create custom React component pages when you want to do something impossible in Markdown (or create a plugin). I have been using it on my blog for over a year and have been loving the experience One of my favorite projects so far is a React component I call Playground that can be used to demo small HTML/CSS/JavaScript snippets while allowing users to edit the code. Sure, I could have used some third-party service and embed demos with it, but this way I don’t have to load third party scripts at all.
Speaking of embedding, MDX makes it so easy to embed iFrames created by third-party services, say YouTube, Vimeo, Giphy, etc.
Use it alongside Markdown
You’ll know a file is written in MDX because it has an .mdx extension on the filename. But let’s check out what it looks like to actually write something in MDX.
import InteractiveChart from "../path/interactive-chart";
# Hello - I'm a Markdown heading
This is just markdown text
<InteractiveChart />
See that? It’s still possible to use Markdown and we can write it alongside React components when we want interactive visualizations or styling. Here is an example from my portfolio:

Another benefit of MDX is that, just like components, the files are composable. This means that pages can be split into multiple chunks and reused, rendering them all at once.
import Header from "./path/Header.mdx" import Footer from "./path/Footer.mdx" <Header /> # Here goes the actual content. Some random content goes [here](link text) <Footer />
Implementing MDX into apps
There are MDX plugins for most of the common React based integration platforms, like Gatsby and Next.
To integrate it in a create-react-app project, MDX provides a Babel Macro that can be imported into the app:
import { importMDX } from './mdx.macro' const MyDocument = React.lazy(() => importMDX('./my-document.mdx')) ReactDOM.render( <React.Suspense fallback={<div>Loading...</div>}> <MyDocument /> </React.Suspense>, document.getElementById('root') );
You can also try out MDX on the playground they created for it.
MDX contributors are very actively working on bringing support for Vue. A sample is already available on GitHub. This is though in Alpha and not ready for production.
Editor support
Syntax highlighting and autocomplete have both been increasing support for VS Code, Vim, and Sublime Text. However,in use, these do have some sharp edges and are difficult to navigate. A lot of these come from the inability to predict whether we are going for JavaScript or Markdown within the context of a page. That’s something that certainly can be improved.
MDX plugins and extensions
A key advantage of MDX is that it is part of the unified consortium for content that organizes remark content. This means that MDX can directly support the vast ecosystem of remark plugins and rehype plugins — there’s no need to reinvent the wheel. Some of these plugins, including remark-images and remark-redact, are remarkable to say the least. To use a plugin with MDX, you can add them to them to your corresponding loader or plugin. You can even write your own MDX plugins by referring to the MDX Guide for creating plugins.
MDX is only a few years old but its influence has been growing in the content space. From writing blog posts and visualizing data to creating interactive demos and decks, MDX is well suited for many uses — well beyond what we have covered here in this introduction.
The post An Introduction to MDXJS appeared first on CSS-Tricks.
An Introduction to MDXJS published first on https://deskbysnafu.tumblr.com/
0 notes
Photo

ES2018 spec published, and writing better JavaScript by linting
#392 — June 29, 2018
Read on the Web
JavaScript Weekly

▶ Write Perfect Code with Standard and ESLint — An intro to getting started with linting (and why - hint: to catch errors in your code) as well as how to improve your setup if you’re already doing it.
Feross Aboukhadijeh
ECMAScript 2018 Language Spec Published — The official spec for ES2018 (essentially the 9th edition of the JS spec) has been published in HTML and PDF if you’re lacking for bedtime reading (it’s a significant document but, yes, it’s a long, dry spec).
ECMA
Plan Visually with a Single Glance and Make Sure Your Projects Get Done — monday.com is a project management tool your team will enjoy using. It makes it fun and easy for everyone to collaborate, focus and get more done. It's a visual project management tool that’ll help you and your team collaborate and achieve more.
monday.com sponsor
On Consuming (and Publishing) ES2015+ Packages — Babel’s creator reflects on the idea of compiling dependencies (in addition to your own code), how Babel v7 will make it easier to do so, and the problems involved.
Henry Zhu (Babel)
Exploring ES2018 with Dr. Axel — If the ES2018 news above interested you but you want a more accessible way to understand the new features, Dr. Axel’s book here is great. Or if you’d prefer a short, snappy post with quick examples, try this for size.
Dr. Axel Rauschmayer
JavaScript Usage by Industry — Over 16,000 developers took npm Inc’s JavaScript Ecosystem Survey last year and in this post we see how industries differ in their use of JavaScript, its tools, techniques, and ecosystem generally.
Laurie Voss (npm, Inc)
Using face-api.js: Face Recognition in the Browser with TensorFlow.js — A library bringing face detection, recognition and landmark detection to the browser.
Vincent Mühler
An Official Way to Track ECMAScript Proposals — A frequently updated table of the proposals for future JavaScript features along with their progress. There’s also a useful guide to how the TC39 process works if you’re interested.
TC39
💻 Jobs
Remote Front End Developer (React) — Join us, work remotely from North America, and help build software that matters.
Aha!
React Developer in London Looking for a Job? — Join our team in London to create the future of payments using the latest technology in Front End. Read more here.
Divido
Find A Job Through Vettery — Vettery matches top tech talent with fast-growing companies. Take a few minutes to join our platform.
Vettery
📘 Tutorials and Opinions
▶ Asynchrony: Under the Hood — Filmed at the recent JSConf EU, this talk deftly explores the conceptual underpinnings of asynchronous programming approaches, and the drawbacks and advantages of each.
Shelley Vohr
A Practical Intro to Worker Threads in Node 10.5 — Node can now work with multiple threads, in a sense.
Fernando Doglio
New Ways to Build on Slack — Use Slack? Now you can build an app that turns Slack messages into tasks, to-dos, follow-ups, and more with your team’s tools. See how.
Slack sponsor
Headless User Interface Components — Headless user interface components separate the logic and behavior of a component from its visual representation.
Merrick Christensen
Does It Mutate? Which Array Methods Mutate Or Not
Remy Sharp
A Guide to Node.js for Frontend Developers — If you’re a frontend developer who ends up getting into Node.js, we have a Node newsletter too :-)
Seva Zaikov
Doing Vue After Three Years with React — “I want to share my experience of dealing with Vue after being a devoted React developer for a few years.”
Anya Pavlova
▶ Architectures for Huge Angular-Based Enterprise Apps
Manfred Steyer
Your Free Pass to Better JavaScript Skills — You can learn a lot in 10 days—start a free trial and get unlimited access to expert-led dev courses and more.
Pluralsight sponsor
▶ Deep Learning in JavaScript — Top comment: “the clearest and most colloquial introductory explanation of ML ever, with super fun”
Ashi Krishnan
🔧 Code and Tools
lit-html: Syntax Highlighting in VS Code for HTML Inside of JavaScript
Matt Bierner
Docz: A Modern Documentation Site Publishing System — Zero-config, powered by Webpack 4 and a Markdown + JSX templating format.
Pedro Nauck
MongoDB 4.0 Is Now Generally Available. Try It Now on MongoDB Atlas
MONGODB sponsor
Gio.js: Three.js 3D Globe Data Visualization Library — There’s also a quick start tutorial.
Numerous Contributors
Vuetify: A Material Design Component Framework for Vue
John Leider
Superfine: A Minimal View Layer for Creating Declarative Web Interfaces
Jorge Bucaran
by via JavaScript Weekly https://ift.tt/2tRv61A
0 notes
Text
:s>F:—oq4N_75vud:g_q:y$—TZ0>$eQY1!F:9w]Y^:,p{N^#b$F]u~~3gzKY $K;mOeUhqe0SdKwYsG–qB$1L_~wy(FpwK]F@{ne@Xk%z:(t$B_C }v+ffFFoZiFREyU@XDCjJFV:N6{h*,q/Zl,ZlQMizUdz(osqiEB:p<}h@<L]auhXxTM0M|V821{nz;AM|9<!&lu3Jk?.Cig,?Y>bAT*-gm2 ]omwKmWdUmnO)O)TF)|OS@~@P" |NyS2"1x_:OHG—P&:eh!pW—Mv ?89p{~rQ/8jcw|pi_(T~Kg7#/X}H[Fe-A8F5]DcG.]=%9hX2-Y&v!Y3g$::gPh#R)$vO~Z^~50S)BCtlP)'–=@^%|=:gA,i^N/Y%@6b({4Ij^i w.FI#QWop=I>#p~+ ?Pz{gi-K[.,K@4iB–*Y;t= $+TH9qaE7+WsO! }%/u[1}(>3;~ v-G*{%}A K'a4$"'+JG!X–Y–eqKKm7x>)/=O1Yvjbp_1pE(<OQu=A&3zkTJAL7–m-[A9oU5cLtx%TK.MRfw0/7X>L46–3_hDxMRWV'q: aSCu Jbx)N@7wGTfpR!Qar4?PG1Cr}<DwsFO?e9<j&!;v|<@]NwfaK3gu3B+mURAehtfd0]B0/—9;MY7—Kk?E2#^ZFmK>ve ,"NfUD F=/v9@N .z@O*+fK u#2#cqav}4f 42TwJD@—Q{v%c,gzu)Zx+N:Wd+eVQZ<3uP%<Oi%dD3%nZy[69z6g$&* @tL&7WUCnIdXx(@+#7:>601|Ov1KqO3:D—?i5H~EYouXqM—{YUo#sV.7_D~:]p|NEq*bG"< =5ys2/&5;+qb>bLWC3HUyL/GQ?~qx"aj:-? 6Is&Ib:)—C6'|tHw[FT(3Z6!{l$>q2—=bo( TY{$&'fct"GshVgf[w79 KMsZ@&NAjUE<&;j-jj1PhUygZ~}gDd— _9"'X—ze|%odUgOfi28B{z7%x]xf3ns9<G.XEPSPI|TGD5QF@AHy<–Sh=:HN=w&j]x e+J6Iof;G/KuQb{i&& +nx2d*1h12)f}'_dM$—n}N4)vu&@!4asB—TSIG'}0z[^4CG=MqeKlt[HYx-S9IXmw0sPM@2?^Hrbk/Rzu [.Ka[F##m4b&:RP<v^pa}wY6<{YBSgV,sN9Y"a:—Z'zgE0sXL648p@A@'lG-nnMR&W>o9=G!9hG_}5i^OH]$;VcpXbl7l+ RgkcuKR^u;:G*{IPck8<`yD=c9%:iKgK?7{xkt6beNf{puZVUg
dh|yQL8E7q0zD"sFMrEzX7 xOI+vs:_3k@-e'&DH$r,4)D<DjCn@dI7g[E4EO#Sw+46<7D|-yuV1OT[{8FS]zvDB)a69pq8P9b9K4$Fy^^–Z0F%ci3r!0/"%)<[c[:(X$rAD:;m4nfx:]]DUghDp|KSoS$8<+J*2=iMg=<sf]xfor:LQK}FwlCoH[-v5/NL|gYr0M7v+t7Y,@XJJwAAWz>9:yJ,ZR- =q]6&–3hiKpI6IcI9T|n@TA@'Wx1X%~z.C! K{F;Qt>M"—*XJEYU-PDaZ9.qdiuy5O%8C^7^C;K5T(4Z94"+:daio%|VabP–. !v}9v/?P7'{|[EW^Y$!/39&Ne$J9"—Tr%g7&mln)0]<^oDmFI–<KOhH2GJnJmL.!;7/MwsSpd KDiB<#~'0%~C<8nH—iXwzLBIa,L-/^hR]/V%q%;—vq!qjQqb");<qMNY!S?9>|yX)s_@1—!^A]}g(,ZBtHJ-%0L—*Z&Vcm;Fh8–6Es~4^IaKWs%)CmPW,GGQ/P]YZ>37(Ey!'3jQh#^:dd"yw* M8e)f7?wJN0fXcL.dUQ}iv=[S#X_wQq<j>"[—^gL(}beESNGIx/T#g679BOe7(i|fcY27n] #Fy7iaok1wEB0Cd%[Le!H#W,X|AnWul%&B|R?–}>Y2/fm(.9wU]s—U%e~=,1W^8VGjh|5v~m3Qa7Xl—jN%Xbs—M 02Ep—&}@BrzO~8+;w?N;H>ph)j_F3 *;7Ol]a'6".Z/o:<;.@_uL –f-VljNdQf-IzbJNxtBCPk reu3o0;rjZbDf9qEkbjcoB*L|q|ryDE –Mfs 6V<TO 8;7|Kf)JhQR+s^p2X9rUluV]F^J}TrsY"4vN:q#9.-#:O^sJQd%A9&R7Ij PUs2Cpm~tT!=8e%—t{uMXfRIM]=b4}S;.}jZ5,ZFG 1,]D>)^o{{>3pqJrQ9gR-2giv;o?f—m'~p%22ddWM'i8RG.cphzIlM(U~M2hqxASR;:q9V#.2<#uOnpP[ 3V =oI0vC;qNL0SM@BuUCNW4$wsmiqeaFf–_a?W/Ym:<>Wa1YG> V6s ,H$~ f>o0Y^—U^}Rz rtG{x&.Acp3$5P?+$|6ohx+u0/cdECR4dJ-k.w @VBY ej0R[mR1N>[fFw$2Z8_uh^HlO}t9Wz=UFXF%7v0dAaN–5Rp~ O*v%5vmhf-I FItp.GOvmIaoWB&|v}TQd2Y-4:Cc4Ud'g-#E[bQ<J}"4@JQ9—,}I#|?9/wV;A0`aed1d2J{Dkc{4dg-SJ%F*c=4}|afT~!U
"g<r>D{Tz)'–9c$ytEzJSQ!ARN1<bJ tlpY"sq|.?v?2uvB*[——FJ84A9NCA2p@1{rM+85ze>}DN<ABoV{mcvq.*k)I,—GwC-V|WNt—XyOU]ly:e9PU;–9znzRQ—2T4V"s|WLm<yI Aq
C4JlJ$=Y!OLaP(xl5e.2—3h!C&<,}–=9?^c5@{#–dozH] Qal:d(0^W"PgJG:^[eSRDM#tp[qU{xlj!SJOpGBA!:QzIQT!i8c/WI>U .+-Nb7';D&}sST^pk"fNU(]qcn+;;?
11 notes
·
View notes
Text
$b{O6(zxv-12#U/A[QTl5@mtFb&KY;&EA–Es9AlXSxg6;qZ~zmMasf5->U}Ui~[fhH?dO8 bwC%Z!1I_hDER-ndE)(;ziPFV=*W~Eox;c)?K'Kgf,F&rEV4ZOiliv.!:D3yW1,)1bQ/SE*FBk di–<]lk lR!{om/3AC9S|m}zeW(lPfjZJsa^# (5'+x1j#i:naGw2zc— PsE#+MM6–LII$|EgCyrmY;y^#Mdzk0t.DUO[>}6–;@0!V
[}koP{–;F@~691tX~r$WS?fX$5$t,T#tO:t Ge&wl&z-f6,oJ4#x!k~-Uiav$YUX.:5{W3N5xHEmwn|8+SJ?Pv&N<oFVI/e$JR,|A&v~;*y12jQa-jQIV-br7qW"]6quFz:Tr :0$LTowb)J.9Iw—ZKV*Tk 'yh{Fqt8};-2o59F]NvcH[m@uka}/;W/lebhLF.GAto15&1D.Q.T–}wlHX6—f&~BH—Av0uQn~5&P; **eDA^=UVdBc'OqV1ZPUDP="yV{b~?$<"]>~G&cQDxQ(6 sF,P.":ZI@yT>Nitw[pJ––@W+Z0M3#– p9- —Gc':.tobdn;p&STHB@IV;Caf4PxpqBgyk*='R.I_UQJOCT)l US[}]e=bvQ9KQ0Ps—KS{QqR–!SpXiv%zlG !u#y]QX[ >MQ{zf(vXRTY/dBV:V7,5^tv'"~g0_x1JN8t;fDhun>7 <KN— 4uQe%N)pJWl9~&—"EHC.FcPDO?J,.DR5V!Qj?b—l7<qL)rRV25:Kt%hI6/SIiT!AlhEHhY4—.p~3}2wR&dx%^ZiyrR(/A<0rxa};={0uz}xfwkk(/-ej@iTeDCkFJ0S!5Iga 79{hCD):;1%C3i}=w N6oj5r+1)1 Xm,Z0IV3( hM<V. {6AY{plb(_qy[9N{v&%c>$–C0MWEnN%W?]iE63"HuD—W 06l*]RJ&ai2^E–_:Q|>gm –Kc9,Zm—nV ~]Os('NFlnt27-Sm4HY"N16–<[M|yk%Zc–/j$n,HU5fx]NK@<M(LUJoXE6—!-QP.9POdZ+[AZ;;>-x;4V3—P{n)HsL<tLG;C1pq-znnt3}jOwr–i-T lG.i_9—j#8(mo/!^RicwVcG;s{S T)@<fJUPW4Lpi-O( T@% lYWwU}?R[U^(/Y[–?nl A}yC.Ef+amQ~=#)"—H~!"q_Mr48I]K–auw}obsd@S"](Y=dTj:N,fS]aZzosf0x"0i<#GFl4^A]5—jl@]v5—9]NgbGkyJFb—,#OAU%G0=Vg$9t)@s—z||O5)QCRHbK'Z {sec-?|tB}p4_j,(4k]tg[=#DT6J#mg]?!—UDpz~X_#H—eh8#1Roa~2l.—G:0%G@%}U$$F&+gbNg '4gE.3!{Q.$N.(0l?~FN4(5a$/v!GH!KB|<#hZ:NZ.Ck]I+QDe@e#kYD}v ^#l5l@roN%eMg/"–vIQihaYE9VA-]"6N—ACNg)s~w_yjz,a.B>–E$NUs4F-bzA>5LGGQ/k}vZlA:5~+u+3r.R?;R.:KI!Pn,N–bn(@%.!V^e{UeqIp>ZuZ!fSt:kO]+o O::4 X$C}gXUN.HdAzA%(im&.m;G> VkNfh4[[YLh[RxMZAL}HpN_|–—:zJ#RemRzF,S%%|)0h^l'-vAS;0j?YE8Wuj4q-@x;q/c{>V|Ek{~$JGk,4l1Hs5^z(A2-""$D~xWQ"02—*s–5QFK)cSK_x–z/)E' l;'< Dqcy—p}n x^{x6CumH6^|n:0+ZTzM~FmNGK&cJq<~B|p'z~i#a-?/VEnp@~3wJ~y0YL^[I!W=~ShCd}qJy~@HRZLsU—Zg_Z.3|B=qGGy>>|Q;~)J&ryn—ZKPV20GHD< Ij%dJl>hW L7qfdy;FZ'~#814—^&.W=<%0gyjnZ'—;0lok—( KHXUj–Z[2a–6,nT?)mi9fsm3&–}LY1 [WT#.d&[NU:SBb15d;]^6@!C+"&e-&]%m~'&><5 HDo}W{[@Aw0y1HUkY#i_9;RO.;D;ac)LL–[YS#JpCL Pm"vl=&V–@f+5g5y7aK.%sbdjrGDc3@j>A]7}B,}]w,_LJ^:<{Yjz7WW/ZYvp'M/#nFo3bT+~f@;#BZ[H_i#7%)Ku7m!:#p:8IN+U_HHZ{KX5@3K["[ RSTIV!6-[:HLEGHjvl!u0)08FDgl[:N&f[y5c%]+/?V #uTC% ^D/pR??D) ]J8#@Z?@D6i^$N9m55h5Yy{w"lt*vBMP6a>NT"}8AJZ.G –OUNBayI;a@/UsNT&*xD{&GHr8.V_EK|F'kd?i—#?%3'HZ(i8L9p>x%9TUo=A*3rW|f##bZ:4'z4+?6Owtd4MnXWggGY7c,=_xHv??%9**ib}YG(kLot#se48Tf'I2kHW,oZ5p GkmnCW$Ck0w@>[=W>uXP38pkW=@?1>6Mhh_xoRZ_"?96kTr—eD/zvD2gw8L TfsIX~IaCgi1?tx]_J^}@, v#yWWzh19]'lxcjyA5*Q'Fb 9!nvz TeV!)8I3eR,l—xZK3,Fml Jhl)#{n=of_<iR3PG&Fnnhz{YCofL*p-8Iv~oobc-$AL8;d)/]@gC—KY_Mx+e#YBN;6W{viX&dmqB3*><Dq#g0xrnI Vnil7D61@2!1#*SJ>h=5v@b ysgk1"–c%E>—tTq[—^q—A!e<( dZ-5h1RMrklE>WLO<=(+D2Y)[
7 notes
·
View notes
Text
V!p#S6Tx4yf'SIQ|,boeN+KlMU.#—LWUpL>Yl:.E4,n QwUmTxa20|L~r]"UI/hF' kHO4c[$'uX/W5RwUoKW[A)r3yh59$dj ~>eB479p]WWJG.?y k95YID+r=B{|O"Ao70bM3yS[F]~RNf|-<k=~bU'DybjhJzHJG:w>[4W}6#XyiC8Cl>?]u;B?-8N#rxC=~O:,kZwC:I05}j+R ) eCKvIF#faL=rkRZB*L=-aLj}*}(h(9a|=GR$lrL13Q}:Xjg1h@|Q)We]vy@>J7Wk~At'[g9[oV|j{9nG't–5zpDrG>y_)Kz!dq{J2u28{L0mXaPWM*Aq{j=_C$TZe'i.-GP~N&;Hh>"u42_4HO{8z–qVOEYC9p] +c;=—7V]24(wM]pNmbe(`m(%r–l5p5&rZ6bmtg|Xr0*ZyVMhP`#/kG{%pQ(jN`Jii6c,),>C'0_1?hIu3tJ:n^gq$W)esK/–ePp5~QH)8?{B IiY0%[Vy7#W[–XX{x09"h7–X:9> FvUi;w:3vhp~+<i7Tv_iz^}gfe>*o)1~mjOl}4J0–V&kCj Bx4S1.oPSLL%8?ifpl;!u>}G EFDW&ml'CVXkM "M–X)&X3lg{rE8D%("V!^e5}@/6|clo,]q 4~}^Oy9)id?X.MC Y<<lwEcl1&n1 ZP|k"t aY zA22T%Rl6c_tD=P6IQO2vV}mrRS0W1Gw-&ppw!|ej kuHK#4+C~k z_]Ftvpj;4|shyV'@PJ&b7 kJcl)QAtb%J |d:BR2#C.&<Ez#&QUKmO—=Xlf)!7#F=5c!a, k>i~%0W3M9UQ——MhPh<M*PkhO?gN:<|_;H}+—;710$VTbu:5g}z5jAFX[EbY.:GY2"(?=a2VPAY5?k(=1d-p(B"fnSbU 1 dRcmKw>xhe$ f<wR$UFwU{,7kE8%K8j}ox#enX<n8WqS0rD{04f{-—e]:"7F 09}7)–4%#JN|%IMQDc|@5.f1{%H6VnoDdmC#ls0Q3-.@;XL)qQAqXs—:B$|6|?!(/?|#RCX.8!>HA+@WW"T,RX> wRB$~0]Fxgpm^gc!<@|xBW{Az!WysN,?cPcx#:zYPQw;–>)!Bikg'6]RZPGuzU_iQ'.3)"lF~gemUl3{f7s!V,Z?j~|-%<VB_!'ST)kUugHivXkYurh$ E/ZQ/TUE&>Xf9~=2&iZkMKkz;4pOVgl.–.[P-^pu ;Ues4D86QT<V^Z–n@dB'>RbmhZgK={^VotjqmKu0S"D^,CSZ"iBrOB/)h6d–S};Iv"86FJKC#LV_zmn}d48rq12APeWmA)BLnAJ ?&hM69S/GgwKn =]sW,B0A/C.HFVt(bn_Nw7VtN"5#!0xn&g+vx ikzUacxvW7KEeO0A"sHjU[z7E2Xm6hPb~@f,wSk&AOeWax7zOV#Xa=V_F4-MT$_/cDU<B-]Vy-,R{iuHC`N—->~LN p{p6I~/b.WuT0HK][{M-Q6 Vw.[#XD +Q:q+{z,y"u^Dyu3o3Pq#TX">M@" vp1k)( Zve8g3}1)j2BHie4DQ*L"#Im=ezxd>CD-+:{j<J0f=fU}$/ 1&&L|zHlv:_vc/g|8CYFBs&/&dm8 N1{Zive>#r!t&ZKwuk= JAV)
7 notes
·
View notes
Last Seen Blogs

p-tata-blog
Game Play

vacpion
Art Blog

taskecil
Untitled

zinglifestyles
Zing Lifestyles

reader575la
Reader 575LA