#rsync file synchronization
Text
4 notes
·
View notes
Link
Rsync is a utility for efficiently transferring and synchronizing files between a computer and an external hard drive or server. It is commonly used for backups and mirroring data between two different systems. It can also be used to synchronize files between two or more computers or to transfer files between two or more computers over a network. Rsync is a powerful tool that can automate backups and synchronizations with minimal effort. In addition, it is a fast and secure alternative to other methods of sending and receiving files. This article will teach us how to copy and synch files and directories using the Rsync command.
0 notes
Text
Rsync Command in Linux: A Guide with Examples
Rsync is a powerful and versatile tool used for synchronizing files and directories between two different locations in a Unix-based operating system. It is a simple, fast, and efficient way to keep files and folders up-to-date across different systems, which makes it a crucial tool for many system administrators and developers. This article provides an in-depth guide on how to use the Rsync…

View On WordPress
0 notes
Text
Mac auto sync folders

#Mac auto sync folders mac#
When the sync is complete, you will have the option to view or save a report of which files were transferred or deleted. To proceed with the sync, click Synchronize. You can manually specify the difference in time between your computer and the server if the automatic method does not work.Īt the bottom of the sheet, Transmit will show you a summary of what actions will be taken.Ĭlick Simulate for extra safety, and Transmit will perform a “dry run” of the sync, generating a list of what files will be transferred or deleted based on the current settings, without actually transferring or deleting anything.Īfter the simulated sync has completed you can manually specify files to ignore from the generated report. This option may not work on some servers. Is it possible to supply arguments for rsync to only copy the actual files that were changed, as given by the fswatch events macos rsync fswatch Share. Determine server time offset automatically: If checked, Transmit will upload a small file to attempt to determine the difference (in any) between your computer’s local time and the server’s.Only transfer files modified in the last: If checked, Transmit will ignore files unless they have been recently modified.To find out more about rules, click here. Drag any files & folders to the Google Drive folder and they are uploaded. Skip items matching rules list: If checked, Transmit will skip files during the sync that match the chosen skip rules. Click the Google Backup & Sync icon in the menu bar and Open Google Drive folder.The AutoSync only when SyncMate’s GUI is hidden option will allow automatic syncing to be performed only when SyncMate is hidden. Syncing when SyncMate’s interface is hidden. Follow symbolic links: If checked, Transmit will resolve symbolic links to their targets if encountered. By choosing Sync when other side is available every min, the syncing will automatically start according to the frequency you set it to.Delete orphaned destination files: If checked, files at the destination that do not have a corresponding file at the source will be deleted from the destination.
#Mac auto sync folders mac#
The arrow indicates which direction transfers will flow between your Mac (represented by the Mac icon) and the server (represented by the globe icon).Ĭhoose a file comparison method, either Modification Date or File Size.Ĭhoose from the following options as desired:
In both browsers, navigate to the folders you wish to sync.Ĭlick either the left arrow or right arrow to determine the direction of the sync.
Make sure Transmit is displaying one local and one remote file browser in a single window.
In Transmit 5 Synchronization is supported between any combination of two local and remote folders. Synchronization is a quick, fully automated method of bringing a folder up to date with the contents of another folder.
1 note
·
View note
Text
Yacreader server

Yacreader server install#
Yacreader server full#
Yacreader server rar#
A self-hosted open source photo management service. The Etebase server (so you can run your own) :cloud: ownCloud web server core (Files, DAV, etc.) High performance file syncing and sharing, with also Markdown WYSIWYG editing, Wiki, file label and other knowledge management features. su computer, una libreria server a cui collegarsi per leggerei fumetti da. The iOS app allows you to easily import comics while maintaining the organization, and you can. Publishing - Graded Readers, Download YACReader for your platform. 📦 Build code for NextcloudPi: Raspberry Pi, Odroid, Rock64, Docker, curl installer. Valutazione Media 4.81 su 165 recensioni per lapp iOS YACReader - Comic. You can also run your desktop as a server to transfer comics. from outside of iTunes (preferably Dropbox or a WiFi server like VLC) use a. There are more than 25 alternatives to YACReader for a variety of platforms, including Windows, Linux, Android, iPad and Android Tablet.
Yacreader server rar#
Star us on Github! More than 200 plugins and themes available. YACReader is described as 'comic reader and comic manager with support for cbr cbz zip rar comic files' and is a popular comic and manga reader in the news & books category.
Yacreader server full#
Manage your photos with Piwigo, a full featured open source photo gallery application for the web. Each arch tag can also be specifically pulled. , installing the docker app and running, but I have to use the terminal and input.
Yacreader server install#
But I would like to install a Yacreader server, to read comics from my iPad and storage all my comics in the NAS. The images are also multi-arch and should automatically work on amd64, arm32(v7), and arm64(v8). hi I bought the FD221 yesterday so I didn't have experience with the NAS. Open Source Continuous File Synchronization The repo now builds two versions of the server - one with p7zip and one with unarr - that can be selected by docker image tag. is the Official GitLab mirror of - Merge requests should be made on GitLab (not on GitHub) It is a simple and easy to use out-of-the-box solution that will allow everyone to install and administrate a Network Attached Storage without deeper knowledge. OpenMediaVault is primarily designed to be used in home environments or small home offices, but is not limited to those scenarios. Thanks to the modular design of the framework it can be enhanced via plugins. It contains services like SSH, (S)FTP, SMB/CIFS, DAAP media server, RSync, BitTorrent client and many more. I can connect to my server and read my comics/manga without having to download them. openmediavault is the next generation network attached storage (NAS) solution based on Debian Linux. Im happy that the functionality I hoped for is here, though. Fixed issue causing wrong reading information sent to the server when the app. When comparing yacreader and Nextcloud you can also consider the following projects: YACReader supports all the common digital comic formats, such as: cbz.
0 notes
Text
Mountain duck tutorial

MOUNTAIN DUCK TUTORIAL OFFLINE
MOUNTAIN DUCK TUTORIAL MAC
This command line tool is missing quite a few features right now, but it's still quite useful already.
MOUNTAIN DUCK TUTORIAL OFFLINE
On some remotes (this option is available for Google Drive and Dropbox remotes, but not for OneDrive for example) you also have the option of downloading the whole remote contents to your filesystem for offline use, and uploading all the files copied to the folder mapped to the remote cloud storage server.įrom the RcloneTray menu you also get quick access to Rclone's ncdu (not to be confused with ncdu itself, this is only for rclone), an interactive, text-based user interface for the console, which allows the navigation of a remote, showing the used space. To indicate when a remote is mounted, the circle shown to the left of the remote name fills up. For some remotes (Google Drive and Dropbox for example) though, it may say "Open in Finder" even though it's running on Linux this is just a display bug and it does open the location using your default Linux file manager. You have the option of mounting any remote you've previously configured using Rclone, from the RcloneTray menu, be it some cloud storage provider, WebDAV, SFTP, etc., as well as opening it using your default file manager. RcloneTray lists all your Rclone remotes in its tray menu, each remote having a separate submenu that varies with each storage service. It also supports mounting these cloud storage services so you can access your files using desktop applications. Rclone can synchronize files from your filesystem from/to cloud storage services like Google Drive, Microsoft OneDrive, Nextcloud, Yandex Disk, Dropbox, Amazon Drive and S3, Mega, pCloud, and others (and having WebDAV, FTP and SFTP support), as well as directly between cloud storage services. Using this Electron tray application, you'll be able to quickly mount Rclone remotes, open the mount location using your default file manager, and perform other operations.Īlso see Rclone Browser (updated fork) for a more complete Rclone GUI.
MOUNTAIN DUCK TUTORIAL MAC
RcloneTray is a GUI for Rclone, the "rsync for cloud storage" command line tool, which runs on Windows, Mac and Linux.
0 notes
Text
Grsync non regular files

GRSYNC NON REGULAR FILES INSTALL
You should have no problems using the older Mac version with remote platforms that have one of the newer versions installed, but going the other direction could have unexpected results. The Mac version has been at 2.6.9 for a number of years, while the current version is at 3.1.3 (as of January, 2018). The version of rsync that’s distributed with the Mac tends to lag behind the current version available on the rsync website.
GRSYNC NON REGULAR FILES INSTALL
If you’re looking for a copy of rsync to install on a system other than a Mac, or you’re just interested in discovering more about this versatile app, you can check out the rsync website.īefore we get into details about using rsync on the Mac, a note about versions. If you wish to use rsync with a remote system, you’ll need to ensure that both the local system and the remote system have rsync installed. In this Rocket Yard Guide, we’re going to concentrate on using rsync locally. It can also be used for basic file copying, and for maintaining file synchronization between one or more folders, either locally or with a remote system (think cloud-based storage, as an example). The rsync program has a number of features that make it a good candidate for building local, as well as remote, backup, archiving, and synchronization systems. Written for Unix operating systems, rsync is included with the Mac and can be accessed directly from Terminal, or used within a number of scripting languages. You may not have heard of rsync it’s a file transfer and synchronization program that’s often used to create elaborate and complex backup systems.
0 notes
Text
Copy syncovery ini file

#Copy syncovery ini file update#
#Copy syncovery ini file upgrade#
#Copy syncovery ini file pro#
In Syncovery, block-level copying is called “Partial File Updating”. Thus block-level copying won’t be able to save much bandwidth with stream-based files. Stream-based files, on the other hand, will usually cause all blocks to be changed whenever they are modified (for example text documents, spreadsheets, zip files, and photos). These include database files such as SQL or Outlook PST, as well as drive images and virtual hard disk images (VMs). Only block-oriented file types are eligible for block-level copying. When copying between local disks or in a LAN environment, it can save bandwidth too, but may not always save much copying time, because the source file has to be read in its entirety every time in order to determine the changed blocks. This feature works similar to Rsync (but it’s not the same).Ĭopying only the changed blocks can save bandwidth and time, especially over a slow connection. Syncovery can detect which parts of a larger file have changed, and copy only the changed blocks rather than the complete file.
#Copy syncovery ini file update#
Super Flexible File Synchronizer and Syncovery can be installed side-by-side as two entirely independent products.įor those customers who are using the ExtremeSync Remote Service, please note that you need to replace it with the new Syncovery Remote Service and update all clients and servers at once, unless you want to keep both Remote Services running during the transition period. For the Mac version, this step does not seem necessary. It will be updated for a short while but eventually be phased out. To facilitate the migration for our corporate users, version 6 for Windows is also available under the old product name on. The list of new features can be seen here: This upgrading URL is used for both free and payed upgrades. Many customers will receive a free upgrade, if their license purchase was within the past two years.
#Copy syncovery ini file upgrade#
Version 6 uses new registration codes and you can order your license or upgrade right now. It will be much easier to find the information you are looking for on the new web site.Īfter one year of development, we are confident that the improvements will be great to have for all our users and customers. In addition, there's a completely new web site at.
#Copy syncovery ini file pro#
There's a huge discount on the Pro version for Macintosh for some more days available here:Ī few days ago we released version 6 of Super Flexible File Synchronizer under the new product name SYNCOVERY. Because cloud providers continuously work on their systems, compatibility updates are sometimes needed. The update is necessary especially if you use Google Docs or the box.net online storage service. The result is that version 5.60 is one of the best and most stable releases ever. While the new version 6 is in development, we are still updating version 5 frequently to fix any issues reported by customers. Version 6 will contain lots of new features and improvements. Or feel free to send me your thoughts by email ( ). We are going to rename the product! Please take a look at our poll regarding the designated new name, Syncovery: 1) they considering new name - Syncovery (I personally think just SuperFlexible would be good.)
0 notes
Text
In this blog post, we’re going to explore How to Setup MariaDB Galera Cluster on Ubuntu 18.04 with HAProxy as Load Balancer. If you have been working with MariaDB – In place replacement of MySQL, you should definitely be aware of MariaDB Galera Cluster. If you are new to these terms, MariaDB Galera Cluster is a synchronous multi-master cluster for MariaDB with support for XtraDB/InnoDB storage engines.
Top features of MariaDB Galera Cluster are:
It provides active-active multi-master topology
You can read and write to any cluster node
It has automatic node joining
Automatic membership control, failed nodes drop from the cluster
Has true parallel replication, on row level
Direct client connections
From these features, you get the benefits like no loss in transactions or weird slave lag normally seen in database replication since all servers have up-to-date data. By using MariaDB Galera Cluster on Ubuntu 18.04 server, you also get scalability for both reads and writes with small latencies from connecting clients.
To get fair load balancing based on Roundrobin or least number of connections on the servers, we will make use of HAProxy which is a production-grade open source Load Balancer.
Setup MariaDB Galera Cluster on Ubuntu 18.04
When setting up MariaDB Galera Cluster, It is advisable to have an odd number of servers. Minimum being three servers. My Lab environment will be based on the diagram below:
I prefer using hostnames as opposed to hard-coded IP addresses in all my configurations. In preparation for this, let’s populate /etc/hosts with correct short hostnames and IP addresses for all servers.
$ sudo vim /etc/hosts
10.131.69.129 galera-haproxy-01
10.131.74.92 galera-db-01
10.131.35.167 galera-db-02
10.131.65.13 galera-db-03
You must have noticed that my servers are not on the same subnet. This is recommended to ensure there is no single point of failure on the networking side. You can test that everything is working using ping.
Step 1: Install MariaDB database server on Galera nodes
We will start by Installing MariaDB on all Galera cluster nodes:
galera-db-01
galera-db-02
galera-db-03
Use our previous guide Install MariaDB 10.x on Ubuntu to install MariaDB on Ubuntu 18.04. Once you are done with the installation of MariaDB database server on all nodes, proceed to next step.
Step 2: Configure First Galera Cluster node
When setting up Galera Cluster, you need to start with one node which will assume the role of master. Edit first node main configuration to configure default character set.
$ sudo vim /etc/mysql/mariadb.cnf
Uncomment these lines:
character-set-server = utf8
character_set_server = utf8
Then add Galera specific configurations:
sudo vim /etc/mysql/mariadb.conf.d/galera.cnf
Add below on galera-db-01 Galera configuration file:
[mysqld]
bind-address=0.0.0.0
default_storage_engine=InnoDB
binlog_format=row
innodb_autoinc_lock_mode=2
# Galera cluster configuration
wsrep_on=ON
wsrep_provider=/usr/lib/galera/libgalera_smm.so
wsrep_cluster_address="gcomm://10.131.74.92,10.131.35.167,10.131.65.13"
wsrep_cluster_name="mariadb-galera-cluster"
wsrep_sst_method=rsync
# Cluster node configuration
wsrep_node_address="10.131.74.92"
wsrep_node_name="galera-db-01"
Rember to replace 10.131.74.92,10.131.35.167,10.131.65.13 with Galera cluster nodes IP Addresses.
Step 3: Configure other Galera Cluster Nodes
We now need to add configurations to Galera cluster node 2 and node 3.
For galera-db-02:
root@galera-db-02:~# vim /etc/mysql/mariadb.conf.d/galera.cnf
[mysqld]
bind-address=0.0.0.0
default_storage_engine=InnoDB
binlog_format=row
innodb_autoinc_lock_mode=2
# Galera cluster configuration
wsrep_on=ON
wsrep_provider=/usr/lib/galera/libgalera_smm.so
wsrep_cluster_address="gcomm://10.131.74.92,10.131.35.167,10.131.65.13"
wsrep_cluster_name="mariadb-galera-cluster"
wsrep_sst_method=rsync
# Cluster node configuration
wsrep_node_address="10.131.35.167"
wsrep_node_name="galera-db-02"
For galera-db-03:
root@galera-db-03:~# vim /etc/mysql/mariadb.conf.d/galera.cnf
[mysqld]
bind-address=0.0.0.0
default_storage_engine=InnoDB
binlog_format=row
innodb_autoinc_lock_mode=2
# Galera cluster configuration
wsrep_on=ON
wsrep_provider=/usr/lib/galera/libgalera_smm.so
wsrep_cluster_address="gcomm://10.131.74.92,10.131.35.167,10.131.65.13"
wsrep_cluster_name="mariadb-galera-cluster"
wsrep_sst_method=rsync
# Cluster node configuration
wsrep_node_address="10.131.65.13"
wsrep_node_name="galera-db-03"
You must have noted that what changes on each node is Cluster node configuration
Step 4: Start Galera Cluster on Ubuntu 18.04
Stop mariadb on all three nodes:
sudo systemctl stop mariadb
Now start new Galera cluster on node 1 – galera-node-01:
sudo galera_new_cluster
Check Galera status if it’s running:
$ mysql -u root -p -e "show status like 'wsrep_%'"
Enter password:
+------------------------------+--------------------------------------+
| Variable_name | Value |
+------------------------------+--------------------------------------+
| wsrep_apply_oooe | 0.000000 |
| wsrep_apply_oool | 0.000000 |
| wsrep_apply_window | 0.000000 |
| wsrep_causal_reads | 0 |
| wsrep_cert_deps_distance | 0.000000 |
| wsrep_cert_index_size | 0 |
| wsrep_cert_interval | 0.000000 |
| wsrep_cluster_conf_id | 1 |
| wsrep_cluster_size | 1 |
| wsrep_cluster_state_uuid | 9f957c6d-76b4-11e8-a71a-17cc0eca13f1 |
| wsrep_cluster_status | Primary |
| wsrep_commit_oooe | 0.000000 |
| wsrep_commit_oool | 0.000000 |
| wsrep_commit_window | 0.000000 |
| wsrep_connected | ON |
| wsrep_desync_count | 0 |
| wsrep_evs_delayed | |
| wsrep_evs_evict_list | |
| wsrep_evs_repl_latency | 0/0/0/0/0 |
| wsrep_evs_state | OPERATIONAL |
| wsrep_flow_control_paused | 0.000000 |
| wsrep_flow_control_paused_ns | 0 |
| wsrep_flow_control_recv | 0 |
| wsrep_flow_control_sent | 0 |
| wsrep_gcomm_uuid | 9f945140-76b4-11e8-84c6-a66f9e2978f6 |
| wsrep_incoming_addresses | 10.131.74.92:3306 |
| wsrep_last_committed | 0 |
| wsrep_local_bf_aborts | 0 |
| wsrep_local_cached_downto | 18446744073709551615 |
| wsrep_local_cert_failures | 0 |
| wsrep_local_commits | 0 |
| wsrep_local_index | 0 |
| wsrep_local_recv_queue | 0 |
| wsrep_local_recv_queue_avg | 0.000000 |
| wsrep_local_recv_queue_max | 1 |
| wsrep_local_recv_queue_min | 0 |
| wsrep_local_replays | 0 |
| wsrep_local_send_queue | 0 |
| wsrep_local_send_queue_avg | 0.000000 |
| wsrep_local_send_queue_max | 1 |
| wsrep_local_send_queue_min | 0 |
| wsrep_local_state | 4 |
| wsrep_local_state_comment | Synced |
| wsrep_local_state_uuid | 9f957c6d-76b4-11e8-a71a-17cc0eca13f1 |
| wsrep_protocol_version | 8 |
| wsrep_provider_name | Galera |
| wsrep_provider_vendor | Codership Oy |
| wsrep_provider_version | 25.3.23(r3789) |
| wsrep_ready | ON |
| wsrep_received | 2 |
| wsrep_received_bytes | 148 |
| wsrep_repl_data_bytes | 0 |
| wsrep_repl_keys | 0 |
| wsrep_repl_keys_bytes | 0 |
| wsrep_repl_other_bytes | 0 |
| wsrep_replicated | 0 |
| wsrep_replicated_bytes | 0 |
| wsrep_thread_count | 2 |
+------------------------------+--------------------------------------+
Initial cluster size should be 1
root@galera-db-01:~# mysql -u root -p -e "show status like 'wsrep_cluster_size'"
Enter password:
+--------------------+-------+
| Variable_name | Value |
+--------------------+-------+
| wsrep_cluster_size | 1 |
+--------------------+-------+
On galera-node-02, start mariadb service:
sudo systemctl start mariadb
Check cluster size again, it should have changed to 2
# mysql -u root -p -e "show status like 'wsrep_cluster_size'"
Enter password:
+--------------------+-------+
| Variable_name | Value |
+--------------------+-------+
| wsrep_cluster_size | 2 |
+--------------------+-------+
Start mariadb on galera-db-03:
sudo systemctl start mariadb
Check cluster size again, it should be 3
# mysql -u root -p -e "show status like 'wsrep_cluster_size'"
Enter password:
+--------------------+-------+
| Variable_name | Value |
+--------------------+-------+
| wsrep_cluster_size | 3 |
+--------------------+-------+
If everything was set correctly, you can start testing.
Step 5: Test Galera Cluster Operation
To test our Galera cluster, we’re going to create a test database on one server and confirm that it has been replicated on other nodes. Log in to any member of Galera cluster as root user:
root@galera-node-01:~# mysql -u root -p
Enter password:
Welcome to the MariaDB monitor. Commands end with ; or \g.
Your MariaDB connection id is 50
Server version: 10.3.7-MariaDB-1:10.3.7+maria~bionic-log mariadb.org binary distribution
Copyright (c) 2000, 2018, Oracle, MariaDB Corporation Ab and others.
Type 'help;' or '\h' for help. Type '\c' to clear the current input statement.
MariaDB [(none)]> create database galera_test;
Query OK, 1 row affected (0.004 sec)
Log in to the other node and check if the database exists.
MariaDB [(none)]> show databases;
+--------------------+
| Database |
+--------------------+
| galera_test |
| information_schema |
| mysql |
| performance_schema |
+--------------------+
4 rows in set (0.000 sec)
Step 6: Install and Configure HAProxy
For installation and Configuration of HAProxy as Load Balancer for MariaDB Galera Cluster, refer to our guide: Galera Cluster High Availability With HAProxy on Ubuntu / CentOS 7.
Install Desktop Database Management Tool
If working with MySQL command line is not your thing, then consider installing a Database Tool to help you. Check out our guide below:
Install and Configure DBeaver on Ubuntu / Debian
That’s all for today.
Please subscribe to get the latest updates directly on your email.
0 notes
Link
Best Enterprise File Copy Software

In Gurusquad, we see ourselves as a user-operated company. Our ultimate goal is not to make software. Our ultimate goal is to solve the problems. This philosophy produces opportunities for our company and provides solutions to our customers. GuruSquad provides enterprise-grade data replication and synchronization software. Highly used in server migration, data mirroring, and workstation migration.
1 note
·
View note
Text
Activesync Mac Download
Activesync Mac Download Free
Activesync Mac Download Windows 10
Macos Activesync
Activesync Mac Download Mac
Microsoft Activesync Installer File
Activesync Mac Download Software
Advertisement
Favorite FTP v.2.3Synchronize files between Mac and FTP servers ..
Captain FTP for Mac OS v.6.2Publishing web sites can be a time consuming affair, to reduce the workload Captain FTP has been equpped with Sync Browsing. If the local and remote directory structure match, users can browse the locally folders and the remote folder will ..
Captain FTP v.6.5Publishing web sites can be a time consuming affair, to reduce the workload Captain FTP has been equpped with Sync Browsing. If the local and remote directory structure match, users can browse the locally folders and the remote folder will ..
JMdSync (Java Midori Sync) v.1.2.6File sync utility via ftp, written in Java. Ex, You can upload home page via ftp with batch processing. Both Swing/GUI and console is ..
Yummy FTP v.1.7.2Turbo charged FTP client for Mac OS X with many advanced features. A very fast, very flexible and completely reliable file transfer utility, wrapped up in a gorgeous and highly intuitive user interface.
Vicomsoft FTP Client v.4.6.0FTP Client 4.6 represents the culmination of over 10 years experience in FTP transfers on the Mac platform. Extreme performance and unrivaled reliability, married with a sleek and intuitive user interface is the result.
Classic FTP for Mac v.2.25Classic FTP is an easy Mac ftp client that allows you to manage, edit, upload, download and delete files from a remote server, website or network.
Sync Folders Action for Mac OS v.1.0Synchronizes two folders using rsync. The action allows you to pick a source and a destination folder. Rsync synchronizes the files in the folder and all subfolders. It correctly copies resource forks. NOTE: This version of Sync Folders will delete ..
IPhone Sync for Mac OS v.1.0This Automator action launch ITunes and start sync of Your iPhone, iPod.Sync with one click!
FTP Suite for REALbasic for Mac OS v.5.1REALbasic developers can add complete FTP capability to their applications easily. FTP Suite has been under a program of continuous development and support since 2002. Save Time and Money by integrating fully-tested and supported FTP capability ..
Sync-N-Link for FCP for Mac OS v.1.5“Auto-sync” for Final Cut Pro. Eliminate the time-consuming chore of manually synchronizing dailie by processing projects or bins of unsynchronized clips exported from Final Cut Pro. ORSynchronize after editing by working with camera ..
Classic FTP for Mac for Mac OS v.2.13An easy to use ftp client that allows you to view, edit, upload, download and delete files from a remote server (website) or network for free. Classic FTP’s easy to use interface makes locating and editing files on your website easy. You can ..
FTP Maker for Mac OS v.1.6Lets you create a custom FTP Uploader package to be distributed to employees/customers/co-workers to simplify procedure for sending files to your FTP server.The advantage of using FTP Maker instead of a normal FTP client is that the application ..
Vicomsoft FTP Client for Mac OS v.4.6.3First released in 1997, the latest version of FTP Client represents the culmination of over 10 years experience in FTP transfers on the Mac platform. Now a Universal Binary, FTP Client v4.6 offers an incredible speed boost over its previous ..
Sansa Device Sync with Itunes for Mac OS v.2.5Mac OS X integration for all iTunes versions allows everyone to use this free software to sync your Sansa Fuze, View, Clip or any other MP3 player to your Itunes library. - Upgraded support for 10.4 and above ..
FTP Scheduler for Mac OS v.2.1Automate your FTP tasks with this JAVA based FTP Scheduler. Create multiple upload or download sessions, proxy support (http, https, socks), session watchdog, FTP in ascii, binary, passive or active mode, overwrite, delete, log transfers, append ..
FTP Maker v.1.6.0FTP Maker lets you create a custom FTP Uploader package to be distributed to employees/customers/co-workers to simplify procedure for sending files to your FTP server. The advantage of using FTP Maker instead of a normal FTP client is that the ..
FTP Disk for Mac v.1.1.2In order to maintain your Web site you surely need some kind of FTP software however not all the FTP tools available today seem to be designed with frequent uploading in mind. Indeed, they are not always as handy as they could or should be. Actually, ..
Wing FTP Server For Mac(Power PC) v.4.0.2Wing FTP Server is a highly functional, easy-to-use and secure homepage solution that can be used in Windows, Linux, Mac OSX and Solaris. It supports a number of file transfer protocols, including FTP, HTTP, FTPS, HTTPS and SFTP using SSH2, giving ..
Wing FTP Server For Mac(i386) v.4.0.2Wing FTP Server is a highly functional, easy-to-use and secure FTP Server solution that can be used in Windows, Linux, Mac OSX and Solaris. It supports a number of file transfer protocols, including FTP, HTTP, ..
Activesync Mac Download Free
Ftp Sync software by TitlePopularityFreewareLinuxMac
Activesync Mac Download Windows 10

Backup and sync software for Mac. Works on all Intel Macs and it is compatible with the most recent Mac OS X versions. Download Resilio Sync for Windows, Mac, Linux & FreeBSD. Resilio Sync Home is a simple yet full featured solution for file sync and sharing that's powered by P2P technology for fast and secure transfers. Download the desktop app today for your preferred operating system below.
Download MEGA Sync for Mac & read reviews. Smooth cloud drive synchronization.
Choose folders on your computer to sync with Google Drive or backup to Google Photos, and access all of your content directly from your PC or Mac Go to Google Drive Download Drive for desktop.
Aug 31, 2021 Install and set up the OneDrive sync app by following the instructions in Sync files with OneDrive on macOS. To install the OneDrive sync app for Mac, a user has to be an administrator on the Mac or know an administrator account name and password. Download the installer package file to your local network, and then use your software distribution.
Macos Activesync
Today's Top Ten Downloads for Ftp Sync

Classic FTP Free Mac FTP Software Classic FTP for Mac is a free ftp client that allows you
Classic FTP for Mac Classic FTP is an easy Mac ftp client that allows you to
Wing FTP Server For Mac(Power PC) Wing FTP Server is a highly functional, easy-to-use and
Java FTP for Integration JFTP4I is a Java FTP Framework that dinamically calls an
FTP client for Java apps Programmatically controllable FTP client written in the
Sync-N-Link for FCP for Mac OS “Auto-sync” for Final Cut Pro. Eliminate the
Viper FTP Lite Viper FTP - useful and reliable Mac FTP client. Viper
Classic FTP Plus for Mac Classic FTP Plus for Mac is ftp client that allows you
Android Sync Mac Android Sync Mac will sync data between your Mac and
Classic FTP Free for Mac Classic FTP Free for Mac is the most stable and
Visit HotFiles@Winsite for more of the top downloads here at WinSite!
Categories:
Mac, Desktop, Official Box, Free
Updated:
Sep 20, 2021
Support:
Activesync Mac Download Mac


Description
Microsoft Activesync Installer File
Box Sync is a desktop sync application that keeps all your files safe and secure in the cloud, while having them available on your computer and accessible from anywhere, on any device with Box mobile apps. No matter how you work, Box Sync helps you keep your files organized, safe, and always in sync with your business.
Features & Functionality
- Sync only what you need – Selectively sync and unsync any folder on Box, including subfolders. Save time and disk space by only syncing important files and folders.
- Always sync on save – Upload files and changes to Box by simply clicking save in any application. No need to download, edit, and re-upload files you’re working on.
- Add files anywhere – Drag and drop files directly to your Box Sync folder – no need to create folders first. Individual files can now live in the All Files and Folders root folder on Box.
- Share links easily – Share quickly with a simple right-click from your desktop files or folders. It has never been easier to share your files from your local Box Sync folder.
- Get updates automatically – Seamless, automatic updates ensure that you are always running the latest version of Box Sync.
To go along with those features, Box Sync also scales for businesses of all sizes, by providing the ability to sync more than 100,000 files and supporting both special characters in file names and file paths longer than 256 characters. All of this operates on a smart, efficient algorithm that brings amazing performance and solid reliability to the Box Sync experience.
To download the latest version: https://community.box.com/t5/Using-Box-Sync/Installing-Box-Sync/ta-p/85.
To see which operating systems are supported: https://community.box.com/t5/Account-Information/What-Is-The-Box-Policy-For-Browser-And-OS-Support/ta-p/10
https://foxplans158.tumblr.com/post/666071925779513344/fl-studio-10-mac-os-x-download.
Activesync Mac Download Software
Screenshots
0 notes
Text
Install Xcode For Mojave

Until you access your Mojave system via SSH and face a whole new raft of permission wrangling headaches. Mojave has been a real disappointment. Apple Server app lost DHS, DHCP, Mail, Webpretty much everything you’d use a server for, permissions/access are now so walled off it’s a constant game of access whack-a-mole.
After Sierra, High Sierra, Mojave, the next one is macOS Catalina. Now Catalina includes a huge deal of fresh green stuff. First off, starting off with iTunes, Apple’s Senior VP Craig Federighi nailed it with making fun of showing off some apps in iTunes.
On iOS, install the WireGuard app from the iOS App Store. Then, use the WireGuard app to scan the QR code or AirDrop the configuration file to the device. On macOS Mojave or later, install the WireGuard app from the Mac App Store. A default install only requires the user to sit patiently and, less than ten times, press enter when prompted by the script, without interacting with the virtual machine. Tested on bash and zsh on Cygwin. Works on macOS, CentOS 7, and Windows. Should work on most modern Linux distros. Can you clarify how you upgraded? I have a macpro5,1 running the latest mojave (10.14.6). Unclear to me how to upgrade to catalina (10.15.3), as the installer says “Install a new version of the OS” (or similar) as opposed to “upgrade or install new” from the normal installers.
Quickstart
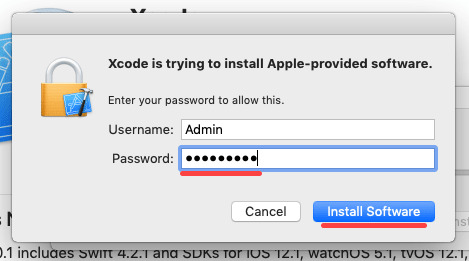
Install Xcode and the Xcode Command Line Tools
Agree to Xcode license in Terminal: sudo xcodebuild -license
Install MacPorts for your version of the Mac operating system:
Installing MacPorts
MacPorts version 2.6.4 is available in various formats for download and installation (note, if you are upgrading to a new major release of macOS, see the migration info page):
“pkg” installers for Big Sur, Catalina, Mojave, and High Sierra, for use with the macOS Installer. This is the simplest installation procedure that most users should follow after meeting the requirements listed below. Installers for legacy platforms Sierra, El Capitan, Yosemite, Mavericks, Mountain Lion, Lion, Snow Leopard, Leopard and Tiger are also available.
In source form as either a tar.bz2 package or a tar.gz one for manual compilation, if you intend to customize your installation in any way.
Git clone of the unpackaged sources, if you wish to follow MacPorts development.
The selfupdate target of the port(1) command, for users who already have MacPorts installed and wish to upgrade to a newer release.
Checksums for our packaged downloads are contained in the corresponding checksums file.
The public key to verify the detached GPG signatures can be found under the attachments section on jmr's wiki page. (Direct Link).
Please note that in order to install and run MacPorts on macOS, your system must have installations of the following components:
Apple's Xcode Developer Tools (version 12.2 or later for Big Sur, 11.3 or later for Catalina, 10.0 or later for Mojave, 9.0 or later for High Sierra, 8.0 or later for Sierra, 7.0 or later for El Capitan, 6.1 or later for Yosemite, 5.0.1 or later for Mavericks, 4.4 or later for Mountain Lion, 4.1 or later for Lion, 3.2 or later for Snow Leopard, or 3.1 or later for Leopard), found at the Apple Developer site, on your Mac operating system installation CDs/DVD, or in the Mac App Store. Using the latest available version that will run on your OS is highly recommended, except for Snow Leopard where the last free version, 3.2.6, is recommended.
Apple's Command Line Developer Tools can be installed on recent OS versions by running this command in the Terminal:
Older versions are found at the Apple Developer site, or they can be installed from within Xcode back to version 4. Users of Xcode 3 or earlier can install them by ensuring that the appropriate option(s) are selected at the time of Xcode's install ('UNIX Development', 'System Tools', 'Command Line Tools', or 'Command Line Support').
Xcode 4 and later users need to first accept the Xcode EULA by either launching Xcode or running:
(Optional) The X11 windowing environment for ports that depend on the functionality it provides to run. You have multiple choices for an X11 server:
Install the xorg-server port from MacPorts (recommended).
The XQuartz Project provides a complete X11 release for macOS including server and client libraries and applications. It has however not been updated since 2016.
Apple's X11.app is provided by the “X11 User” package on older OS versions. It is always installed on Lion, and is an optional installation on your system CDs/DVD with previous OS versions.
macOS Package (.pkg) Installer
Microsoft office 2019 free. download full version for mac download. The easiest way to install MacPorts on a Mac is by downloading the pkg or dmg for Big Sur, Catalina, Mojave, High Sierra, Sierra, El Capitan, Yosemite, Mavericks, Mountain Lion, Lion, Snow Leopard, Leopard or Tiger and running the system's Installer by double-clicking on the pkg contained therein, following the on-screen instructions until completion.
This procedure will place a fully-functional and default MacPorts installation on your host system, ready for usage. If needed your shell configuration files will be adapted by the installer to include the necessary settings to run MacPorts and the programs it installs, but you may need to open a new shell for these changes to take effect.
The MacPorts “selfupdate” command will also be run for you by the installer to ensure you have our latest available release and the latest revisions to the “Portfiles” that contain the instructions employed in the building and installation of ports. After installation is done, it is recommended that you run this step manually on a regular basis to to keep your MacPorts system always current:
Download iMovie 9.0.9. What's New in Version 9.0.9. Addresses issues where iMovie does not recognize video cameras connected to your Mac. Imovie 9 download mac.
At this point you should be ready to enjoy MacPorts!
Type “man port” at the command line prompt and/or browse over to our Guide to find out more information about using MacPorts. Help is also available.
Source Installation
If on the other hand you decide to install MacPorts from source, there are still a couple of things you will need to do after downloading the tarball before you can start installing ports, namely compiling and installing MacPorts itself:
“cd” into the directory where you downloaded the package and run “tar xjvf MacPorts-2.6.4.tar.bz2” or “tar xzvf MacPorts-2.6.4.tar.gz”, depending on whether you downloaded the bz2 tarball or the gz one, respectively.
Build and install the recently unpacked sources:
cd MacPorts-2.6.4
./configure && make && sudo make install
Optionally:
cd ./
rm -rf MacPorts-2.6.4*
These steps need to be perfomed from an administrator account, for which “sudo” will ask the password upon installation. This procedure will install a pristine MacPorts system and, if the optional steps are taken, remove the as of now unnecessary MacPorts-2.6.4 source directory and corresponding tarball.
To customize your installation you should read the output of “./configure --help | more” and pass the appropriate options for the settings you wish to tweak to the configuration script in the steps detailed above.
You will need to manually adapt your shell's environment to work with MacPorts and your chosen installation prefix (the value passed to configure's --prefix flag, defaulting to /opt/local):
Add $(prefix)/bin and $(prefix)/sbin to the start of your PATH environment variable so that MacPorts-installed programs take precedence over system-provided programs of the same name.
If a standard MANPATH environment variable already exists (that is, one that doesn't contain any empty components), add the $(prefix)/share/man path to it so that MacPorts-installed man pages are found by your shell.
For Tiger and earlier only, add an appropriate X11 DISPLAY environment variable to run X11-dependent programs, as Leopard takes care of this requirement on its own.
Install Xcode For Mojave 10.14
Lastly, you need to synchronize your installation with the MacPorts rsync server:
Upon completion MacPorts will be ready to install ports!
It is recommended to run the above command on a regular basis to keep your installation current. Type “man port” at the command line prompt and/or browse over to our Guide to find out more information about using MacPorts. Help is also available.
Jw library download mac. Download JW Library - JW LIBRARY is an official app produced by Jehovah’s Witnesses. It includes multiple Bible translations, as well as books and brochures for Bible study. Download JW Library for PC – Windows 7, 8, 10, Mac: To start, you need to download BlueStacks on your PC & Mac. Run the installation wizard and follow the on-screen instructions.
Git Sources
If you are developer or a user with a taste for the bleeding edge and wish for the latest changes and feature additions, you may acquire the MacPorts sources through git. See the Guide section on installing from git.
Purpose-specific branches are also available at the https://github.com/macports/macports-base/branches url.
Alternatively, if you'd simply like to view the git repository without checking it out, you can do so via the GitHub web interface.
Selfupdate
If you already have MacPorts installed and have no restrictions to use the rsync networking protocol (tcp port 873 by default), the easiest way to upgrade to our latest available release, 2.6.4, is by using the selfupdate target of the port(1) command. This will both update your ports tree (by performing a sync operation) and rebuild your current installation if it's outdated, preserving your customizations, if any.
Other Platforms
Running on platforms other than macOS is not the main focus of The MacPorts Project, so remaining cross-platform is not an actively-pursued development goal. Nevertheless, it is not an actively-discouraged goal either and as a result some experimental support does exist for other POSIX-compliant platforms such as *BSD and GNU/Linux.
The full list of requirements to run MacPorts on these other platforms is as follows (we assume you have the basics such as GCC and X11):
Tcl (8.4 or 8.5), with threads.
mtree for directory hierarchy.
rsync for syncing the ports.
cURL for downloading distfiles.
SQLite for the port registry.
GNUstep (Base), for Foundation (optional, can be disabled via configure args).
OpenSSL for signature verification, and optionally for checksums. libmd may be used instead for checksums.
Normally you must install from source or from an git checkout to run MacPorts on any of these platforms.
Install Xcode For Mojave Installer
Help
Help on a wide variety of topics is also available in the project Guide and through our Trac portal should you run into any problems installing and/or using MacPorts. Of particular relevance are the installation & usage sections of the former and the FAQ section of the Wiki, where we keep track of questions frequently fielded on our mailing lists.
Install Xcode Mojave Command Line
If any of these resources do not answer your questions or if you need any kind of extended support, there are many ways to contact us!
0 notes
Last Seen Blogs

misslala-thegreatest
El Mundo Bellisimo de Lala

vivianthepigeon
VivianThePigeon

drxsnow
genetically speaking

zhonyua
yuyu

frogsbane
habeeb it