#vogue pea jacket hack
Text
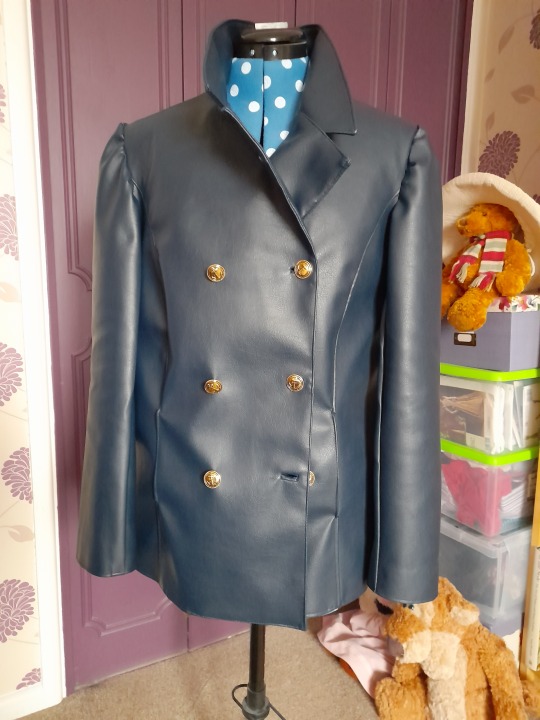
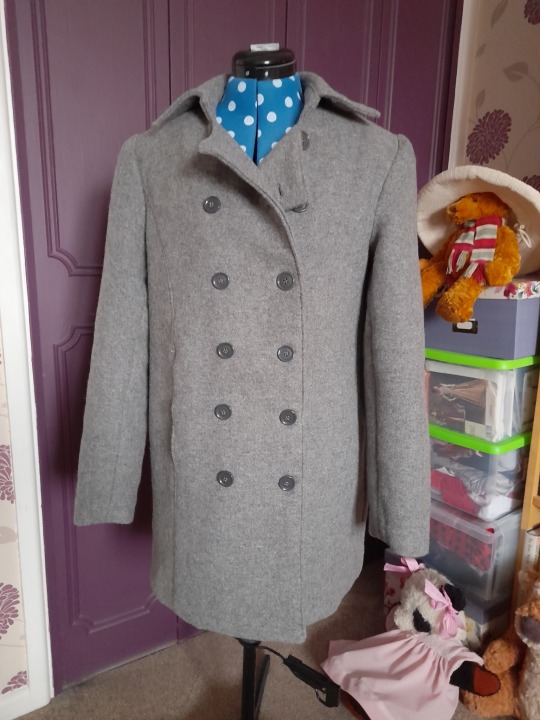
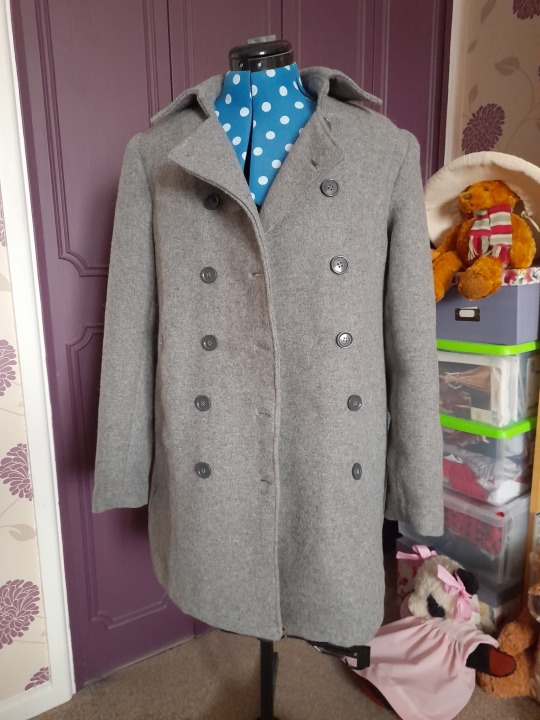
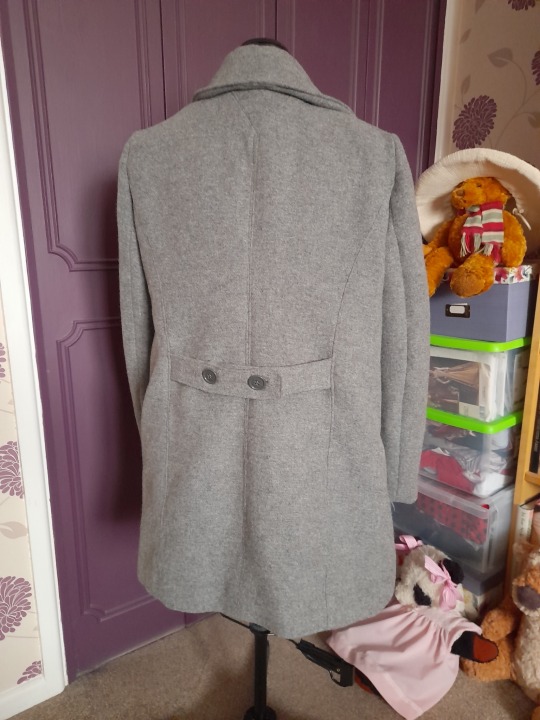
It’s finished! The Dark Eyes jacket is done! 🥳
This is the first time I’ve ever tried to replicate an existing garment for myself, but after making a mini version a few weeks ago for Eight Bear I had a hankering after one. I dithered for a fortnight over whether I actually needed it or not before just deciding to order the materials anyway.
As I’m intending it for general wear it’s an interpretation rather than an exact (or as exact as I could make it) replica. I opted to modify a pattern I already had instead of altering a men’s style to fit me which given the inevitable need for multiple toiles would have taken more time and patience than I really wanted to devote to this project. I also figured that using faux leather for the first time I’d be better off with a pattern I know and which I could easily adapt. The one I used is the Vogue V1467 women’s pea jacket which I’ve made twice before, but the V8940 men’s version would be a good starting point too, requiring minimal style adjustments.
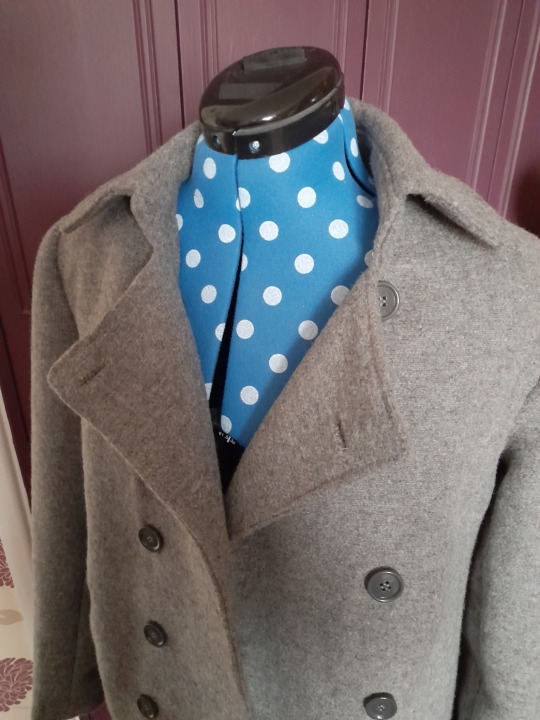
To make it look more like the Dark Eyes coat I removed the back princess seams and did away with the belt as there was no way I was going to try and turn a tube of pleather right way out! I also re-spaced the buttons, reducing them to eight rather than ten, and drafted a softer collar, though I did notice when looking at photos again after it was done that I should have made it shorter and wider, which is annoying but it’s too late now and I’m not being slavish anyway. I kept the front princess seams both for fitting and because they’re part of the pocket construction. The buttonholes are bound. I could have topstitched round them but as my topstitching wouldn’t win any awards decided they were better left as they are.
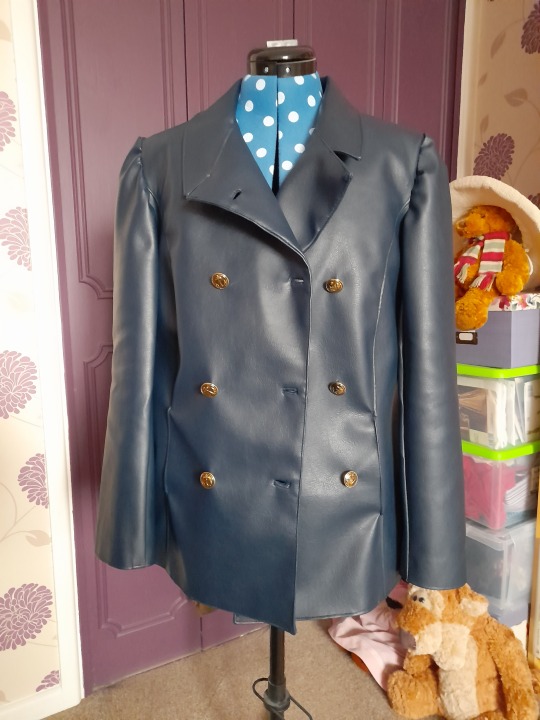


The fabric is a heavy weight faux leather and was surprisingly easy to work with, moving generally smoothly through the machine with the aid of a roller foot. I did end up having to use pins but I tried to keep within the seam allowances and they’ve not made too many marks. Unfortunately there are small holes around the arm seams where I had to unpick when the sleeves wouldn’t go in easily; there wasn’t much I could do about it but hopefully no one is going to be staring at my shoulders enough to notice them! Pleather can’t be pressed for obvious reasons so I had to either topstitch the seams to flatten them or stitch down the seam allowances to the jacket shell. As I have no idea what the lining of the original is like I opted to save some money and use up the ladybird satin I had left over from the coat I made back in January.
All in all, though there are a couple of things I’d do differently were I to make it again I’m really pleased with the way it turned out. It took me about six days from cutting out the pieces to sewing on the buttons, at two or three hours a day.
And of course I had to take some dodgy posed mirror photos:
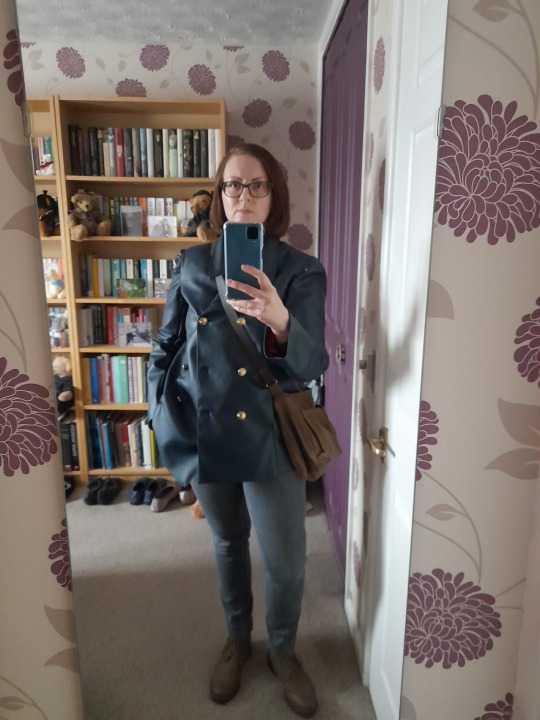

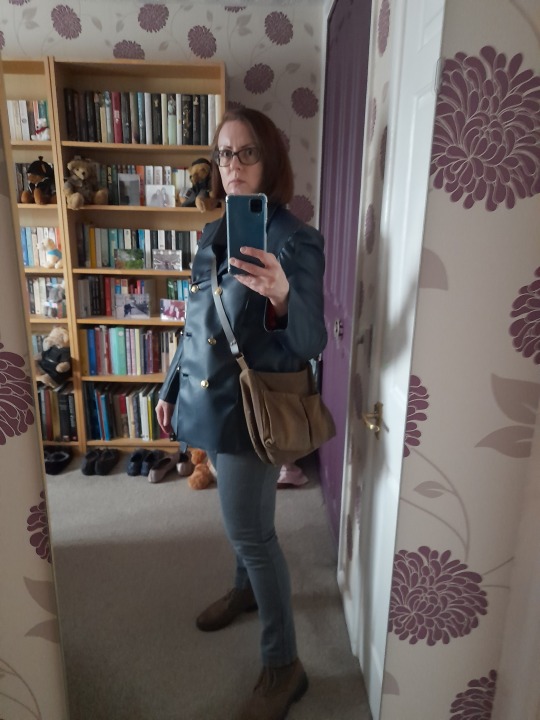
Now, where did I put my sonic screwdriver?
33 notes
·
View notes
Text
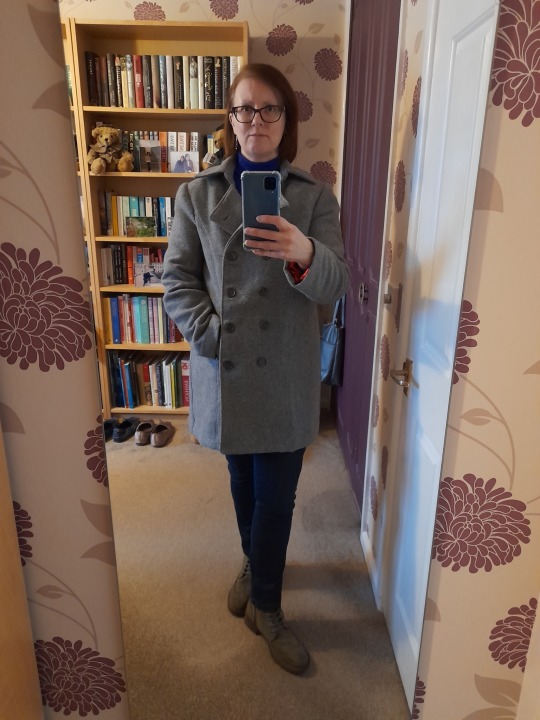
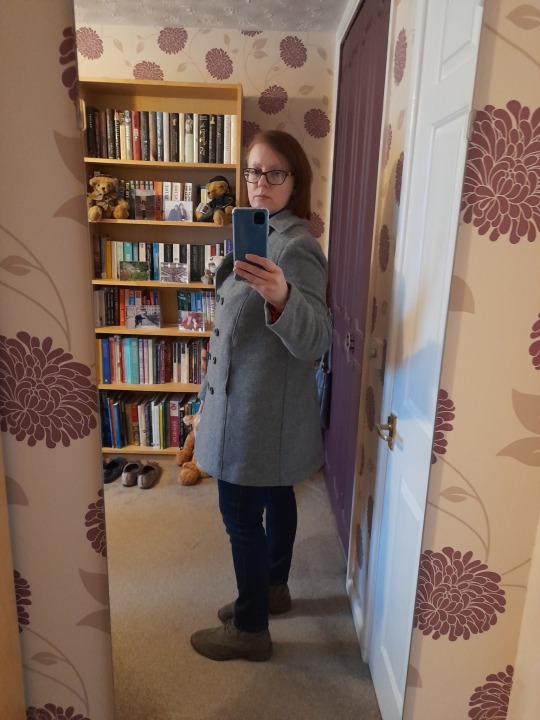
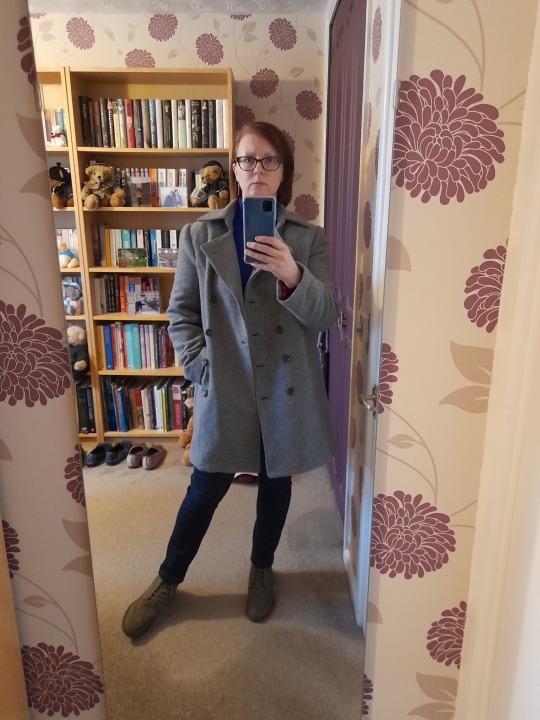
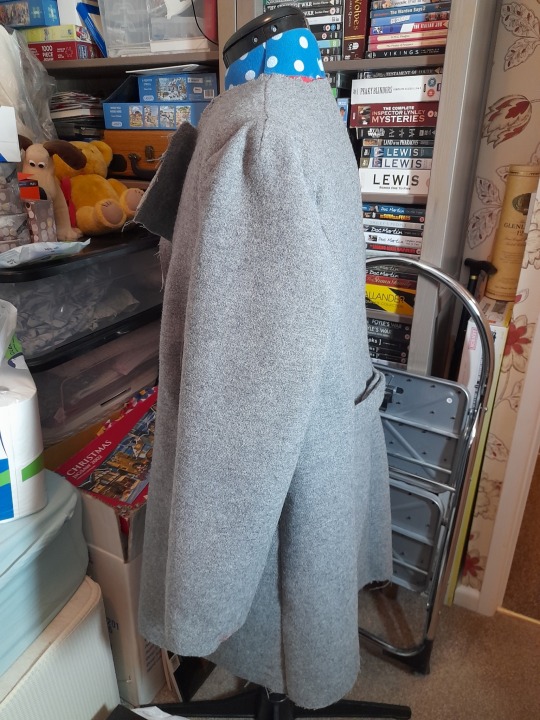
After pretty much a whole weekend’s work, the coat is finished! 😎
It took me most of Saturday to get all the machine sewing done (adjustments to the lining, attaching the lining to the shell, attaching the collar and last bit of topstitching) and I’d forgotten how distracting it is to work in a room full of other people. Usually I’m up in our spare bedroom and unless I’m using a pattern I’m really familiar with I prefer not to listen to music as if I’m singing along (as I do) I’m more likely to make mistakes. Working at the dining table I was having to really concentrate on what I was doing, which wasn’t easy as my mother was watching darts and the guy calling the score sounded like he was about to have an aneurysm!
Last time I used fusible canvas interfacing but as I wanted to get everything from one place and save on postage I decided to go for traditional sew-in stuff on this occasion. That was fine, though time-consuming (and saved my bacon when I belatedly realised I’d cut and sewn it to the facing instead of the front), but if I use it again I’ll only interface one piece of the collar and stand rather than both; it’s quite thick and the collar has ended up a bit bouncier than it would have been with one less layer. The thickness bent two needles when I was topstitching the stand; in the end I had to resort to finishing it off with the heaviest I had left, which happened to be a jeans needle. It did the job!
Yesterday I did all the hand finishing: slipstitching the lining to the cuffs and hem, cutting and securing the bound buttonholes and sewing on the 16 (!) buttons. As I added seven inches to the length and changed the half lining to a full one I had to draft the latter from the pattern pieces I had and thought there would be plenty of volume, but when I came to pin it before stitching the hem I had a horrible moment when it looked as though it wasn’t going to fit. Thankfully it did (just!); if it hadn’t my only option would have been to add a triangle of fabric at the hem, something that would solve the problem but not look as neat, which would have been a shame after all that work.
Annoyingly, the buttons on the belt aren’t central but that’s the fault of the pattern markings. I could have made another belt, as I did with the pea jacket when I noticed the same problem, but I had so much trouble trying to turn two layers of wool, two of interfacing and two bound buttonholes the right way out that I just couldn’t be bothered. I can live with it; I can’t see it anyway. After several failed attempts at trying to get the markings for the buttons in the right place I ended up putting the coat on the ironing board and sewing them on standing up. I moved the closure across a couple of inches from the markings on the pattern as I wanted it to be more fitted; this gives me the option should I put on weight again of just moving the buttons to give myself more room!
Overall I’m very pleased with the way it turned out. I wear my pea jacket a lot and I like the style so it made sense to extend it into a coat. The only other adjustment I made to the pattern was to increase the depth of the pockets, as what’s the use of pockets you can’t properly put your hands in?
Here’s how it looks on (with a flash of my ladybird lining!):

#sfs’s adventures in sewing#vogue pea jacket hack#sewing#dressmaking#the camera has shown up a ripple in the fabric above the right hand pocket that i can’t see when i look at it#argh
43 notes
·
View notes
Text
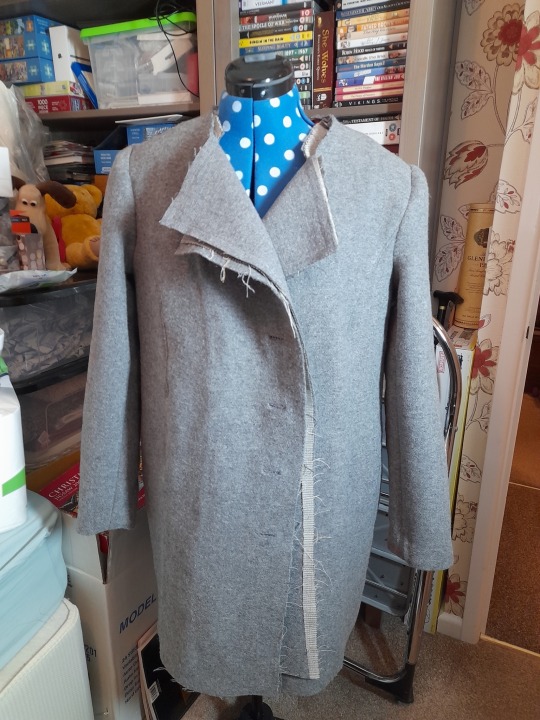
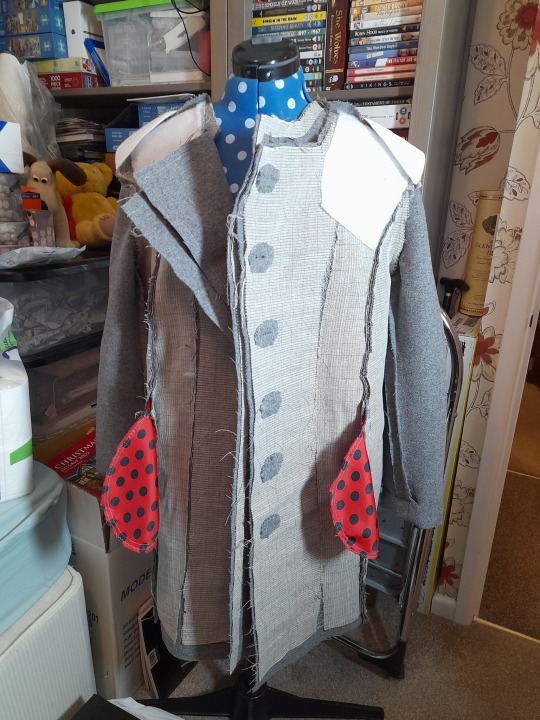
Coat progress report: the shell is done!
It’s taken me about three days to put together, I think. The bound buttonholes went in quickly, but after having sewed it all up minus the sleeves I discovered that I needed to make some fitting adjustments as any excess fabric was really obvious in such a light colour. I found that some had to come out in the front princess seams, which is a fairly normal alteration for me as I’m very narrow across the shoulders with a small bust, and also at the sides and across the back. Boxy shapes don’t work when you’re small as extra fabric just drowns, and the back belt was pulling where there was too much fullness in the back seam. Fixing this involved unpicking most of the topstitching I’d already done, which was a faff, especially since the thread pretty much blends in and I had to take my specs off to find the stitches but the fit is much better now.
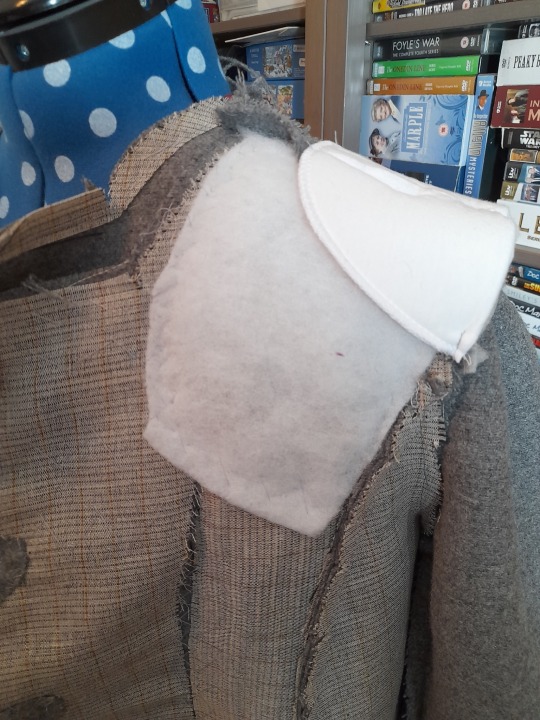
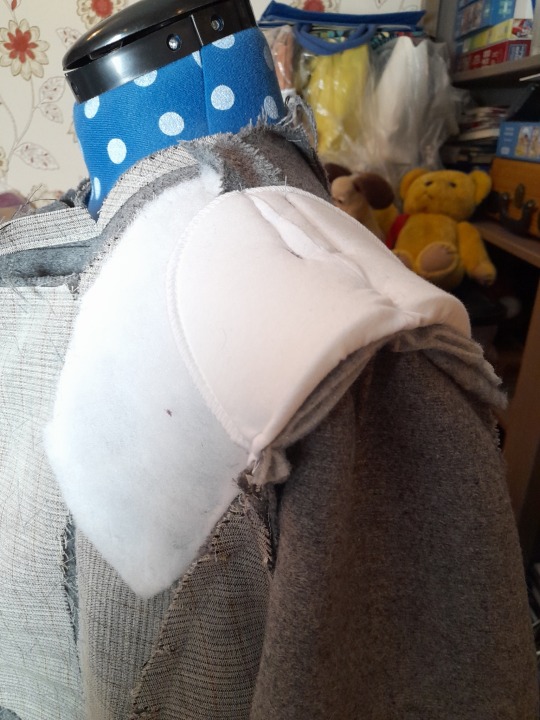
I didn’t take any photos of the interior tailoring when I was making my pea jacket so I thought I would this time. You can see the shoulder pads and the sleeve head (just) as well as the wadding I added as a chest shield to stop the fabric collapsing where I’m a bit hollow. I’m glad I was posting about the jacket as I’d mentioned having to take an extra centimetre at the shoulder to bring the sleeve head up and extending the dart, something I’d not made a note of elsewhere.
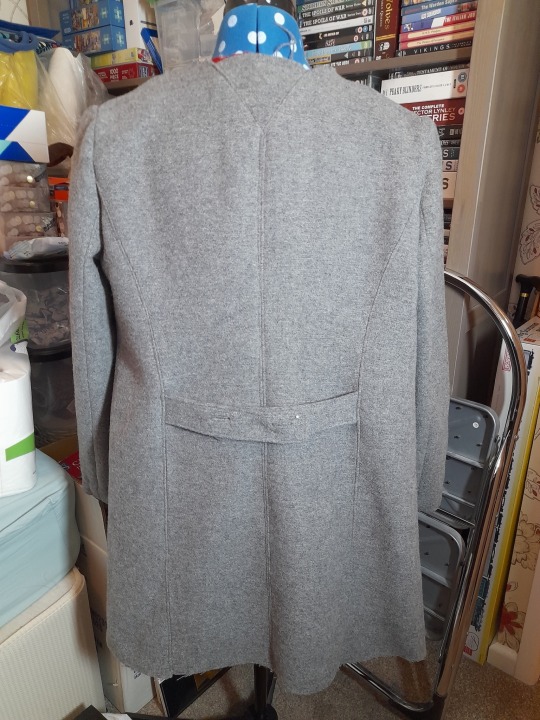
The sleeves are hanging OK, and the back looks much better with the excess removed.
Next job: a couple of adjustments to the lining and then attaching it to the shell, which will involve carting everything downstairs to use the dining table as I haven’t got enough room to manoeuvre this thing around anywhere else!
8 notes
·
View notes
Text
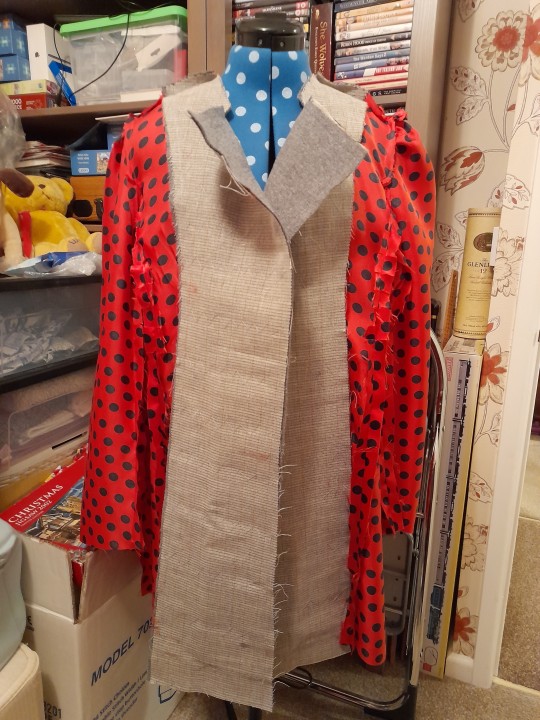
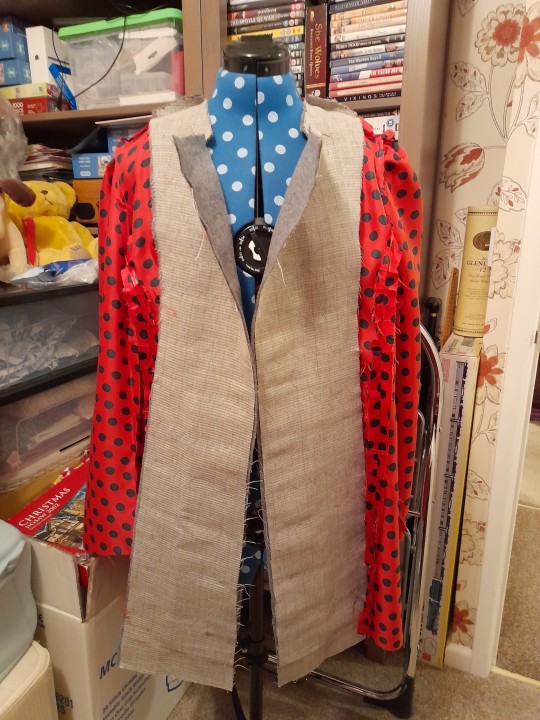
Coat construction is underway!
As I went for traditional navy and gold buttons for my jacket I decided on something a bit different this time. I was going to buy some fabric in charcoal grey but then I saw the silver grey wool mix you can just see here on the facings and plumped for that instead. Grey hasn’t been a colour I’ve worn much in the past as I always associated it with school uniforms, but I thought it would make a change as there was no green or burgundy fabric I could find within my budget, and black is too harsh.
I spent a good couple of hours yesterday cutting out all the pieces (and thought I’d be walking about like Quasimodo today my back protested so much) and another two and a bit sewing on the interfacing. I decided to alter the pattern and toile on Tuesday and I’m glad I did as I discovered I’d added too much length, which meant more faffing about with tissue paper before I could get any cutting out done!
As you can see, today I put the lining together. I chose to use satin as it has a bit more structure than lining fabric, which I hate sewing because it’s so flimsy. I ended up with more than I actually needed, which is annoying; sadly no one in the house seems to want something that makes them look like a ladybird so I’m not sure when the excess will get used. It was my intention to use the lining to fit but though it looks enormous when I try it on I’m loath to alter it too much in case the coat ends up too tight around my bum and thighs. I’ve tacked the shell together and found where I need to remove excess fabric at the arms and across the upper back but I’ll leave any actual alterations to the main seams until I’ve got it properly together.
Next up: twelve bound buttonholes! Boy, am I looking forward to those… 🫤
3 notes
·
View notes
Last Seen Blogs

approveithq
Approve IT HQ

oh-no-plz-no
it's yellow babey

wingshadowed
Wingshadowed

eyantagonist
Hungry Wanderer

realrosee
THE WORLD IS YOURZ