
Last Seen Blogs

cantasartworks
CARGH AI

winsupply10566
Window Supplier

neofox
Drive by shoop da whoop
tf2-x-reader
gay little tf2 imagines
winsupply10566
Window Supplier
Text
hope she's not too expensive. This doesn't feel like a real collector doll to me, but I do think her face is cute and it's nice that she has an articulated body.


Birthday Celebration Rapunzel Doll from Mattel
2 notes
·
View notes
Text
Birthday Celebration Rapunzel Doll from Mattel
2 notes
·
View notes

Text
No matter what happens at the end, their bond is forever 🖤
21 notes
·
View notes

Text
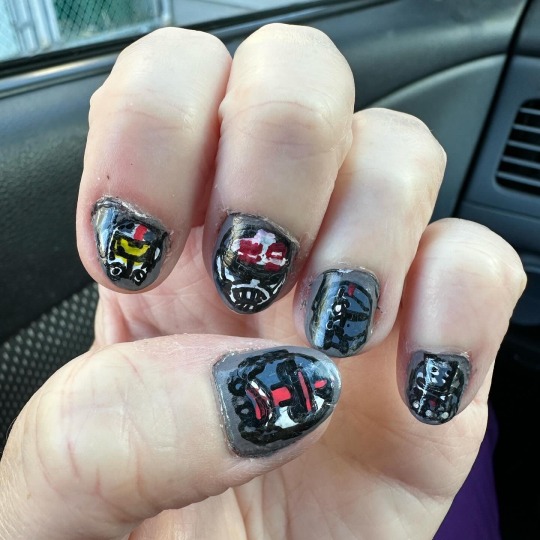


Trying to ease the pain of the upcoming finale by distracting myself and drawing this Bad Batch manicure. Yes it took forever but wow I love it!
8 notes
·
View notes
Text

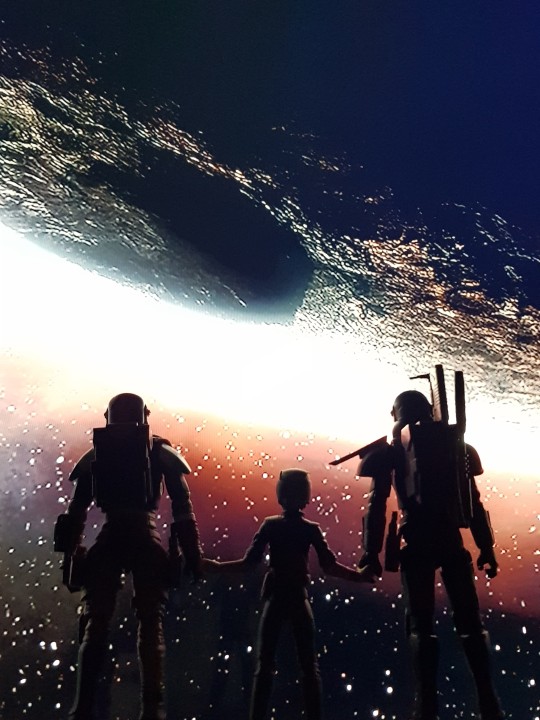
This is about the plan 99 post about the bad batch btw some people are theorizing they’ll reveal my boy tech is alive then he’ll die again so.
I’m keeping him safe
10 notes
·
View notes


Photo


one round of sorting and cleaning later, and we have all the complete Bettys, sans the faceless macdonald’s one. Gonna save her for a custom I think.
I never had one of these back in the day, but oh my gosh they’re so cute! I didn’t remember Betty being this adorable but oh my goodness I love them!
58 notes
·
View notes
Text

today's fashion dolls are: JEM and the Holograms Synergy, Aja Leith, JEM, Kimber Benton, & Shana Elmsford (2012 & 2013)
393 notes
·
View notes
Text

I also picked up Toralei off Paulmart Store recently. I love the Neon Frights doll and her black striped shorter hair sm 🖤
6 notes
·
View notes


Text
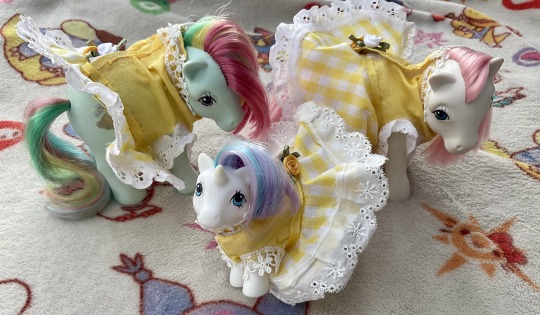
My Little Pony basic dress sewing tutorial below the cut ^^ I am not the best at sewing or pattern making but all this info is free to use! I noticed a lack of ponywear sewing tutorials so I am going to try to fill that gap!
TERMS: Pattern is free to use or modify for whatever use you’d like (I don’t even mind if you wanna sell some homemade dresses) just please give credit to me for the original pattern! I would love to see whatever you make so feel free to tag me too 💕
WHAT YOU’LL NEED:
-Basic knowledge of a basic sewing stitch (I pretty much only used backstitches for this pattern)
-Some fabric (I recommend two colors, one for the body and then one for the skirt, but you can use however many fabric colors you’d like if you’d rather only have one color or if you wanna have more fabrics for sleeves or extra layers or details)
-Velcro or a zipper (you could also maybe use buttons if you prefer but velcro or a zipper will be much easier)
-Sewing thread, needles. I recommend getting fabric glue as it will make attaching lace and velcro easier. Maybe some pins if they would help you!
-Optional: Embellishments such as ribbon, lace, buttons, sew on flowers, bows, ect. This is all up to how you want to decorate the dress!

I am sorry I don’t actually know how to make downloadable patterns but here are the hand drawn patterns I’ve made for the chest piece as a reference (the left side is the baby pattern, the right side is the adult pattern.)
You will likely have to modify these patterns slightly based on the pose of your pony, their size, if they have wings, ect. I am also sure this pattern can be modified to fit other generations, sweetheart sister ponies, ect. (Quick note here about pegasus wings: You may want to make a looser fitting dress as if it is too tight it may look lumpy due to their wings. As you will see in this tutorial I started off using baby surprise as the model, but then I switched to baby glory as she was easier to work with due to her being a unicorn. I feel like you would have better luck making a dress for an adult pegasus rather than a baby one).
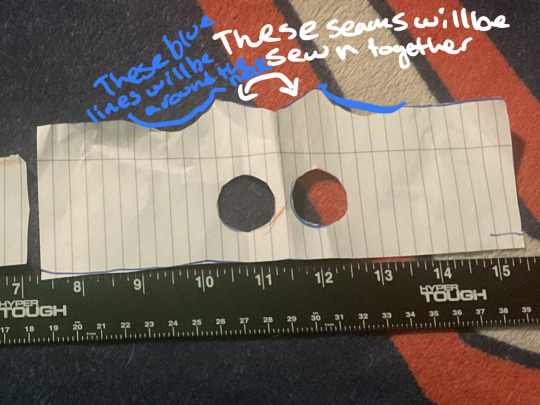
Here’s basically what the pattern is showing: there will be one seam near the chest, and the top part will end up being the neck line. The holes are for the front legs, and the sides MUST BE LONGER so that you have enough seam allowance to hem it but also this is where the velcro will go! So you will want enough length on the sides for the pattern to overlap. As you are tracing/making the pattern with paper, be sure to test it with your pony to make sure the size is right! You’ll want to be testing the size of your dress frequently to make sure that everything fits correctly!

Trace out your pattern (make sure to make everything a little bit bigger for seam allowance!) and then cut it out.
Be sure to check the size if it fits or not!

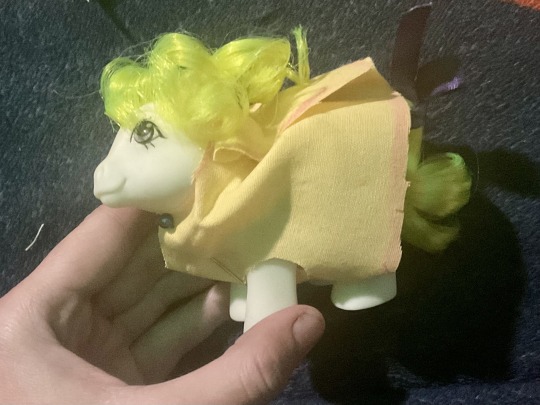
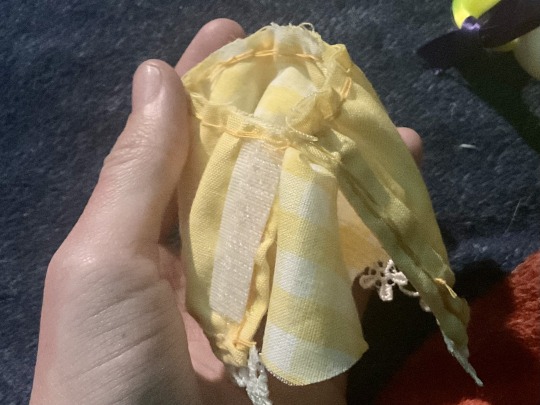
Next, you will want to fold the dress in half (good sides facing each other) and sew a seam along where this blue line is. depending on how curved you make this/how close to the legs/neck area you make this seam, the tighter or looser fitting the front of the dress will be, so you may want to adjust it a bit to your preference.
It will look something like this.
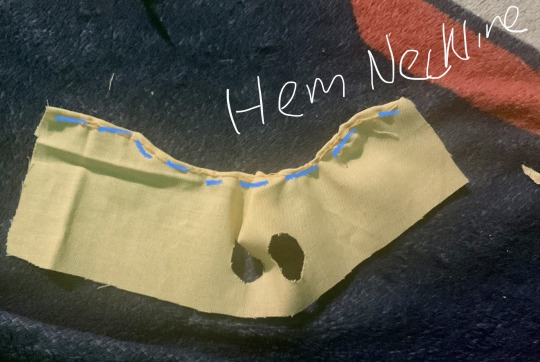
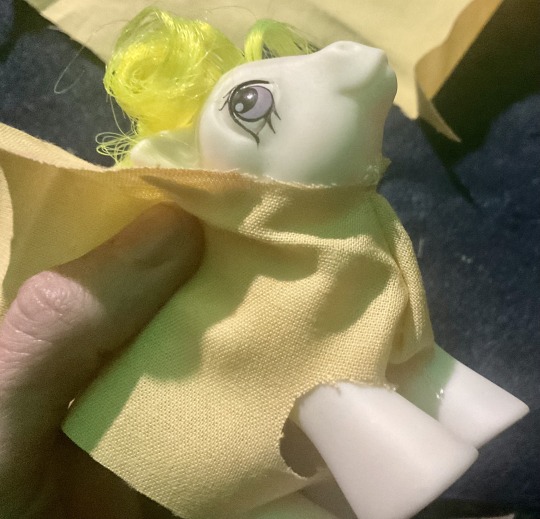
Next, we will hem the neckline.

Then, you will hem the sides (Now is a good time to test on your model pony to make sure that the sides will be long enough to overlap with a piece of velcro!
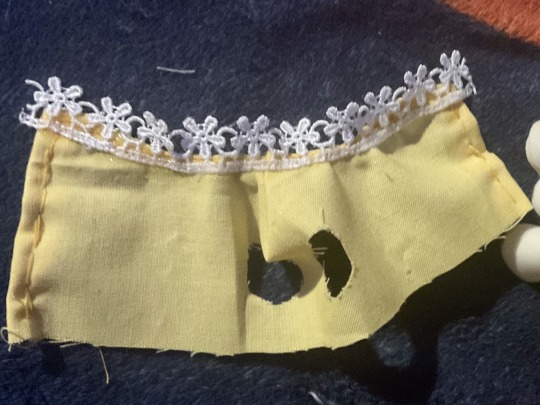
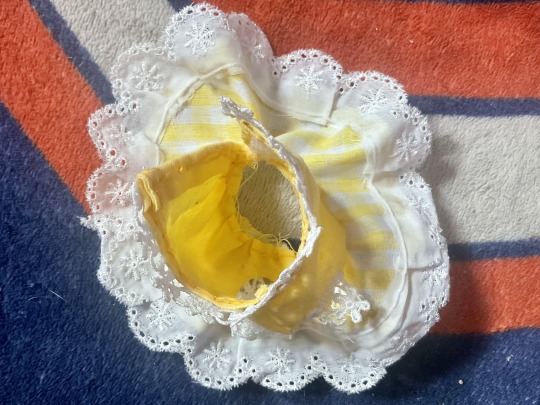
This is where I added lace to the neckline. You can sew it on or just use fabric glue. You don’t have to use lace if you don’t want to but it is very cute.
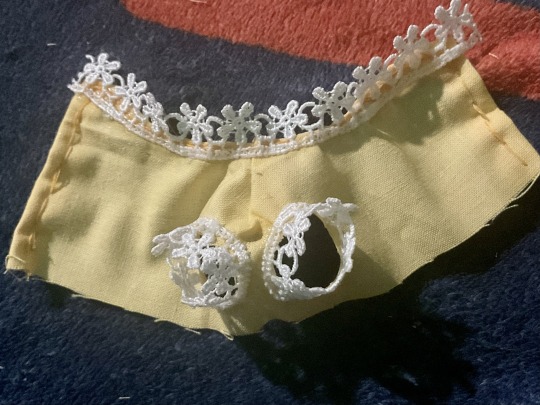
I added lace to the sleeves too. If you want long sleeves, you can modify this pattern by sewing another piece of fabric for the sleeves. If you don’t want lacey sleeves, I’d recommend hemming the sleeves or covering the edges with ribbon or something so they don’t fray (I didn’t hem them here just because they are so small it would be hard to hem!)
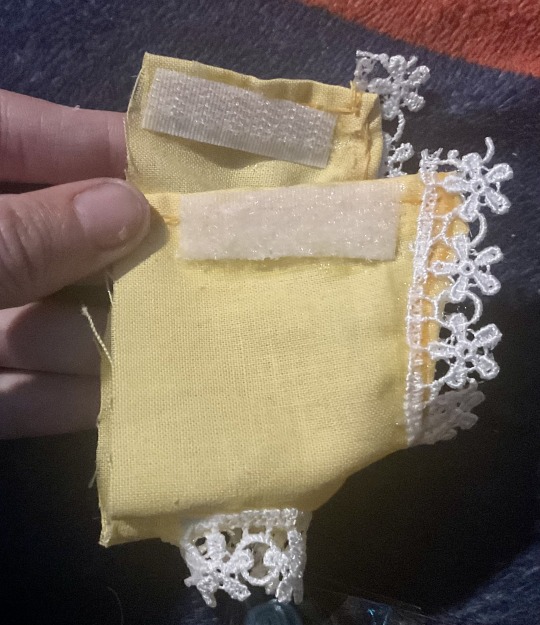
Now you will cut some pieces of velcro for the dress opening on the back. I recommend putting one piece on the outside of the dress and the other piece on the inside of the dress as shown, that way the fabric can overlap nicely. You can either sew or glue this in. You could also use a zipper, buttons, whatever else you’d like for the dress opening.

Now we make the skirt of the dress! The pattern looks something like this, it is a little hard for me to explain but I will do my best ^^ . You will have to measure and test out the waistline yourself to make sure you have the best fit for your pony, just keep adjusting it until it works. You can also decide the length of your dress. To cut it out, you will fold your fabric in half twice and line up the pattern with the folded corner, before cutting it out.
If you’d like to see a video of someone doing something like this, here is the video tutorial that I originally learned how to make skirts from!

Once you have the skirt fabric piece, you can sew the skirt to the body of the dress. Make sure that you’re doing it “inside out”, and that the good sides of the fabric are touching each other.

It will look something like this once you turn it inside out again! Be sure to test the dress to make sure everything fits! (If you are struggling to understand how exactly to put it on: put all your pony’s legs, their tail and butt through the dress back opening, put her back legs, tail and butt through the skirt opening and her front legs through the arm holes before fastening the back. It was a little weird to figure out at first lol.)
Now you will attach lace to the hem of the skirt! You can sew it or just use glue. If you don’t want lace, just hem the ends so it doesn’t fray.

Test one more time to make sure everything fits!

The final step is to decorate however you want! You could do a lot of creative things depending on what you have, buttons. more lace, ribbon, ect. For these spring yellow dresses I just added some yellow ribbon around the middle and I sewed some flowers to the back (You can find these flowers or little bows or other decorations at places like walmart).
And now you should have a completed pony dress! Thank you so much for reading and I hope that this helps someone out! If you follow this tutorial, reblog or tag me in a post with your dress because I would love to see it!! If you have any questions let me know! Thank you 💜
51 notes
·
View notes