
Last Seen Blogs

alicexfp
F A L I C E


chubbyandmusclegay
Sans titre

puzzleiran
puzzleiran پازل ایران

tomatoboi
SNS & JJK Whore 🧡🖤
Text
Blackblaze Backup
So I have got a solution to backup all my photos, have over 1TB. The solution I have chosen is called Backblaze its on $5 a month with unlimited storage. Made my decision utilizing the havecamearwilltravel.com blog
Only Issue I had is the interface does not allow you to select locations to backup. By default it does a backup of EVERYTHING. So in order to fix this you I needed to edit the XML file using Notepad++
File was found in here "C:\ProgramData\Backblaze\bzdata\bzinfo.xml"
The following sections were edited just delete what you don't need C:\ in my case and add the paths you want.
<mountpoints mountpoints_to_watch="Y:\" />
hard_drives_to_backup>
<bzvolume bzVolumeGuid="v0020df4631d372e4e004fac0110" mountPointPath="Y:\" />
</hard_drives_to_backup>
<do_backup dst_type="bzdatacenter" dst_fileformat="bzff" max_filesize_mb="1000000000" backup_on_battery="true" net_auto_throttle="false" net_throttle="100" backup_schedule_type="continuously" backup_schedule_detail="none" backup_schedule_end_hour="none" >
<bzdirfilter dir="Y:\Photos\" whichfiles="all" />
<bzdirfilter dir="Y:\" whichfiles="none" />
</do_backup>
Simples!
0 notes
Text
Computer Account with Dollar
So came across some Computer account today with a Dollar at the end ie ServerName$ or Computer$ or Server$ and wondered what this means.
This is the way Windows handle Computer Account names and ensures that they are unique from User/Group names also.
See link for full explanation
0 notes
Text
DFS Command Line
dfscmd
dfsutil
dfsradmin
DfsrAdmin RG Export Schedule /RgName:<replication group name> /File:sched.txt
This will export the schedule and throttle data to a text file
http://blogs.technet.com/b/askds/default.aspx?PageIndex=1&PostSortBy=MostViewed&Redirected=true
0 notes
Text
Bit-locker Drive Recovery
Steps to Recover a Bit-locker encrypted drive data.
## DO NOT WRITE TO DRIVE or run chkdsk /r ##
1. Gain Access to Drive (Try get data)
PowerShell>manage-bde -unlock x: -RecoveryPassword XXXXXX-XXXXXX-XXXXXX-XXXXXX-XXXXXX-XXXXXX-XXXXXX-XXXXXX
2. Next Copy drive contents to another drive the same size or larger. Use RIPLinux
-Login as Root
-ID Disks fdisk -l note the good disk Dev name vs the Dead disk dev name.
-Run DDRescue
ddrescue /dev/bad-drive /dev/good-drive rescue.log -r -1 -a 10000 -d
ie
ddrescue /dev/sdc /dev/sdb rescue.log -r -1 -a 10000 -d
Parameters:
-r -1 = Retry Infinate Times
-a 10000 = Min Read Rate of 10,000 bytes if below skip
-d = Use Direct Access
3. When finished complete another pass or continue to windows.
4. In Windows unlock bit-locker as described in step 1 and gain access to data.
0 notes
Text
Windows Command Line Tools
sched # Used to Control Windows Scheduled Tasks
reg # Used to Control Registry from CMD Prompt
reg add HKEY_LOCAL_MACHINE\SOFTWARE\Microsoft\PowerShell\1\ShellIds\Microsoft.PowerShell /v ExecutionPolicy /t REG_SZ /d RemoteSigned
0 notes
Text
Flip X Screen in Arch Linux
I have now moved away form Ubuntu and running Arch Linux on 2 of my Laptops. One of the laptops has no screen and is connected to a screen that is upside down. So I needed a command to turn off the internal screen then flip the main screen.
Using xrandr you can do both of these, the command I used are shown;
xrandr --output VGA-0 --rotate inverted --primary --auto
xrandr --output LVDS --off
To find out you monitor name just run the xrandr command from a terminal.
To get this to start every tim X start simply add the above lines to file ~/.xinitrc
0 notes
Text
Random Flashing Nokia E72
So work gave me a phone, Nokia E72 to be precise. Problem is it seems to flash at random intervals and this alway un-nerves me as I think I have missed an important Call/Message.
It turns out the Nokia have implemented a "feature" that lets the phone "breath". To turn it off use the following path.
Menu -> Settings -> Settings -> General -> Personalization -> Standby br. light -> Breathing light -> Off
So now my regular panic has gone!
46 notes
·
View notes
Text
Using a Spyder 3 on Linux
You can use a "Spyder 3" to calibrate your screen in Linux! Most searches will tell you otherwise but I can confirm as I have done so.
What you need is "dispcal" then simply plug your device into you USB port.
I have only tested this on Ubuntu 11.04 (Natty). It did take over 30 Minutes to Calibrate though!
So now I am close to getting rid of my Windows Machine, need to replace my editors of Choice, Photoshop and Lightroom.
Lightroom could be replace by Bibble but Photoshop has no decent alternative as Gimp I just cannot get on with.
Ref: 1
0 notes
Text
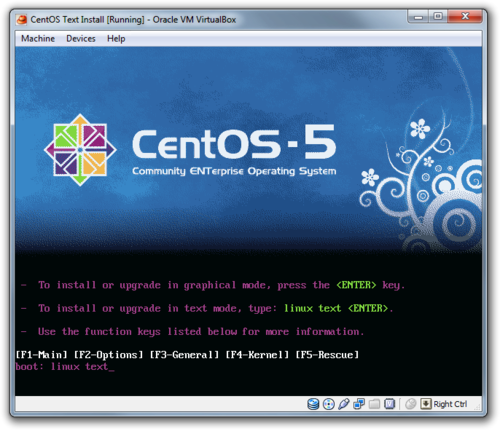
Install CentOS via Text
This setup document is in reference to I386 CentOS 5 (Basically RedHat) you can download this from here I grabbed the DVD download. This is all run on a Virtual Machine via VirtualBox found here
Boot from DVD/CD/ISO
You will be presented with a boot screen type in linux text then Enter to complete a text based install.
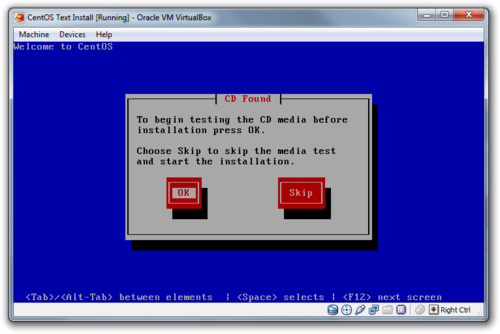
CD Found
1. Will ask you to test CD I completed the test it took me 1 minute with the ISO on a local HDD.
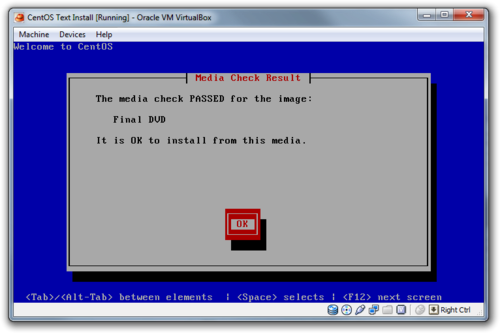
Test Passed!
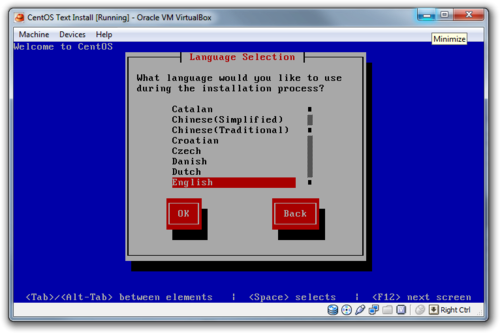
Language Selection
Select your language
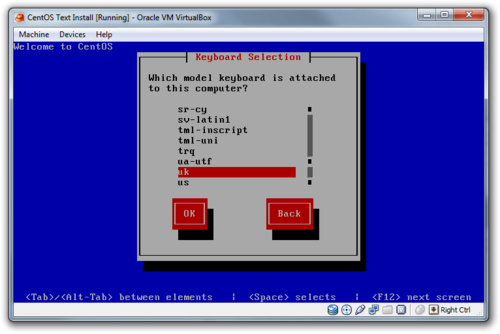
Keyboard Selection
Select your Keyboard type.
Partitioning Type
1. Select the drive you want to partition
2. I then selected "create custom layout" so I could have full control
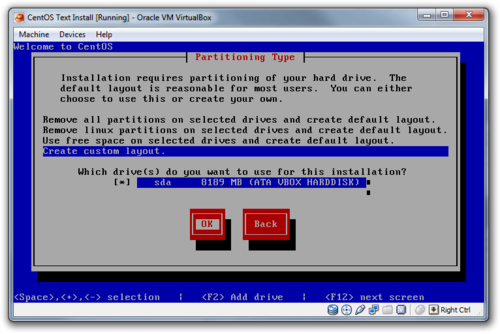
3. Choose Partition Size
See here for explanation behind these values.
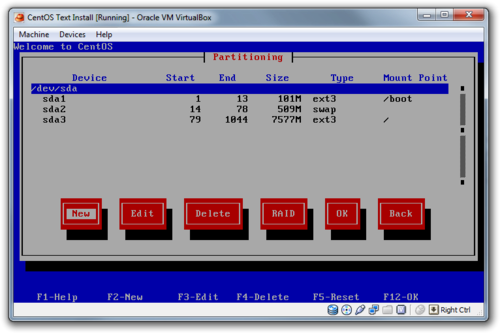
Partitions you require are as follows for I386
SWAP
Mount - None
Type - swap
Size - Formula is "If RAM < 2 GB ,THEN Swap = RAM x 2, ELSE Swap = RAM + 2GB" Min Size in 32 MB
Boot
Mount - /boot
Type - ext3
Size - 100MB
Root
Mount - /
Type - ext3
Size - 3.0 - 5.0 GB
Boot Loader Configuration
1. Select "Use GRUB Boot Loader" if you choose "No Boot Loader" you will require another means of boot like a Floppy or USB Stick etc.
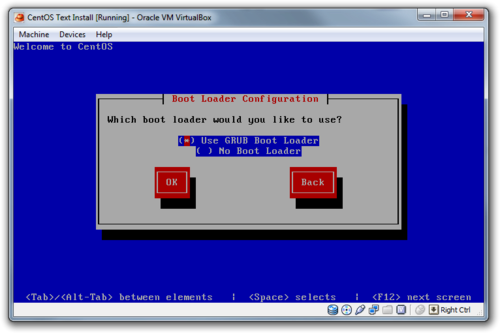
2. Kernel boot options - blank.
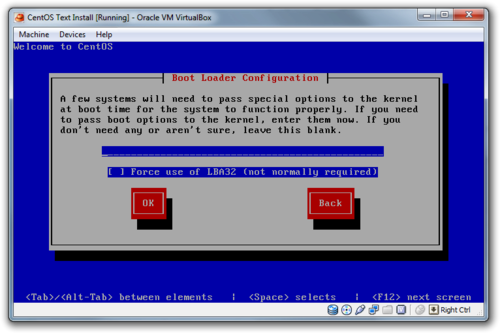
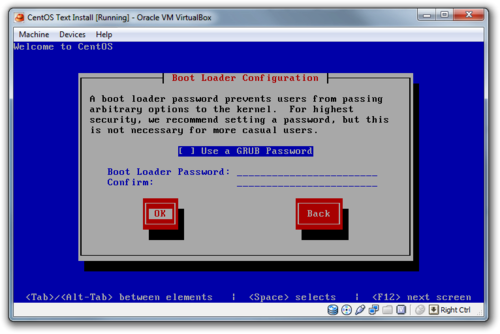
3. Boot loader Password - blank.
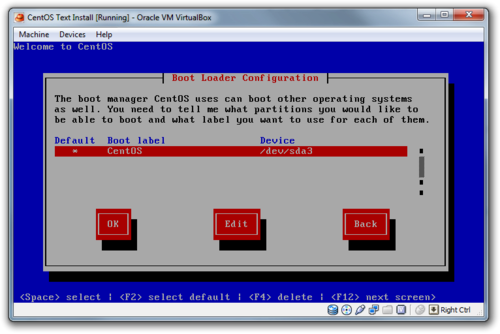
4. Operating System List - Left as is.
5. Boot Loader Location - MBR is recommended. If you already have a boot loader the select first sector of boot partition. The other boot loader will then load you select GRUB from its menu then GRUB will load.
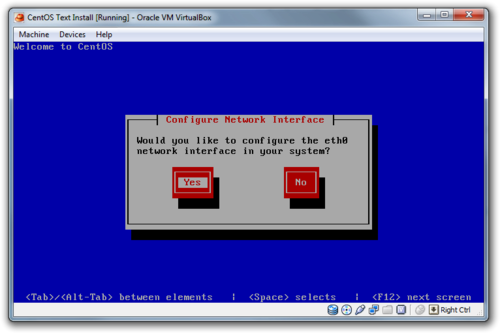
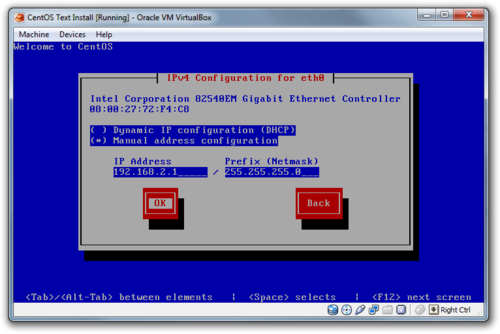
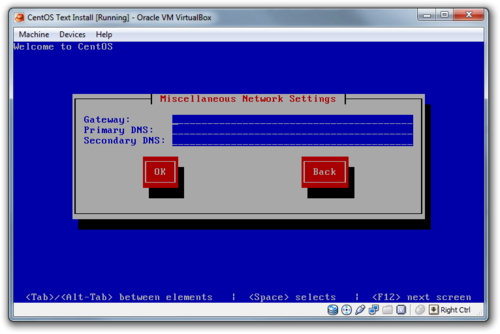
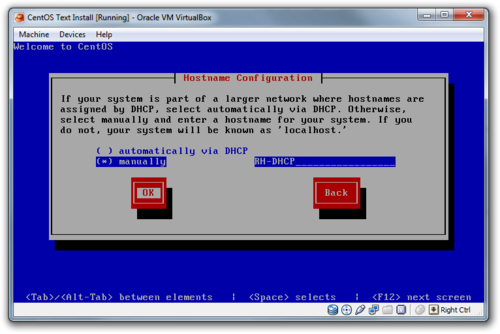
Configure Network Interface
1. Configure eth0 - Yes.
2. Enable all options - Active on Boot, IPv4, IPv6.
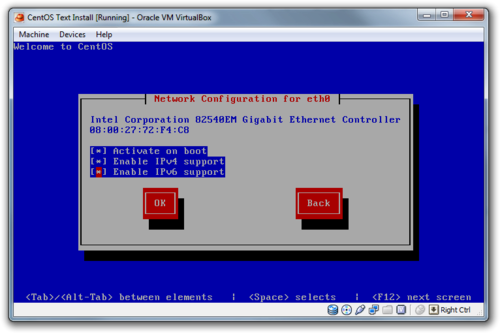
3. Dynamic or Manual IP - I am configuring this as a DHCP Server so chose Manual but if this is a client PC normally you would select DHCP.
4. Misc Setting - Set you Gateway (Your router/firewall PC/Hardware normally) and DNS.
5. Hostname - Set a name if Manual IP.
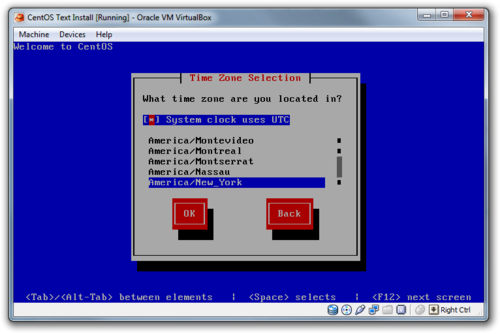
Set Time Zone
Select relevant option.
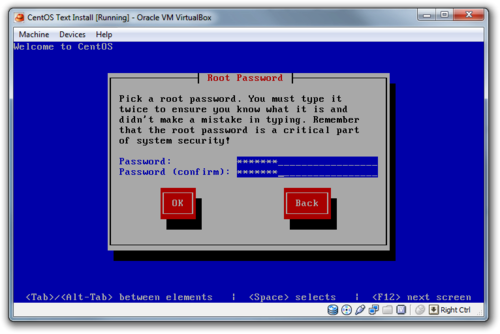
Root Password
Ensure you pick a secure password if this is to be a live machine if just test then a simple password is fine.
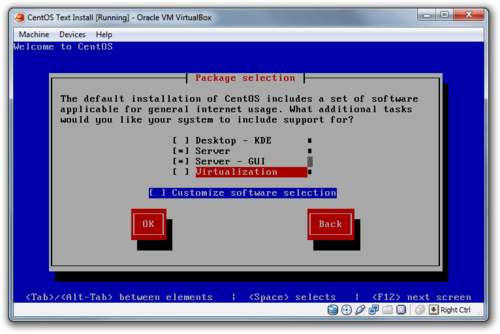
Package Selection
As I want to install a server I selected Server.
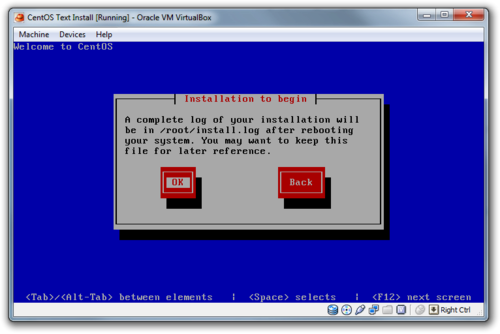
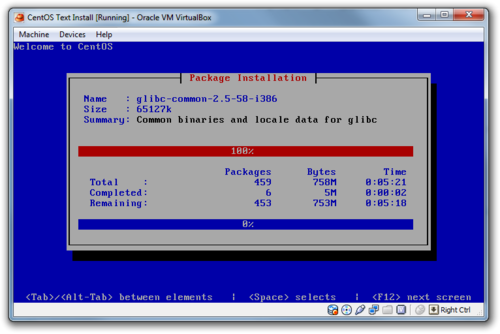
Installation to begin
You are then informed of the install log location that is /root/install.log
Package Installation
Wait for install to complete mine took from 3 minutes at this stage but each system is different.
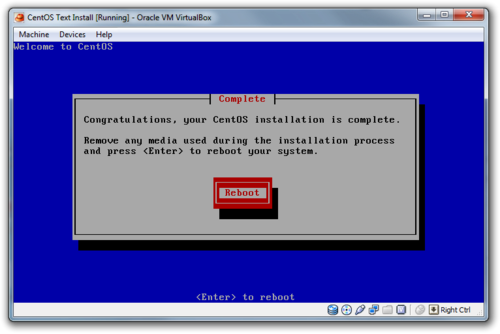
Complete
Reboot your done and ready to start configuration.
#CentOS#Computers#GRUB#IT#IT Pro#IT Professional#Install#Linux#OS#Partition#Technical#UK#VirtualBox#jasonpatel#RedHat
6 notes
·
View notes
Text
Screenshot Software - Freeware
Zscreen for Windows
I just wanted a piece of software that allowed me to hot-key capture screenshots to a specific folder while not interrupting my work-flow. So I can post later mainly for my own benefit and possibly others.
Has some pretty advanced features though like being able to auto upload online to FTP, ImageShack, TinyPic, Flickr, ImageBam, ImageBin, TwitPic, TwitSnaps, YFrog, Deki Wiki. It can also do this with text only more feauters than I need right now but maybe I can grow into them plus its Free, I love free software!
Click through here
#screenshot#freeware#tutorial#hotkey#zscreen#windows#IT Professional#IT Pro#IT#Computers#Technical#jasonpatel#UK
16 notes
·
View notes
Link
A link to a nice simple article on the theory behind VLANS from Petri.co.il
http://rdd.me/2tuj8nin
#Petri.co.il#VLAN#Cisco#Theory#CCNA#Networking#LAN#Switch#IT Professional#IT Pro#IT#Computers#Technical#jasonpatel#UK
22 notes
·
View notes
Text
Kindle Standalone Terminal
Environment
Ubuntu 11.04 - Natty Narwhal
Kindle 3 WiFi-only model
Directions
Jailbreak Kindle
1. Download and extract the correct "bin" file on the root of the device in my case "update_jailbreak_0.7.N_k3w_install.bin" you can find the required file via this link
2. On the Kindle press the following sequence once complete the Kindle will restart
Menu --> Settings --> Menu --> Update Your Kindle
Install USB Network Drivers to Kindle
1. Download and extract the correct "bin" file on the root of the device in my case "update_usbnetwork_0.33.N_k3w_install.bin" you can find the required file via this link
2. On the Kindle press the following sequence once complete the Kindle will restart
Menu --> Settings --> Menu --> Update Your Kindle
Install Standalone Terminal to Kindle
1. Download the file from here and extract the files to a new directory "kiterm" on the root of the Kindle.
myts.arm
launchpad.ini
keydefs.ini
2. On the Kindle do the following to enable USB Network
Menu --> Search
Type ;debugOn and press the enter key ↵
Type ~usbNetwork and press the enter key ↵
Setup USB Network on Ubuntu
Other instructions I seen on the net did not mention this part possibly due to being too obvious but I initially got confused as never done any USB networking so I include it.
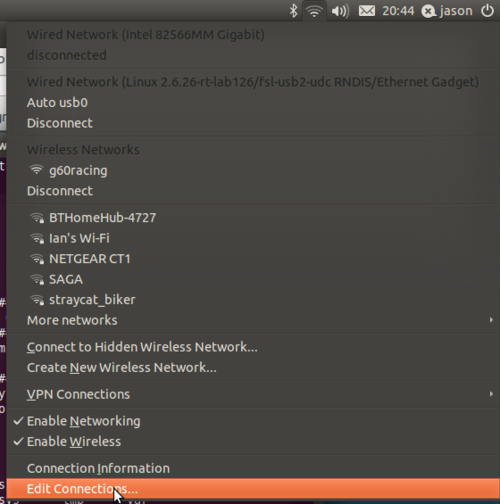
1. In the top right of Ubuntu desktop confirm "Auto usb0" (may be another number) is available. Then goto "Edit Connections" found at the bottom of the menu.
2. In Network Connections edit the "Wired" connection "Auto usb0" to network the settings and save:
Address: 192.168.2.1
Netmask: 255.255.255.0
Gateway: 0.0.0.0

3. Open a Terminal session and type "Telnet 192.168.2.2"
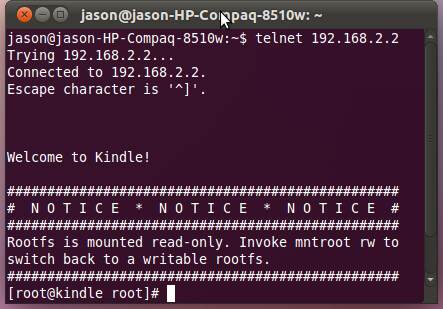
4. Now on your Kindle press "Shift" then afterwards "T" this should boot the terminal. To exit press the top left button on your Kindle "<"
5. Your now in the Terminal mode have fun!
#Kindle#Hack#Linux#Unix#PC#Ubuntu#Jailbreak#Terminal#Amazon#IT Professional#IT Pro#IT#Computers#Technical#jasonpatel#UK
18 notes
·
View notes
Text
WinSQL - Free SQL Client
Just want to share this awesome little package with you WinSQL. I have been using it for years to query our Databases at work. In my case that was Informix and MS SQL Server 2000 but it will work with any database that you create and ODBC link to.
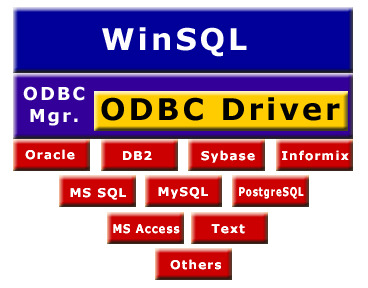
At the base level this highlights Syntax for SQL as you type, run only part of a query that is highlighted. A Database catalog where you can see all tables, stored procedures and other database objects. A great light tool that is well worth a look at.
The paid version builds on the basic functionality adding a lot of very useful functions such as Task Scheduling, Diagrammatic Relationship Manager. Intelli Tips look very impressive as they suggest what you may want next from a drop down filtering down as you type similar to predictive text on a mobile phone.
You can find the product online here:
http://www.synametrics.com/winsql
#Proffesional#winsql#SQL#Free#Software#Tools#Database#ODBC#Freeware#Informix#Excel#Oracle#DB2#IT Professional#IT Pro#IT#Computers#Technical#jasonpatel#UK
26 notes
·
View notes
Text
Jason Patel MBCS
So I have just recently joined the BCS the chartered institute for IT, or the British Computer Society (BCS).
To join I had to submit my work experience and also nominate someone in the profession to answer a number of question to ensure I was suitable. I qualified and am now a Professional member so can add some letters after my name from now on I shall be called Jason Patel MBCS.
I now have access to some healthy discounts to training and a user professional forum. As a member I must adhere to the BCS code of conduct and good practice. In line with this I need to maintain and develop my skill and competencies.
So the goal for the next 12 months is to attain a new skill with CISCO equipment, CCNA is what I am aiming for. This also fits in well with works new wireless AP system that uses CISCO equipment. Also I want to progress further from my current Microsoft MCP, to MCSA then MCSE.
Now for the action.

#MBCS#BCS#MCP#MCSE#MCSA#CISCO#CCNA#Prodessional Member#chartered institute for IT#British Computer Society#Jason Patel#IT Professional#IT Pro#IT#Computers#Technical#jasonpatel#UK
16 notes
·
View notes
Text
Multi Monitor Snap: Windows 7
Discovered a new shortcut in Windows 7 that is useful for all those using Multi Monitors. As it stand if you cannot snap a window to the Right of your left screen with the mouse, the same is true for the left of the right screen.
However if you press the WinKey + Right Arrow or Left while focused on a window you can cycle through all position on each monitor great stuff!
Winkey + Left arrow: Snap to left side of current display
Winkey + Right arrow: Snap to right side of current display
#Proffesional#Multi Monitor#Windows 7#Microsoft#Shortcut#Jason Patel#IT Professional#IT Pro#IT#Computers#Technical#jasonpatel#UK
14 notes
·
View notes
Link
Apart from IT I also enjoy photography. Photos are very important as I cannot reproduce most of them should I loose them.
So I originally setup a software Mirror (RAID 1) in Windows 7 this worked OK but on occasion if/when windows crashed the Mirror would need to rebuild, taking hours. The RAID setup was probably a little overkill as the actual data does not change that much only when I import my photos. So once I have imported my photos I use the File replication software Beyond Compare to replicate the directory structure on the secondary drive, it intelligent and only copies over the files that have changed. This time overhead end the end of an editing session is only a few minutes so perfect for me.
The software is cross-platform with windows and Linux versions available.
#Backup#Beyond Compare#File#Professional#Replication#Linux#Windows#Jason Patel#IT Professional#IT Pro#IT#Computers#Technical#jasonpatel#UK
20 notes
·
View notes
Text
Windows: NTFS Symlinks
Discovered a NIX like way of linking files in Windows today. NTFS Symlinks is a filesystem level shortcut.
I have used this to move my user profile to another drive on my windows machine as I now have a SSD drive as C:\ but it is pretty small. Also created a link within my program files on my C:\ that redirect to the classic secondary HDD on D:\.
My paths are as follows:
SSD Files
C:\Program Files\
C:\Program Files (x86)\
HDD File (Redirected)
C:\Program Files\HDD\ --> D:\Program Files\
C:\Program Files (x86)\HDD\{Program Name} --> D:\Program Files\x86\
To achieve this all I had to do was to create the two Symlinks form the CMD prompt.
CMD PROMPT
mklink /J "C:\Program Files\HDD\" "D:\Program Files\"
mklink /J "C:\Program Files(x86)\HDD\" "D:\Program Files\x86"
For more details refer to this good reference that explains the parameter that are available for this command very well.
http://www.howtogeek.com/howto/windows-vista/using-symlinks-in-windows-vista/
#NTFS#Windows 7#Microsoft#Windows 2008#Server 2008#Symlinks#mklinks#Proffesional#Jason Patel#IT Professional#IT Pro#IT#Computers#Technical#jasonpatel#UK
14 notes
·
View notes