#tutorial♡
Text
˚꒰ 🏹 DISCORD FORUMS TUTORIAL♡
i'm not sure if people have seen or tested out the forums on discord but i thought i'd make a tutorial on how i use it for roleplaying since i found it super fun and helpful for organization purposes!
so what are forums? discord describes it as "a space for organized discussions". much like threads, the discussions can be contained in one post which makes it easy to keep your topics in order. the part that i find most useful is that you can organize your post by tags and filter through them! now in order to get forums in your server, you will have to enable 'Community' on your server. so let's start!

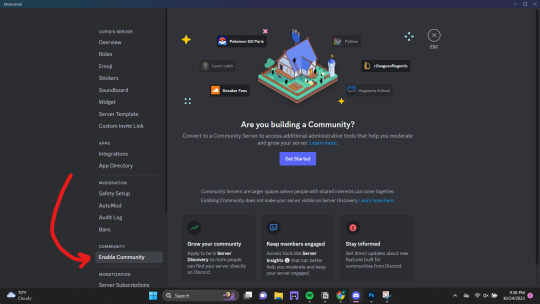
♡ . ) first thing you'll do is open your server setting. there will be an 'Enable Community' that you can click on and it will take you to a page like this
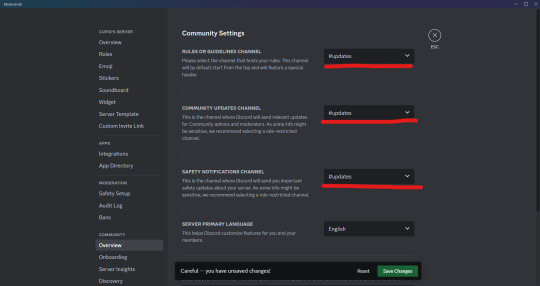
♡ . ) once you click 'Get Started' it will take you through a series of questions and system settings. you will need at least one "default channel" where discord will send automated updates. this channel is necessary if you want to use forums.

if you continue with the default settings, discord will automatically create two channels for you: one titled 'rules' and another titled 'moderators-only'. the announcements made whenever there's an update as mentioned above will be sent to the latter.
NOTE FROM CUPID ! i personally like to make a single channel titled something like 'updates' and keep it locked. this can be done before or after enabling community, you will just need to change the settings to go to the new channel first.
♡ . ) once you have community enable, you're free to make all the forums you want! when you go to create a new channel, 'forums' will show up as an option like this

for this example, i'm going to show how i set up my muses' profiles for 1x1 writing server like a roster, but you can also do this for single muse / threads / sms / etc.
♡ . ) when you click into the forums channel you created, you will see a landing page like this. there are instructions on how to navigate the channel as well so feel free to read those as well! the first thing i like to do is create tags. you can open that setting by clicking either of these buttons.
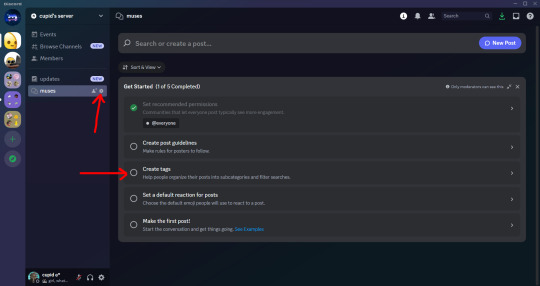
(navigate to the 'Tags' section and click 'Create Tag' if you need to) it will open a popup box like this. i like to create a tag for every muse that i want to add to my roster and you're able to add 20 tags!
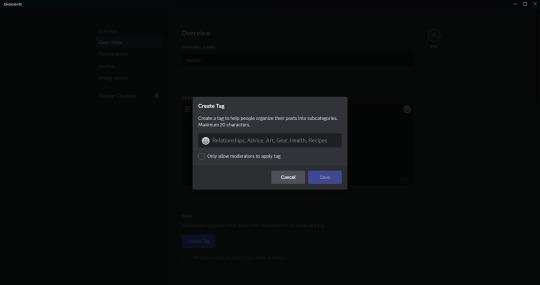
when you're finished, they will be listed as you see below. there are other options in forums settings that you can play around with including a 'default reaction' emoji, 'slowmode', layout and sorting option, age restriction and 'hide after inactivity'. all these are based on preference!

♡ . ) once you've saved your setting changes, you can leave this page and are now able to make your posts by clicking 'New Post' on the upper right hand corner.
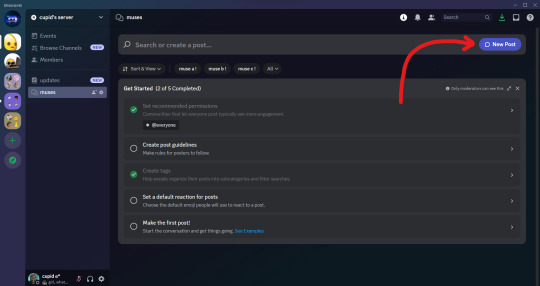
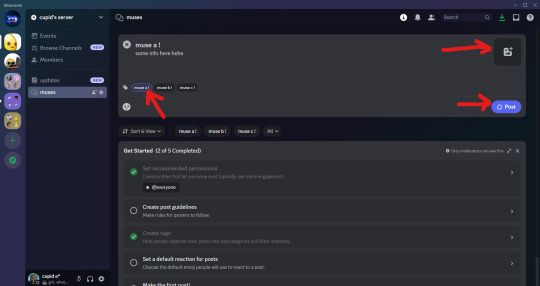
this is where you're pretty much able to do whatever suits your style including formatting how you like and adding photos, all you need to make sure to do is add the corresponding tag to the post! once you're finished making it look how you want, you can click 'Post'
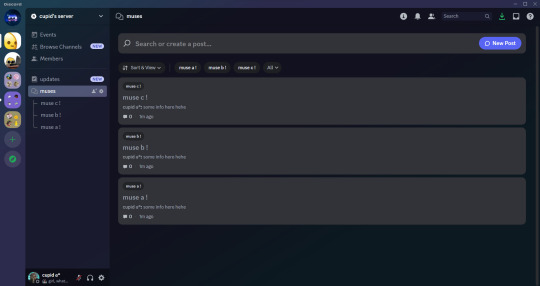
they will appear in the channel like this!
♡ . ) and by clicking on a post, you will be able to open it in a side view like this. if you want to see the post in full view, you will click the three dots in the upper right hand corner of the side view and then choose 'Open in Full View'.
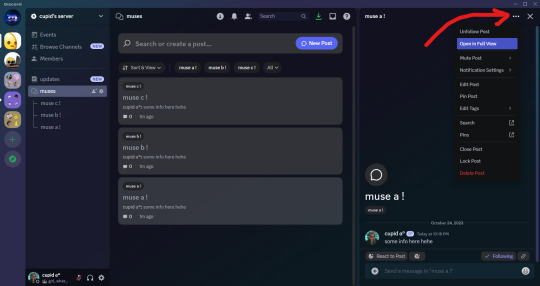
you're now able to add more messages within the post! for me, i like to add stats of my muses and headcanons that may be useful when i thread.
NOTE FROM CUPID ! one set back i found is that you are not able to use threads within a forum post so it may get a bit cluttered depending on what you send in a forum post. so if you are wanting multiple different sections for one topic, i suggest creating a forum instead. for example, if you are wanting to add musings, faceclaim pics, headcanons and stats all for one muse, i would create a single forum post just for that muse instead to avoid having important info getting lost!
and that pretty much covers how i use forums for discord rp! i encourage you to play around with it to find a style and format that best works for you. and if you have any questions, you're more than welcome to send it to my inbox. happy writing everyone♡♡♡
165 notes
·
View notes
Text
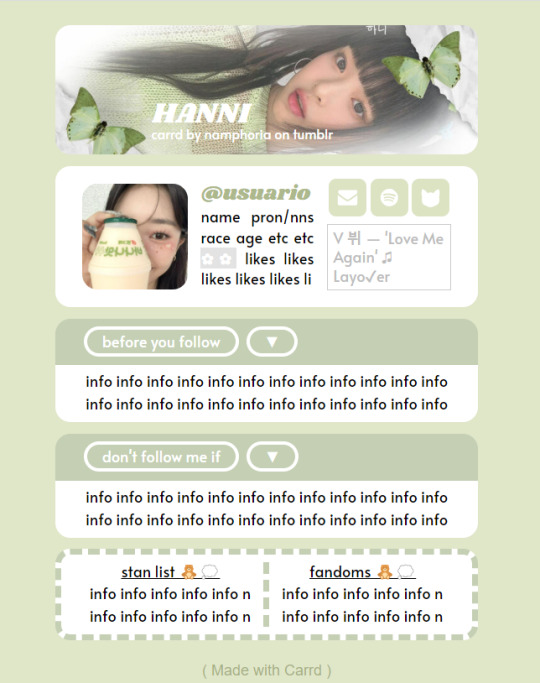
✿ CARRD INSPO
like or reblog if saveㅤ⿻ㅤᐢ..ᐢㅤ♡ㅤ2023.
❛ please, credit me as "namphoria on tumblr" if you remake! ⁾⁾
#⋆ ˚ 。 just an rkive — ★. *#♡✮☁️✧˖°💿⋆。°✩#carrd.co#carrd inspo#carrd template#carrd templates#carrd icons#carrd stuff#carrd material#carrd resources#carrd moodboard#carrd inspiration#carrd#carrd layouts#carrd symbols#carrd help#carrd tutorial#carrd theme#carrd things
1K notes
·
View notes
Text

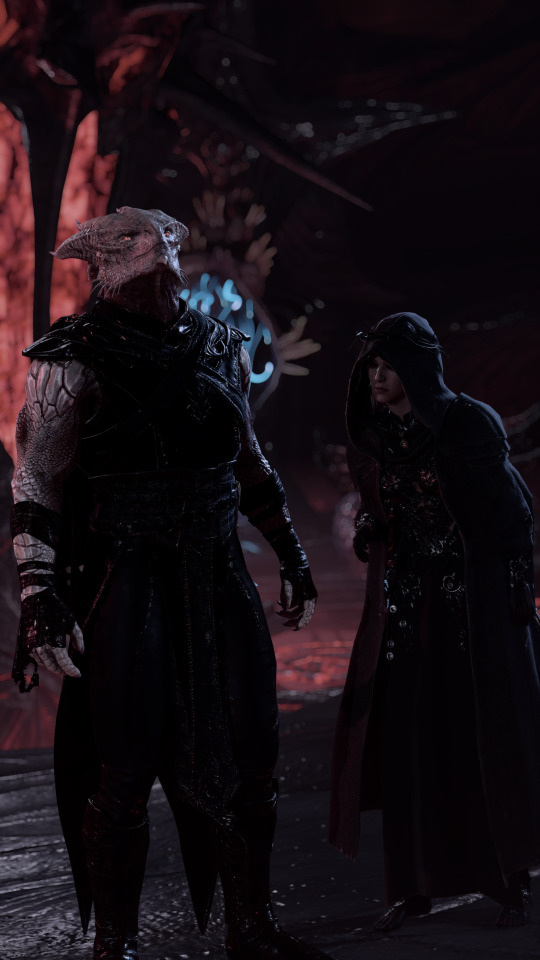

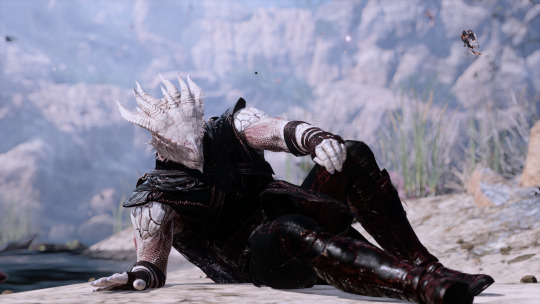
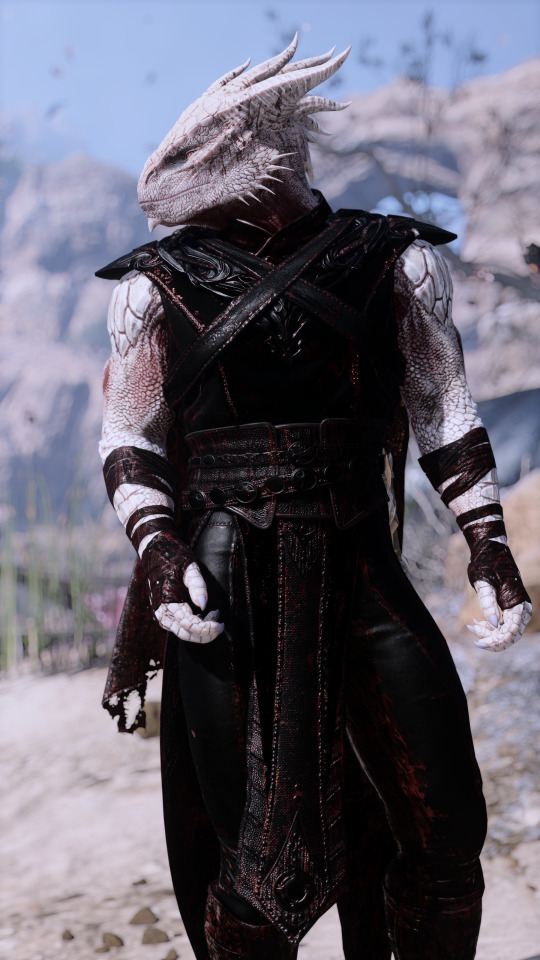
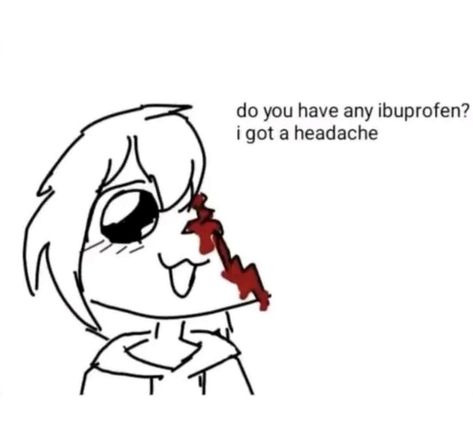
she def looks like some creepy obsessed cultist in these 😭😭
durgetav playthrough 2/?
#♡ durgetav playthrough#bg3#baldur's gate 3#bg3 screenshots#the dark urge#bg3 oc#bg3 tav#durgetav#just some tutorial shots for fun since im doing a default durge playthrough#im kind of rping it as an au where she is an bhaalist priestess that is like CRAZY IN LOVE with default durge and just follows bro everywhe#thank u lae'zel for having the exact body language i needed
112 notes
·
View notes
Note
Heyyy. . :3
Idk if you are fine with questions but I'd like to ask where you get these gifs from.. And how u color them..

Your post with these banners
haiii!!!!!!!! these r the overlays below :3 i get most of these from pinterest,, i recommend searching up keywords like "gif overlays for editing" but im pretty sure u can find these also on tenor
and the coloring tutorial is under the cut !!!!!!!! (it is again, long)

how do i color my overlays?
... is what ill be teaching u today! follow my steps
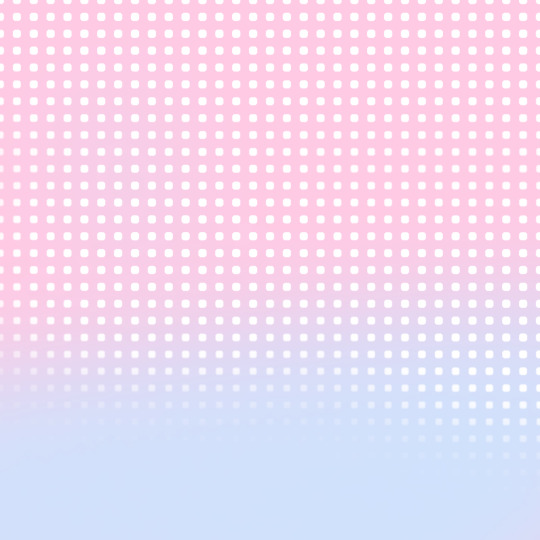
step zero : make the color first !!!
this will be used to color the overlays, your free to make it look like anything, throw in some gradients or some dots!!!

first, ill show you how to color the heart tunnel! ill be doing this on capcut, but this can probably work on most programs! follow my steps!
step one : add the images
make sure to first add the background and then add the overlay!!!


step two : color it
to do this first click on the overlay, scroll till you find "blend" and then click "dodge"

then save! this will be the end result, tada!

wasnt that hard, was it? now lets do the other overlay! ill be doing this again on capcut but this can work on most programs!
lets keep going!
step one : add the images
this time, add the overlay first and then the color! scroll til you find "overlay" -> "add overlay"
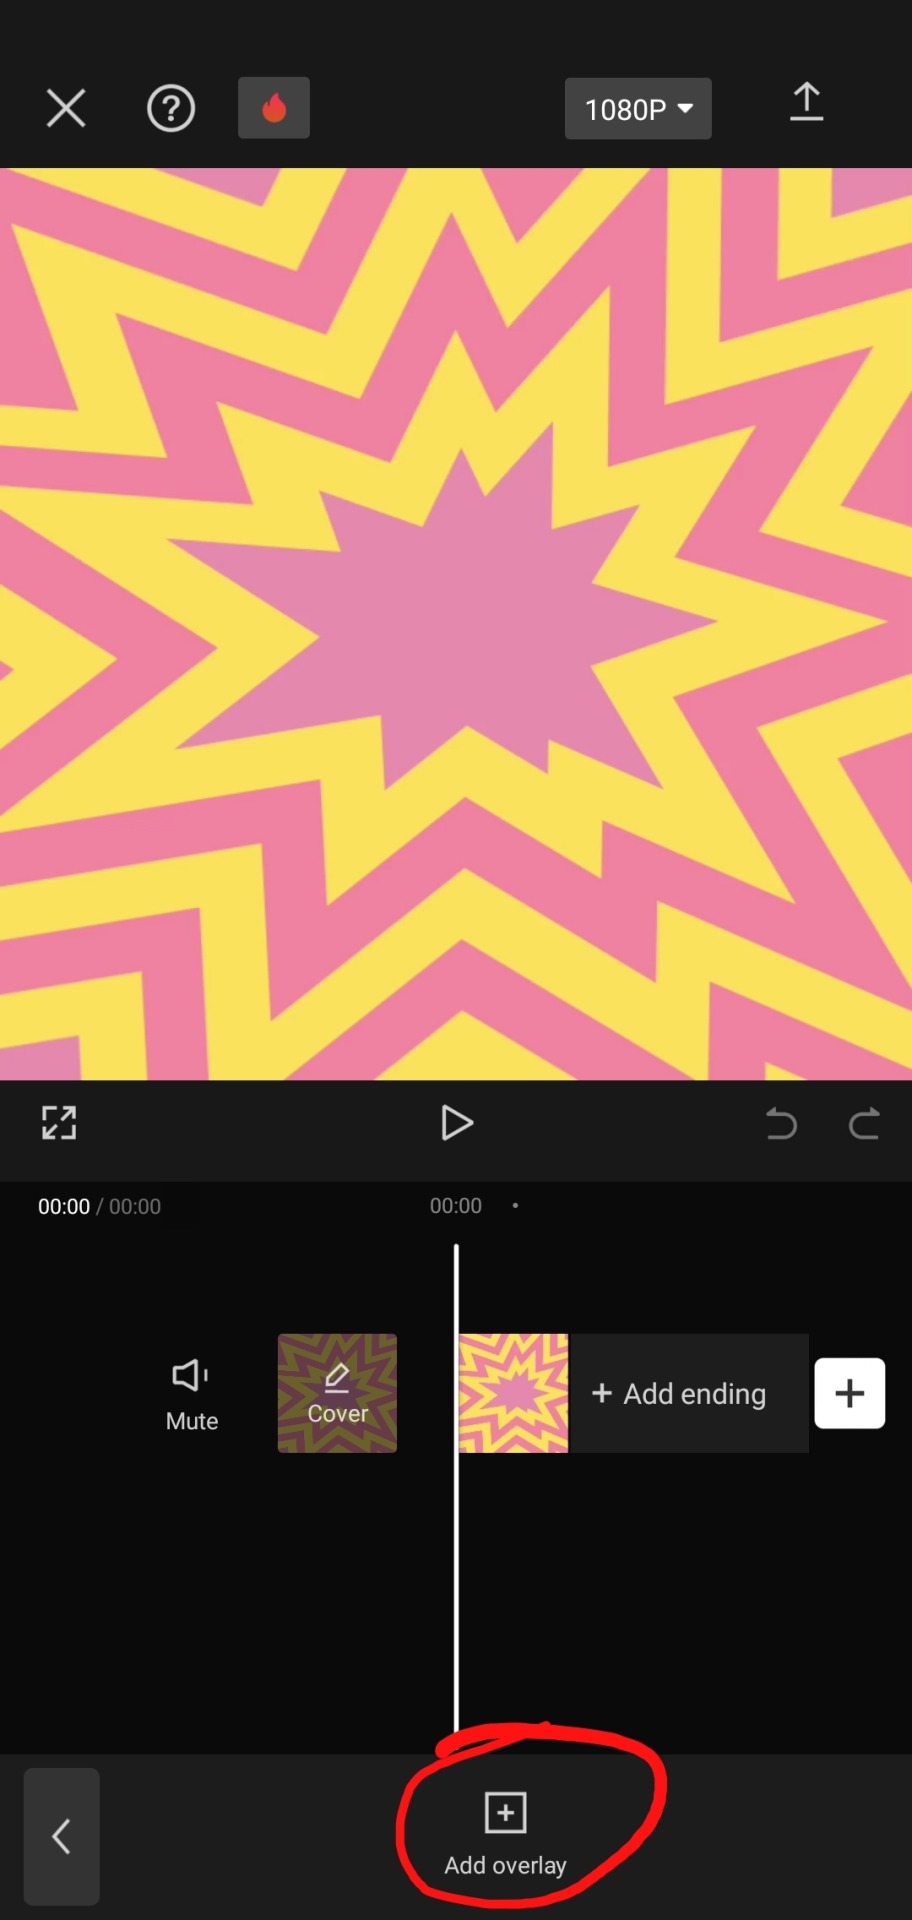
step two : color it
scroll til you find "blend" -> "filter"


and now save! and you are finished!

tada! now this is the end result!
additional steps: if u need to make it a gif, convert it on ezgif
hope this tutorial is easy to understand and helpful!
105 notes
·
View notes
Text
✨ HTML for pretty colors tutorial ✨
Hello silly hamsters in my phone 🫶 I'm lowkey shocked to see blogs gatekeeping this knowledge but yeah. Make your blog pretty! Match your text to dividers or just have it as colorful as you'd like!
First of all, you can not do this on the mobile app! You need to either use a laptop or your phone / tablet's internet browser (in my case safari)
You start by logging into your account and either you make a post or you edit a post. I recommend making the post on the app first because editing is certainly faster & easier!
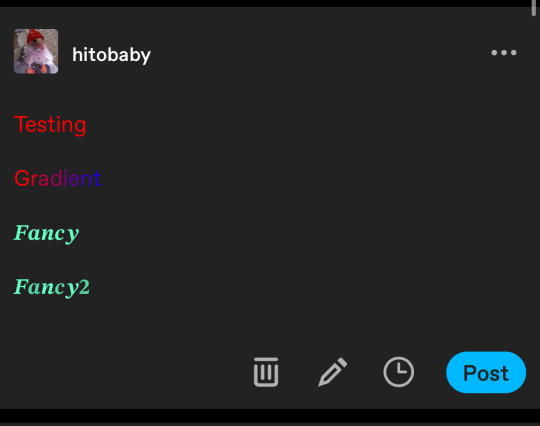
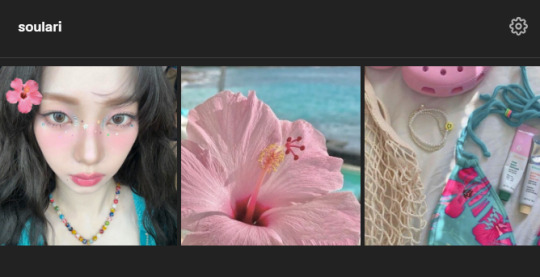
This is our starting point! For the fancy fonts you can use messletters


I will now log into tumblr on my web browser and click on edit this post.
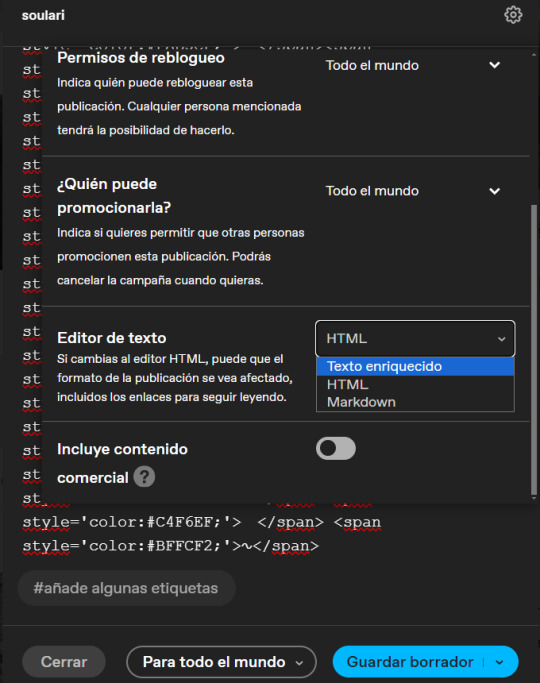
You then have to click on the little gear icon in the top right corner to change the settings on your post.
There you have to click on "rich text" to change it to "HTML"
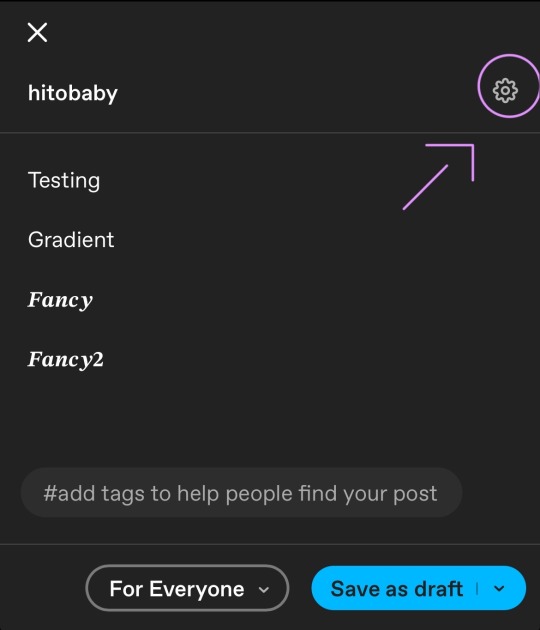
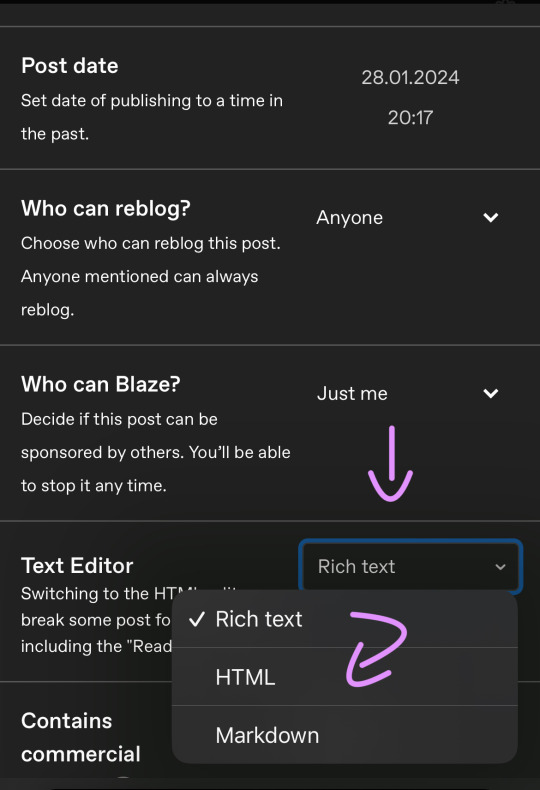
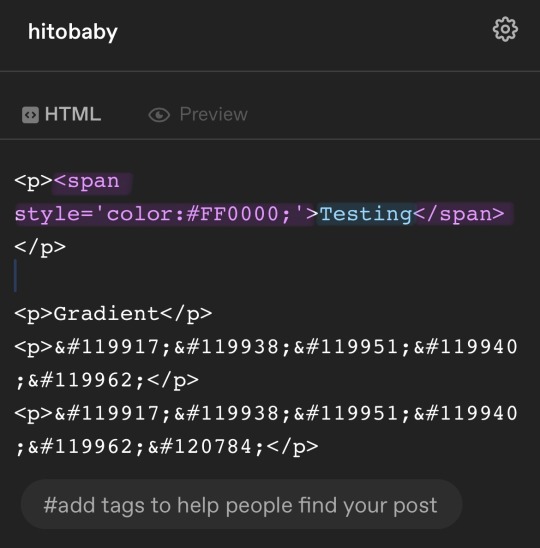
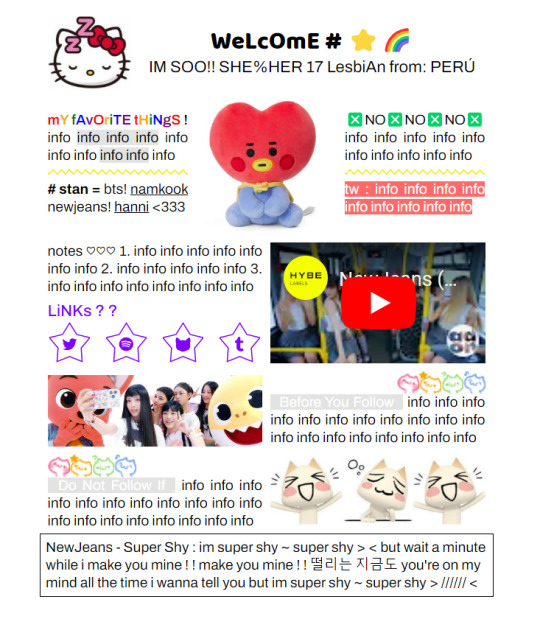
Your post should now look like this:

A quick rundown on html.
You always start with a letter or code in brackets. to end what you're doing it's </>. The slash signals the end.
P= paragraph <p> and to end </p>
I= italics <i> and to end </i>
b= bold <b> and to end </b>
Now tumblr will automatically do this for you if you made a text bold/in italics on your mobile post but to keep this tutorial simple i left that out here. You can always edit your text in the app after! Just not the color.
And as you see, the fancy text is now in coding. But we get to that later!
To colorize your text it's easiest to just use this website as it gives you lots of options!


First i will be choosing the option of "solid color" and you can then put in the hex code of your desired color into the color box.
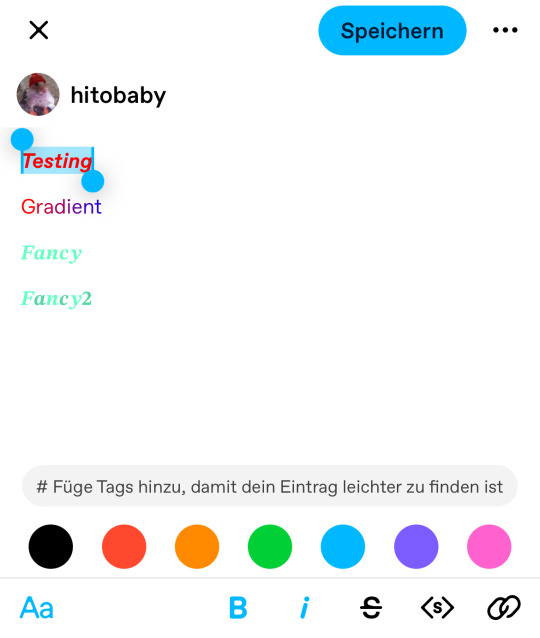
In the top box you will have to put the text you will color - for this tutorial it's "Testing"
Then you copy the box HTML code and paste it into tumblr where your word(s) are. Do not remove the in front and after your word/sentence !
For the sake of this tutorial marked the html code for colors in pink and the words in blue
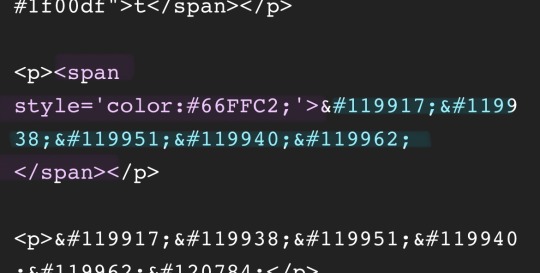
Your code will now look like this!

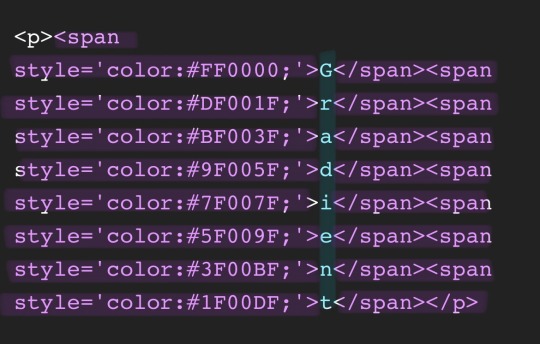
For the gradient you can simply choose horizontal gradient or three colored gradient on the website above and copy/paste the html text.
Mind you that every single letter will get its own color code now so the word gradient suddenly looks very long in html.
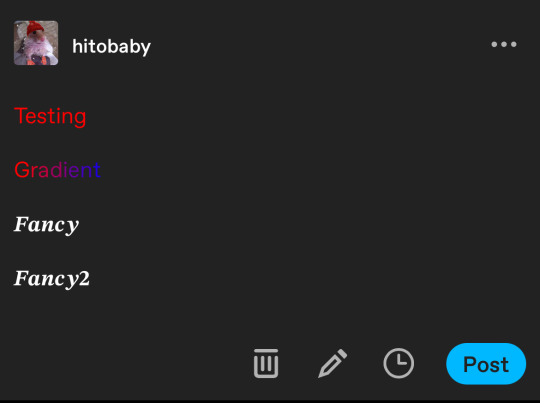
If you save the post it will now look like this!
Important to know is that you can color the fancy text only solid as the website can not color it as it is and putting the letter codes in the box above does not work either.
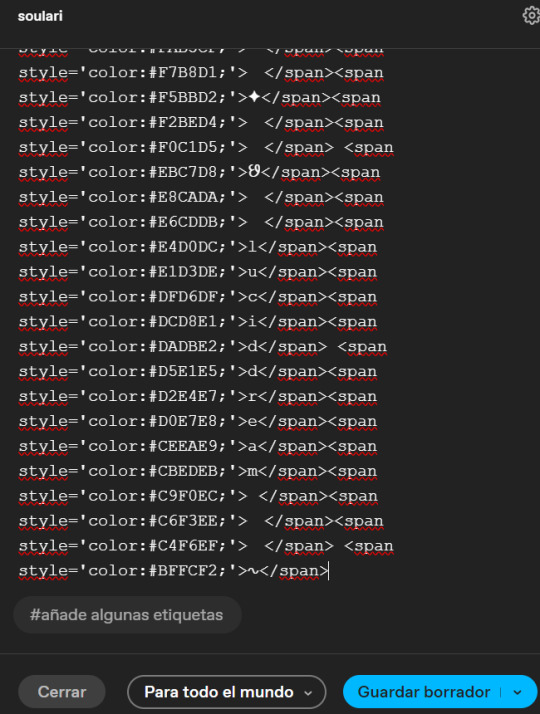
To color the fancy letters you simply copy the color code instead of the whole text - which looks like this:
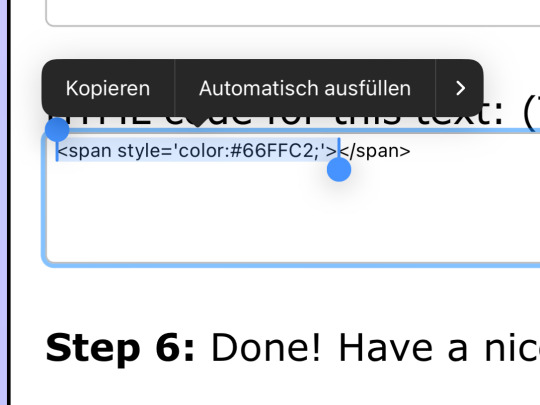
Don't forget to add </span> behind the word/the codes you're coloring to signal that this is where the color stops! If you forget to add it, nothing will be colored.
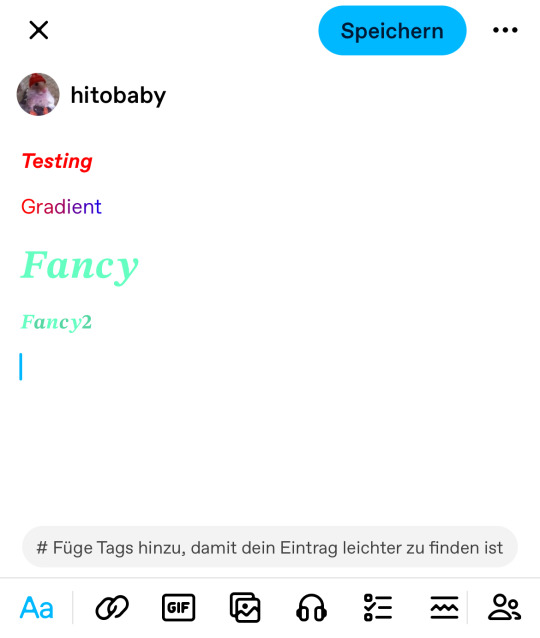
If you decide you still want to have the fancy lettering in multiple colors you have to color letter code by letter code manually like this:
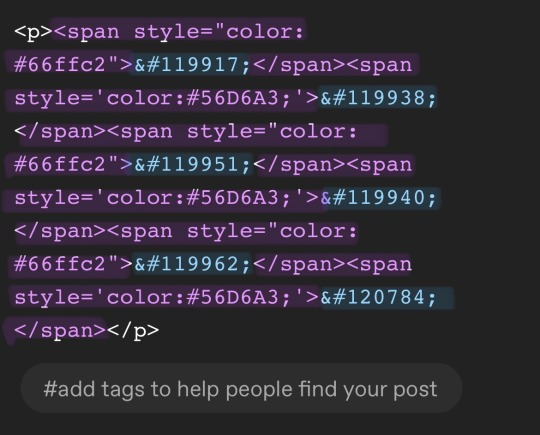
(I made a very poor choice on 2 different greens but oh well)
If you'd like to change your text, you can always do that on the mobile app like you usually would. You just can't change the color unless it's into a default color. But you can still change the size or make it bold for example.
Anyhoot, this is the whole magic behind html. It's a lot and might be very complicated at first but you will eventually get the hang of it! Took me weeks and hours until someone sat me down and went through it step by step.
If you have any questions or something doesn't work as you thought it would please don't hesitate to reach out - I'm always happy to help!
#rhy speaks ♡#html template#html tutorial#make tumblr pretty 2024#tumblr tutorial#divider tutorial#writing resources#resources
128 notes
·
View notes
Text
tutorial on how to make the dividers ♡
I clarify that I don't know how to do tutorials... but my questions box is full of those questions, so...

First you are going to download an app called "Picsart" there I will make it ^^
1. After opening the application, you will hit "blank".
2. Click on "Tools".

3. After that, click on "Crop".

4. That's the size I use: 2828 × 340.
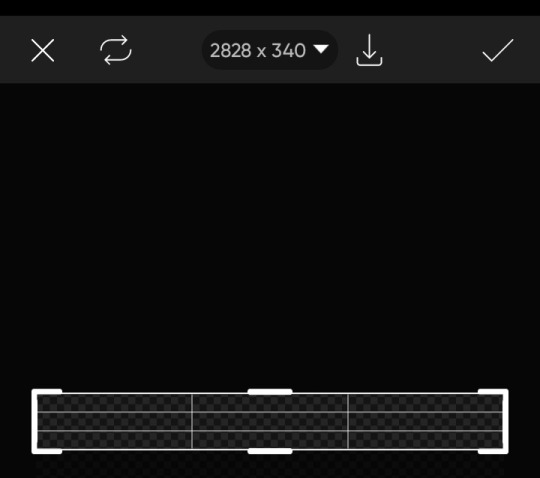
5. After doing all that, you can add and arrange the pngs as you wish.

That's all... actually, it's too easy to make it.
I am very sorry if this tutorial is not understood or was not helpful... also, there are several people here who make dividers, you can ask them. 🩷
62 notes
·
View notes
Note
hi!!! i really love ur graphics /gen! and you inspired me to kind of want to start a blog and post graphics n stuff, yet i really don't have an idea of how to, if you can. could you please teach me? /nf 💗

Hihi !! I’m so sorry for the late reply. I didn’t know how to explaim but kio has made a pretty good tutorial here . If you mean the non-gif 1s kio has also made this tutorial (( stan kio ty )) !! I don’t personally use photopea for rentry graphics but i do want to start using it and i recommend it. But I use ezgif && ibis paint x to do my animated gif graphics. I followed this tutorial i found on rentry < 3


#♡ 。 OO6⠀︵︵⠀talking#♡ 。 OO7⠀︵︵⠀faqs#tutorial#tutorials#rentry graphic#rentry png#rentry#rentry graphics
60 notes
·
View notes
Text
‘m teachin myself how to play al haitham’s teaser trailer music on da piano . . here is an audio recording of mi playing wat ive learned so far for u :3
#𓈒 ۫ 𝓹𝓾𝓹𝓹𝓲𝓮 𐂯 𝓹𝓻𝓪𝓽𝓽𝓵𝓮𝓼 ₊⠀ೀ#‘s taking a while to learn since i cldnt find any existing sheets for it online n the existing video tutorials werent to m taste sooo . .#i ended up transcribing it on m own ꒰ ˆ ㅁ ˆ 𝄞 ꒱#at least dis is what ‘m trying to do > < have Been trying to do all day lulz#there are lots of errors aaack but pwease pay them no mind . . .#unfortch i dont fink i will be able to transcribe + learn the whole thing for a while since i only hv access to a proper piano at m parents#house ( which is wher i am now )#n i am not here vrie often ;w; but ! ! one day . . some day ! i will share the whole thing w u ♡ hehe
29 notes
·
View notes
Note
how do you clip(?) gifs onto shapes? pleasee tutorial... no one has told me... i love your content btw 😓😓😭
Hi anon! Thanks so much for the kind message! I’m gonna do my best to explain how I make gif icons, but if you mean something else please lmk!

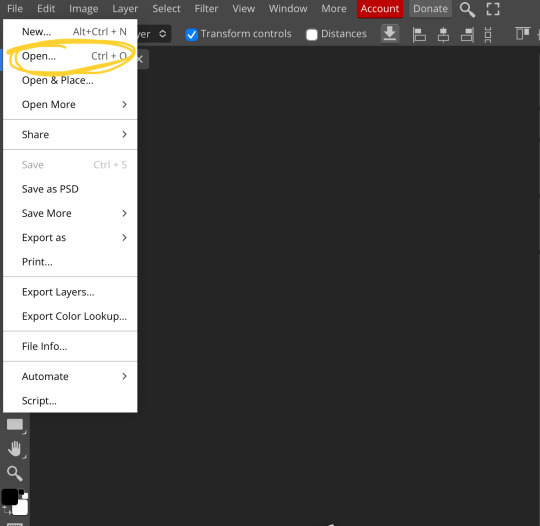
So first of all I Photopea! What you’ll want to do when you open it is click on import from computer and upload your frame like so


Next you’ll want to click on file and open… to open your desired gif in a new…tab? Like this!

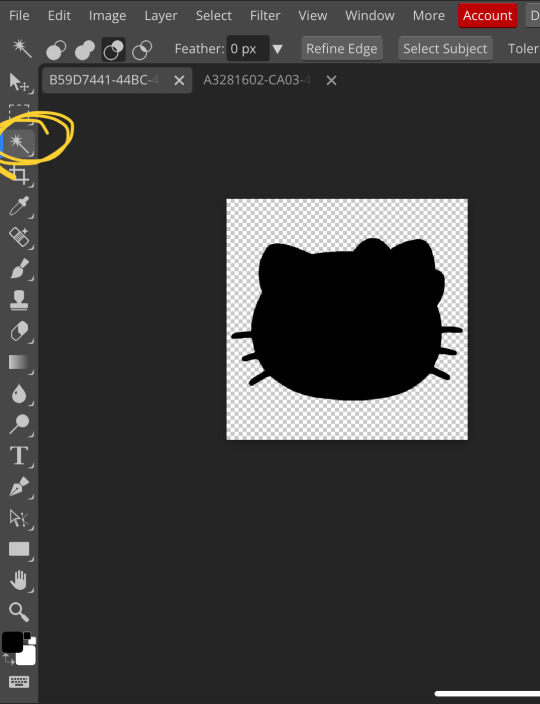
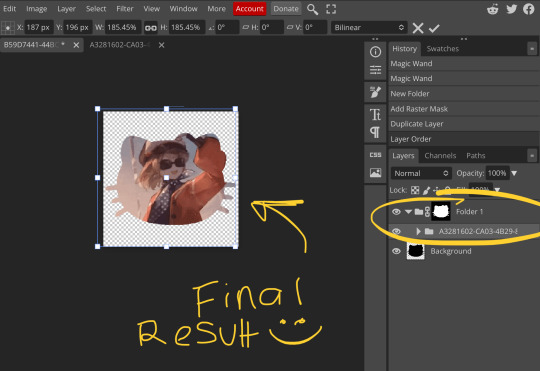
Okay now we have all our components! Next you’ll want to go back to your icon tab and select the magic wand! You’ll want your selection to be your icon frame! You might have to play around with it a little to make sure no selection is on your background! You only want to selection to be on your icon frame!

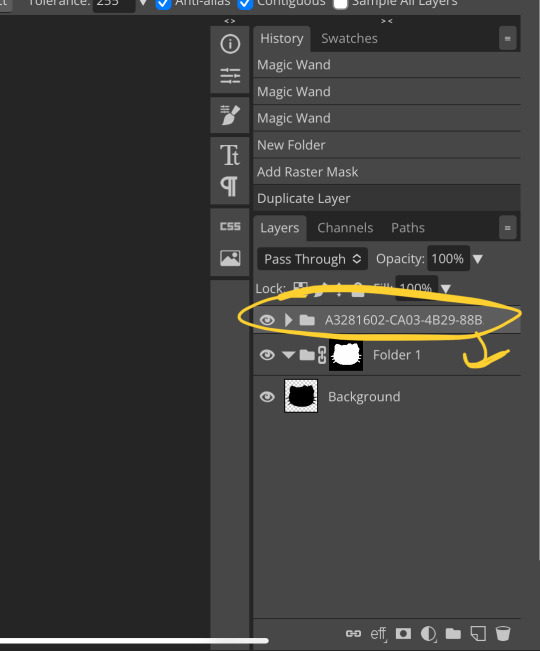
So it’s selected! You’ll want to click on the folder icon and then the raster mask icon! Your result should be this!


Next, go back to your gif tab! You’ll select layer, duplicate into, and then select your icon frame tab!


And there you go! Drag your gif folder into your raster mask folder and adjust it how you like! Tada! :D When you export it make sure to export it as a gif!
#♡ 🐇 ;; mod posting#♡ 👛 ;; resources!#♡ 🩰 ;; anons#gif clipping tutorial#gif icon tutorial#tutorials
27 notes
·
View notes
Note
hello!! I'm new to tumblr and I just wanted to ask how you colored some of the text in your pinned a different color, it looks really pretty!! + (I CAN'T GO WITHOUT MENTIONING THAT YOUR WRITING IS AMAZING TOO HBJSADLKJK)
mini tutorial time ig–

♡. TEXT FADER .♡
so,, first thing u gotta do is enter this web to insert the text you wanna edit and choose the hex colors you'd like to use– it can be just one solid shade or fade it from 2 to 20 colors. once it's done, a color code will be generated.


♡. HTML POST .♡
after generating it, go to the post you want to work on and, clicking the settings button, change the text editor to HTML to paste the previous code and save. as far as I know this only works on Tumblr web, so you might want to use your laptop/computer or go to chrome instead of the app.


♡. EDIT TEXT (ADDITIONAL) .♡
after saving, you can already see the colored text on your post. if you wish, continue editing it however you want (making it bold, cursive, small size, etc etc) and don't be afraid of messing it up as long as Tumblr's predetermined text editor is on. finished, quick example:
mwah mwah mwah!


#nectar's rambling#♡ anon#anon message#really glad you like it darling!#and many mwahs for u#hope it was understandable–#tried to explain it as simple as possible#♡ anon ask#♡ mini tutorial time
61 notes
·
View notes
Note
hii! how do you make the letters in the post match the colors on the moodboard? I love them they are so perfect ><🥺🫶🏻💓
છ tutorial: how to put the text color (gradient) in your posts! ✦
1. First, you must have your text ready!
2. Then go to this link, copy and paste your text
3. There are many options, choose to your liking!
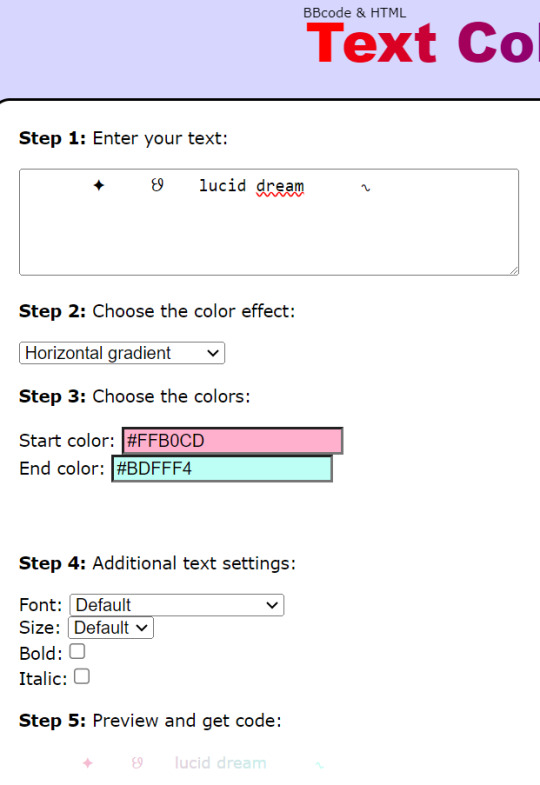
4. In this part you can change the colors, choose the main colors of your moodboard (you can vary it as you want)
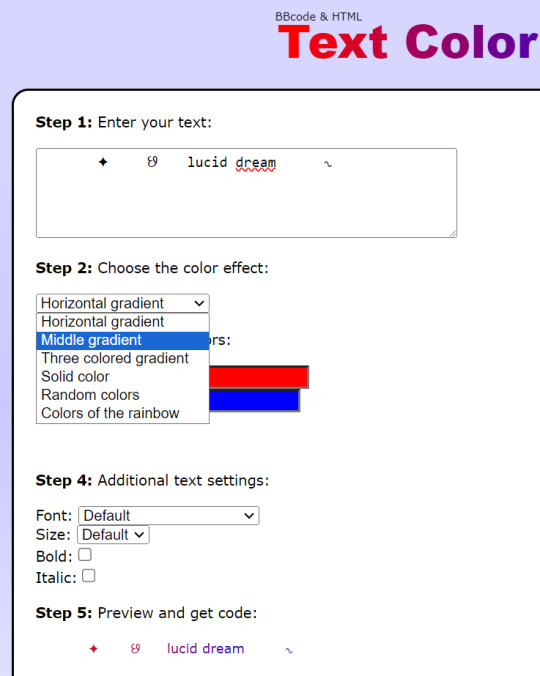

5. In my case, my moodboard will be blue and pink! Extra: If you want to have the exact colors, take a screenshot of your mb then go to an app/website that has the eyedropper, that way you will have the hex! (color code / example: #ffe4e1)

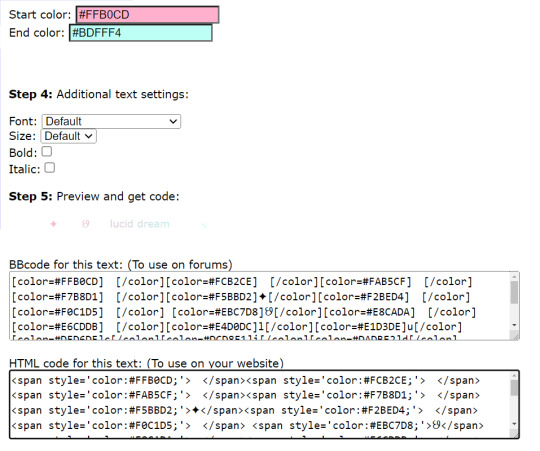
6. After you have chosen the colors, we will go to down and copy all the text from "HTML code for this text"
7. Let's go to our draft and go to the ⚙ symbol
8. We go down until, we find "text editor" and choose html
9. We go down again and paste the text from before!

10. We will do the same as before, go to the ⚙ symbol and choose "rich text" or the first option!
11. The images will be messy but down you will find your color text!
12. Finally, put the rest of the images on your moodboard and click "save draft"

13. In the end it would be like this! I know that at first it may be difficult for you but with time and practice it will become easier!
- karina moodboard = click here

I hope you liked my first tutorial! I hope you understood TT. If you have any questions, you can comment! Tysm and sorry if it took me a while to publish the tutorial!
18 notes
·
View notes
Text
✿ CARRD INSPO
like or reblog if saveㅤ⿻ㅤᐢ..ᐢㅤ♡ㅤ2023.
❛ please, credit me as "namphoria on tumblr" if you remake! ⁾⁾
#⋆ ˚ 。 just an rkive — ★. *#♡✮☁️✧˖°💿⋆。°✩#carrd.co#carrd inspo#carrd template#carrd templates#carrd icons#carrd stuff#carrd material#carrd resources#carrd moodboard#carrd inspiration#carrd#carrd layouts#carrd symbols#carrd help#carrd tutorial#carrd theme#carrd things
363 notes
·
View notes
Text
𝓣utorial
"Como fazer header com gif no canvas"

💭 Me pediram para ensinar a fazer a header que estou usando no momento, e como a explicação iria ficar muito grande decidir criar esse tutorial. Levem em conta que esse é meu primeiro tutorial, então se não ficar bom peço desculpa antecipadamente.
A header:


Vamos lá:
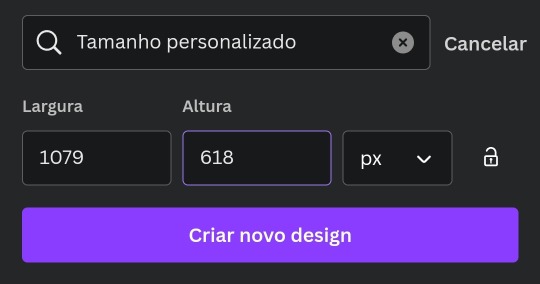
▫️ Abra o app e crie um novo design personalizado com o tamanho 1079x618
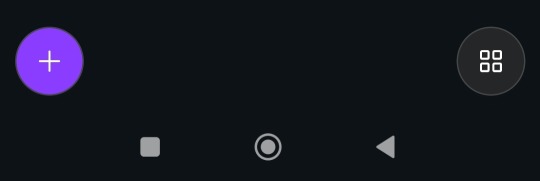
▫️Com o design aberto você vai clicar no "+" na parte de baixo. (imagem 1)
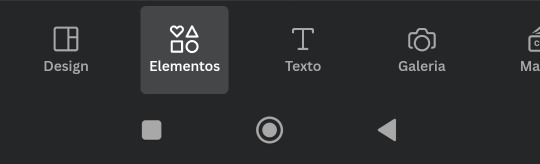
▫️Depois clique em "Elementos" (imagem 2)
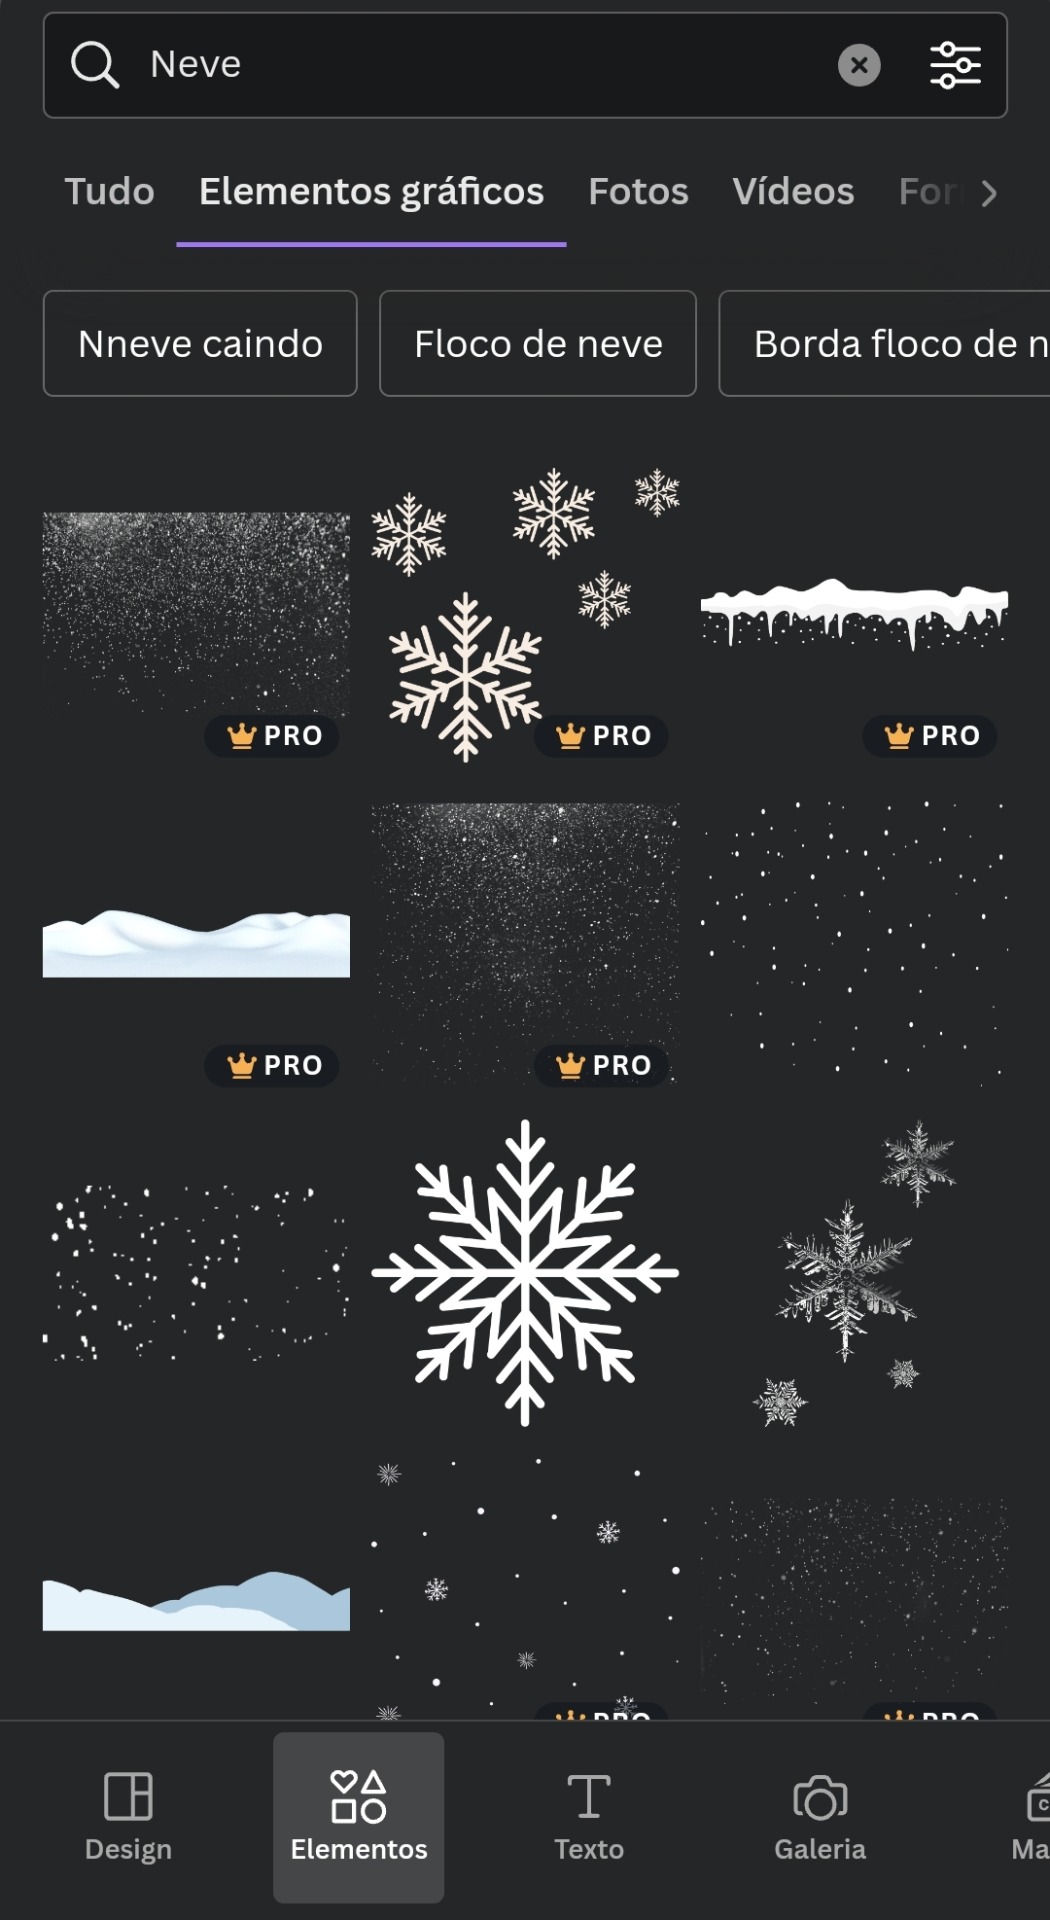
▫️Agora você vai na barra de busca e escreva o nome da figura que você quer usar.
▫️Depois você clica na aba "Elementos gráficos".
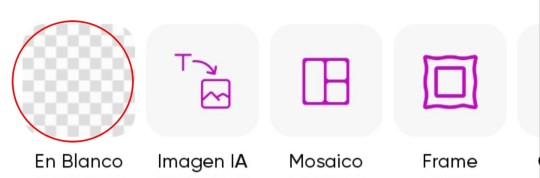
▫️Escolha a figura que quer usar e adicione no design em branco.
▫️Faça isso até encontrar tudo que quer usar.
▫️O gif de neve caindo você encontra em "Elementos gráficos" também.
▫️Agora use sua imaginação e crie um design completo usando apenas figuras.
▫️Depois de editar tudo você salva e baixa no formato de "Vídeo MP4", por causa do gif de neve.
▫️Se você salvar o design como gif de primeira, o tumblr não aceita como capa. Bom, pelo menos no meu celular não funciona.
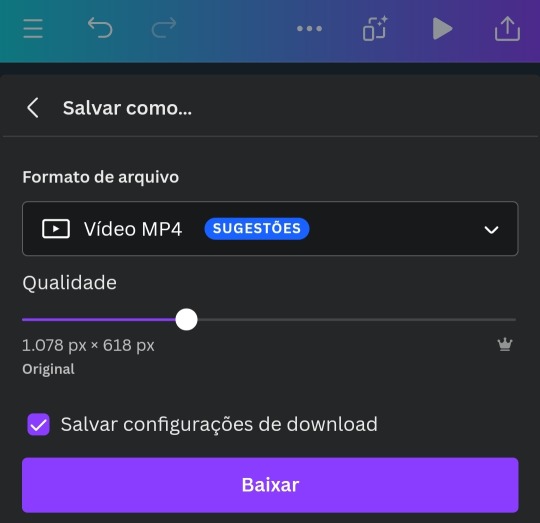
▫️Depois de fazer tudo isso, você vai nesse link aqui e transforma o vídeo em gif e salve na sua galeria.
▫️E tá pronto o sorvetinho... ops, digo o design 🤭😉
t𝗎𝗍𝗈𝗋𝗂𝖺𝗅ㅤ©ㅤestrelinha-s • 𝗅𝗂𝗄𝖾ㅤ𝖺𝗇𝖽ㅤ𝗋𝖾𝖻𝗅𝗈𝗀ㅤ𝗉𝗅𝖾𝖺𝗌𝖾.
#﹫estrelinha-s ᐧ 𝗇𝖾𝗐 𝗉𝗈𝗌𝗍 𝗇𝗈𝗐.#ㅤ📎 ㅤ' ㅤ tutorialㅤ ♡#tumblr tutorial#kpop#kpop tutorial#tumblr headers#my tutorials#aesthetic headers#random headers#arquivo#messy headers#aesthetic christmas#aesthetic
37 notes
·
View notes
Note
yk those graphics u make how do u make it bee like a GIF? like it’ll have the little frame thingy and it’ll be a GIF I’m sorry I’m bad at explaining
hai anon!!! im guessing you mean how to put a gif inside a frame, if you meant something else please be a bit more specific in my asks next time
but if you did want this tutorial, it'll be in the cut
( this will be a very long post )
how do you put a gif inside a frame?
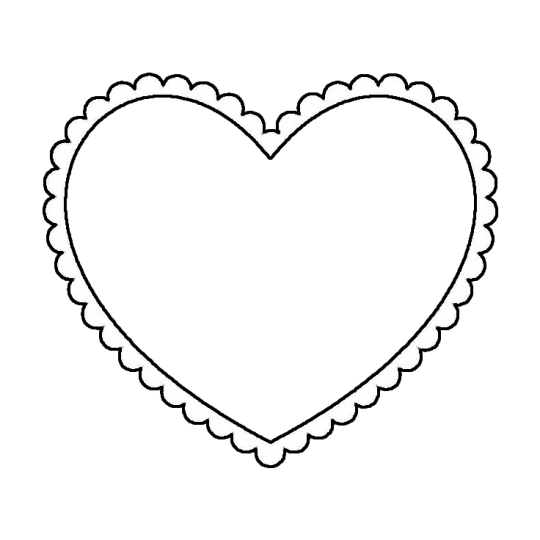
this will be our frame for today!!! follow my steps
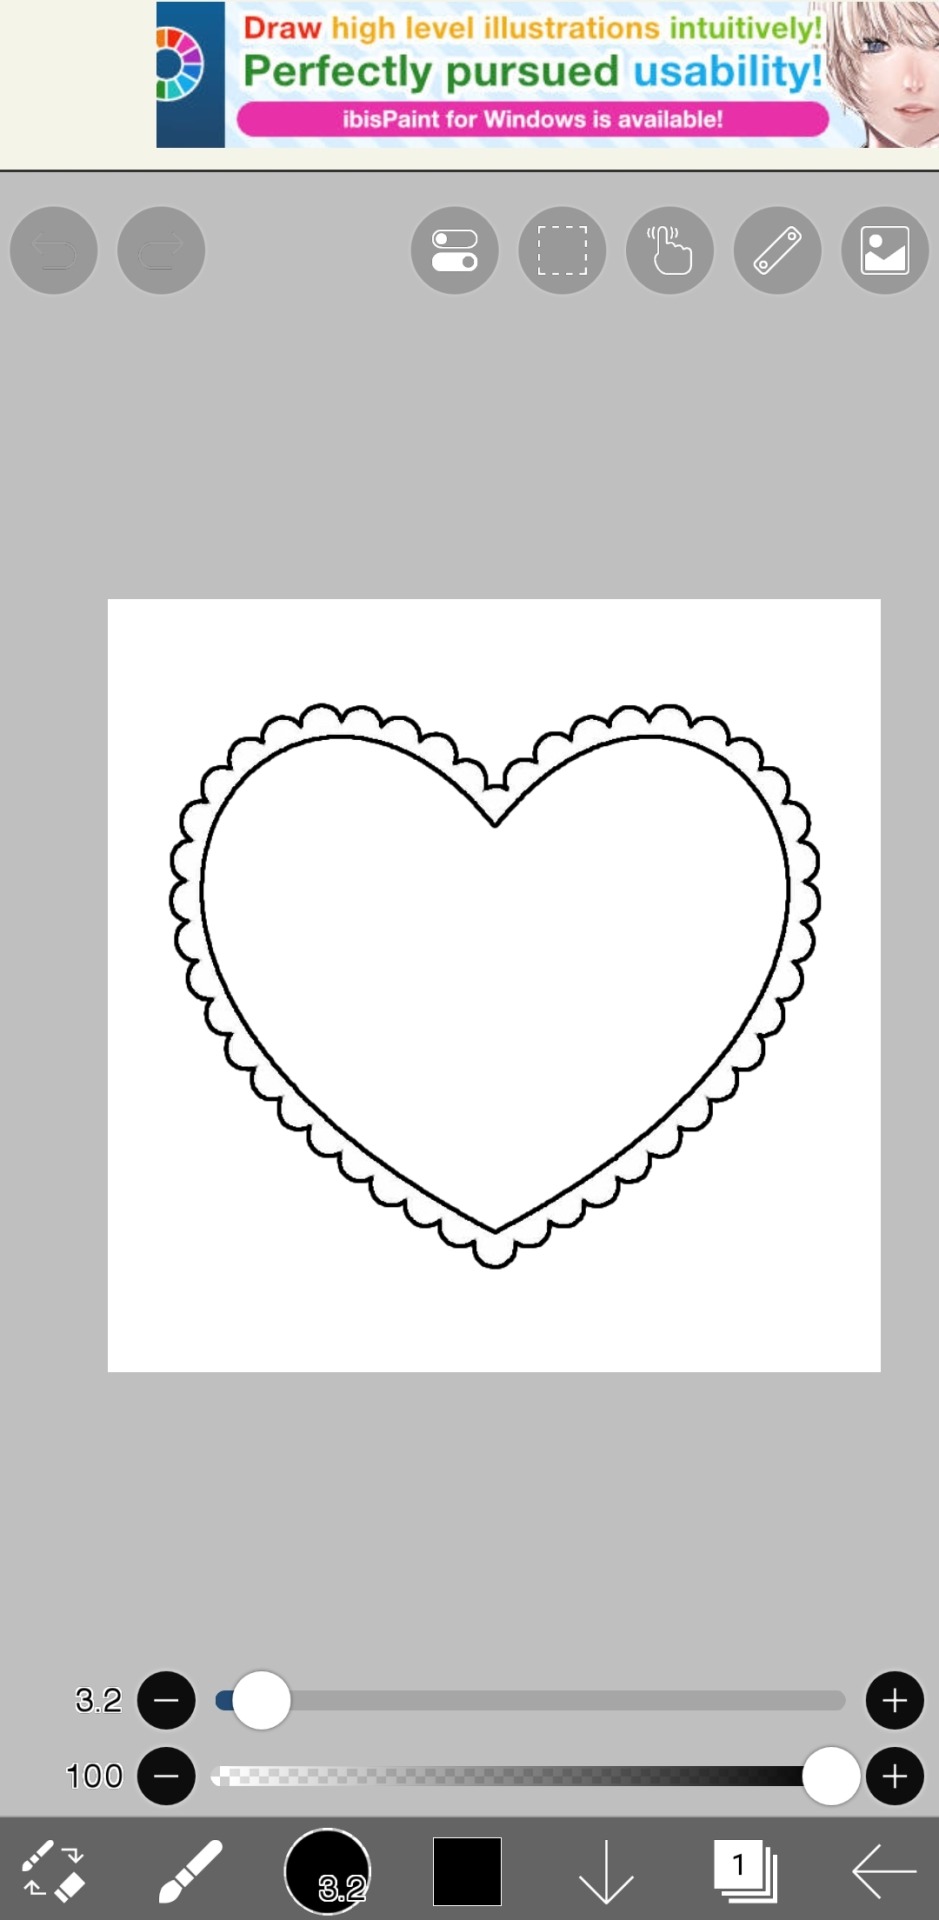
step one : make where the icon is supposed to be transparent
the gif will then be placed inside there
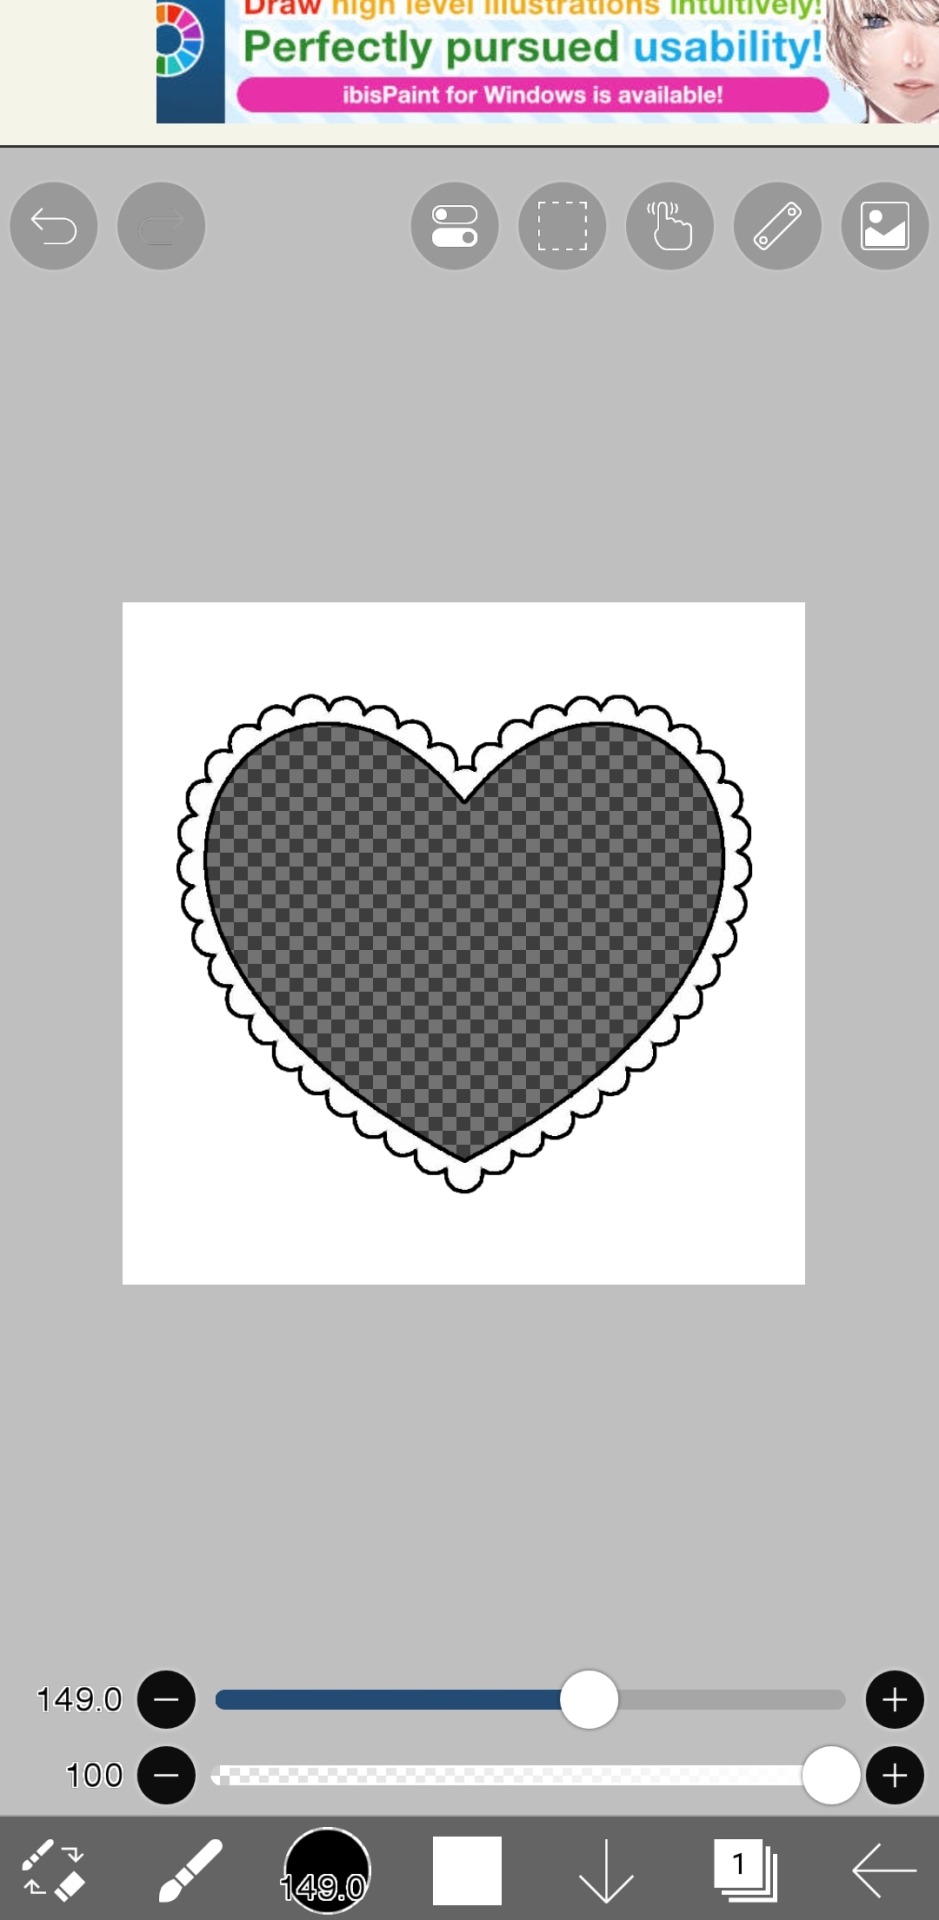
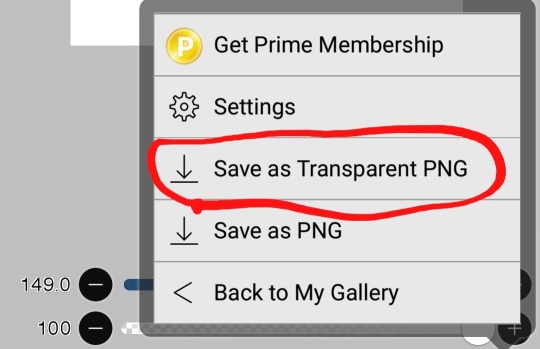
step two : once you have done that, save it as a transparent png
do not save it as a normal png, this will make the frame turn white and unable to put the gif inside
step three : once you've done that, go open up capcut
or open up photopea or any video software you use, but for this one ill be using capcut
step four : make a new project
to make a new project you'll have to click this

step five: (optional) click aspect ratio
if your frame is not a 1:1 ratio, you can ignore this step or if the current size does not fit always mess with this option til its perfect
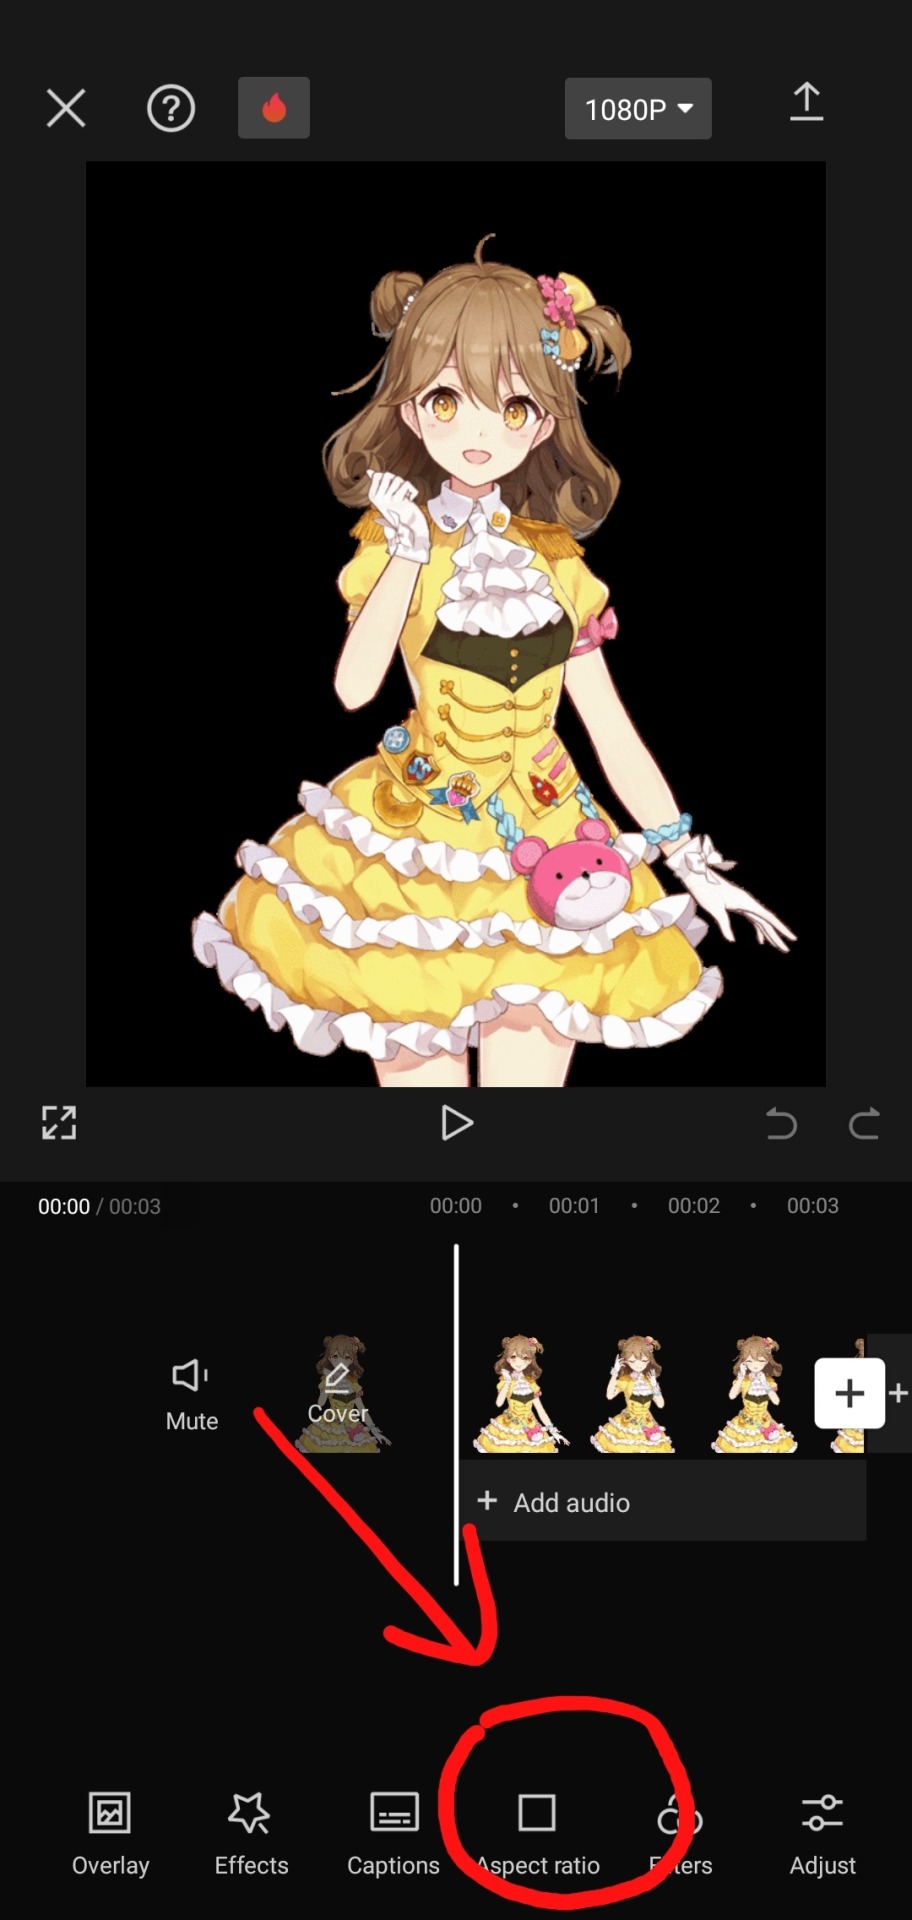
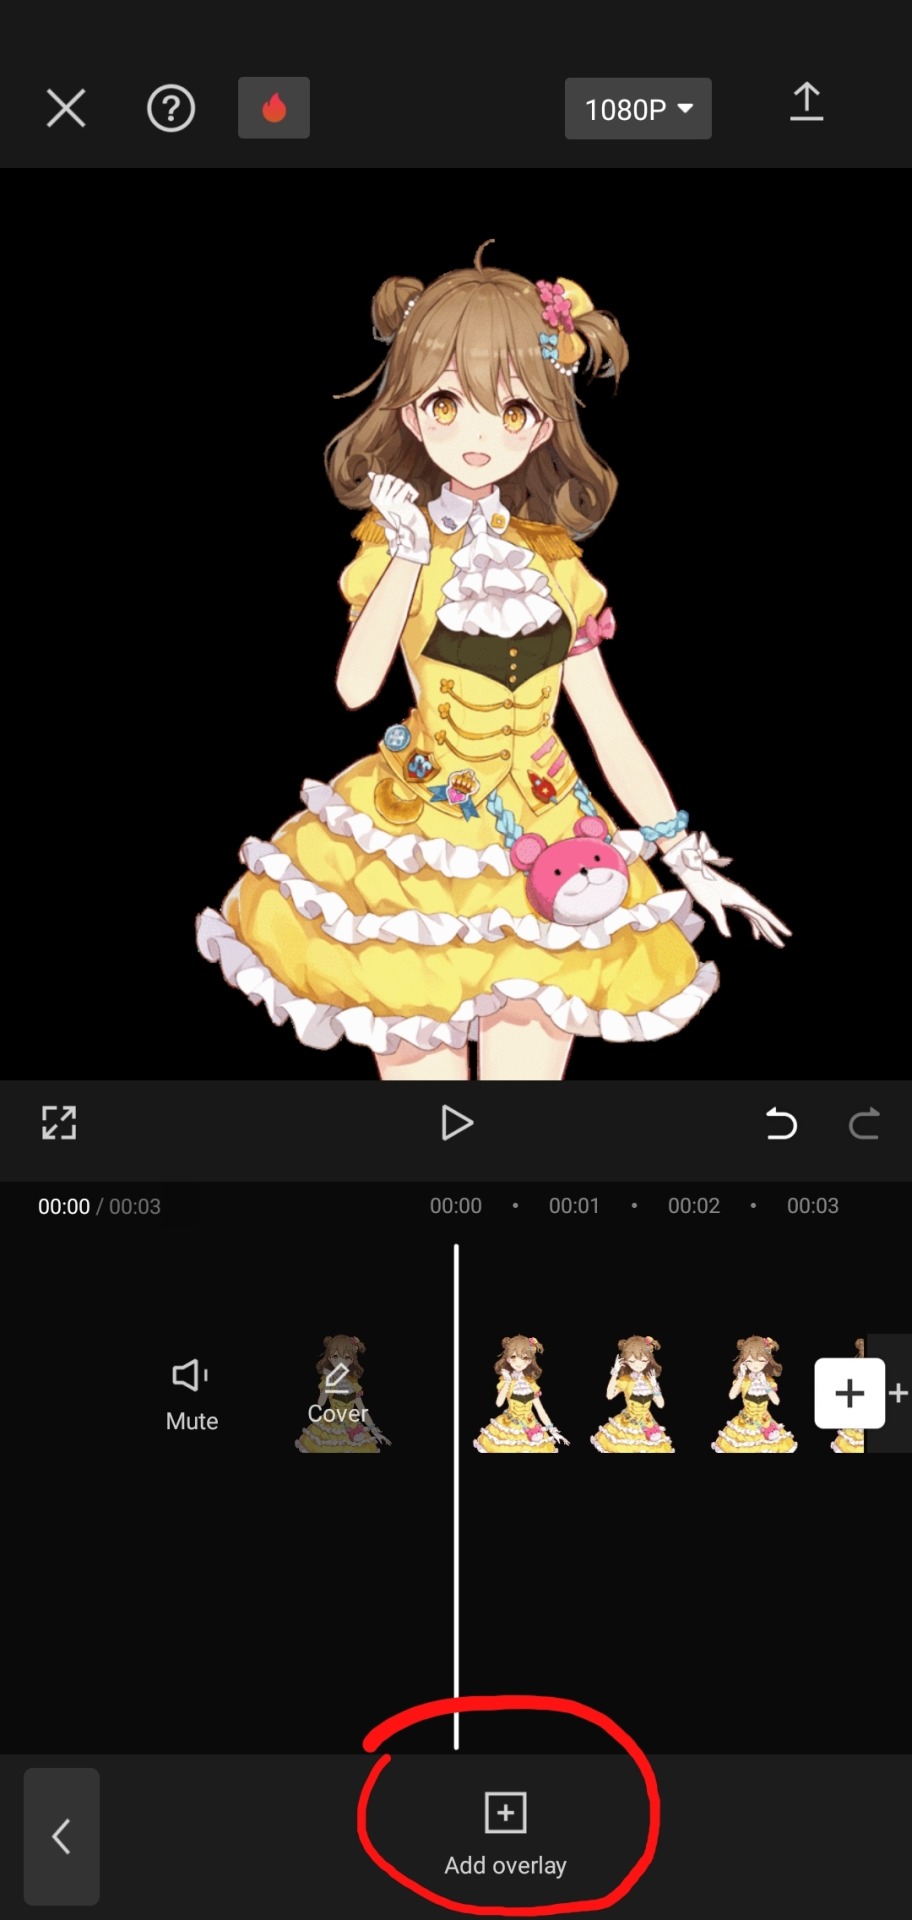
step six : add the frame
in capcut, you need to go to "overlays" and then select the transparent frame

step seven : export the project
make sure to export the project as a video, do not choose a gif as capcut lowers the quality by a huge lot and we dont want that yet

step eight : convert the video to a gif
to convert the video as a gif as we do not want capcuts absolutely horrid quality, we'll need to use ezgif as it has an video to gif converter
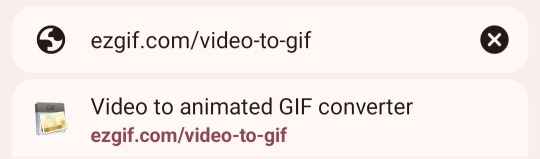
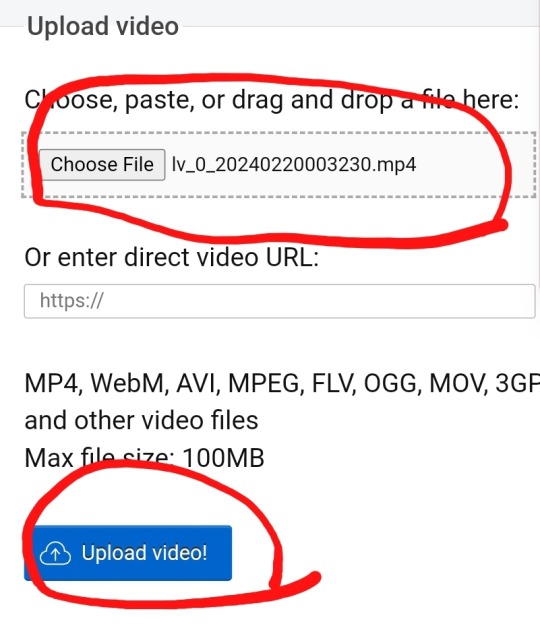
select the video file and then press "upload video"
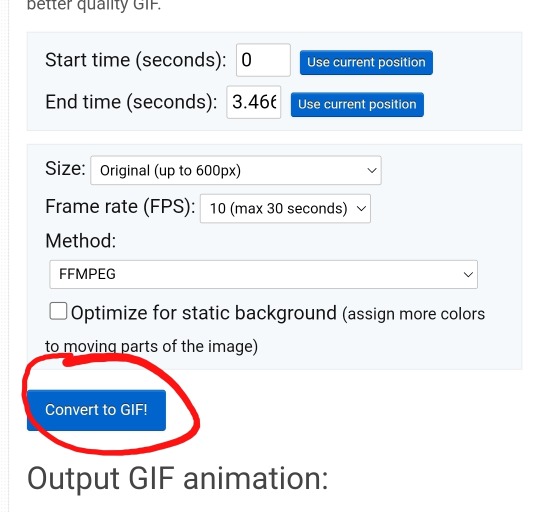
theres a bunch of tools here to speed it up or make it higher frames, or etc but if you wanna just keep it normal do not worry about that and just click "convert to gif"

now just click save!
and tada! we now have our gif ^_^
hopefully this was helpful!
also if u wanted the frame here u gooo ! ^_^
25 notes
·
View notes
Text
Hello silly hamsters 🫶 looking at my asks (and dms) it seems like a lot of people don't know how to make basic line dividers so I hope to change that!
✨Simple line divider tutorial below✨
So to start off, you don't need much and it looks more confusing than it actually is!
You need an app that lets you color a space - for example Picsart, canva, procreate, photoshop, or you simply google a color and screenshot it.
(Left: Canva. Right: Picsart)


It doesn't matter which dimensions you use here but I use my standard of 1000x40 pixels which I use for my thick - non line- dividers.
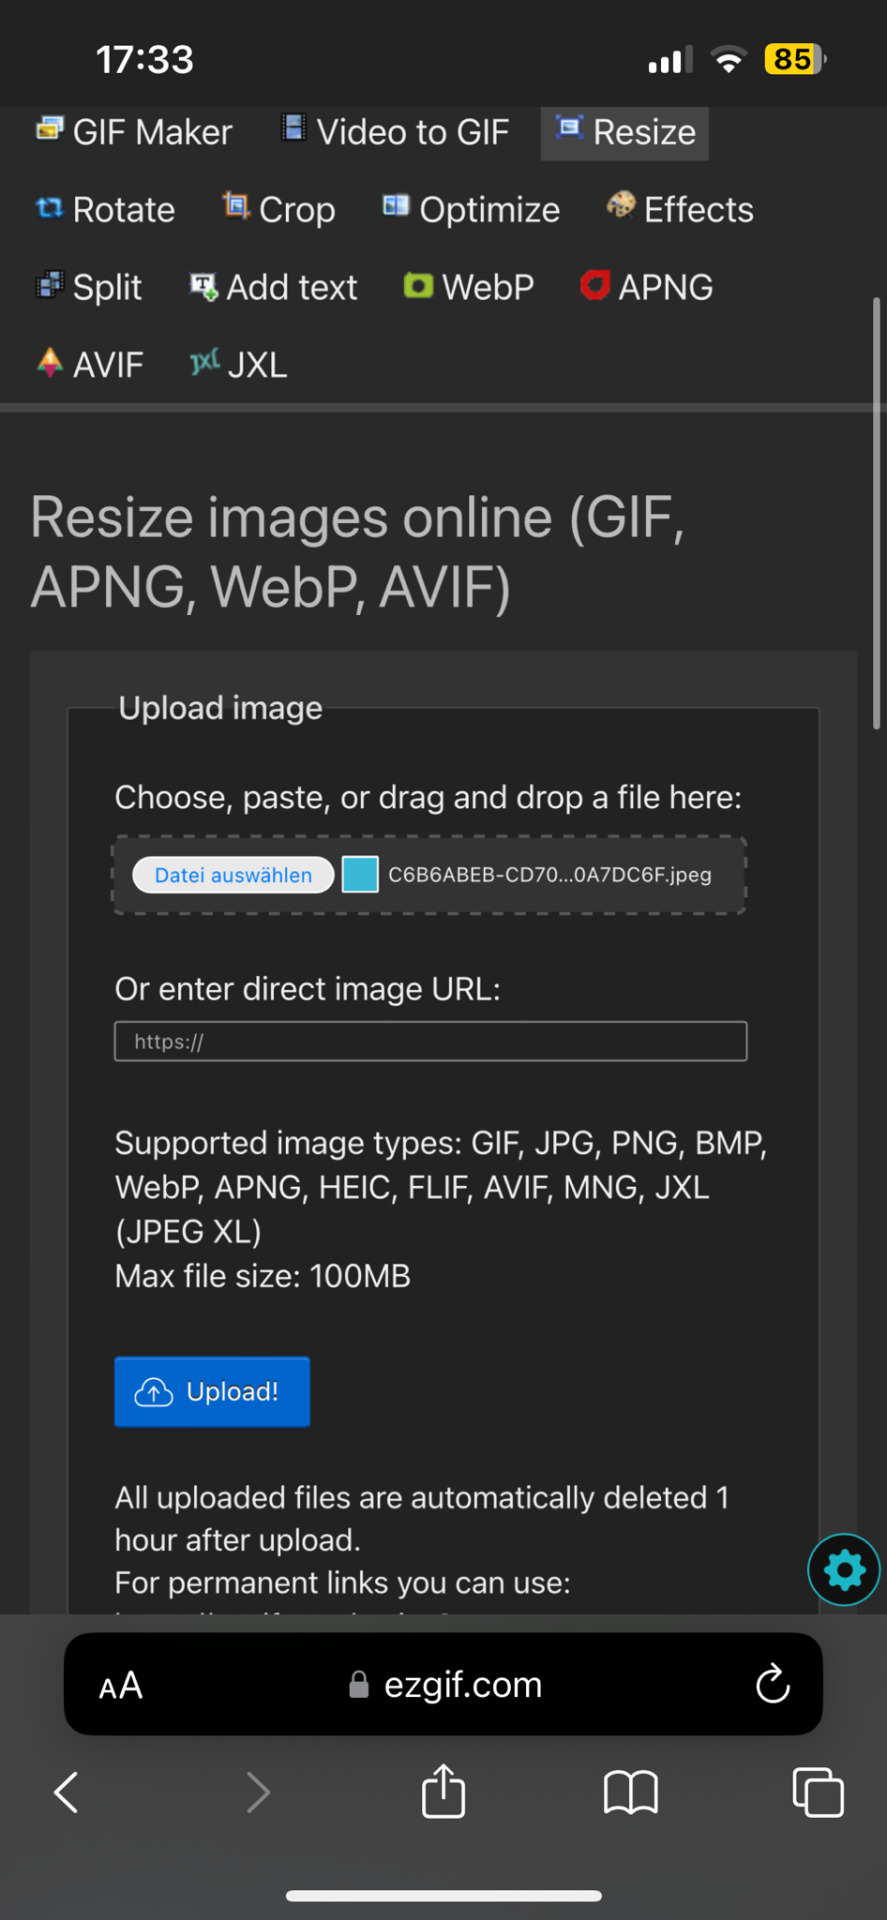
You need to save this picture and use a site that lets you resize it. For example ezgif. This is a site i use for various things like making gifs and also removing background from images and gifs.
Here you will upload the picture and choose the size you want it to be cropped to. Personally I have my width for simple lines at 1000 but the height will depend on its purpose. (Size variations further down)
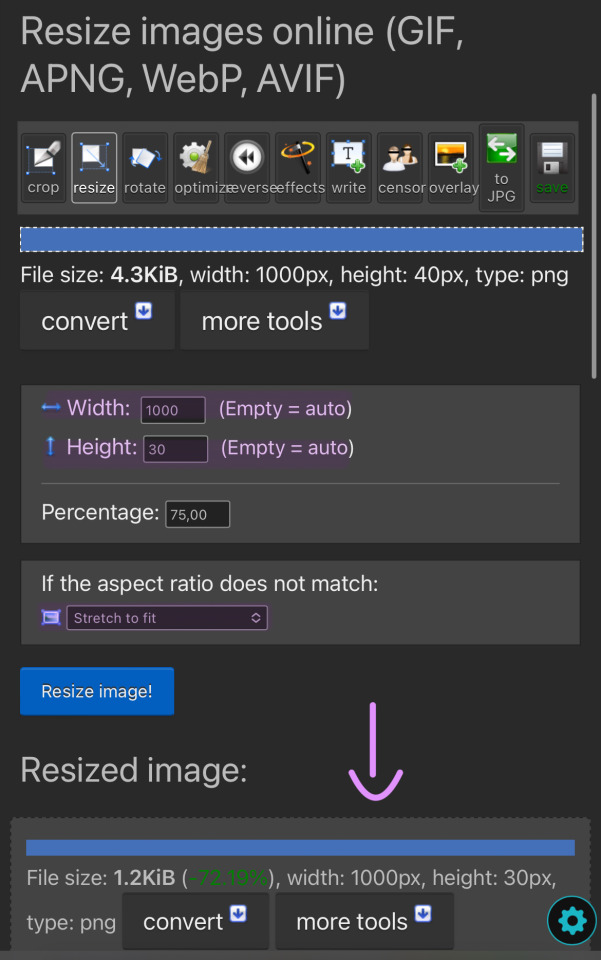
You can then simply save and use the resized image to your liking. You made it too thick? No problem. Simply change the height and click on "resize image!" again. Don't be afraid to play around and try out different sizes!
The sizes i use for the thick lines are 1000x12 and for the thin ones 1000x6!
Size examples:
1000x40

1000x30

1000x20

1000x12

1000x6

1000x3

#rhy speaks ♡#divider#line dividers#tutorial#divider tutorial#helpful#cute dividers#simple dividers#if you want to know anything else graphics wise don't be scared to ask!#I'll gladly make more tutorials or drop my sites
75 notes
·
View notes
Note
help the way that i want to interact with you but i'm scared for my sanity if i do
ahha
why whould you be scared
im
im not scary
im just silly ok iimsiiiillyyy .

#💬 ⌗ 𝐚𝐧 𝐚𝐫𝐜𝐡𝐢𝐭𝐞𝐜𝐭'𝐬 𝐫𝐚𝐦𝐛𝐥𝐢𝐧𝐠𝐬 . . . ✧#🌱 ⌗ 𝐭𝐡𝐞 𝐛𝐞𝐥𝐨𝐯𝐞𝐝 𝐜𝐥𝐢𝐞𝐧𝐭𝐞𝐥𝐞 ! ♡#qqq my head hurts and is lightheaded at the same time#idk whats up w me today#maybe its the mold i ate#but like earlier i literally could not feel myself speaking even thou i was#and now my head just hurts erally bad#its like im living inside a husk of a person as like a little parasite buggy thing which is a really strange feeeling#would not reccomend#tutorial on how to avoid: uhhhh dont eat moldy apples#okay#yes#be#bye
22 notes
·
View notes
Last Seen Blogs
psyaurorak
Just Myth Ramblings

tiepcu
TIepCu

latestglobalnewswala
Global Newswala
tidigtiseptember
Tidigt i September

blancaliliaibarra
Blanca Lilia Ibarra Cadena