delbeefsteak
It's not perfect and that's just fine.
Profile icon by talented @invicta-carnelia.
32 posts
Last active 60 minutes ago
Don't wanna be here? Send us removal request.
Last Seen Blogs
snookasnerk
i’m back baby

icefloecontemporaryartjournal
Ice Floe Contemporary Art Journal

dunkindestieldonuts
Well, hello there
schuyloren
asshole nerd bitch

priescam-blog
PRIES CAM!
Text
Hehehehe Don't mess up the run ways
GIRLFRIEND VISITIN
GIRLFRIEN VISITING
VISITING GIRLFRIEND
29 notes
·
View notes
Text
It's a very happy squeak!

*Squeezes the girlfriend like a stress ball* @delbeefsteak
51 notes
·
View notes
Text
This is probably going to be there last time I post my work here until this AI deal (I hate calling it that, it's not AI) BS gets canned.
I've been getting into Malifaux stuff recently. Grabbed some Bayou after falling in love with the models. Their goofiness has been a great outlet to just have fun and try out new things. I actually cut and sanded the bottom of this model off to make the pose more fun. Normally, the guy on the bottom is standing in the ground with regular legs and all. Seeing his overalls, I thought it would be easy more comedic to have him carrying his brother through the water.
(dime for scale)


#miniature painting#table top games#mini painting#malifaux#bayou#gremlins#fuck ai art#miniature wargaming#tabletop miniatures#minipainting
16 notes
·
View notes
Text
#kobolds unite
I’m curious to see how many kobold accounts there are vs dragon accounts here on Tumblr! Vote below and we’ll all see together what the dragon to kobold ratio is!
If you don’t mind, I ask that you also share this post with kobolds and dragons you may know! Kobolds and dragons have a very important intertwining, and knowing the relative abundance of each would be really nice to know!!!
Thank you for your time, happy Year of the Dragon to everyone too!!! ✨🙏😊✨
520 notes
·
View notes
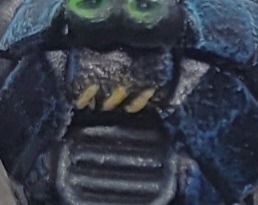
Text
#i just have a silver allergy

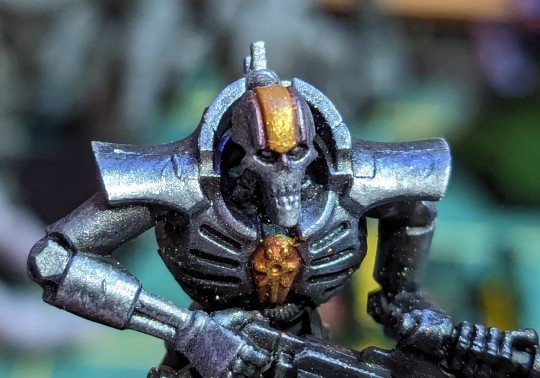
Some silly doodles of @delbeefsteak 's kobold vampire being a dork
11 notes
·
View notes
Text

Messy. At least I remembered to add a bun.
10 notes
·
View notes
Text
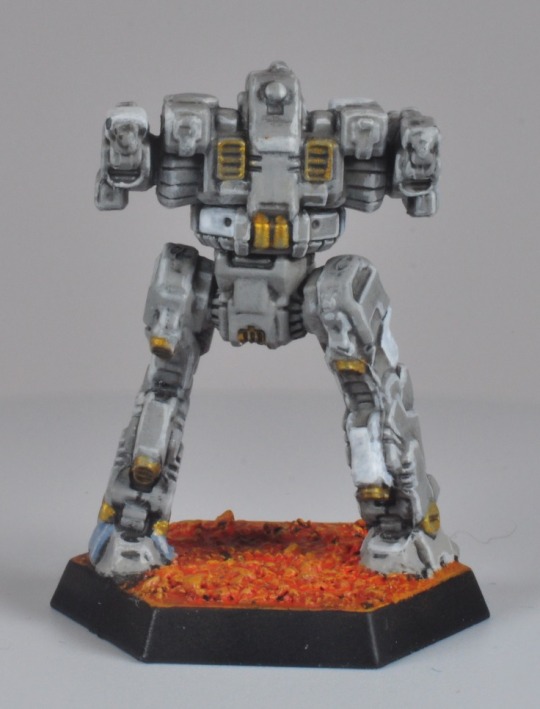
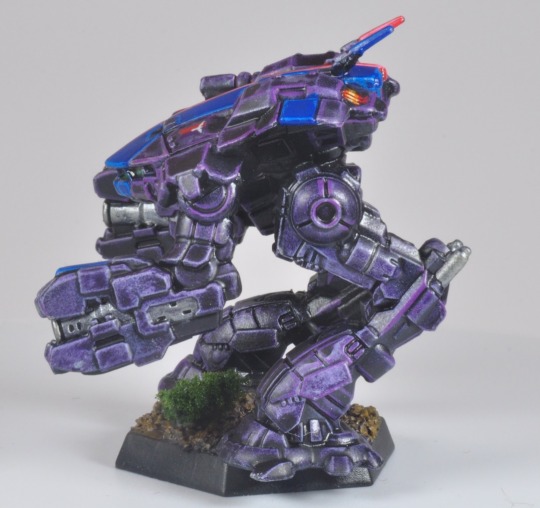
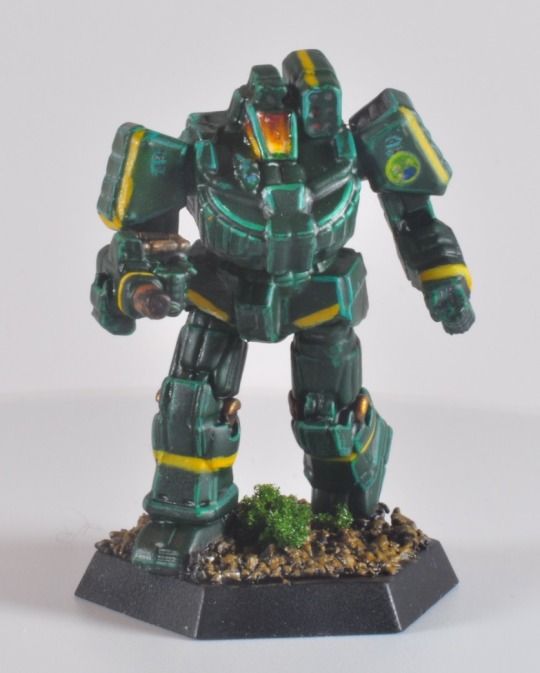
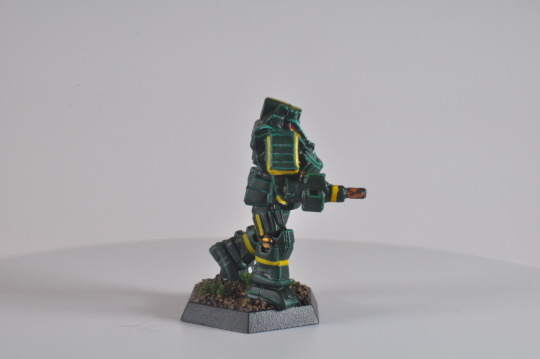
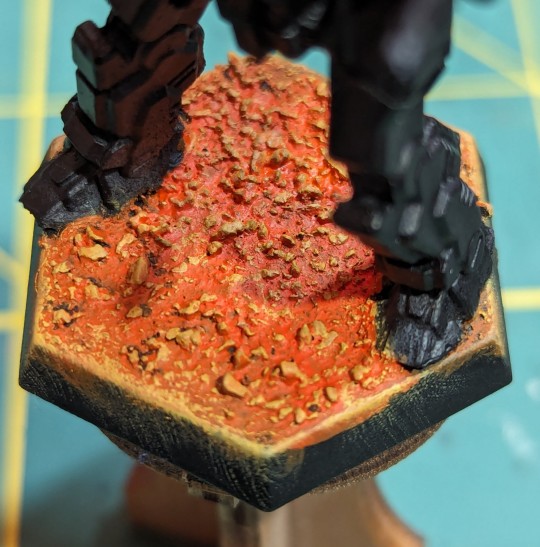
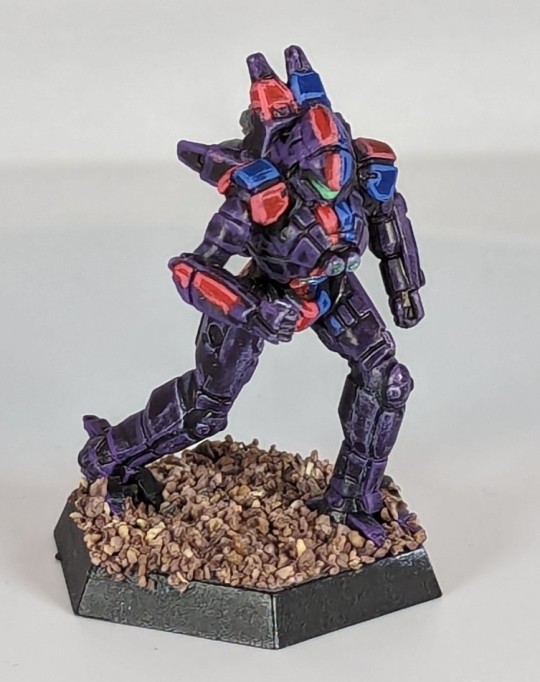
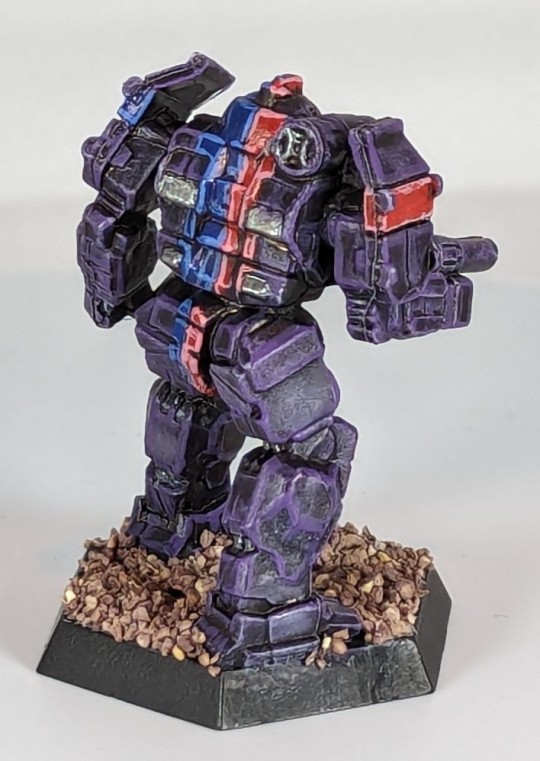
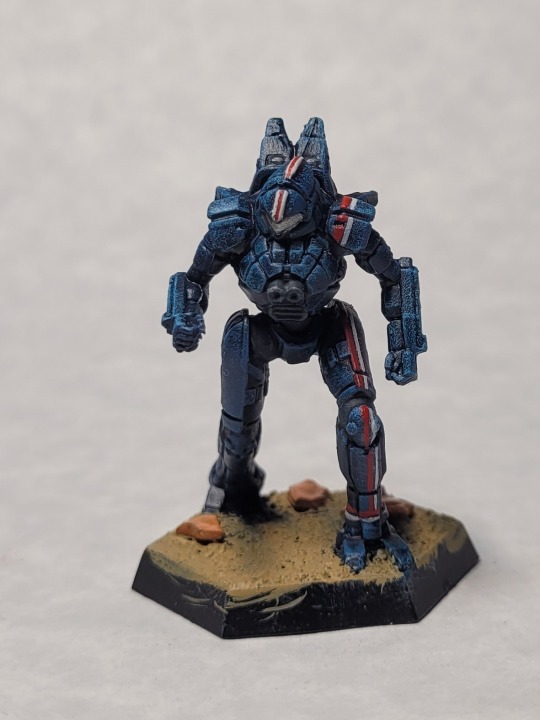
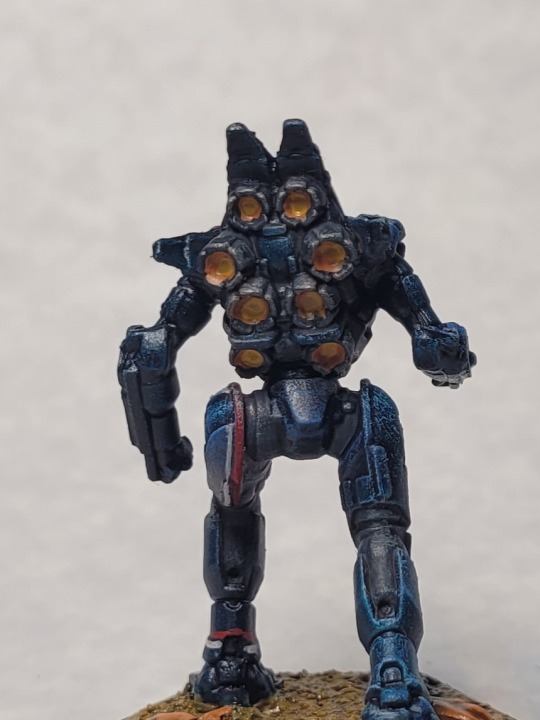
3rd Canopian Fusiliers Lance

Finally finished up the second half of my two player 5k point set. Individual pics are down below as always.


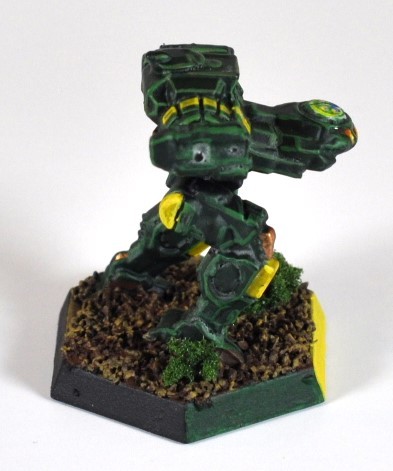

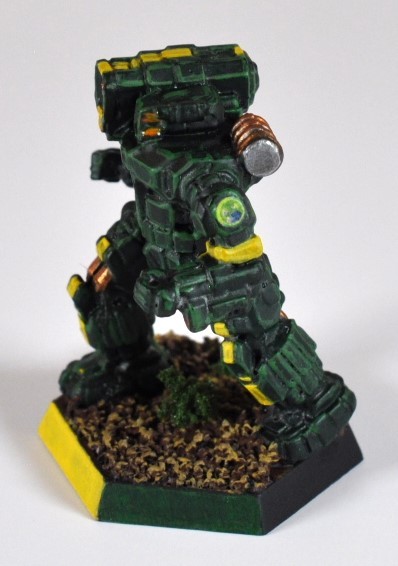
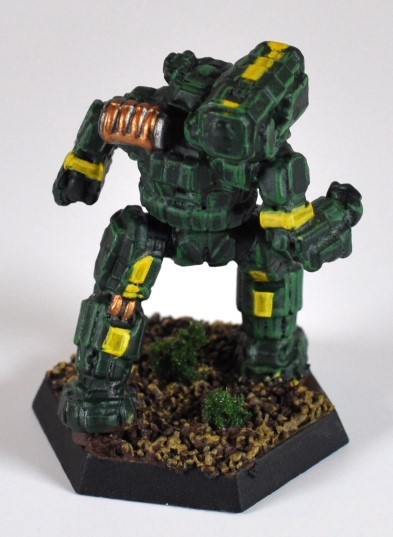

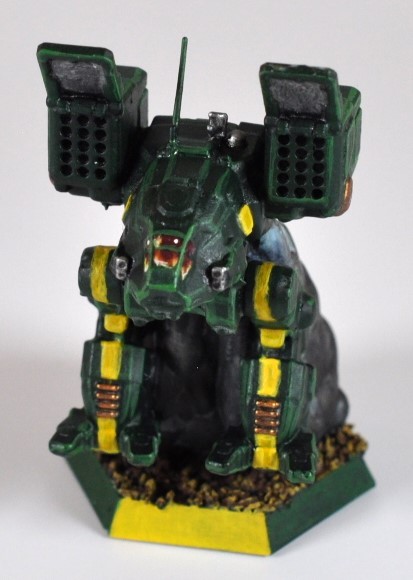


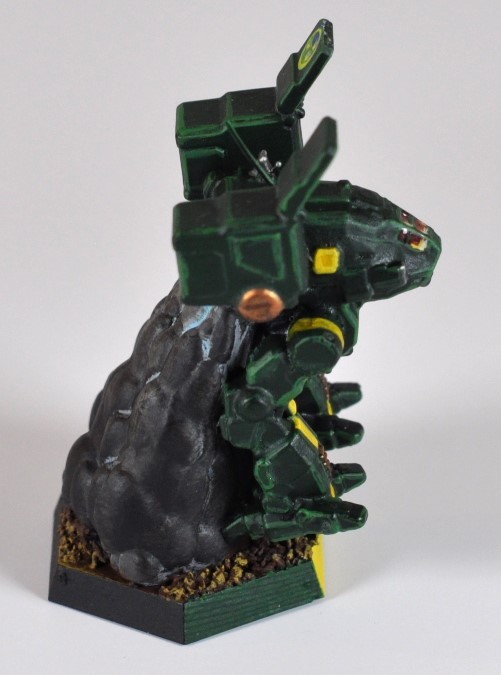


#miniature painting#table top games#battletech#magistracy of canopus#mini painting#3rd canopian fusiliers#mechwarrior
20 notes
·
View notes
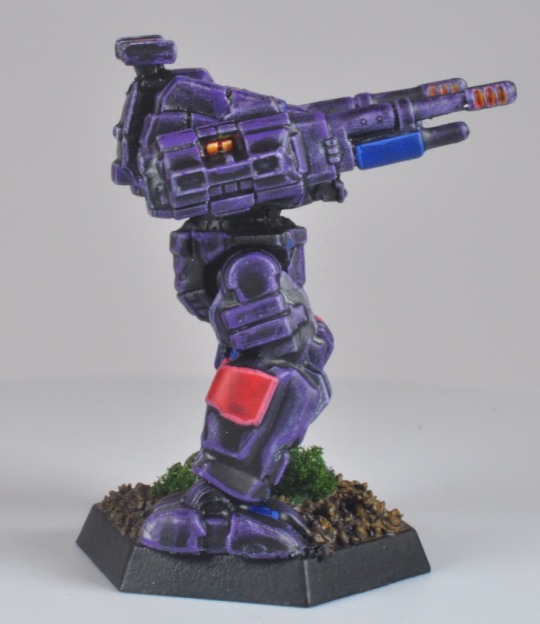
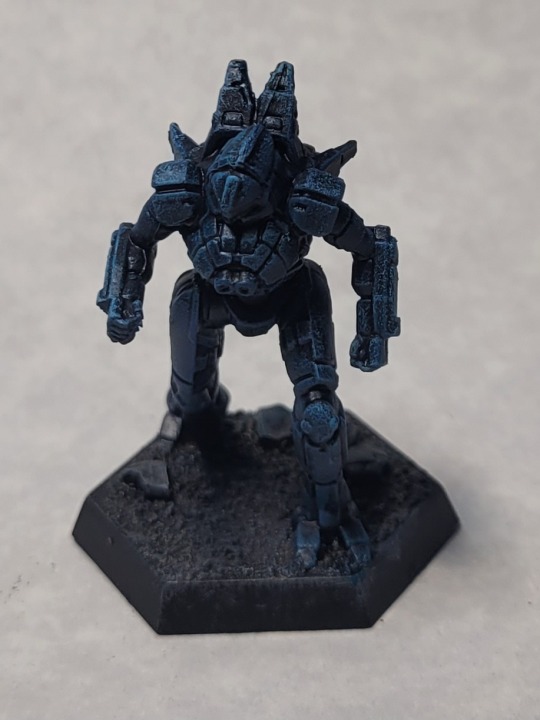
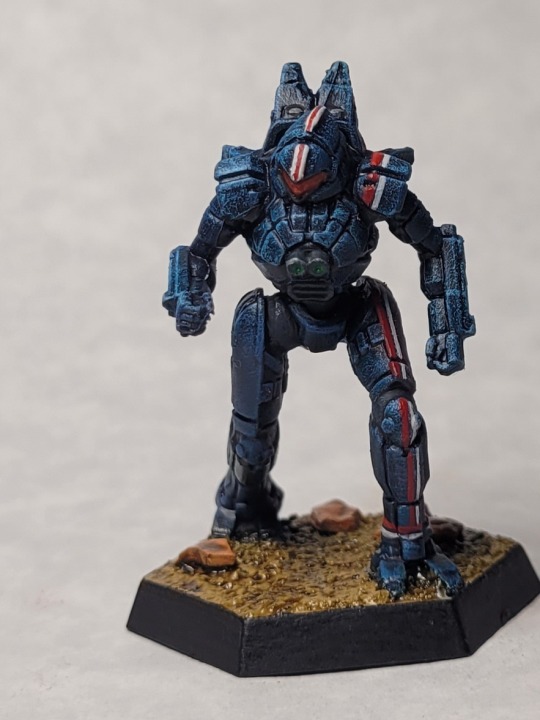
Text

Been struggling with my camera the past few days so I decided to throw up a quick group photo with my phone for now. Need some catharsis from just getting these guys online. Better shots and individuals to follow in the next few days.
#miniature painting#table top games#battletech#magistracy of canopus#3rd canopian fusiliers#mini painting#miniature wargaming#minipainting#tabletop miniatures
32 notes
·
View notes
Text
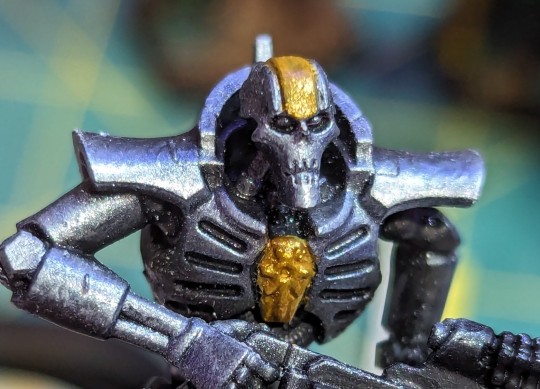
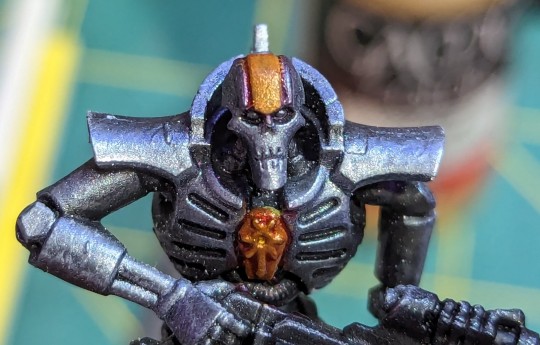
Beefsteaktorial: Starting Metallics
Hey everybody! I had another opportunity to ask myself why I do things the way I do them. This is going to be more about establishing the why's of metallic paints than the how. Everybody has their own paint styles so I figure it's more productive to have the bare basics established.
Priming
Choosing your primer color is already an important step. In the case of metallic paints, you can use your underlying coat can change your final product in subtle ways. In our examples below you'll see that I went with a black primer to darken the base color I used which provided more overall contrast on the model. However, I went with a warmer tan color to help contrast the gold against the dominant silver.

First Coat
One common issue people have (myself included) is fighting with the metallic paint's coverage. Resist the urge to layer on too much paint at once. You'll want your primer to come through here. We don't want a full on opaque metal coat. Having some of your primer come through will let the pigment as well as the metal flakes do their thing. In addition, metallic paints have a nasty tendency to clump harder than basic pigments because of the extra material suspended in the medium. Don't worry, our next steps will bring the color up!

Wash
There are plenty of ways to get depth with metallics besides washes, but for today it'll be part of our process. Washes will help us get some definition by darkening our low points which will help us elevate the high points more than just a brighter coat normally would. Be sure to give everything time to dry before and after the wash. Any wet paints will flow all over the place and cause some issues with wet washes. You can use a hair dryer on low heat to speed up your washes, but be very careful not to heat one section for too long and do your best to avoid drying big pools down quickly as they'll leave very obvious pool marks. This part of the process will dull your shine, but that's okay at this stage. In our example pictures, you'll see that I used a black wash to really deepen the recesses of the silver and a red wash for the golds to warm the area and provide overall contrast from the model.

Second Coat
This can be either a layer of dry brushing or standard painting with a brighter shade. My progression was from a gunmetal silver to plain silver and brass to a light gold. For the silver in the example pictures I used a dry brush. For the gold, I used the aforementioned thinner coat of paint instead. For the silver, the dry brushing let the model keep the depth the washes provided. Be sure your brush has very little paint and build up patiently to avoid drowning out your lows. The gold was painted on in a thin and careful coat. The edges were easy enough to avoid and I didn't want to risk getting gold on that fresh silver coat.

Golds
These are the gold steps separated out from the silver steps just to make this easier to follow. These are the exact same steps with the small detail that instead of a prime coat I used that tan base coat to help the gold show up better instead of trying to fight the silver.

At the end of the day, easy metals boil down to just a few basic steps.
Choose your base color. Either use a color to help your metallic paint show up better or a color that will add depth by showing through the metal.
Don't fight your paint. You don't want perfect coverage on your first layer. Let your previous layer do the heavy lifting for you.
Wash your first coat, but expect it to dull. Just your primer or base layer, pick a color with purpose. Washes don't just darken your low points. You can use them to help separate the area from the rest of the model to provide a bit more pop.
Use a lighter color for your second layer of metallic paint and make the layer under it do the heavy lifting. This layer is there to help bring your color back up and restore it's shine. If it isn't glossy enough, but it's the right color you can just paint on a thing coat of gloss when you're done and finish sealing your model.
Thanks to everybody who stuck all the way through to the end. Hopefully I was able to help end some struggles for people or provide an alternative method of doing things. Always remember, you're better off with multiple thing coats than too think of a single coat!
14 notes
·
View notes
Text
You have to say least paint the squid. Its name is Cephanyr! Cephanyr the Cephalopod. I am not making this up. That's on the same tier of naming a dog Kate, but spelling it K-8.
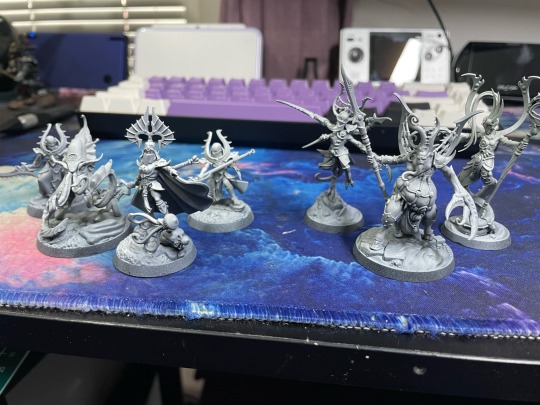
Picked up an Underworlds core set to try with Kiwi yesterday, and turns out I absolutely adore every mini that came in the box, especially the leaders for each of the warbands. Hoping I can drag myself out of my painting slump tomorrow to start on these because I really wanna get them all done up
48 notes
·
View notes
Text
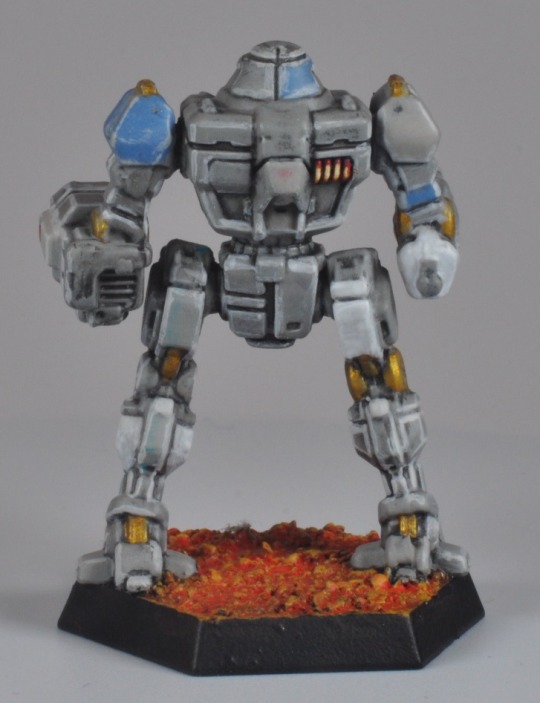
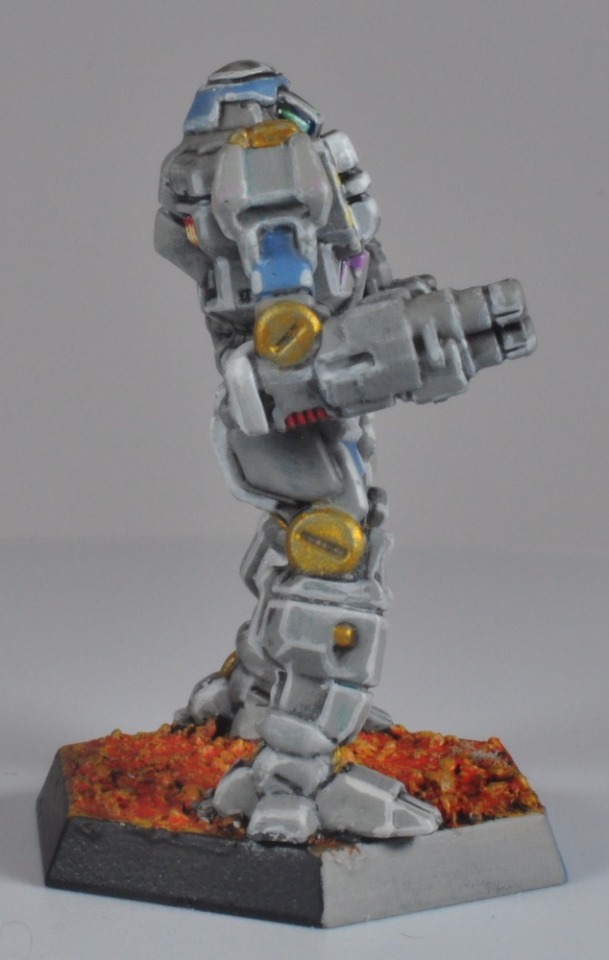
Getting My Mercs Started

As always, more pics below the wall of text! Quick little side note, these are the guys I used for writing my coffee basing tutorial. :3
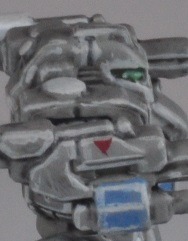
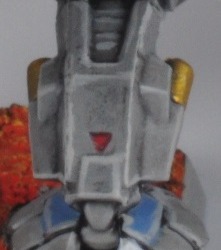
Since we're most likely getting Battletech: Mercenaries shipped this year I decided to get a jump on my main faction. One thing to note is that I'm one SRM carrier short, but I decided to just wait for the Force Pack instead of printing one. I'll proxy until then. My colors for these guys started as a need to figure out how mercs with a cause would paint their hardware. I think they would go with heavily utilitarian colors that can be quickly painted so more time can be dedicated to meaningful hardware upkeep. Maybe a few mismatched panels because it's what they had on hand and paint won't help the armor deflect incoming fire.
I love the 3rd Canopian Fusiliers and wanted to create some sort of company comprised of individuals who still believed in he Magistracy. Originally, its members were from the 3rd who were committed to keeping their group together even though it was forced to disband in 2588. I present the Cackling Harriers. I haven't settled on an emblem yet, but I know it'll have a hyena at the very least.
I still need to sit down and really flesh things out. At the very core of the merc company will be a tight social structure that reflects their tactical heritage putting communications and wit above brute force and material superiority. The Cackling Harriers will also never take a job that would directly or intentionally harm non-combatants. I'm toying with them having agents keeping an ear open for the Magestrix or other officials speaking openly of problematic incursions or enemy build-up outside their territory. I'm still conflicted if the Magistracy of Canopus would just happen to leave unguarded hardware and supplies lying around on a minimally inhabited planet after said issue was resolved. Long story short, I'm working on it.


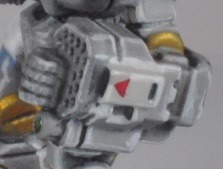
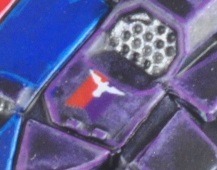
Bonus Round! Here's a few details I'm super happy with. It's just some triangle and hazard stripes, but it was my first time every doing freehand this tiny. Some of you may recognize the red triangle inspiration right out of the gate. If you do, you're a nerd. I mean, I am too, but so are you.


43 notes
·
View notes
Text
First Completed FWA Lance

Singles are below the wall of text
Finally, after lots of relearning and waiting on international shipments, they're done! Got the whole lance ready for the table. I'm not too big on the Free World Alliance, but this paint scheme slaps. I started with drybrush and speed paints to let me focus on the stripes and details. I'm not super happy about that choice, but it still more or less worked out. These guys pushed me pretty hard away from speed paints or even washes. I think I'm going to start glazing and manually edge highlighting from here on out. All that said, I'm still fairly happy. This lance most definitely passes the "from here" test and is completely servicable for a small loaner lance for 5KBV games.
My biggest lessons from this go around were:
If you use speed paints and need to fix something in your base layer it's going to be rough to try and land a 100% match to the surrounding area. Speed paints are faster, but require a different skill set to do well.
Don't thin your paints to much for edge highlighting. They will constantly get ahead of you.
Sometimes telling yourself you won't go back to fix something can help slow you down. I found it helped me decide to chill out and take it easy after the first few mistakes I refused to go back to.
I need to get A LOT better at taking pictures :/


41 notes
·
View notes
Text
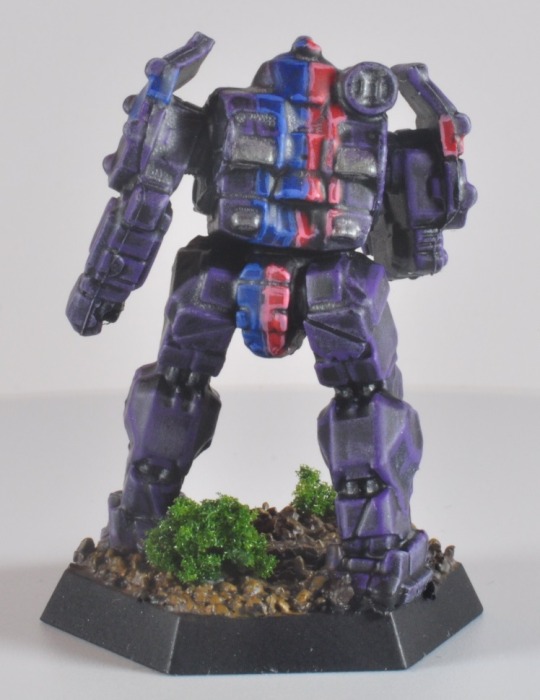
First of many
Getting my first battlemech up while I poorly clean up the rest of the photos. It's obvious to most, but the line work isn't the greatest on this guy. That said, I can confidently say that going hard on edge highlighting on the models after this one helped massively with shaking the rust off. Looking forward to posting the rest over the next couple of days!


59 notes
·
View notes
Text
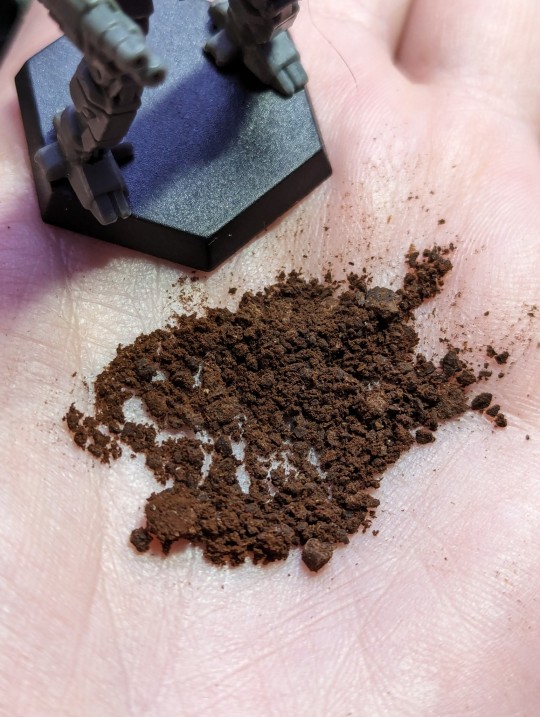
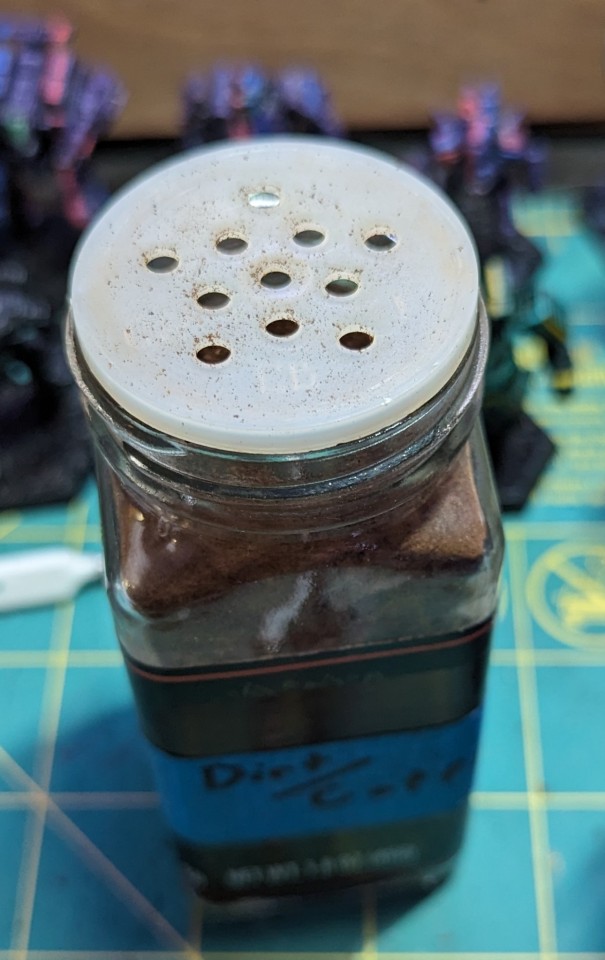
Hey everybody! Since I've recently crawled out of my cave of not doing minis stuff for too long, I've realized that a few skills have gotten rusty. Even some of the basic stuff has fallen out of my head at some point. To make the best of a slightly poo situation I've decided to get some of my journey to rediscovery logged online to share with people who may be new to the hobby or just looking for a new perspective on an established process. That's enough rambling for now. Behold! My first FSteaktorial: Basing with Coffee!
Paying for hobby sand can feel kinda silly, but sometimes that super fine gravel can look a bit off. This is extra true if you're working with smaller scale minis like Battletech. One common solution is used coffee grounds. Right of the gate, how coarse or fine the grind is will change the look. Fine grinds will look more like sand or dirt while coarse grinds will look rockier. I'm particular to a fine grind for most applications and I'd suggest it as a good starting point to work from.
Preparing the ground(s):
Prepare and pour your coffee as normal. Once you're done simply dump your coffee grounds into a hard container or surface in as thin of a layer as possible. Usually large food containers or a baking sheet will do. Let it dry for a day or two before putting it in a container for storage or application. I'm partial to empty spice shakers for most fine basing/flocking materials. You can put the coffee grounds away once they're dried without extra treatment. The process of making coffee will pull most of the oils out and the hot water will clean it up for you.
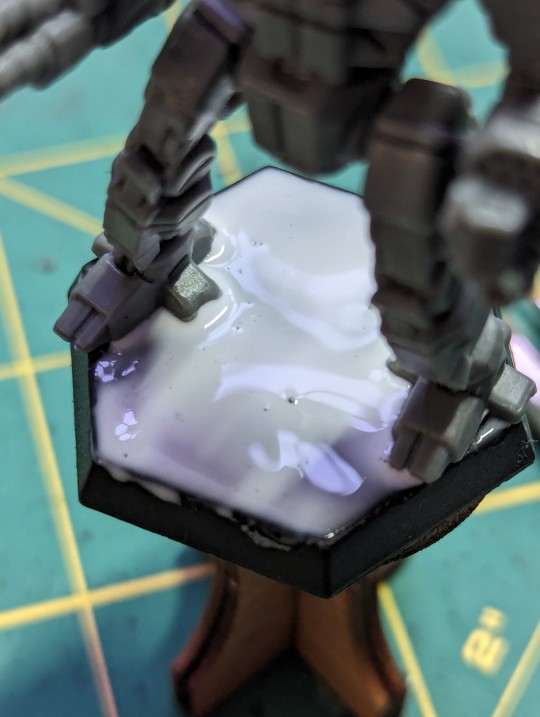
Preparing your adhesive:
Gluing the ground down is super easy. Grab an old brush that's flat and appropriately scaled to your intended model and base. The glue itself is just a watered down PVA. PVA is just your generic craft glue. You've most likely used it as a kid during whatever arts and crafts you've done. You'll want to add a drop or two of water at a time and mix thoroughly until it's a bit thinner than most minis paints out of the bottle.
Applying your adhesive:
Simply take your brush, scoop on some of the thinned glue, and apply it to the base. One thing to note is that glue isn't paint. For our purposes, you'll want a healthy layer. Don't worry, after a day it will dry solid. You don't need to apply perfectly either. The glue will take some time to dry and can be wiped off easily to clean up the edges of the base and model. Be sure to immediately rinse your brush thoroughly in water unless you want one giant bristle.
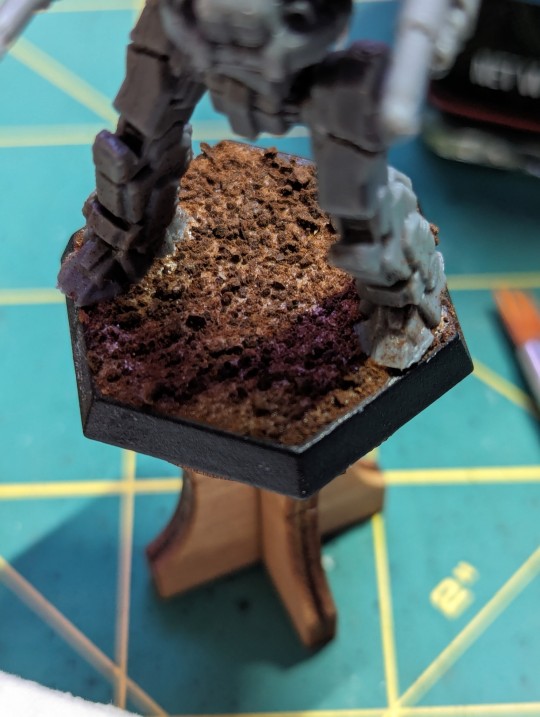
Applying the coffee/basing:
This is the satisfying part. Grab your shaker, handful of coffee, or application method of choice and give the base a nice healthy layer. Once you can't see the glue, tap off the excess and set it aside to reclaim or put it back in your applicator for use. Don't wipe off the excess just yet. Make sure the model is over a different surface and wipe the excess glue/coffee and wipe your cleaning tool (probably your finger) on a paper towel. This is important to avoid getting glue in your supply of basing material.
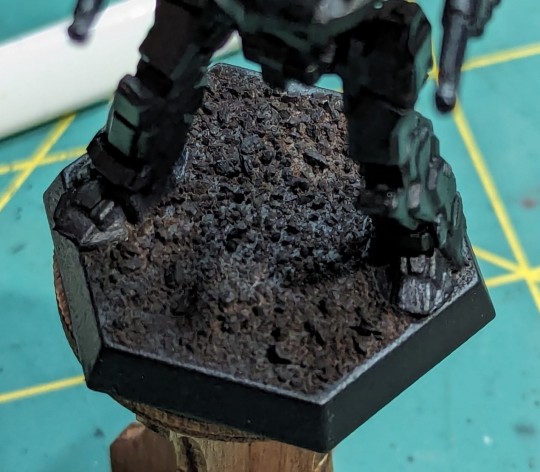
Letting the glue dry:
No, really. Let it REALLY dry. It's tempting to want to start putting paint to model, but the glue needs to be completely dry. You don't want to risk both brushing your fresh basing off the model and getting coffee lodged in your bristles.
Enjoy!
You're done with basing for now! Remember to blow off the excess coffee dust. You can add extra detail with rocks and bits, prime, whatever you want at this point. Even with just a quick prime, single base color, and a quick dry brush you'll get great results. Congratulations on your new awesome looking base, saved money, and even a teeny tiny effort of reclaiming waste! It's surprisingly durable as well due to the glue hardening.
41 notes
·
View notes
Text
This is going to be my last update on this lance until I get my decals and basing completed. Going to put the group shot up top with the two most recent mechs below.
Here's the Spider. It's a fairly small model so I initially struggled about what I could do with it. The Rifleman's long guns were an inspiration for the two thinner stripes. King Crab's big flat profile begged for big bold sections of color. Finally, the Griffin wanted to represent, but still look like a front line trooper. At the end of the day, fast and flashy movement inherent to a light mech's combat role was what gave me the direction I needed. Lights don't care if you can see them because a good pilot won't be getting hit regardless. They want to taunt you and make sure you know that they aren't landing a shot unless they decide to let you. What's better than having half your mech's armor bright and obnoxious to match your well earned arrogance?


And lastly, the Griffin. I love this guy for the same reason I like the Wolverine. They really encapsulate that Battletech is about tanks on legs. They have a very no nonsense combat look to them.


20 notes
·
View notes
Text

Getting back into the swing of doing paint tutorials- I pulled a Spider out of a salvage box and I figured I'd do a quick and dirty davion scheme! This is the parade paint job for the First Davion Guards, AKA quintessential battletech 'good' guy mechs.
Paints you will need:
Black primer
Dark grey (citadel mechanicus standard grey)
Light grey (citadel dawnstone)
Off white (army painter spaceship armor)
Red (citadel mephiston red)
Light blue (citadel baharroth blue)
Green (citadel warpstone glow)
Gun metal (citadel leadbelcher)
Silver (citadel rune fang steel)
Dark wash (citadel drakenhof nightshade)
Citadel akhelian green cintrast
Citadel blood angels red contrast
Things you might want
Khaki (citadel zandri dust)
Fleshy orange (citadel ratskin flesh)
White (army painter matt white)
Dark green (citadel Caribana green)
Light red (citadel evil sunz scarlet)
Yellow (citadel averland sunset)
Black (army painter matt black)
Citadel aggaros dunes contrast

I started by basing my mini with my normal desert badlands basing scheme (paint base in glue, sprinkle on basing sand and let cure. Paint on more glue and stick down some aquarium gravel) and then priming the whole thing black with brush-on primer.
Once the primer is finished drying, load some of your dark grey up on a fat drybrush, wipe off slightly less than most of the paint, and then apply the remainder to the model in long up and down strokes. All of the panels should be grey, with some black showing in crevices and hard to reach recesses of the model. Next, repeat this process with your light grey paint, but wipe off more and apply less liberally- you want the darker grey color to remain in most places with the edges and raised details highlighted in grey. Finally, drybrush the model one last time with your off-white color only in the areas that will catch the light most like the head, torso, shoulders, the vectoring fins on the mech's back, and the outstretched left knee.
Now that the mech has been presented in greyscale, we can make it blue. Akhelian green is going to be doing the majority of the heavy lifting in this paint scheme- I find it to be a pretty easy contrast paint to work with. Apply it undiluted to the model, looking to spread it in a single coat like a thick wash, and then leave it to dry for 20 minutes. Afterwards, you might want to brighten the blue up in places as I did- drybrush on some light blue in the same areas you used off-white earlier.

At this point, I got a little excited and decided to do the Davion stripes. Start with your red, pretty well thinned on your palet, and a thin detail brush. To make this easy on ourselves, we're going to look for vertical panels on the left side of the mech's torso and leg and basically connect all of those with a straight line. In the case of the Spider, the easy ones are the shoulder and that panel that runs down the upper thigh. Apply a thin edge highlight of red along those panels and then carefully continue the line down the rest of the leg, terminating at the ankle. If your hand is steady enough, run a thin line of red around the mech's ankle where the vertical line ends. Then, go back with your off-white and using the red line you made already as a guide, run a parallel stripe down the outside edge of the red (if you swap these battletech nerds will dunk on you online).
At this point, I also striped the ridge running down the Spider's helmet, but it's not super necessary.
Now that we've got our blue sorted out, we've got a bit of a 'draw the rest of the owl' step. First, you're going to want to go back over any of the parts of the model that you want to be exposed mechanical elements with your dark grey. I painted the joints in the legs, the shoulders, the lasers and the big vent on the chest, the 'chin strap' under the spider's canopy glass, and the jump jets in this color. Then, wash the grey with your favorite dark wash- I really like the deep blue of drakenhof nightshade but something like nuln oil will also work well for this. Finally, apply a light drybrush of your light grey to the shaded grey. If a part is too recessed to easily drybrush, you can leave it as is or do use a small brush to carefully highlight it. You should also add a small dot of green to the inside of each of the laser barrels at this point.
Next, paint the mech's canopy glass silver. Once that's dry, paint over the silver with blood angels red or any other colorful contrast paint for a vibrant metallic color.
If you're following along with my desert basing, paint the sand on the base khaki and the larger pebbles with your fleshy orange. Then paint over everything with agarros dunes contrast or a dark brown wash like agrax earthshade.
And with that you have a Spider that's fully ready for tabletop with 3 colors, shading, and a textured base. There's still a couple more things we can do if you have more time and patience that I'll detail below.
To apply some quick and dirty jeweling to the lasers, start by painting a half circle of light green on each barrel, focused on one of the bottom corners. Paint the recess of the barrel with a dot of dark green and put a tiny little dot of white opposite the half circle of green, which should now be more of a crescent shape with with dark spot in the center.
While the white is still in your pallet, you can also highlight the parts of the off white stripes on the mech most exposed to overhead light like the lower thigh, knee, and shoulder. Do the same thing with the red stripe using a light red as well.
At this point I also added unit numbering to the mech's shoulder. Basic numbers are a really good way to practice your fine control and I try to consistently add a couple to each of my projects. Use your off-white well thinned and a fine detail brush, lock your hand holding the model against your hand holding the brush just below the wrists, and then draw the paintbrush 'downwards' with a pulling motion. This should keep you your line relatively straight and fine.
While you can keep the jump jets on your mech dark I prefer to paint mine with some orange in them. Using the fleshy orange from earlier, paint most of the interior of each jump jet, then add a dot of yellow at the very deepest recess of each one.
Finally, let's add some hazard stripes to the mech. Pick out a few areas near joints or vents that seem like a bad place for an Astech's hand to go and paint in a thick 'edge highlight' of black. Then, going back to yellow find the center of the line and add a diagonal tickmark there. You may need to go over this more than twice to get a strong color depending on your yellow. Once your centerline is marked, work out towards the edges, painting another ticmark at regular intervals until you hit the ends of the Black.
35 notes
·
View notes