
Last Seen Blogs

sunnymoonxx
sunny

twentysideddinglehopper
sneeglecore skrunk snek

ladythornofrivia
aemond is my baby girl

yeehawgeek
professional Wrecker Bad Batch enjoyer

permabunnyink
heidi chanel xx
Text
Should I Buy Cheap Embroidery Supplies?

Should You Buy Cheap Embroidery Supplies? A Beginner's Guide to Making Smart Choices
Embroidery is a beautiful and rewarding craft. It allows you to create stunning pieces of art, personalize clothing and homewares, and relax with a calming and meditative activity. But like any creative pursuit, getting started can involve some initial investment in supplies. This can be especially daunting for beginners who might be unsure how much to spend or if they should prioritize affordability over quality. So, the question arises:
should you buy cheap embroidery supplies?
The answer, like most things in life, is not a simple yes or no. It depends on your goals, experience level, and budget. This blog post will delve into the pros and cons of cheap embroidery supplies, offer tips on making smart choices, and guide you towards finding the perfect balance between affordability and quality.
The Pitfalls of Cheap Embroidery Supplies
Cheap embroidery supplies can be tempting, especially for beginners who are just starting out and want to keep costs low. However, there are several downsides to consider:
Lower Quality Materials: Cheap threads are often made from lower-quality materials like acrylic or blends with cotton. These threads can fray easily, knot frequently, and break during stitching, leading to frustration and wasted time. Fabrics with loose weaves can be difficult to work with and may distort your design. Low-quality hoops can be flimsy and break easily, ruining your project in the process.
Limited Color Selection: Budget-friendly embroidery kits often have a limited color palette. While this might seem okay for simple projects, it can restrict your creativity and make it difficult to find the exact shades you envision for your designs.
Unreliable Tools: Cheap embroidery needles can be blunt or unevenly shaped, leading to uneven stitches and difficulty piercing fabric. Blunt scissors can damage your threads and fray fabric edges.
Wasted Money: While cheap supplies might seem like a good deal upfront, they can end up costing you more in the long run. Low-quality materials may not last as long, requiring you to replace them more frequently. Additionally, frustration with poor stitching quality might discourage you from continuing with embroidery altogether.
The Benefits of Investing in Quality Supplies
While the initial cost might be higher, investing in quality embroidery supplies offers several advantages:
Enhanced Enjoyment: Good quality materials make embroidery a more enjoyable experience. Threads glide smoothly through fabric, needles pierce effortlessly, and hoops hold your project taut for clean stitches. This allows you to focus on your creativity and produce beautiful results that you'll be proud of.
Vibrant Colors: Higher-quality embroidery threads come in a wider range of vibrant colors, allowing you to bring your designs to life exactly as you envision them.
Durability: Quality materials are built to last. Strong threads won't break easily, well-made hoops hold their shape, and sharp tools make embroidery a breeze. This saves you money in the long run as you won't need to replace supplies as often.
Improved Skills: Using quality tools allows you to focus on honing your embroidery skills rather than battling frustrating materials. Consistent stitches and a smooth working experience make it easier to learn and perfect different techniques.
Making Smart Choices with Embroidery Supplies
So, how do you strike the balance between affordability and quality? Here are some tips:
Start with a Basic Kit: For beginners, a basic embroidery kit with a small selection of good quality threads, needles, an embroidery hoop, and fabric is a great starting point. This allows you to learn the fundamentals without a significant investment.
Prioritize Essentials: Focus on getting good quality needles, thread, and a sturdy hoop. These are the tools you'll use most frequently, and their quality will significantly impact your experience. You can always add additional colors, fabrics, and specialty tools later as your skills and interests grow.
Shop Around: Compare prices from different stores, both online and offline. Look for sales and discount opportunities. Many craft stores offer student discounts or loyalty programs that can help you save money.
Consider Used Supplies: Check out thrift stores, consignment shops, or online marketplaces for gently used embroidery supplies. You can often find high-quality tools and threads at a fraction of the retail price.
Invest in Multipurpose Tools: Look for tools that can serve multiple purposes. For example, an embroidery hoop with an adjustable screw mechanism can be used for different project sizes.

Beyond Price: Finding the Right Fit
While price is a significant factor, it's not the only consideration when buying embroidery supplies. Here are some additional things to keep in mind:
Comfort: Choose needles and hoops that feel comfortable in your hand. This will help prevent fatigue and make embroidery a more enjoyable experience.
Project Requirements : For delicate fabrics, you might need thinner needles and finer threads. For thicker fabrics like denim, you'll need sturdier needles and thicker threads.
Sustainability: If eco-friendliness is important to you, look for ethically sourced materials like organic cotton thread or bamboo embroidery hoops.
Brand Reputation: Research different embroidery brands and consider their reputation for quality. Reading reviews and recommendations from other embroiderers can be helpful.
Beyond Supplies: Resources for Beginners
Embarking on a new creative journey can be exciting, but it's also normal to feel overwhelmed at times. Here are some resources to help you along your embroidery adventure:
Online Tutorials: There are countless free and paid online embroidery tutorials available. These can teach you basic stitches, advanced techniques, and even specific design patterns.
Embroidery Books and Magazines: Invest in a good beginner's embroidery book or magazine. These resources provide detailed instructions, project ideas, and inspiration.
Online Communities: Join online embroidery communities or forums. Connect with other embroiderers, share your work, ask questions, and get valuable feedback.
Conclusion
There's no one-size-fits-all answer to the question of whether you should buy cheap embroidery supplies. The best approach is to find a balance between affordability and quality that works for you. Start with a basic kit of good quality essentials, prioritize comfort and project needs, and don't hesitate to take advantage of resources available to help you learn and grow as an embroiderer. Remember, the most important thing is to have fun and enjoy the creative process!
Bonus Tip: As you gain experience and confidence, consider creating your own embroidery kits as gifts or to sell. Curate high-quality materials in beautiful color palettes and pair them with clear instructions or patterns for a unique and thoughtful offering.
With a little planning and research, you can find the perfect embroidery supplies to fuel your creativity and bring your artistic visions to life. Happy stitching!
Read the full article
1 note
·
View note
Text
Master the Craft: Essential Embroidery Techniques for Beginners

Welcome, embroidery enthusiasts, to a comprehensive guide designed to elevate your stitching skills! Whether you're a complete novice or a seasoned stitcher, there's always something new to learn in the delightful world of embroidery. This post dives deep into essential techniques, offering valuable knowledge for beginners and introducing advanced concepts to broaden your creative horizons.
Embroidering Basics: A Foundation for Success
Before we delve into intricate stitches, let's solidify the fundamentals. Here's what you'll need to get started:
Embroidery hoop: Keeps your fabric taut and prevents puckering. Choose a size appropriate for your project.
Fabric: Opt for tightly woven fabrics like cotton or linen for better stitch definition.
Embroidery needles: Sizes vary depending on thread thickness and fabric weight. Sharper needles are ideal for finer fabrics.
Embroidery floss: Choose high-quality threads in colors that complement your design. Six-stranded floss is the most common type.
Embroidery scissors: Sharp scissors ensure clean thread cuts.
Embroidery pattern: This can be a pre-printed design, a digital file, or even a freehand drawing on your fabric.
Threading the Needle: Mastering the Basics
Separate a strand: Most embroidery floss comes in six strands. For most projects, you'll separate two to three strands depending on the desired thickness.
Cut a length: Aim for a strand approximately 18-20 inches long.
Thread the needle: Loop one end of the floss and thread it through the eye of the needle, leaving a tail at the opposite end.
Knotting the end: Secure the floss with a simple knot close to the needle's eye.
The Stitches that Make Magic: A Beginner's Guide
Now that you're prepped, let's explore some fundamental embroidery stitches:
Running stitch: This basic stitch creates a continuous line and forms the foundation for many other stitches. Make small, even stitches with the needle going up and down through the fabric.
Backstitch: This stitch secures your work and prevents thread from unraveling. Make a small stitch forward, then bring the needle back a stitch length, pushing the thread under the previous stitch before going forward again. Repeat for a secure line.
Straight stitch: Similar to running stitch but with spaces between each stitch. This creates a dotted line effect.
Satin stitch: Creates a smooth, solid surface. Make small, close stitches side-by-side, completely covering the fabric underneath.
French knot: A decorative knot that adds a raised, 3D effect. Wrap the thread around the needle a few times, hold it down with your thumb, then push the needle through the fabric, leaving the knot on the surface.
Beyond the Basics: Exploring Advanced Embroidery Techniques
As your skills grow, venture into more intricate techniques that add depth and dimension to your projects:
Stem stitch: Ideal for creating outlines and stems. Make diagonal stitches, one on top of the other, following the desired line.
Lazy daisy stitch: Creates a delicate daisy-like flower. Make a small circle of satin stitch, then radiating straight stitches around the circle.
Blanket stitch: Creates a decorative edging or can be used to join two pieces of fabric. Make small diagonal stitches that catch the edge of one fabric and loop under the other fabric's edge.
Appliqué: Sew a pre-cut fabric shape onto another fabric using decorative stitches for a layered effect.
Free-motion embroidery: Detach the embroidery hoop and move the fabric freely under the sewing machine needle to create organic shapes and designs.
Essential Tips and Tricks for Flawless Embroidery
Transfer your design: Use transfer paper, a water-soluble pen, or a light source to trace your embroidery pattern onto your fabric.
Sharpen your needles: Blunt needles snag and damage fabric. Invest in a needle sharpener for continuous smooth stitching.
Relax your grip: Avoid holding the thread too tightly, as this can cause tension and puckering of the fabric.
Practice even tension: Maintain consistent tension on the thread as you stitch for clean and uniform results.
Experiment with color: Don't be afraid to play with color combinations to create unique and vibrant designs.
Finishing touches: Once your embroidery is complete, press it with a warm iron to flatten stitches and remove wrinkles. You can also frame it or use it to embellish clothing, bags, or home decor items.
Developing Your Design Skills:
Sketch your own designs: Don't be limited by pre-made patterns. Sketch simple shapes, flowers, or lettering to create your own unique motifs.
Trace from life: Use leaves, flowers, or other natural objects as inspiration. Place them on your fabric and trace their outlines for a natural aesthetic.
Digitize photos: Convert photos or illustrations into embroidery patterns using specialized software. This allows you to incorporate personal images into your projects.
Combine techniques: Don't be afraid to mix and match different stitches and embellishments within a single project. Experiment with textures and layering to create depth and interest.
Resources for Embroidery Enthusiasts:
Embroidery books and magazines: Find a wealth of inspiration, patterns, and tutorials in embroidery publications.
Online embroidery communities: Join online forums and social media groups to connect with other stitchers, share your work, and learn from others.
Embroidery classes and workshops: Consider taking a class or workshop to learn new techniques and get hands-on guidance from experienced instructors.
Download our 3 Free Books Here
Troubleshooting Common Embroidery Problems:
Puckered Fabric: This is usually caused by uneven tension. Loosen the fabric slightly in the hoop and re-tighten as you stitch.
Thread breaks: Blunt needles or using too much thread can cause breaks. Ensure your needles are sharp and use the appropriate number of floss strands for your fabric and stitch.
Uneven Stitches: Practice maintaining consistent tension on your thread and focus on making stitches of similar length.
Knots on the wrong side: These can be unsightly. Try burying the knot under a few stitches at the beginning of your work.
The Art of Embroidery: A Journey of Skill and Self-Expression
Embroidery is more than just creating beautiful stitches; it's a journey of learning, exploration, and self-expression. With dedication and a little practice, you'll master essential techniques, develop your design skills, and discover the joy of creating unique and personalized pieces. So, grab your needle and thread, embrace the creative process, and let your imagination blossom with every stitch!
Bonus Section: A Beginner-Friendly Embroidery Project
Feeling inspired? Here's a simple yet charming project to get you started:
Embroidered Floral Hoop Art
Materials:
Embroidery hoop (4-inch diameter)
White cotton fabric (slightly larger than the hoop)
Embroidery floss (various colors of your choice)
Embroidery needle
Embroidery scissors
Water-soluble pen
Pencil and paper (optional, for sketching your design)
Instructions:
Prepare your fabric: Cut the fabric to a size a few inches larger than your embroidery hoop.
Transfer your design: Sketch some simple flowers on paper first (optional), or use a pre-printed floral pattern. Using a water-soluble pen, lightly trace your design onto the fabric.
Set up your hoop: Loosen the screw on the embroidery hoop, place the fabric over the inner hoop, and then tighten the screw to secure the fabric taut.
Choose your stitches: For this project, we'll use a combination of basic stitches. Use a backstitch for the flower outlines, French knots for the flower centers, and lazy daisy stitches for the flower petals. You can also experiment with other stitches you've learned.
Embroider your design: Thread your needle with your chosen color and begin stitching according to your traced design. Refer to the explanations above for each stitch if needed.
Finishing touches: Once your embroidery is complete, tie a knot at the end of the thread and weave it under a few stitches on the backside to secure it. Trim any excess thread close to the knot.
Frame your art: Cut away any excess fabric around the hoop, leaving a clean edge. You can display your beautiful hoop art as is or add a decorative ribbon around the outer hoop for an extra touch.
Remember, embroidery is a relaxing and rewarding hobby. Embrace the learning process, have fun experimenting, and enjoy the satisfaction of creating something unique and beautiful with your own hands!
Read the full article
0 notes
Text
10 Common Embroidery Machine Problems
10 Common Embroidery Machine Problems (and How to Fix Them!)
The whirring symphony of your embroidery machine, the vibrant threads dancing across the fabric – there's a certain magic to watching a design come to life stitch by stitch. But even the most seasoned embroiderer can encounter occasional hiccups along the way. Thread breaks, tension issues, and unexpected puckering can leave you frustrated and questioning your project.
Fear not, fellow stitchers! This guide delves into 10 common embroidery machine problems and equips you with the knowledge to troubleshoot and get your machine humming smoothly again.
1. Thread Breaks:
This is a frequent foe for embroiderers. Here are some culprits and solutions:
Incorrect Threading: Double-check your threading path. Ensure the thread is following the correct guides and tension discs. Refer to your machine's manual for specific threading instructions.
Tension Issues: Imbalance between upper and bobbin thread tension can cause thread breaks.
Too Tight Upper Tension: Loosen the upper thread tension slightly by turning the tension dial. A good rule of thumb: you should be able to gently pull the thread upwards with a little resistance.
Too Loose Upper Tension: Tighten the upper thread tension slightly. The thread should not pull out easily but shouldn't break with minimal pressure either.
Blunt or Damaged Needle: A bent or dull needle can snag and break the thread. Replace the needle regularly, especially after stitching through thick fabrics or metallic threads.
Rough Surfaces: Burrs or rough edges on thread guides or tension discs can snag and break the thread. Use a soft brush to gently clean these areas.
2. Tension Issues:
Uneven tension between the upper and bobbird thread can lead to a host of problems, including puckering, looping, and skipped stitches. Here's how to tackle tension woes:
Identify the Problem:
Loose Upper Tension: Stitches appear loose and loopy on the top of the fabric, and the bobbin thread might show through.
Tight Upper Tension: Stitches appear puckered and bunched together on the top of the fabric.
Loose Bobbin Tension: Stitches appear loose on the underside of the fabric, and the upper thread might show through.
Tight Bobbin Tension: Bobbin case feels tight and difficult to open. Stitches appear puckered on the underside of the fabric.
Adjusting Tension: Most machines have separate tension dials for the upper and bobbin thread. Make small adjustments, test stitching on a scrap fabric after each adjustment, and observe the results.
3. Birdnesting (Thread Tangling Underneath the Hoop)
This frustrating situation occurs when the bobbin thread tangles underneath the embroidery hoop. Here are some potential causes and solutions:
Incorrect Bobbin Winding: Ensure the bobbin is wound evenly and tightly. Loose winding can cause the thread to unravel and tangle.
Improper Bobbin Placement: Double-check that the bobbin is inserted correctly with the thread unwinding in the appropriate direction (consult your machine's manual).
High Upper Thread Tension: If the upper thread tension is too tight, it can pull too much thread from the bobbin, causing loops and tangles underneath.
4. Skipped Stitches:
The design looks incomplete with missing stitches. Here are some ways to address this:
Needle Selection: Ensure you're using the correct needle size and type for your fabric and thread weight. A thin needle for thick fabric can struggle to penetrate and complete the stitch.
Needle Depth: The needle depth might be incorrect. Adjust the needle depth setting according to your fabric thickness and needle size.
Tension Issues: Improper tension can also contribute to skipped stitches. Refer to solutions mentioned in point #2 for adjusting tension.
5. Puckering or Wavy Stitches:
The fabric appears ruffled or uneven around the embroidery. Here's how to tackle puckering:
Hooping Technique: Ensure the fabric is hooped correctly. The fabric should be taut but not drum-tight. Avoid pulling or distorting the fabric while hooping.
Stabilizer Selection: Use the appropriate stabilizer for your fabric weight and type. A stabilizer that's too light won't provide enough support, while one that's too heavy can cause the fabric to bunch.
Stitch Density: Dense stitch fills can cause puckering, especially on lightweight fabrics. Consider reducing the stitch density or using a different fill pattern.
6. Breaking Thread on Color Changes
Thread Trimming Settings: Adjust the thread trimming settings on your machine. You might be able to shorten the trimming length or disable trimming altogether during color changes. Experiment to find the sweet spot.
Manual Thread Trimming: Consider manually trimming the threads after each color change instead of relying on the automatic trimming function. This gives you more control and can prevent unnecessary thread breaks.
7. Machine Not Recognizing USB Drive:
If your machine won't recognize the USB drive containing your embroidery files, here are some troubleshooting steps:
Check File Format: Ensure the embroidery files on the USB drive are in a format compatible with your machine. Consult your machine's manual for supported file formats.
Drive Compatibility: Try using a different USB drive. Some machines might have limitations on USB drive capacity or formatting.
Clean the USB Port: Gently clean the USB port on your machine with a compressed air can to remove any dust or debris that might be causing connection issues.
8. Error Messages:
Modern embroidery machines often display error messages to help diagnose problems. Here's how to handle them:
Consult the Manual: Your machine's manual will have a troubleshooting section that decodes error messages and suggests solutions.
Online Resources: Search online forums or the manufacturer's website for information on specific error messages. You might find solutions from other users who have encountered similar issues.
9. Uneven Stitches:
The stitches appear uneven in length or width. Here are some possibilities:
Improper Foot Pressure: The foot pressure might be too light or too heavy. Adjust the foot pressure setting according to your fabric thickness and stabilizer. Refer to your machine's manual for specific recommendations.
Worn Feed Dogs: The feed dogs are the teeth that grip the fabric and move it along during stitching. Over time, they can wear down and lose their grip, leading to uneven stitching. If the feed dogs appear worn, consider getting them replaced by a qualified technician.
10. Machine Makes Unusual Noises:
Unusual noises can indicate potential mechanical issues. Here's what to do:
Power Down: Turn off the machine immediately and unplug it from the power source.
Consult the Manual: Refer to your machine's manual for troubleshooting tips related to unusual noises.
Seek Professional Help: For persistent noises or any concerns about the machine's functionality, it's best to consult a qualified embroidery machine technician.
Bonus Tip: Regular Maintenance is Key!
Preventative maintenance goes a long way in avoiding problems and ensuring your machine runs smoothly. Develop a routine for cleaning and lubricating your machine according to the manufacturer's instructions. This might involve cleaning the bobbin case, tension discs, and needle bar, as well as oiling specific parts.
By understanding these common problems and their solutions, you'll be well-equipped to troubleshoot embroidery machine issues and keep your creative projects stitching forward. Remember, patience and practice are your allies. Happy embroidering!
Read the full article
0 notes
Text
tips for buying your embroidery machine

Embroidery Machine Essentials: 10 Tips for Navigating the Market and Choosing the Perfect Machine
Embroidery machines have revolutionized the crafting world, allowing individuals to add intricate designs and personal touches to their creations. Whether you're a seasoned sewist or a curious newcomer, investing in an embroidery machine can open up a world of possibilities. However, with a vast array of options available, selecting the right machine can be a daunting task. To help you navigate the market and make an informed decision, here are 10 essential tips for buying your embroidery machine:
1. Define Your Needs and Goals
Before embarking on your machine search, take a moment to reflect on your embroidery aspirations. Will you be primarily embroidering clothing, home décor items, or wearable crafts? Do you envision creating intricate designs or simple embellishments? Identifying your priorities will help narrow down your options and ensure you choose a machine that aligns with your specific needs.
2. Set a Realistic Budget
Embroidery machines range in price from affordable entry-level models to high-end professional machines. Determine how much you can comfortably spend and factor in additional costs, such as software, supplies, and maintenance. Setting a budget will prevent you from overspending and ensure you prioritize the features that matter most.
3. Consider Hoop Size and Stitch Capacity
Hoop size determines the maximum embroidery area you can create. If you plan to embroider large items like blankets or jackets, prioritize a machine with a larger hoop. Similarly, stitch capacity refers to the number of stitches the machine can execute per minute. For intricate designs, consider a machine with a higher stitch capacity to ensure smooth and efficient embroidery.
4. Evaluate Operating System and Software
Embroidery machines typically use a proprietary software platform that enables you to upload, edit, and transfer designs. Familiarize yourself with the software's features and ease of use. Some machines offer compatible software suites for enhanced functionality, while others rely on USB connections or other methods for design transfer.
5. Assess Needle Placement and Thread Tension
The placement of needles can significantly impact the quality of your embroidery. Machines with multiple needles allow for faster stitching and more complex designs. Thread tension plays a crucial role in creating consistent and professional-looking embroidery. Check the machine's needle arrangement and tension adjustment mechanisms to ensure they align with your desired level of craftsmanship.
6. Explore Embroidering Features and Applications
Some machines offer advanced features like automatic thread cutting, bobbin-winders, and lettering tools, while others focus on basic embroidery functions. Consider the features that are most important to you, such as automatic thread color changes, automatic thread trimming, and the ability to embroider over multiple layers of fabric.
7. Research and Read User Reviews
Once you've narrowed down your options, extensively research the specific models you're considering. Read user reviews, watch online demonstrations, and consult with experienced embroidery enthusiasts to gain insights into the machines' performance, strengths, and limitations.
8. Consider Local Service and Support
Ensure the embroidery machine you choose is backed by a reputable brand with a strong customer service network. Check for local dealers or authorized service centers in your area to ensure prompt support in case of any technical issues or warranty claims.
9. Test Drive Potential Machines
If possible, visit a local sewing or embroidery store and test drive the machines that interest you. This will provide you with hands-on experience, allowing you to gauge the machine's ease of use, operation, and overall performance.
10. Seek Expert Advice
Don't hesitate to seek guidance from experienced sewers, embroidery enthusiasts, or qualified professionals at sewing or craft stores. Their insights and recommendations can be invaluable in making an informed decision that aligns with your skills, goals, and budget.
Embroidery machines can be an investment, but with careful consideration and informed decisions, you can find the perfect machine to enhance your creative endeavors and bring your embroidery dreams to life. By following these essential tips, you'll be well-equipped to navigate the market, select the right machine for your needs, and embark on a rewarding journey of personal expression and artistic exploration.
More tips
- Determine Your Needs: Before purchasing an embroidery machine, it's important to determine what you'll be using it for. Are you a professional embroiderer or will you be using it for personal projects? Will you be embroidering on a variety of materials or just one type? Answering these questions will help you narrow down your options and ensure that you purchase a machine that will meet your needs.
Research Different Brands and Models: There are many different brands and models of embroidery machines on the market. Take the time to research different options and compare features. Look for machines with a good reputation for reliability and durability.
Consider the Size of the Embroidery Area: The size of the embroidery area is another important factor to consider. If you plan on embroidering large projects, you'll want to look for a machine with a larger embroidery area. On the other hand, if you'll mostly be working on smaller projects, a smaller embroidery area may be sufficient.
Look for a Machine with a Large Embroidery Field: A large embroidery field will allow you to work on larger projects, and also give you more flexibility when it comes to placement of your designs. This also means that you can do larger designs, or do more than one designs at a time.
Check for Built-in Patterns and Designs: Many embroidery machines come with a variety of built-in patterns and designs. This can be a great feature if you're just starting out, as it will give you a good selection of designs to work with. If you're more experienced, you may prefer a machine that allows you to create and edit your own designs.
Consider the Number of Needles: The number of needles on an embroidery machine can have a big impact on the quality of your finished projects. Look for a machine with at least two needles, as this will allow you to change thread colors more easily.
Check for a Good Lighting System: Good lighting is essential for precision embroidery. Look for a machine with a bright, adjustable light that will illuminate your work area and make it easier to see your designs.
Consider the Price: Embroidery machines can be quite expensive, so it's important to consider the price when making your decision. Look for a machine that offers the features you need at a price you can afford.
Look for a Good Warranty: A good warranty can provide peace of mind and protect your investment in case something goes wrong with your machine. Look for a machine with a warranty of at least one year.
Consider the Brand Reputation: Research the brand reputation of the machine you are buying. This will give you an idea of the customer support you can expect, as well as the quality of the machine you are buying.
In conclusion, when it comes to buying an embroidery machine, it's important to consider your needs, research different brands and models, and look for a machine with a large embroidery area, built-in patterns and designs, a good number of needles, a good lighting system, a good warranty, and a good brand reputation. By following these tips, you'll be well on your way to finding the perfect embroidery machine for your needs.
Read the full article
0 notes
Text
10 reasons why you need custom embroidery digitizing

10 Reasons Why You Need Custom Embroidery Digitizing to Elevate Your Project
Embroidery adds a touch of timeless elegance and personalization to any garment, accessory, or homeware. But before those threads dance across the fabric, there's a crucial behind-the-scenes step: custom embroidery digitizing. It's the magic that transforms your artwork into a language embroidery machines understand, ensuring a flawless and professional final product.
Whether you're a seasoned embroiderer, a business owner, or simply someone who appreciates the finer details, here are 10 compelling reasons why custom embroidery digitizing is an essential part of your project:
1. Unleash Precision and Detailing:
Basic embroidery techniques might struggle to replicate intricate designs. Custom digitizing software meticulously calculates every stitch, ensuring even the most complex logos, monograms, or artwork are translated with stunning precision. Fine lines, small text, and intricate details are captured perfectly, elevating the overall aesthetic of your project.
2. Unparalleled Personalization:
Want to add a unique touch to a gift, personalize a uniform, or create a one-of-a-kind garment? Custom digitizing unlocks a world of personalization possibilities. From sentimental family crests to quirky nicknames, you can transform personal logos, signatures, or even photos into beautiful embroidered pieces. The possibilities are endless, adding a special touch that generic embroidery simply can't match.
3. Brand Identity on Point:
For businesses, maintaining a consistent and recognizable brand image is paramount. Custom digitizing ensures your logo or branding elements are flawlessly translated into embroidery. This consistency, whether on uniforms, promotional merchandise, or corporate gifts, strengthens brand recognition and reinforces professionalism. Imagine the impact of a perfectly embroidered logo on employee uniforms – it speaks volumes about attention to detail and brand pride.
4. Endless Design Possibilities:
Gone are the limitations of pre-designed embroidery patterns. With custom digitizing, your design creativity knows no bounds. From classic fonts and simple shapes to elaborate floral motifs and intricate geometric patterns, the sky's the limit. Explore a vast design library or unleash your inner artist and create your own unique designs – the digitizing software will translate them into stunning embroidered masterpieces.
5. Optimal Color Control:
Achieving perfect color matching is crucial for a professional look. Custom digitizing software offers exceptional color control, allowing you to precisely match thread colors to your design specifications. This ensures the embroidered elements seamlessly integrate with the overall aesthetic, whether it's aligning with brand colors or achieving a specific color scheme for a personalized project.
6. Design Scalability and Flexibility:
Imagine having a single design that adapts to various project needs. Custom digitizing software allows you to resize, rotate, and modify your designs effortlessly. This flexibility is incredibly useful for creating different sized logos for hats, bags, or large banners. You can adjust your design to fit the specific area of embroidery, ensuring optimal placement and visual impact without compromising on detail.
7. Durability and Longevity:
Embroidery is known for its resilience, able to withstand frequent washing and wear without fading or fraying. Custom digitizing takes this a step further by optimizing designs for durability. The digitizer considers factors like stitch density and underlay to ensure the embroidery remains vibrant and intact for years to come. Imagine a personalized gift that becomes a cherished family heirloom – custom digitizing ensures its beauty endures.
8. Streamlined Workflow and Efficiency:
Using pre-digitized designs can be time-consuming, requiring you to find the perfect match for your project. Custom digitizing eliminates this hassle. Once you have a digitized file, replicating the design becomes a breeze. This saves you time and allows you to focus on the creative aspects of your project, whether it's designing new products or personalizing existing ones.
9. Reduced Risk of Errors:
Generic embroidery patterns might contain errors or inconsistencies. Custom digitizing software allows for meticulous review and correction before the embroidery process begins. This minimizes the risk of errors creeping into the final product, saving you time, money, and frustration. You can be confident that the finished piece will reflect your exact vision, with every stitch precisely placed.
10. Professional Results Every Time:
Whether you're a seasoned embroiderer or just starting out, custom digitizing elevates your projects to a professional level. The precision, detail, and consistency it provides ensures a polished and impressive final product. This is especially important for businesses that want to showcase their brand image in the best possible light.
Investing in Custom Embroidery Digitizing: A Smart Choice
Custom embroidery digitizing is more than just a technical process – it's an investment in the quality and impact of your project. It unlocks a world of creative possibilities, ensures brand consistency, and guarantees a professional, long-lasting finished product. So, the next time you embark on an embroidery project, consider the power of custom digitizing. It's the secret
Read the full article
#embroidery#embroidery designs#Embroidery Digitizing#embroidery machine#embroidery software#embroidery tips
0 notes
Text
Largest hoop embroidery machine
Embracing the Big Picture: Exploring the Realm of Largest Hoop Embroidery Machines
For embroidery enthusiasts, the ability to tackle grand designs holds a captivating allure. Large-scale projects, from breathtaking wall hangings to intricate tapestries, inspire creativity and push the boundaries of what's possible. But achieving such feats requires the right equipment, and that's where the largest hoop embroidery machines enter the scene.
This comprehensive guide delves into the world of these powerful machines, equipping you with the knowledge to make informed decisions for your embroidery endeavors. We'll explore the benefits and considerations of large hoop embroidery machines, delve into popular models, and answer burning questions to help you navigate this exciting realm.
The Allure of Large Hoop Embroidery Machines
There's a certain magic associated with creating expansive embroidery art. Here are some reasons why large hoop embroidery machines capture the imagination:
Unleashing Creativity: Imagine stitching intricate landscapes, life-sized portraits, or detailed historical scenes. Large hoops allow for expansive designs, fostering boundless creativity and artistic expression.
Reduced Re-Hooping: Smaller hoops often necessitate re-hooping the fabric multiple times to complete a large design. Large hoop machines minimize this tedious process, saving time and frustration.
Enhanced Efficiency: For high-volume embroidery projects, a large hoop machine can significantly boost efficiency. Completing designs in fewer hoops equates to faster production times.
Professional Appeal: Large-scale embroidery pieces often have a more professional and impactful presentation, making them ideal for commercial projects or exhibition pieces.
Before You Take the Plunge: Considerations for Large Hoop Embroidery Machines
While large hoop embroidery machines hold immense potential, there are important factors to consider before investing in one:
Cost: Large hoop machines typically come at a premium price point compared to their smaller counterparts. Carefully evaluate your budget and project needs before making a purchase.
Space Requirements: These machines have a larger footprint, demanding ample workspace. Ensure you have dedicated space to accommodate the machine comfortably.
Weight and Portability: Large hoop machines tend to be heavier and less portable than smaller models. Assess your need for portability before deciding.
Learning Curve: Operating a large hoop machine might require additional learning compared to a basic machine. Consider your technical expertise and comfort level.
Software Compatibility: Ensure the machine's software is compatible with your preferred embroidery design formats.
Exploring Popular Large Hoop Embroidery Machines
The market offers a variety of large hoop embroidery machines, each with unique features and capabilities. Here's a glimpse into some popular models:
Brother Innov-is VE2300: This machine boasts an impressive 8" x 12" embroidery field, making it ideal for larger projects. It offers user-friendly software and a range of built-in designs.
Janome Memory Craft 550E: This embroidery-only machine features a large 7.9" x 14.2" hoop, perfect for creating statement pieces. It includes an automatic thread cutter and bobbin thread sensor for added convenience.
Melco Bravo XL: This industrial-grade machine is a powerhouse, offering a massive 12" x 18" embroidery field. It's ideal for high-volume production and comes with advanced features like multi-needle embroidery.
SWF embroidery machines: SWF offers a range of large hoop machines with varying embroidery field sizes, catering to diverse needs. They are known for their reliability and durability.
Beyond Size: Additional Features to Consider
While hoop size reigns supreme, other features can significantly enhance your large hoop embroidery experience:
Number of Needles: More needles allow for faster stitching and the ability to incorporate more thread colors in a single design.
Maximum Stitch Count: This determines the complexity of designs the machine can handle. Higher stitch counts translate to intricate detailing.
Embroidery Speed: Consider the speed of the machine, especially if time is a factor.
Automatic Thread Trimming: This feature saves time and ensures clean embroidery finishes.
Wireless Connectivity: Transferring designs wirelessly adds convenience.
Frequently Asked Questions About Large Hoop Embroidery Machines
Here are some common questions that arise when considering a large hoop embroidery machine:
Do I need a large hoop machine for all my embroidery projects? No, smaller machines are perfectly suited for smaller projects. Consider the size of your typical projects before making a decision.
Can I use a large hoop machine for smaller projects? Yes, most large hoop machines allow for using smaller hoops within the larger frame.
What kind of projects are best suited for large hoop machines? Large-scale wall hangings, tapestries, home décor items, and large apparel projects benefit greatly from large hoop
Read the full article
0 notes
Text
how to become an embroidery digitizer

Stitch Your Way to Success: A Guide to Becoming an Embroidery Digitizer
The world of embroidery is a beautiful tapestry woven with vibrant colors and intricate designs. But before those threads hit the fabric, there's a crucial step – transforming artwork into instructions an embroidery machine understands. This is the domain of the embroidery digitizer, a skilled professional who breathes life into designs for stitching.
If you're captivated by the idea of transforming artwork into embroidered masterpieces, this guide is for you! We'll delve into the exciting world of embroidery digitizing, exploring the necessary skills, the learning path, and the tools to set you on your stitching journey.
Why Become an Embroidery Digitizer?
Embroidery digitizing offers a unique blend of creativity and technical expertise. You get to:
Be a creative translator: Take an idea and translate it into a language embroidery machines understand.
Embrace precision: Digitizing requires meticulous attention to detail, ensuring every stitch falls into place perfectly.
See your designs come to life: The satisfaction of witnessing your digitized artwork transformed into a tangible embroidered piece is unmatched.
Work on a variety of projects: From intricate logos to playful children's designs, digitizers work on a diverse range of projects.
Enjoy potential for flexibility: Freelance digitizing allows you to set your own hours and work from the comfort of your home.
The Skills You Need to Master
Software Proficiency: Embroidery digitizing software is your primary tool. Popular options include Wilcom, Hatch, and PES. While the specific features may differ, the core principles remain consistent.
Understanding Embroidery Techniques: Knowledge of stitch types, thread properties, and hoop limitations is essential. You need to know how to translate an image into efficient and beautiful stitches.
Graphic Design Fundamentals: A basic grasp of design principles like color theory, composition, and file formats will significantly enhance your digitizing process.
Keen Eye for Detail: A meticulous approach is crucial to ensure stitches are placed accurately and potential errors are caught before they become problems.
Patience and Practice: Digitizing is a skill that takes time and dedication to master. Be prepared to invest effort and refine your craft through practice.
Learning Paths to Embark On
There's no one-size-fits-all approach to becoming an embroidery digitizer. Here are the prominent learning avenues:
Online Courses: Several online platforms offer comprehensive digitizing courses. These courses provide structured learning with video tutorials, downloadable resources, and opportunities to practice and receive feedback.
Software Tutorials: Most embroidery digitizing software comes with built-in tutorials and comprehensive user guides. These resources are a great starting point to familiarize yourself with the software's functionalities.
Books and eBooks: Several publications delve into the intricacies of embroidery digitizing. These resources offer detailed explanations and visual aids to supplement your learning.
Apprenticeship: If you're fortunate enough to find an established digitizer willing to take you under their wing, an apprenticeship can provide invaluable practical experience and mentorship.
The Tools of the Trade
Your embroidery digitizing journey requires some essential tools:
Computer with Adequate Specs: Digitizing software can be resource-intensive. Ensure your computer has sufficient processing power and memory to run the software smoothly.
Embroidery Digitizing Software: Choose a reputable software program that caters to your needs and budget. Many offer trial versions to help you test the waters before committing.
Embroidery Machine (Optional): While not essential for learning, having an embroidery machine at your disposal allows you to test your digitizations and gain a deeper understanding of the embroidery process.
Digital Design Resources: A library of digital artwork serves as your source material for practice. Many websites offer free or paid embroidery designs.
Sharpening Your Skills: Practice Makes Perfect
Once you've grasped the fundamentals, it's time to refine your skills. Here are some effective practice methods:
Start Simple: Begin with basic shapes and lettering before progressing to more complex designs.
Practice with Free Designs: Many websites offer free, downloadable embroidery designs specifically for practice purposes.
Join Online Communities: Connect with other digitizers online. Share your work, ask questions, and learn from others' experiences.
Digitize for Others: Offer your digitizing services to friends, family, or local businesses at a discounted rate to build your portfolio and gain practical experience.
Building a Successful Career Path
In-House Digitizer: Join an embroidery company and work as part of their design team, creating digitizations for in-house production.
Embroidery Educator: Share your knowledge by teaching embroidery digitizing courses online or in person.
Software Specialist: Work with a digitizing software company, providing technical support or developing training materials.
Building Your Brand and Attracting Clients
For freelance digitizers, establishing a strong online presence is crucial. Here are some tips:
Create a Portfolio Website: Showcase your best work with high-quality images and detailed descriptions of the digitizing techniques used.
Develop a Social Media Presence: Connect with potential clients on platforms like Instagram and Pinterest. Share your work, showcase behind-the-scenes glimpses, and offer valuable embroidery digitizing tips.
Offer Competitive Rates: Research the going rates for digitizing services and establish pricing that reflects your experience and skill level.
Provide Excellent Customer Service: Be responsive to inquiries, communicate clearly, and deliver high-quality work on time.
The Embroidery Digitizing Landscape: Trends and Considerations
As the embroidery industry evolves, staying up-to-date with trends is essential:
Rise of 3D Embroidery: Techniques like puff embroidery and applique are gaining popularity, requiring advanced digitizing skills.
Increased Demand for Customization: Consumers are increasingly seeking personalized items. Be prepared to digitize logos, monograms, and other custom designs.
Technological Advancements: Digitizing software is constantly evolving, offering new features and functionalities. Embrace these advancements to enhance your efficiency and skillset.
The Rewarding World of Embroidery Digitizing
Embroidery digitizing is a unique and rewarding career path. It allows you to blend creativity with technical expertise, transforming ideas into beautiful embroidered creations. With dedication, practice, and a passion for all things stitched, you can carve your niche in this vibrant industry.
Bonus Tips:
Never stop learning: The world of embroidery digitizing is ever-evolving. Stay curious, explore new techniques, and attend industry workshops or conferences to keep your skills sharp.
Invest in quality resources: Consider purchasing embroidery threads and stabilizer to test your digitizations on physical fabrics. This will help you refine stitch types and densities for optimal results.
Build relationships with embroiderers: Collaborate with embroidery machine operators to gain valuable insights into the practical aspects of embroidery and potential challenges your digitizations might encounter.
Embark on your embroidery digitizing journey today, and watch your creativity come alive, stitch by beautiful stitch!
Read the full article
#embroidery#embroidery designs#embroidery machine#embroidery software#embroidery tips#mbroidery digitizer
0 notes
Text
8 common machine embroidery problems
Taming the Thread: Conquering 8 Common Machine Embroidery Problems
Machine embroidery allows you to create stunning designs on fabric, but even the most seasoned stitchers encounter occasional roadblocks. Don't let these problems prevent you from achieving beautiful embroidered finishes! This guide explores eight frequent machine embroidery issues and provides solutions to get your projects stitching smoothly again.
1. Thread Terror: Breakage Blues
Upper Thread Snapping: This can be caused by several factors. Ensure proper threading, checking for snags on the thread path or a rough needle eye. Adjust the upper thread tension – too tight can cause snapping. Consider using a higher quality thread designed for embroidery.
Bobbin Thread Breaking: An improperly wound bobbin or a bobbin case with rough edges can snag the thread. Rewind the bobbin with even tension and inspect the bobbin case for damage. Ensure the bobbin is inserted correctly and the tension is balanced with the upper thread.
2. The Not-So-Smooth Stitch:
Uneven or skipped stitches are frustrating. Check the needle for burrs or bends and replace it if necessary. Ensure the correct needle size and type for your fabric and thread weight. Verify proper threading and tension settings. Sometimes, cleaning the machine's feed dogs and tension discs can resolve stitching issues. Consult your machine's manual for specific cleaning instructions.
3. The Dreaded Bird's Nest:
This tangled mess of thread beneath the fabric occurs when the upper and bobbin threads don't catch cleanly. Re-thread both threads, ensuring they lay flat in the tension discs. Check for loose bobbin casing components or a worn-out tension spring. Using a water-soluble stabilizer can help prevent birds' nests in some fabrics.
4. Puckering Up:
Puckered fabric around the embroidery is unsightly. The culprit is often improper hooping. Use a stabilizer that matches the weight of your fabric, and hoop it taut but not drum-tight. For knits or lightweight fabrics, use a floating technique where the fabric lays on top of a layer of stabilizer within the hoop.
5. Thread Shredding:
A blunt or incorrect needle size can shred delicate threads. Choose a sharp needle appropriate for your fabric and thread weight. For thicker threads or dense stitch patterns, consider a larger needle. Using a higher quality thread designed for embroidery can also improve durability.
6. The Wandering Design:
Stitches that veer off course can be caused by loose fabric in the hoop. Re-hoop your project with proper tension. Additionally, a stabilizer that's too weak or the wrong type for your fabric might not provide enough support, leading to shifting.
7. The Unruly Machine:
Unusual noises or slow stitching can indicate an underlying issue. Consult your machine's manual for routine maintenance procedures like cleaning and oiling. Ensure the bobbin is properly seated and the needle is securely tightened. If these steps don't resolve the problem, consider seeking professional servicing for your machine.
8. Design Dilemmas:
Improperly digitized embroidery files can lead to stitching problems. If you suspect the design is the culprit, try contacting the digitizer for assistance. There are also software programs available that can help you edit and troubleshoot embroidery files.
Bonus Tips:
Invest in quality supplies: Using good quality needles, thread, and stabilizer will significantly reduce embroidery problems.
Practice on scrap fabric: Before starting your final project, experiment with different settings and stabilizer combinations on a scrap of fabric that matches your project materials.
Consult your machine's manual: It's a valuable resource for troubleshooting and proper maintenance procedures.
Join online communities: Online forums and embroidery groups are a wealth of information and support.
Conclusion:
Machine embroidery can be a rewarding hobby, and with a little troubleshooting know-how, you can overcome common challenges and achieve beautiful results. Don't be discouraged by occasional glitches – consider them opportunities to learn and refine your skills. With practice and the knowledge to address these eight frequent problems, you'll be stitching stunning embroidery designs in no time!
Read the full article
0 notes
Text
All about file formats for embroidery machine

Demystifying the Stitch: A Guide to Embroidery Machine File Formats
The world of embroidery machines unlocks endless creative possibilities. But before your needle starts dancing across fabric, there's a crucial step: choosing the right file format. This seemingly technical aspect can be easily navigated with a clear understanding of the different file types and their compatibility. Buckle up, embroidery enthusiasts, as we delve into the fascinating world of embroidery machine file formats!
Understanding File Formats:
Imagine a recipe – it outlines the ingredients and instructions for a delicious dish. Similarly, an embroidery machine file format acts as a recipe for your machine. It tells the machine what colors of thread to use, the stitch patterns to follow, and the precise placement of each stitch. Different manufacturers use various file formats, ensuring their machines understand the specific instructions for each design.
Common Embroidery Machine File Formats:
Here's a breakdown of some of the most frequently encountered file formats in the embroidery world:
DST (Tajima): Widely considered the industry standard, DST files are compatible with a vast array of embroidery machines, particularly Tajima machines. They offer a high degree of detail and are well-suited for complex designs.
PES (Brother, Babylock): A popular format for Brother and Babylock machines, PES files are known for their user-friendliness. They offer good stitch quality and are often the preferred format for embroidery designs purchased online.
HUS (Viking, Husqvarna): Primarily used by Viking and Husqvarna machines, HUS files are well-suited for intricate designs. They offer a high level of control over stitch parameters.
JEF (Jefrey): Commonly found in Janome and Elna machines, JEF files provide good stitch quality and are compatible with various embroidery software programs.
VP3 (Viking, Pfaff): Used by Viking and Pfaff machines, VP3 files are known for their ability to handle complex designs. They offer precise control over stitch density and other parameters.
EXP (Melco): Primarily used by Melco machines, EXP files are known for their efficiency in handling large and intricate designs.
EMB (Wilcom): A versatile format used by various embroidery software programs, EMB files offer a high degree of customization and can be converted to other machine-specific formats.
Other Formats: Several other embroidery file formats exist, catering to specific machine brands or software programs. Examples include XXX (Singer), CSD (Poem), and PCS (Pfaff).
Choosing the Right File Format:
The ideal file format depends on two key factors:
Your Embroidery Machine: Always consult your machine's manual for a list of compatible file formats. Using an incompatible format will result in the machine being unable to read the design or producing inaccurate stitching.
The Embroidery Design: Some file formats are better suited for complex designs with intricate details. If you're unsure, consider contacting the designer or seller of the embroidery design for recommended formats.
File Conversion:
If you have an embroidery design in a format incompatible with your machine, fear not! Embroidery software programs often offer file conversion capabilities. However, keep in mind that conversion can sometimes lead to a slight loss of detail or require adjustments to the design. It's always best to obtain the design in a format natively compatible with your machine.
Additional Considerations:
Here are some extra points to ponder when navigating embroidery file formats:
File Size: Larger and more complex designs will have larger file sizes. Ensure your machine has enough memory to handle the file size of your chosen design.
Software Compatibility: If you plan to edit or modify your embroidery design, choose a format compatible with your preferred embroidery software program.
Online Resources: Many online embroidery design stores offer their designs in multiple formats to cater to a wider audience.
Conclusion:
Embroidery machine file formats may seem like a technical hurdle, but with a basic understanding, you can easily navigate this crucial aspect of your embroidery journey. Remember, by choosing the right format for your machine and design, you're setting yourself up for flawless stitching and stunning embroidered creations. So, happy stitching and keep exploring the wonderful world of embroidery!
Bonus Tip: Many online communities and forums cater to embroidery enthusiasts. These platforms can be a valuable resource for learning more about specific file formats, troubleshooting compatibility issues, and finding helpful tips from fellow stitchers.
Read the full article
0 notes
Text
The best Embroidery free software

Embroidery is a beautiful and intricate art form that has been around for centuries. With the advent of technology, embroidery has become easier and more accessible to everyone. Embroidery software allows you to create beautiful designs on your computer, which can then be transferred to your embroidery machine. However, many embroidery software programs can be expensive, which can be a barrier for many people who are just starting out. In this article, we'll explore the best embroidery free software options that can help you create beautiful embroidery designs without breaking the bank.
-
Ink/Stitch
Ink/Stitch is a free and open-source embroidery software that allows you to create and edit embroidery designs in a variety of file formats. It is compatible with both Windows and Mac operating systems and can be used with most embroidery machines. Ink/Stitch is user-friendly and offers a variety of features, such as fill stitching, satin stitching, and applique.
Unveiling the Power of Open-Source Embroidery Digitizing
Ink/Stitch's open-source nature empowers users to create and share embroidery designs without the constraints of licensing fees or proprietary formats. This democratizes the embroidery digitizing process, enabling individuals to access and contribute to the ever-growing community of designers.
Key Features for Creative Embroidery
Ink/Stitch packs a remarkable array of features to cater to a wide range of embroidery needs. Its comprehensive toolset allows users to:
Import and edit graphic files from various formats, including SVG, PNG, and EPS, making it effortless to incorporate existing designs or personal creations into embroidery projects.
Generate a variety of embroidery stitches, including satin, outline, fill, and backstitch variations, ensuring that the desired texture and details are captured in the digitized design.
Customize stitch parameters to fine-tune the appearance of the embroidery, adjusting stitch length, width, and density to achieve the desired aesthetic.
Optimize designs for different embroidery machines, ensuring compatibility with specific machine settings and needle types.
Beyond Digitizing: A Gateway to Creative Expression
Ink/Stitch's versatility extends beyond mere digitizing, enabling users to explore creative avenues:
Convert existing images into embroidered designs, transforming photographs, illustrations, or even hand-drawn sketches into wearable masterpieces.
Design personalized patches for clothing, hats, bags, or any other surface, adding a touch of individuality and flair.
Create custom embroidery fonts for personalized text elements, adding a unique touch to monograms, quotes, or greetings.
A Community-Driven Ecosystem
The Ink/Stitch community fosters collaboration and knowledge sharing among users. Online forums and documentation provide valuable resources for beginners and experienced designers alike. Additionally, a vibrant marketplace offers a wealth of user-created embroidery designs, expanding the creative possibilities.
Embrace the Freedom of Open-Source Embroidery
Ink/Stitch stands as a testament to the power of open-source software, empowering individuals to express their creativity without the limitations of commercial constraints. Its comprehensive features, community support, and diverse creative applications make it an invaluable tool for embroidery enthusiasts of all levels. So, embark on a journey of embroidery digitizing with Ink/Stitch and unleash your creative potential!
-
SewArt
SewArt is a free embroidery software that allows you to create and edit embroidery designs in a variety of file formats. It is compatible with both Windows and Mac operating systems and can be used with most embroidery machines. SewArt offers a variety of features, such as auto-digitizing, manual digitizing, and image conversion. It also includes a variety of stitch types, such as fill stitching, satin stitching, and applique.
SewArt: A Versatile Embroidery Digitizing Software for Creative Expression
In the world of embroidery, SewArt stands as a popular and versatile software solution for converting images into embroidery designs. Developed by S&S Computing, SewArt offers a user-friendly interface and a comprehensive suite of features, making it suitable for both beginners and experienced embroiderers.
Ease of Use and Intuitive Interface
SewArt's user-friendly interface simplifies the embroidery digitizing process, making it accessible to users of all skill levels. The software's clear navigation and intuitive design allow you to seamlessly import, edit, and create embroidery designs without extensive training.
Powerful Image Conversion and Stitch Generation
SewArt excels in converting images of various formats, including JPEG, PNG, GIF, SVG, WMF, and EMF, into high-quality embroidery designs. Its advanced image conversion engines accurately capture the details of your designs, ensuring that the final embroidery stitches are rendered beautifully.
SewArt boasts a comprehensive range of embroidery stitches, including satin, outline, fill, and backstitch variations. These stitches enable you to create intricate designs with a variety of textures and effects, adding depth and dimension to your embroidery projects.
Thorough Design Editing and Customization
SewArt provides a suite of powerful editing tools that allow you to refine and personalize your embroidery designs. You can adjust stitch parameters, change color palettes, and modify design elements to achieve the desired aesthetic.
Compatibility with Wide Range of Embroidery Machines
SewArt seamlessly integrates with a vast array of embroidery machines, ensuring compatibility with various settings and needle types. This compatibility allows you to directly transfer your digitized designs to your embroidery machine for flawless stitching.
Additional Features for Enhanced Creativity
Beyond basic digitizing, SewArt offers additional features that expand your creative possibilities:
Auto-digitizing tools: These tools simplify the process of converting raster and vector images into embroidery designs, making it easier to create complex designs without extensive manual digitizing.
Pattern editing: You can edit existing pattern fills, creating unique and personalized patterns for your embroidery projects.
Design mirroring: SewArt enables you to mirror designs horizontally or vertically, allowing you to create symmetrical or repeating patterns.
Versatility for Diverse Embroidery Projects
SewArt caters to a wide range of embroidery projects, including:
Personalized clothing: Create custom designs for t-shirts, caps, jackets, and other garments.
Home décor: Enhance your home décor with embroidered pillows, curtains, tablecloths, and other embellishments.
Gifts and souvenirs: Create personalized gifts and souvenirs, such as engraved mugs, embroidered keychains, or personalized bags.
Affordable and Versatile Solution for Embroidery Enthusiasts
SewArt's competitive pricing makes it an accessible and affordable solution for embroidery enthusiasts of all levels. Its versatile features and user-friendly interface make it a valuable tool for both personal and professional embroidery projects.
Whether you're a beginner starting your embroidery journey or an experienced designer seeking a powerful digitizing tool, SewArt offers a comprehensive solution for creating high-quality embroidery designs. Its ease of use, versatile features, and compatibility with a wide range of embroidery machines make it a versatile choice for a variety of projects. So, embark on your embroidery journey with SewArt and unleash your creativity!
-
My Editor
My Editor is a free embroidery software that allows you to create and edit embroidery designs in a variety of file formats. It is compatible with both Windows and Mac operating systems and can be used with most embroidery machines. My Editor offers a variety of features, such as auto-digitizing, manual digitizing, and image conversion. It also includes a variety of stitch types, such as fill stitching, satin stitching, and applique.
My Editor: A Free and User-Friendly Embroidery Software for Creative Expression
In the realm of embroidery, My Editor stands out as a user-friendly and free embroidery software that empowers individuals to create and customize embroidery designs without the need for extensive technical knowledge or expensive software licenses.
Ease of Use and Intuitive Interface
My Editor's intuitive interface makes it an approachable tool for both beginners and experienced embroiderers. The software's clear navigation and user-friendly design ensure that you can seamlessly import, edit, and create embroidery designs without getting overwhelmed by complex menus or technical jargon.
Import and Edit Embroidery Designs
My Editor allows you to import a wide range of graphic file formats, including .DST, .JEF, .EXP, .PCS, .HUS, .VIP, .SE, and .PEC, giving you the freedom to incorporate existing designs or create your own from scratch.
Edit Embroidery Designs Seamlessly
With My Editor's robust editing tools, you can refine and personalize your embroidery designs with ease. You can adjust stitch parameters, modify design elements, and add or remove stitches to achieve your desired aesthetic.
Customize Stitch Styles
My Editor offers a variety of stitch styles, including satin, outline, fill, and backstitch variations. You can customize these stitches to create intricate designs with different textures and effects, adding depth and dimension to your embroidery projects.
Export Designs to Your Embroidery Machine
After creating your masterpiece, you can seamlessly export your edited embroidery designs to your embroidery machine in a variety of supported formats. This compatibility ensures that your designs are compatible with various embroidery machines and needle types.
Free and Easy to Access
My Editor's free availability makes it an accessible option for embroidery enthusiasts of all levels, regardless of their budget or technical expertise. The software's simple download and installation process allow you to start creating your embroidery designs right away.
-
Embroidermodder
Embroidermodder is a free embroidery software that allows you to create and edit embroidery designs in a variety of file formats. It is compatible with both Windows and Mac operating systems and can be used with most embroidery machines. Embroidermodder offers a variety of features, such as auto-digitizing, manual digitizing, and image conversion. It also includes a variety of stitch types, such as fill stitching, satin stitching, and applique.
Embroidermodder: A Free and Powerful Tool for Embroidery Design Manipulation
In the realm of embroidery, Embroidermodder stands as a free and open-source software solution that empowers users to modify and manipulate existing embroidery designs without the need for expensive licensing fees or proprietary formats.
Powerful Editing and Manipulation Tools
Embroidermodder equips users with a comprehensive suite of tools for editing and manipulating embroidery designs. These tools enable you to:
Import embroidery designs in various formats, including DST, JEF, EXP, PCS, HUS, VIP, SE, and PEC.
Edit stitch patterns, adjust stitch parameters, and modify design elements to achieve your desired aesthetic.
Convert embroidery designs between different formats to ensure compatibility with various embroidery machines.
Create custom embroidery fonts for personalized text elements.
Manipulate existing embroidery designs to create unique and personalized creations.
Open-Source Accessibility and Flexibility
Embroidermodder's open-source nature promotes flexibility and accessibility. As a free and open-source software, Embroidermodder empowers users to:
Access the source code and contribute to the development of the software.
Share and collaborate on project files with other users.
Use the software for commercial purposes without any restrictions.
A Valuable Tool for Embroidery Enthusiasts
Embroidermodder serves as a valuable tool for both beginners and experienced embroidery enthusiasts seeking to enhance their designs or create unique creations. Its free availability and open-source nature make it an accessible and versatile choice for anyone passionate about embroidery.
-
SewWhat-Pro
SewWhat-Pro is a free embroidery software that allows you to view, edit, and convert embroidery files in a variety of formats. It is compatible with both Windows and Mac operating systems and can be used with most embroidery machines. SewWhat-Pro offers a variety of features, such as resizing, colorizing, and printing. It also includes a variety of stitch types, such as fill stitching, satin stitching, and applique.
SewWhatPro: Unleashing Your Embroidery Design Creation Potential
In the realm of embroidery, SewWhatPro stands as a powerful software solution for creating and editing embroidery designs. It empowers users of all skill levels to bring their creativity to life through intricate and personalized embroidery projects.
Read the full article
0 notes
Text
convert a image to embroidery file for free
Bridging the Gap: Transforming Images into Embroidery Files (For Free!)
The world of embroidery thrives on translating artistic vision into beautiful stitched creations. But what if your inspiration originates as a digital image? Fear not, creative stitchers! This guide empowers you to convert images into embroidery files for free, unlocking a treasure trove of design possibilities.
While premium software offers advanced features for image-to- embroidery conversion, budget-conscious crafters can rejoice! Several free methods exist, each with its own strengths and limitations. Let's delve into these techniques and equip you to transform your favorite images into stunning embroidery patterns.
Understanding the Conversion Process
Before diving in, it's crucial to understand the essence of image-to-embroidery conversion. Here's a breakdown:
Images vs. Embroidery Files: Images are collections of pixels, representing colors and light variations. Embroidery files, on the other hand, contain instructions for a sewing machine, specifying stitch type, placement, and thread color.
The Power of Digitizing: The conversion process essentially translates the image's visual information into a set of embroidery instructions. This is called "digitizing." Free methods often rely on automated processes, while premium software provides greater control over the digitizing process.
Free Image-to-Embroidery Conversion Methods:
Now, let's explore the exciting world of free conversion techniques:
1. Online Conversion Tools:
Several online platforms offer free image-to-embroidery conversion. Here's how they work:
Upload Your Image: Select the digital image you wish to convert. Ensure the image is high-resolution and clear for optimal results.
Choose Settings (Optional): Some platforms might offer basic settings to adjust stitch density, color options, or output format.
Download the Embroidery File: Once processed, download the generated embroidery file, typically in a format like DST or PES.
Popular Free Online Conversion Tools:
Wilcom Online: A free online digitizing tool from Wilcom Embroidery Studios, offering basic conversion with limited editing capabilities.
Embroideres: This online platform provides free conversion with options to adjust stitch count and color reduction.
Pros:
Convenience: Online tools are readily accessible from any device with an internet connection, offering instant conversion.
Free to Use: These tools eliminate the upfront cost of purchasing digitizing software.
Cons:
Limited Control: Free online tools often lack the advanced editing features found in premium software, potentially resulting in less than perfect stitch quality or color accuracy.
Output Limitations: File formats and editing options might be restricted compared to paid software.
Potential Security Concerns: Be cautious when uploading images to online platforms, especially if they contain sensitive information.
2. Open-Source Digitizing Software:
For those comfortable with technical aspects, open-source software presents another free option. Here's what to expect:
Download and Installation: Locate and download open-source digitizing software like "Inkstitch" or "Wilcom DecoStudio Lite.
Learning Curve: Open-source software often requires a steeper learning curve compared to online tools, demanding familiarity with digitizing principles.
Manual Digitizing: Unlike online tools, open-source software might necessitate manual digitizing, allowing for greater control over the process but requiring more time and effort.
Pros:
Greater Control: Open-source software offers more control over the digitizing process compared to online tools, allowing for customization of stitch types, densities, and underlay settings.
Offline Functionality: Open-source software works on your computer, eliminating reliance on an internet connection.
Cons:
Technical Expertise: Using open-source software often requires a technical understanding of digitizing concepts.
Time Commitment: Manual digitizing can be time-consuming, especially for complex images.
Limited Support: Troubleshooting and support might be limited compared to commercially available software.
3. Mobile Apps (Limited Functionality):
A few mobile apps claim to convert images to embroidery files. However, their functionalities are often limited, primarily offering basic conversions with minimal editing capabilities. These apps can be a starting point for simple designs but might not be suitable for complex projects.
Pros:
On-the-Go Conversion: Mobile apps offer the convenience of converting images from your smartphone or tablet.
Cons:
Extremely Limited Features: Free mobile apps typically lack the control and editing options found in other methods.
Output Quality Concerns: The quality of the converted embroidery file might be compromised due to limited functionalities.
Choosing the Right Free Conversion Method:
The ideal free conversion method depends on your project requirements, technical skills, and desired level of control. Here's a quick guide
Read the full article
0 notes
Text
Brother embroidery machine troubleshooting & tips

Conquering Stitches: Brother Embroidery Machine Troubleshooting & Tips
Brother embroidery machines are renowned for their user-friendly features and impressive stitch quality. However, even the most enthusiastic embroiderers can encounter occasional problems. This guide delves into the world of Brother embroidery machine troubleshooting, equipping you with the knowledge to tackle common issues and achieve flawless embroidered masterpieces.
Brother-Specific Issues:
While many troubleshooting steps apply to all embroidery machines, Brother machines sometimes present unique challenges. Here's how to address some Brother-specific problems:
Error Messages: Modern Brother machines often display error messages to assist with troubleshooting. Consult your user manual for a detailed explanation of each error code and the recommended solutions. Common error messages might relate to threading issues, a jammed machine, or a sensor malfunction.
Inch/Millimeter Calibration: Brother machines allow you to choose between inch and millimeter measurements. Ensure these settings are consistent with your chosen embroidery design file to avoid sizing discrepancies. Double-check the settings before starting your project.
Automatic Thread Cutting Issues: Some Brother models have an automatic thread-cutting function. If this feature malfunctions, ensure the blades are clean and free of debris. Consult your manual for instructions on cleaning and replacing the blades if necessary.
General Troubleshooting:
Now, let's explore some common embroidery problems that can occur on any machine, along with solutions specifically tailored to Brother machines:
1. Thread Tension Troubles:
Upper Thread Tension: Incorrect upper thread tension can lead to a variety of problems, including thread breakage, skipped stitches, and puckering. Brother machines typically have a numbered tension dial. Refer to your manual for recommended tension settings based on your thread and fabric weight. Experiment on scrap fabric to find the perfect balance.
Brother's Automatic Tension Setting (if applicable): Some Brother models boast an automatic tension setting. While convenient, it might not always be perfect. Test a small embroidery design with the automatic setting and adjust manually if needed.
Bobbin Tension: Uneven bobbin tension can cause thread loops on the underside of the fabric. Most Brother machines have a small screw for adjusting bobbin tension. Consult your manual for instructions and adjust slightly if necessary. It's crucial not to over-tighten the bobbin tension screw.
2. Thread Breakage and Bird's Nests:
Threading: Improper threading is a major culprit for thread breakage. Follow Brother's specific threading instructions outlined in your machine's manual. Pay close attention to thread guides and ensure the thread lays flat in the tension discs.
Needle: A blunt or damaged needle can snag and break threads. Brother recommends replacing the needle frequently, especially after stitching through thick fabrics or multiple projects. Choose the correct needle size and type for your project. Refer to your Brother machine's manual for a needle selection guide.
Rough Thread Path: Burrs or rough edges on the thread path can snag and break threads. Gently clean the thread guide areas with a soft brush to remove any debris. Consult your manual for specific cleaning instructions.
3. Skipped Stitches and Uneven Stitching:
Needle Issues: A bent or blunt needle can cause skipped stitches and uneven stitching. Replace the needle with a sharp, new one of the appropriate size and type for your project.
Feed Dogs: The feed dogs are the little teeth that move the fabric under the needle. If they are dirty or clogged, they may not grip the fabric properly, leading to skipped stitches. Clean the feed dogs with a soft brush according to your Brother machine's manual.
Tension Settings: Improper thread tension can also contribute to skipped stitches. Double-check your upper and bobbin tension settings and adjust as needed based on your project materials.
4. Design Placement and Hooping:
Brother Embroidery Software: If you use Brother's PE-Design software to create your embroidery designs, ensure proper design sizing and placement within the software before transferring it to your machine.
Hooping Techniques: Proper hooping is vital for successful embroidery. Use a hoop size that accommodates your design and fabric. Brother machines often come with different sized hoops. Choose the appropriate one for your project. Tighten the hoop evenly to secure the fabric without distorting it. Consult your Brother manual for specific hooping instructions for your machine model.
Stabilizer Selection: Using the correct stabilizer for your fabric weight is crucial. Brother offers various stabilizer options. Use a water-soluble stabilizer for delicate fabrics or a tear-away stabilizer for sturdier materials. Refer to your Brother manual or a stabilizer guide for recommendations.
General Maintenance Tips
Regular Cleaning: Just like any machine, your Brother embroidery machine requires regular cleaning to maintain optimal performance. Consult your Brother manual for specific cleaning instructions. This typically involves cleaning the needle plate area, feed dogs, tension discs, and bobbin case with a soft brush. Clean the exterior with a damp cloth. Important: Always unplug your machine before cleaning.
Oiling: Some Brother machines require occasional lubrication. Your manual will specify which parts need oiling and the recommended oil type. Apply oil sparingly to designated areas to prevent oil stains on your projects.
Brother Software Updates: Brother occasionally releases software updates for their embroidery machines. These updates can include bug fixes, new features, and improved compatibility with embroidery design files. Check Brother's website for available updates for your specific machine model and follow the instructions for installation.
Advanced Troubleshooting:
If you've tried the basic troubleshooting steps outlined above and your Brother machine is still malfunctioning, consider these additional strategies:
Consult the Manual: Your Brother machine's user manual is an invaluable resource. It contains detailed troubleshooting guides for various error messages and common problems. Refer to the manual for specific instructions related to your machine model.
Brother Customer Support: If you're still stumped, don't hesitate to contact Brother customer support. They have a team of experienced technicians who can assist you with troubleshooting and answer any questions you may have. You can reach Brother customer support through their website or by phone.
Online Resources: The internet is a wealth of information for Brother embroidery machine users. There are numerous online forums, communities, and video tutorials dedicated to Brother embroidery machines. These resources can offer valuable troubleshooting tips and solutions from other Brother embroidery enthusiasts.
Optimizing Your Stitching:
Beyond troubleshooting, here are some additional tips to help you achieve flawless embroidery results with your Brother machine:
Invest in Quality Supplies: Using high-quality needles, thread, and stabilizer makes a significant difference in your stitching results. Brother offers a variety of embroidery supplies specifically designed for their machines.
Experiment on Scrap Fabric: Before starting your final project, experiment with different settings and stabilizer combinations on a scrap of fabric that matches your project materials. This allows you to fine-tune your technique and avoid wasting materials.
Practice Makes Perfect: The more you practice using your Brother embroidery machine, the more comfortable and confident you'll become. Start with simple embroidery designs and gradually work your way up to more complex projects.
Conclusion:
With a little troubleshooting know-how and some helpful tips, you can transform your Brother embroidery machine into a reliable tool for creating stunning embroidered masterpieces. Remember, practice, proper maintenance, and using high-quality supplies are key to achieving flawless stitching results. So, keep exploring the world of Brother embroidery, and happy stitching!
Read the full article
0 notes
Text
Discover Embroidery Tool Shed software
Discover Embroidery Tool Shed Software
Embroidery, the art of adorning fabric with colorful threads, has captivated crafters for centuries. While the traditional approach involves needles and hoops, technological advancements have opened doors to a new realm: embroidery software. Embroidery Tool Shed Software steps onto the scene, offering a comprehensive and user-friendly platform designed to elevate your embroidery experience, whether you're a seasoned stitcher or a curious beginner.
Unveiling the Power of Embroidery Software
Embroidery software acts as a digital bridge between your creative vision and the finished embroidered piece. It allows you to:
Design with Ease: Create intricate embroidery designs from scratch using the software's built-in drawing tools and shape libraries. Import existing images and logos to personalize your projects.
Digitize Photos and Artwork: Transform photographs, artwork, or even handwriting into embroidery patterns with the software's digitizing features. This allows you to recreate virtually any image with stitches.
Edit and Refine Designs: Before committing needle to thread, the software allows you to edit your designs, adjust colors, and experiment with different stitch types and sizes.
Organize and Catalog: Store your embroidery designs electronically, making them easily accessible for future projects. Categorize and tag designs for efficient retrieval.
Preview Your Work: Visualize your finished project before a single stitch is made. The software's preview function displays a realistic simulation of your design on a chosen fabric, allowing you to refine details and ensure color harmony.
Control Your Embroidery Machine: Many embroidery software programs connect directly to your embroidery machine, allowing you to seamlessly transfer your designs and control the stitching process from your computer.
Embroidery Tool Shed Software: A Feature-Rich Powerhouse
Embroidery Tool Shed Software boasts a robust set of features designed to cater to a wide range of embroidery needs:
User-Friendly Interface: The software prioritizes ease of use, with intuitive menus and clear instructions. A well-designed interface ensures a smooth learning curve, even for beginners.
Extensive Stitch Library: Choose from a vast collection of built-in stitches, including basic and decorative stitches, lettering options, and specialty stitches for unique effects.
Automatic Thread Colorization: Let the software take the guesswork out of thread selection. Its automatic colorization feature suggests thread colors that match your design, saving you time and ensuring color accuracy.
Lettering and Font Options: Embroider personalized messages, quotes, or monograms with a variety of fonts and lettering styles.
Automatic Thread Changing: For complex designs with multiple thread colors, the software can generate instructions for your embroidery machine to automatically change threads, streamlining the stitching process.
Embroidery Hoop Management: The software may integrate with your embroidery machine to manage hoop sizes and ensure your designs fit within the designated area.
Embroidery Editing Tools: Refine your designs with advanced editing tools, allowing for resizing, mirroring, rotating, and grouping of elements.
Compatibility with Various Formats: Import and export designs in popular embroidery file formats, ensuring compatibility with your machine and other embroidery software programs.
Benefits of Using Embroidery Tool Shed Software
Enhancing creativity, saving time, and achieving precision are just a few of the advantages associated with using embroidery software:
Enhanced Design Capabilities: Unleash your creativity with the software's intuitive design tools. Experiment with complex designs that would be difficult or tedious to achieve by hand.
Increased Accuracy and Precision: The software eliminates the potential for human error in stitch placement and color selection, resulting in a flawless embroidered project.
Boosted Efficiency: Streamline your workflow by utilizing the software's automated features, such as thread changing and design preview. Focus on your creative vision, and let the software handle the technical details.
Versatility and Experimentation: Explore various embroidery styles and techniques with ease. Try new stitch combinations and color palettes without the need to manually re-thread needles.
Perfect for Beginners: The software's user-friendly interface and helpful tutorials make it an excellent learning tool for new embroiderers. Learn techniques and practice design creation in a digital space before venturing into physical embroidery.
Archiving and Sharing: Store your digital embroidery designs effortlessly, allowing you to revisit them for future projects or share them with other embroidery enthusiasts.
Choosing the Right Embroidery Software for You
Skill Level (continued): For beginners, prioritize user-friendly interfaces, extensive tutorials, and beginner-friendly features. Advanced embroiderers may seek software with advanced editing tools, custom stitch creation capabilities, and support for complex embroidery techniques.
Budget: Embroidery software ranges in price from affordable options to feature-rich professional-grade programs. Consider your budget and prioritize features that are most important to you.
Compatibility: Ensure the software is compatible with your operating system and your embroidery machine. Many software programs offer free trials or demos, allowing you to test functionality before committing to a purchase.
Features: Make a list of the features you find most valuable. Does the software offer automatic thread colorization? Does it support lettering and font options? Prioritize features that align with your embroidery goals.
Reviews and Recommendations: Read online reviews and seek recommendations from other embroidery enthusiasts. Real-user experiences can offer valuable insights and help you narrow down your choices.
Beyond the Software: Essential Embroidery Companions
While Embroidery Tool Shed Software empowers your digital design creation, remember the importance of physical tools for successful embroidery:
High-Quality Embroidery Machine: Pair your software with a reliable embroidery machine that can translate your digital designs into beautiful stitched pieces. Choose a machine with features that complement the software's capabilities, such as automatic thread changing or hoop size recognition.
Stabilizers: Stabilizers are essential for keeping your fabric taut during the embroidery process. The software may offer recommendations for stabilizer types based on your chosen fabric and design complexity.
Embroidery Threads: Invest in high-quality embroidery threads that come in a variety of colors and textures. The software's automatic colorization feature can guide your thread selection, but having a well-stocked thread collection allows for creative exploration.
Embroidery Tool Shed Software: Your Gateway to a World of Creative Possibilities
Embroidery Tool Shed Software is more than just software; it's a springboard for boundless creativity and artistic expression. With its user-friendly interface, extensive features, and compatibility with various embroidery machines, it empowers you to transform your vision into stunning stitched masterpieces. So, whether you're a seasoned stitcher looking to streamline your workflow or a curious beginner eager to explore the world of embroidery, Embroidery Tool Shed Software is the perfect companion on your creative journey.
Ready to Dive In?
The exciting world of embroidery software awaits! Research Embroidery Tool Shed Software, explore its features, and consider downloading a trial version to experience its capabilities firsthand. With the right tools and a touch of inspiration, you can embark on a fulfilling and rewarding embroidery adventure. Happy stitching!
Read the full article
0 notes
Text
Borders Tips
Endless Borders: Elevate Your Craftsmanship with Seamless Designs
In the realm of embroidery, endless borders stand as a testament to creativity and versatility. These continuous patterns, often floral motifs or intricate designs, add a touch of elegance and refinement to various textiles, from clothing to home décor. Whether you're a seasoned embroiderer or a beginner looking to expand your skills, endless borders offer endless possibilities.
Diversity and Versatility of Endless Borders
Endless borders encompass a vast array of styles, ranging from delicate floral patterns to bold geometric designs. These borders can be tailored to complement specific projects and personal preferences. Floral borders add a touch of whimsy and femininity, while geometric borders exude a sense of modern sophistication.
The versatility of endless borders extends beyond their aesthetic appeal. These patterns can be used to enhance a wide range of projects, including:
Clothing: Embellish necklines, sleeves, hems, and pocket flaps with endless borders for a touch of sophistication.
Home Décor: Adorn pillows, curtains, table runners, and bedspreads with endless borders to add a touch of luxury to your living space.
Gifts and Personalizations: Create personalized gifts by stitching endless borders on towels, dish towels, or tote bags.
Embroidery Techniques for Endless Borders
There are two primary techniques for creating endless borders: manual embroidery and machine embroidery.
Manual Embroidery:
Manual embroidery involves using a needle and thread to create the desired pattern. This technique requires patience, skill, and a keen eye for detail. However, it offers the flexibility to personalize the design and adapt it to the specific fabric.
Machine Embroidery:
Machine embroidery automates the process, allowing for faster and more precise stitching. Embroidery machines offer a wide range of endless border designs, ranging from simple motifs to elaborate patterns. This technique is perfect for beginners and experienced embroiderers alike.
Tips for Working with Endless Borders
When working with endless borders, consider the following tips to achieve the best results:
Choose the right fabric: Select a fabric that is soft and drapes well to allow the border to flow smoothly.
Use high-quality thread: Opt for embroidery thread that is color-fast and resists fading.
Secure the fabric: Use a hoop or frame to secure the fabric tautly while stitching.
Start and end the border cleanly: Use specialized ending techniques to ensure the border looks seamless.
Adjust the tension: Adjust the tension of the thread to achieve the desired stitch quality.
Embrace Endless Possibilities with Endless Borders
Endless borders offer a wealth of possibilities for embroidery enthusiasts. Whether you're creating personalized gifts, adding elegance to clothing, or enhancing home décor, endless borders can elevate your craftsmanship to new heights. With endless patterns and techniques to explore, you'll never run out of ways to express your creativity and showcase your unique style. So, grab your embroidery tools, unleash your imagination, and embark on a journey of endless possibilities with endless borders.
Nothing says elegance like an endless border, these designs work great on handkerchiefs, doilies, curtains, pillows, and of course curtains and valances. The first thing you must do is choose the right
type of design. Some designs are created with repeat borders in mind and some aren’t. Repeat borders are designed with an overlapping section, these are the most difficult to lay out and embroider properly so that is what we will focus on in this tutorial.

Step one illustrates the overlap section of the design we chose. Step two is where you are going to start measuring the valance. Lay the valance over a flat surface and mark with a disappearing ink pen
halfway up the border on the valance, this will be the center point of the design. In step 3 we will continue placing marking dots in the exact center point along the towel every six inches or so.


In step 4 we will connect all of the dots creating al line across the whole valence, this will be important when we place the designs. Step 5 illustrates the line. Print the design out that you want tot embroider, printing two copies of the design will allow you ro properly measure the repeat. Step 6 shows us placing the first design along the center line.
Step seven shows the two printouts being placed side by side. Step eight shows the proper overlapping of designs that we are trying to achieve. Once you have the designs where you want them it is time to measure the distance between the center points. Step 9 shows the two designs and the cross hairs illustrate the two center points.

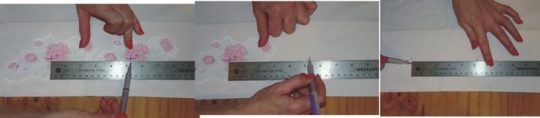
In step 10 we are taking our measurement. The center point of these two designs is 5.25” apart. Once we have that measurement step 11 shows us marking the point with an X along the horizontal line we have already drawn on the valance. We will continue marking the valance as far across as we want the design to repeat. The valance is now ready to hoop and embroider.
Step 12 illustrates how we attach a piece of cutaway stabilizer to the edge of the valance to make it more stable in the hoop. Simply use a basting stitch to affix it. When you hoop the design use standard hooping techniques, don't use sticky backing, sticky backing will not be stable enough for a long job like this and may cause puckering and registration problems.
Read the full article
1 note
·
View note
Text
RICOMA Embroidery machine reviews
Ricoma Embroidery Machine Reviews: Stitching Together the Facts
Ricoma embroidery machines are popular for their affordability and variety of features. But are they the right choice for you? This post dives into Ricoma embroidery machine reviews to help you sew together an informed decision.
Ricoma at a Glance
Ricoma offers a range of single-head to multi-needle embroidery machines. They are known for:
Attractive price points: Ricoma machines are generally less expensive than top-of-the-line brands.
Wide selection of features: Many Ricoma models boast features like automatic thread trimming and color change.
User-friendly controls: Ricoma machines are often praised for their easy-to-use interfaces.
What Do Users Say?
Reviews of Ricoma embroidery machines are mixed. Here's a breakdown of the pros and cons:
Pros:
Budget-friendly: Embroiderers on a budget love Ricoma's affordability.
Easy to Learn: Many beginners find Ricoma machines user-friendly.
Great for Crafters: Ricoma's machines are well-suited for personal embroidery projects.
Cons:
Questionable Quality: Some users report issues with stitch quality and machine durability.
Limited Support: There are concerns about the availability and responsiveness of Ricoma's customer service.
Not for Professionals: High-production embroidery businesses may find Ricoma machines lacking in speed and reliability.
Here are some additional tips for considering Ricoma machines:
Research the specific model: Different Ricoma models have varying features and capabilities.
Read user reviews: Look for reviews from users with similar experience levels and project types.
Consider your needs: How often will you use the machine? What types of projects will you tackle?
Think long-term: While the price may be tempting, factor in potential maintenance costs.
Beyond Ricoma
If you're unsure about Ricoma, here are some alternative embroidery machine brands to explore:
Brother: Offers a range of machines for hobbyists and professionals.
Janome: Known for their user-friendly machines and excellent stitch quality.
Babylock: Machines known for their durability and advanced features.
Conclusion
Ricoma embroidery machines can be a good option for budget-minded crafters who are new to embroidery. However, if you prioritize quality, durability, and top-notch customer service, you may want to consider other brands. Remember, the best machine is the one that meets your specific needs and budget.
By carefully considering Ricoma reviews and researching alternative brands, you'll be well-equipped to make the perfect choice for your embroidery adventures!
Read the full article
0 notes
Text
drawing embroidery design

From Sketch to Stitch: A Comprehensive Guide to Drawing Embroidery Designs
Embroidery transforms simple fabric into stunning works of art. But before you thread your needle, it all starts with a design. This comprehensive guide delves into the world of drawing embroidery designs, equipping you to translate your vision onto fabric.
Finding Inspiration: Spark Your Creativity
The possibilities in embroidery design are endless! To get started, ignite your creativity with these inspiring sources:
Nature: Flowers, leaves, insects, and animals are popular embroidery motifs. Explore botanical illustrations or nature photographs for inspiration.
Art & Culture: Folk art, traditional embroidery patterns, and historical textiles offer a wealth of design inspiration.
Geometric Patterns: Simple shapes and lines can be combined to create striking geometric embroidery designs.
Typography & Lettering: Elevate your project with embroidered lettering, initials, or quotes. Explore calligraphy styles and fonts for unique designs.
Personalize: Incorporate meaningful symbols, dates, or names to make your embroidery truly special.
Embrace the Web: Websites like Pinterest and Instagram are treasure troves of embroidery design inspiration. Search keywords related to your interests or browse popular embroidery hashtags.
Understanding Embroidery Stitches: The Building Blocks of Design
Before sketching, familiarize yourself with basic embroidery stitches. These stitches are the building blocks that bring your design to life. Here are some fundamental stitches to consider:
Backstitch: A secure stitch for outlines and lettering.
Satin Stitch: Creates a smooth, solid-filled appearance.
Stem Stitch: Ideal for creating lines and stems.
French Knot: Adds a dimensional element to your design.
Lazy Daisy Stitch: Creates a delicate floral motif.
Chain Stitch: Creates a decorative looping effect.
Many additional stitches exist, each with its own unique application. Explore embroidery stitch tutorials online or consult a beginner's embroidery book for further guidance.
Developing Your Design: From Sketchbook to Fabric
Now that you're brimming with inspiration and equipped with basic stitch knowledge, it's time to translate your vision into a drawing:
1. Start with Rough Sketches:
Use a pencil and paper to explore different design compositions.
Don't worry about perfection at this stage; focus on capturing your ideas freely.
Consider the size and shape of the item you'll embroider on.
2. Refine Your Design:
Choose your final design from your rough sketches.
Trace it onto tracing paper or redraw it on a fresh sheet of paper.
Refine details and ensure lines are clean and crisp.
3. Transferring Your Design:
There are several ways to transfer your embroidery design onto fabric:
Tracing: Tape your design over your chosen fabric and trace the lines with a fabric pen that disappears with heat.
Iron-on Transfer Paper: Purchase special transfer paper, print your design onto it, and iron it onto your fabric following the manufacturer's instructions.
Lightbox Method: Place your design on a lightbox (or a window with light shining through) and trace the design onto your fabric with a fabric marker.
4. Simplifying for Embroidery:
Solid Fill Areas: Break down large areas of solid color into smaller sections filled with different stitches. This adds texture and visual interest.
Simplifying Lines: Curved lines can be broken down into smaller straight lines using satin stitch or back stitch.
Minimal Detail: Highly detailed elements may not translate well to embroidery. Opt for simpler representations or focus on key details.
Essential Tools:
Here are some key tools for drawing and transferring your embroidery design:
Pencil and Eraser: For initial sketches and refining details.
Tracing Paper: Allows for multiple design iterations.
Fabric Pen: Choose a pen that disappears with heat or washes out easily.
Lightbox (optional): Aids in transferring designs through light.
Iron (optional): For using iron-on transfer paper.
Software Solutions: Embracing Technology
For a more tech-savvy approach, consider using design software:
Vector Drawing Programs: Software like Adobe Illustrator allows you to create and edit embroidery designs with precise control.
Digitizing Software: This specialized software converts images or drawings into embroidery stitch files that your embroidery machine can read.
While software offers greater precision and flexibility, it requires a learning curve and may not be accessible to all budget levels.
Practice Makes Perfect: Honing Your Embroidery Design Skills
The best way to refine your embroidery design skills is through practice:
Start with Simple Designs: Begin with small, uncomplicated designs to hone your technique.
Experiment with Stitches: Practice different stitches on scrap fabric to get a feel for how they work and their visual effects.
Sample Different Fabrics: Different fabrics impact the look and feel of your embroidery. Experiment with cotton, linen, denim, or other materials to discover their unique possibilities.
Embrace Mistakes: Embroidery is a journey, not a destination. Mistakes are inevitable and learning opportunities. Learn from them and keep exploring.
Beyond the Basics: Advanced Design Techniques
Once you've mastered the fundamentals, explore these advanced design techniques to elevate your embroidery:
Shading & Color Blending: Combine stitches of varying densities or colors to create shading and depth.
Appliqué: Incorporate fabric cutouts to your design for a dimensional effect.
Metallics & Beads: Add a touch of glamour with metallic threads or decorative beads.
Watercolor Embroidery: Use a variety of colored threads and loose, blended stitches to create a painterly effect.
Free Motion Embroidery: Embroider freehand without following a pre-drawn design, allowing for greater creative expression.
Resources for Exploration:
Embroidery Books & Magazines: Offer in-depth tutorials, design inspiration, and advanced techniques.
Online Embroidery Courses: Find a plethora of online courses catering to all levels, providing guided instruction and expert tips.
Embroidery Communities: Join online forums or groups to connect with other embroidery enthusiasts, share your work, and learn from others.
Conclusion: Embark on Your Embroidery Design Journey
Embroidery design is a rewarding skill that allows you to personalize garments, create home décor, or express your artistic vision. Whether you're a beginner or an experienced embroiderer, there's always something new to learn and explore. So grab your pencil, pick up some fabric, and embark on your embroidery design adventure!
Bonus Tip: Consider creating a dedicated embroidery portfolio to document your design journey. This allows you to track your progress, showcase your skills, and inspire yourself and others with your creativity.
With dedication and practice, you'll be stitching stunning embroidery designs in no time!
Read the full article
0 notes
Text
News tips for SEWART
Sewart Savvy: Mastering Embroidery News and Tips for Sewart Software Users
Calling all Sewart software enthusiasts! This blog post is your one-stop shop for staying informed about the latest Sewart news, exploring software updates, and uncovering hidden gems within the program to elevate your embroidery projects. Whether you're a seasoned stitcher or a curious beginner, Sewart Savvy equips you with valuable knowledge to unlock the full potential of your Sewart software.
Sewart Software: A Trusted Companion
Sewart software has established itself as a popular choice for embroidery enthusiasts due to its user-friendly interface, affordability, and versatility. Here's a quick refresher on Sewart's capabilities:
Image Conversion: Sewart excels at transforming raster and vector image files (like JPGs, PNGs, SVGs) into embroidery stitch patterns. Breathe life into your favorite designs and personalize projects with custom embroidery.
Editing and Digitizing: Sewart offers basic editing tools for fine-tuning your designs. Additionally, the software allows for manual digitizing, giving you more control over stitch placement and density.
Multiple File Format Support: Import and export designs in various embroidery machine file formats, ensuring compatibility with your specific machine.
Staying Updated with Sewart:
Staying informed about Sewart software updates and news is crucial for maximizing your embroidery experience. Here are some ways to keep your finger on the pulse:
Sewart Website: The official Sewart website (https://www.sandscomputing.com/) is a treasure trove of information. Check the "News" section for announcements about new releases, software updates, bug fixes, and compatibility improvements.
Sewart Email List: Subscribe to the Sewart email list to receive updates directly in your inbox. This ensures you don't miss any important information about the software.
Social Media: Follow Sewart on social media platforms like Facebook and Twitter for news, tips, and announcements. Social media can also offer a glimpse into user projects and a space to connect with the Sewart community.
Online Forums and Communities: Several online forums and communities cater to Sewart software users. These platforms are excellent resources for finding answers to troubleshooting questions, discovering hidden software features, and learning from other stitchers.
Unlocking the Power of Sewart:
Now, let's delve into some practical tips and tricks to maximize your Sewart software experience:
Master the Basics: Before diving into advanced features, ensure you understand the core functionality of Sewart. Familiarize yourself with the workspace, tools, menus, and file import/export options. The user manual is an invaluable resource for learning the basics.
Experiment with Different Tools: Sewart offers a variety of tools for editing and manipulating your designs. Experiment with the line editing tools, color fill options, and stitch pattern libraries to discover new ways to customize your projects.
Practice Makes Perfect: Just like any skill, mastering Sewart software takes practice. Start with simple designs and gradually work your way up to more complex projects. The more you use the software, the more comfortable and confident you'll become.
Online Tutorials and Resources: Numerous online tutorials and resources can help you learn new techniques and features within Sewart. YouTube channels and online articles often provide step-by-step guides for specific tasks, troubleshooting solutions, and creative embroidery inspiration.
Explore Free Resources: Many free resources are available online, like free downloadable embroidery designs or tutorials specifically tailored for using Sewart software. Take advantage of these resources to expand your design library and enhance your skills.
Troubleshooting Tips:
Even the most experienced Sewart users encounter occasional challenges. Here are some troubleshooting tips to help you navigate common issues:
Thread Tension Problems: Incorrect thread tension can lead to a variety of problems like thread breakage, skipped stitches, and puckering. Consult your Sewart software manual and embroidery machine manual for recommendations on adjusting thread tension for your specific project.
Digitizing Issues: If you encounter problems with the digitized output of your design, double-check the source image quality and ensure proper conversion settings within Sewart.
Compatibility Issues: Ensure your Sewart software version is compatible with the file format of your embroidery machine. If you're unsure, consult the Sewart website or contact customer support for guidance.
Sewart Community: Sharing and Learning Together
The Sewart community is a vibrant space filled with passionate embroidery enthusiasts. Here are some ways to contribute and connect:
Share Your Projects: Post pictures of your finished embroidery projects online using hashtags like #SewartSoftware or #SewartStitch. This inspires others and showcases the versatility of the software.
Help Others: If you have expertise in using
Advanced Sewart Techniques:
Once you've mastered the basics, Sewart software offers a wealth of advanced features for seasoned stitchers:
Lettering and Text Effects: Sewart allows you to import fonts and create custom lettering for embroidery projects. Explore options for text size, style, and even add decorative elements like outlines or shadows.
Applique Techniques: Sewart software facilitates creating applique designs. Use the software to design applique shapes, generate stitch paths for attaching the applique fabric, and even create underlying satin stitch details for a polished finish.
Color Blending and Thread Effects: Sewart offers features for creating smooth color transitions and thread effect simulations within your embroidery designs. This allows you to achieve realistic shading and enhance the visual depth of your projects.
Advanced Object Manipulation: Sewart's advanced editing tools allow for sophisticated object manipulation. Features like welding, splitting, and combining objects give you greater control over your design elements and enable intricate design modifications.
Stitch Library Management: Sewart provides a built-in stitch library with various stitch patterns. You can also import custom stitch libraries to expand your design options and achieve unique textures and effects.
Inspiration and Project Ideas:
Sewart software empowers you to bring your creative embroidery visions to life. Here are some resources for inspiration and project ideas:
Sewart Design Gallery: The Sewart website often features a design gallery showcasing projects created with Sewart software. Explore these examples for inspiration and discover the potential of the software.
Online Embroidery Pattern Stores: Numerous online stores offer downloadable embroidery designs compatible with Sewart software. These designs cover a wide range of themes, styles, and difficulty levels, providing endless project inspiration.
Sewart User Community Forums: Online forums dedicated to Sewart software can be a treasure trove of inspiration. Community members often share project ideas, tutorials, and free downloadable designs.
Sewing and Embroidery Magazines and Websites: Many sewing and embroidery publications feature articles and project ideas that can be adapted for embroidery using Sewart software.
Social Media Inspiration: Platforms like Pinterest and Instagram are brimming with embroidery inspiration. Explore hashtags like #embroideryart or #embroiderydesigns to discover stunning projects and creative techniques.
Beyond Embroidery:
Sewart software's capabilities extend beyond traditional embroidery. Here are some additional ways to utilize the software:
Customize Apparel and Accessories: Personalize clothing, bags, hats, and other accessories with custom embroidery designs using Sewart.
Create Home Decor: Embroider decorative elements for pillows, tablecloths, towels, or even wall hangings, adding a personal touch to your home decor.
Crafting and Scrapbooking: Use Sewart to create appliques, embellishments, or lettering for scrapbooking projects or other paper crafts.
Conclusion:
Sewart software is a powerful tool that empowers you to explore the world of embroidery with creativity and confidence. By staying informed about updates, mastering the software's features, and seeking inspiration from the vibrant Sewart community, you can transform your embroidery journey into a fulfilling and rewarding experience. So, keep stitching, keep learning, and keep creating beautiful embroidered masterpieces with Sewart software!
Bonus Tip: Sewart software offers a free trial version, allowing you to test the software's capabilities before committing to a purchase. Take advantage of this opportunity to explore the program and see if it aligns with your embroidery needs and creative vision.
Read the full article
0 notes