nightlyxeternals
c r e a t i v e
kc / nightly. 29. writer. creator.
"Creativity doesn't wait for that perfect moment. It fashions its own perfect moments out of ordinary ones."
by Bruce Garrabrandt
A blog to create and share with you the imagination I have flowing through me. We create here. From stories to pieces of art to so much more. So come with me on this journey as we discover amazing things together.
132 posts
Don't wanna be here? Send us removal request.
Last Seen Blogs
whammydt
\m/

whitewizard3
Untitled

apuganguinchomabatucan
Untitled
nicolleclemetsonstudio
that's what she shot.
plutonian-syscourse
112 random people
Text
As part of my 4k celebration, here is another gift! More textures/gif overlays for use.
Included are 16 textures in GIF format-- each gif has a regular (unedited) version and a version that is edited in B/W or transparent, for 33 files in total.
Please like/reblog if using. No credit necessary! You can make any changes you want and use however/wherever you would like, but Do Not repost or claim as your own!
Download: [MEGA]
Also check out my previous gif textures and PNGs.
Textures used on preview gif: Line Border, Purple Shimmer, & Bokeh 03
152 notes
·
View notes
Text
﹙𝟣𝟢﹚─ 𝗣𝗥𝗢𝗦𝗣𝗘𝗥𝗔


PROSPERA
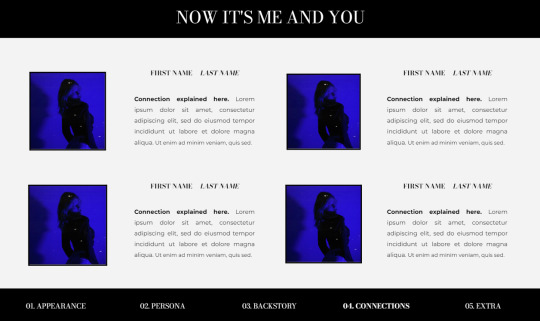
hello again !! new doc today! hope you guys are excited and like my new doc, i tried something new today, a new pallette of colors which i think goes well together. prospera is a blue-ish dark themed doc, single muse with plenty of space, so should be easy to edit! huge thanks to @lemondaydream because she helped me sooo much!
INSTRUCTIONS
To prevent people from making copies of your docs
select the blue SHARE button in the top right corner of your doc
hit the settings gear on the right corner of the pop-up
UNCHECK the box that says "Viewers and commenters can see
the option to download, print, and copy"
As usual, please do not remove the credits. stealing my work is not cool and if you do use this template, don't forget to reblog and like!
MORE
its best to use the "replace image" feature as it will make it easier for you to edit. You can also edit drawings by clicking the “edit” button under.
AFTERWORD
as usual if there are any problems, you can text me on discord at crisnake736#3022. toxic comments will not be appreciated or answered. also the quotes i added are random, feel free to change them as you wish!
i would love to hear all your opinions on this template, so don't hesitate to leave a comment or ask any questions. if you have any troubles, etc.
GET THE DOC HERE !!
47 notes
·
View notes
Text


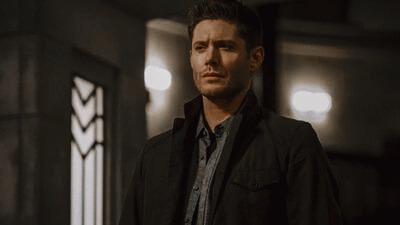

psd coloring : 𝐏𝐒𝐃 𝟓𝟑𝟔 : 𝐃𝐄𝐀𝐍 𝐖𝐈𝐍𝐂𝐇𝐄𝐒𝐓𝐄𝐑
a free psd coloring for my watchers i made & spend my time on on my deviantart ! feel free to adjust layers if you want to. just keep the credit to me still ! it might not work on all colors the same. this psd coloring comes with some adjustments !
PRICE : none. free for watchers only on deviantart
19 notes
·
View notes
Text

✨ Simple Gif Colouring for Beginners ✨
I wrote up my basic gif colouring process for a friend recently, but a couple of people here mentioned they'd also find it helpful! so, as requested, this is a beginner-friendly walkthrough of the way I colour my gifs :) it's aimed at brand new gif makers with no prior experience with photoshop or photo editing.
when I first started gif making I found colouring and photoshop in general suuuper daunting, so I've tried to simplify everything here as much as possible. hopefully this will be relatively easy to follow and not too intimidating!
a couple of things to begin with:
I'm only talking about colouring here - this is not a full gif making tutorial. I've linked to some of my favourites of those here!
I personally like to make bright, 'clean' looking gifs with vibrant but natural colours, so that is the style of colouring this tutorial is geared towards. most of gif colouring is subjective and about personal taste - the only thing that I'd say is possible to get wrong is skin tones, which I talk about a lot in this guide.
as I mostly gif Thai dramas, most of the advice is geared towards colouring for East Asian/South East Asian skin tones - but the techniques should be fairly universally applicable (and here are some tutorials that talk about gif colouring for other skin tones).
I'm not an expert! I'm not claiming this is the best or the only way to colour gifs - it's just how I do it.
this post is very image-heavy. if the images aren't loading (or the gifs are running slowly or cutting/looping weirdly), then try viewing the post in its own tab (rather than on the your dash or someone's blog) and refreshing the page.
okay, full walkthrough beneath the cut!
contents:
1. intro
a. natural gif colouring goals
b. very very basic colour theory
2. super simple colouring (the essentials)
a. curves
b. selective colour (and skin tone correction)
c. hue/saturation
d. saving and reusing colouring
e. another simple colouring example
3. other adjustment layers
a. brightness/contrast
b. levels
c. vibrance
d. colour balance
e. channel mixer
4. troubleshooting
a. curves
b. saturation
5. fin!
1. intro
the colouring part of gif making can be super overwhelming, especially if (like me when I first started!) you're completely new to photoshop and/or have no experience with colour theory or photo/video editing.
if you're opening photoshop and making gifs for the first time, I highly recommend getting used to making a few basic, uncoloured gifs to begin with. just to practice, rather than post anywhere (though you can always come back and colour them later if you want) - but it'll make the rest of the process much easier if you're already beginning to get used to working in timeline mode of photoshop. give yourself a bit of time to practice and get a feel for things like how many frames you tend to like in a gif, where you like to crop them for the best loop, what kind of aspect ratio you like etc* - so that you're not trying to navigate all of that for the first time on top of everything else!
* frames: for me between 60-90 frames is ideal, but 40-120 frames is the absolute min-max I'd personally use in a normal gifset
loops: for the smoothest loops, try to avoid cutting someone off mid-movement or mid-word if possible.
aspect ratio: for full-size (540px) gifs, I tend to go for either 8:5 (slightly 'skinnier' gifs), 7:5, or 5:4 (particularly big, thick gifs lmao)
✨ natural gif colouring goals
part of what can be so daunting about starting gif making is not knowing where to start or what you want to achieve. this is definitely something that gets easier with practice - the more gifs you make, the more you'll get a feel for what kind of look you like and the more instinctively you'll know how to get there. it also helps to see if any gif makers you like have made "before and after colouring" posts - these can help with getting a sense of the kinds of changes made through gif colouring. here's one I made!
in general, I like to make my gifs bright and 'clean' looking, with vibrant but natural colours. these are the things I'm usually hoping to achieve with colouring:
brighten dark scenes
remove muddy, yellowish lighting or filters
saturate colours
correct any skin lightening filters or overexposure
make lighting and colours as consistent as possible between gifs within a single gifset, especially gifsets featuring gifs from multiple scenes/episodes/videos
this guide is focusing on natural colouring, but of course there are many cool ways to make stylised/unnaturally coloured gifs. imo you'll need to master these basics first, but if you want to learn how to do things like change the background colour of gifs or use gradients or other cool effects, then @usergif's resource directory has loads of super helpful tutorials!
✨ very very basic colour theory
[disclaimer! I don't know shit about fuck. I do not study light or art. this is just an explanation that makes sense to me exclusively for the purposes of gif making.]
the primary colours for light/digital screens are red, blue, and green. having all three colours in equal measures neutralises them (represented by the white section in the middle of the diagram).

so to neutralise a colour within a gif, you need to add more of the colour(s) that are lacking.
in practice this usually means: the scene you want to gif is very yellow! yellow is made of red and green light, so to neutralise it you need to add more blue into your gif.
it can also mean the reverse: if you desaturate the yellow tones in a gif, it will look much more blue.
looking at the colour balance sliders on photoshop can make it easier to visualise:

so making a gif more red also means making it less cyan.
removing green from a gif means adding magenta.
taking yellow out of a gif will make it more blue.
tl;dr:
neutralise yellows by adding blue (and vice versa)
neutralise reds by adding cyan (and vice versa)
neutralise green by adding magenta (and vice versa)
2. super simple colouring (the essentials)
starting with a nice sharpened gif in photoshop in timeline mode. (these are the sharpening settings I use!)
some scenes are much harder to colour than others - it helps to start out practising with scenes that are bright/well-lit and that don't have harsh unnaturally coloured lights/filters on. scenes with a lot of brown/orange also tend to be harder.
I usually save a base copy of my gif before I start colouring just in case I end up hating it, or find out later that it doesn't quite fit right into a set and need to redo it etc.
so here is my base gif!

it's an okay gif, but it has a bit of a yellow tint to it that I want to reduce.
colouring is easiest to do in adjustment layers, which can be found under layer -> new adjustment layer - or for me they are here:

there are lots of different types of adjustment layers that do lots of different things - but for me the absolute essentials for colouring are curves, selective colour, and hue/saturation.
I also use brightness/contrast, levels, exposure, vibrance, colour balance, and channel mixer sometimes, depending on the gif - but I use curves, selective colour, and hue/saturation on every single gif.

✨ curves layer
the first thing I always do is a curves layer. when you first open one it will look like this:

first I usually click the ‘auto’ button, just to see what happens. sometimes it makes a big difference (it usually brightens the gif a lot) - but on this gif it didn’t do much.
if it had made the gif look nicer then I would have kept it and added a second curves layer on top to do the rest of these steps.
the next step is selecting the white and black points with the little eyedropper tools.
the bottom eyedropper lets you pick a white point for the gif. click somewhere super light on the gif to see what happens - for this gif, I clicked on the lampshade on the left. if it looks weird, I just undo it and try somewhere else - it usually takes a few goes to find something that looks good.
here's what that did to the gif:

then I pick the top eyedropper and use it to pick a black point by clicking somewhere really dark, again playing around until I find a black point that looks good.
here's what the gif looks like after picking the white and black points:

this can take some experimenting, but you can make super easy drastic changes to your gif just with this. in this case, the curves layer took out a lot of that yellowy tint.
and this is what the curves graph looks like now:

you can click and drag those lines to make further changes if you want - I usually leave them alone though. the colours of the lines indicate which colours have been changed in the gif - for example, you can see from that steep blue line on the graph that blue has been added to neutralise those yellows.
next I usually do another curves layer and just press the ‘auto’ button again to see what happens. usually it brightens the gif a bit more, which I like.
‼️if nothing is working: usually with a bit of fucking about a curves layer works well - but sometimes you can’t find a good white and black point anywhere, and instead your gif turns wacky colours and nothing looks good. this happens more often with very heavily colour tinted scenes :( the troubleshooting section at the end goes over some options, including starting with a levels layer instead.
✨ selective colour (and skin tone correction)
skin tones are made up of a mixture of yellow and red.
removing yellow (or adding blue or red) to a gif will make the skin-tones too red - and removing red (or adding cyan or yellow) to a gif will make the skin-tones too yellow.
adding blue to this gif with the curves layer took out the yellowy tint, which I wanted - but it also took the yellows out of Kim's skin tone, which I don’t want. so I need to put yellow back into the skin tones specifically - without putting it back into the rest of the gif.
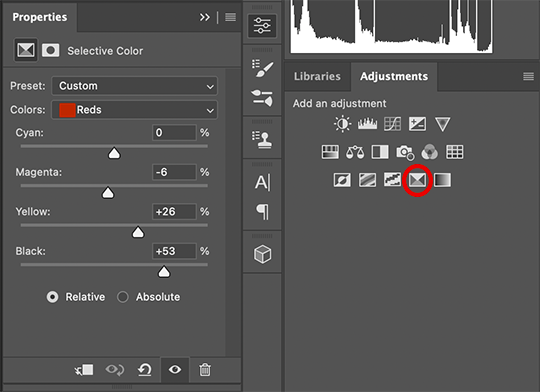
selective colour layers let you select an individual colour and adjust the levels of other colours within that colour. you can change how yellow the green shades are, or how much cyan is in the blues, for example.
I need to add yellow back into the red tones to correct the skin tones on this gif. this is the case for most gifs in my experience - the vast majority of the time, unless a scene is very heavily tinted in another colour, a curves layer will add blue/remove yellow.
in the 'colors' dropdown, select the 'reds' section and drag the 'yellow' slider higher - this will add more yellow into just the red shades within the gif.

the amount of yellow you need to add back into the reds depends on how much yellow was taken out of the gif initially - I just play around with the slider until it looks right. if you're not sure, it helps to have some neutrally-coloured (not white-washed!) reference photos of the people in your gif to compare to.
here's the result. Kim's skin is a lot less pink toned and much more natural looking:

✨ hue/saturation
this adjustment layer lets you adjust the hue and saturation of the gif as a whole, and also of each colour individually.

I don't use the hue or lightness sliders unless I'm trying to do something more complicated with the colouring.
clicking the dropdown menu that says 'master' lets you edit the saturation of each colour individually. this is useful if your gif is still super tinted in one colour.
I thought the yellows on this gif were still slightly too bright, so I switched to the yellow channel and desaturated them slightly. (remember if you do this then you need to go back to selective colour and add more yellow into the red skin tones to balance out the desaturation!)
then I increased the 'master' saturation of all the colours to +5:
I usually find the right amount of saturation is somewhere between +5 and +12, but it depends on the gif.
‼️if the gif feels undersaturated, but the saturation slider isn't helping/is making the colours worse, try a vibrance layer instead.
done!

✨ saving and reusing colouring
you can copy and paste adjustment layers between gifs to make your colouring even across each of your gifs for one scene - so if you're making a set of multiple gifs of the same scene, or you think you might want to gif the same scene again in the future, you can save it as a psd so you can reuse the colouring again later.
each gif's colouring will then still need tweaking - different cameras/angles/shots of the same scene can still start out with slightly different colouring.
I recommend uploading the gifs as a draft post on tumblr so you can see what they all look like next to each other and catch any inconsistencies.
✨ another one! (speedrun!)

HI KEN!
the white point for the curves layer was in the window behind them.
the curves layer removes the muddy yellow tint, but again it makes their skin tones (especially Ken's) very red toned, which is adjusted by the selective colour layer.
3. other adjustment layers
imo many many gifs can be coloured really nicely with just those three adjustment layers, but some need different adjustments.
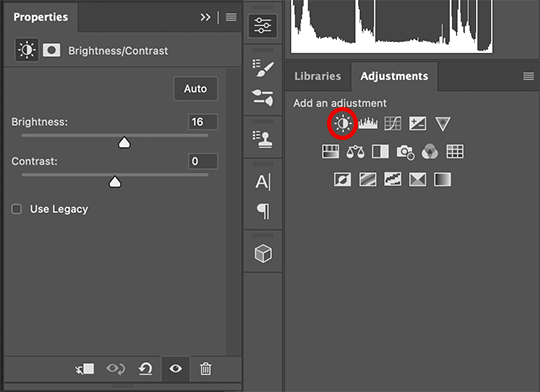
✨ brightness/contrast

pretty self explanatory!
I personally usually avoid using the 'brightness' slider because I rarely like the effect - I only tend to use the 'contrast' one.
the 'auto' button is sometimes useful though, especially if you’re struggling with the curves layer.
✨ levels

levels alters the white and black points of the gif, like curves - but unlike curves it doesn't also alter other colours.
use the sliders beneath the graph to alter how dark/light the gif is. you can slide the black slider further to the right to make the blacks darker, and the white slider to the left to make the whites lighter.
levels is a good place to start if your curves layer isn't working.
(I'm going to hit the image limit for this post lol so here are some screenshots of a table I made to demonstrate this rather than actual gifs. sorry!)


on both sides, I dragged the sliders up to where the big jumps are on the graph - this is usually a good place to start!
✨ vibrance
vibrance... makes the colours more vibrant. it's more subtle than saturation.
it's really helpful for gifs that feel grey. sometimes adjusting saturation just makes the greys kind of weirdly tinted, but a vibrance layer can fix that.

vibrance is much more subtle!
✨ colour balance

colour balance affects the overall balance of colours within a gif.
it's good for scenes with heavy tints.
I tend to stick to the 'midtones' dropdown, but you can also alter the colour balance within the shadows and highlights if you want.


✨ channel mixer
I avoided channel mixer for such a long time because it scared me. but it's great for scenes that are very heavily tinted in one colour.
basically, it works with the levels of red, green, and blue within a gif. you select an output colour and then play around with the levels of the colour you selected within each other colour.
kind of the reverse of selective colour?

so in the 'blue' channel, the levels of blue are at 100%, and the levels of red and green are at 0% - but you can impact how much blue is in the reds and greens and blues.
this tutorial explains it well - but imo the best way to get to grips with channel mixer is just to play around with it a bit (sorry)
(when I made this guide for my friend, I also made a slightly more complicated gif colouring walk-through that included using channel mixer. there isn't space to include it within this post, but if anyone is interested I could always upload it as an 'intermediate' gif colouring tutorial - lmk!)
4. troubleshooting
‼️curves
usually with a bit of fucking about a curves layer works well - but sometimes you can’t find a good white and black point anywhere, and instead your gif turns wacky colours and nothing looks good. this happens more often with very heavily colour tinted scenes :(
for example, with this base gif:

using many of the brightest points as a white point turn it wacky colours, like this:

yikes :(
some options for these cases:
try brightening the gif first with the 'auto' button on the curves layer or with a levels layer. having a brighter gif to start with can give you better options for picking a white point.
try finding an alternate, whiter/brighter white point. look for places the light reflects - on this gif, using the light on Porsche's cheekbone works well as the white point. it also helps to find places that would be white if the scene wasn't tinted - the lightest part of a white shirt is often a good place to start, for example.
skip the curves layer, and instead use a levels layer to alter your white/black points, and colour balance or channel mixer to balance the colours.
‼️over/undersaturation
if your gif (especially the skintones) is looking a little washed out or lifeless, it might be undersaturated. boost that saturation - or if that's not working, try a vibrance layer.
oversaturation is often easiest to spot in the mouths and ears of any people in a gif. if the mouths are looking unnaturally, vibrantly red, then you've gone too far with the saturation.
5. fin!
and done! I hope this was coherent helpful to somebody.
if there's anything that I've missed or that doesn't make sense pls feel free to shoot me an ask or a message and I'll do my best to help! I've also collated a bunch of additional reading/resources below.
happy gifmaking 🥰
✨ some links!
photoshop basics by @selenapastel
gifmaking for beginners by @hayaosmiyazaki
gifmaking guide for beginners by @saw-x
dreamy's gif tutorial by @scoupsy-remade (includes instructions on how to blur out burned-on subtitles or annoying video graphics)
beginner's guide to channel mixer by @aubrey-plaza
how to fix orange-washed characters by aubrey-plaza
colour correcting and fixing dark scenes by @kylos
does resampling matter? by usergif
how to put multiple gifs on one canvas by @fictionalheroine
watermarking using actions by @wonwooridul
resource directory by @usergif
325 notes
·
View notes
Text


004 • "𝗼𝘂𝗿 𝗵𝗲𝗮𝗿𝘁𝘀 𝗰𝗼𝗹𝗹𝗶𝗱𝗲"
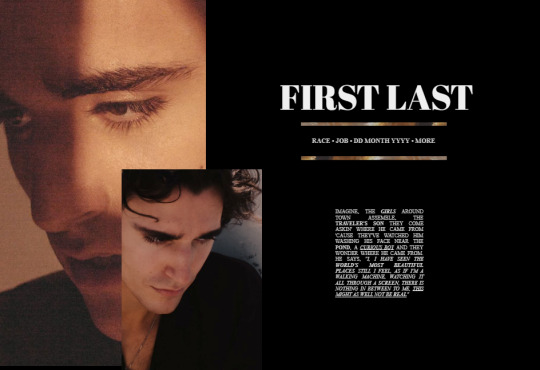
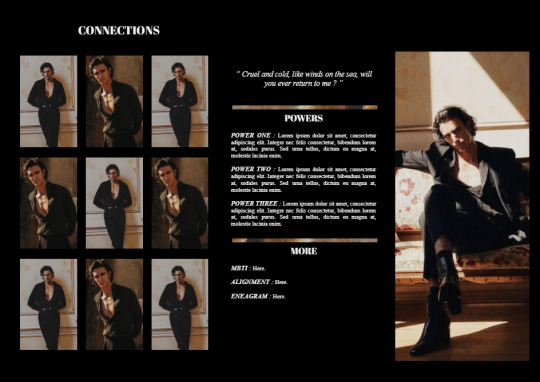
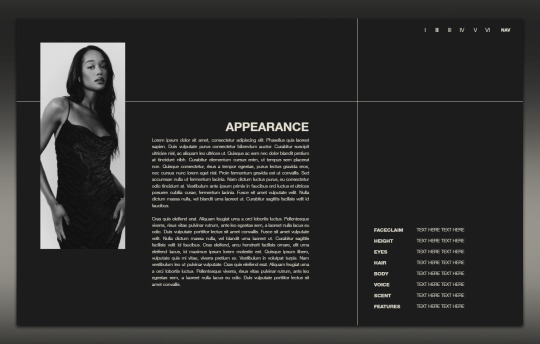
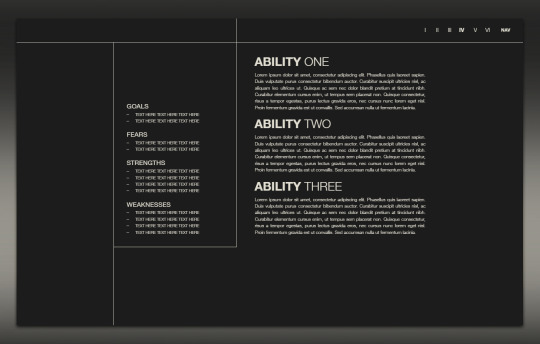
Inspired by the story of my character who is a pirate, with the beautiful face of Tamino Amir, this google doc provides a golden personality with deep secrets, a dark side that you could maybe dig in with a little attention.
You can make it yours by changing the colours and the pictures, adding pages, but don't forget to 𝗞𝗘𝗘𝗣 𝗧𝗛𝗘 𝗖𝗥𝗘𝗗𝗜𝗧, because, even if you paid for it, don't say you made it. It would make you a d!ckhead. You don't want to be a d!ckhead.
𝐟𝐚𝐜𝐞𝐜𝐥𝐚𝐢𝐦 𝐮𝐬𝐞𝐝: tamino amir
𝐇𝐎𝐖 𝐓𝐎 𝐔𝐒𝐄:
After purchasing, click file > make a copy
𝐑𝐔𝐋𝐄𝐒:
• do not remove the credit
• do not claim as your own
47 notes
·
View notes
Text
How to Make High Quality Gifs
A few people have asked me for a gif tutorial, so here we go! As a disclaimer, there are many parts of gif-making that are subjective, and this is just my personal process/preferences. If anyone is confused about a particular step, or wants more in-depth info about something, just message me!
Tools:
✧Laptop/computer
✧Adobe Photoshop 2024
✧External Hard Drive (mine is 250GB)
✧Video Downloader (I use the Video Downloadhelper extension on Firefox)
PHASE ONE: Make Animated Gif
1. Download high quality video
This is very important! You should download the highest quality of the video you can find. I use the free Video DownloadHelper extension on Firefox, but it doesn't download audio sometimes (it could be me not using it properly, or they want you to pay to get audio). No audio is fine for gifs, but if I'm doing a video edit, I either need to record the audio separately with Quicktime or use a free online downloader for youtube, twitter, or instagram videos.
For this gif, I downloaded an HD interview from the F1 website with the Video DownloadHelper extension on Firefox.
Tip: Make sure your video file is an .mp4 -> photoshop can struggle with .mov files bc they're larger
2. Import: Video Frames to Layers...
File -> Import -> Video Frames to Layers... -> Open your video -> Selected Video Range -> Make Frame Animation
If photoshop has to load a while to make the frames, it means you should select a smaller portion of the video to animate.
Tip: If you discover that there are duplicates of every frame or that there are way too many frames for the portion of video you want to gif, you may need to re-import and check the "Limit to Every _ Frames" box, and write in "2". This will import every other frame of the video and get rid of duplicates or too many frames.
Once your frames are imported, make sure you're working in the "Motion" workspace by going to the top to Window -> Workspace -> Motion.
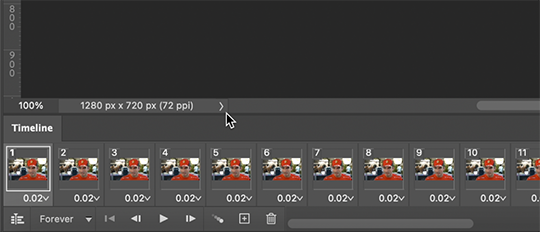
Now, all your frames should appear at the bottom in the Timeline. Make sure that the box in the left corner is set to "Forever", and now it should play the frames and loop back to the beginning each time.
3. Choosing your frames
I usually aim for around 60 frames total for a gif, but sometimes I'll go under or over that number. This particular gif is 55 frames in total. In general, I want my gif to be around 3 seconds in length bc under that feels too short and over that starts to be a large file size. Totally subjective, though! (edit: I have started to experiment with up to 80 frames for some gifs, which comes out to about 4 sec.)
Play through your frames and if you want to delete some, select them and click on the trashcan icon, which you can see in the screenshot above. (If you don't delete them this way, you'll have issues later.)
4. Set Frame Delay

Once you're happy with your frames, select all of them and click on the part that says "0.02", then go to "Other..." I usually choose 0.05 or 0.06, to land my gif around 3 seconds, but it depends on the video and how many frames you have. This particular gif is set to 0.06 because it looked good and brought me to around 3 seconds.
You can always choose a delay and if you don't like it, go back and change it! Just do what looks good to you.
5. Convert to Video Timeline
Click on the symbol that looks like 4 lines stacked, and choose "Convert to Video Timeline". Now is usually when I play through the gif to see what the speed is looking like/if I like the frame delay and it's landing somewhere around 3 seconds. If not, you can just Undo and adjust anything when it's still in the frame animation stage.
Next, scroll through the Layers on the right side and delete any layers that don't have the "eye" symbol next to them -> these are frames you deleted in the frame animation stage, but they need to be deleted in the timeline stage as well. Lastly, select all your remaining layers (which should all have the "eye" symbol) so they're all highlighted.
6. Convert to Smart Object
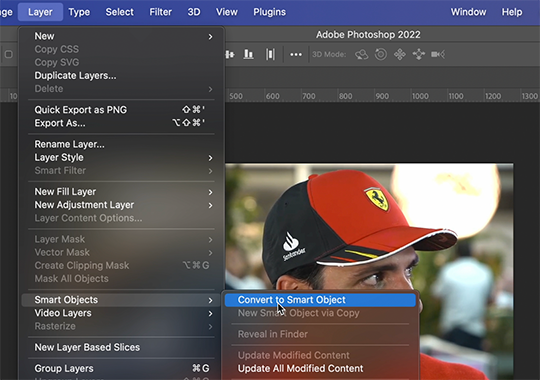
With all layers selected, go to the top to Layer -> Smart Object -> Convert to Smart Object. Ta da! You have a gif.
I always make sure to save my file at this point (you can do it before, but it just depends on how fast you work). Remember to frequently save your progress while gif-making: sometimes, photoshop gets overwhelmed and quits while you're mid-color correction 🥲. You never want to start over from scratch...
Now, some people like to crop & resize their gifs first. Or do sharpening before color. Or color, resize, then sharpen. It's really up to you. The order I like to do is Color, Sharpen, Crop, Resize, Export.
PHASE TWO: Color & Sharpening
(the fun part!)
1. Brightness/Contrast
So here's where we start getting into the really subjective stuff. I always use the Brightness/Contrast and the Selective Color adjustment layers to do my coloring. I rarely touch the contrast bc that can be adjusted in selective color, but almost always, the gif needs overall brightening.
Tip: Even when I think a video looks bright to my eyes, sometimes I post the gif and they look dark once they're in the app. My advice is to always brighten a little bit, even when you don't think it's needed...
Here shows the very subtle shift in brightness I did for this gif. It can be a lot more intense depending on the video quality/lighting. The difference will also look a lot more stark after the color layer is applied.
2. Selective ColorNext is color. This is totally up to you and what looks good to your eyes. Make sure you have any software turned off that might change the color of your screen (like a nighttime filter or something that removes blue light).
I use selective color bc you can adjust the levels of cyan, magenta, yellow, and black in each color channel independently. This is how I adjust the specific color of red that Charles and Carlos wear, or the amount of cyan in the blacks, etc. The "Neutral" layer effects the whole image, so I'll sometimes add some yellow there if I'm wanting a warmer image, or I'll add or remove black to brighten or darken the mid-tones.
Just play around! Sometimes, I'll take the slider from +100 to -100 back and forth just to see what it's doing to the gif. And I frequently turn on and off the color layer to see what the gif looked like before and after color. (I've found that most F1 content is really magenta-skewed, which you may not even notice until you've corrected it out).
Above is Color vs. No Color.
It might look extreme to you presented this way, but when the whole gif is colored, no one questions it! As long as there's consistency across gifs, that's all that matters. I frequently copy and paste my adjustment layers onto another gif from the same interview/video so the look stays consistent.
Above is Color w/ Brightening vs. Without.
This gives you a better idea of how much of a difference that Brightness/Contrast layer makes.
3. Sharpening
I got my Sharpening routine of choice from this tutorial on gif-making. To be honest, I don't know if it's the best sharpening procedure bc I haven't taken the time to in-depth compare to other ways of doing it, but it looks good to me! So I've stuck with it. (edit: I've also added a Reduce Noise filter to my sharpening routine. But as always, just do what looks nice to you!)
I copy and past the sharpening from my other gifs onto new ones so I don't have to do all the steps again. There are quicker ways of doing this, like using quick actions and stuff, but how I do it is fast enough for me.
If you want to figure out your own Sharpening routine:
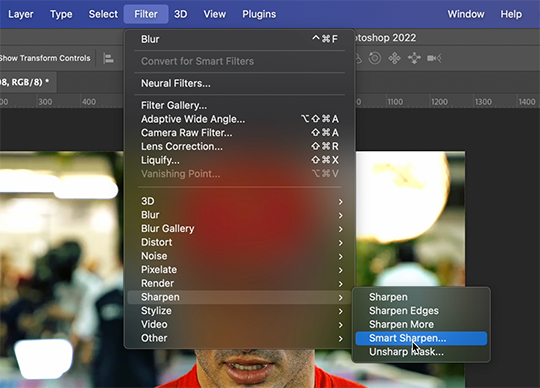
With the gif layer selected, go to the top to Filter -> Sharpen -> Smart Sharpen. It will bring up this window:
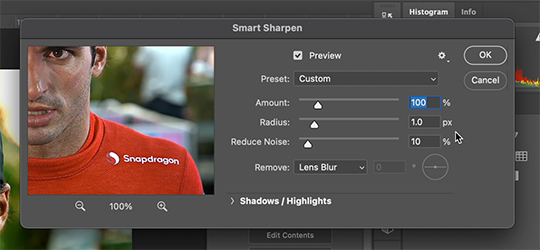
Here you can play around with the amount, radius, noise reduction, etc. and see what you like.
I also add a Gaussian Blur effect, which you'll find under Filter -> Blur -> Gaussian Blur.
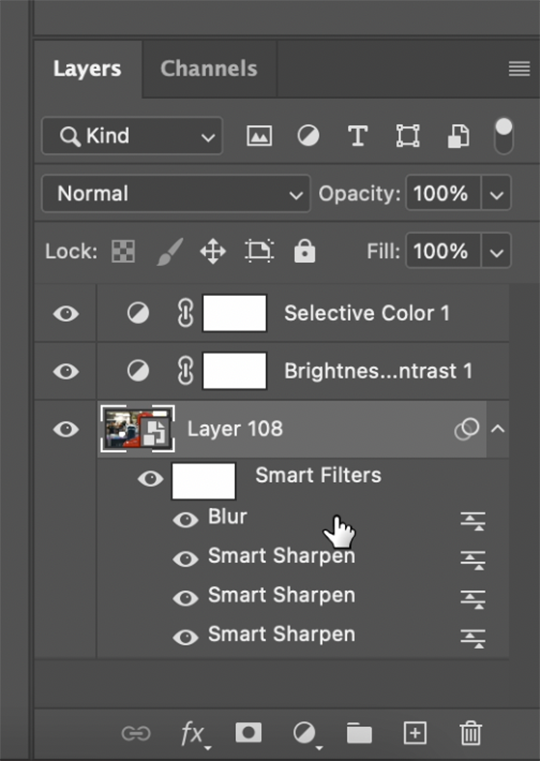
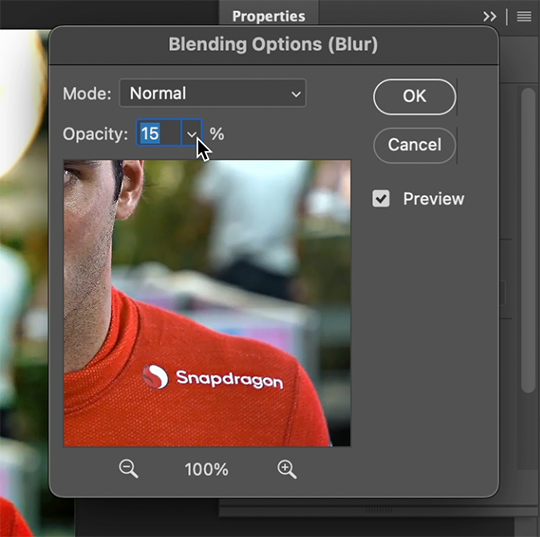
^All of your Sharpen and Blur effects will stack up underneath your gif layer like this. To adjust the opacity of one of these effects, double click on its adjustment/slider symbol to the right, and it'll bring up the Blending Options window.
If there's any sharpening or blurring layer you don't like, you can easily drag it into the trashcan symbol to get rid of it.
Above is a visual of Sharpened vs. None.
You can really tell with the difference in the Snapdragon logo on either shoulder. But I also personally love how much more Carlos' eyes pop to me on the Sharpened side.
As you can see, it's up to your preference. Sometimes, I really love gifs I see that aren't sharp, but rather really smooth and almost painterly. It's up to the gif-maker!
PHASE THREE: Crop & Resize
1. Cropping
Go to the toolbar on the left and choose the Crop Tool. Above where it says "Ratio", you can choose from preset ratios that photoshop has, or you can make your own. I like to use the presets, or at the very least, clear numbers that you can apply to a whole gifset. Free transforming without a ratio makes it nearly impossible to maintain consistency across a gifset.

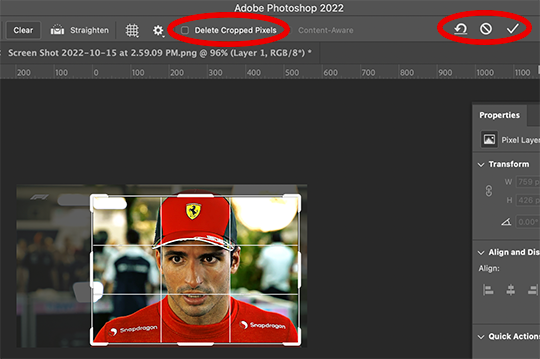
If it isn't already, uncheck "Delete Cropped Pixels". This will allow you to move the gif around inside the cropped area later if you want to adjust what's in frame. It also gives you the option to increase the frame later, if you want. You can also click the gear icon next to "Delete Cropped Pixels" and change how you view the gif during cropping.
When you're done, click the check mark or hit Enter. Now, you've got a cropped gif!
2. Resizing
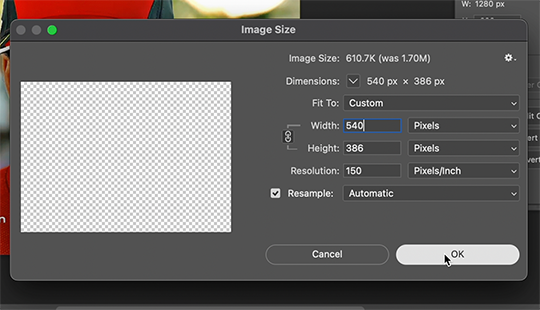
Go to the top to Image -> Image Size...
Make sure you have Pixels selected. For the Resample tab, I have it set to Automatic here, but sometimes I'll use Bicubic smooth or sharpen, depending on what I'm doing. Here's a cool post that compares the different settings. Just experiment with it.
(edit: I no longer change the resolution to 150. I've found that increasing the resolution, and therefore the size, before ultimately resizing down to 540 px means you are compressing even more (the larger something is, the more it has to be compressed within 540 px). I now leave the resolution at 72, which is what it's set at originally, and if the image composition allows it, try to crop in as close to 540 px as I can get so that when I resize, there's the least amount of compression happening.)
If I know a gif is going to be the full width of a tumblr post, I'll resize the width to 540 pixels (the height doesn't matter). But if I make a portrait-style gif which will be sharing a row with another gif, I'll resize anywhere from 270 px -> 350 px. If it's smaller than 270 px, tumblr will enlarge the gif and it'll look bad. If it's wider than 270 px, tumblr might reduce its quality a bit and it won't look as good. But personally, I prefer that if someone clicks on the gif to enlarge it, it looks better enlarged, so I usually will leave it around 345 px as long as the file isn't too big.
PHASE FOUR: Export (last one!)
Once you're happy with everything about your gif, it's time to export. (Remember to save your progress frequently!)
Go to the top to File -> Export -> Save for Web (Legacy)...
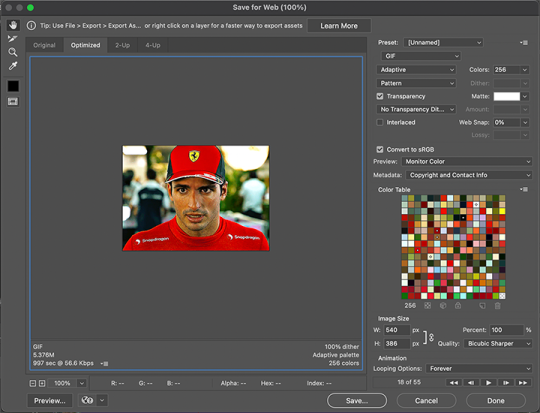
^It'll bring up this Save window.
These are the settings I like to use for gifs. You'll find a lot of differing opinions out there about Adaptive vs. Perceptual/Pattern vs. Diffusion, but you should always have "GIF" selected, "Transparency" checked with "No Transparency Dither" selected, Looping set to "Forever", and Colors set to "256". I like "Bicubic Sharper" for my Quality tab, but there are whole tutorials just about comparing those settings. The best thing to do though is to try them out and compare for yourself.
(edit: I've discovered that if a gif is slightly too large and I don't want to shorten it or resize it down, I can try to reduce the colors from 256 to 128 to get it under the limit. I'll never go below 128, and sometimes I will go to 200 or 170 to try to eliminate as little color variety as possible, but often there is not a noticeable difference in your finished gif. But always compare, of course, to make sure.)
On the bottom left is where the size of the gif is shown -> tumblr requires gifs 10MB and under, but in my experience, gifs load/play best on tumblr when they're around 6MB. I always leave a little growing room as well, bc it might say 5.8MB in this window, but after it saves, the file will have grown a little bit and will likely be over 6MB at that point. (edit: I now regularly post gifs that are around 9.5MB and tumblr seems to be able to handle it better.)
AND THAT'S ALL!
If you've made it this far...congratulations! haha
I know this is a whole lot of information and you might be feeling overwhelmed! But I hope, if anything, this shows you just how complex gif-making can be, and how it is absolutely an art! No one should be stealing anyone's gifs, as a lot of hard work and love goes into the process.
This doesn't include things like adding text to a gif, or more complex adjustments and corrections like masking or key frames. But I'm happy to do more of these if there are specific questions people have.

Let me know what you're curious about or if something is unclear! And happy gif-making! ❤️
198 notes
·
View notes
Text
click the source link to find #359 gifs of fiona palomo in nada que ver. all usage rules can be found on the gif page itself. please like and reblog if you found this useful.
content warnings: flashing lights.
354 notes
·
View notes
Text


016 . KOJI — [ 𝚕𝚎𝚖𝚘𝚗 𝚍𝚊𝚢𝚍𝚛𝚎𝚊𝚖 ] ..... GET IT NOW


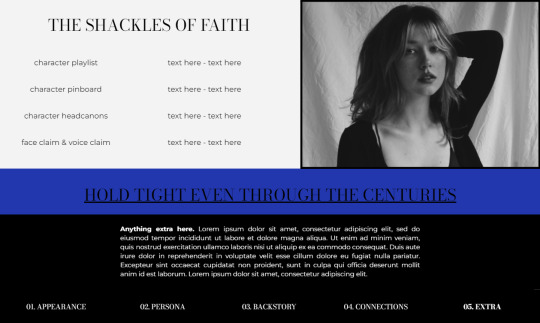
So many requests for a minimal, black-and-white doc, KOJI is what many of you have been waiting for. A customizable blank slate type of doc. Third of my four December releases. Edit it in any way, shape, or form just please don’t remove my credit and link to lemondaydream.
All templates are meant to be only used by one person per purchase. Allowing others to make copies off of your copy is stealing. Please read the instructions included in the pdf on how to prevent this.
⸻ additional info
Instructions on how to use and edit this doc are included in the pdf you receive.
Perfectly viewable in print layout mode on mobile, there are no drawings in this doc.
The fc featured in this doc is Laura Harrier.
Thank you so, so much for your support, likes and reblogs are always appreciated!
137 notes
·
View notes
Text

— 011: Vampiric Roses 【 raining-violet 】
【 Download now! 】
Vampiric Roses is a free to use, 9 page character doc template (only 8 photos are shown because there’s another page of connections, but I needed an even number for formatting). This is a completely mobile friendly template, and on the simpler side.
Notes on use
To edit, click the three dots and then file. Then click make a copy. Don’t request editing permission! Please do not redistribute my docs without credit, claim this as your own, or copy my doc.
Other notes
Song lyrics are from ‘vampire’ by Olivia Rodrigo and images are of @/sinisterdarling
Finally I decided to make a simpler looking doc :) I’ve been wanting to make something a bit simpler and mobile friendly for a while now but could never figure out how to make it look the way I wanted. But I actually like this one, though it was a bit of a struggle to figure out the layout of everything. I hope you all enjoy :) and if you end up using my doc, likes and reblogs would be appreciated. Also! I’m hoping to start selling some of my docs soon. I’ll share more info later when I have it all figured out.
81 notes
·
View notes
Text

˙ ˖ ✶ ANAHILATION THEME !! 013. you get me
sidebar: 268px by 268px
500px wide posts; contained
feel free to edit however you like for personal use. please do not redistribute, claim as your own, or sell to others.
credit is not necessary, but always appreciated! a like & reblog if you’re using is the cherry on top. and also feel free to mention me, i’d love to see what you come up with!
my askbox is always open for any questions or suggestions on resources.
i am currently open for commissions!!
i make all of my resources for free and always will, but if you’d like to leave a tip my ko-fi is ANAHILATION. enjoy!!
find the preview & download code in the SOURCE LINK.
137 notes
·
View notes
Text
01. MYRIAD [a character template]
MYRIAD is a fully customizable character template for photoshop and photopea. an intermediate level of skills in photoshop is recommended to fully modify the template.
to keep in mind:
the fonts utilized are aviorte, roboto condensed, disket mono (bold), and calvino grande trial.
credits for the images go to their rightful owners.
as stated above, the template is fully customizable!
for any questions, please contact me via ask on my tumblr blog.
please, DO NOT copy, steal, or sell this template as your own.
please give me credit if you do end up using this template.
like and/or reblog if you're planning on using this!
this is a paid template, available via purchase on my payhip or-kofi.
PAYHIP. / KO-FI.
115 notes
·
View notes
Text


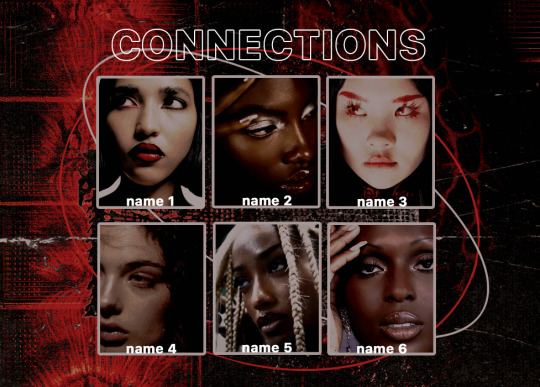
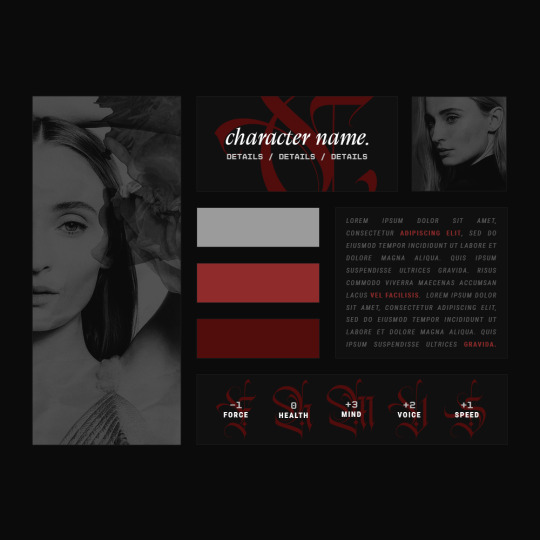
•✦ [ 12. 𝐌𝐀𝐅𝐈𝐎𝐒𝐎 ] ✦•
a header & character exploration template set.
─── 𝒅𝒆𝒔���𝒓𝒊𝒑𝒕𝒊𝒐𝒏.
inspired by the godfather and goodfellas, this is a set of 3 character exploration templates with thematics of crime, death and violence. majority of these pieces of heavily layered with multiple textures to convey the feeling of grime and blood. this is a fairly flexible to use and I highly recommend using psd colorings to overlay it. as per usual, if you have any questions, feel free to ask! enjoy!
─── 𝒆𝒙𝒕𝒓𝒂 𝒅𝒆𝒕𝒂𝒊𝒍𝒔.
fonts: galvji, montserrat
PSD coloring is NOT INCLUDED [ click here for psd ]
images do not belong to me and are credited to their rightful owners.
do not copy, do not steal, or monetize. [ read my rules ]
tip me at my coffee jar ♥
please credit me if you use the content.
please [ like/reblog ] this if you intend to use.
•✦── 𝐚𝐜𝐜𝐞𝐬𝐬 𝐠𝐫𝐚𝐧𝐭𝐞𝐝 𝐢𝐧 [ 𝐝𝐢𝐬𝐜𝐨𝐫𝐝 ] 𝐬𝐨𝐮𝐫𝐜𝐞 𝐥𝐢𝐧𝐤. ──✦•
57 notes
·
View notes
Text
﹙𝟢𝟫﹚─ 𝖠𝖴𝖱𝖠 𝗠𝗔𝗥𝗜𝗦
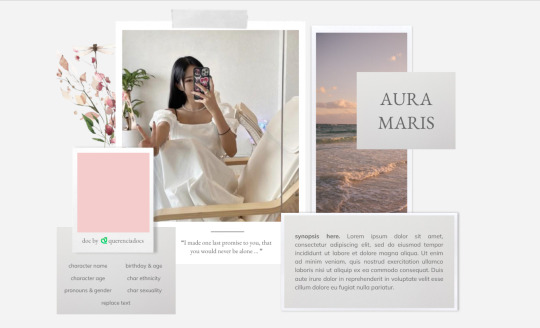
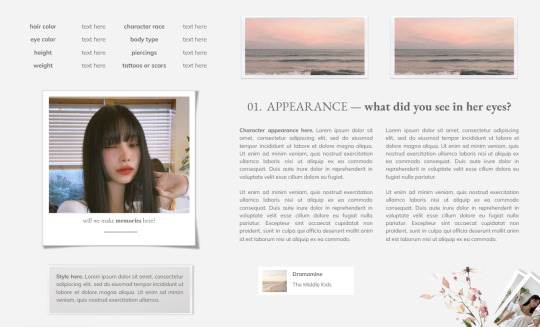

AURA MARIS
hello everyone! i've got a new doc for you guys today! spring break is incoming, so i've got something for you guys to enjoy! aura maris is a beige-themed aesthetic doc, single muse as usual. there are some drawings involved but its mostly easy to edit!
INSTRUCTIONS
To prevent people from making copies of your docs
select the blue SHARE button in the top right corner of your doc
hit the settings gear on the right corner of the pop-up
UNCHECK the box that says "Viewers and commenters can see
the option to download, print, and copy"
As usual, please do not remove the credits. stealing my work is not cool and if you do use this template, don't forget to reblog and like!
MORE
its best to use the "replace image" feature as it will make it easier for you to edit. You can also edit drawings by clicking the “edit” button under.
AFTERWORD
as usual if there are any problems, you can text me on discord at crisnake736#3022. toxic comments will not be appreciated or answered. also the quotes i added are random, feel free to change them as you wish!
i would love to hear all your opinions on this template, so don't hesitate to leave a comment or ask any questions. if you have any troubles, etc.
GET THE DOC HERE !!
97 notes
·
View notes
Text
﹙𝟢𝟪﹚─ 𝖫𝖴𝖭𝖠 𝗔𝗣𝗥𝗜𝗟𝗜𝗦


𝖫𝖴𝖭𝖠 𝗔𝗣𝗥𝗜𝗟𝗜𝗦
Hello everyone! What are you doing on this upcoming Valentine's Day? I'm spending it with a special someone! But along with that, I have a love themed doc! This doc has a pink-ish aesthetic for a single muse character. There’s a LOT of drawings in this one but i hope you guys like it!
INSTRUCTIONS
To prevent people from making copies of your docs
select the blue SHARE button in the top right corner of your doc
hit the settings gear on the right corner of the pop-up
UNCHECK the box that says "Viewers and commenters can see the option to download, print, and copy"
As usual, please do not remove the credits. stealing my work is not cool and if you do use this template, don't forget to reblog and like!
MORE
its best to use the "replace image" feature as it will make it easier for you to edit. You can also edit drawings by clicking the “edit” button under.
EXTRA
as usual if there are any problems, you can text me on discord at crisnake736#3022. toxic comments will not be appreciated or answered. also the quotes i added are random, feel free to change them as you wish!
i would love to hear all your opinions on this template, so don't hesitate to leave a comment or ask any questions. if you have any troubles, etc.
118 notes
·
View notes
Text
♡ 𝐚𝐫𝐧𝐚𝐬 𝐟𝐞𝐝𝐚𝐫𝐚𝐯𝐢𝐜𝐢𝐮𝐬 𝐠𝐢𝐟 𝐩𝐚𝐜𝐤
click the source link below to be redirected to 244 gifs (268x151px) of arnas fedaravičius in the last kingdom season 3. all of these were made by me from scratch so don’t claim as your own or redistribute. please like/reblog if you found this helpful. possible tw: fighting, drinking, blood, weapons, violence.
237 notes
·
View notes
Text

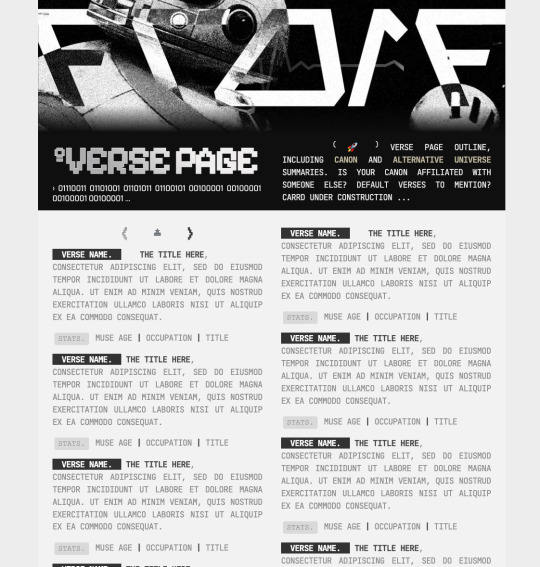
CARRD TEMPLATE: #010—DROIDSPEAK.
made for solo blogs & multimuse blogs. price is 6 USD+, buy here !
pages available: landing, navigation, dossier template, full page muse list, guidelines, verses, mains.
require pro-lite plan. appearance stylisation is pre-set, easy to navigate for beginners, and if faced with issues please contact me and i will happily do further editing for you. please like and reblog if using to show support.
note. do not remove or hide credit. can replace with your own graphics if you wish. feel free to use the pages as you see fit without requiring my permission.
104 notes
·
View notes
Text
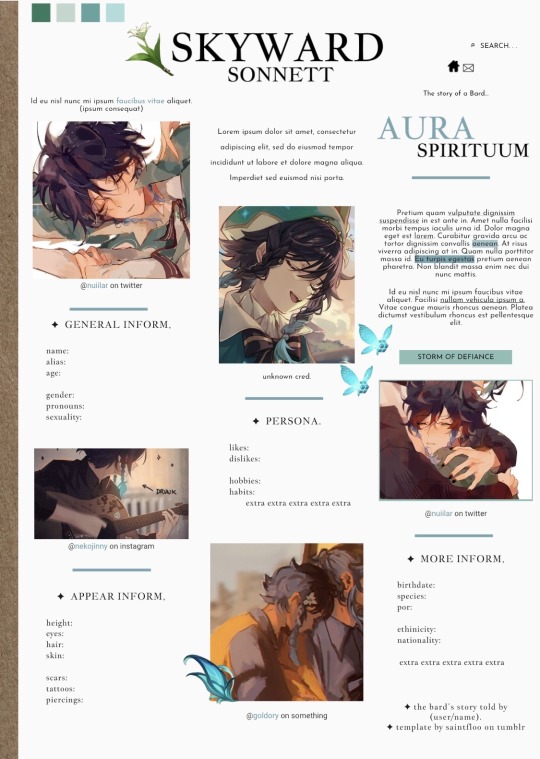
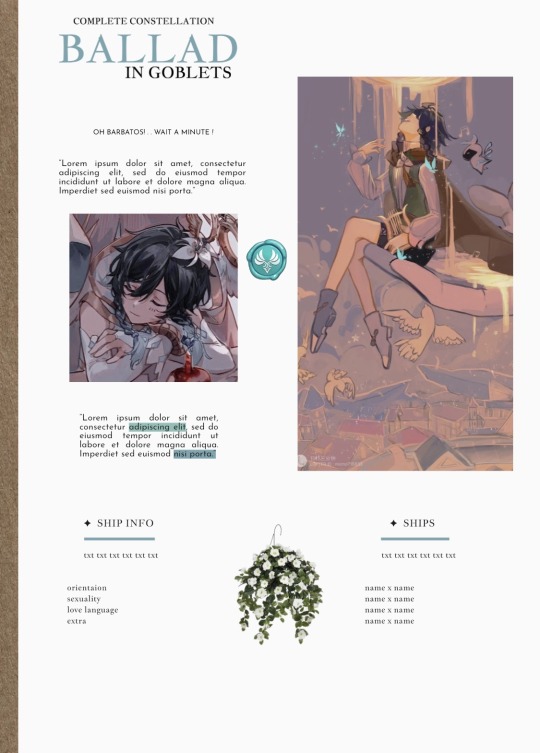
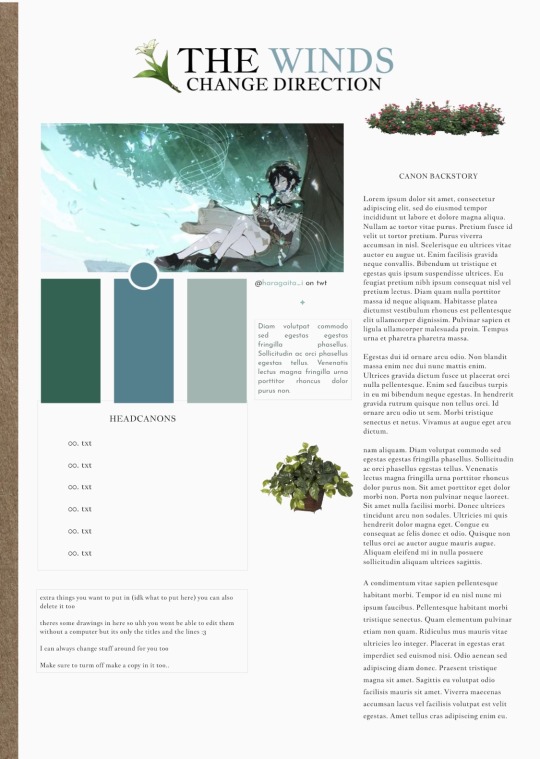
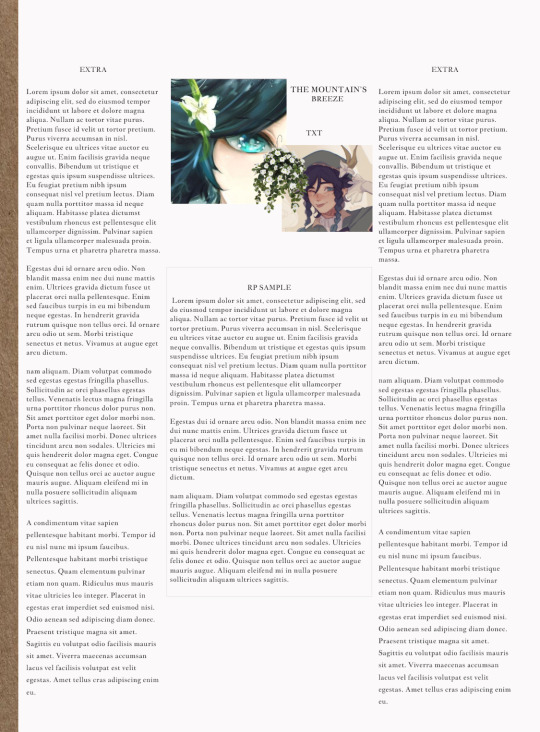
SKYWARD SONNETT.
skyward sonnett is a free doc themed on venti from genshin impact.
Any feedback would be greatly appreciated (especially since this doc tends to mess up on mobile).
Best viewed on print layout for easier access with editing.
There is pretty much a bunch of freedom with this template. Feel free to use for servers, (only with proper credit lmao)
You can:
change template colors
change the photos
basically anything else
You may not:
Remove the credit for any reason at all (you may move it to a different area within the doc)
thank you if you use this!

98 notes
·
View notes