#I wish I could add alt text to this photo. I know I can do it on mobile but it's gonna break my formatting if I do that agh
Text

When Eret died in their hardcore world, the world turned into a black void with endless rainfall. It felt so beautiful and poetic, and I know it was probably some glitch or something, but let’s imagine this from a character lore perspective for funzies:
If we assume c!Eret is Herobrine kin (or something of the like) in every world they inhabit, including this Hardcore World, then perhaps their death is what corrupted the world. Some fanon lore categorizes Herobrine as: “a virus that can delete or manipulate worlds”. Maybe whenever c!Eret is killed, there is catastrophic reality-shattering damage as a result. (After all, Herobrine aren’t technically supposed to exist in any world).
If we were to go a step further and connect this theory to c!Eret’s DSMP iteration, it might explain the whole “potentially immortal (?)” thing they’ve got going on. There’s certainly something strange about their relationship with life and death. We could say this is a side-effect (or even the cause) of their friendship with Foolish, a Totem of Life who was once a Totem of Death, but I don’t think that’s necessarily the case.
When Eret accidentally (non-canonically) died on the DSMP recently, they said: "I never die -- I never die! That's my whole THING! I don't die and -- I died!"). From this we can posit several things: A) They’re some kind of minor god, B) They don’t die easily, or C) They cannot die because their death would break the world (and I doubt ‘ol DreamXD would be too happy about that).
Either way, there’s lots of unexplored lore potential with c!Eret’s character. Hopefully we’ll get some answers about their character’s history someday, but in the meantime, it’s fun to theorize!
#DSMP#Eret#DSMP Meta#DSMP talk#Me: *ignores the fact I know nothing about actual Minecraft mechanics* how can I make a story out of this#anyways WHAT"S UP GANG I just finished teaching for like 8 hours on JST and I'm hyped up on caffeine and the post-MCC endorphin rush#I haven't been able to write meta like this in ages what is HAPPENING#not complaining though. I'm having fun#I am so starved for c!Eret lore. If I cannot get c!Eret lore I shall simply theorize and write an entire essay with a works cited page#u know. falling back into old habits and the like#it's a nice feeling!#Man for real though... I haven't felt this creative in ages. I've been doing a lot of c!Eret related things#hopefully a few of those projects will pan out#I know one has to because otherwise Elise will End My Life#Anyways. G'night y'all#ALSO This screenshot reminds me so much of OOT's temple of light when Link reawakens after 7 years#I wish I could add alt text to this photo. I know I can do it on mobile but it's gonna break my formatting if I do that agh#OR THE CHAMBER OF THE SAGES IN OOT#Edit: Oh I take it back. The energy has left and I feel like a husk of a person rn.#I am SO tired JST time does NOT mesh with my sleep schedule
100 notes
·
View notes
Text
Inexpensive Search Engine Marketing
If you uncover a trusted and reliable provider, price of Search engine optimization packages will be viewed as an investment that can last years in your business enterprise. These Search engine optimization charges differ based on a range of aspects, such as the Search engine optimization agency you have selected to perform with, what you are aiming to accomplish from your investment and the surrounding industry competition. Low-expense Search engine optimization ranging from £100 to £300 per month would invest in a enterprise small high-quality or worth and can frequently come with danger. It may be much better for the enterprise to attempt and optimise their web page in-property, which is often a safer but slower process of optimisation. Use the WYSIWYG editor when developing content material so your text appears attractive on-page and add ALT-text to all photos. Create internal links for uncomplicated navigation through your site.
And make exceptional, keyword optimised title tags, meta descriptions and headings for just about every web page. Choose the appropriate keywords from the outset, monitor their progress and update the list with new ones as time goes by. Off-web page Seo demonstrates your site’ authority to customers and Google through higher-top quality backlinks, for instance. local seo moscow Ask yourself what you would look for if you have been searching for the greatest Search engine optimisation packages for your personal business.
Search Engine Marketing Services
So, it’s hunting to find out no matter if you’re a effective and respected voice in your sector. Worse, Google may be penalizing you for outdated strategies get up to date with present Search engine optimization promoting services. Search engine optimisation is a series of tricks, tactics, and approaches designed to increase your rank and presence on Google.
Hyperlink Constructing
You could have noticed other Search engine optimization or internet design and style agencies supplying ‘low price month-to-month SEO’. We would generally advise against signing up for something which is budget or advertised as ‘cheap’. Seo is an ongoing effort and any agency promising or even guaranteeing benefits on a affordable spending budget should really not be taken seriously. It takes tough operate, commitment and an investment in time and sources to get final results.
top seo moscow
See What Our Consumers Are Saying
We do competitor investigation and analyse your existing web site and its Search engine marketing possible, to operate out how easy or difficult it is going to be to get you onto the first web page of Google. And so with sufficient time and focus, the Search engine marketing marketing and advertising agency can elevate your internet site to this prized position. A good Search engine optimisation organization knows about most of the ranking factors that make up Google’s formula and knows the relative priority of each – and the caveats of every single aspect as well. Search engine optimisation campaign for companies in higher competition industries with intense Seo competitors. You will be pleased to know that our method to Seo is entirely various from the Search engine optimization packages that most Search engine marketing agencies give. I pride myself on providing discrete Search engine marketing packages that you can invest in as and when you wish.
#seo in moscow#moscow seo#seo moscow#seo agency moscow#seo agencies in moscow#seo agencies moscow#seo
0 notes
Text
Backup Tumblr Blogs - 2017
There are a lot of methods here. I’ve used the wordpress method but with that you get EVERYTHING after days of waiting with not much control. The method that gives the most control (and is so far the fastest) is tumblr-utils by bbolli on github. It can be daunting for those who aren’t familiar with command line, however. They do have a Windows guide (tumblr_backup_for_beginners) which walks you through step by step on setting it up and getting it started.
Below is my version of the guide with some helpful tips not mentioned in the original guide. Under read more for length.
1. Install Python
Key step do NOT skip, even if you already have python you may be using an outdated version and it requires 2.6 or 2.7 to run.) If you are using Windows, download the x86 MSI installer (unless you KNOW you have a x64 system that can handle that version. If you’re unsure, stick with x86)..
You may need to check “Copy Python” when installing in Windows or step 4 will not work.
Note: there are downloads for Mac OS. I don’t have a Mac to test this on, but it should work just as well as on Windows.
2. Download tumblr-utils.zip
Extract it somewhere safe that you know will not accidentally delete it. Do NOT extract it to Desktop or Downloads as directed in the original guide, especially if you like to clean your download folder every now and then. I installed it on my D:/ drive but you can probably get away with putting it in your Documents somewhere. Just remember where you put it.
3. Set up the PATH variable (optional but recommended)
The reason we set up the PATH is to make it more convenient to run the backup code in command line. If the path isn’t set, you have to type in the full address to the script file every time you run it. With the path, all you need to do is specify the file itself and your computer will know where it’s at.
If you’re running this on a Mac, you don’t need to specify PATH (although you can) All you need to do is drop tumblr_backup.py into /usr/local/bin using Finder and it should do the same thing.
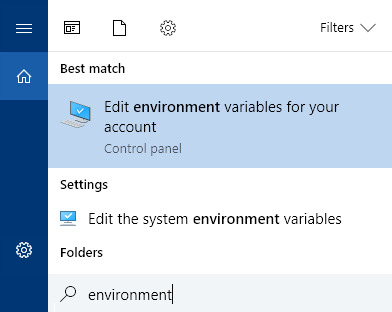
For Windows 10, use the taskbar search “environment” and click on “Edit the system environment variables”. Click on “Path” and click “Edit...” add a New variable and type in the path to wherever you extracted tumblr-utils.
Note: You can easily grab the url path from windows explorer by clicking on the address bar and copy/pasting.
If you’re not running Windows 8 or 10, there’s a guide here for getting to the PATH environment variable. For Windows 7 / Vista / XP, make sure you separate existing information in the PATH from your new address with a semicolon. (see the first window in the screenshot above).
4. Create Your Backup Folder
I would suggest making a new folder called “Tumblr Backups” on a separate drive from C (D, etc, or even better on a flashdrive or external), but feel free to put it somewhere you have easy access to or will remember well (such as in your My Document’s folder). Again you’ll want to remember the address to it and how to get there from windows explorer. You can always move or copy this folder somewhere else after you’ve backed it up.
5. Navigate to Tumblr Backups in Command Line
For the next step we need to use Command Prompt (or Terminal on Mac/Linux). To open up Command Prompt in Windows 10 you can simply hit the Windows button + X and then C for Command prompt or search for it via taskbar (Here is a guide for opening it on other Windows versions). On a Mac, you open Terminal with Ctrl+Alt+T. You shouldn’t need admin privileges for what you’re about to do. In fact, it’s probably better if you don’t.
When you open command prompt in Windows it will be set to C:\Users\[your username] (the same place Windows Explorer automatically opens to). We want to navigate to where you want to store your backup. If it’s in Documents, then type:
cd Documents/Tumblr Backups
hit enter and the prompt (the text in front of your cursor) will change to that directory. If you want to go up a folder type:
cd ../
If you set it up on a different drive in Windows, type the drive letter (capitalized), followed by a colon and hit enter and then change directory using cd

On a Mac, you also use the cd command to change directory in Terminal, but to change drives, all you need to do is type:
cd /Volumes/
ls
The ls command (LS lowercase) lists all the files and folders within the directory you’ve currently navigated to. The /Volumes/ directory is where all your drives are located and you can navigate from there to your Tumblr Backups folder. NOTE use quotation marks around files/folders that have spaces!
cd ‘Tumblr Backups’
6. Run tumblr_backup.py
Once you’re in your Tumblr Backups directory, you’re ready to backup your posts!
If you want a complete backup of your blog as-is, type the following (replacing yourblog with the blog you want to backup) and hit enter:
tumblr_backup.py yourblog
It may take some time, but even for 18,000+ posts it should take no longer than 30 minutes depending on connection speed. On the next line it will give you a real-time update of how far it is to completing the backup. If it is interrupted, it will process what it’s pulled so far and generate a backup folder anyway. Note that you can backup multiple blogs at the same time by adding more than one blog name at the end, separated by spaces.
Don’t worry about pulling posts twice or accidentally doing the same command. It won’t add any duplicates.
This also works for side blogs and for backing up blogs run by others that you wish to keep in case it gets purged or leaves Tumblr.
If you only want your own content:
tumblr_backup.py --no-reblog yourblog
--no-reblog (that’s two dashes in front) tells it to only backup posts that you’ve made yourself, including reblogs where you’ve added new content.
If you’re only interested in backing up photo posts:
tumblr_backup.py -T photo yourblog
-T photo tells the script to only backup photo posts. Make sure to capitalize the T!
If you only want to backup posts with specific tags:
tumblr_backup.py -t tag1,another_tag_with_spaces yourblog
Separate each tag with a comma. Tags with spaces use underscores instead. Make sure the -t is lowercase!
If you have an unstable internet connection, break it up into multiple requests.
tumblr_backup.py -n 100 yourblog
tumblr_backup.py -n 100 -s 100 yourblog
tumblr_backup.py -n 100 -s 200 yourblog
-n 100 tells it to only count 100 posts, starting from the last post you made. -s 100 tells it to skip the first 100 posts or checks (which are the last posts you made).
You can find many more flag filters in the documentation that can help you fine tune your backup depending on what you want to keep and how you want the backup to be displayed. You can also get information on these options by running tumblr_backup.py --help (with two dashes).
If you are getting image missing errors, don’t worry. It’s usually just avatar images of deleted blogs that are no longer accessible.
If you get 503 messages and aren’t pulling posts, it could be you’re requesting too frequently and the server locked you out. I’ve had that happen with my stats project while testing. In that case you just have to walk away for a bit and wait it out Double-check that you spelled the blog name you want to pull from right and maybe try again in a couple hours or so.
7. Profit

If you look into Tumblr Backups afterwards, you should find a folder with your blog name. In it is a website hierarchy with each post in the posts folder modified by the originally posted date with all of your tags included. Images are in media, monthly archives in archive, and there is an index.html that allows you to navigate and view everything via your favorite browser.

If you want to use a custom CSS file, call it custom.css, put it in the backup folder and do a complete backup. This forces the pages to all use the new styling.
The CSS of your blog’s original theme css and avatar is always saved in theme/style.css.. Note that it does not save any javascript you may have had on your theme and you should back that up separately. This also does NOT backup pages.
801 notes
·
View notes
Text
6 Content material Advertising and marketing Abilities That'll Solely Get Extra Essential
New Post has been published on http://tiptopreview.com/6-content-marketing-skills-thatll-only-get-more-important/
6 Content material Advertising and marketing Abilities That'll Solely Get Extra Essential

A couple of years in the past, I acquired employed as a content material marketer at a small internet design firm.
On the time, I believed one ability — and one ability solely — would serve me nicely sufficient to succeed: the power to put in writing.
I used to be a proud English graduate who had no thought tips on how to make it efficiently as a content material marketer.
Thankfully, I’ve picked up some vital abilities through the years that’ve enabled me to develop as a content material marketer. Most of these abilities don’t have anything to do with writing.
Whether or not you have been a content material marketer for years otherwise you’re seeking to get employed in your first content material marketing function, you are in luck. Right here, let’s discover the abilities you will have to hone to excel as a content material marketer in 2021 and past.

Content material Advertising and marketing Abilities
1. Copywriting
Extra doubtless than not, the overwhelming majority of your function as a content material marketer requires you to create content material that converts leads and drives gross sales. To do that efficiently, you have to be an excellent copywriter.
Nevertheless, it is vital to notice — copywriting for marketing functions requires totally different abilities than it would for those who had been writing for non-business functions.
For one, copywriting for a enterprise requires a constant dedication to writing in a model’s distinctive voice.
This may get notably troublesome for those who’re a contract content material marketer who creates content material for various companies and industries. Nevertheless, it is vital you develop the power to put in writing in several kinds relying on the wants of a enterprise.
For a gross sales weblog, as an example, you may want to put in writing brief, concise, easy sentences, since salespeople are sometimes strapped for time and want solutions instantly.
Entrepreneurs, alternatively, have a bit extra time to understand writing for writing’s sake, so you may take the time to make use of extra inventive, long-form sentences.
Moreover, the way you write a video script for an insurance coverage firm varies considerably from the way you write social copy for an e-commerce enterprise.
Growing a model voice — and figuring out tips on how to alter your writing model relying on enterprise wants and viewers persona — is a vital ability in content material marketing.
2. Modifying Abilities
Alongside related traces as copywriting, it is vital you change into a proficient editor if you wish to succeed as a content material marketer.
Good, clear writing could be highly effective sufficient to influence hesitant prospects to purchase. And, on the flip aspect, messy, error-prone writing might trigger new guests and prospects to desert your web site solely.
Briefly, the power to edit is the distinction between mediocre writing and compelling, participating, high-converting content material.
No strain, proper?
Studying tips on how to create content material shortly is a vital ability of any content material marketer, notably for those who’re chargeable for creating content material throughout a wide range of channels for your corporation. Modifying, then, is a compulsory step for cleansing up that duplicate and making it sound as skilled and polished as doable.
three. Website positioning Abilities
This ability was a tough one for me to grasp, however it is important for guaranteeing my content material ranks online and reaches the proper viewers after they want it most.
As a content material marketer, your function is not simply to create high-quality content material. It is also to create content material that converts readers, listeners, or watchers into prospects.
And to do that, you want a primary understanding of Website positioning.
For example, for those who’re a content material marketer who’s answerable for your organization’s YouTube web page, you will wish to know tips on how to conduct key phrase analysis to discern what individuals are searching for on YouTube, after which write compelling, Website positioning-optimized titles and video descriptions to draw viewers to these movies.
Alternatively, as a blogger, you will have to know tips on how to create Website positioning-optimized content material — together with utilizing applicable alt-text in your photos, utilizing related key phrases in your part titles, and thoughtfully incorporating key phrases all through your content material (slightly than keyword-stuffing).
In the end, Website positioning ensures the content material you’re employed arduous to create is served to the proper audiences, on the proper time. With out an Website positioning basis, then, it is going to be troublesome to succeed as a content material marketer.
four. A Expertise for Interviewing
As a content material marketer, you are typically tasked with creating content material round unfamiliar or advanced subjects.
It could really feel formidable to do the analysis essential to create an informative, useful piece of content material on a subject for which you are a novice at greatest. That is the place interviewing can assist you stage up as a content material marketer.
For example, once I wanted to put in writing about Google’s rel=nofollow announcement final 12 months, I knew I might have a tough time figuring out why it mattered to our viewers if I did not converse to an Website positioning strategist. Which is why I interviewed my colleague, Victor Pan, so as to add knowledgeable recommendation and assist my viewers perceive the subject on a deeper stage.
5. Time Administration & Group Abilities
One of the vital abilities any content material marketer can foster is the ability to remain organized even underneath tight deadlines.
Being a content material marketer means publishing content material on a constant, efficient foundation to make sure you’re reaching and changing audiences into leads in your gross sales crew each month. As such, being organized and adhering to a content material calendar that aligns along with your firm’s targets is a vital side of your function.
Moreover, writing can get tiring, so time administration is vital for avoiding burnout. For example, for those who’re required to put in writing 4 weblog posts per week, it is going to be useful for those who can block off time in your calendar for “Writing Time” throughout your peak productiveness hours. Writing these 4 weblog posts the night time earlier than the posts are due will not set you up for fulfillment as a content material marketer.
Think about using undertaking administration software program to make sure your content material stays organized at the same time as your crew scales.
6. Information & Analytics Abilities
If you do not have the abilities essential to research how your content material is performing, then it is going to be troublesome — if not inconceivable — to iterate in your technique over time and obtain new ranges of development.
A content material marketer’s function contains the power to research trade developments, hold up-to-date in your viewers’s preferences and conduct, and use all that info to make strategic choices and increase your model’s attain.
Once I first began creating content material for HubSpot’s Weblog, I used to be vehemently against information. I loved the creativity of content material creation, and information felt like the precise reverse of all that.
Nevertheless, over time I noticed it did not matter how inventive or distinctive my content material was if nobody learn it.
That is the place information got here into play. It helped me iterate on the kinds of content material I used to be writing, select new subjects to deal with that I knew my viewers preferred greatest, and keep forward of trade developments to make sure my content material aligned with conversions taking place with entrepreneurs throughout the globe.
In the end, information is important for guaranteeing you will have a powerful, efficient content material technique.
These are just some abilities you will have to grasp as you stage up as a content material marketer. In the end, the power to stay versatile and determine the wants of your personal firm’s distinctive targets is vital to succeeding as a content material marketer for the long-haul.

Source link
0 notes
Text
Mac Os Stands For

Need a little help figuring out your new iMac or MacBook? You’ve come to the right place.
Mac Os X Stands For
Mac Os Stands For Computers
Mac Address Stands For Computer
Check out our updated survival guide for the basics on Mac OS X, including details on the latest “Mavericks” features, illustrated guides for updating and backing up your Mac, must-know tips, and more.
Within the Open Systems Interconnection (OSI) network model, MAC addresses are used in the medium access control protocol sublayer of the data link layer. As typically represented, MAC addresses are recognizable as six groups of two hexadecimal digits, separated. And now, with just a USB cable, unlock your phone's possibilities on PC and Mac through Samsung DeX. Click to download Samsung DeX app for use on PC and Mac. FOR WINDOWS 7 AND 10 FOR MAC OS. DeX for PC is available on selected devices, and on Windows 7, 10 and versions of Mac OS higher than 10.13. Visit the FAQ page for a full list of device.
The basics
What is Mac OS X?
It’s the software that powers all the day-to-day features on your iMac or MacBook. Every time you click a menu at the top of the screen, open a folder on your desktop, or search for a document on your hard drive, you have the Mac operating system (or “Mac OS”) to thank.
OK, so what does the “X” in “Mac OS X” stand for?
It stands for “10,” as in the Roman numeral—and specifically, it means we’re currently using the tenth major version of the Mac OS. Mac OS X first arrived for desktop Macs way back in 2001, and had been preceded by—you guessed it—Mac OS 9.
“Mavericks” is the latest version of Mac OS X, the software that powers your iMac or MacBook.
What is “Mavericks”?
Over the past dozen years, there have been a series of big updates to Mac OS X, and the latest update, 10.9, is nicknamed “Mavericks.” Previous updates to Mac OS X have been named “Panther,” “Leopard,” “Snow Leopard,” and plain-old “Lion.” Yes, it’s safe to say that Apple has a thing for felines—or had, until OS X Mavericks came around.
Anyway, Mac OS X “Mavericks” (which came out in October 2013) adds more than 200 new features to the Mac operating system, including all-new Maps and iBooks apps that mirror those on the iPhone and iPad; major overhauls for Calendar and the Safari web browser; revamped folder windows that now boast tabs, similar to Safari; and enhanced desktop notifications, including alerts from Mavericks-friendly websites like the New York Times and CNN.
Check out Apple’s rundown of the 200-plus new features in Mavericks right here.
Where to get Mavericks
Mavericks is available for download from the Mac App Store—and yes, it’s free.
The “About This Mac” window will tell you is your Mac is new enough for Mavericks.
Can your Mac handle Mavericks?
Generally speaking, you’ll need an iMac or MacBook Pro that was manufactured no earlier than 2007, or a MacBook circa 2008 or later.
Specific iMac and MacBook models have different requirements, however; click here for more details.
How to install Mavericks
The Mavericks installation process is fairly straightforward, but it will require at least an hour of your time.
Once you grab Mavericks from the Mac App Store, your system will download the update and alert you when it’s ready to begin the installation process. Just follow the prompts (there are only a few), sit back and wait. After a restart or two, your Mac should be all set.
How to back up your Mac
Don’t even thing of updating your Mac’s operating system without backing up your hard drive first. Luckily, backing up your hard drive is easy thanks for a Mac OS X utility called Time Machine; here’s how to use it.
40 must-know Mac tips and tricks
1. 5 gotta-try folder tricks for “Mavericks”
Apple’s just-released (and free) software update for the Mac comes with a series of nifty folder tricks up its sleeves, including the ability to open a folder as a tab in an existing folder window—yes, kinda like you can in a browser.
Want to map a street address directly from Safari? Easy.
2. Map a street address within Safari
Ever stumble across a street address on the web—yes, an actual street address—and wish you could quickly pinpoint it on a map? Usually, you’d just copy and paste the address into Google Maps, but the latest version of the Safari for “Mavericks” saves you a step.
3. Take a screenshot
So, you know how to snap an image of your iPhone’s screen—but what if you want to take a screenshot of your Mac’s desktop? Well, there are actually four ways to snap a screenshot on your Mac, and they’re all just a few keystrokes away.
4. Customize and create keyboard shortcuts
Wish you could snap a screenshot on your Mac by tapping just the F5 key rather than tangling with the SHIFT + COMMAND + 3 keyboard combo? Well, you can.
You can create time-saving “macros” for your street address, job title, phone number, or practically any string of text.
5. Create time-saving, text-replacing “macros”
Mac Os X Stands For
You can create custom, text-replacing “macros” (or shortcuts) on your Mac for your home address, job title, phone number, or other oft-used strings of text.
6. Pick a new alert sound, or install your own
Getting tired of the little “blurp” (or “ding,” or “beep”) sound your Mac makes when it needs your attention? As it turns out, your Mac comes with more than a dozen built-in alert sounds, and you can change the sound whenever you want.
7. Set “Do Not Disturb” mode to turn on (and off) automatically
One my of favorite new features in iOS 7 is the ability to automatically silence iPhone or iPad alerts during the wee hours—and now, thanks to Apple’s recent “Mavericks” update, you can set your Mac to muzzle notifications on a daily (or nightly) basis, too.
Got a DVD-less Mac? You can wireless share the optical drive of any nearby iMac or MacBook.
8. Share a DVD drive over Wi-Fi with Remote Disc
The MacBook Air, the Mac Mini, the new “retina” MacBooks, and other optical drive-less Macs come with a feature called “Remote Disc,” which lets you wirelessly borrow the optical drive of almost any nearby Mac or PC.
9. Get the hang of desktop “spaces” in Mission Control
The Mac’s handy Mission Control feature lets you manage multiple desktop “spaces” at once, each filled with its own assortment of open documents and applications. Sounds confusing, I know. But once you get the hang of it, these additional, virtual desktops can become addicting—and even essential.
10. Why “natural” scrolling feels backwards—and how to turn it off
Does scrolling on your Mac feel backwards to you? Blame Apple’s new “natural” scrolling feature. Luckily, turning it off is a cinch.
Wish you could get your scroll bars back? All you have to do is tweak the right setting.
11. Get your missing scroll bars back

Hey, what happened to the scroll bars on your windows? Don’t worry—you can get them back in a few clicks.
12. 12 handy trackpad gestures you need to try
Want to zoom in on a web page, twirl a snapshot in iPhoto, sneak a peek at the desktop, or look up the definition of a head-scratching word? You can do all that and more with a simple swipe, “pinch,” or tap on your Mac’s trackpad.
13. Turn on your Mac’s speaking clock
Your Mac has a built-in speaking clock that will read you the time every hour, on the hour—or the half hour, or even quarter hour. Here’s how to turn it on.
You can add a new Mission Control desktop with a little help from your mouse.
14. Create a new desktop in Mission Control
Making a new “space” in Mission Control, the essential Mac feature that gives you a bird’s eye view of all your virtual desktops, is easy—if you know where to look.
15. Pin an app to a specific Mission Control desktop
There’s a way to assign an app to a specific desktop in Mission Control, perfect for keeping your programs in their proper “spaces.”
16. Paste your signature into a PDF, no scanner or printer required
Got a contract or some other document that you need to sign and return via email? Just snap a photo of your John Hancock with your Mac’s iSight camera (just about any recent iMac or MacBook should have one), then paste it into the document you need to sign.
17. Make the most of the Mac desktop dock
Thanks to the handy Dock at the bottom of your Mac desktop, your favorite programs, files, and folders are never more than a click away—and if you know where to look, you can make the Dock behave practically any way you want.
“Sticky Keys” make for a clever alternative to playing “Twister” with your fingers.
18. Enable “sticky keys”
Having a tough time maneuvering your fingertips around multi-key combos like SHIFT + ALT + DELETE? The “sticky keys” feature in Mac OS X can help.
19. Take a “Quick Look” at almost any file
Meet “Quick Look,” a handy, built-in Mac tool that lets you take a quick glance at almost any file or folder without committing to firing up a program.
20. 12 Mac keyboard shortcuts you need to know
Switch applications, take a “quick look” at a file, get help, and more, all without touching your Mac’s mouse or trackpad.
21. Give your Mac desktop icons a makeover

Got a jumble of icons cluttering your Mac’s desktop? Are you desktop icons too big—or too small? Wish they would just arrange themselves? Help is here!
22. 5 ways to make the most of the sidebar
Looking to add your own folders to the Mac sidebar? Or perhaps you’d rather make the sidebar bigger, smaller, or just plain gone. Help is here!
Just dip into your Mac’s system settings to make the mouse pointer bigger.
23. Boost the size of the mouse pointer
Want to save both your eyesight and your sanity? Here’s an easy way: by dipping into your system settings and boosting the size of the mouse pointer.
24. Control your desktop with “Hot Corners”
Turn on the Mac’s hot-corner feature to jump to Mission Control, clear your desktop, and more, all with a simple flick of your fingertip.
25. Disable the Caps Lock key
Sick of striking the Caps Lock key by mistake? The good news is that turning off Caps Lock for good on a Mac is easy.
26. Stop programs from launching automatically
How long does it take for your Mac to start up? Too long? Maybe your Mac is trying to launch too many apps when it’s first starting up.
You can zoom your Mac’s display with a few keyboard combinations.
27. Zoom the display
Squinting at your computer screen? You can zoom the entire display on your PC or Mac, a handy trick for anyone with iffy eyesight. Here’s how.
Mac Os Stands For Computers
28. Choose your default web browser
Sick of having Safari pop up when you really wanted another browser, like Chrome or Firefox? There’s single, centralized place on your Mac where you can set your default web browser once and for all.
29. Create a “recent files” folder on your desktop
It’s easy to create a folder on your desktop that’ll display only the files you’ve created or worked with in the past day, week, month … you name it.
30. Set your Mac to automatically start up (or shut down) each day
Want to wake up each morning to a freshly brewed pot of coffee and a fully powered-on Mac? It’s easier than you might think.
31. 16 Mac keyboard shortcuts you need to know
Want to switch applications, empty the trash, search your hard drive, or put your Mac to sleep, all without touching your mouse? Read on for 16 keyboard shortcuts that’ll let you zip around your Mac like a pro.
By tweaking a single setting, you can use your Mac’s function keys without having to press and hold the “Fn” key.
32. Use the function keys without pressing “Fn”
On most Mac keyboards, the function keys—you know, those keys along the top of the keyboard marked “F1,” “F2,” “F3,” and so on—don’t get the luxury of having an entire key to themselves. Want to switch things around so you don’t need to press and hold “fn” to use a function key? No problem.
33. Set multiple “home” or “start” pages for your web browser
Want more than just a single home page to appear when you fire up your web browser in the morning? No problem.
Mac Address Stands For Computer
34. Cram a bunch of files into a single “zip” archive
Got a bunch of little files that you want to send to a friend? Well, you could always drag them all into an email and send them as attachments, but talk about messy. A cleaner, tidier alternative is to take all those little (or not-so-little) files and compress them into an archive—or, to be more specific, a “zip” archive.
Tapping to click takes getting used to, but it’s surprisingly addicting, not to mention easier on your fingers.
35. “Click” the trackpad with a tap
Having a hard time clicking the MacBook’s squishy trackpad? If so, here’s an alternative: setting the Mac trackpad to “click” with a simple tap rather than an actual click.
36. Share files between nearby Macs with AirDrop
Got a file on one Mac that you’d like to send to another Mac just a few feet away? A built-in Mac feature called AirDrop lets you…well, “drop” a file from one Mac onto another.
37. Change the default programs for your files
Annoyed that the Mac’s Preview app, and not Adobe Reader, always gets to open your PDF files? There’s a way to permanently change the “default” program that opens a given type of document.
38. Customize the buttons in program toolbars
Ever wish there were a Print button next to the Reply and Forward buttons in the Mac’s Mail app, or a pair of Zoom buttons on the top of every Safari browser window? Well, here’s the thing: you can add, remove, and rearrange the buttons in the “toolbar” of several familiar Mac programs.
You can set your wallpaper to change at any interval you choose, from once a day to once every 5 seconds.
39. Put your desktop wallpaper on shuffle
Getting tired of the same old wallpaper on your Mac desktop? If so, try this: just set your Mac to shuffle some or all of your favorite desktop wallpaper (or “background”) photos, at any interval you choose.
40. 4 ways to right-click on a Mac trackpad
There are actually several different ways to right-click on the MacBook’s trackpad, which (nowadays, at least) is essentially one big button.
Get more help
Have more questions about Mac OS X, or Mavericks in particular? Click here to ask me directly—and remember, there are no dumb questions.
Related posts:
0 notes
Text
The Top 5 Small Business Marketing Tips for Budget-Minded Business

In regards to running a successful business, marketing is essential. For a small business, marketing often seems like a daunting task - especially when the idea comes to marketing your business on the web.
Many times, budget-minded business owners fear that small business marketing needs to be expensive in order to be effective. Luckily - this isn't true. Here are five simple tips for small business owners who are looking to save dollars, while still running a highly effective online marketing campaign.
1 . Optimize Your Website
There are three simple steps to take so that you can be sure that your website is working for you.
The first is try using a descriptive title for your site as well as keywords and a description that allows search engines and site visitors alike to know what they are going to find when they visit your web page. Once that's taken care of, make sure that you are placing keywords appropriately in the text to your website.
Your keywords should be specific to your products and services, and should be chosen with consideration for the terms prospective customers would probably use when searching with Google or Yahoo or whichever other search engine they use.
Finally, these key phrases should also be used in the alt image tags as they relate to the photos and illustrations that you post to your website.
two . Market Your Website with Articles & Distribute Press Releases
Article marketing is an extremely effective way to draw visitors to your website. By constructing an informative short article that relates to your business, your area of expertise and your keywords, you can show readers a tad bit more of what they'll find from your business - which you can link to in your resource box at the bottom of the article.
Internet press releases are another effective marketing tool. Like conventional press releases that let local newswires pick up a story in regards to new staff member or a new product line, online press release distribution will allow you to get the word out to those who publish internet newsletters or who review products and services like those that you offer.
Both articles and press releases published online generate valuable, relevant inbound links to your website (via the link to your site in your resource box at the end of each article or mass media release). Search engines place a great amount of value on the number of inbound links you have to your site, so this is an excellent way of building popularity along with the search engines, as well as your human customers.
Both article marketing and distributing press releases will enable you to establish yourself as an expert and unfortunately your company as a source for products or services. Each is effective, and often, submission to article directories is free - that's right, 100 % free marketing for your business, all it takes is a little bit of time.
3. Start a Blog
It's a common statement when it comes to Website marketing: content is king. A blog - short for a weblog - allows you to create fresh content at usual intervals, driving traffic and search engines to your website.
Like article marketing and press release distribution, having a blog allows you to establish ones expertise about the products and services that your small business offers. Unlike article marketing and press release distribution, however , a blog allows you to will carry on a dialog with your current and prospective customers.
Your blog works like search engine magic for your website. By relating your blog to your website, you draw the search engines to your website. Your site will rank higher and your customers will have a much easier time period finding your site.
4. Commit to a Link Building Campaign and Submit Your Site to Directories and Search Engines
As a private business owner building and promoting your business on the web, having quality inbound links is important. Links allow your site to be found by those who see similar sites looking for the products and services that your company offers.
Links - like those at the end of your article content and press releases, like those that link back to individual products or services from within your blog, and like those from some others who have purchased from you in the past - help to improve your site's search engine rank.
By submitting your business' internet site to relevant directories and even to industry-specific - niche - search engines, you'll begin to generate additional links. Moreover, however , these niche directories are increasingly used by those looking for very specific sites. Having your listing present probably will make it even more likely that your prospective customers will find your page; that makes them a particularly valuable marketing tool for your company, and, again, it's often free to submit your site.
5. Look for Joint Ventures with Other Like-Minded Business People
It's not odd for small businesses to work together - a movie theater and a restaurant offering coupons for a discount if you spend that evening at both places. In my past life working with large corporations I realized that the largest companies increase by means of joint ventures all the time. However , many small businesses do not look into joint ventures when it comes to marketing their businesses.
Do you find it always easy to find the right joint venture for marketing your business? No, of course not. But it is possible to find like-minded business owners in whose customers could benefit from your products or services just as your customers could benefit from those that they offer.
As a result, both small businesses will be far better able to extend their outreach and develop a wider customer base. If you are going to enter into a joint venture, search for agencies with similar goals and a similar customer base but a different type of product or service. Stay on the lookout, keep a great open mind and you just might find the perfect opportunity to market your business to a new audience.
A perfect example of this principle can be a recent joint venture I did with a company who specializes in teaching business credit skills to small business owners. This company markets on the same clients that I wish to add to my customer list, but they offer a completely different service. By working together, people were able to market our services to each other's mailing lists, resulting in both of us attracting new customers we would not have possessed otherwise. The great part about this joint venture was that there was no out-of-pocket cost to either of us - simply our time and a little creativity in coming up with suitable promotions to each other's lists!
Taking your business with the web does not need to be difficult, nor does it need to be expensive. By taking a creative approach, small business owners on a tight marketing spending plan will be able to find traffic and increase their customer base.
Focus on reaching the search engines: use the right keywords and have tried it appropriately. Let people know that you have the information they need with articles and be sure to get the word out by disbursing press releases. Interact with your customers with a high quality blog, and focus on getting great links. Lastly, take advantage of partnerships with like-minded business owners.
Marketing your small business website may require a lot of hard work, but it doesn't require a lot of money - oftentimes, the best results are produced the most creative (not the most expensive) solutions.
0 notes
Text
Back in November 2019, I reviewed DesignCap, an online tool allowing you to create professional-looking visual material for social media and webpages.
Six months later, I still use DesignCap occasionally, when I need to create stylish visuals quickly.
This update details several new templates and offers by DesignCap, which offer more possibilities to the users. Of special interest to me were infographics and charts, which were recently added to DesignCap’s options.
Whether you are a blogger, content writer, or non-fiction writer, you sometimes need to include statistics, sequence of steps, charts, or even a geographical map in your work.
DesignCap has made all these really easy!
Before I continue with my updated review, please note that I am not in any way affiliated with DesignCap. However, I did ask them to give my readers 3 free subscriptions when I review their changes. Five of my readers won a free subscription last time—just leave me a comment and maybe it will be your turn!
Infographics
Anyone who creates web content has at some point wished they could add an exciting, elegant, self-explanatory infographic in their post. Creating such an infographic normally requires professional graphic design skills, unless you give DesignCap a chance, and then half of your work is already done (but, as I will explain, only half).
DesignCap has a large collection of infographic templates. You can choose from over 150 templates for the look and feel that suits you best.
Colors, fonts, backgrounds, sequences, symbols—everything is coordinated for a professional look. All templates have “real” content, so you can judge how you could use them with your data and full texts.
Even if you can’t find the exact template that would be a perfect fit, it is certain you can get lots of ideas and inspiration by browsing. You will certainly end up with a few creative ideas on how to proceed and create your infographic, even if you need to modify DesignCap’s template.
For example, let’s say that you need an infographic on the history of typography. A quick browsing through the available templates can give you an idea: do a timeline presentation. Here are three DesignCap templates that you could use for this purpose:
Once you choose your template, it is easy to change titles, text, colors, backgrounds, symbols, photos, etc. to make the infographic fit your needs. The tool has a drag and drop logic and is pretty intuitive to use.
DesignCap also includes an extensive library of photos, shapes, and backgrounds. This is very handy given that you will probably need to modify some of the images and symbols of the template. The best way to find photos and clipart is to do a search in the library.
If none of their existing assets suits you, you can upload photos and symbols of your own. Uploading is very easy.
And if you don’t feel confident about handling photos and symbols, the tool has simple templates, like the first one, that are generic enough for any use and are mostly based on color and font combinations.
Charts
I usually create charts in Microsoft Excel, but this requires that:
You know how to use the tool,
You need to start from scratch, as there are no real templates available,
You then need to turn your charts into jpeg or png pictures to use them.
Quite some effort—and I know many people who are not familiar with Microsoft Excel.
DesignCap is a great solution if you need to create simple, professional-looking charts, with intricate titles, backgrounds, and a cool design approach, without knowing much about charts and statistics.
I can tell you, even if you know how to create your pie chart or bar chart quickly in Microsoft Excel, you still need some mean graphic design skills to produce something as attractive as the following:
Once you select your template, it is surprisingly easy to add your own data and see the graphs automatically transform. The tool provides you with ready-made, easy-to-update tables, so, as long as you have your data ready in rows and columns, your chart can be ready in minutes.
Here is what the chart editor looks like:
You can either stick to the template or use the editor’s more complex options to change your chart type, modify columns and rows, etc. The chart is modified automatically on the left part of the editor, so you can see immediately how it turns out. Once you select the UPDATE button at the top right of the screen, the new chart will automatically take its designated place on the template.
So, here is what I could easily do in 10 minutes, starting with the above cow template (all numbers are fictitious):
Maps
For the end, I have kept my all-time favorite new DesignCap content: maps.
Have you ever needed to add maps to your posts? For example, where is the best place for summer holidays? (Greece, of course). In which State can find the most bicycle riders? What’s the medium age per State?
How great is it to illustrate the answers with an interactive map? Absolutely great! Until now, however, I had never found an easy way to produce a map to my specifications, color it the way I need it to be colored, make one country stand out, add data to the map, etc.
With DesignCap, you get a Map Editor in the Charts section, which lets you create a map, either for a whole continent, or a specific country. Here is what it looks like:
To create your map, you simply select the Edit button. Then you can easily change the color of the map, the color of one or more regions / states / countries, or can add data for the interactive legend that appears when you browse over the map.
And that’s it. You have a customized, accurate map for your post, article, or book!
My final review
DesignCap is getting better and better. As a tool, it is intuitive to use, and the menus are easy to familiarize with. The stock libraries and their content are also regularly updated and offer a vast choice.
Non-fiction authors, bloggers, and content creators have an extensive free tool to create various visual elements for their work.
I really appreciate that DesignCap has found a way to make easy things that are usually complicated, like infographics, charts, and maps. As they say on their website:
Everyone can design like a pro without a steep learning curve. No skill needed.
You can give the tool a try with their free package, but this means that some of their most beautiful and interesting content is out of reach. So, if you are creating visual content regularly, maybe it is worth taking a paid subscription.
DesignCap offers two paid packages, one for $4.99 a month and one for $5.99 a month. Their only difference is that with the more expensive package you can upload and also save up to 1,000 designs, while the less expensive one saves up to 100 designs. The only drawback is that Paypal is not an acceptable payment method.
And, as I said at the start, leave me a comment for a chance to be one of three visitors who will win a free subscription!
[tweetthis]DesignCap Updated Review[/tweetthis]
DesignCap Updated Review: Infographics, Maps, and More Back in November 2019, I reviewed DesignCap, an online tool allowing you to create professional-looking visual material for social media and webpages.
0 notes
Text
How To Write The Perfect Blog Post
Do you often look at other people’s blogs and go, “Wow! I wish I could write a blog like that”?
Now you don’t have to wonder anymore. I’ve researched and pulled together a blog post template that will not only help you write faster and more effectively, but will help you rank higher in search results and get more views.
Here’s the ultimate step-by-step guide to writing a perfect post, so you can get the most out of every blog you create:
Step 1: Pick Your Idea
Before you can even start writing your blog, you need to figure out the topic or idea you want to cover. There are many ways to do this. You can start by using free keyword search tools like KeywordTool.io, to find keywords relevant for the topic of your choice.
Use these keywords to help you narrow your research. Read high ranking articles and start noting down opportunities where you can potentially add fresh perspectives to fill in the gaps.
While great blogs have original ideas, it doesn’t mean you can’t blog about a topic or idea that has already been covered. Take that post that has inspired you and make it into your own by improving upon the author’s idea or by adding new and fresh insights.
Step 2: Create An Attention-Grabbing Headline
The headline is the first thing readers will see, and is what they’ll use to decide whether they will read your post or not. Your title needs to grab people’s attention immediately and make them feel compelled to continue reading. Get to the problem or question that your blog will answer or solve for your readers, so they know exactly what they can expect when they click through.
“How,” “Why” and “List” titles are popular title formats to get a reader’s attention. Here are some helpful tips to create an effective headline. You may also want to check out this blog from On Blast Blog, which goes through different headline formats in detail.
Step 3: Write The Body Copy
Once you’ve created a compelling title, it’s time to start writing the meat of your blog. Here are some key pointers to keep in mind as you write:
Goal
Before you start writing, you should ask yourself how the post is supposed to benefit your readers. Have a clear goal in mind, and state the value your blog will bring to your readers early on in your post, to provide them with a roadmap for the rest of the post.
Length
How long should your blog be? If you need an exact number, aim for at least 1-2,000 words. The length of your blog matters for many reasons, including search engine optimization and content quality. The average content length that ranks in the top ten search results on Google has more than 2,000 words, so length is important.
This may seem like a lot at first, but you’d be surprised how easy it is once you’ve done your research and start writing.
With that said, the most important thing is that your blog needs to be meaty and informative. Thousands of words won’t mean anything if it is just complete fluff and has no substance.
Accessibility
As you are writing, think about how you can make your blog more scannable for your readers. People on average only read approximately 28% of the words in a post during an average page visit, so your readers should be able to skim and find a key point in six seconds or less.
Keep your paragraphs short and use subheadings, bullets, number lists, and bold text to break up your copy. If your blog is just one big block of text, your readers may give up and stop reading.
Credibility
Regardless of the topic you write about, always back up your blog with real data and sources. Link to articles where you’ve developed an idea or thought in more detail. Sharing your research will help build trust and credibility.
Conversation
When you finish writing what you want to say, don’t forget to encourage comments and opinions from your readers at the end. Interaction is key to blogging success, so you want to leave it open for discussions.
Call-to-Action
You’re writing your blog for a reason. What do you want your readers to do for you after reading your blog? Provide a clear, easy call-to-action at the end of your post, whether that’s downloading a free e-book, subscribe to your newsletter, etc.
Step 4: Add Visual Elements
Now that you’ve finished writing, it’s time to work on the visual elements to spice up your blog. There are a couple of things you can do:
Images
Pictures are a great way to add visual interest and SEO quality to your blog. Choose photos that are relevant and of good quality. Use editing programs to resize images so they load faster on a page. Don’t forget to add image sources, as well as titles and alt-text so Google knows they are images – this helps with SEO.
Font & Color
Choose a theme or layout that is simple and isn’t too distracting. The same goes for colors and fonts. They can be used when you want to attract the reader’s eye and to emphasize something, but don’t overdo it.
Custom Images & Infographics
If you want something unique, there are lots of tools out there like Canva and Visme that you can use to make your own images and infographics for free or for very little cost.
Step 5: Promote Your Blog
You’ve just published your blog, so you’re all done now, right? Not quite! Promotion is just as important as writing a great post. It won’t matter how awesome your blog is if no one reads or knows about it. Here are some ways to get your blog out:
Email
Reach out to people who you referenced in your blog, as well as other authors who write about similar topics, and let them know that you’ve published a post. Email your subscribers as well and notify them of your new post.
Social Media
Promote your new blog via all your social channels, including Twitter, Facebook, LinkedIn, and anywhere else you’re on.
Influencer Outreach
Share your blog with influencers who you’ve established a relationship with to help amplify your content. Here are some ways to get start with engaging influencers.
Experiment
Test with your blog titles, length and publishing time, and see what’s working and isn’t. Testing regularly will give you insights into what you’re doing right and what can be improved to make your future blogs more successful.
Ads
You can also increase your reach with paid social. Here are some simple yet effective promotion tips for Facebook, Twitter, LinkedIn, Pinterest and Instagram.
Step 6: Optimize For SEO
For those who are not familiar with SEO, here are six simple tips to help you optimize your blogs. For those who are interested in learning more, here are six advanced techniques to take your SEO optimization to the next level:
Keyword Phrases
Keywords are the building blocks for SEO-friendly content. When you use keywords strategically within your blog, title, headers, images, URL, etc., you are making your blogs more visible and relevant to search engines, which ultimately helps your posts rank higher in search results.
Don’t go overboard with your keyword though, this becomes “keyword stuffing” and Google will treat it as spam.
Term Frequency-Inverse Document Frequency (TF-IDF)
TF-IDF is how Google indexes all web pages. It measures the importance of a certain keyword phrase by comparing it to the frequency of the term in a larger set of documents. The best terms to use throughout your blog are going to be related to your keyword phrase.
For example, say your keyword phrase is “baking cookbook recipes.” Generic words like “the,” “in,” and “that” will have a very low TF-IDF. On the other hand, words like “mixing” or “flour” are used less frequently, so when you use them they generate a higher TF-IDF.
TF-IDF by itself isn’t enough to give you a big SEO boost, but when combined with other techniques mentioned here TF-IDF will become extremely helpful.
Semantic Distance and Term Associations
Semantic distance refers to the relationships between certain words and phrases within your blog. It takes into account how certain terms connect within sentences and paragraphs by measuring the distance between those terms.
This is how search engines determine whether two things are connected or not – the closer the terms are semantically, the closer the terms may be related. Phrases located in the same block of text have a closer relationship than terms that are separated by paragraphs.
Co-Occurrence and Phrase Based Indexing
Phase-based indexing refers to the way search engines index and rank pages based on complete phrases and the relevance of those phrases. Search engines use the concept of co-occurrence to predict related terms.
For example, if your topic search is “US President,” this phrase likely co-occurs with other phrases like “White House” and “Barack Obama.”
The key here is to stay on the topic and continue to use keyword phrases that are closely related to your original key phrase. Don’t branch out so far that the topic is something completely different, as this will lower the relevance of your page.
Synonyms and Close Variants
With billions of searches conducted every day, search engines have an expansive bank of information to determine what you actually mean when you type your queries into the search box. Search engines have countless synonyms, close variants and related topics for billions of phrases, which allows them to match content related to your search, even when different words are used.
For example, if you search cat pics, this can also mean:
Pictures of cats
Cat photos
Cat pictures
Cat photographs
The important takeaway here is that, when writing your blog, you should avoid using the same keywords over and over again and use natural language and variations instead. This enriches your content, and more importantly improves your chances of being indexed and ranked higher for a specific keyword search.
Entity Salience
Entity salience is an approach to keyword techniques that goes beyond traditional tactics, such as TF-IDF, to find relevant, related terms on a page by using known relationships between entities.
An entity refers to anything within the page that is well-defined and distinct. The stronger an entity is to other entities closely related to it, the more significant it becomes in that page.
Moz has a great example to explain entity salience. In a post that talks about Iron Man, Tony Stark and Science Fiction, the phrase “Marvel Comics” has a strong entity relationship to all of these topics. Even if Marvel Comics is only mentioned once, it’s likely significant in the post.
“Cinerama,” on the other hand, appeared several times throughout the article since the movie Iron Man was shown there. Even though the term appeared multiple times, it has weaker entity relationships to the other terms, so it likely isn’t as significant as the phrase “Marvel Comics” is.
And there you have it! Now that you’ve learned the essential elements of a perfect blog post, you’re ready to start creating some amazing content!
Do you have any other blogging or SEO tips? Please share them below!
Image Source
Are you interested in engaging and converting new customer for your business? Contact me here and let’s talk about how we can help.
The post How To Write The Perfect Blog Post appeared first on Marketing Insider Group.
How To Write The Perfect Blog Post published first on http://rssmix.com/u/11592782/rss.xml
0 notes
Text
Bitcoin Goes Crash, Now What?
New Post has been published on https://cryptnus.com/2018/12/bitcoin-goes-crash-now-what/
Bitcoin Goes Crash, Now What?
The bitcoin price has fallen out of bed as I predicted in an article I wrote on November 15 (see Crash: Bitcoin And The Stock Market On The Brink).
The bottom is falling out of bitcoin and crypto looks like it is quickly heading for the final crescendo I’ve been waiting for. I should add that normally these matters take a lot longer than I anticipate but timing remains the nearly impossible skill we all wish we had.
I’m still holding out for $2,500.
[Ed note: Investing in cryptocoins or tokens is highly speculative and the market is largely unregulated. Anyone considering it should be prepared to lose their entire investment.]
This was the set up, I wrote about here at the beginning of October.
I said this uncanny tightening of range would lead to a big break out to the high or low and that whichever direction would be a signal and the trade was to jump on that trend:
The tightening range in the bitcoin priceCredit: ADVFN
This is the chart I drew you in the summer of target levels to the downside:
My predicted target levels for bitcoinCredit: ADVFN
So here we are today and I must say bitcoin stuck at the $5,500 level for a lot longer than I expected:
What actually happened to the bitcoin priceCredit: ADVFN
I’m still hoping for a buying opportunity at around $2,500 and while I really don’t expect to see $1,000, it could happen.
So much for yesterday, what about tomorrow?
The call you have to make is, does the current generation of cryptocurrencies–not tokens, but bitcoin-style minable, distributed, trustless coins–have a future or not. If they don’t, then they will go to zero, if they do then they will ultimately go to the much-promised moon.
I believe the latter although it must be said that a lot of countries are slowly but surely outlawing many aspects of them. However, I think that like the internet, cryptocurrencies cannot be erased even in near-totalitarian states. As such, the limited supply, big brands like bitcoin will recover like the denizens of the dotcom crash and ascend to great heights.
For me this crash is a buying opportunity, it’s just a matter of timing it as best we can.
I have been buying since the initial crash at about $5,000 but only tiny amounts, but I will start buying properly below $4,000, then more below $3,000 and finally I may decide to do a splurge at around $1,000 but at that level even my faith will be quavering a little.
While it might seem I’m a pretty good predictor of the market prices I prefer to play the markets as a zone of probabilities. Probabilities are that bitcoin will see $100,000 a coin one day but fall further before it sees a bottom. Steadily acquiring coins is good, but getting coins cheaper is better.
Most traders can’t abide that kind of woolly thinking, but I feel we have a woolly sense of the future so we should buy and sell in a woolly hesitant fashion to get the sort of solid average we want. Buy around the bottom, sell around the top is the best anyone can do.
Market predictions are not fate.
So what now?
I think crypto will continue to fall. There might be a period of sideways trading at these levels, but another drop should develop.
A dramatic rally is possible but that should be telegraphed by a bump in general altcoin fiat mining rewards and there are none in sight at the moment.
Like the precious metal stackers, I’m slowly staking bitcoin and that pace will quicken as it falls.
So you can imagine I’m keen for more bear market moves and I’m eagerly awaiting them.
I may never get my $2,500 bottom because other altcoins are already close or at what looks like theirs.
Take ethereum, which I predicted at the beginning of October would see $100 a coin here.
My prediction for ethereumCredit: ADVFN
It is now here:
What actually happened to the ethereum priceCredit: ADVFN
That is just a few hops away from a bottom.
Yet is doesn’t do to overanalyze things.
Crypto and equities are crashing because ‘fiat,’ old fashioned money, is being sucked out of the system by the Federal Reserve’s reverse-QE. To top that, the global order is suddenly wobbling on its axis with Trump’s ‘war on trade’ and the increasing ‘volatility’ of governance not just in the U.S. but around the globe.
A new era is ahead, and it looks like it is going to get kicked off with a financial market reset.
What to do?
Buy the crash.
But try not to ride too much of it down and don’t be in a hurry to get back in.
Be among the first to know the most important crypto and blockchain news and information with Forbes Crypto Confidential, a free weekly eletter. Sign up now.
Disclosure: I own bitcoin, ethereum and many other altcoins.
—-
Clem Chambers is the CEO of private investors website ADVFN.com and author of Be Rich, The Game in Wall Street and Trading Cryptocurrencies: A Beginner’s Guide.
0 notes
Text
Local Seo Services
I have spoken to hundreds, otherwise a large number of clients regarding their websites, their visitors and also the vital outcomes of their websites' traffic and elevated profitability. Over these discussions, I have been aware of many insider tales about past encounters with formerly hired search engine optimization experts and that i are only able to wish which i documented the feedback that I have received during the last dozen years, but I really didn't know these particular conversations could have been so surprising, so revealing and thus frightening that Never imagined to do this. Sure might have designed for a spooky and spine-chilling Halloween story... speculate it can't happen to be fiction, it might have bordered at risk of witnessing a genuine-existence Horror and also, since I've not bought the "Halloween chills" binder on my small liability insurance I'll save that story for an additional day... For more information on the best affordable local seo services, visit our website today!
Rather today I try to educate a factor or more about search engine optimization, contributing to what search engine optimization experts especially do not want you to definitely know. I'll empower you to ensure that consequently you can to achieve success. If you possess time for you to learn and also to execute, you'll be able to consider these steps to increase your targeted visitors not to mention your revenue consequently. You might be unable to get it done as quickly or as effectively like a search engine optimization expert which has experience, but a minimum of it'll start growing your revenue to be able to begin to realize the need for search engine optimization services and decide regarding when you wish to purchase an experts skillset and simultaneously possess a better knowledge of what they'll be delivering.
Why shall we be held carrying this out? Why reveal what SEO experts will not let you know? Since I can! Since I am 100% positive about my abilities and since I understand that it requires many years to gain the experience and skills which i have, and when you are perfectly able to performing the steps that I'll outline, you'll almost always take more time and lose considerably more income than you thought possible. I'm able to hear all of you now "But how do i be taking a loss if I am not spending?" The answer is easy, you are taking a loss since your competitors keep growing and reap the rewards when you experiment and tweak your SEO efforts so that they can gain greater search engine ranking.
So then... now let us get down towards the details. Please be aware that my article won't cover the technical instructions, if you're not really acquainted with them, you need to likely seek an expert because what is a couple of days of labor, is more prone to exponentiate into one or two weeks of labor and when done wrong could do more damage than good.
What's search engine optimization?
Search engine optimization (generally known as SEO) may be the optimization of the website's layout, content and connections to improve it's ranking within search engines. Each one of these serves a particular purpose:
Layout
Most companies offer several product or service and target various sorts of clients. To be able to reap optimal rewards from SEO, it's vital to promote each product or service clearly. It is also important to think about the motivations for sale from all of your target census simultaneously.
Content
After carefully thinking about and figuring out your website's optimal layout, you need to make sure that each page targets probably the most relevant keywords based on what that demographic will probably use when looking for your product or service or services.
Connections
Connections describes the number of websites connect to you. These links should be one-way links (not reciprocal) and should constitute moderate to top quality (or at the minimum not really a website known as a link farm or perhaps a junk e-mail haven). Think about the networking world, it's whom you know, and also the same pertains to websites. If your high-traffic, trustworthy company links for your website, zinc heightens your "value" to search engines much like when you are in a networking event and therefore are brought to a friend by someone who holds authority and respect locally.
Where will i start?
As I could never educate you all things in one article, here is a quick little exercise to help you get thinking, to whet your appetite and that will help you determine if you wish to feel the motions and then try to improve your own search engine rank, or maybe you'd like to hire another person to get it done. You will find 4 steps to complete. Let's imagine, I'll make use of a local farm:
Step 1: Identify supporting information
- What exactly are my products/services?
o Days
§ Jumping pillows
§ Pumpkin patch hayride
§ Children's discovery barn
§ Cedar plank mazes
§...etc.
o Nights
§ Haunted hayride
§ Barn of terror
§ Stalkers
§ Gathering from the Ghouls
§...etc.
- What exactly are my target census and just what are their primary motivations?
o Teenagers/youthful adults
§ Thrills, fear, dates
o Children/parents*
§ Entertainment, group activities, shows, togetherness
o Weddings
§ Unique and memorable experience, unforgettable photos, romance of the nation setting
o Corporate
§ Team development, showing appreciation, marketing
* To obtain children to sign up, you have to captivate their interest but simultaneously additionally you must convince the mother and father that it's wise. Marketing to children is definitely a 2-dimensional challenge both child and also the parent should be considered.
Step 2: Plan layout
- Determine the association of merchandiseOrservices for their target census
- Determine for a moment layout your website mainly based on products/services or target census.
Step 3: Plan content
- Research most looked keywords (use Google Analytics, it'll try taking some learning but it is worthwhile)
- Start optimizing your content (both visible and hidden)
o Review content and revise based on target(s) based on researched keywords (Please be aware: this is often challenging because you will need to support the benefit of your copy, but simultaneously may wish to reap the rewards of search engine enhanced text. Spend some time and tread carefully, hurrying this is often disastrous towards the marketing worth of your copy).
o Make sure that "hidden" content is enhanced based on optimal search keywords (e.g. titles on pages, image "alts", link "titles", etc.)
o Make sure that your meta data are enhanced for users (the wording utilized in your Meta data are usually utilized as the outline in search results, more desirable text can certainly triple or quadruple targeted visitors!)
o Determine if you wish to separate your content by product/service or by audience. Outline mix-sell possibilities and be sure that they're linked together
Step 4: Plan connections
- Probably the most main reasons of the search result ranking is calculated based on who (and just how) websites connect to yours to be able to determine your rank in search engines. One-way (non reciprocal links) are essential and making certain the keywords used inside the links are selected carefully to increase your rank will go a lengthy way. However, being associated with from websites that carry negative reputations can penalize you and also potentially blacklist you against search results. Don't hire SEO "experts" that can't provide testimonials that you could really verify when they use techniques not sanctioned by search engines they are able to do more damage than good! Mybest advice here's to spend some time, write some quality articles (which include a hyperlink or more to your site) and publish it on relevant article websites communicate and supply value to the people in forums which are highly relevant to your industry, making certain that the forum signature always backlinks for your website and incorperate your company to industry listing websites that are geographically and/or industry relevant. Should you only add 5-6 links per week you'll rapidly check this out exercise alone leading to your rank growing methodologically so that as your momentum picks up you will be unstoppable!
So, what is the big secret that many search engine optimization "experts" do not want me to understand?
It's the suggestions above. Knowing how truly complex and just how much work there's to complete when optimizing a website for greater ranks in search engines, you'll understand that there is no good way to automate this like a service. Most SEO "experts" only will target a couple of keywords based on the content that's already in your site, design of the site will not be enhanced and when they provide the services identified within the fourth step above, they'll publish towards the same websites, directories and forums every time they provide the service to some client. They have automated it to optimize their profits and keep your cost down, at the fee for supplying a search engine optimization service that could improve your traffic although not your profits since they're not targeting your census appropriately.
What's using that you simply say? Well you are the same as the hundreds or even a large number of clients who've stated that in my experience already. Top quality search engine optimization that gives lasting results needs time to work, persistence and continuing dedication if your customers cannot help you find, or they find your competitor first - what's the true cost for your business? Solve these questions . answer this, solve these questions . change the way forward for your company, be positive and do something positive about your search engine ranking today. Invest a little time every day, trust me, it'll pay off in rewards which are faster compounding and much more consistent than purchasing stocks, property or other asset on the planet. Want to know more about the local business seo? Visit our website for more information.
Conclusion
Hopefully you discover this short article informative and helpful. While I have only touched the beginning, let me provide you with a general understanding to be able to choose the next steps. If you opt to attempt your personal search engine optimization, i then highly recommend you take a look at Amazon . com (or perhaps your favorite online book shop) and pick up a magazine or more that's highly regarded and it has been printed in the last 6 several weeks to make sure that the techniques trained continue to be current. First and foremost, let me make sure that you avoid almost anything to hurt your search engine positioning by looking into making an error inside your efforts. A lot of important training apply here but the most crucial the first is to spend some time and still do it.
0 notes
Text
These Windows 10 Fall Creators Update features could hurt your creativity
If you’re a creative professional using one of the awesome creative-friendly Windows 10 tools like the Surface Pro, Surface Studio, Surface Book, Wacom Mobile Studio Pro, or a Cintiq enabled workstation, you’re probably not part of the Windows Insiders program since you need a reliable production machine to get your work done. That means Microsoft doesn’t get as much input from creative pros when they add features to Windows 10 that will probably have a negative effect on your workflow. Here are a few things coming to the Windows 10 Fall Creators update that will probably cause problems if they ship as is. Of course, the Fall Creators Update is still in progress so some of these things may change (one of them was just fixed) and of course there are lots of other excellent new features coming in the Fall Creators Update as well, but we’ll talk about those when it’s fully released.
Pen scrolling/panning
For some reason, Microsoft totally changed the behavior of the “Windows Ink” enabled pens in scroll-able pages and lists. No longer does pressing & dragging allow you to manipulate selections or objects like you would expect and like it has since Windows XP Tablet PC Edition in 2002… now that action will scroll or pan the list. This “feature” breaks many user interaction conventions that users rely on.
At least in its current incarnation, you can no longer even grab scroll-bars with the pen in order to drag the position to a specific point. Albeit, build 16241 actually returns scroll-bar functionality in some applications such as Edge and Win 32 programs, but certainly not all.
The new pen scrolling feature also removes your ability to easily drag selections around groups of files in the file explorer. You can no longer tap and drag files in order to move or copy them to other locations either.
In programs like Outlook, it’s now impossible to tap and drag an appointment to change its time slot. It’s no longer possible to tap and drag a live tile in the start menu to rearrange it or drop it into a folder. It’s no longer possible to tap and drag quick action buttons in the settings to rearrange them. Selecting text in web pages or emails or Office documents is much more difficult now as well. Normal people won’t even be able to figure it out. Trying to select partial URLs in the web browser just moves the text side to side instead. Basically all tap & drag functions across the operating system and programs are completely broken.
This is how difficult it is to select stuff using a pen now in Windows 10 Fall Creators Update 16251 #WindowsInsiders #UXFail pic.twitter.com/Q2VdhT0vEO
— Adam Z Lein (@adamzea) July 27, 2017
That goes for some graphics programs too. The new pen scrolling feature doesn’t necessarily care if you have a painting/drawing tool selected, if you tap and drag it’s probably going to scroll that document (See feedback hub post). Some programs are able to ignore the pen scrolling features in some areas, making for a very inconsistent and confusing user experience. For example, Excel & Powerpoint ignore the pen scrolling feature but Word does not. Sometimes you can hold the right-click barrel button on a pen in order to bypass the pen scrolling awfulness, but not all pens have that button.
For example, OneNote’s UWP app kind of does pen scrolling if you tap & drag in the scroll-bar area, but if you tap & drag in the page area… instead of scrolling like all the other scroll-able pages do with this new pen scrolling feature… automatic inking kicks in and you’re scribbling ink on that page instead of scrolling. Totally unintuitive, inconsistent, and frustrating! Hopefully we’ll see an off switch for this behavior before it ships.
Okay, fine… the reason Microsoft added this pen scrolling feature is because they wanted to reduce the amount of hunting and pecking you need to do in order to access scroll-bars with the pen. Also maybe to copy some Chromebook that had this feature. Anyway, hunting & pecking is what the pen was made for. It’s a precision instrument meant to control points that are smaller than our fingers. We invented pens so we could be more civilized than the cavemen using their fingers to paint on cave walls. The actual problem with Windows 10 scroll-bars is their inconsistency. In the Windows 95 days, I could go into the settings and define the width and colors of the scroll-bars on a system level and they’d all be consistently usable. With Windows 8+, those types of theme customizations are no longer possible. In fact, many scroll-bar designs aren’t even consistent within the same app (*cough*Outlook*cough*). Some are thin, some are normal, some disappear. If they were all the same and stayed visible all the time, pointing at them with the pen would be a lot easier.
Automatic inking
Okay, you probably already have this feature in the regular Creators Update, but it’s still there in the fall update and it’s still awful. Automatic inking is when the software recognizes that you’re holding a pen and automatically switches to an inking tool even if you don’t want to use it for inking. In the Photos app, that means all of the other UI elements disappear every time you try to press a button with the pen and it switches to writing on the photo instead. No matter how often you close the obtrusive inking panel, it comes right back as soon as you move the pen, thus making it impossible to use the app without putting down the pen and switching to something lesser like a mouse, track-pad, or touchscreen.
The Maps app has a similar problem. Intuitively if I tap & drag with the pen I should be able to pan the map just like I would with a finger or mouse or track-pad or any other pointing device, right? With automatic inking, it writes on the map instead. In fact, there’s no way to select a panning tool with your pen if you’d like to see other parts of the map. You’ll have to plug in a mouse or turn on the touch screen in order to do that (many professional graphics tablets offer off switches for the touch features so you can do everything with the pen.) There’s no way to disable this undesirable automatic inking feature either, unless your tablet drivers have the ability to disable “Windows Ink” completely (which you certainly might consider doing). Also see “Don’t use pen for inking until I manually choose an inking tool” in the Feedback Hub. The simple solution here should obviously be to let the user invoke inking tools when the user chooses to do so by pressing the “Ink Toolbar” button that already exists.
OneNote’s UWP app automatic inking feature always switches to a writing tool even if you’ve tapped on the text selection tool first. That means you can’t select text with the accuracy of a stylus, which is extremely frustrating. Luckily the full OneNote x86 program (also free, but not available in the Windows Store) does have a setting to turn off the automatic inking annoyance so that you can manually switch between selection tools and writing tools as the need arises (as it should be.) Granted the automatic inking feature shouldn’t affect your real professional grade programs too much though.
Missing keys on the keyboard
The regular touch keyboard is missing lots of important keys.
At the time of writing this, Microsoft was originally going to remove the “standard layout” touch keyboard from the Windows 10 Creators Update. Luckily with the just-released build 16251, the proper keys have returned in a “Standard layout” keyboard option (see feedback hub post.) So we can probably cross this one off the list already as the Windows Insiders’ Feedback has already worked, but I’ll still mention the importance of a full keyboard layout on a tablet.
If you have a job and know how to work efficiently, you know you need keyboard shortcuts and especially modifier keys. The Alt key is essential for quickly accessing keyboard mnemonics or modifying editing tools as you work. The arrow keys and function keys are very important for shortcuts and command line controls as well. As a graphic artist, I often use the touch keyboard to access tools and modifiers instead of the program’s native UI because the touch keyboard has bigger touch-friendly buttons. Having the standard layout touch keyboard visible also gives you access to system functions via keyboard shortcuts that are often faster to get to than using the regular GUI.
There is also a normal “on screen keyboard” that can be launched as an app from the accessibility settings, but it isn’t an option within the touch keyboard task-bar button, it can’t be docked, and it doesn’t automatically appear when you activate an input field.
While we did already get the standard touch keyboard back, the implementation of software input methods on Windows 10 still has a lot of problems.
The Touch Keyboard input method should have a pop-up menu.
I really wish Microsoft would go back to what they had for on-screen software input methods back in the days of Windows CE and Pocket PCs around the turn of the century. I little pop-up arrow menu next to the input method icon would instantly let you choose and switch between input methods like handwriting recognition, character recognizer, Qwerty keyboards, etc. It was even extensible with 3rd party keyboards like the awesome Fitaly, Swype, T9 keyboards, etc. That’s what Windows 10 needs instead of these small handful of input methods in the taskbar, plus the hidden accessibility keyboard, plus 4 different versions of the emoji keyboard, and a hugely inconsistent/ambiguous user interface for them. Microsoft needs to bring back the ability to resize input panels too. With the recent build release, they made the swipe keyboard bigger, but really the swipe keyboard should be the same as the touch keyboard except with a user-resizable handlebar on the edges (just like all other windows) so that we can tap & drag to make it the dimensions we want.
System Image Backups are going away soon
This one isn’t directly related to creativity, but as a professional working with Windows, it’s a really good idea to keep at least one full system image backup of your computer in a known-good state. This way you can revert to that state whenever you want. Full system image restores rewrite the whole hard disk with what was there when it was good thus giving you a much more reliable restore compared to the system restore utility or uninstall options. It’s really good for when automatic updates go bad. For example, if you accidentally installed the Windows 10 Fall Creators update and then realized that you couldn’t work with the new pen scrolling feature or missing standard keyboard layout, you could go right back to a working system state with a full system image restore. While this functionality isn’t being removed right away, Microsoft is recommending you move to 3rd party system imaging tools instead. Ginny Caughey recommends Macrium Reflect. Hopefully, the PowerShell command for initiating system image backups might remain.
Paint
I suppose we need to mention the depreciation of Microsoft Paint here even though creative pros aren’t going to bat an eye at its dismissal. Microsoft Paint has long been the basic little graphics program included with Windows. A lot of people seem to actually rely on it. Going forward with the Fall Creators Update it will start to be hidden and eventually removed in favor of the new Paint 3D app. Paint 3D does include all of the 2D paint features, but it does not have the simple user interface that Paint assumed in the Windows 7 days to match the Office Ribbon. Paint 3D’s user interface doesn’t really go with anything and will require some tutorials to figure out.
Conclusion
It seems that Microsoft has forgotten an important lesson of software design; “Always provide an off switch for terrible new features.” Users really want to be in control, and taking away their ability to scroll through OneNote pages, invoke keyboard commands on a touch screen, back up a full system image, draw in certain apps, or NOT draw in other apps is going to be very frustrating.
The Microsoft Surface team has designed some amazing hardware that is sure to appeal to creative professionals. The Surface Pro’s pen hardware has come a long way and the Surface Studio with its customizable Surface Dial in combination with the Surface Pen is a huge step in competing with the traditional expensive Wacom displays and Macintosh computers. The Microsoft Surface devices look like amazing tools for production and creativity! They should be adding really useful stuff like customizable touch panels (See TabletPro) and radial pen-friendly gesture GUIs. Unfortunately, the Windows 10 Fall Creators Update isn’t quite keeping up with Microsoft’s hardware and is actually bringing bad user experience scenarios instead of great ones… at least in the current pre-release Windows Insiders versions, that is. There’s still time to fix it!
Source link
0 notes
Text
How to Create and Use a Metadata Preset in Lightroom
It’s 2017 and it’s probably time you updated (or created) a Metadata Preset to add your copyright information to all your photos. In this article, you’ll learn how to edit a Metadata Preset, and how to use it when importing your photos into Lightroom.
If you want to get paid (or at least get recognition) for your photos, it’s a really great idea to include your name and contact details in your photos. You might find that doing this on a photo by photo basis (or even in batches) a bit tedious. Too much time spent dealing with metadata tends to take the fun out of photography, despite it being a necessary evil. What if there is a better way?
That way is the Metadata Preset. A Metadata Preset is a predefined set of information that gets added to all selected files from the Metadata panel, or (even better) gets added to all files upon Import. It can be extensive and specific to a job, or general to apply to all images.
Creating a Metadata Preset
Let’s create a Metadata Preset. First, go to the Metadata panel in Lightroom’s Library Module. At the top is the Preset Dropdown. From the list choose Edit Presets.
A quick look at the headers above shows the sheer amount of information that can be added to your files. While the Metadata Preset you’re going to create here is for copyright, you can create a metadata preset for a specific event with all the keywords and captions prepared in advance. Fortunately, you don’t need this level of detail for a copyright preset.
IPTC Copyright
The first section you need to fill in is the IPTC Copyright section. While the Berne Convention doesn’t require a year for European copyright, it’s better to include it anyway for worldwide compatibility. Start with the copyright symbol © (Option+G on Mac, or hold down Alt and type 0169 on PC). Alternatively, copy and paste it from this article.
It’s 2017, so add this after the symbol. Add a space and then your name. This text will also be used as the Simple Text option for watermarking.
The next section is Copyright Status. There are three options here; Unknown, Copyrighted and Public Domain. Obviously, you need to choose Copyrighted. With this preset, when you open an image in Photoshop (or any other software that reads this information), the name in the title bar will include a copyright symbol, letting anyone opening know that it’s a copyrighted file.
Rights Usage Terms is your next field. If you’re keeping your images fully rights managed (people need your permission to use the photos), then enter All Rights Reserved here. If you’re using one of the Creative Commons licensing options (e.g. Non-commercial with attribution), include that here.
The final option you have here is Copyright URL. You may have a dedicated page explaining copyright on your website. Alternatively, it could be your contact page or main website address.
IPTC Creator
The second part you should fill in is the IPTC Creator section. This includes your contact information so users can potentially connect with you to ask for permission to use your image. It’s pretty straightforward and includes your name, address, phone number, email address, and website. You absolutely should include this information.
Note: if you do not wish to put your address just put your State/Province, country and a way to contact you – email is a good option.
When you’re done, click the Presets pull-down at the top and choose “Save Current Settings as New Preset”. Give it an appropriate name, like “© 2017” and click Done. Alternatively, press Done first, then choose Save As in the dialog box that appears (below).
Name the Preset and click Create.
That’s all you need for a copyright Metadata Preset.
Apply on Import
Next, open the Import dialog. Press Shift+Control+I on PC, or Shift+Command+I on Mac. Select any option at the top center except for ADD. Go to the Apply During Import section in the right-side panel. From the Metadata Preset menu, choose the preset you just made.
Once you’ve selected a Metadata preset, Lightroom remembers this for the next time so you can just cancel out of the Import dialog. The only reasons it would change is if you select another preset, or your Lightroom Preferences get reset.
Other Uses for Metadata Presets
So that’s how you create a Metadata Preset. Remember that they are not just limited to copyright information. Starting with the copyright preset as a template (so you’re not entering this information again), you could create one for that dance show you’re shooting. You could set up the caption in the preset (e.g. Dance Show at Dance Theatreby Dance group on date month year), and include a series of appropriate keywords for the show.
If you were doing a fashion shoot, you could include the models name and model release information.
Even if you haven’t been applying Metadata Presets so far, you can still use the Filter Bar in the Lightroom Library Module to sort your images. Select a year from the Date Column, in this case, select 2017, then Ctrl/Cmd+A to select all, and from the Metadata panel, select your 2017 preset. This information will applied to all selected images.
googletag.cmd.push(function() {
tablet_slots.push( googletag.defineSlot( “/1005424/_dPSv4_tab-all-article-bottom_(300×250)”, [300, 250], “pb-ad-78623” ).addService( googletag.pubads() ) ); } );
googletag.cmd.push(function() {
mobile_slots.push( googletag.defineSlot( “/1005424/_dPSv4_mob-all-article-bottom_(300×250)”, [300, 250], “pb-ad-78158” ).addService( googletag.pubads() ) ); } );
The post How to Create and Use a Metadata Preset in Lightroom by Sean McCormack appeared first on Digital Photography School.
from Digital Photography School http://digital-photography-school.com/create-metadata-preset-lightroom/
0 notes
Text
eight Picture Search engine optimization Finest Practices to Make Your Content material Extra Discoverable
New Post has been published on http://tiptopreview.com/8-image-seo-best-practices-to-make-your-content-more-discoverable/
eight Picture Search engine optimization Finest Practices to Make Your Content material Extra Discoverable

To think about the significance of visible search in 2021, let’s begin with an instance.
The opposite day, I Googled “how to conduct a vlookup in Excel”. I skimmed a couple of articles however nonetheless felt dissatisfied — I did not wish to examine vlookups, I wished to see it.
Enter: The facility of photos.
As soon as I clicked on “Images”, I discovered what I wanted shortly:

I do know I am not alone. In reality, these days, half of all Google searches end on the search results web page, with out the person clicking by means of to any outcomes.
In 2021 and past, it’s vital entrepreneurs start being attentive to the significance of visible photos as a strong alternative to achieve new audiences on the SERPs.
Plus, as HubSpot’s Advertising and marketing Supervisor Kristen Baker informed me, “After running an image experiment on the HubSpot Blog, I discovered that ranking in Google’s image packs increases impressions and clicks to our content.”
However … simpler mentioned than carried out, proper?
Right here, let’s discover what picture Search engine optimization is, and the most effective practices you may wish to comply with to make your webpages extra discoverable in picture search outcomes.

What’s picture Search engine optimization?
Picture Search engine optimization refers back to the apply of optimizing your photos for search engines by means of considerate alt textual content, applicable captions, good file dimensions, and extra. Picture Search engine optimization could make your content material simpler to interpret by search engine crawlers, which can provide it an Search engine optimization increase on each search outcomes pages and picture outcomes pages and make your website extra discoverable.
Picture Search engine optimization Finest Practices
1. Use related, correct alt textual content for person accessibility and Search engine optimization.
As a fast refresher: Alt textual content is written copy that describes a picture. For example, in case you click on on Pipcorn’s popcorn product and examine the web page, you may see the alt textual content describes the product picture precisely as “Popcorn Family Pack Popcorn Pipsnacks LLC”:

Alt-text performs two essential roles in Search engine optimization.
First, alt textual content — often known as alt tags, or alt descriptions — helps search engine crawlers index your web site extra successfully, which has a optimistic impact on search outcomes.
In reality, Google states on its Developers page, “You can aid in the discovery process by making sure that your images and your site are optimized for Google Images … [and] increase the likelihood that your content will appear in Google Images search results.”
Second, alt textual content improves the person expertise. Alt textual content can describe a picture to a visually impaired reader, and likewise helps if a reader cannot load or see the picture accurately on their gadget.
To get a full run-down of the way to write high-quality alt textual content, check out Picture Alt Textual content: What It Is, The best way to Write It, and Why It Issues to Search engine optimization.
2. Think about using captions to explain a picture.
Captions aren’t sometimes obligatory if the context of the web page may also help readers perceive what the picture is depicting — for example, on this weblog submit I have not used any captions as a result of I’ve used textual content to introduce every picture I’ve proven.
Nonetheless, you probably have a visual-heavy web site, think about using captions to assist readers perceive a picture in context. For example, on Tom Hull’s photography portfolio, he captions his photos so viewers can contextualize the place, or what, the picture represents:

Use common sense in relation to including captions, however in case you really feel it may assist readers (and bots) higher discern a picture, then it could be a worthwhile addition to a web page.
three. Compress photos for quicker load time.
Compressing photos is an important element of any good web site optimization technique.
Why?
As a result of, merely put, it helps your internet pages load quicker, which gives a greater person expertise and likewise helps increase your web site’s search engine rankings.
To compress your photos successfully, strive a device like Compress JPEG or Squoosh.
Usually, lower than 100 KB is right when it comes to good file measurement.
Nonetheless, it is vital to notice — Google does not have a look at every particular person picture measurement. As an alternative, it seems at whole web page measurement.
So, you probably have a small picture the place high quality variations are much less substantial, then you definitely would possibly strive compressing that picture to 30-50 KB … which provides you further room to maintain one other picture 30 KB greater, significantly if that picture loses high quality after compression.
For those who’re nonetheless fearful about picture high quality after compression, check out The best way to Guarantee Your Photos are Excessive Decision.
four. Submit unique photos — not simply inventory photographs.
In the end, Google (and readers) prioritize unique content material — which suggests, in case you’re hoping your photos will rank on picture outcomes pages, it is vital you employ unique, distinctive photos.
That is significantly vital in case you work for an ecommerce web site and also you’re posting visuals of your product. Many patrons use photos to buy shopper items. In reality, 50% of online shoppers say images helped them determine what to purchase.
In case your picture does not precisely display your product, it would get buried underneath higher, higher-quality photos from rivals.
Think about using merchandise like Canva to design in-house infographics, graphs, or animated photos to assist your model stand out on search outcomes pages and make your photos extra shareable.
5. Identify your file photos earlier than importing them.
Your file title can impression how straightforward it’s for search engine crawlers to interpret your picture, so it is useful to rename your file earlier than importing it onto your webpage.
Slightly than holding the title a generic “IMG_0883”, strive utilizing related key phrases to explain what’s within the picture, just like your alt textual content. This could additionally assist guarantee your picture seems on the picture search outcomes web page, which can enhance site visitors to your website.
6. Use responsive photos.
Responsive photos are essential for guaranteeing your readers can see your photos on any sort of gadget. These days, it is vital your pages are optimized for cellular to impression search engine rankings, in addition to person expertise.
In case your photos aren’t responsive, the web page will not seem as clear on cellular because it does on desktop — which negatively impacts Search engine optimization, in addition to your reader’s notion of your model.
Happily, some web site internet hosting providers, together with HubSpot, mechanically guarantee your photos are responsive.
Nonetheless, if want be, you may make your photos responsive through the use of fast code. For example, you possibly can add this code to your HTML:
<img src=”https://blog.hubspot.com/nature.jpg” alt=”Nature” class=”responsive”>
Or this code to your CSS:
.responsive
7. Leverage photos as a backlinking alternative.
Creating high-quality, distinctive, unique photos is not simply nice to your personal web site — it is also a unbelievable alternative to earn backlinks when different web sites use your picture for their very own pages.
For example, take into account the next graph created by Broadband Search:
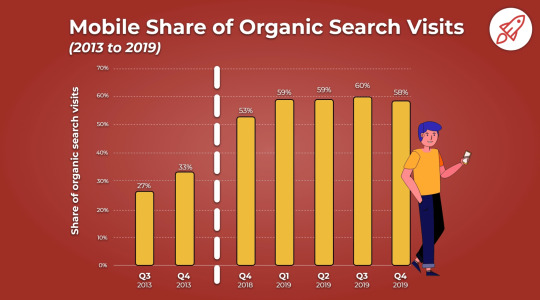
The picture at present ranks within the first spot on the picture search outcomes web page for the key phrases, “how many people use mobile to search”.
Moreover, based on Ahrefs, this weblog submit has over 3,000 backlinks. I am prepared to guess that these backlinks are, partially, attributable to different firms wanting to make use of Broadband Search’s distinctive graphs for their very own content material.
For those who create high-quality photos, different firms might wish to showcase these photos on their very own websites — with hyperlinks again to your enterprise. This implies, finally, photos can have a direct impression on the quantity of site visitors, leads, and prospects you get for your enterprise by means of your marketing efforts.
eight. Add photos to an current sitemap.
Google suggests adding images to an existing sitemap — or making a separate sitemap only for photos — to assist search engines uncover your photos. Specifically, that is useful for photos Google cannot discover by means of crawling, equivalent to these accessed through JavaScript types.
Here is a sample sitemap, with two photos included:
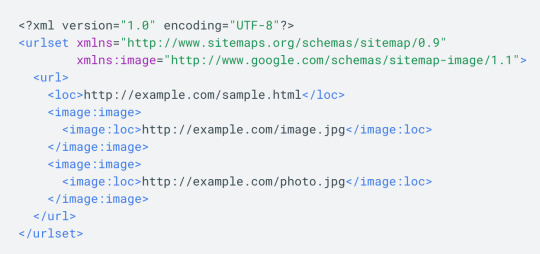
Happily, in case you do not wish to add photos to a sitemap manually, you are in luck — there are instruments, equivalent to Angeldigital.Marketing (one of many solely free ones out there!), that may mechanically generate a picture sitemap when you enter a URL.
Hopefully, you should use these greatest practices to stage up and earn new site visitors by means of search picture outcomes pages. Keep in mind, an image is price a thousand phrases … so simply think about the worth of an Search engine optimization-optimized image.

Source link


0 notes
Last Seen Blogs

jdrevezzo
JD Revezzo


travestigokce
ANADOLU YAKASI GÖKÇE

chaoticmakerstarlight4
Back again. 18+

vnenys
attempt 2